LG Electronics USA PF80AJE DLP PROJECTOR User Manual G User s manual
LG Electronics USA DLP PROJECTOR G User s manual
Contents
User Manaul Part 4
24 Using the PROJECTOR
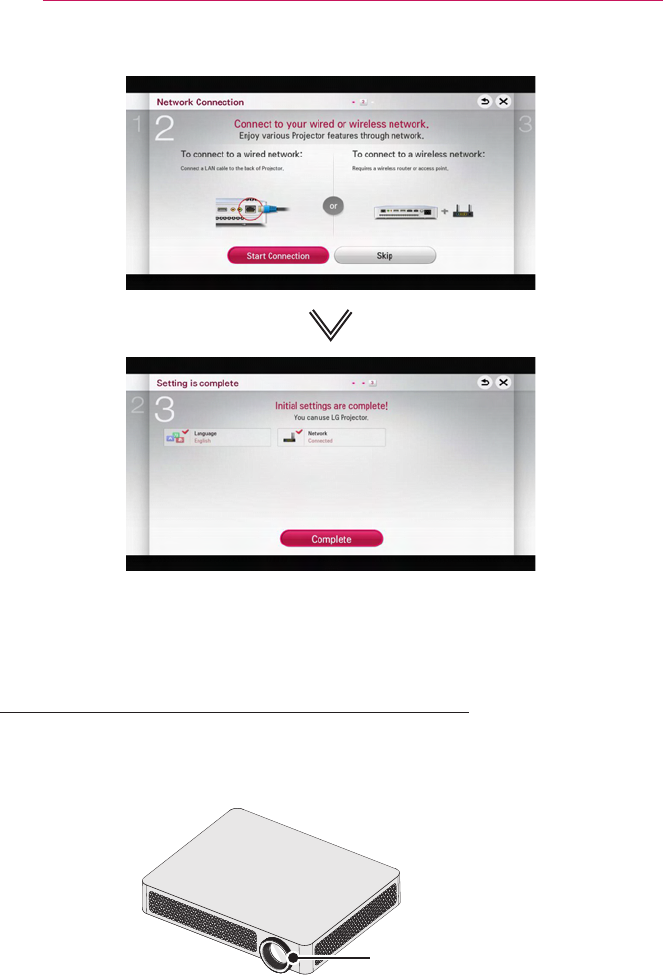
* The initial settings are completed when you select the settings above.
Focus and Position of the Screen Image
When an image appears on the screen, check if it is in focus and ts the screen
properly.
To adjust the focus of the image, rotate the focus ring.
Focus Ring
25
Using the PROJECTOR
Using the Keystone
Function
To prevent the screen image from
becoming trapezoidal, Keystone adjusts
the top and bottom width of the image
if the projector is not set up at a right
angle to the screen.
Because the Keystone function may
cause inferior screen image quality, use
this function only when it is not possible
to set up the projector at an optimal
angle.
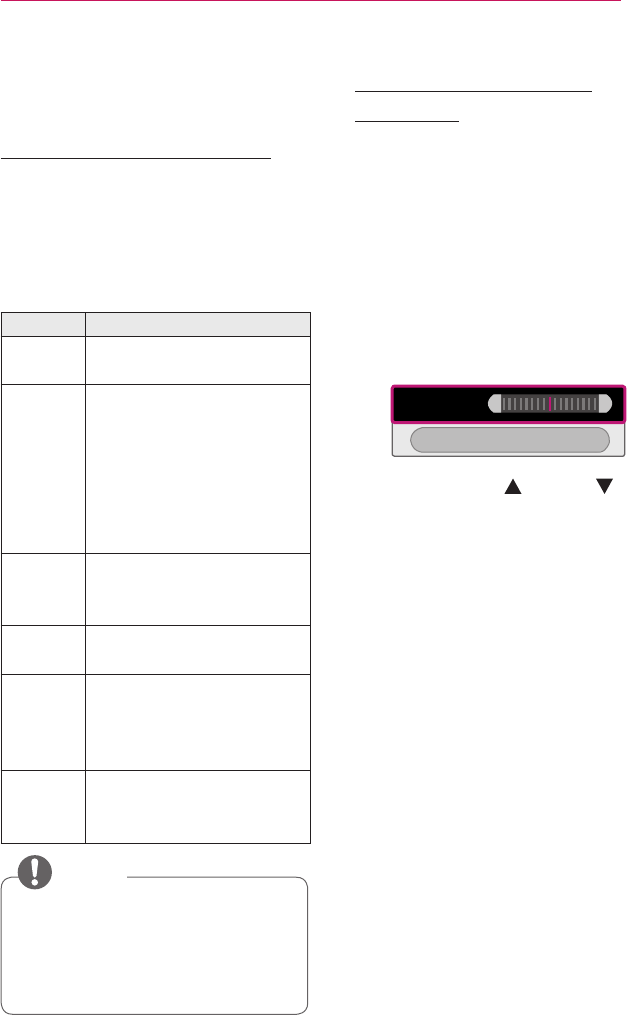
• Keystone 0 < >
- +
Close
1 Press the Key's or Key's
button to adjust the picture.
yKeystone can be adjusted
from -40 to 40.
2 Press the OK button when done.
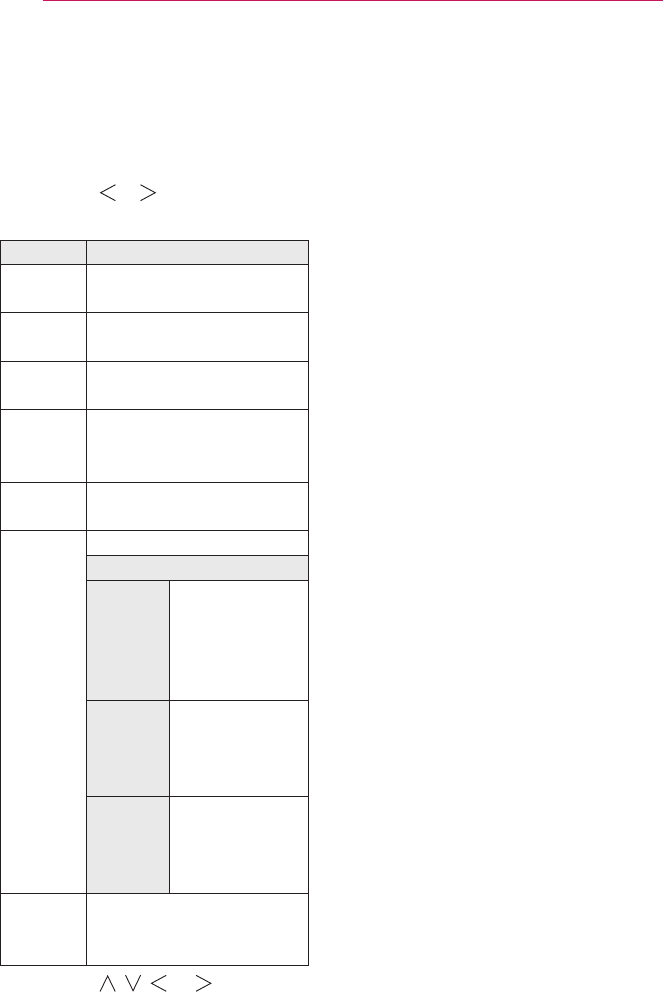
Additional Options
Adjusting Aspect Ratio
yPress the SETTINGS button on the
remote control. Select PICTURE →
Aspect Ratio to change the aspect
ratio.
yYou can also use the Q.MENU or
RATIO button.
Menu Description
16:9 Resizes images to t the
screen width.
Just
Scan Displays video images in
the original size without
removing parts of the edge
of the image.
yIn HDMI/Component (over
720p) mode, Just Scan
is available.
Set By
Program Changes the aspect ratio to
4:3 or 16:9 depending on
the input video signal.
4:3 Resizes images to the
previous standard 4:3.
Zoom Resizes the image to t the
screen width. The top and
bottom parts of the image
may be cut off.
Cinema
Zoom 1
Choose Cinema Zoom when
you want to enlarge the
picture in correct proportion.
NOTE
yAvailable picture size may differ
depending on the input signal.
yThe screen aspect ratios on HDMI-
PC input are available in 4:3 and
16:9 only.
26 Using the PROJECTOR
Changing input device
To select an external input
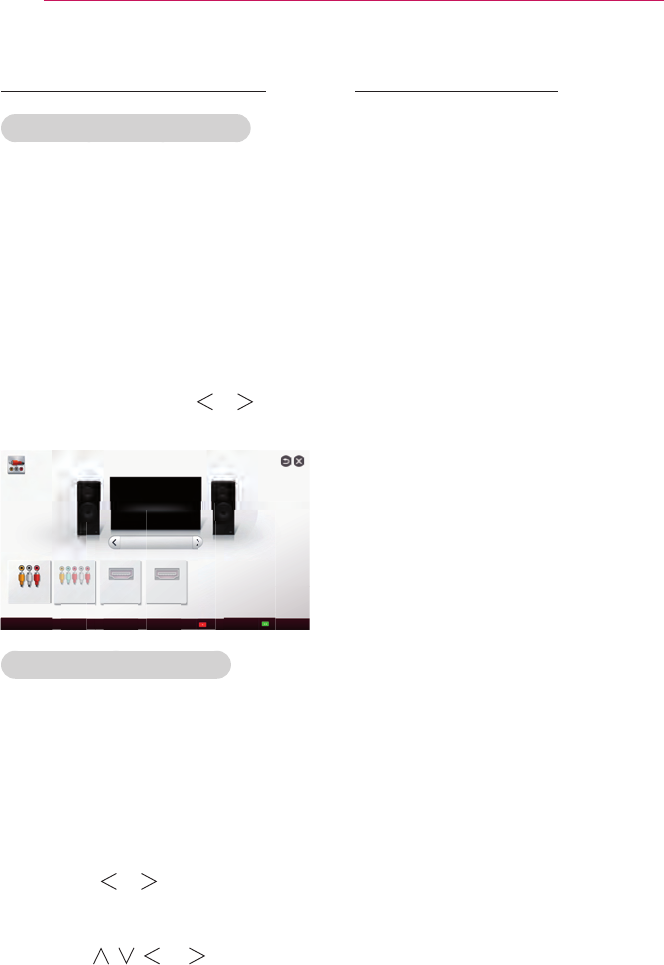
Selects external input.
yPress the INPUT button on the
remote control to display the input
selection screen.
- Connected inputs are displayed first.
However, AV is always activated.
ySelect an input signal using the
remote control's INPUT button to
connect the projector to the desired
input. You can use the or button
to switch between all the input modes.
Projector Speaker
AV Component HDMI1 HDMI2
Change Device Name SIMPLINK Setting
AV
No Signal
INPUT LIST
Select an input device to view.
Selecting an Input Label
Displays which devices are connected to
which input ports.
1 Press the INPUT button on the
remote control to display the input
selection screen.
2 Press the red button.
3 Press the or button to go to
the desired input and press the OK
button.
4 User the , , , or button to
select a device name.
To use SIMPLINK
SIMPLINK is a feature that enables
you to control and manage various
multimedia devices conveniently using
the projector remote control only via the
SIMPLINK menu.
1 Connect the projector's HDMI IN
terminal with SIMPLINK device's
HDMI output terminal using HDMI
cable. For home theater units with
SIMPLINK function, connect HDMI
terminals as above and use an
optical cable to connect Optical
Digital Audio Out from the projector
to Optical Digital Audio In of the
SIMPLINK device.
2 Press the SIMPLINK button on the
remote control.
The SIMPLINK menu window
appears.
3 Select SIMPLINK Setting on
SIMPLINK menu window. SIMPLINK
Setting window appears.
4 SIMPLINK Setting to On in
SIMPLINK setup window.
5 Close SIMPLINK Setting window.
6 Press the SIMPLINK button on the
remote control.
Select the device you want to control
in the SIMPLINK menu window.
27
Using the PROJECTOR
NOTE
yThis function only works on devices
with the SIMPLINK logo ( ).
Verify that the external device has
a SIMPLINK logo.
yTo use the SIMPLINK function, you
need to use a high-speed HDMI®
cable (with CEC, or Consumer
Electronics Control, feature added).
High-speed HDMI® cables have
the No. 13 pin connected for
information exchange between
devices.
yTurn on or select the media of a
device with home theatre features
to see the speaker switch to
External Speaker.
yConnect with an Optical cable
(sold separately) to use External
Speaker.
ySwitching to external input causes
devices operating with SIMPLINK
to stop.
yUse of a third-party device with
HDMI-CEC features may cause
malfunctions.
Explanation on SIMPLINK features
Menu Description
Direct Play Plays the multimedia
device on the projector
instantly.
Select
multimedia
device.
Selects the desired
device via the SIMPLINK
menu to control it from
the projector screen
instantly.
Disc
playback Manages the multimedia
device with the projector
remote control.
Power off
all devices If the Auto Power
function is set to On in
the SIMPLINK settings,
turning the projector off
will turn the power off on
all SIMPLINK-connected
devices.
Sync
Power on If the Auto Power
function is set to On in
the SIMPLINK settings,
turning on a SIMPLINK
device will turn the
projector on.
Speaker Selects speaker either
on the home theatre unit
or the projector.
28 Using the PROJECTOR
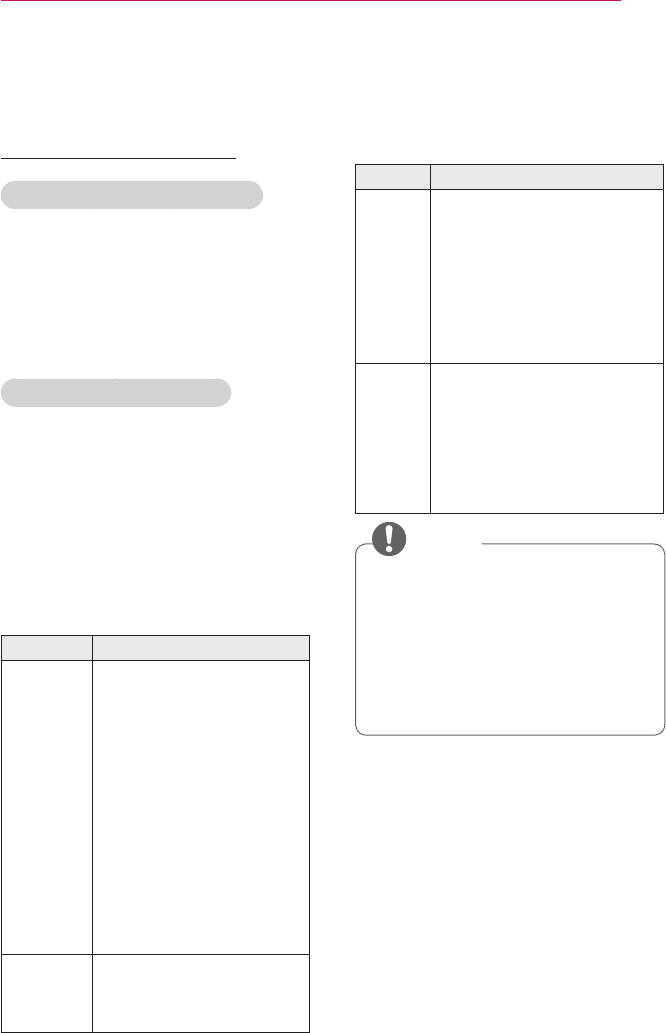
Using the Quick Menu
You can customize frequently used menus.
1 Press the Q.MENU button.
2 Press the or button to select a
menu and press OK.
Menu Description
Aspect
Ratio Resizes the picture.
Picture
Mode Changes the picture mode.
Sound
Mode Sets the sound mode.
Sleep
Timer Sets the projector to be
turned off at the specied
time.
Energy
Saving Adjusts the brightness.
AV Mode Sets the mode.
Mode
Off You can watch
using the
settings in the
video/audio
menu.
Cinema Change to
optimal video/
audio settings
for movies.
Game Change to
optimal video/
audio settings
for games.
USB
Device Allows you to remove a
connected USB device in a
safe manner.
3 Press the , , , or button to
scroll through the following menus.
29
Using the PROJECTOR
To set Sound
To set sound output
To use projector’s speakers
Sound is output through the projector
speaker.
yPress the SETTINGS button on the
remote control. Select SOUND →
Sound Out → Projector Speaker.
To use External Speaker
Sound is output through the speaker
connected to the optical port.
SIMPLINK is supported.
yPress the SETTINGS button on the
remote control. Select SOUND →
Sound Out → External Speaker
(Optical/HDMI ARC) to set up as
follows:
Menu Description
ARC
Mode External audio devices
can be connected via
High-Speed HDMI® cable
without an extra optical
audio cable to output
SPDIF. It interfaces with
SIMPLINK.
For an external device
that supports ARC (Audio
Return Channel), connect
it to the HDMI IN 1(ARC)
port.
Digital
Sound
Out
Sets up Digital Sound
Output.
yPress the SETTINGS button on the
remote control. Select SOUND →
Sound Out → External Speaker
(Optical/HDMI ARC) → ARC Mode.
Menu Description
Off Even when the connected
ARC-supported external
audio device is turned
on, audio output is not
automatically processed
through the external audio
device's speakers.
On If ARC-supported external
audio device is turned on,
audio output is automatically
processed through the
external audio device
speakers.
NOTE
yConnect to ARC-only terminal when
connecting to external devices.
yUse high-speed HDMI® cable when
connecting to external devices.
yUse of a third-party device with
an ARC function may cause
malfunctions.
30 Using the PROJECTOR
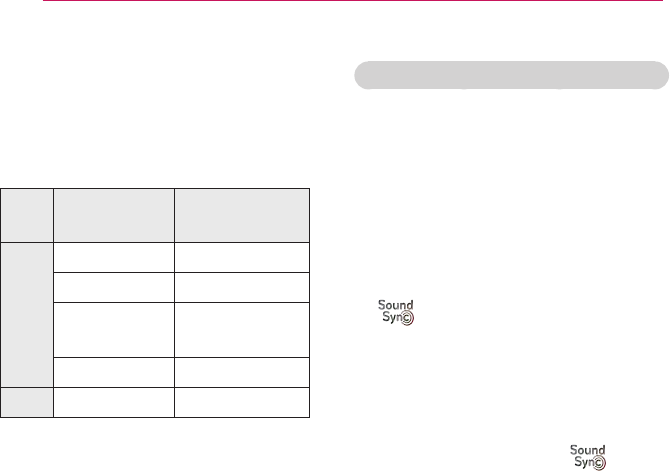
yPress the SETTINGS button on the
remote control. Select SOUND →
Sound Out → External Speaker
(Optical/HDMI ARC) → Digital
Sound Out.
Item Sound Input
Digital Sound
Out
Auto MPEG PCM
Dolby Digital Dolby Digital
Dolby Digital
Plus
Dolby Digital
HE-AAC Dolby Digital
PCM All PCM
To connect and use LG audio device
LG audio device allows you to enjoy rich
powerful sound easily.
yWired Connection:
Press the SETTINGS button on the
remote control. Select SOUND →
Sound Out → LG Sound Sync
(Optical).
Connect LG audio device with the
logo to the OPTICAL DIGITAL
AUDIO OUT port.
yWireless Connection:
Press the SETTINGS button on the
remote control. SOUND → Sound
Out → LG Sound Sync (Wireless).
LG audio device with the logo
can be connected wirelessly.

31
Using the PROJECTOR
NOTE
yYou can use the projector remote
control to adjust the volume of the
connected device.
yFor wireless connection, if the device
fails to connect. Check the device
power to connect and if the LG
Audio device is in a proper operating
condition.
yIf you select LG Sound Sync
(Wireless), devices available for
connection are searched and one of
searched devices is automatically
connected. When a device is
connected, its name is shown.
yIf two or more devices are detected,
the first detected device is connected
first. To view more detected devices to
connect, press the Show More button.
yIf LG Sound Sync (Wireless) is
being selected and you turn on the
projector, it search and try to connect
the device which recently connected.
To Connect and Use a
Bluetooth headset
Sound output is through the Bluetooth
headset.
ySMART
HOME
ⰶᲳ ㄮᗺ
ⱞⳮ
Ẳⱞ⩛
/
ხ㢢☎⳿
?
→ Settings → SOUND
→ Sound Out → LG Sound Sync
(Wireless)
yThe devices that can be connected
are: LG BTS1, LG HBS-700, LG
HBS-730, LG HBS-800 (Product
availability may vary by country.)
yFor wireless connection, if the device
fails to connect. Check the device power
to connect and if the LG Audio device is
in a proper operating condition.
If two or more devices are detected,
the rst detected device is connected
rst. To view more detected devices to
connect, press the Show More button.

32 ENTERTAINMENT
ENTERTAINMENT
To connect network
A wireless or wired network connection
is required to use the DLNA function.
One-click network
connection
Connects easily to a wired/wireless
network.
yPress the SETTINGS button on
the remote control. NETWORK →
Network connection to connect to
an available network automatically.
Follow the prompts on the projector.
To connect to a network
through Set Expert
For use in special circumstances such
as in ofces (in cases where a static IP
is used).
yPress the SETTINGS button on the
remote control. Select NETWORK →
Network connection.
1 Select a network connection, either
Wired or Wireless.
2 When connecting via Wi-Fi, use
the one of the following network
connection methods.
Item Description
AP List Connects to the network
selected from the AP List.
Enter the
SSID Connects to the wireless
AP typed in.
WPS-
PBC Connects easily when the
button of a wireless AP
supporting PBC is pressed.
WPS-PIN Connects easily when the
PIN of the wireless AP
that you wish to connect
to is entered in to the AP
website.

33
ENTERTAINMENT
To use the Wi-Fi Direct
function
Wi-Fi Direct is a function that allows your
projector to connect with a Wi-Fi Direct
device without Internet connection. With
SmartShare™, you can watch the les
stored on a device connected via Wi-Fi
Direct.
yPress the SETTINGS button on the
remote control. Select NETWORK →
Wi-Fi Direct.
1 Set Wi-Fi Direct to On. (If you do not
use it, please change it to Off.)
2 Enable the Wi-Fi Direct settings on the
device that you want to connect to.
3 A list of devices that can be
connected to the projector is
displayed.
4 Select a device to connect.
5 Select Yes, when the connection
request message appears.
6 If the device that you want to connect
accepts the request, Wi-Fi Direct is
connected.
To use the Miracast™/
Intel’s WiDi function
You can view the screen of a device with
Miracast™ and Intel’s WiDi technologies
on your projector. Contact the device
manufacturer to nd out if the device
supports this function.
yPress the SETTINGS button on the
remote control. Select NETWORK →
Miracast™/Intel’s WiDi.
1 Set Miracast™/Intel’s WiDi to On. (If
you do not use it, please change it to
Off.)
2 Enable the Miracast™/Intel’s WiDi
settings on the device that you want
to connect to.
3 A list of devices that can be
connected to the projector is
displayed.
4 Select a device to connect.
5 Select Yes, when the connection
request message appears.
6 If the device that you want to connect
accepts the request, Miracast™/
Intel’s WiDi is connected.
yWhen Wi-Fi Direct is set to Off, if
you set Miracast™/Intel’s WiDi to
On, Wi-Fi Direct is automatically set
to On.
yWhen you set the Miracast™ / Intel’s
WiDi function to Off, Wi-Fi Direct
returns to the previous setting.
NOTE
yIt is recommended to connect a
laptop using Intel’s WiDi within
close range.
yThough Intel’s WiDi can be
connected without a wireless router,
it is recommended to connect the
wireless router first for optimal
performance.
yYou may not connect your projector
to a non-Artograph device even
when it is detected.
yIt is recommended you to connect a
device to a 5 GHz router.
yThe response rate may vary
depending on the user’s environment.
yFor more information on the device
you want to connect to, refer to its
owner’s manual.

34 ENTERTAINMENT
Tips for Network Settings
yUse a standard LAN cable (Cat5
or higher with RJ45 connector, 10
Base-T or 100 Base TX LAN port).
yResetting your modem can cause
network connection problems. To
resolve the problem, turn the power
off, disconnect and reconnect, and
then turn the power back on.
yArtograph is not responsible for any
network connection problems or
any faults, malfunctions and errors
caused by an network connection.
yA network connection may not work
properly depending on the Internet
service provider.
yA DSL modem is required for a DSL
service; a cable modem is required
for a cable service. Only a limited
number of network connections
may be available, and projector
network setting may not be available
depending on your contract with your
Internet Service Provider (ISP). (If
only one device is allowed per line
and the PC is already connected,
other devices cannot be used.)
yWireless networks can be subject
to interference from other devices
operating at a frequency of 2.4 GHz
(wireless phones, Bluetooth devices
or microwave ovens). There may also
be interference from devices with a
frequency of 5 GHz, same as other
Wi-Fi devices.
yThe surrounding wireless environment
can cause the wireless network
service to run slowly.
yIf you do not turn off the entire local
home network, network traffic may
occur on some devices.
yFor an AP connection, an access
point device that supports wireless
connection is required and the
wireless connection feature must be
enabled on the device. Contact your
service provider regarding availability
of wireless connection on your access
point.
yCheck the SSID and security settings
of the AP for AP connection. Refer
to the appropriate documentation for
SSID and security settings of the AP.
yInvalid settings on network devices
(wired/wireless line sharer, hub) can
cause the projector to run slowly
or not operate properly. Install the
devices correctly according to the
appropriate manual and set the
network.
yConnection method may differ
according to the AP manufacturer.
35
SMARTSHARE
SMARTSHARE
Before Using
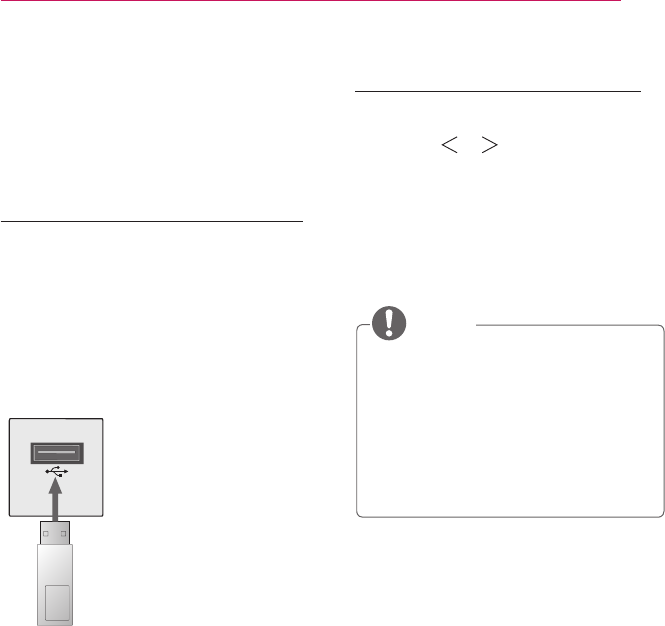
Connecting a USB Device
Connect a USB device (external HDD,
USB memory) to the USB port of
projector to enjoy the content les stored
in the USB device with your projector.
You cannot write or delete data in the
USB device. Connect a USB ash drive
as shown below.
USB Flash Drive
Removing a USB Device
1 Click the Q.MENU button.
2 Use the or button to move
to USB Device and press the OK
button.
3 Select a USB to remove. Wait for
conrmation that the USB device has
stopped before removing the USB.
NOTE
yIf detached early, an error may
occur on the projector or the USB
storage device.
yOnce a USB device has been
selected for removal, it can no longer
be read. Remove the USB storage
device and then re-connect it.

36 SMARTSHARE
Tips for Using a USB Device
yIf the USB storage device has a built-
in auto recognition program or uses
its own driver, it may not work.
ySome USB storage devices may not
work or may work incorrectly.
yIf you use a USB extension cable, the
USB device may not be recognized or
may not work properly.
yUse only USB storage devices
formatted with the Windows FAT32 or
NTFS file system.
yFor external USB HDDs, it is
recommended that you use devices
with a rated voltage of less than 5 V
and a rated current of less than 500
mA.
yIt is recommended to use a USB
hub or hard disk drive with power
supplied. (If the power supplied is not
enough, the USB storage device may
not be detected properly.)
yIt is recommended that you use USB
flash drives of 32 GB or less and USB
HDDs of 2 TB or less.
yIf a USB HDD with power-saving
function does not work properly,
turn the power off and on. For more
information, refer to the user manual
of the USB HDD.
yData in USB storage device can
be damaged so be sure to back
up important files to other devices.
Data maintenance is the user's
responsibility and the manufacturer is
not responsible for data loss.
37
SMARTSHARE
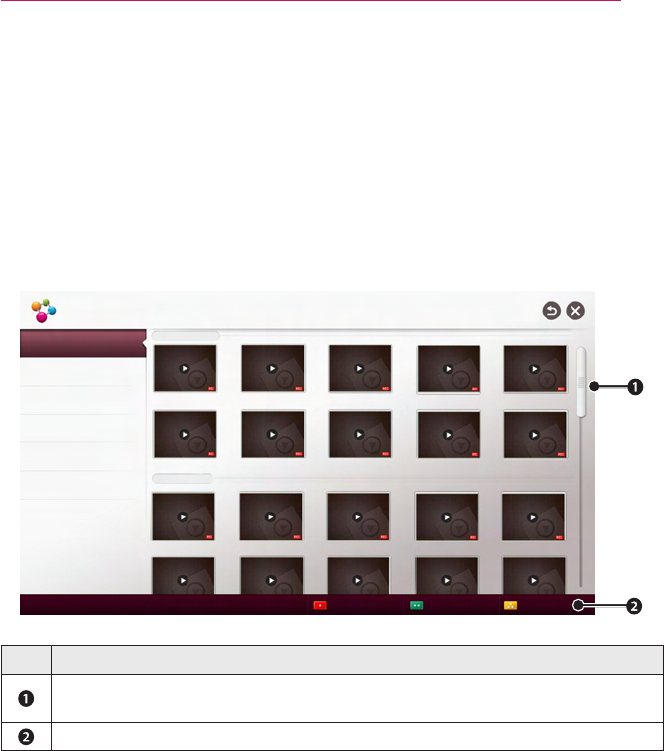
To use SmartShare™
1 Press the SETTINGS button on the remote control.
2 Select SMART SHARE.
You can watch the photo, music, video and document on the projector by connecting
a USB or home network (DLNA). The photo, music, video and document les of all
devices connected to the projector are displayed. (For the document les, only those in
the devices connected via USB are displayed.)
SmartShare™
Recently Played
Newly Added
Recent
Videos
Photos
Music
File Viewer
Linked Device
000 001 002 003 004
005 006 007 008 009
010 011 012 013 014
Settings Delete History
Connecting guide
Description
Displays photo / music / video / document les on all devices connected to the
projector.
Shows how to connect PC, smartphone/device, and USB.

38 SMARTSHARE
Watching the Videos
In the Movie List, you can watch movies stored on the connected USB device.
Controls playback and sets options while viewing videos.
Playing video - warning
ySome subtitles created by users may not work properly.
yThe video and subtitle files should be placed in the same folder. For subtitles to
display correctly, the video and subtitle files must have the same name.
ySubtitles on an NAS (Network Attached Storage) device may not be supported
depending on the manufacturer and model.
yWe do not support any stream that contains GMC (Global Motion Compensation) or
Qpel (Quarterpel Motion Estimation).
yFuLL HD Video: 1920 X 1080
Only H.264 / AVC profile level 4.1 and lower is supported.
yThe file size limit is dependent on the encoding environment.
yIt works only the above version of Window Media Audio V2.
yIt’s not supported AAC Main Profile.
yVideo files created by some encoders may not be played back.
yVideo files in formats other than the ones specified here may not be played back.
yPlayback of video files stored on the USB device that do not support High Speed,
may not work properly.
yThe projector supports DTS audio codec when the USB/HDMI video file playback.
39
SMARTSHARE
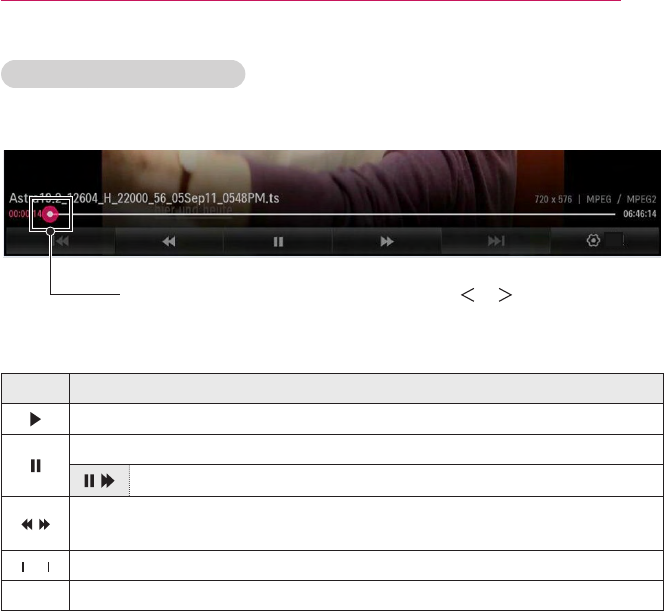
To control video playback
You can control playback using the following buttons.
Shows the current playing position. Use the or button to
move forward or backward.
Option
Item Description
Resumes normal playback.
Pauses the video player.
Displays in slow motion.
Whenever this button is pressed, the playback speed is increased or
decreased by one unit.
ꕙ
ꕙ
Plays the previous/next le.
Option Sets the option.