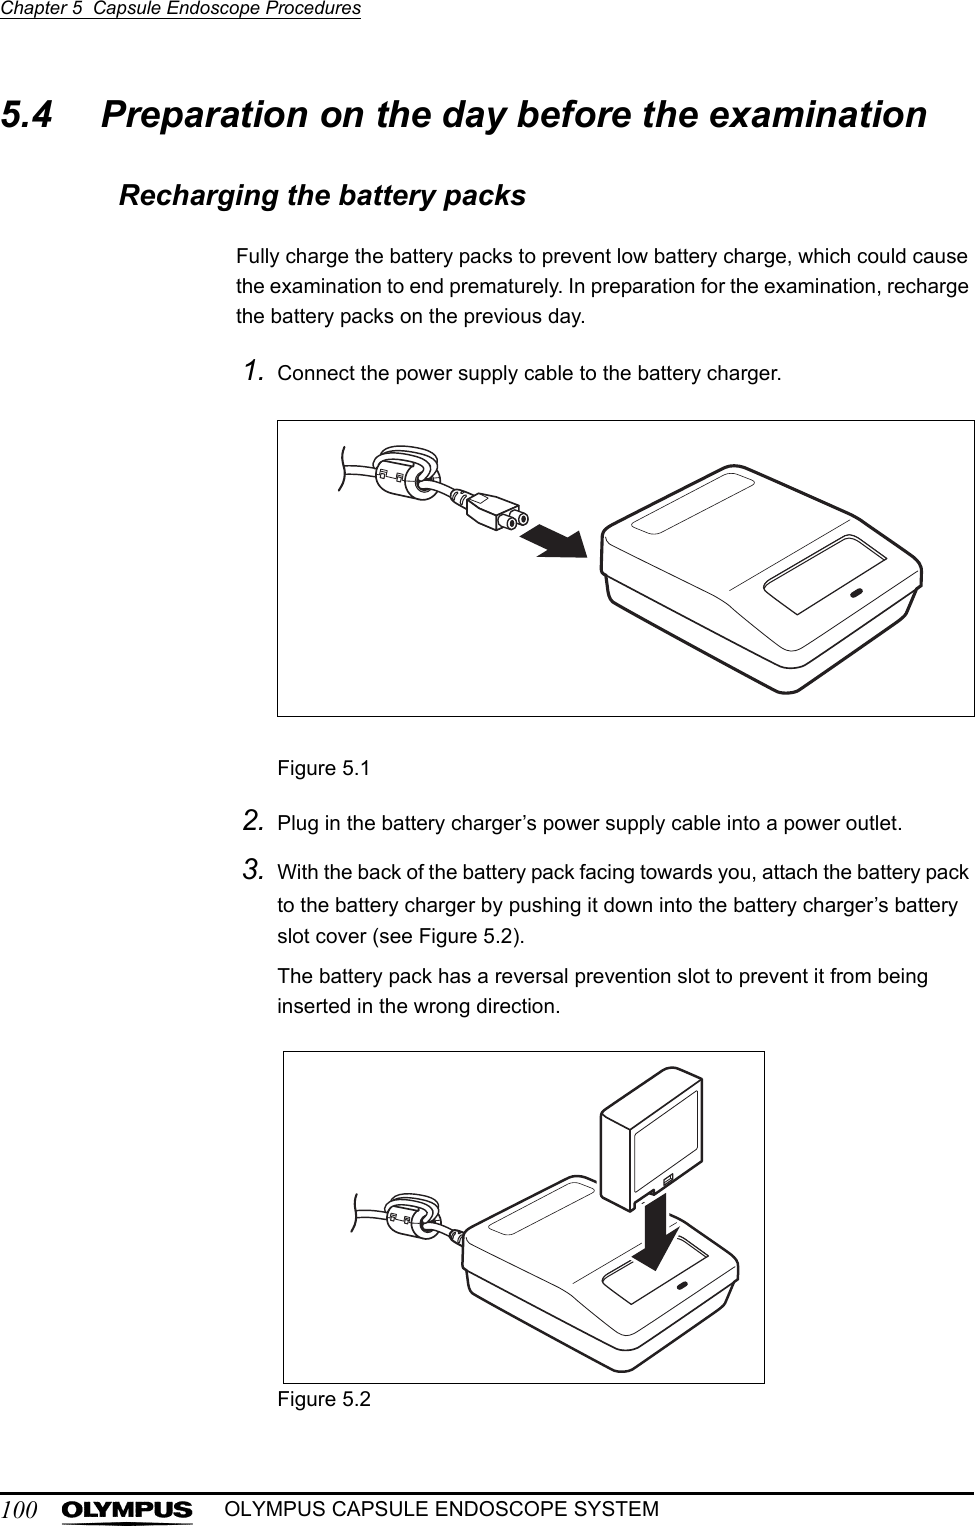
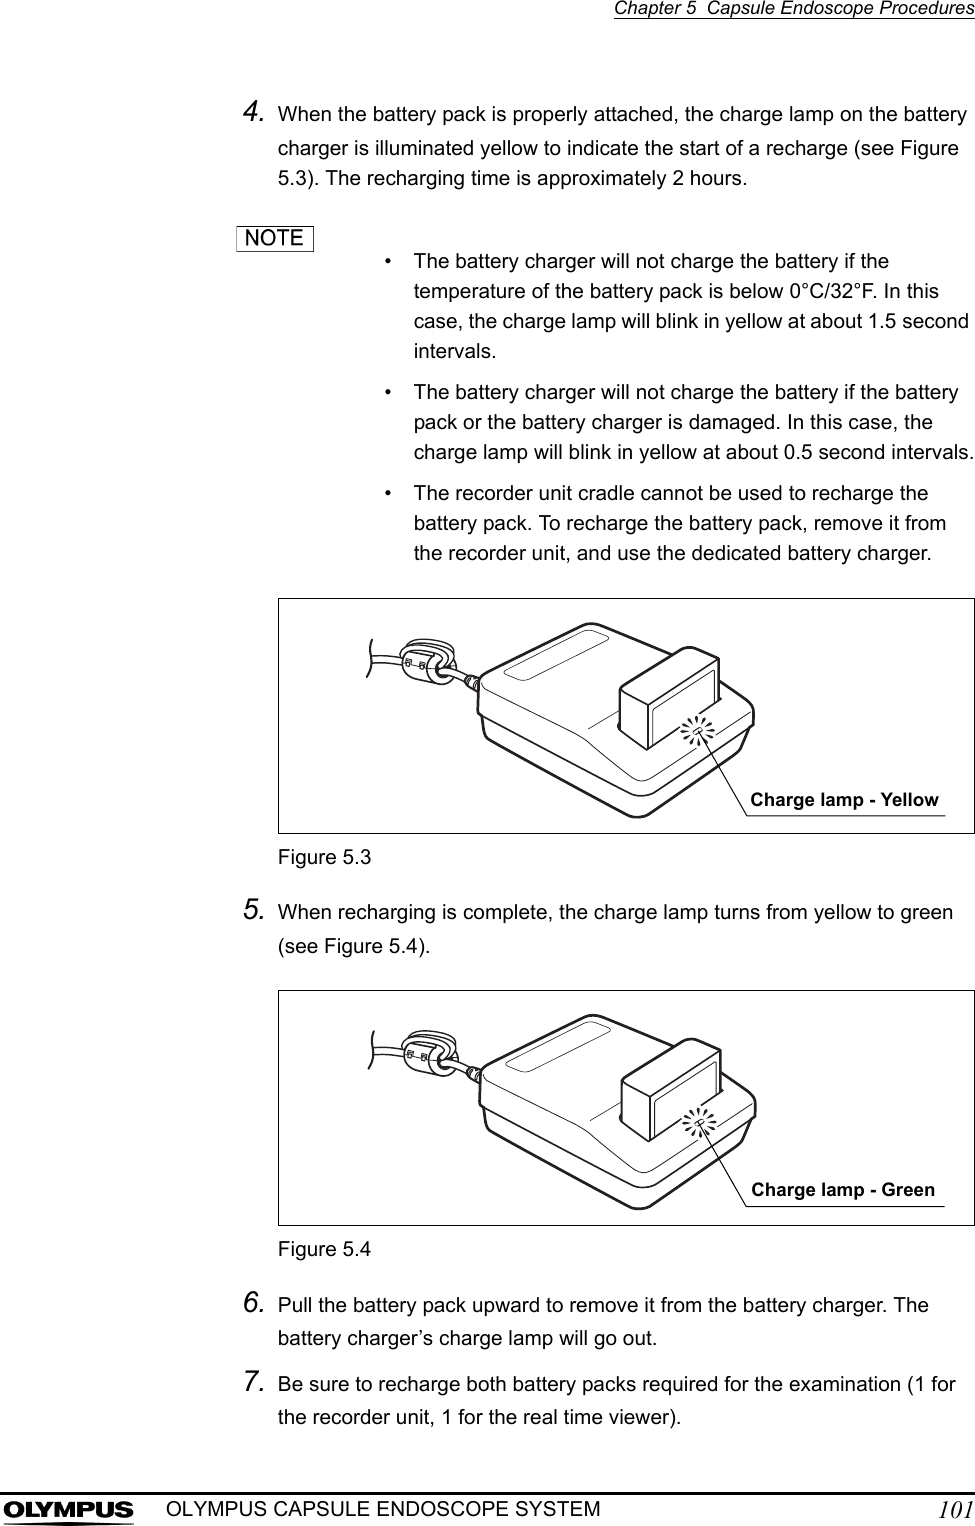
Olympus Medical Systems EC-1 Low Power Transmitter User Manual GT1629 FCC MAJ 1467 C1
Olympus Medical Systems Corp. Low Power Transmitter GT1629 FCC MAJ 1467 C1
Contents
- 1. Users manual Part 1
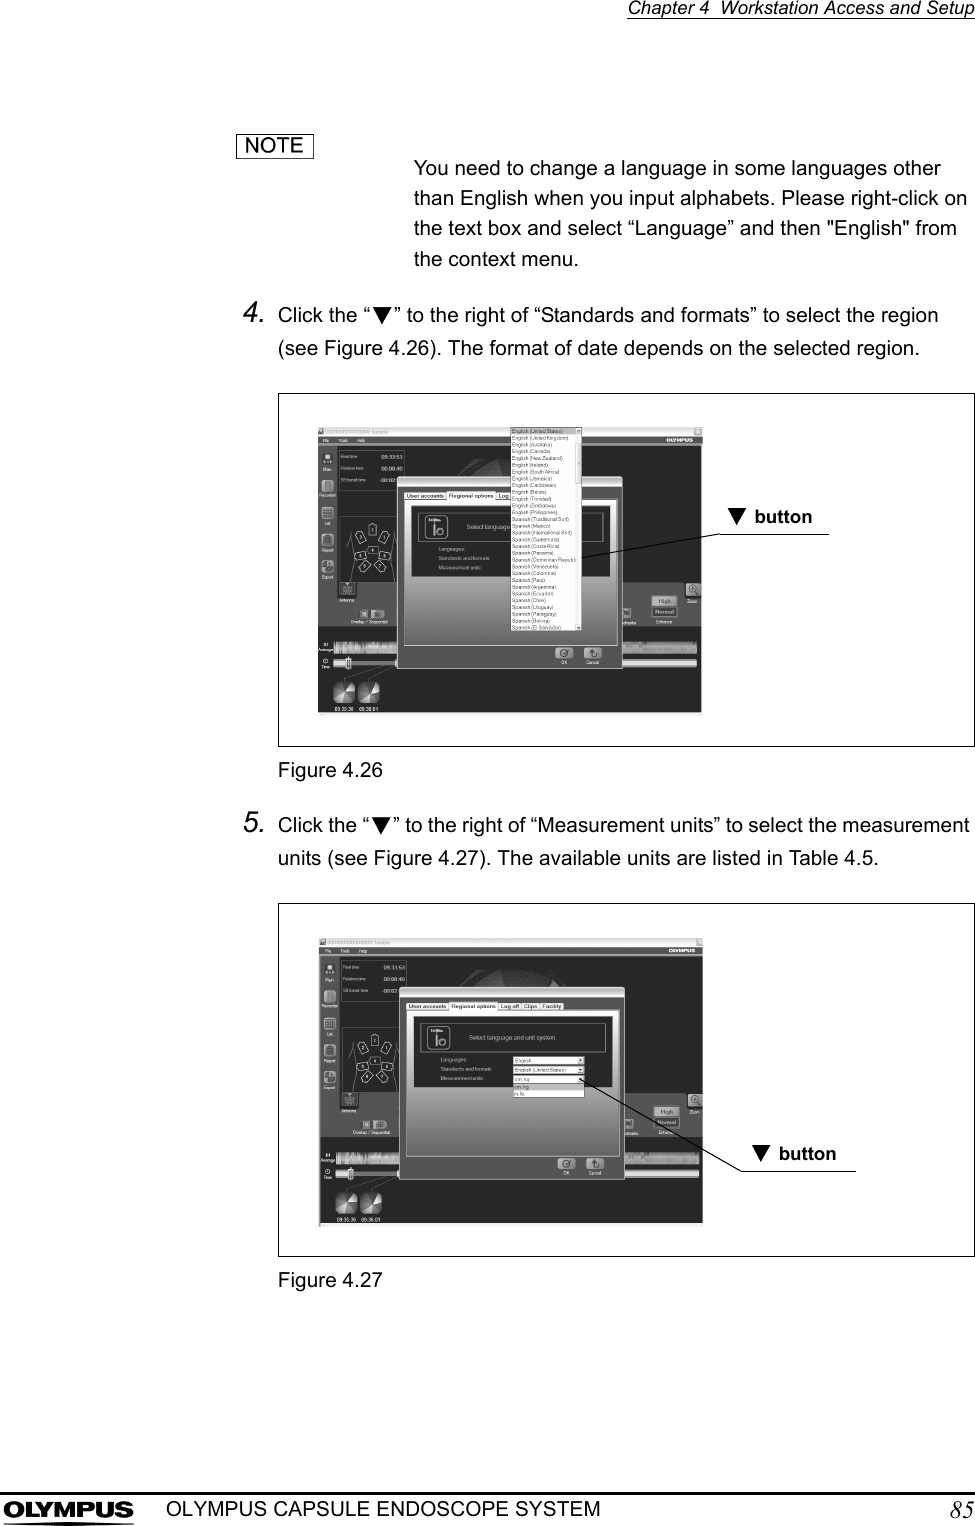
- 2. Users manual Part 2
- 3. Users manual Part 3
- 4. Users manual Part 4
- 5. Users manual part 5
Users manual Part 2
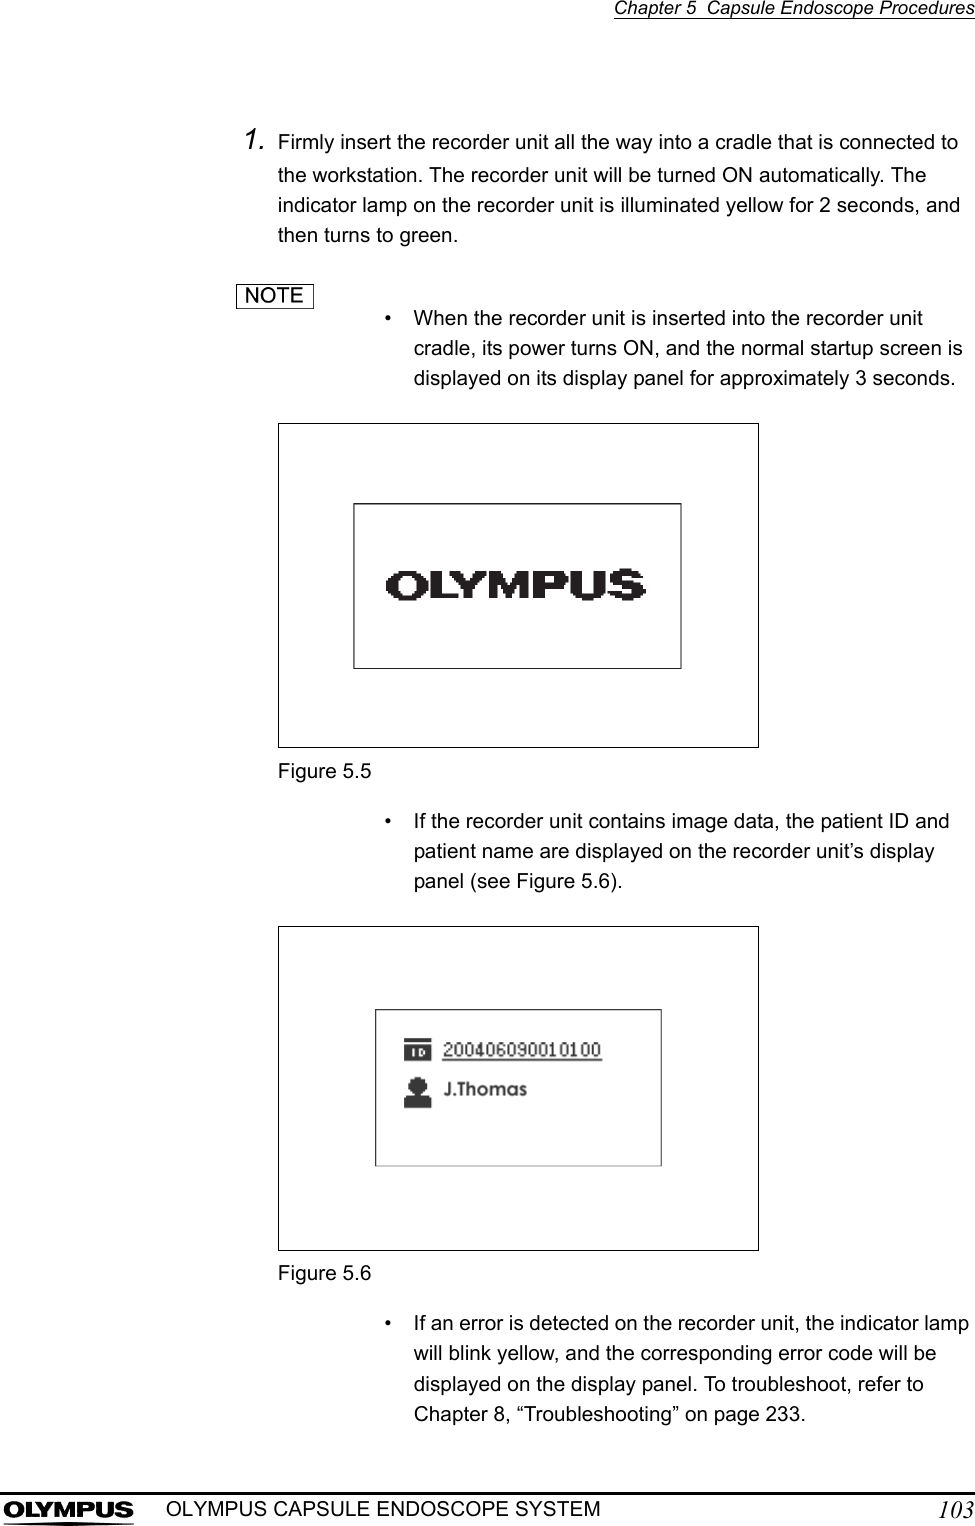
![Chapter 4 Workstation Access and Setup75OLYMPUS CAPSULE ENDOSCOPE SYSTEM4.4 User settingsThe “User Settings” function is not available in Endo Capsule Software Light.You can add or remove users, as well as change passwords. 1. Select “Settings” from the “Tools” menu on the main screen. 2. Click the “User accounts” tab. The user settings screen is displayed. Figure 4.15Adding users• You must log in as an administrator in order to add a user. • Characters that can be used for user IDs and passwords are shown in Table 4.2.• For more information on authority levels, see “Workstation operation limitations” on page 82.Table 4.2Uppercase A B C D E F G H I J K L M N O P Q R S T U V W X Y ZLowercase a b c d e f g h i j k l m n o p q r s t u v w x y zNumbers 0 1 2 3 4 5 6 7 8 9Symbols ` ~ ! @ # $ % ^ & * ( ) _ + – = { } | [ ] : " ; ' < > ? , . /User accounts tab](https://usermanual.wiki/Olympus-Medical-Systems/EC-1.Users-manual-Part-2/User-Guide-618770-Page-1.png)
![76Chapter 4 Workstation Access and SetupOLYMPUS CAPSULE ENDOSCOPE SYSTEM1. Click the [Add] button on the user settings screen. The adding user screen is displayed.Figure 4.162. Enter the user ID, user name, authority, and password. Enter additional information in the “Remarks” field as necessary.Figure 4.17• The user ID and password can be up to 32 characters in length.• All fields are case sensitive.• Operation on the workstation will be limited depending on the user’s authority (see “Workstation operation limitations” on page 82).• The password to be set is for initial use.Add button](https://usermanual.wiki/Olympus-Medical-Systems/EC-1.Users-manual-Part-2/User-Guide-618770-Page-2.png)
![Chapter 4 Workstation Access and Setup77OLYMPUS CAPSULE ENDOSCOPE SYSTEM3. Click the [OK] button. The user settings screen is displayed, and the new user is added to the list on the user settings screen.Figure 4.18Click the [Cancel] button to return to the user settings screen without adding a user.4. Click the [OK] button on the user settings screen. The new user is added.Click the [Cancel] button to cancel the addition.OK button](https://usermanual.wiki/Olympus-Medical-Systems/EC-1.Users-manual-Part-2/User-Guide-618770-Page-3.png)
![78Chapter 4 Workstation Access and SetupOLYMPUS CAPSULE ENDOSCOPE SYSTEMChanging user informationYou must log in as an administrator in order to change user information.1. Select the user whose information you wish to change, and click the [Edit] button. The user information update screen is displayed.Figure 4.192. Enter the new information.Figure 4.20Edit button](https://usermanual.wiki/Olympus-Medical-Systems/EC-1.Users-manual-Part-2/User-Guide-618770-Page-4.png)
![Chapter 4 Workstation Access and Setup79OLYMPUS CAPSULE ENDOSCOPE SYSTEM3. Click the [OK] button. The user settings screen is displayed.Click the [Cancel] button to return to the user settings screen without changing the user information.4. Click the [OK] button on the user settings screen. The user information is updated.Click the [Cancel] button to discard the changes.Changing passwords• You can only change the password for the user who is currently logged in.• If you forget your password, an administrator can change the user information.1. Click the [Password] button. The password update screen is displayed.Figure 4.21Password button](https://usermanual.wiki/Olympus-Medical-Systems/EC-1.Users-manual-Part-2/User-Guide-618770-Page-5.png)
![80Chapter 4 Workstation Access and SetupOLYMPUS CAPSULE ENDOSCOPE SYSTEM2. Enter the old and new passwords. Enter the new password twice to confirm it.Figure 4.223. Click the [OK] button. The password is changed, and the user settings screen is displayed.Click the [Cancel] to return to the user settings screen without changing the password.4. Click the [OK] button on the user settings screen. The new password becomes effective.Click the [Cancel] button to discard the new password and keep the old password.Old passwordNew password](https://usermanual.wiki/Olympus-Medical-Systems/EC-1.Users-manual-Part-2/User-Guide-618770-Page-6.png)
![Chapter 4 Workstation Access and Setup81OLYMPUS CAPSULE ENDOSCOPE SYSTEMRemoving usersYou must log in as an administrator in order to remove a user.Once a user is removed, the user can no longer log in to the workstation.1. Select the user that you wish to remove and then click the [Remove] button.Figure 4.232. The user is removed from the “Users” list.Click the [Cancel] button to discard the removal.3. Click the [OK] button on the user settings screen. The removal becomes effective.Remove button](https://usermanual.wiki/Olympus-Medical-Systems/EC-1.Users-manual-Part-2/User-Guide-618770-Page-7.png)
![86Chapter 4 Workstation Access and SetupOLYMPUS CAPSULE ENDOSCOPE SYSTEMTable 4.56. Click the [OK] button on the local information settings screen.The new language and unit settings will be reflected.Click the [Cancel] button to discard the changes.System UnitsCGS system Length: cm / Weight: kgYard-pound systems Length: inches / Weight: pound](https://usermanual.wiki/Olympus-Medical-Systems/EC-1.Users-manual-Part-2/User-Guide-618770-Page-12.png)
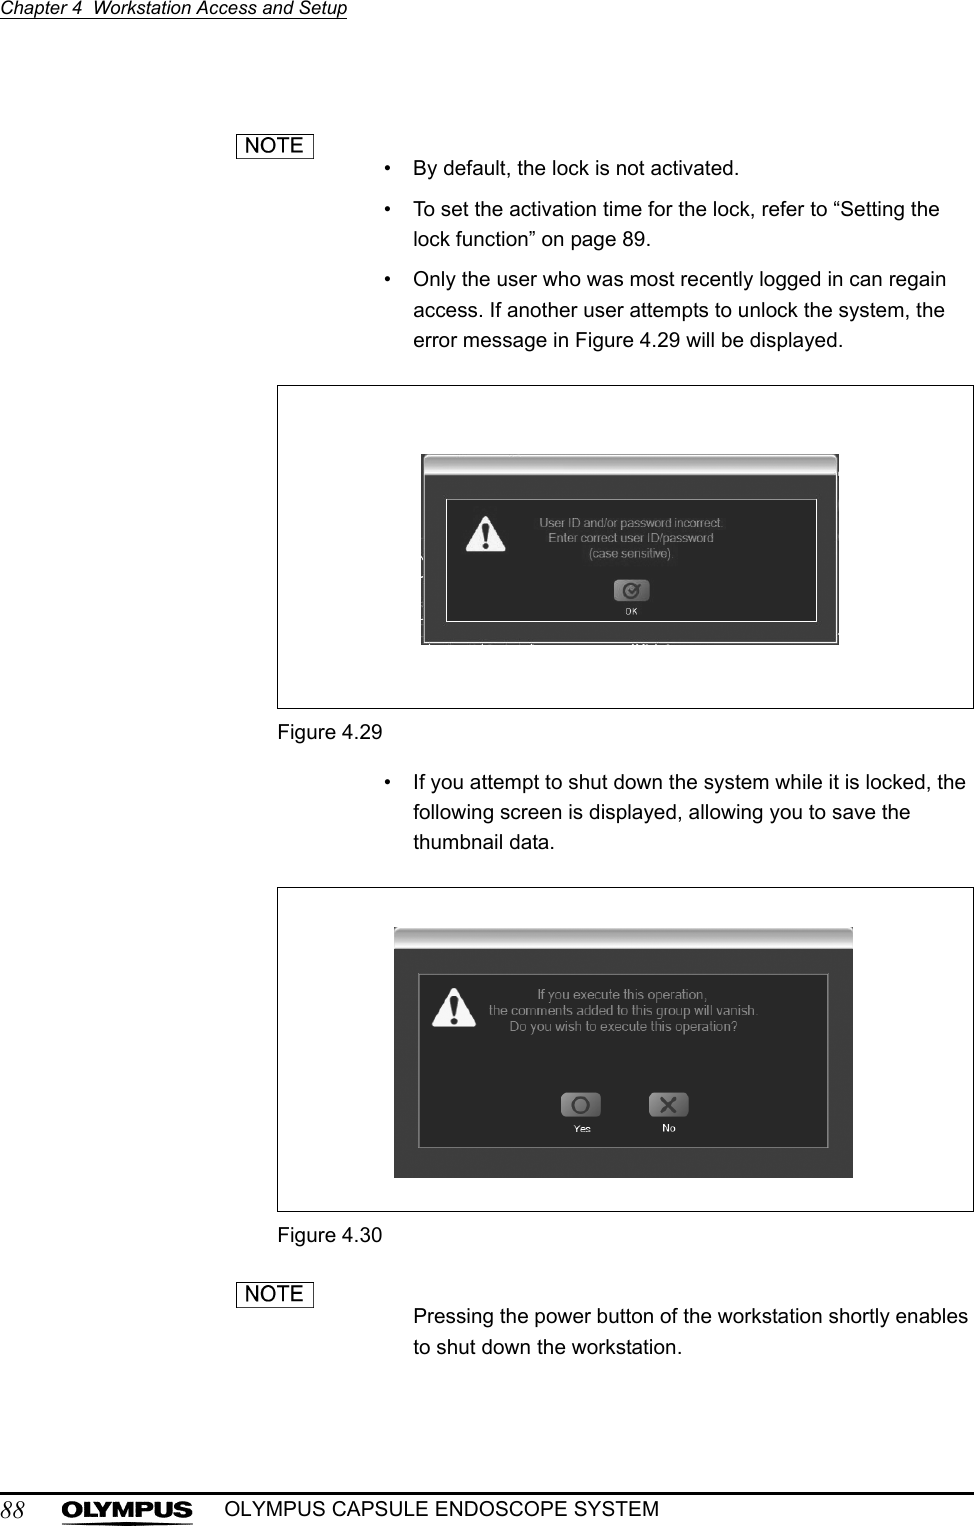
![Chapter 4 Workstation Access and Setup87OLYMPUS CAPSULE ENDOSCOPE SYSTEM4.6 Lock functionThe “Lock” function is not available in Endo Capsule Software Light.The application is locked after a period of inactivity, and the lock screen is displayed. To release the lock, you will need the user ID and password of the user who was last logged in.Releasing the lock1. Enter the user ID and password on the lock screen (see Figure 4.28).Figure 4.282. Click the [OK] button. The screen is restored to the state before the activation of the lock.User IDPassword](https://usermanual.wiki/Olympus-Medical-Systems/EC-1.Users-manual-Part-2/User-Guide-618770-Page-13.png)
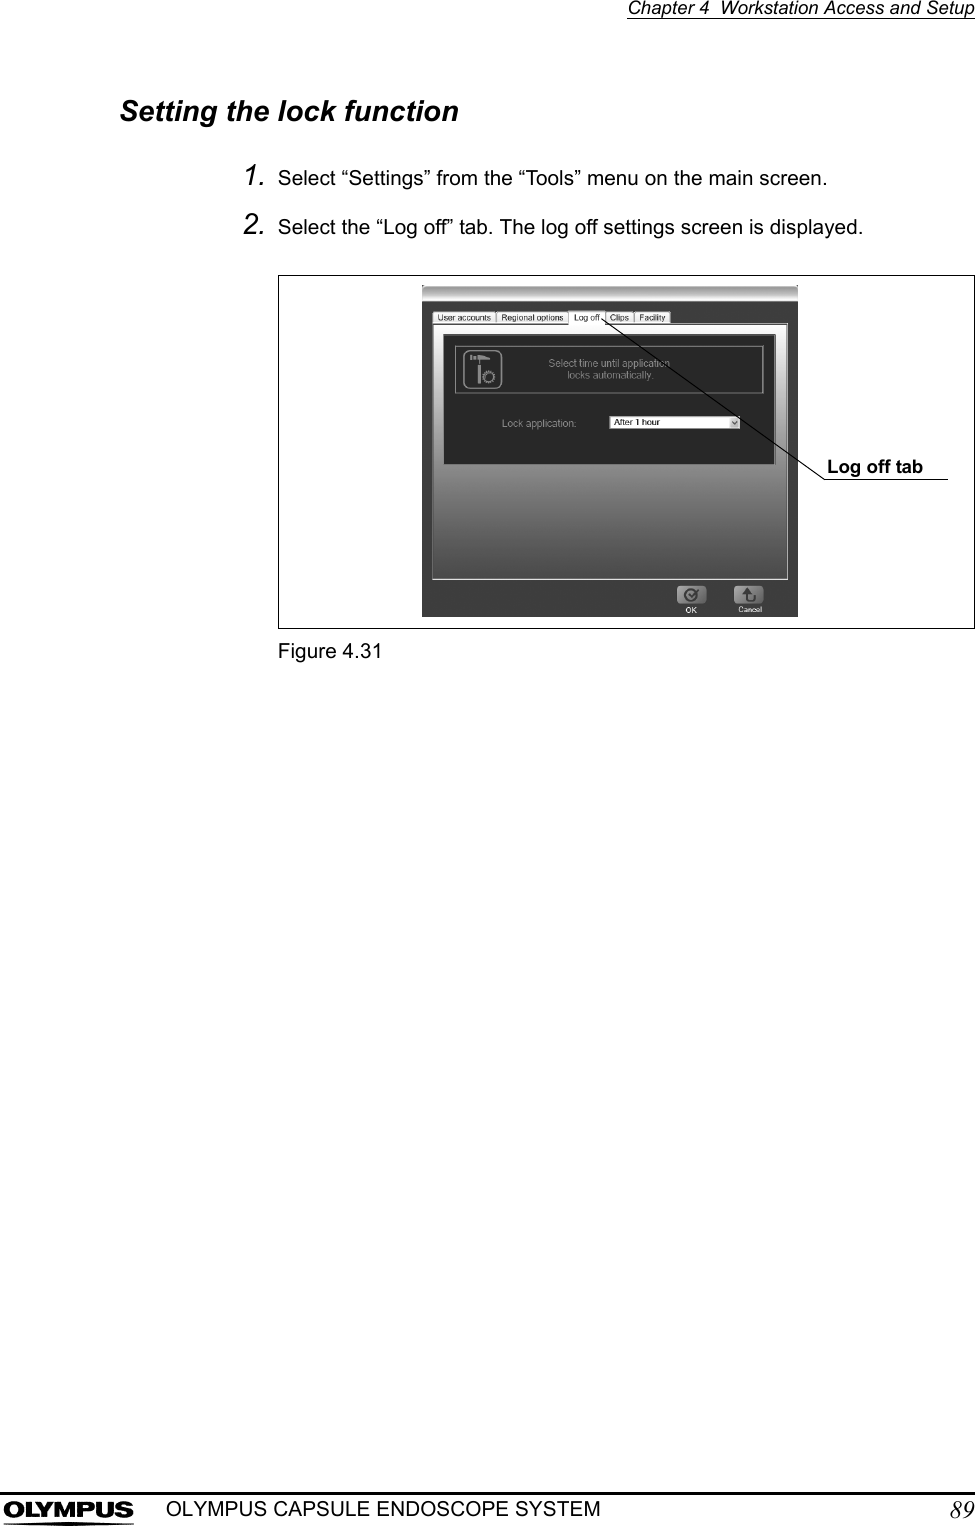
![90Chapter 4 Workstation Access and SetupOLYMPUS CAPSULE ENDOSCOPE SYSTEM3. Click the “ ” to the right of “Lock application” to select the activation time for the lock screen (see Figure 4.32).Figure 4.32The following activation times are available: 4. Click the [OK] button on the log off settings screen.Click the [Cancel] button to discard the changes.• Never (defaults) • 5 minutes • 10 minutes • 20 minutes • 30 minutes • 1 hour button](https://usermanual.wiki/Olympus-Medical-Systems/EC-1.Users-manual-Part-2/User-Guide-618770-Page-16.png)
![Chapter 4 Workstation Access and Setup91OLYMPUS CAPSULE ENDOSCOPE SYSTEM4.7 Facility logo1. Select “Settings” from the “Tools” menu on the main screen.2. Select the “Facility” tab. The facility information settings screen is displayed.Figure 4.333. Select “Current logo” from the drive selection box.The current logo is displayed in the preview area.Figure 4.344. Select the logo file (Bitmap file) in the file selection box and click the [OK] button on the facility information settings screen. The selected logo file is displayed in the preview area.Facility tabDrive selection boxPreview area](https://usermanual.wiki/Olympus-Medical-Systems/EC-1.Users-manual-Part-2/User-Guide-618770-Page-17.png)
![92Chapter 4 Workstation Access and SetupOLYMPUS CAPSULE ENDOSCOPE SYSTEMFigure 4.355. Click the [OK] button on the facility information settings screen. The selected logo file is registered.Click the [Cancel] button to discard the settings.6. To clear the current facility logo, click the [Clear] button on the facility information settings screen.Figure 4.36File selection boxClear button](https://usermanual.wiki/Olympus-Medical-Systems/EC-1.Users-manual-Part-2/User-Guide-618770-Page-18.png)
![Chapter 4 Workstation Access and Setup93OLYMPUS CAPSULE ENDOSCOPE SYSTEM4.8 Log off and exitEndo Capsule software1. Select “Log off” from the “File” menu on the main screen (see Figure 4.37). The login screen is displayed.Figure 4.37• You also can log off by clicking the [X] button at the upper-right of the main screen.• If the thumbnail data is not saved, you will be asked if you wish to save the data (see Figure 4.38). Click the [Yes] button if you wish to save the thumbnail data, or the [No] button to discard any work since the last save. Click the [Cancel] button to cancel the logoff.Figure 4.38File menu](https://usermanual.wiki/Olympus-Medical-Systems/EC-1.Users-manual-Part-2/User-Guide-618770-Page-19.png)
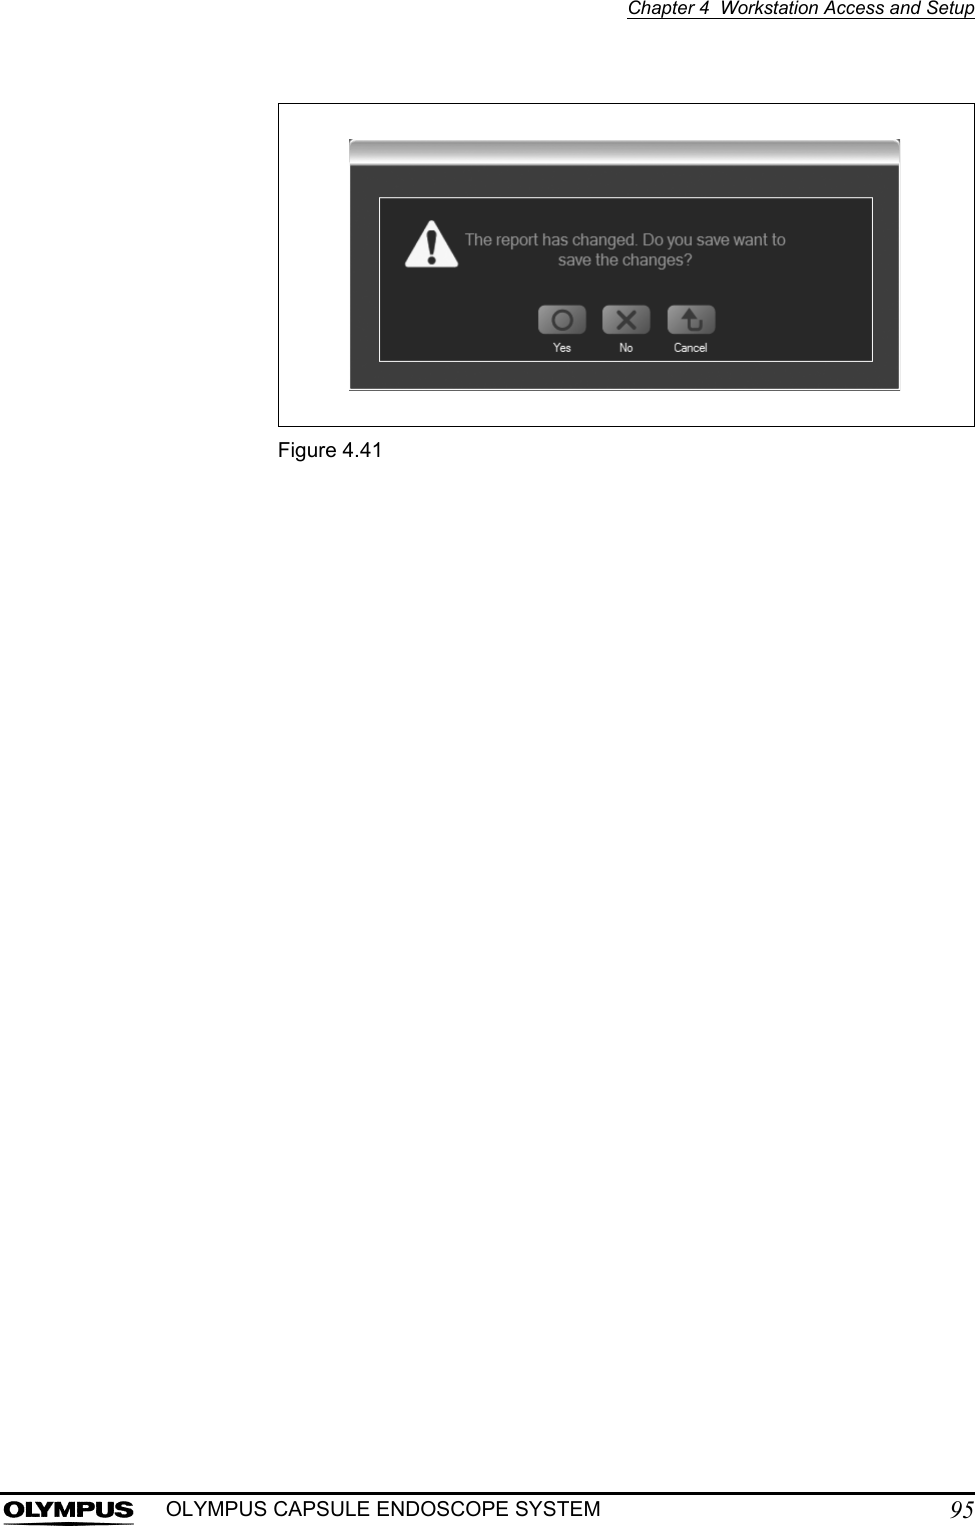
![94Chapter 4 Workstation Access and SetupOLYMPUS CAPSULE ENDOSCOPE SYSTEM2. Click the [Shut Down] button on the login screen. The workstation will be turned OFF.Figure 4.39Endo Capsule software light1. Select “Exit” from the “File” menu or click the [X] button at the upper right on the main screen (Figure 4.40).Figure 4.40If the thumbnail data is not saved, you will be asked if you wish to save the data (see Figure 4.41). Click the [Yes] button if you wish to save the thumbnail data, or the [No] button to discard any work since the last save. Click the [Cancel] button to cancel exiting (see Figure 4.41).Shut Down buttonExit](https://usermanual.wiki/Olympus-Medical-Systems/EC-1.Users-manual-Part-2/User-Guide-618770-Page-20.png)
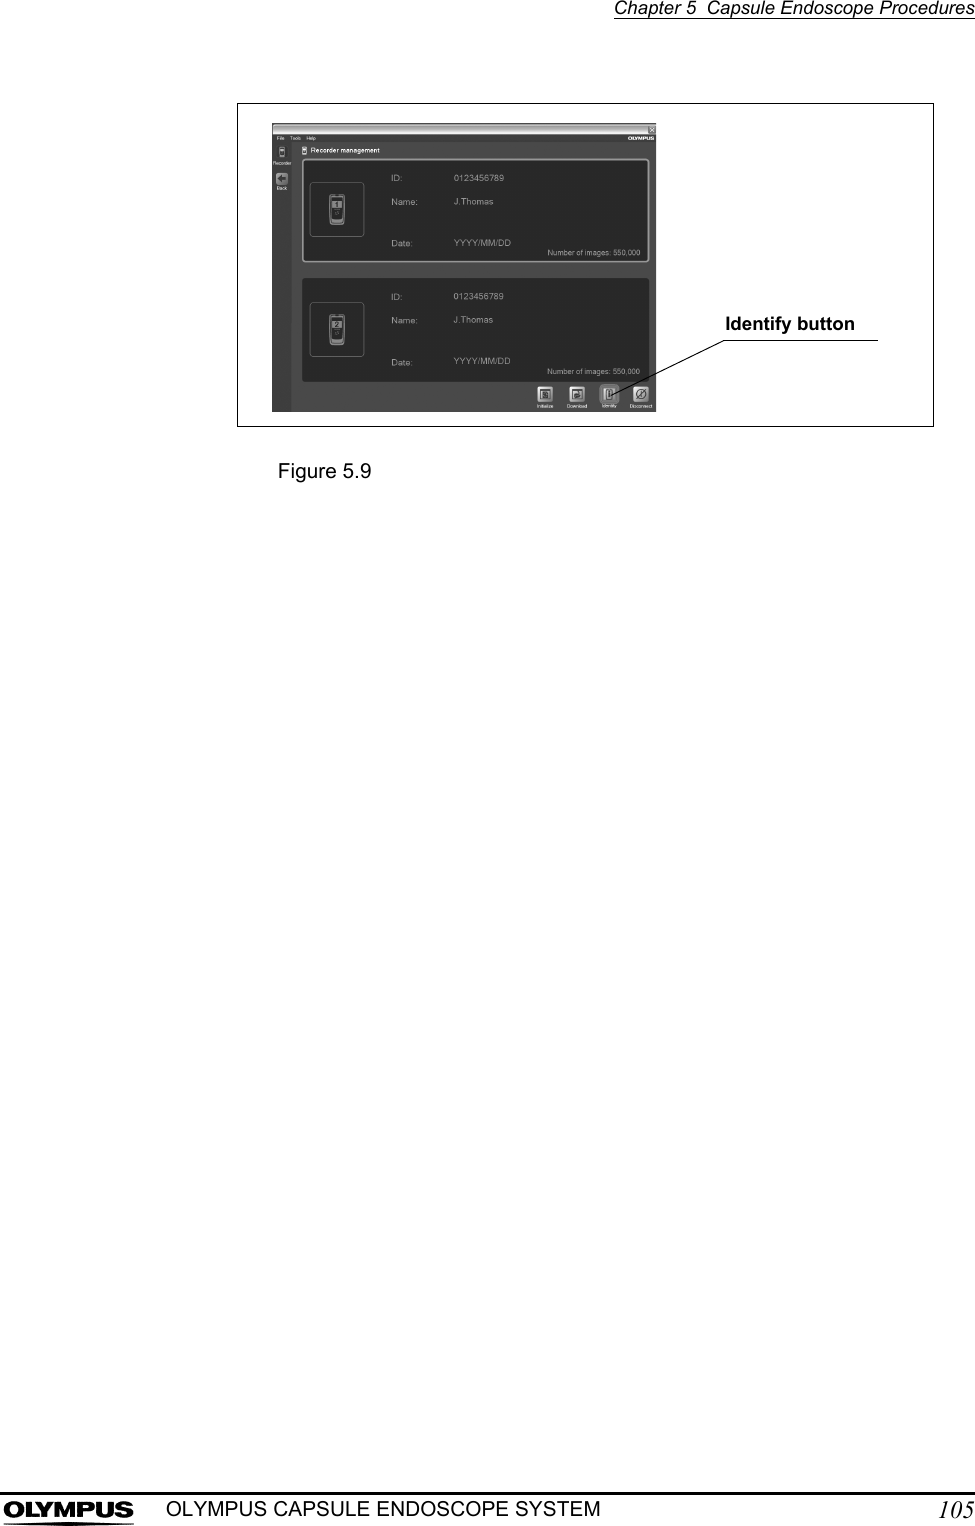
![104Chapter 5 Capsule Endoscope ProceduresOLYMPUS CAPSULE ENDOSCOPE SYSTEM2. Click the [Recorder] button on the main screen (see Figure 5.7). The recorder management screen is displayed, and the information recorded on the recorder unit is shown. Figure 5.7• If two recorder units are connected to the workstation, information for both units is displayed (see Figure 5.8). Figure 5.8• To identify which recorder unit is selected to display information onto the recorder management screen, click the [Identify] button. The selected recorder unit will blink green three times.Recorder buttonInformation for recorder unit 2Information for recorder unit 1](https://usermanual.wiki/Olympus-Medical-Systems/EC-1.Users-manual-Part-2/User-Guide-618770-Page-30.png)
![106Chapter 5 Capsule Endoscope ProceduresOLYMPUS CAPSULE ENDOSCOPE SYSTEMSetting up the recorder unit1. Select the recorder unit for which the initial setup is to be performed.If two recorder units are connected to the workstation, first identify which recorder unit is being set up.2. Click the [Initialize] button on the recorder management screen (see Figure 5.10). The initial settings screen is displayed.Figure 5.10When you perform the initial setup of the recorder unit, all data on the recorder unit will be deleted. If you wish to keep any of the data stored on the recorder unit, be sure to download it before initializing.• If there are any image data remaining on the recorder unit, a confirmation message will be displayed (see Figure 5.11). If you click the [NO] button, the initial setup screen will be displayed. Click the [YES] button to display the download screen.• If the workstation cannot recogize the connected recorder(s), please remove the cradle cable from the workstation, restart the workstation and then connect it again.• Do not remove the recorder unit from the cradle while initializing with two recorders connected whether the data is now set to it or not. Doing so may result in the hangup of the workstation. If the workstation does not work properly, please restart the workstation.Initialize button](https://usermanual.wiki/Olympus-Medical-Systems/EC-1.Users-manual-Part-2/User-Guide-618770-Page-32.png)
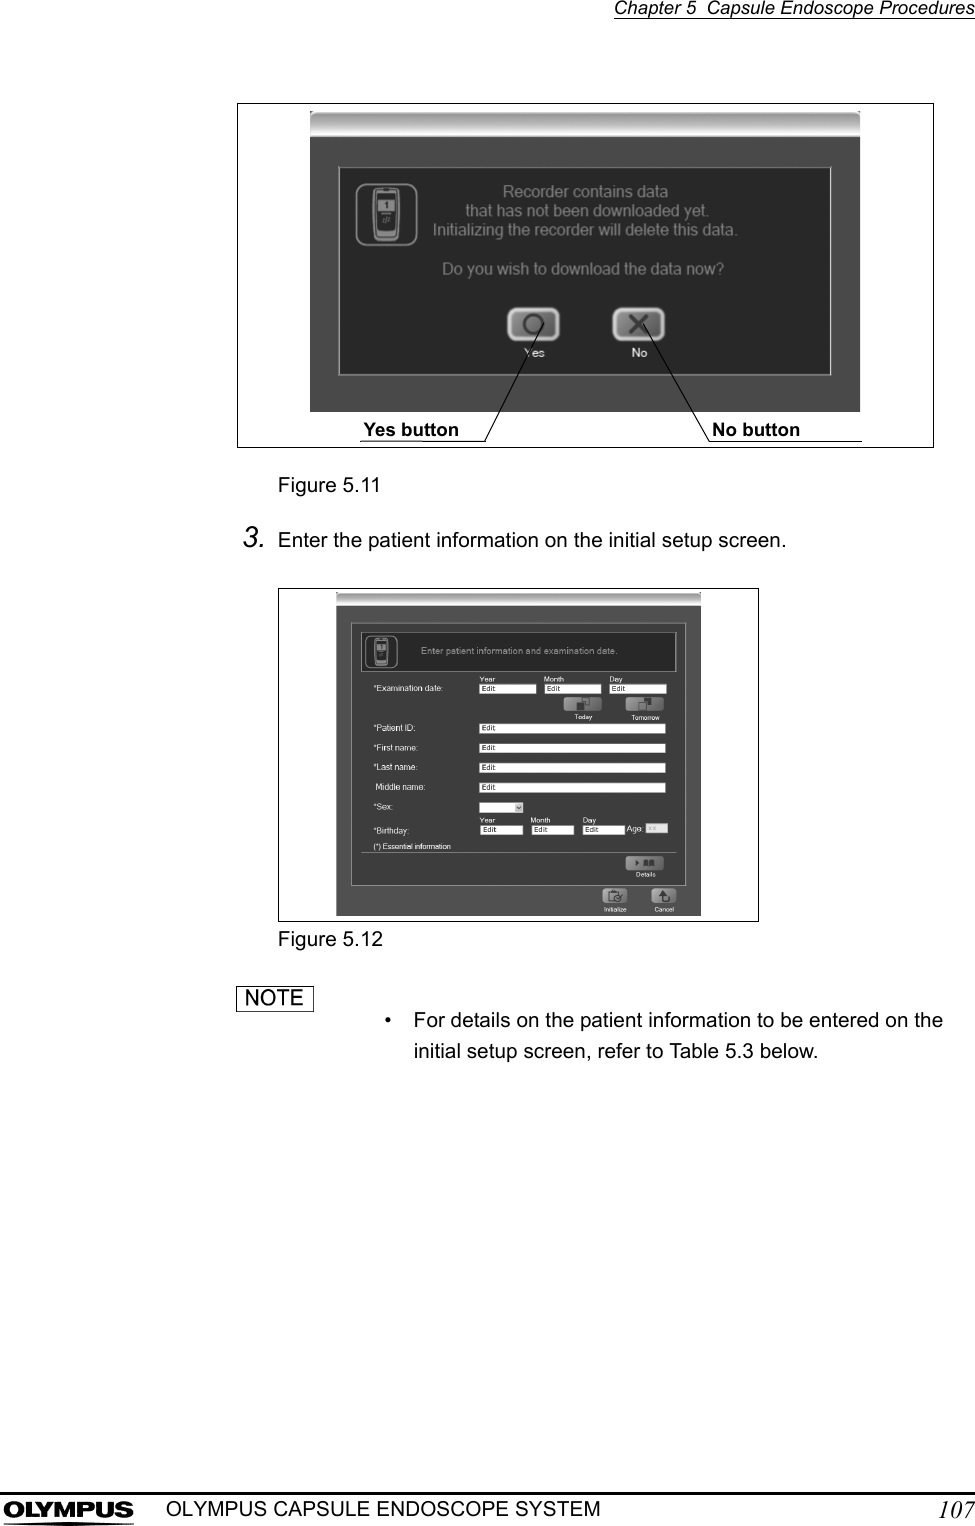
![108Chapter 5 Capsule Endoscope ProceduresOLYMPUS CAPSULE ENDOSCOPE SYSTEMTable 5.3* Essential information• Click the [Today] button to enter today’s date in the examination date field. Click the [Tomorrow] button to enter tomorrow’s date in the examination date field.4. Click the [Show more detail] button to display the panel for entering detailed patient information, like the patient’s height, weight, and waist size.Figure 5.13Item DescriptionExamination date* Year, Month, and Day (numbers)Patient ID* Up to 15 alphanumeric charactersFirst name* Up to 40 charactersLast name* Up to 40 charactersMiddle name Up to 20 charactersSex Select “male” or “female” from the pull-down menuBirthday Year, Month, and Day (numbers)Age Automatically displayed after entering the birthdayShow more detail button](https://usermanual.wiki/Olympus-Medical-Systems/EC-1.Users-manual-Part-2/User-Guide-618770-Page-34.png)
![Chapter 5 Capsule Endoscope Procedures109OLYMPUS CAPSULE ENDOSCOPE SYSTEM• Click the [Close detail] button to hide the details panel.Figure 5.14• The height, weight, and waist must be entered as a number with 5 or less digits, with up to 3 digits in the integer part, and up to 2 digits in the decimal part.5. Click the [Initialize] button. The initial setup confirmation screen is displayed. Figure 5.15If you click the [Initialize] button with any essential information missing, the message “Enter patient information and examination date.” is displayed. Complete all the essential information, and then click the [Initialize] button again.Close detail buttonInitialize button](https://usermanual.wiki/Olympus-Medical-Systems/EC-1.Users-manual-Part-2/User-Guide-618770-Page-35.png)
![110Chapter 5 Capsule Endoscope ProceduresOLYMPUS CAPSULE ENDOSCOPE SYSTEM6. Check your input on the initial setup confirmation screen, and then click the [OK] button.Figure 5.16• Check that the information being displayed belongs to the patient who is being examined.• Patient information cannot be altered after the completion of an examination. To change an entry, click the [Cancel] button and return to the initial setup screen, then re-enter the information.7. Patient information is transmitted to the recorder unit. After transmission is completed, the initial setup completion screen is displayed (see Figure 5.18).During the initial setup, the icon shown in Figure 5.17 will be displayed on the recorder unit’s display panel, and the recorder unit’s indicator lamp will blink yellow.Figure 5.17OK button](https://usermanual.wiki/Olympus-Medical-Systems/EC-1.Users-manual-Part-2/User-Guide-618770-Page-36.png)
![Chapter 5 Capsule Endoscope Procedures111OLYMPUS CAPSULE ENDOSCOPE SYSTEMFigure 5.188. Click the [YES] button. The recorder unit is turned OFF and the recorder management screen is displayed.If you want to manually turn OFF the recorder unit later, click the [NO] button.9. Holding the cradle with one hand, lift the recorder unit upward to remove it from the cradle.Figure 5.19](https://usermanual.wiki/Olympus-Medical-Systems/EC-1.Users-manual-Part-2/User-Guide-618770-Page-37.png)
![112Chapter 5 Capsule Endoscope ProceduresOLYMPUS CAPSULE ENDOSCOPE SYSTEM• Do not connect the recorder unit to the cradle while the antennas are attached to the patient. In the worst case, electric shock and burns may result.• If the recorder unit is ON, first turn it OFF by clicking the [Disconnect] button after selecting the recorder unit on the recorder management screen. If you remove the recorder unit from the cradle while it is ON, it may become damaged.Do not connect the recorder unit to the cradle while the antennas are attached to the patient.](https://usermanual.wiki/Olympus-Medical-Systems/EC-1.Users-manual-Part-2/User-Guide-618770-Page-38.png)