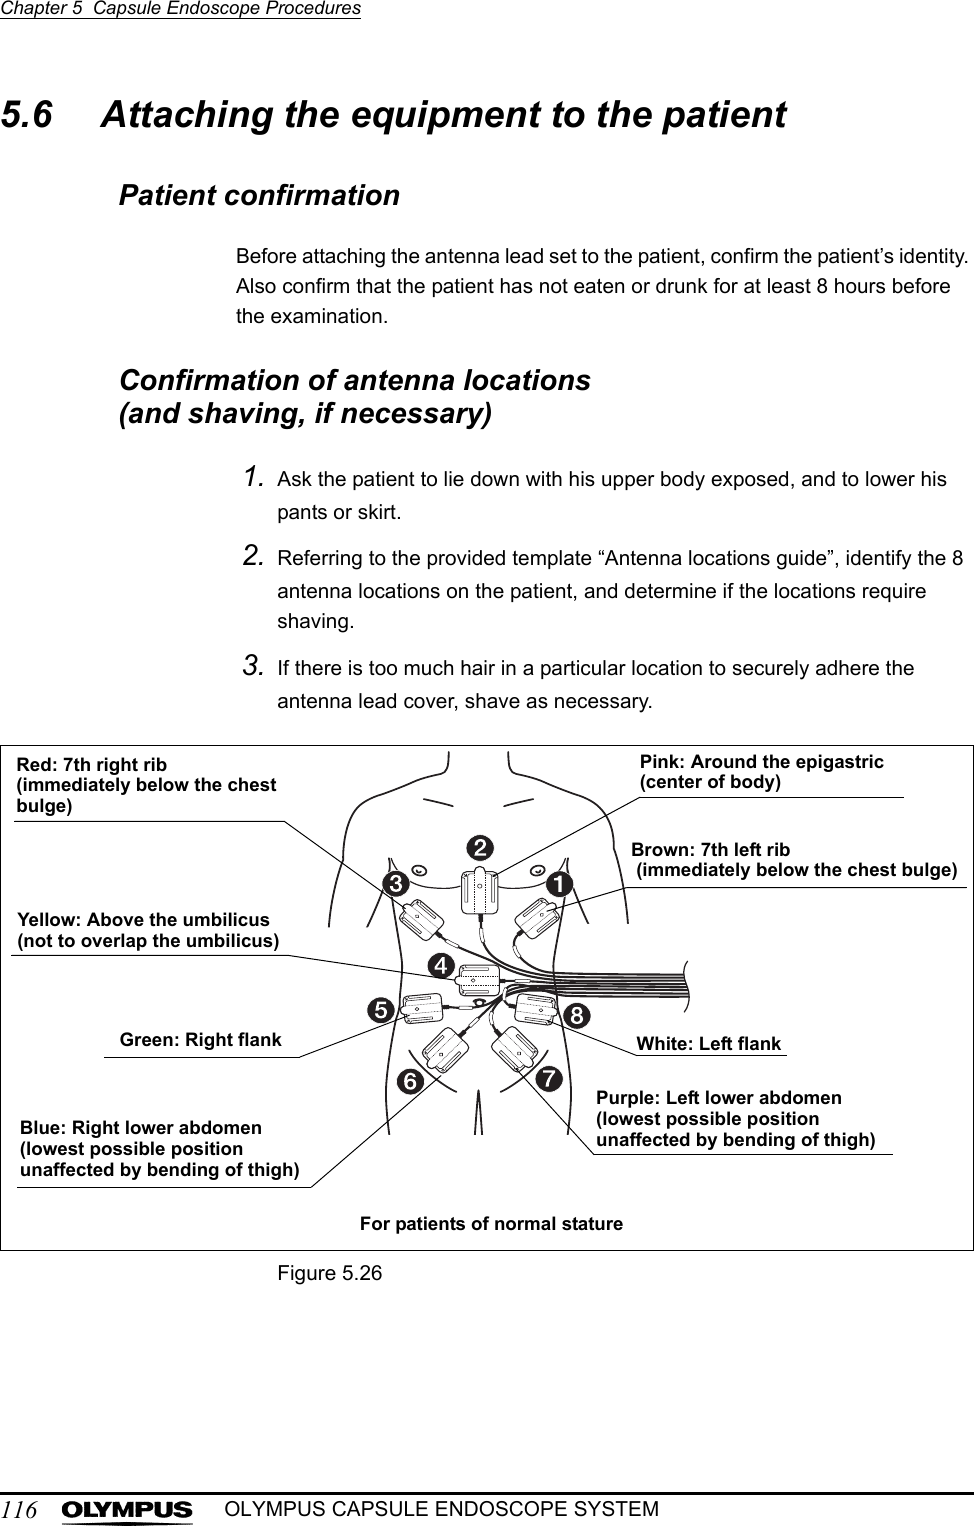
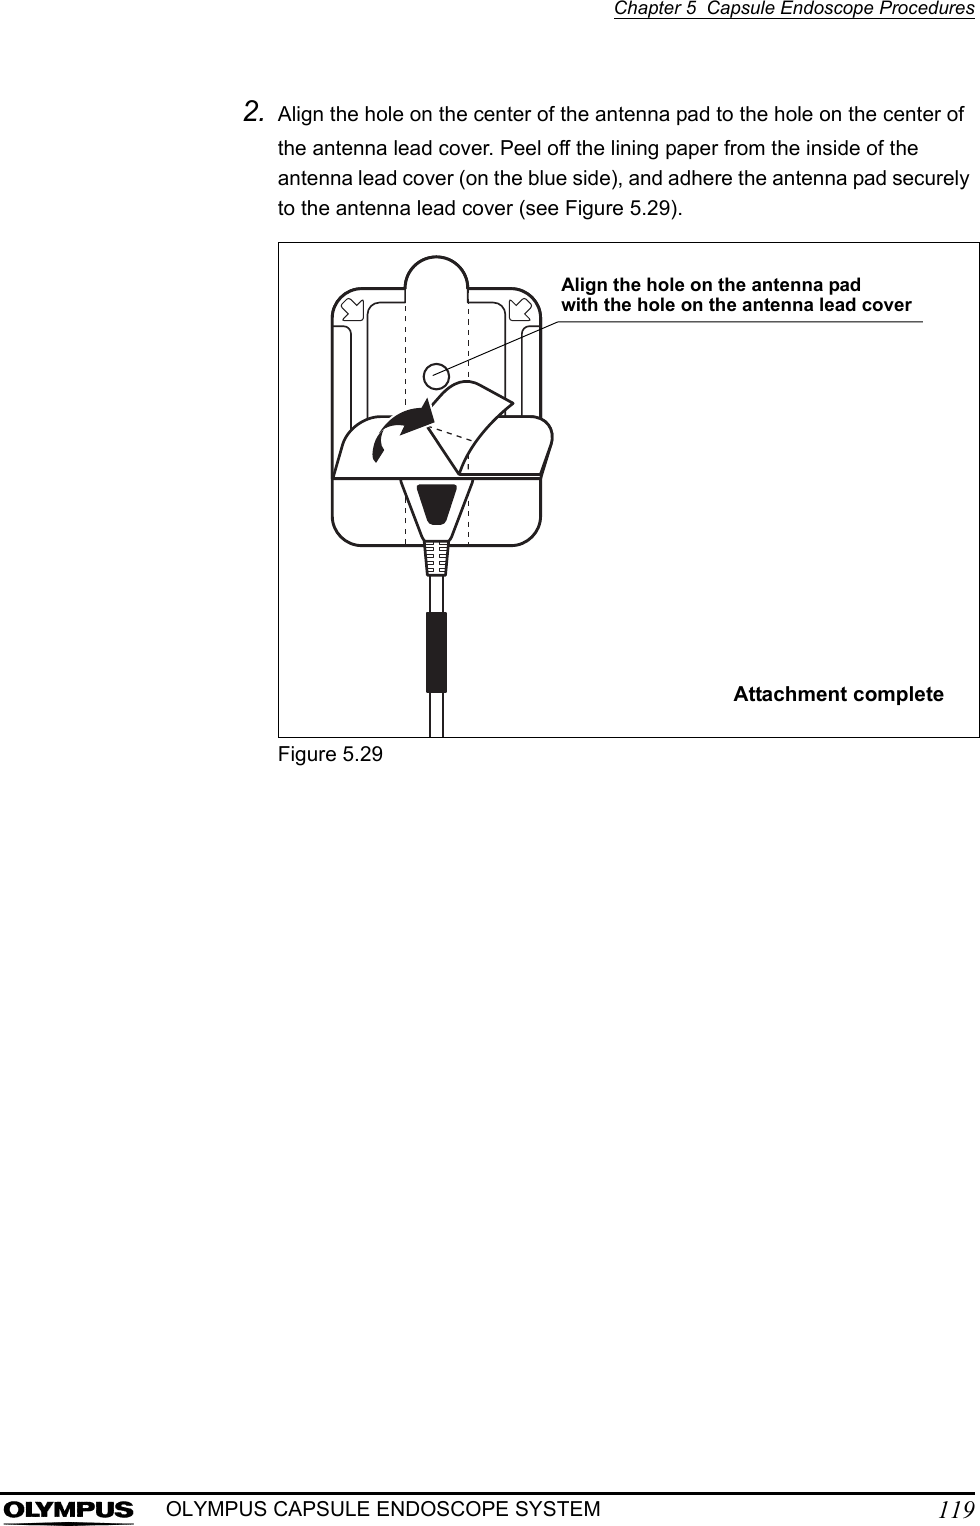
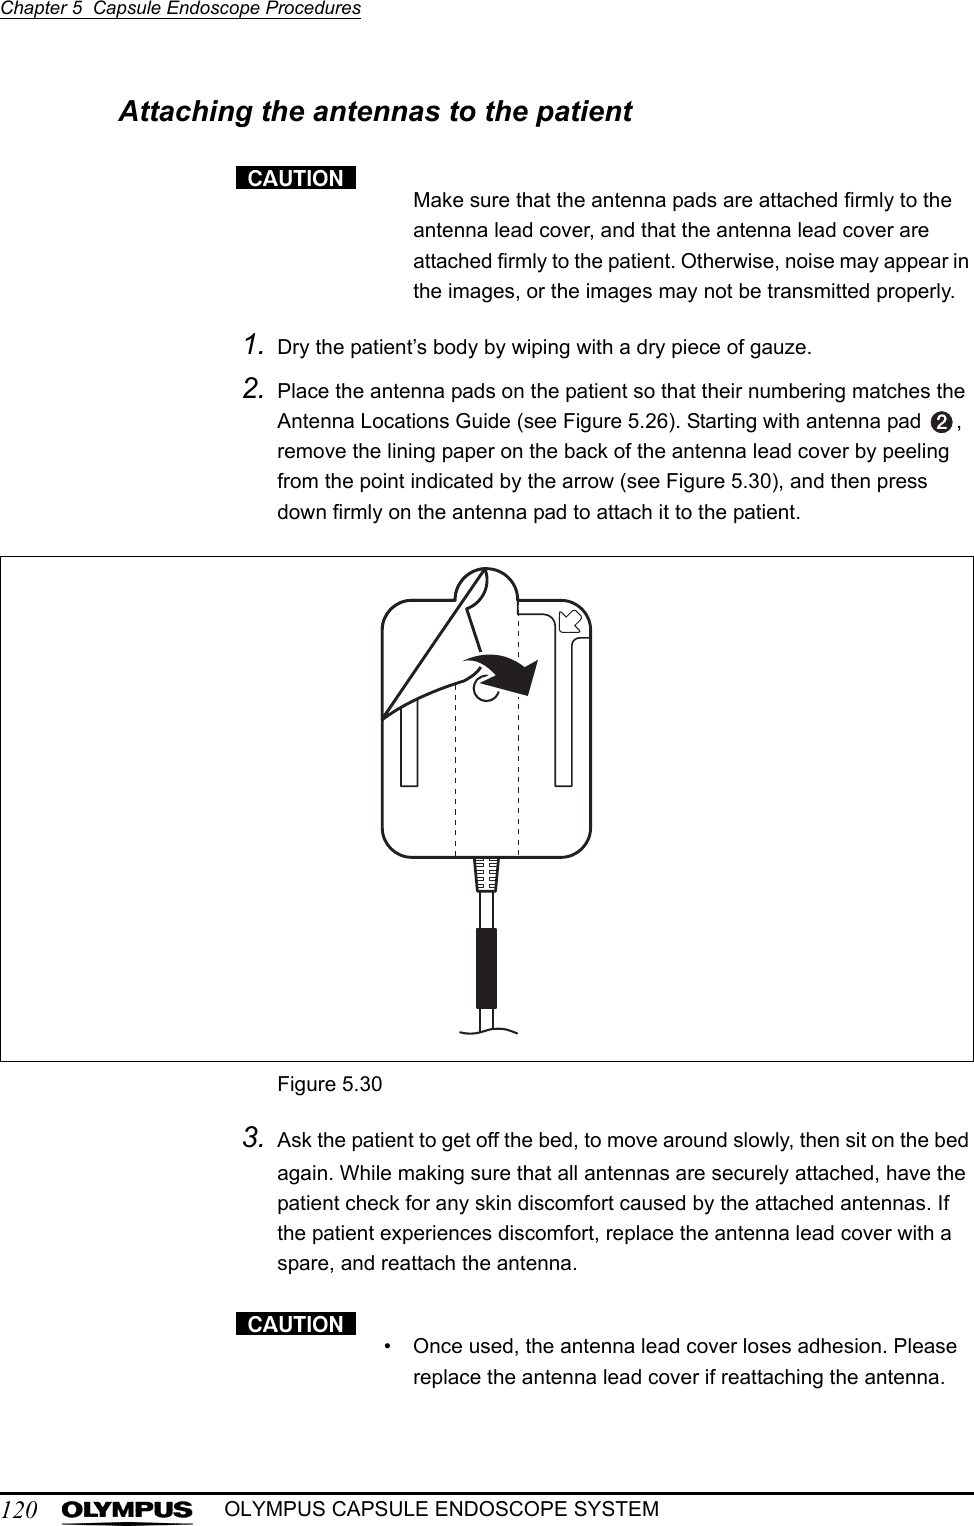
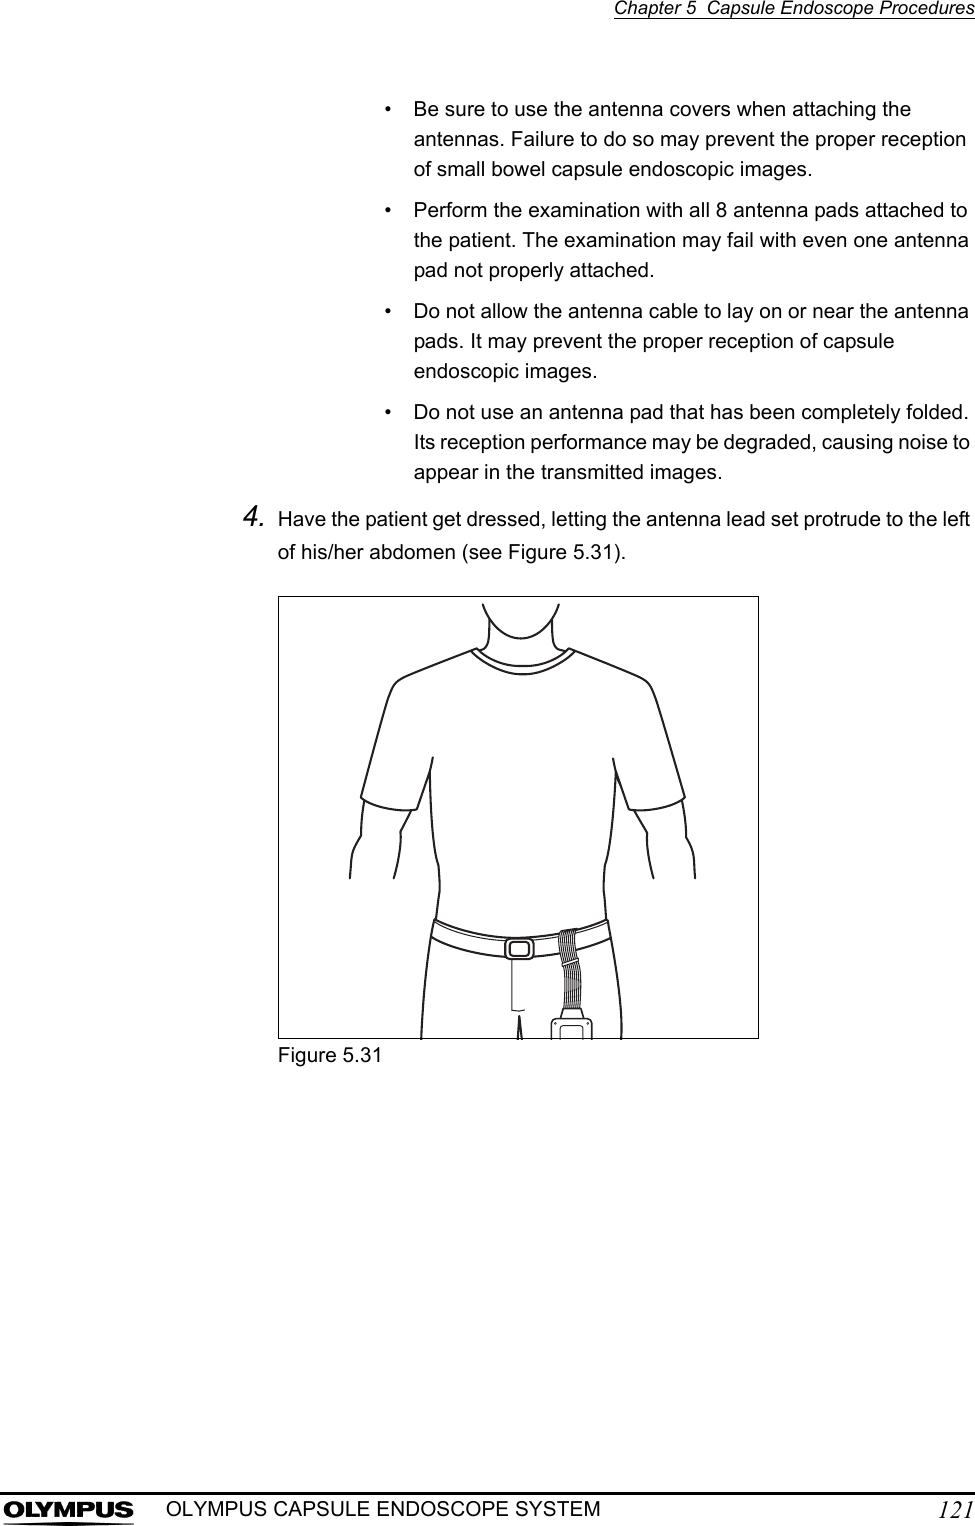
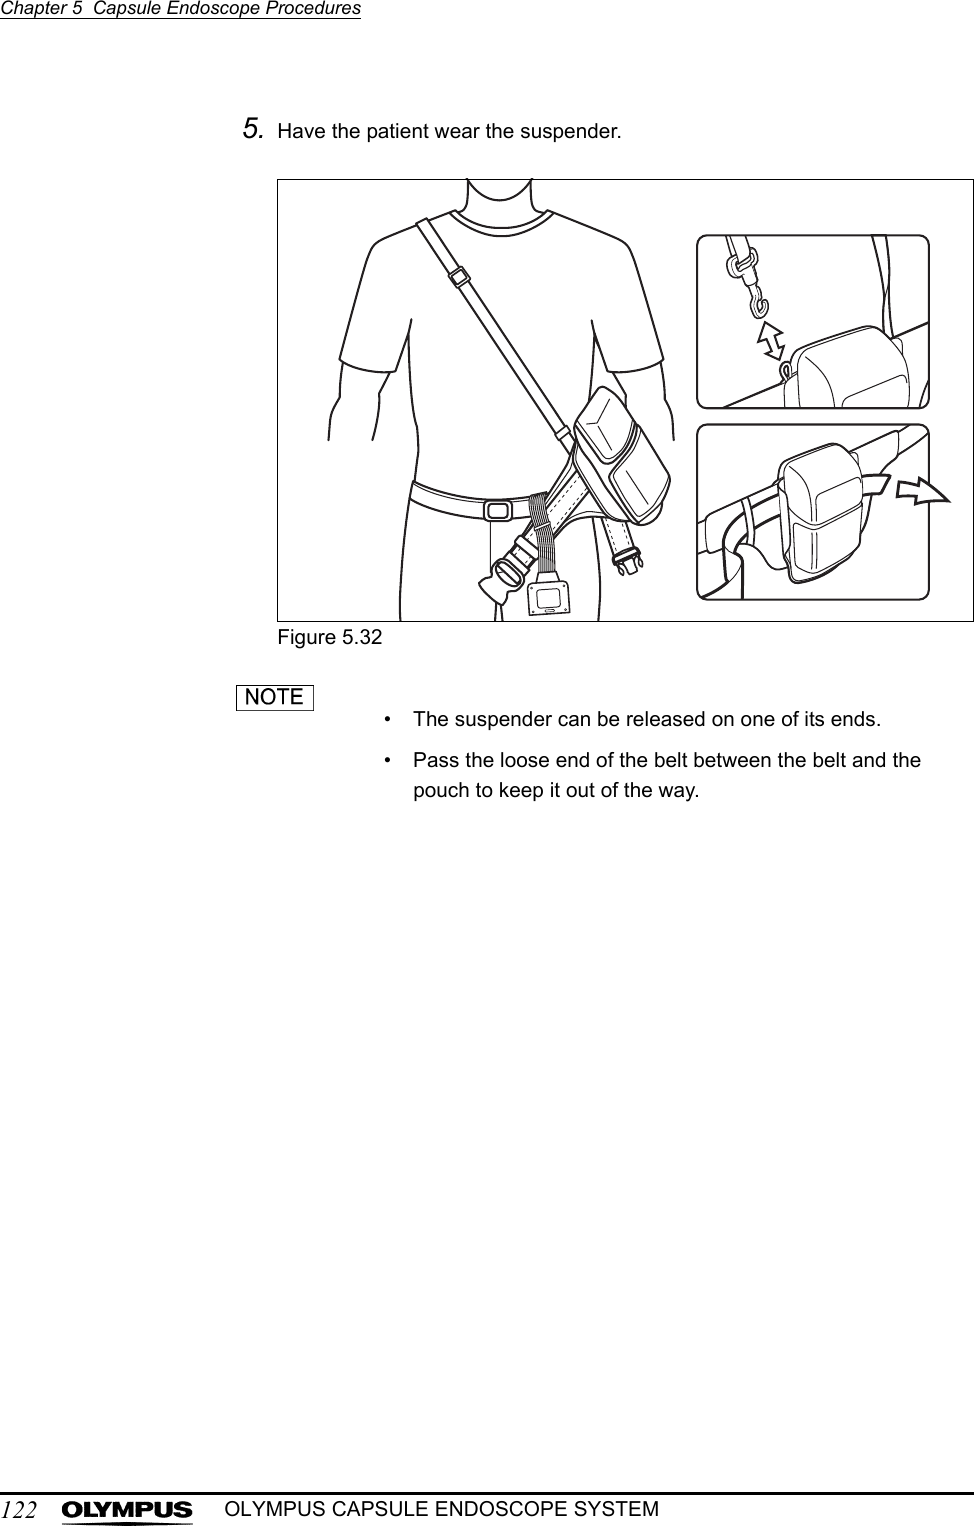
Olympus Medical Systems EC-1 Low Power Transmitter User Manual GT1629 FCC MAJ 1467 C1
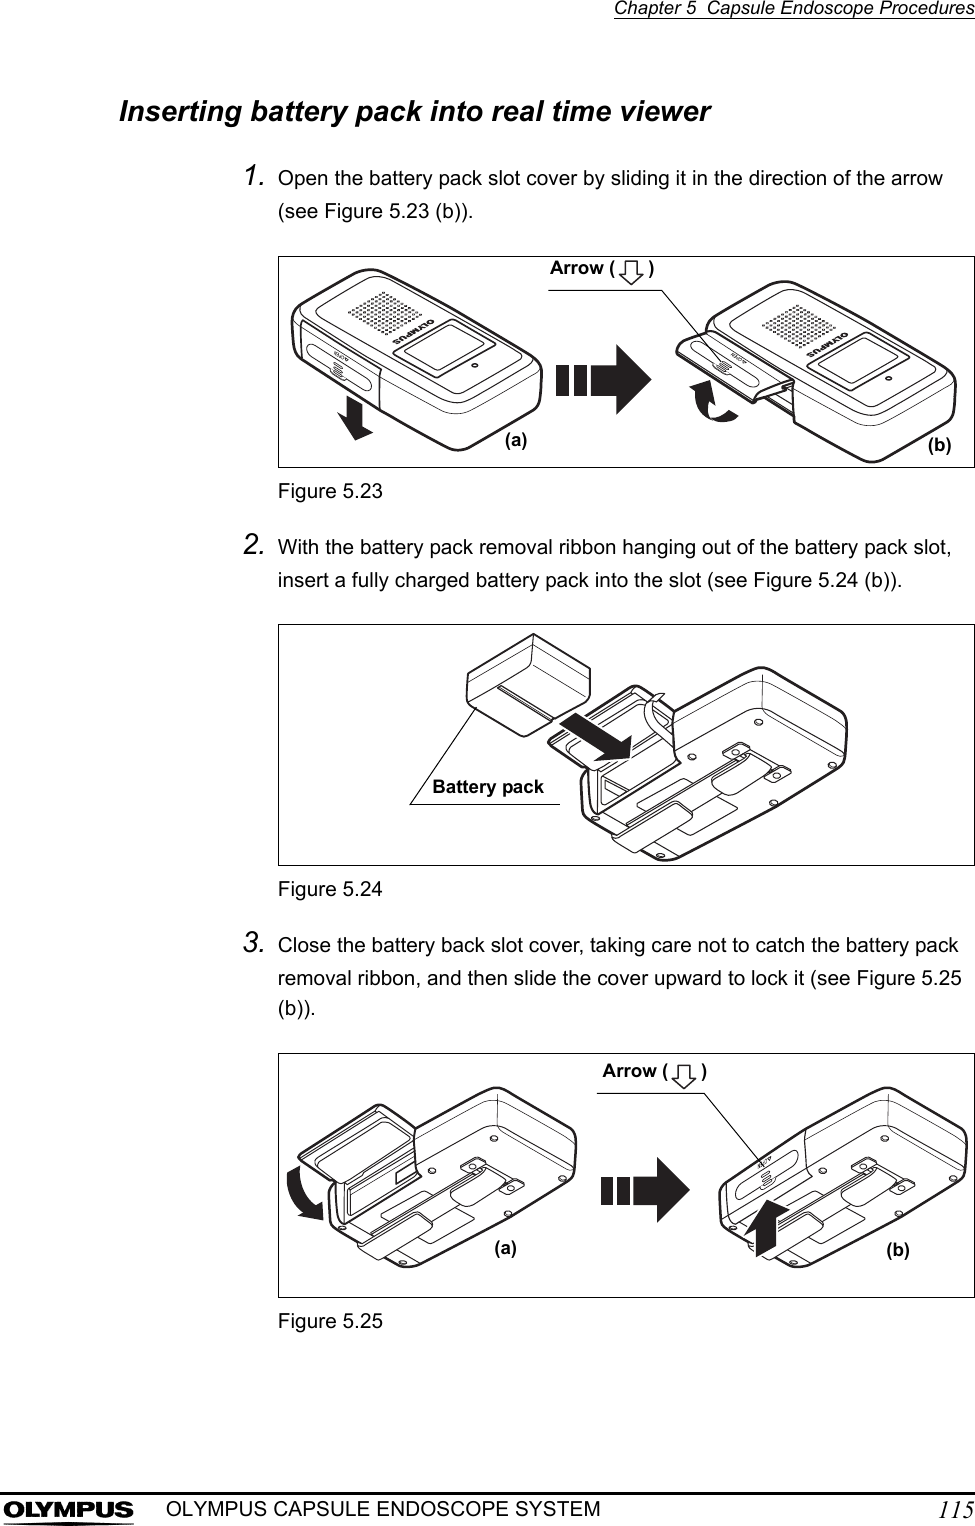
Olympus Medical Systems Corp. Low Power Transmitter GT1629 FCC MAJ 1467 C1
Contents
- 1. Users manual Part 1
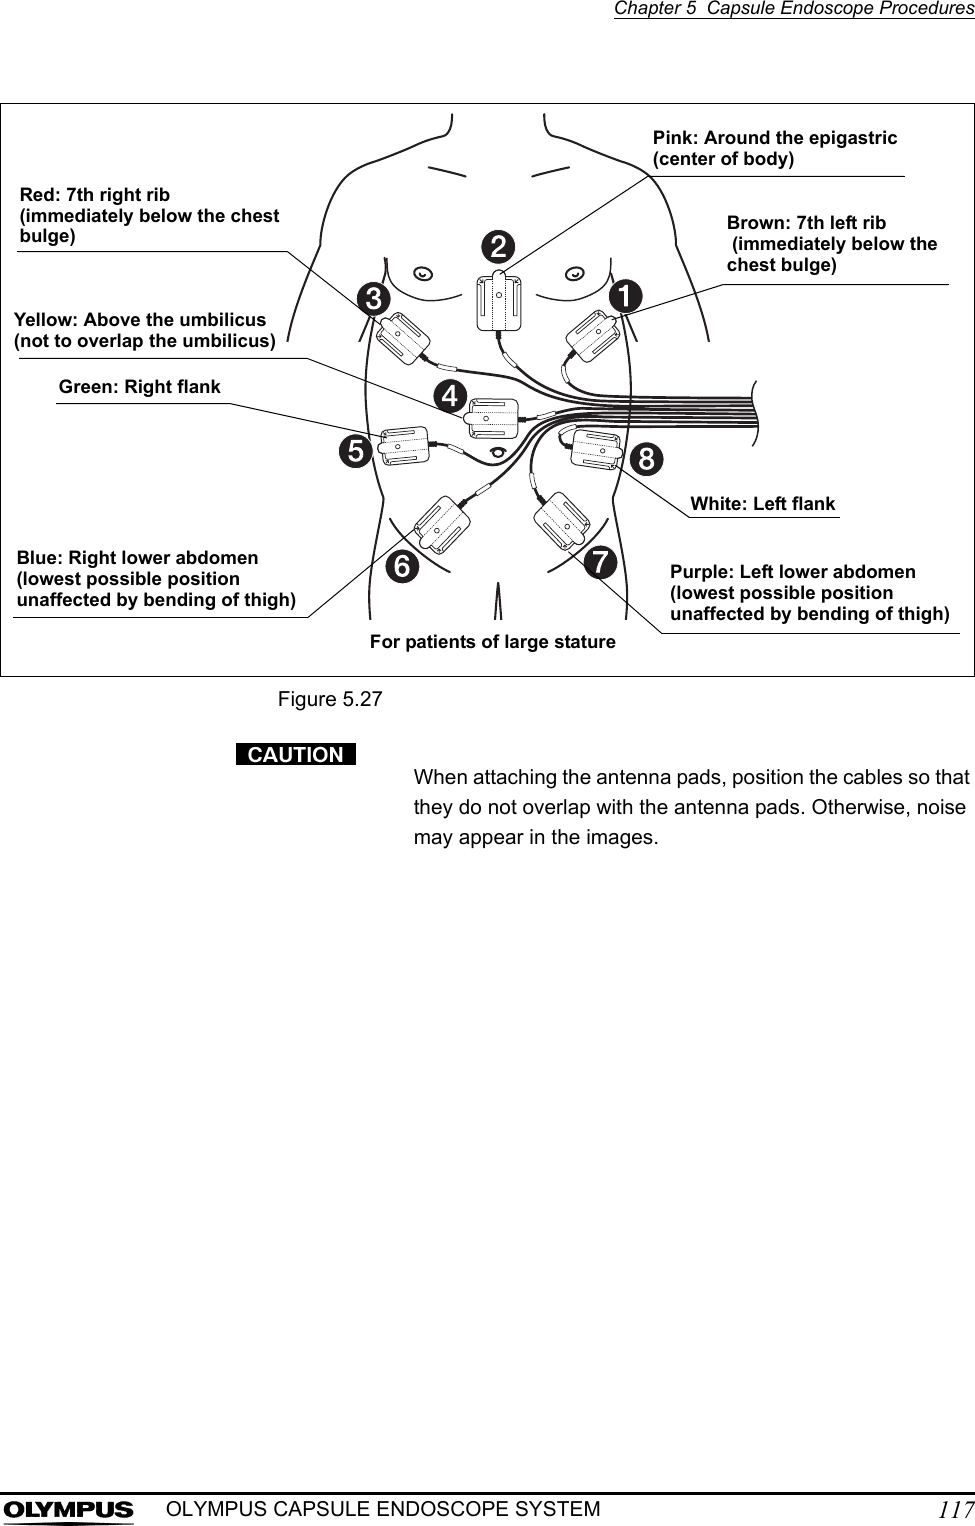
- 2. Users manual Part 2
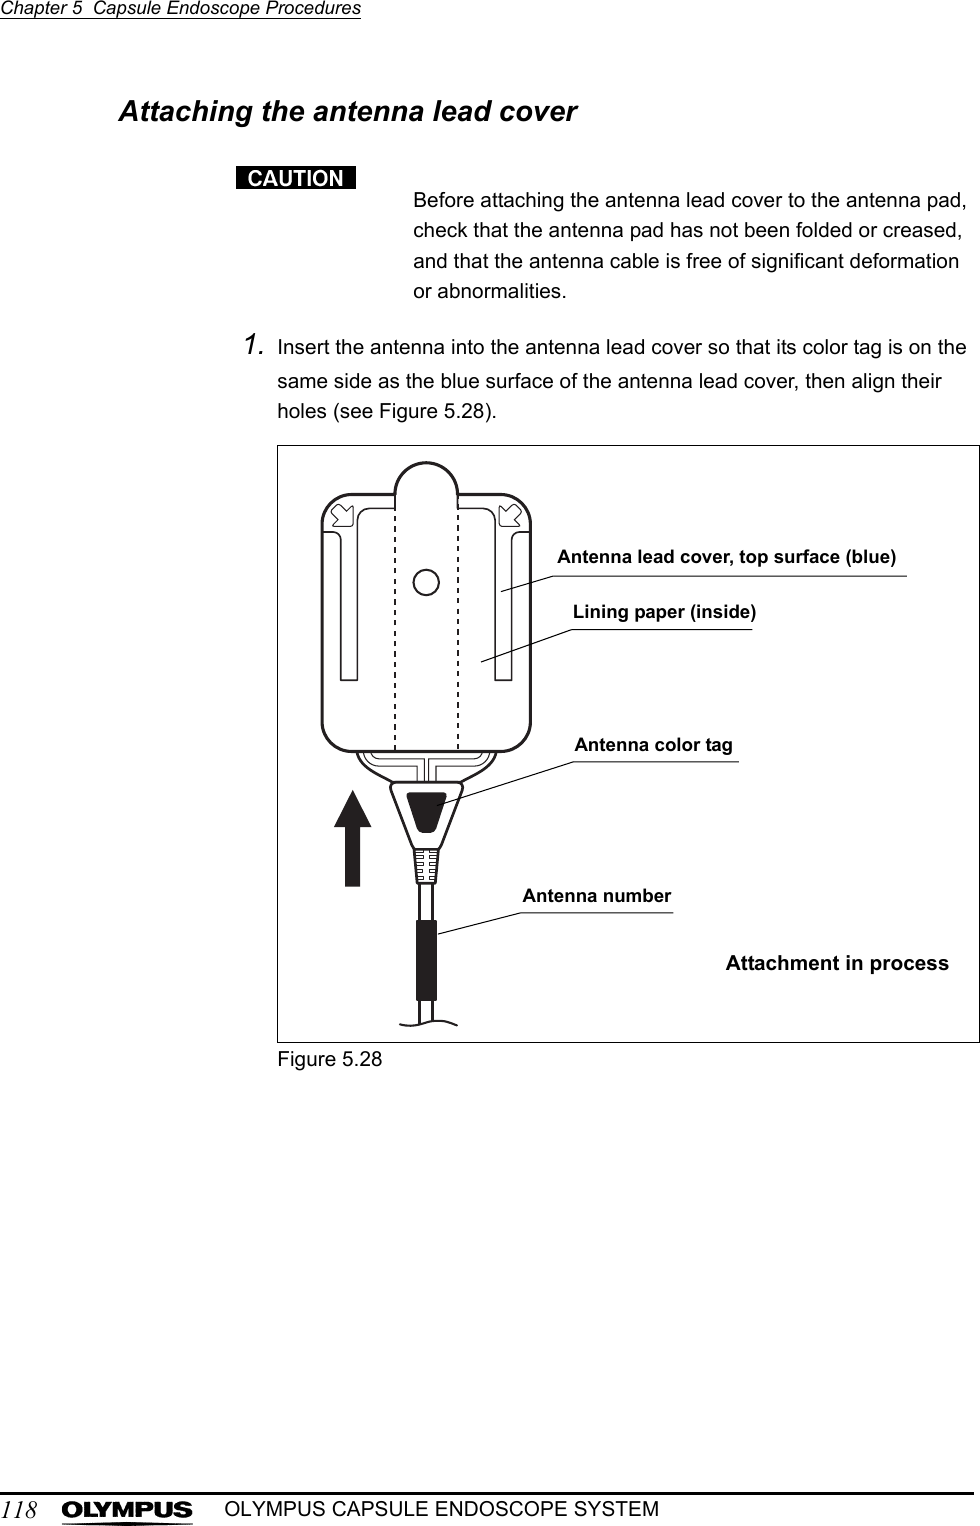
- 3. Users manual Part 3
- 4. Users manual Part 4
- 5. Users manual part 5
Users manual Part 3


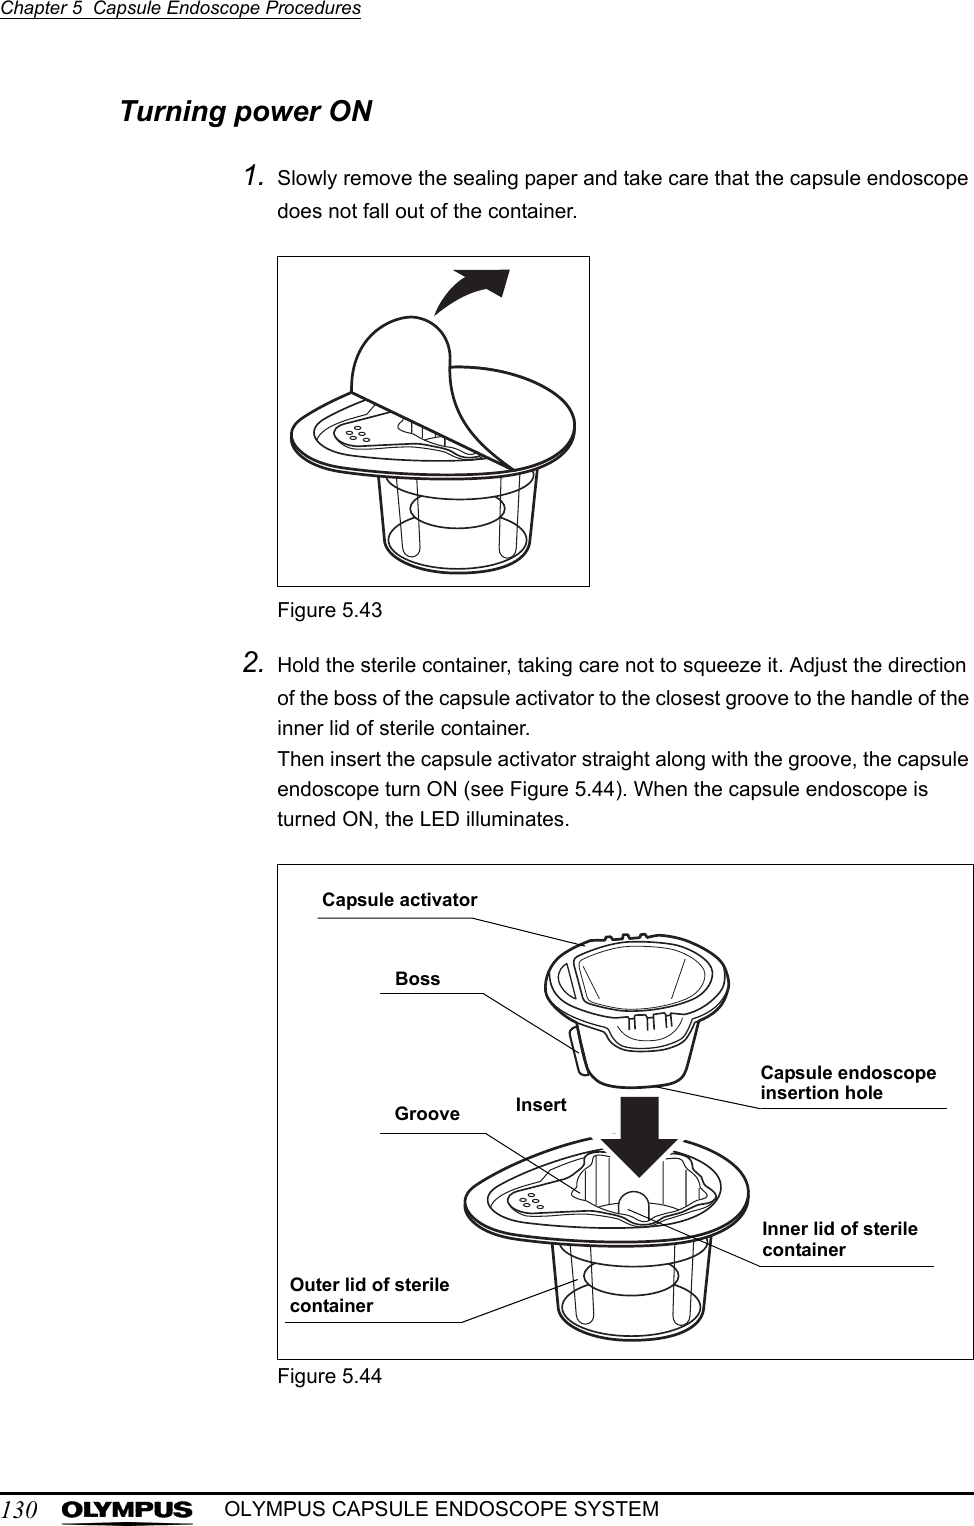


![138Chapter 5 Capsule Endoscope ProceduresOLYMPUS CAPSULE ENDOSCOPE SYSTEM3. Remove the battery pack from the recorder unit and insert the recorder unit into the recorder unit cradle. The recorder unit will be turned ON automatically.4. The patient’s ID and name are displayed on the recorder unit’s display panel (see Figure 5.50).Figure 5.50If an error is detected on the recorder unit, the indicator lamp will blink yellow. To troubleshoot, refer to Chapter 8, “Troubleshooting” on page 233.5. Click the [Recorder] button on the main screen. The recorder management screen is displayed (see Figure 5.51).Figure 5.51Recorder button](https://usermanual.wiki/Olympus-Medical-Systems/EC-1.Users-manual-Part-3/User-Guide-618771-Page-24.png)
![Chapter 5 Capsule Endoscope Procedures139OLYMPUS CAPSULE ENDOSCOPE SYSTEM6. Click the [Download] button on the recorder management screen. The download screen is displayed (see Figure 5.52).Figure 5.527. Information stored on the recorder unit is displayed on the download screen (see Figure 5.53).Figure 5.53If two recorder units are connected, the information for both units is displayed.Download button](https://usermanual.wiki/Olympus-Medical-Systems/EC-1.Users-manual-Part-3/User-Guide-618771-Page-25.png)
![Chapter 5 Capsule Endoscope Procedures141OLYMPUS CAPSULE ENDOSCOPE SYSTEM9. Click the [Start] button. The image data download will start (see Figure 5.56). The download status is displayed after starting the download.Figure 5.56• If you click the [Cancel] button during the download, the download will stop immediately. As it is not possible to continue a stopped download process, you will be required to start the downloading from the beginning again.• While downloading the image data, the indicator lamp on the recorder unit turns from green illumination to yellow blinks (once every second). The recorder unit will be turned OFF when the download is completed.• While downloading the image data, the icon in Figure 5.57 is displayed on the recorder unit’s display panel.• Remove the USB devices from the workstation and restart the workstation when it does not work properly. Then connect the removed USB devices again.Figure 5.57Start button](https://usermanual.wiki/Olympus-Medical-Systems/EC-1.Users-manual-Part-3/User-Guide-618771-Page-27.png)
![142Chapter 5 Capsule Endoscope ProceduresOLYMPUS CAPSULE ENDOSCOPE SYSTEM10. When the download has completed successfully, “Complete” is displayed on the download screen (see Figure 5.58).Figure 5.5811. Click the [Close] button to exit the download screen. The recorder management screen is displayed (see Figure 5.59).Figure 5.59The workstation has disk space for about 30 examinations (Each examination is estimated to be 8 hours long). If you take many pictures and movies, the number of examination may decrease.Close button](https://usermanual.wiki/Olympus-Medical-Systems/EC-1.Users-manual-Part-3/User-Guide-618771-Page-28.png)
![Chapter 5 Capsule Endoscope Procedures143OLYMPUS CAPSULE ENDOSCOPE SYSTEMRemoving the recorder unitThe “Removing the Recorder Unit” function is not available in Endo Capsule Software Light.1. On the recorder management screen, select the recorder unit you wish to remove (see Figure 5.60).Figure 5.602. Click the [Disconnect] button (see Figure 5.61). The selected recorder unit is turned OFF.Figure 5.613. Remove the recorder unit from the recorder unit cradle.The recorder unitDisconnect button](https://usermanual.wiki/Olympus-Medical-Systems/EC-1.Users-manual-Part-3/User-Guide-618771-Page-29.png)

![148Chapter 6 Capsule Endoscope Image ObservationOLYMPUS CAPSULE ENDOSCOPE SYSTEM• If the examination data is password-protected, the password input screen is displayed (see Figure 6.3). Enter the password for the examination data and click the [OK] button.Figure 6.3• When you open new examination data while another examination data is already open, the previous examination data is closed to allow the new examination data to open. If the thumbnail data is not saved, you will be asked if you wish to save the data.Opening data in Endo Capsule softwareOpening examination data and thumbnail data from the examination list screen1. Click the [List] button on the main screen (see Figure 6.4). The examination list screen is displayed.Figure 6.4List button](https://usermanual.wiki/Olympus-Medical-Systems/EC-1.Users-manual-Part-3/User-Guide-618771-Page-34.png)
![Chapter 6 Capsule Endoscope Image Observation149OLYMPUS CAPSULE ENDOSCOPE SYSTEMSelect “Open examination” or “Open thumbnails” from the “File” menu on the main screen. The examination list screen is displayed.2. On the examination list screen, use the drive selection box to select the drive on which the examination data is stored (see Figure 6.5).Figure 6.5To select examinations stored on the workstation, select workstation in the drive selection box.3. Select the examination data from the examination list, and click the [Open] button (see Figure 6.6). The data open screen is displayed.Figure 6.6Thumbnail data for the selected examination data is displayed in the thumbnail data list on the data open screen.Drive selection boxOpen button](https://usermanual.wiki/Olympus-Medical-Systems/EC-1.Users-manual-Part-3/User-Guide-618771-Page-35.png)
![150Chapter 6 Capsule Endoscope Image ObservationOLYMPUS CAPSULE ENDOSCOPE SYSTEM4. Select a thumbnail data, and click the [OK] button (see Figure 6.7). The main screen is displayed, and the examination data and thumbnail data are opened.Figure 6.7To create a new thumbnail data, select “New” (top row) from the examination data list, and click the [OK] button (see Figure 6.8).Figure 6.8OK button“New”OK button](https://usermanual.wiki/Olympus-Medical-Systems/EC-1.Users-manual-Part-3/User-Guide-618771-Page-36.png)
![152Chapter 6 Capsule Endoscope Image ObservationOLYMPUS CAPSULE ENDOSCOPE SYSTEM3. Select the examination data (∗∗∗.opg), and click the [Open] button (see Figure 6.11). The examination data is opened.Figure 6.11Opening thumbnail data from the menu1. Select “Open thumbnails” from the “File” menu on the main screen (see Figure 6.12). The file open screen is displayed.Figure 6.12Open buttonOpen thumbnails](https://usermanual.wiki/Olympus-Medical-Systems/EC-1.Users-manual-Part-3/User-Guide-618771-Page-38.png)
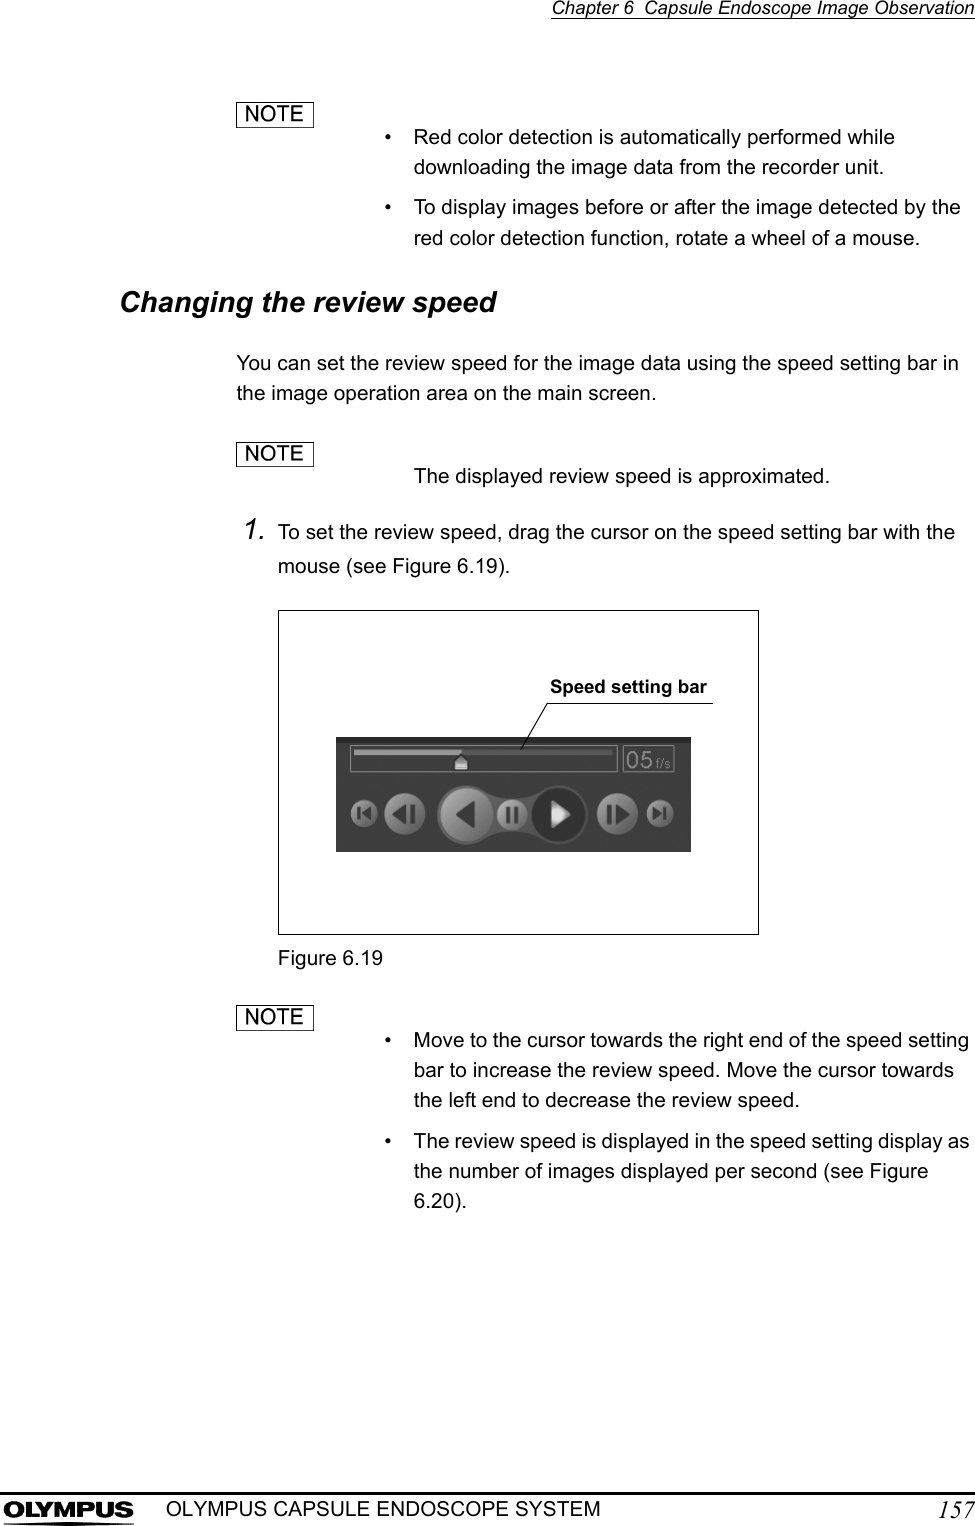
![Chapter 6 Capsule Endoscope Image Observation153OLYMPUS CAPSULE ENDOSCOPE SYSTEM2. Select the folder in which the thumbnail data is saved (see Figure 6.13).Figure 6.133. Select the thumbnail data (∗∗∗.xml), and click the [Open] button (see Figure 6.14). The thumbnail data is opened.Figure 6.14FolderOpen button](https://usermanual.wiki/Olympus-Medical-Systems/EC-1.Users-manual-Part-3/User-Guide-618771-Page-39.png)

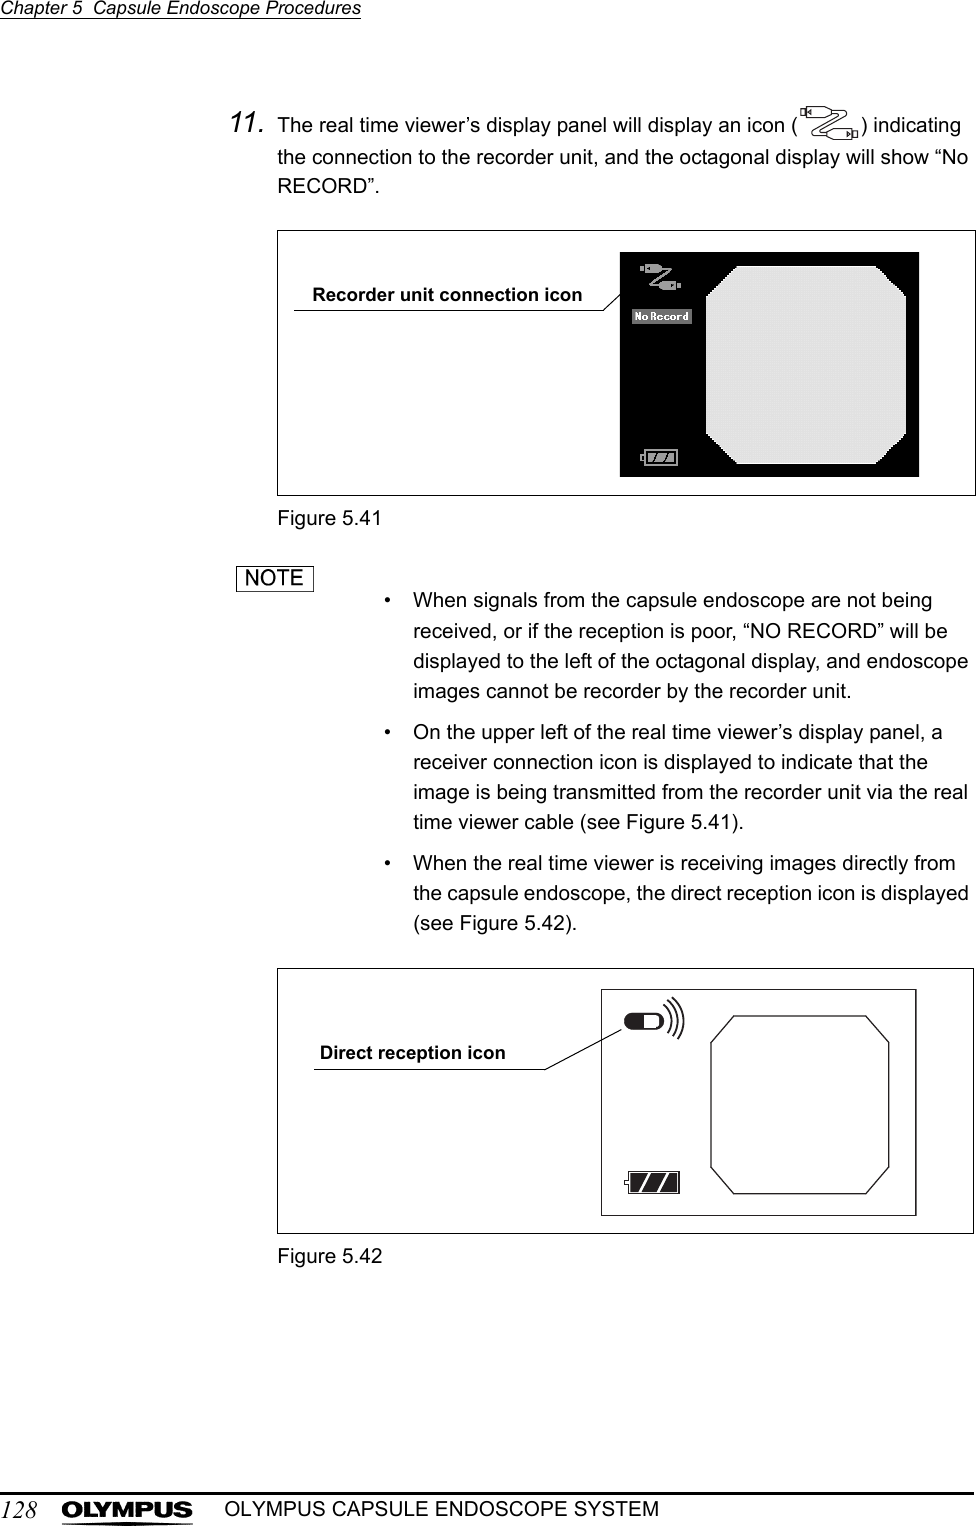
![Chapter 6 Capsule Endoscope Image Observation159OLYMPUS CAPSULE ENDOSCOPE SYSTEM• In the “2 Display Mode”, the image on the left side is 0.5 second older than the image on the right (see Figure 6.22).• In the “4 Display Mode”, the images shown in the upper left, upper right, and lower right are 1.5, 1.0, and 0.5 second older than the image on the lower left, respectively (see Figure 6.22).Figure 6.22Switching the image update modeYou can select the way in which images on the main screen are refreshed.1. Click either of the [Overlap / Sequential] buttons (see Figure 6.23).Figure 6.231 Display Mode 4 Display Mode2 Display ModeOverlap / Sequential buttons](https://usermanual.wiki/Olympus-Medical-Systems/EC-1.Users-manual-Part-3/User-Guide-618771-Page-45.png)