Samsung Electronics Co HTZ320 DIGITAL HOME CINEMA SYSTEM User Manual 4
Samsung Electronics Co Ltd DIGITAL HOME CINEMA SYSTEM Users Manual 4
Contents
- 1. Users Manual 1
- 2. Users Manual 2
- 3. Users Manual 3
- 4. Users Manual 4
- 5. Users Manual 5
Users Manual 4
41
ENG ● PLAYBACK
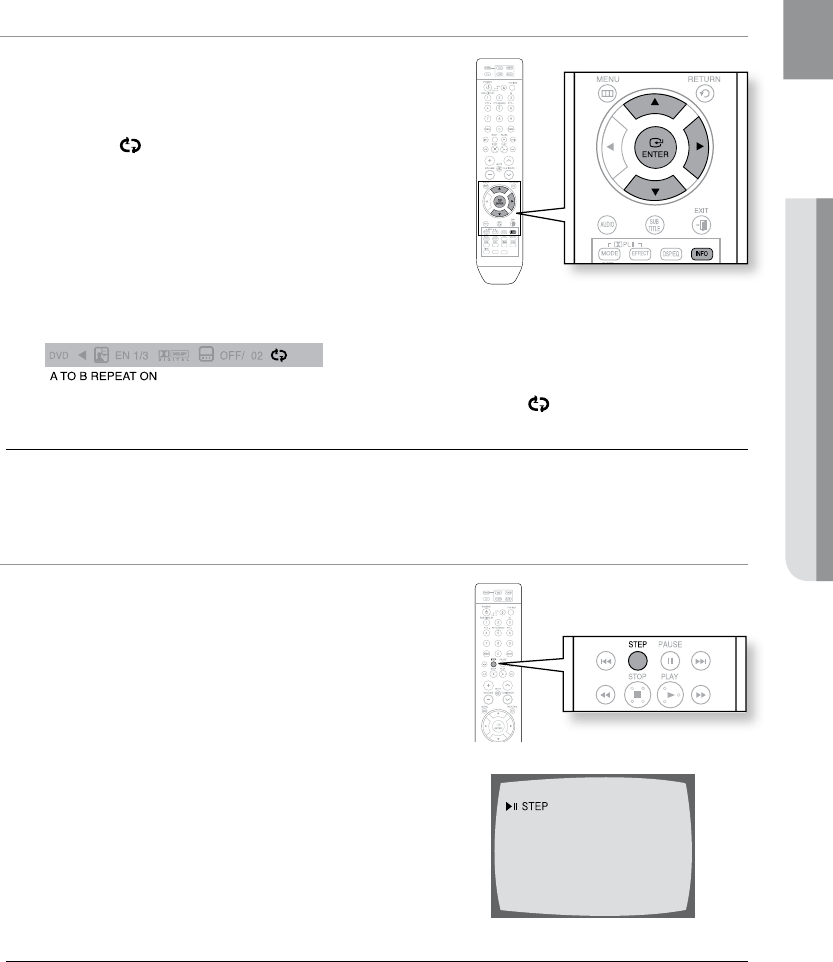
A-B Repeat Playback d
You can repeatedly play back a designated section of a DVD.
Press the 1. INFO button twice.
Press the Cursor 2. button to move to REPEAT
PLAYBACK ( ) display.
Press the Cursor 3. , button to select A- and then press
the ENTER button.
When the • ENTER button is pressed, the selected
position will be stored in memory.
Press the 4. ENTER button at the end of the desired
segment.
The specified segment will be played repeatedly. •
A -
A -?
A - B
REPEAT : AÐ
A TO B REPEAT ON
d To return to normal playback, press the Cursor , button to select OFF.
M
The A-B Repeat function does not operate with DivX, MP3 or JPEG discs. `
Step Function dD
Press the STEP button.
The picture moves forward one frame each time the button is •
pressed during playback.
M
No sound is heard during step motion playback. `
ASC
CD RIPPING

playback
42
USING THE PLAYBACK FUNCTION
Angle Function d
This function allows you to view the same scene in different
angles.
Press the 1. INFO button.
Press the Cursor 2. button to move to ANGLE ( )
display.
Press the Cursor 3. , button or numeric buttons to select
the desired angle.
Each time the button is pressed, the angle changes as •
follows:
1/3 ➞ 2/3 ➞ 3/3 ➞ 1/3
M
The Angle function works only with discs on which multiple angles have been recorded. `
Zoom (Screen Enlarge) Function d
This function allows you to enlarge a particular area of the
displayed image.
Press the 1. ZOOM button.
Press the Cursor 2. ,,, button to move to the area
you want to enlarge.
Press the 3. ENTER button.
Each time the button is pressed, the zoom level changes •
as follows:
ZOOM X 1.5 ➞ZOOM X 2 ➞ZOOM X 3
➞ZOOM OFF
ASC
CD RIPPING
ASC
CD RIPPING
ASC
CD RIPPING
ENTER SELECT
SELECT ZOOM POSITION
43
ENG ● PLAYBACK
USING THE PLAYBACK FUNCTION
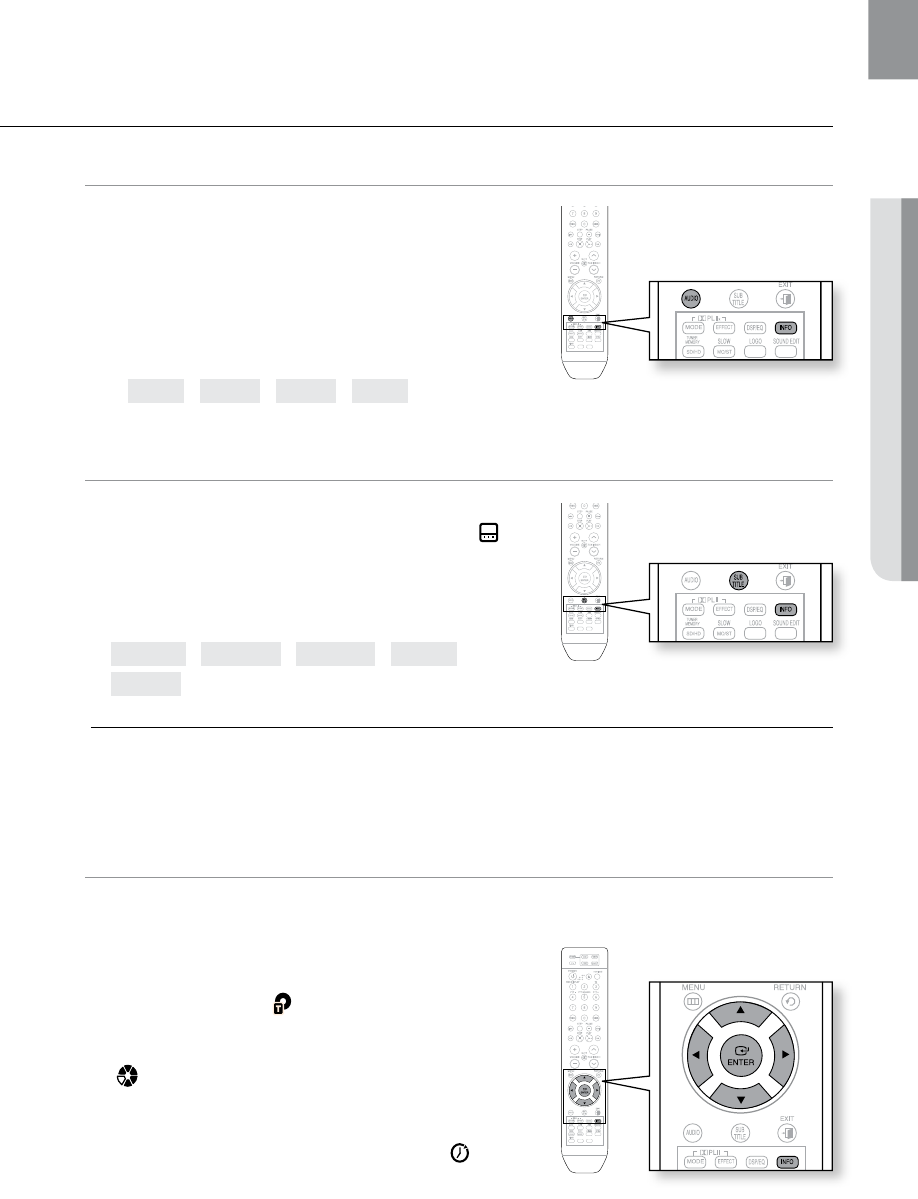
Audio Language Selection Function d
Press the 1. INFO button twice.
Press the Cursor 2. , button or numeric buttons to select
the desired audio language.
Depending on the number of languages on a DVD disc, •
a different audio language (ENGLISH, SPANISH,
FRENCH, etc.) is selected each time the button is
pressed.
EN 1/3 ➞ SP 2/3 ➞ FR 3/3 ➞ EN 1/3
Subtitle Language Selection Function d
Press the 1. INFO button twice.
Press the Cursor 2. button to move to SUBTITLE ( )
display.
Press the Cursor 3. button or numeric buttons to select
the desired subtitle.
EN 01/03 ➞ SP 02/03 ➞ FR 03/03 ➞ OFF/03 ➞
EN 01/03
M
To operate this function, you can also press the AUDIO or SUBTITLE buttons on the `
remote control.
Depending on the disc, the Subtitle and Audio Language functions may not be available. `
Moving Directly to a Scene/Song dBAG
dB
Press the 1. INFO button.
Press the Cursor 2. , button or numeric buttons to select
the desired title/track ( ) and then press the ENTER
button.
Press the Cursor 3. , button to move to the Chapter
() display.
Press the Cursor 4. , button or numeric buttons to select
the desired chapter and then press the ENTER button.
Press the Cursor 5. , button to move to time ( )
display.
Press the numeric buttons to select the desired time 6.
and then press the ENTER button.
ASC
CD RIPPING
ASC
CD RIPPING
ASC
CD RIPPING
playback
44
Moving Directly to a Scene/Song dBAG
AG
Press the numeric buttons.
The selected file will be played.•
When playing an MP3 or JPEG disc, you cannot use the Cursor •
, button to move to a folder.
To move a folder, press the STOP (T) and then press the Cursor
, button.
M
You can press the `
[,]
button on the remote control to move directly to the desired title,
chapter, or track.
Depending on the disc, you may not be able to move to the selected title or time. `
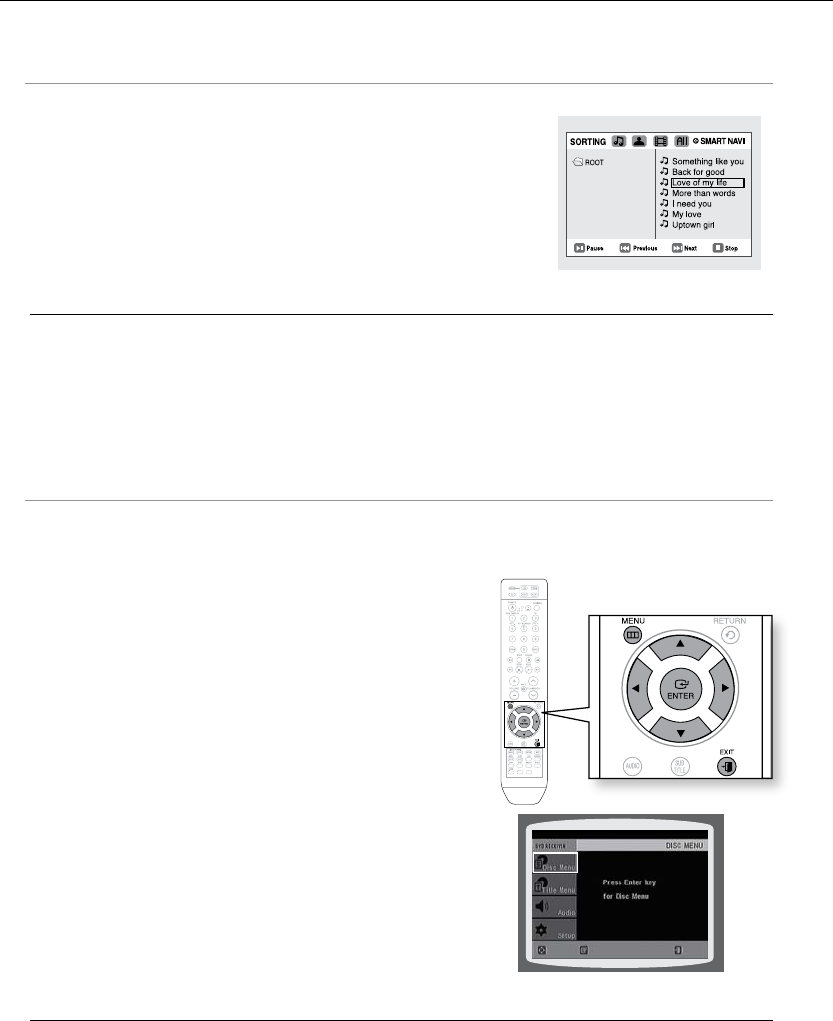
Using the Disc Menu d
You can use the menus for the audio language, subtitle language, profile, etc.
DVD menu contents differ from disc to disc.
In Stop mode, press the 1. MENU button.
Press the Cursor 2. , button or numeric buttons
to move to Disc Menu and then press the
ENTER button.
When you select Disc Menu and it is not supported by •
the disc, the "This menu is not
supported" message appears on the screen.
Press the Cursor 3. ,,, button to select the desired
item.
Press the 4. ENTER button.
d Press the EXIT button to exit the setup screen.
M
The disc menu display may be different depending on the disc. `
ASC
CD RIPPING
ENTERMOVE EXIT
45
ENG ● PLAYBACK
USING THE PLAYBACK FUNCTION
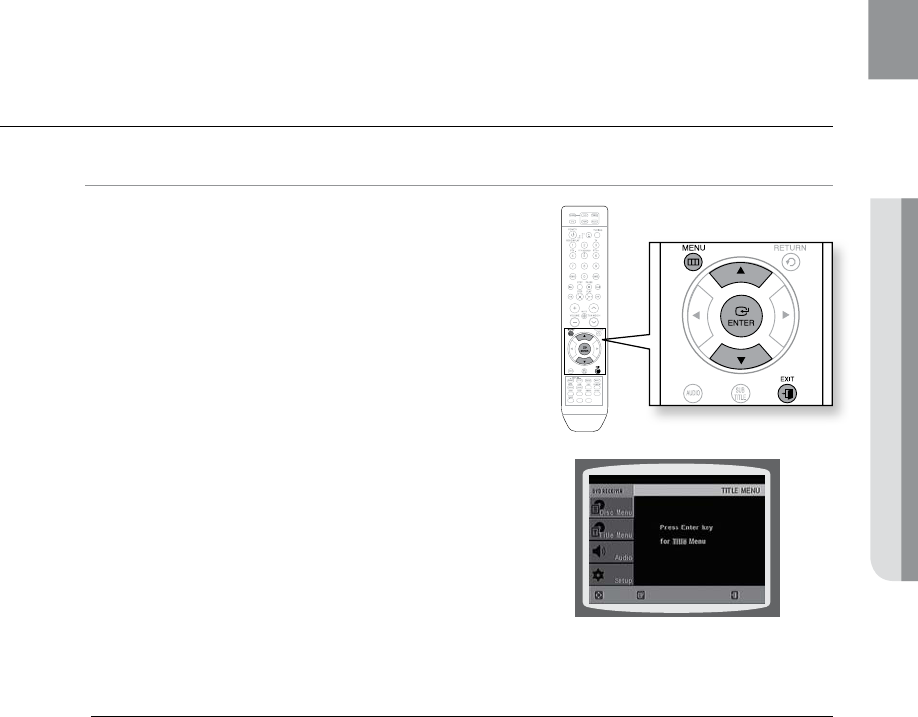
Using the Title Menu d
For DVDs containing multiple titles, you can view the title of
each movie. Depending on the disc, the availability of this
feature may vary.
In Stop mode, press the 1. MENU button.
Press the Cursor 2. , button to move to Title Menu.
Press the 3. ENTER button.
The title menu appears.•
d Press the EXIT button to exit the setup screen.
M
The Title menu display may be different depending on the disc. `
ASC
CD RIPPING
ENTERMOVE EXIT
playback
46
USING BLUETOOTH
You can use a Bluetooth device to enjoy music with high quality stereo sound, all without wires!
What is Bluetooth?
Bluetooth is a new technology that enables Bluetooth-compliant devices to easily interconnect
with each other using a short wireless connection.
A Bluetooth device may cause a noise or malfunction, depending on usage.•
When a part of the body is in contact with the receiving/transmitting system of the Bluetooth device •
or the Home Cinema System.
Electrical variation from electrical jamming by the wall, corner or office partitioning.•
Electrical interference from the same frequency-band devices including medical equipment, •
microwave oven and wireless LAN.
Pair the Home Cinema System with the Bluetooth device while maintaining a close distance.•
The further the distance is between Home Cinema System and Bluetooth device, the worse the •
quality. If the distance exceeds the Bluetooth operational range, the connection is lost.
In poor reception-sensitivity areas, the Bluetooth connection may not work properly.•
The Home Cinema System has an effective reception range of up to 10 m in all directions if there are •
no obstacles. The connection will be automatically cut off if the distance is out of this range. Even
within this range, the sound quality may be deteriorated by obstacles such as walls or doors.
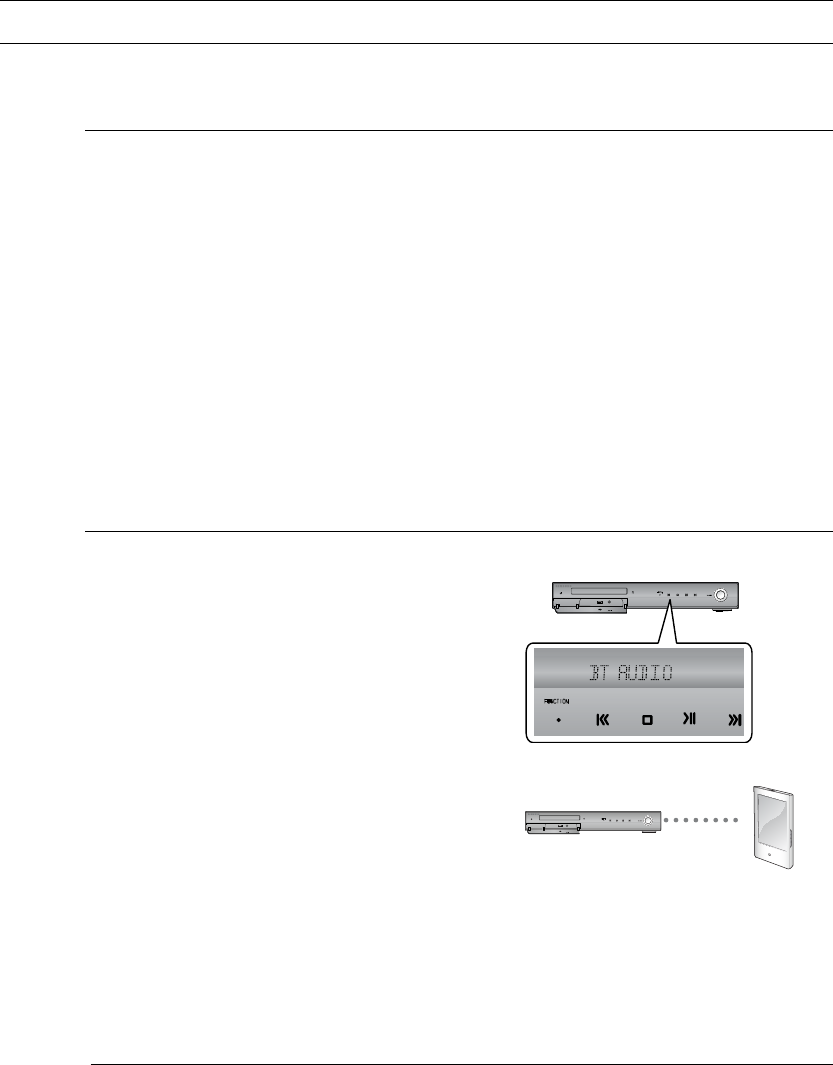
To connect the Home Cinema System to a bluetooth device
Check if the Bluetooth device supports the Bluetooth-compliant stereo headset function.
Press the 1. FUNCTION button on the front panel of the
home cinema system repeatedly until the "BT AUDIO"
appears.
The mode switches as follows : •
DVD/CD ➞ D.IN ➞ AUX 1 ➞ AUX 2 ➞ USB
➞ (BT AUDIO) ➞ FM.
You will see “• WAIT” for 2 seconds and then
“READY”
on the front display of the Home Theater System.
Select the Bluetooth menu on the Bluetooth device you 2.
want to connect. (refer to Bluetooth device's user
manual)
Select a Stereo headset menu on the Bluetooth device.3.
You will see a list of scanned devices.•
Select "4. Samsung Home Theater" from the searched
list.
When the Home Cinema System is connected to the Bluetooth device, the Home Cinema System will •
display "Connect" on the front display, followed by the name of the connected Bluetooth device.
The Home Cinema System connection is complete.•
Play music on the connected device.5.
You can listen to the music playing on the connected Bluetooth device over the home cinema system.•
M
You may be required to enter a PIN code(password) when connecting the Bluetooth `
device to the home cinema system. If the PIN code input window appears, enter <0000>.
The Home Cinema System may control play related function only when connected device
`
supports the function.
If connected device dose not support some play related function, the Home Cinema
`
System can't control the device.
The Home Cinema System only supports Middle Quality SBC data(up to
`
237kbps@48kHz), and does not support High Quality SBC data(328kbps@44.1kHz).
AUX IN 1
AUX IN 1
Connect
Bluetooth
Device

47
ENG ● PLAYBACK
You can disconnect the Home Cinema System from the Bluetooth
device (refer to Bluetooth devices’ user manual).
The Home Cinema System will be disconnected.•
When the Home Cinema System is disconnected from the •
Bluetooth device, the Home Cinema System will display
"DISCONNECT" on the front display.
Press the FUNCTION button on the front panel of the home cinema system to switch from “BT AUDIO”
to another mode.
The bluetooth device connected will wait a certain time for response from the home cinema system •
before terminating the connection. (Time to disconnection may differ, depending on the bluetooth
device)
The currently connected device will be disconnected.•
M
In Bluetooth connection mode, the Bluetooth connection will be lost if the distance `
between the Home Cinema System and the Bluetooth device exceeds 10 m.
If the distance is returned to the effective range or you restart the Bluetooth device, the
Bluetooth connection can be restored.
With some bluetooth devices, some functions may not work properly. `
To disconnect the Bluetooth device from the Home Cinema System
To disconnect the Home Cinema System from the Bluetooth device
AUX IN 1

playback
48
PLAYING MEDIA FILES USING THE USB HOST FEATURE
You can enjoy media files such as pictures, movies and music saved on an MP3 player, USB memory stick or digital
camera in high quality video with 5.1 channel Home Cinema sound by connecting the storage device to the USB port of
the Home Cinema.
Connect the USB device to the USB port on the front 1.
of the unit.
Press the 2. FUNCTION button on the DVD Player or the
PORT button on the remote control to select the USB
mode.
USB• appears on the display screen and then
disappears.
The USB MENU screen appears on the TV screen •
and the saved file is played.
To stop playback, press the 3. STOP (T) button.
To prevent damage to the memory stored in the USB device,
perform safe removal before disconnecting the USB cable.
Press the • STOP (T) button twice in a row.
The display will show REMOVE USB.
Remove the USB cable.•
M
To listen to your music files with 5.1 channel home cinema sound, you must set the Dolby `
Pro Logic II mode to Matrix. (See page 60)
In USB mode, you are not able to change the resolution or use the SETUP menu if there is no `
USB device connected to the USB port.
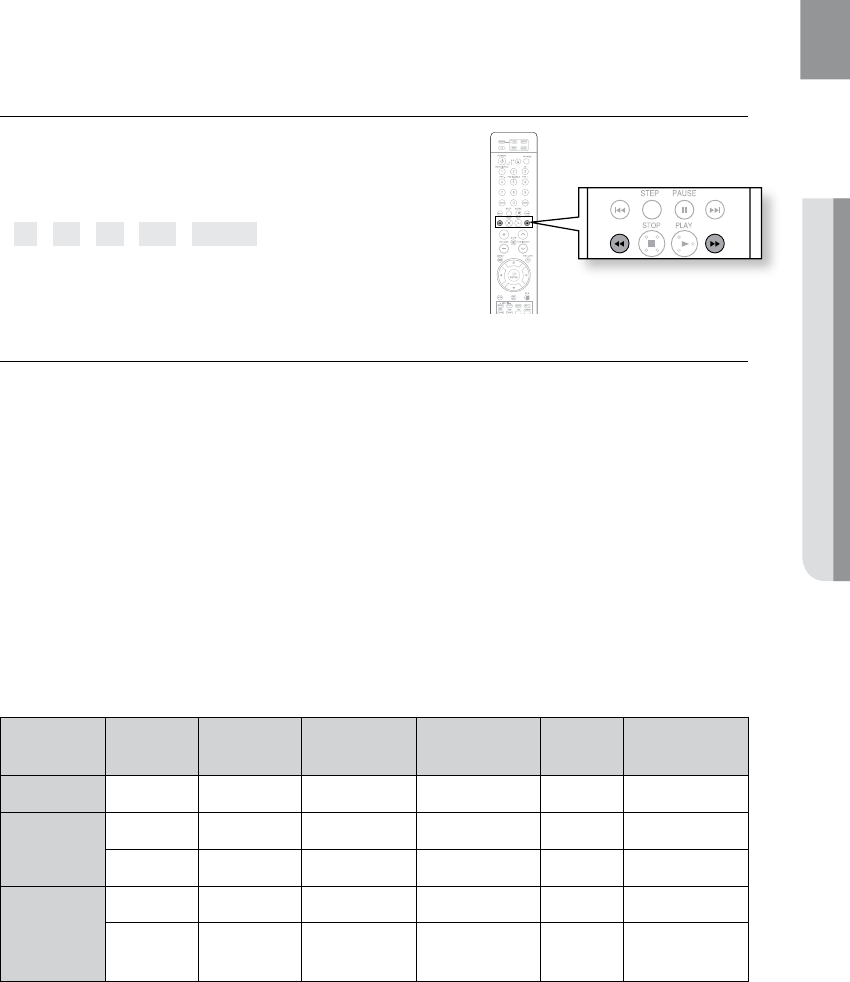
Skip Forward/Back
During playback, press the [,] button.
When there is more than one file and you press the • ]
button, the next file is selected.
When there is more than one file and you press the • [
button, the previous file is selected.
AUX IN 1
Safe PORT Removal
49
ENG ● PLAYBACK
Fast playback
During playback, press the (,) button.
Each time you press either button, the playback speed •
will change as follows:
2x ➞ 4x ➞ 8x ➞ 32x ➞ Normal.
Compatible Devices
USB devices that support USB Mass Storage v1.0. (USB devices that operate as a removable disc 1.
in Windows (2000 or later) without additional driver installation.)
MP3 Player: HDD and flash type MP3 players.2.
Digital camera: Cameras that support USB Mass Storage v1.0.3.
Cameras that operate as a removable disc in Windows (2000 or later) without additional driver installation.•
USB HDD and USB Flash Drive: Devices that support USB2.0 or USB1.1.4.
You may experience a difference in playback quality when you connect a USB1.1 device.•
For a USB HDD, make sure to connect an auxiliary power cord to the USB HDD for proper operation.•
5. USB card Reader: One slot USB card reader and Multi slot USB card reader.
Depending on the manufacturer. the USB card reader may not be supported.•
If you install multiple memory devices into a multi card reader, you may experience problems.•
6. If you use a USB extension cable, the USB device might not be recognized.
Supported Formats
Format File name File
extension Bit rate Version Pixel
Sampling
Frequency
Still Picture JPG JPG .JPEG – – 640x480 –
Music
MP3 .MP3 80~384kbps – – 44.1kHz
WMA .WMA 56~128kbps V8 –44.1kHz
Movie
WMV .WMV 4Mbps V1,V2,V3,V7 720x480
44.1KHz~48KHz
DivX
.AVI,.ASF 4Mbps DivX3.11~
DivX5.1, XviD 720x480
44.1KHz~48KHz
CBI (Control/Bulk/Interrupt) is not supported.•
Digital Cameras that use PTP protocol or require additional program installation when connected to a •
PC are not supported.
A device using NTFS fi le system is not supported. (The system supports only the FAT fi le system and •
will not play a movie larger than 1 GB in USB mode.)
Some MP3 players, when connected to this product, may not operate depending on the sector size of •
their file system.
The USB host function is not supported if a product that transfers media files by its manufacturer- •
specific program is connected.
Does not operate with Janus enabled MTP (Media Transfer Protocol) devices.•
The USB host function of this product does not support all USB devices. For information on •
supported devices, see page 71.
50
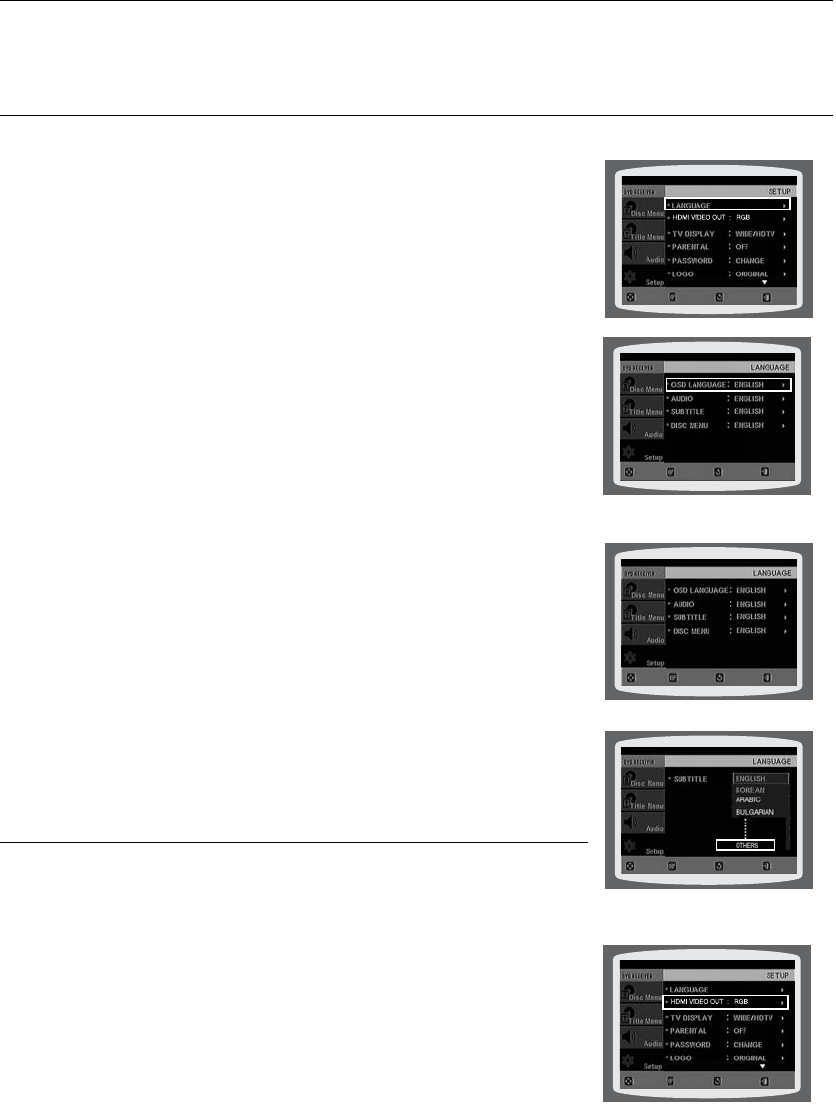
SETTING THE LANGUAGE
OSD(On-Screen Display) language is set to English by default.
In Stop mode, press the 1. MENU button.
Press the Cursor 2.
%
button to move to Setup and then press the
ENTER button.
Select 3. Language and then press the ENTER button.
Press the Cursor 4.
$
,
%
button to select OSD Language and then
press the ENTER button.
Press the Cursor 5.
$
,
%
button to select the desired language
and then press the ENTER button.
Once the setup is complete, the OSD will be English if •
English has been selected as language.
d Press the RETURN button to return to the previous level.
d Press the EXIT button to exit the setup screen.
OSD LANGUAGE• : Selecting the OSD Language
AUDIO• : Selecting the Audio Language (recorded on the disc)
• SUBTITLE : Selecting the Subtitle Language (recorded on the disc)
DISC MENU• : Selecting the Disc Menu Language (recorded on the disc)
a If the language you selected is not recorded on the disc, menu
language will not change even if you set it to your desired language.
OTHERS : To select another language, select OTHERS and
enter the language code of your country
(see page 70).
AUDIO, SUBTITLE and DISC MENU languages can be
selected
.
SETTING THE HDMI VIDEO OUT MODE
You can select <RGB> or <Y Cb Cr> mode.
In Stop mode, press the 1. MENU button.
Press the Cursor 2.
%
button to move to Setup and then press the
ENTER button.
Press the Cursor 3.
%
button to move to HDMI VIDEO OUT and then
press the ENTER button.
Press the Cursor 4.
$
,
%
button to select the desired item
and then press the ENTER button.
Once the setup is complete, you will be taken to the •
previous screen.
d Press the RETURN button to return to the previous level.
d Press the EXIT button to exit the setup screen.
system setup
For your convenience, you can set this DVD Home Cinema's features for the best use in your home
environment.
MOVE ENTER
EXITRETURN
MOVE ENTER EXITRETURN
MOVE ENTER EXITRETURN
MOVE SELECT EXIT
RETURN
MOVE ENTER
EXITRETURN
51
ENG ● SYSTEM SETUP● SYSTEM SETUP
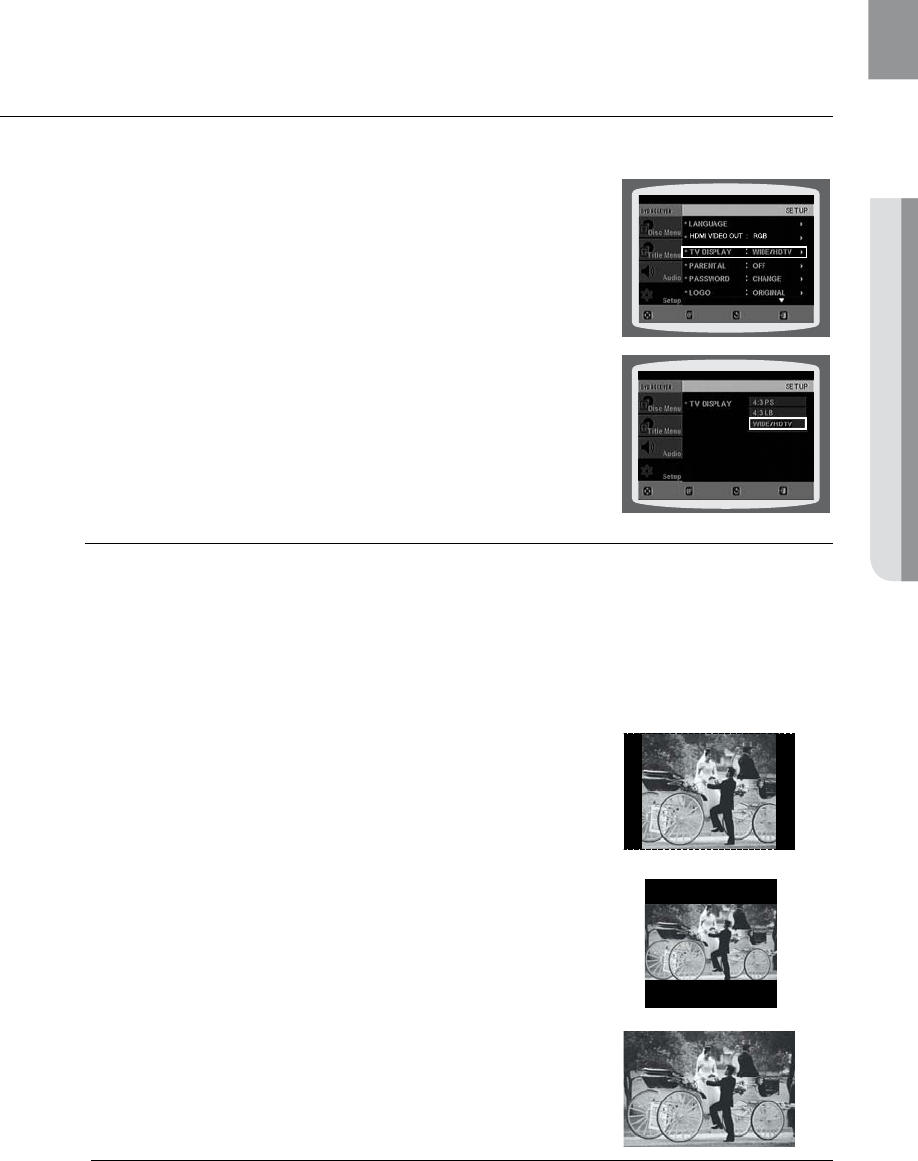
SETTING TV SCREEN TYPE
Depending on your TV type (Widescreen or conventional 4:3), you can select the TV's aspect ratio.
In Stop mode, press the 1. MENU button.
Press the Cursor 2.
%
button to move to Setup and then press the
ENTER button.
Press the Cursor 3.
%
button to move to TV DISPLAY and then
press the ENTER button.
Press the Cursor 4.
$
,
%
button to select the desired item
and then press the ENTER button.
Once the setup is complete, you will be taken to the •
previous screen.
d Press the RETURN button to return to the previous level.
d Press the EXIT button to exit the setup screen.
Adjusting the TV Aspect Ratio (Screen Size)
The horizontal to vertical screen size ratio of conventional TVs is 4:3, while that of widescreen and high
definition TVs is 16:9. This ratio is called the aspect ratio. When playing DVDs recorded in different
screen sizes, you should adjust the aspect ratio to fit your TV or monitor.
For a standard TV, select either 4:3PS or 4:3LB option according to personal preference.
Select WIDE/HDTV if you have a widescreen TV.
4:3PS (4:3 Pan&Scan)
Select this to play a 16:9 picture in the pan & scan mode on a
conventional TV.
You can see the central portion of the screen only (with the sides of •
the 16:9 picture cut off).
4:3LB (4:3 Letterbox)
Select this to play a 16:9 picture in the letter box mode on a
conventional TV.
Black bars will appear at the top and bottom of the screen.•
WIDE/HDTV
Select this to view a 16:9 picture in the full-screen mode on your
widescreen TV.
You can enjoy the widescreen aspect.•
M
If a DVD is in the 4:3 ratio, you cannot view it in widescreen. `
Since DVD discs are recorded in various image formats, they will look different depending `
on the software, the type of TV, and the TV aspect ratio setting.
When using HDMI, the screen is automatically converted to Wide mode. `
MOVE ENTER EXITRETURN
MOVE SELECT EXIT
RETURN
52
system setup
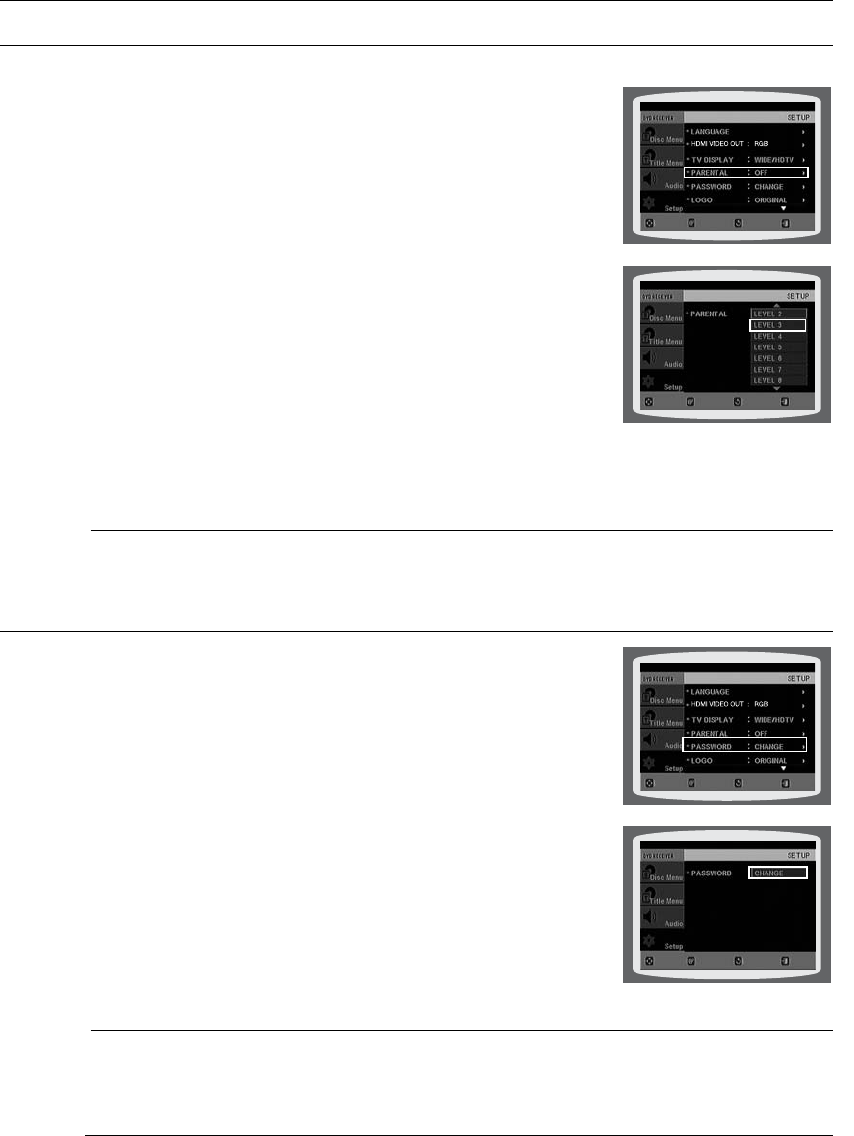
SETTING PARENTAL CONTROLS (RATING LEVEL)
Use this to restrict playback of adult or violent DVDs you do not want children to view.
In Stop mode, press the 1. MENU button.
Press the Cursor 2.
%
button to move to Setup and then press the
ENTER button.
Press the Cursor 3.
%
button to move to PARENTAL and then press
the ENTER button.
Press the Cursor 4.
$
,
%
button to select the desired rating level and
then press the ENTER button.
If you have selected Level 6, you cannot view DVDs with Level 7 •
or higher.
The higher the level, the closer the content is to violent or adult •
material.
5. Enter the password and then press the ENTER button.
The password is set to "7890" by default.•
Once the setup is complete, you will be taken to the previous screen. •
d Press the RETURN button to return to the previous level.
d
Press the EXIT button to exit the setup screen.
M
This function works only if a DVD disc contains the rating level information. `
SETTING THE PASSWORD
You can set the password for the Parental (rating level) setting.
In Stop mode, press the 1. MENU button.
Press the Cursor 2.
%
button to move to Setup and then press the
ENTER button.
Press the Cursor 3.
%
button to move to PASSWORD and then
press the ENTER button.
Press the 4. ENTER button.
Enter the password and then press the 5. ENTER button.
Enter the old password, a new password, and confirm new •
password.
The setting is complete. •
M
The password is set to "7890" by default. `
If you have forgotten the rating level password, do the following
While the player is in No DIsc mode, hold the DVD Players • STOP (T) button for longer than
5 seconds. INITIAL appears on the display and all settings will return to the default values.
Press the • POWER button.
Using the RESET function will erase all stored settings.
Do not use this unless necessary.
MOVE ENTER EXITRETURN
MOVE SELECT EXITRETURN
MOVE SELECT EXITRETURN
MOVE ENTER EXIT
RETURN
53
ENG ● SYSTEM SETUP● SYSTEM SETUP
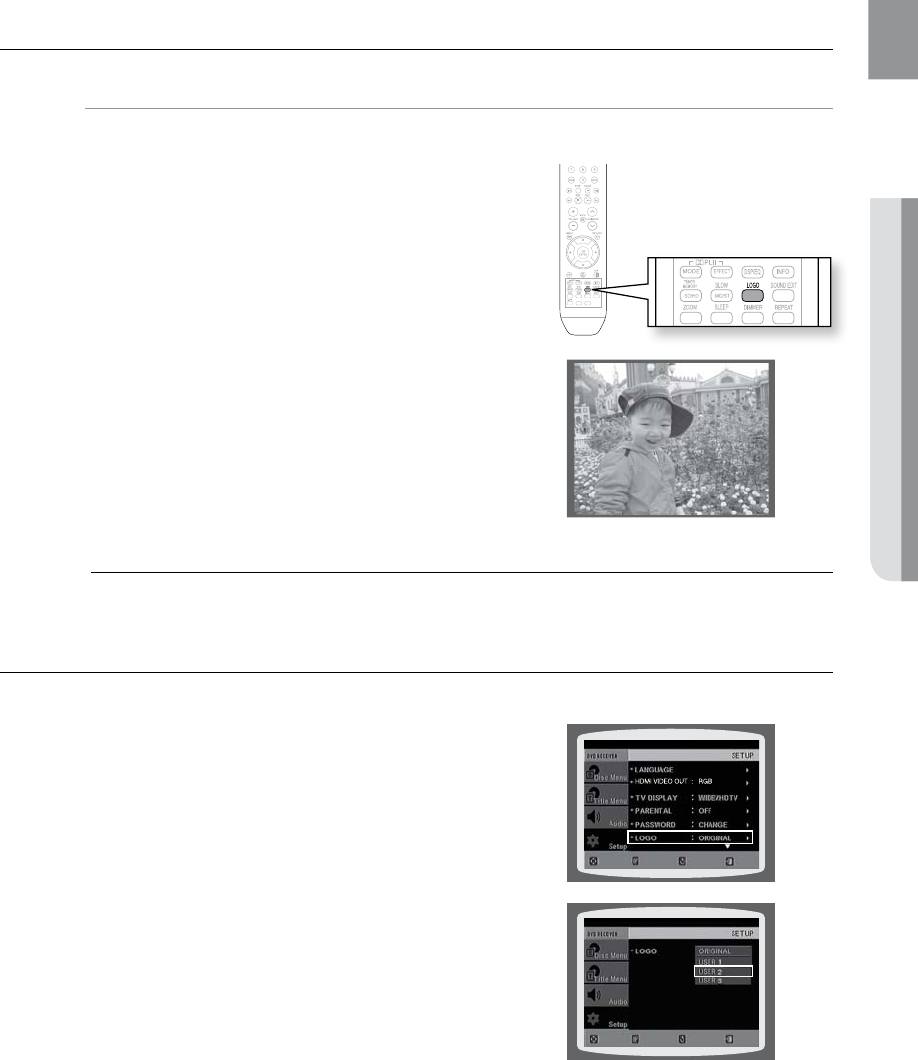
SETTING THE WALLPAPER
dG
While watching a DVD or JPEG CD, you can set the image you like as background wallpaper.
During playback, press the 1. PAUSE button when
an image you like appears.
Press the 2. LOGO button.
COPY LOGO DATA• will be displayed on the TV screen.
The power will turn off and then back on.3.
The selected wallpaper will be displayed. •
You can select up to 3 wallpaper settings. •
M
This function will not work when the HDMI output is 720p, 1080i or 1080p. `
TO SELECT ONE OF THE 3 WALLPAPER SETTINGS YOU'VE MADE
In Stop mode, press the 1. MENU button.
Press the Cursor 2.
%
button to move to Setup and then
press the ENTER button.
Press the Cursor 3.
%
button to move to LOGO and then
press the ENTER button.
Press the Cursor 4.
$
,
%
button to select the desired USER,
and then press the ENTER button.
This selects one of the 3 wallpaper screens.•
5. Press the EXIT button to exit the setup screen.
ORIGINAL • : Select this to set the Samsung Logo image as
your wallpaper.
USER • : Select this to set the desired image as your
wallpaper.
d Press the RETURN button to return to the previous level.
d Press the EXIT button to exit the setup screen.
ASC
CD RIPPING
MOVE ENTER EXITRETURN
MOVE SELECT EXIT
RETURN
COPY LOGO DATA
54
system setup
DviX (R) Registration
Please use the Registration code to register this player with the DivX (R) video on demand format.
To learn more, go to www.divx.com/vod.
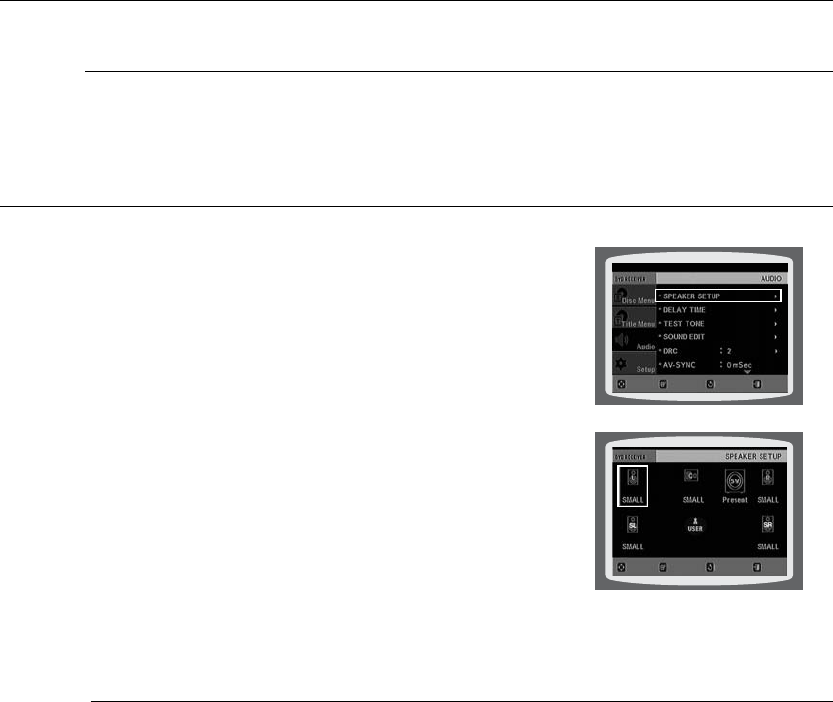
SETTING THE SPEAKER MODE
Signal outputs and frequency responses from the speakers will
automatically be adjusted according to your speaker configuration
and whether certain speakers are used or not.
In Stop mode, press the 1. MENU button.
Press the Cursor 2.
%
button to move to Audio and then press
the ENTER button.
In the 3. SPEAKER SETUP, press the ENTER button again.
Press the Cursor 4. ,,, button to move to the desired
speaker and then press the ENTER button.
For C, SL, and SR, each time the button is pressed, the mode •
switches alternately as follows : SMALL
➞
NONE.
For L and R, the mode is set to SMALL.•
SMALL • : Select this when using the speakers.
NONE • : Select this when no speaker is connected.
d Press the RETURN button to return to the previous level.
d Press the EXIT button to exit the setup screen.
M
Depending on PRO LOGIC and STEREO settings, the speaker mode may vary (see page 60). `
MOVE ENTER EXITRETURN
MOVE CHANGE EXIT
RETURN
55
ENG ● SYSTEM SETUP● SYSTEM SETUP
SETTING THE DELAY TIME
If the speakers cannot be placed at equal distances from the listening position, you can adjust the delay
time of the audio signals from the center and rear speakers.
In Stop mode, press the 1. MENU button.
Press the Cursor 2.
%
button to move to Audio and then press the ENTER button.
Press the Cursor 3.
%
button to move to DELAY TIME and then press the ENTER button.
Press the Cursor 4. ,,, button to move to the desired speaker and then press the ENTER button.
5. Press the Cursor , to set the Delay time.
You can set the delay time for C between 00 and 05mSEC and for SL and SR between 00 and 15mSEC.•
d Press the RETURN button to return to the previous level.
d Press the EXIT button to exit the setup screen.
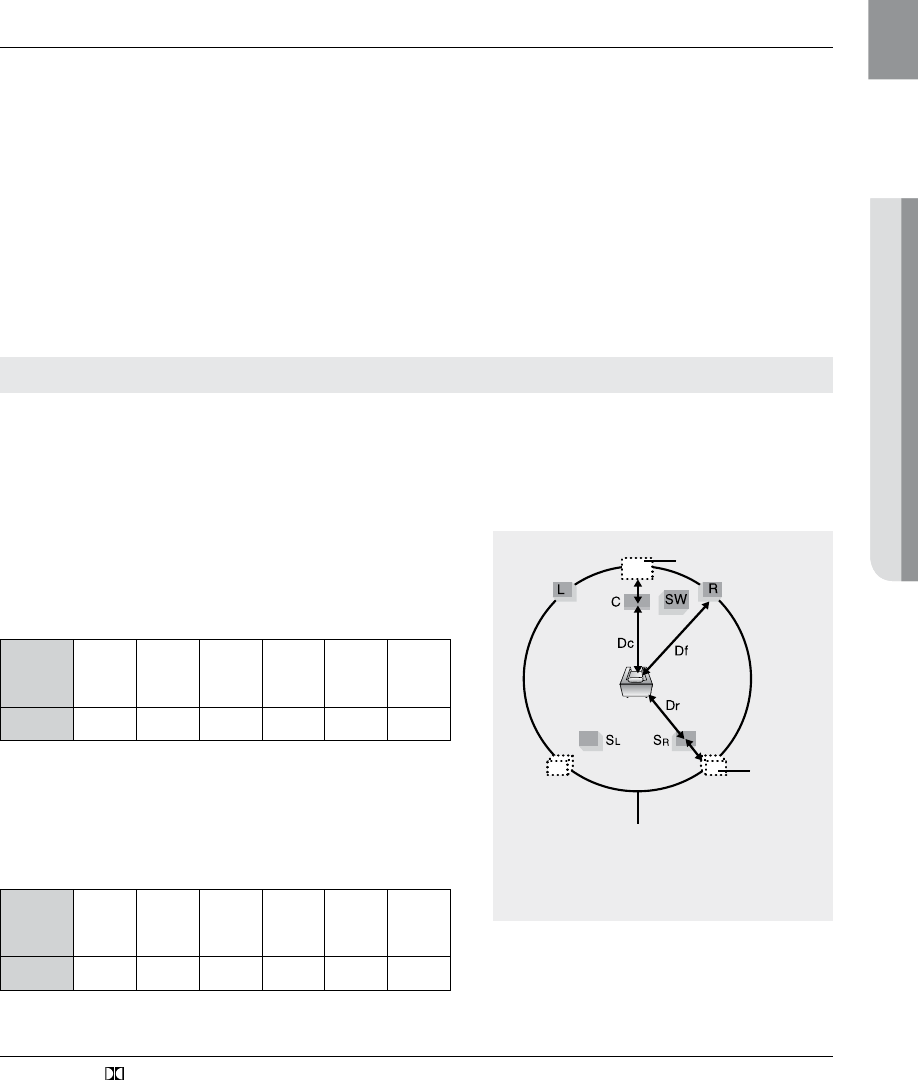
When 5.1CH Surround Sound is played, you can enjoy the best sound if the distance between you and each
speaker is the same.
Since the sounds arrive at the listening position at different times depending on the placement of speakers, you can
adjust this difference by adding a delay effect to the sound of the Center and Rear Speakers.
Setting CENTER SPEAKER
If the distance of Dc is equal to or longer than the
distance of Df in the figure, set the mode as 0ms.
Otherwise, change the setting according to the table.
Distance
between
Df and Dc
0.00 m 0.34 m 0.68 m 1.06 m 1.40 m 1.76 m
Delay Time
0 ms 1 ms 2 ms 3 ms 4 ms 5 ms
Setting REAR SPEAKER
If the distance of Dc is equal to or longer than the distance of Dr
in the figure, set the mode as 0ms.
Otherwise, change the setting according to the table.
Distance
between
Df and Dc
0.00 m 1.06 m 2.11 m 3.16 m 3.62 m 5.29 m
Delay Time
0 ms 3 ms 6 ms 9 ms 12 ms 15 ms
M With ` PL II (Dolby Pro Logic II), the delay time may be different for each mode.
With AC-3 and DTS, the delay time can be set between 00 and 15mSEC. `
The Center channel is only adjustable on 5.1 channel discs. `
Ideal CENTER SPEAKER
placement
Df: The distance from FRONT SPEAKER
Dc: The distance from CENTER SPEAKER
Dr: The distance from REAR SPEAKER
It is desirable to place all speakers within this circle.
Ideal
REAR
SPEAKER
placement
Setting up the Speaker Delay Time
56
system setup
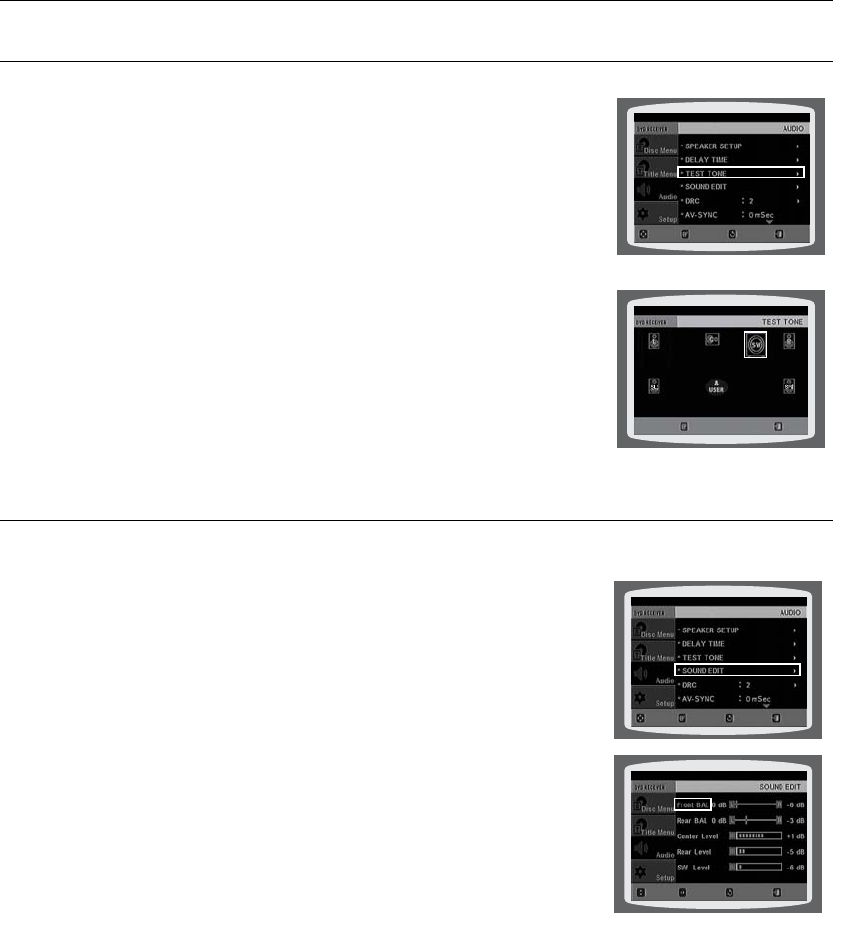
USING THE TEST TONE
Use the Test Tone feature to check the speaker connections.
In Stop mode, press the 1. MENU button.
Press the Cursor 2.
%
button to move to Audio and then press the
ENTER button.
Press the Cursor 3.
%
button to move to TEST TONE and then
press the ENTER button.
The test tone will be sent to • L ➞ C ➞ R ➞ SR ➞ SL ➞ SW in
order.
If the ENTER button is pressed again at this time, the test tone
will stop.
d Press the RETURN button to return to the previous level.
d Press the EXIT button to exit the setup screen.
SETTING THE AUDIO
You can adjust the balance and level for each speaker.
In Stop mode, press the 1. MENU button.
Press the Cursor 2.
%
button to move to Audio and then press the
ENTER button.
Press the Cursor 3.
%
button to move to SOUND EDIT and then
press the ENTER button.
Press the Cursor 4.
,
button to select and adjust the desired item.
Press the Cursor
,
button to adjust the settings.
d Press the RETURN button to return to the previous level.
d Press the EXIT button to exit the setup screen.
MOVE ENTER EXITRETURN
MOVE CHANGE EXIT
RETURN
MOVE ENTER EXITRETURN
STOP EXIT

57
ENG ● SYSTEM SETUP● SYSTEM SETUP
SETTING THE AUDIO
Press the SOUND EDIT button and then press the Cursor
,
button.
Adjusting Front/Rear Speaker Balance
You can select between 00, -06, and OFF. `
The volume decreases as you move closer to –6. `
Adjusting Center/Rear/Subwoofer Speaker Level
The volume level can be adjusted in steps from +6dB to –6dB. `
The sound gets louder as you move closer to +6dB and quieter as you get closer to -6dB. `
SETTING THE DRC (DYNAMIC RANGE COMPRESSION)
This feature balances the range between the loudest and quietest sounds. You can use this function to enjoy Dolby
Digital sound when watching movies at low volume at night.
In Stop mode, press the 1. MENU button.
Press the Cursor 2.
%
button to move to Audio and then press the
ENTER button.
Press the Cursor 3.
%
button to move to DRC and then press the
ENTER button.
Press the Cursor 4.
,
to adjust the DRC.
When the Cursor •
button is pressed, the effect is greater, and
when the Cursor
button is pressed, the effect is smaller.
d Press the RETURN button to return to the previous level.
d Press the EXIT button to exit the setup screen.
Manually Adjusting the Speaker Volume and Balance with the SOUND EDIT Button.
ASC
CD RIPPING
RETURNMOVE ENTER EXIT
CHANGE EXIT
RETURN
58
system setup
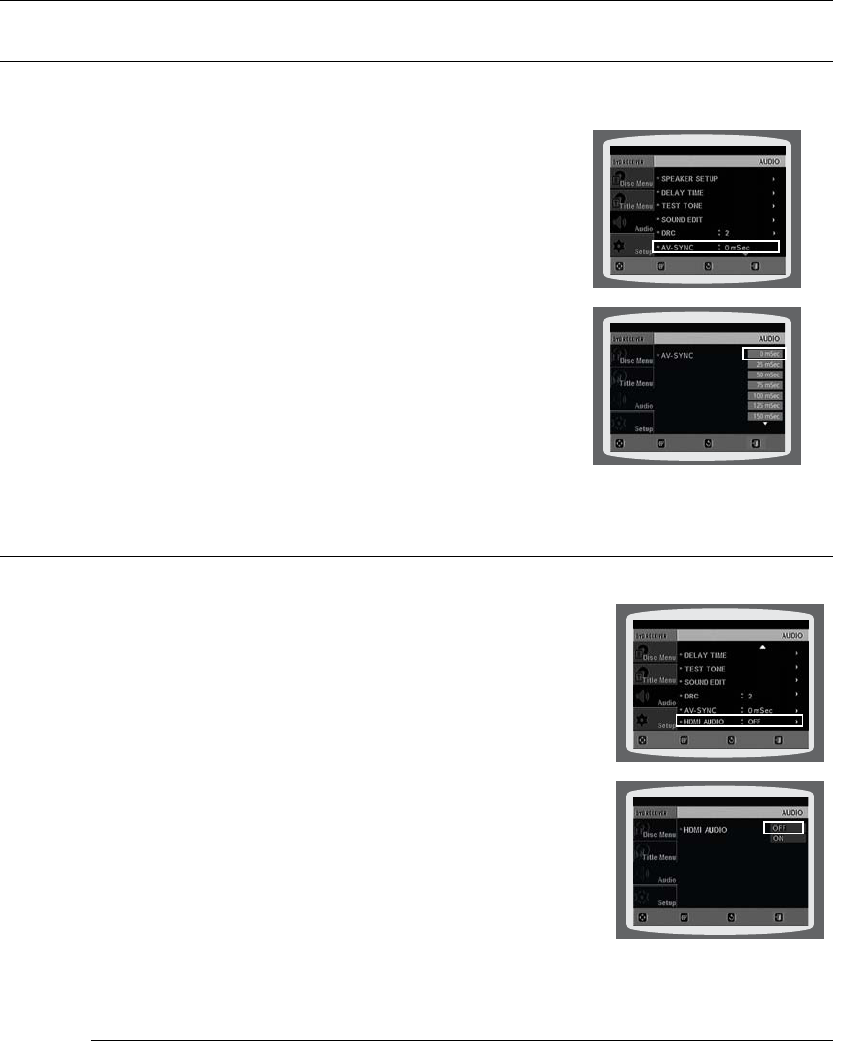
SETTING THE AV SYNC
Video may look slower than the audio if it is connected to a digital TV. If this occurs, adjust the audio delay time to
match the video.
In Stop mode, press the 1. MENU button.
Press the Cursor 2.
%
button to move to Audio and then press
the ENTER button.
Press the Cursor 3.
%
button to move to AV-SYNC and then
press the ENTER button.
Press the Cursor 4.
,
button to select the AV-SYNC Delay
Time and then press the ENTER button.
You can set the audio delay time between 0 ms and 300 ms. •
Set it to the optimal status.
d Press the RETURN button to return to the previous level.
d Press the EXIT button to exit the setup screen.
SETTING THE HDMI AUDIO
The audio signals transmitted over the HDMI Cable can be toggled ON/OFF.
In Stop mode, press the 1. MENU button.
Press the Cursor 2.
button to move to Audio and then press the
ENTER button.
Press the Cursor 3.
button to move to HDMI AUDIO and then
press the ENTER button.
Press the Cursor 4.
,
button to select ON or OFF and then press
the ENTER button.
• ON : Both video and audio signals are transmitted over the HDMI
connection cable, and audio is output through your
TV speakers only.
• OFF : Video is transmitted over the HDMI connection cable only,
and audio is output through the home cinema speakers only.
d
Press the RETURN button to return to the previous level.
d
Press the EXIT button to exit the setup screen.
M
The default setting of this function is HDMI AUDIO OFF. `
HDMI AUDIO is automatically down-mixed to 2ch for TV speakers. `
MOVE ENTER EXITRETURN
MOVE SELECT EXIT
RETURN
MOVE ENTER EXITRETURN
MOVE SELECT EXIT
RETURN
59
ENG ● SYSTEM SETUP● SYSTEM SETUP
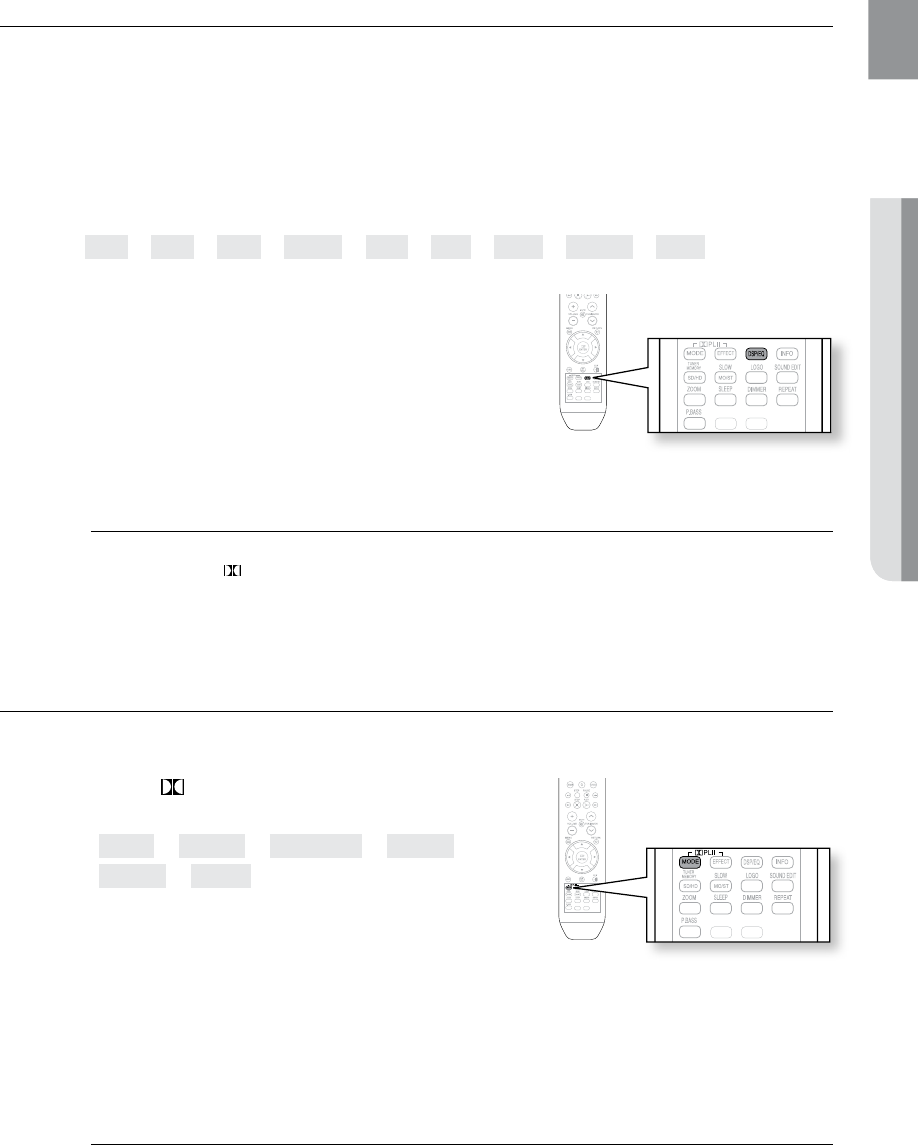
SOUND FIELD (DSP)/EQ FUNCTION
DSP(Digital Signal Processor) : DSP modes have been designed to simulate different acoustic environments.
EQ :
You can select ROCK, POP, or CLASSIC to optimize the sound for the genre of music you are playing
Press the DSP/EQ button.
DSP• appears on the display panel.
Each time the button is pressed, the selection changes as follows:
POPS ➞ JAZZ ➞ ROCK ➞ STUDIO ➞ CLUB ➞ HALL ➞ MOVIE ➞ CHURCH ➞ PASS
POPS, JAZZ, ROCK • : Depending on the genre of music, you
can select POP, JAZZ, and ROCK.
STUDIO • : Provides a sense of presence as if in a studio.
CLUB • : Simulates the sound of a dance club with a throbbing
bass beat.
HALL • : Provides a clear vocal as if listening in a concert hall.
MOVIE • : Provides the feeling of a movie cinema.
CHURCH • : Gives the feel of being in a grand church.
PASS • : Select this for normal listening.
M
The DSP/EQ function is only available in STEREO mode. `
Press the PL II mode button to show STEREO on the display.
This feature works with CDs, MP3-CDs, 2 channel DVD-Audio, DivX, tuner and Dolby Digital discs. `
When playing a DVD disc encoded with two or more channels, multi-channel mode will be `
selected automatically and DSP/EQ function does not work.
DOLBY PRO LOGIC II MODE
You can select the desired Dolby Pro Logic II audio mode.
Press the PL II MODE button.
Each time the button is pressed, the mode changes as follows.•
MUSIC ➞ CINEMA ➞ PRO LOGIC ➞ MATRIX ➞
STEREO ➞ MUSIC
PRO LOGIC II
MUSIC • : When listening to music, you can experience
sound effects as if you are listening to the actual performance.
CINEMA• : Adds realism to the movie soundtrack.
PRO LOGIC• : You will experience a realistic multi-channel effect, as if using five speakers, while using
just the front left and right speakers.
MATRIX • : You will hear 5.1 channel surround sound.
STEREO • : Select this to listen to sound from the front left and right speakers and the subwoofer only.
M
When selecting Pro Logic II mode, connect your external device to the AUDIO INPUT jacks `
(L and R) on the player. If you connect to only one of the inputs (L or R), you cannot listen
to surround sound.
ASC
CD RIPPING
ASC
CD RIPPING
ASC
CD RIPPING
ASC
CD RIPPING
60
system setup
DOLBY PRO LOGIC II EFFECT
This function works only in Dolby Pro Logic MUSIC mode.
Press the 1. PL II MODE button to select MUSIC mode.
Press the 2. PL II EFFECT button.
Press the 3.
,
buttons to select the desired effect setting.
PANORAMA : You can select either 0 or 1.•
C- WIDTH : You can select between 0 and 7.•
DIMENS : You can select between 0 and 6.•
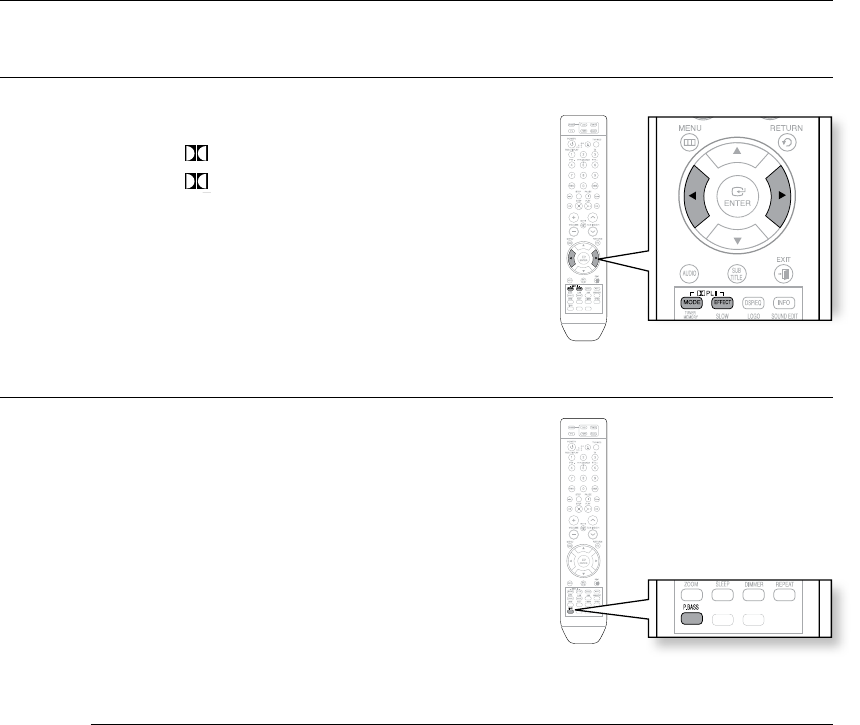
P.BASS
P.BASS function boosts the bass for a more powerful
sound.
Press the 1. P.BASS button to select P.BASS mode.
Press the 2. P.BASS button again to turn off the P.BASS
mode.
M
The P.BASS function is only available with 2 channel LPCM sources such as mp3,Divx,cd `
and wma. Press P.BASS button and "POWER BASS ON" will be displayed on the screen.
The P.bass does not work with DSP/EQ or DOLBY PRO LOGIC ll modes.
`
If you press P.BASS in the DSP/EQ mode, the DSP/EQ mode is automatically shut off and
the P. BASS function comes on.
ASC
CD RIPPING
ASC
CD RIPPING
ASC
CD RIPPING