Samsung Electronics Co SLM3065FW Multi Function Printer User Manual
Samsung Electronics Co Ltd Multi Function Printer
Contents
Users Manual Part 1
26
1. Introduction
Installing the driver locally
A locally connected machine is a machine directly attached to your computer
using the cable. If your machine is attached to a network, skip the following
steps below and go on to installing a network connected machine’s driver (see
"Installing driver over the network" on page 148).
• If you are a Mac, Linux, or Unix OS user, refer to the "Software Installation"
on page 138.
• The installation window in this User’s Guide may differ depending on the
machine and interface in use.
• Only use a USB cable no longer than 3 meters (118 inches).
14
Windows
1Make sure that the machine is connected to your computer and
powered on.
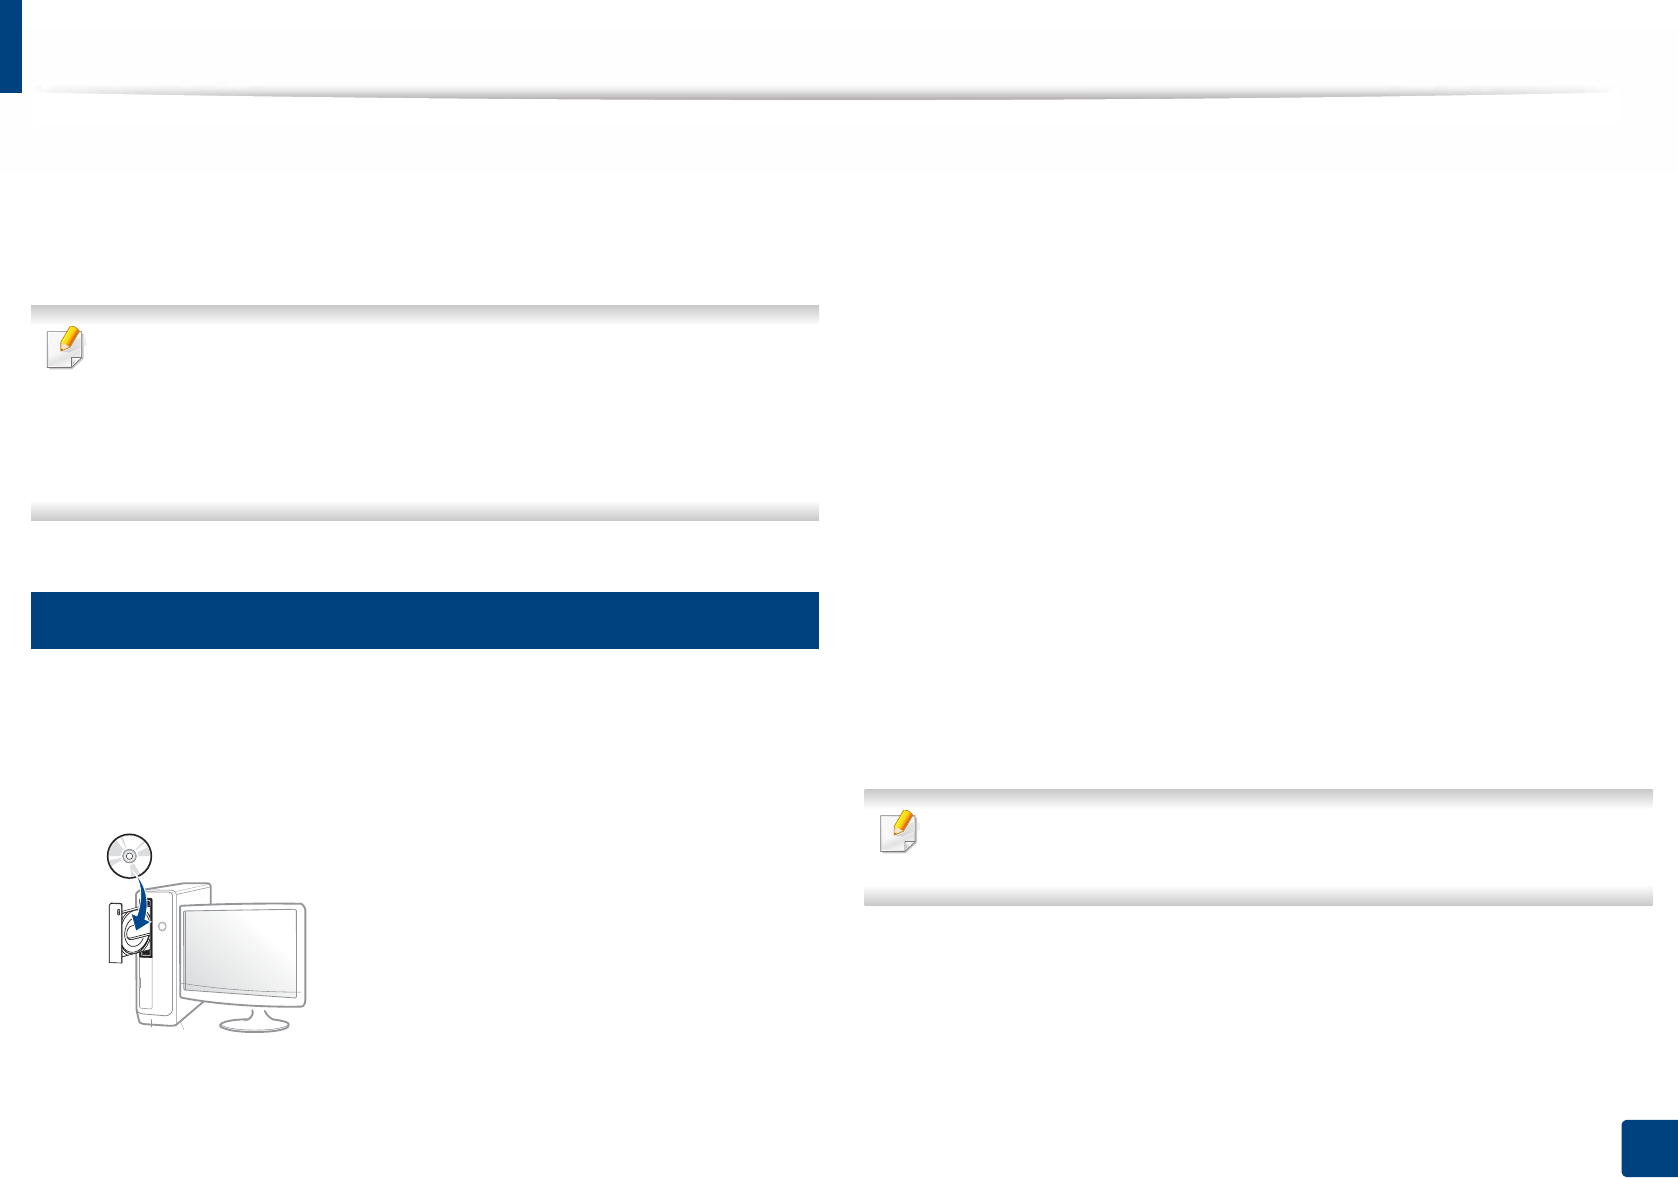
2 Insert the supplied software CD into your CD-ROM drive.
If the installation window does not appear, click Start > All programs >
Accessories > Run.
X:\Setup.exe replacing “X” with the letter, which represents your CD-
ROM drive and click OK.
• For Windows 8,
If the installation window does not appear, from Charms, select
Search > Apps and search for Run. Type in X:\Setup.exe, replacing
“X” with the letter that represents your CD-ROM drive and click OK.
If “Tap to choose what happens with this disc.” pop-up window
appears, click the window and select Run Setup.exe.
3 Review and accept the installation agreements in the installation
window. Then, click Next.
4 Select USB connection on the Printer Connection Type screen. Then,
click Next.
5 Follow the instructions in the installation window.
You can select the software applications in the Select Software to Install
window.
Installing the driver locally
27
1. Introduction
From the Windows 8 Start Screen
• The V4 driver is automatically downloaded from the Windows Update if
your computer is connected to the Internet. If not, you can manually
download the V4 driver from Samsung website, www.samsung.com >
find your product > Support or downloads.
• You can download Samsung Printer Experience app from the Windows
Store. You need have a Microsoft account to use the Windows Store.
1 From Charms, select Search.
2 Click Store.
3 Search and click Samsung Printer Experience.
4 Click Install.
• If you install the driver using the supplied software CD, V4 driver is not
installed. If you want to use the V4 driver in the Desktop screen, you can
download from the Samsung website, www.samsung.com >find your
product > Support or downloads.
• If you want to install Samsung’s printer management tools, you need to
install them using the supplied software CD.
1Make sure that your computer is connected to the Internet and powered
on.
2 Make sure that the machine is powered on.
3 Connect the computer and the machine with a USB cable.
The driver is automatically installed from the Windows Update.
28
1. Introduction
Reinstalling the driver
If the printer driver does not work properly, follow the steps below to reinstall
the driver.
15
Windows
1Make sure that the machine is connected to your computer and
powered on.
2 From the Start menu, select Programs or All Programs > Samsung
Printers > Uninstall Samsung Printer Software.
• For Windows 8,
1 From Charms, select Search > Apps.
2 Search and click Control Panel.
3 Click Programs and Features.
4 Right-click the driver you want to uninstall and select Uninstall.
3 Follow the instructions in the installation window.
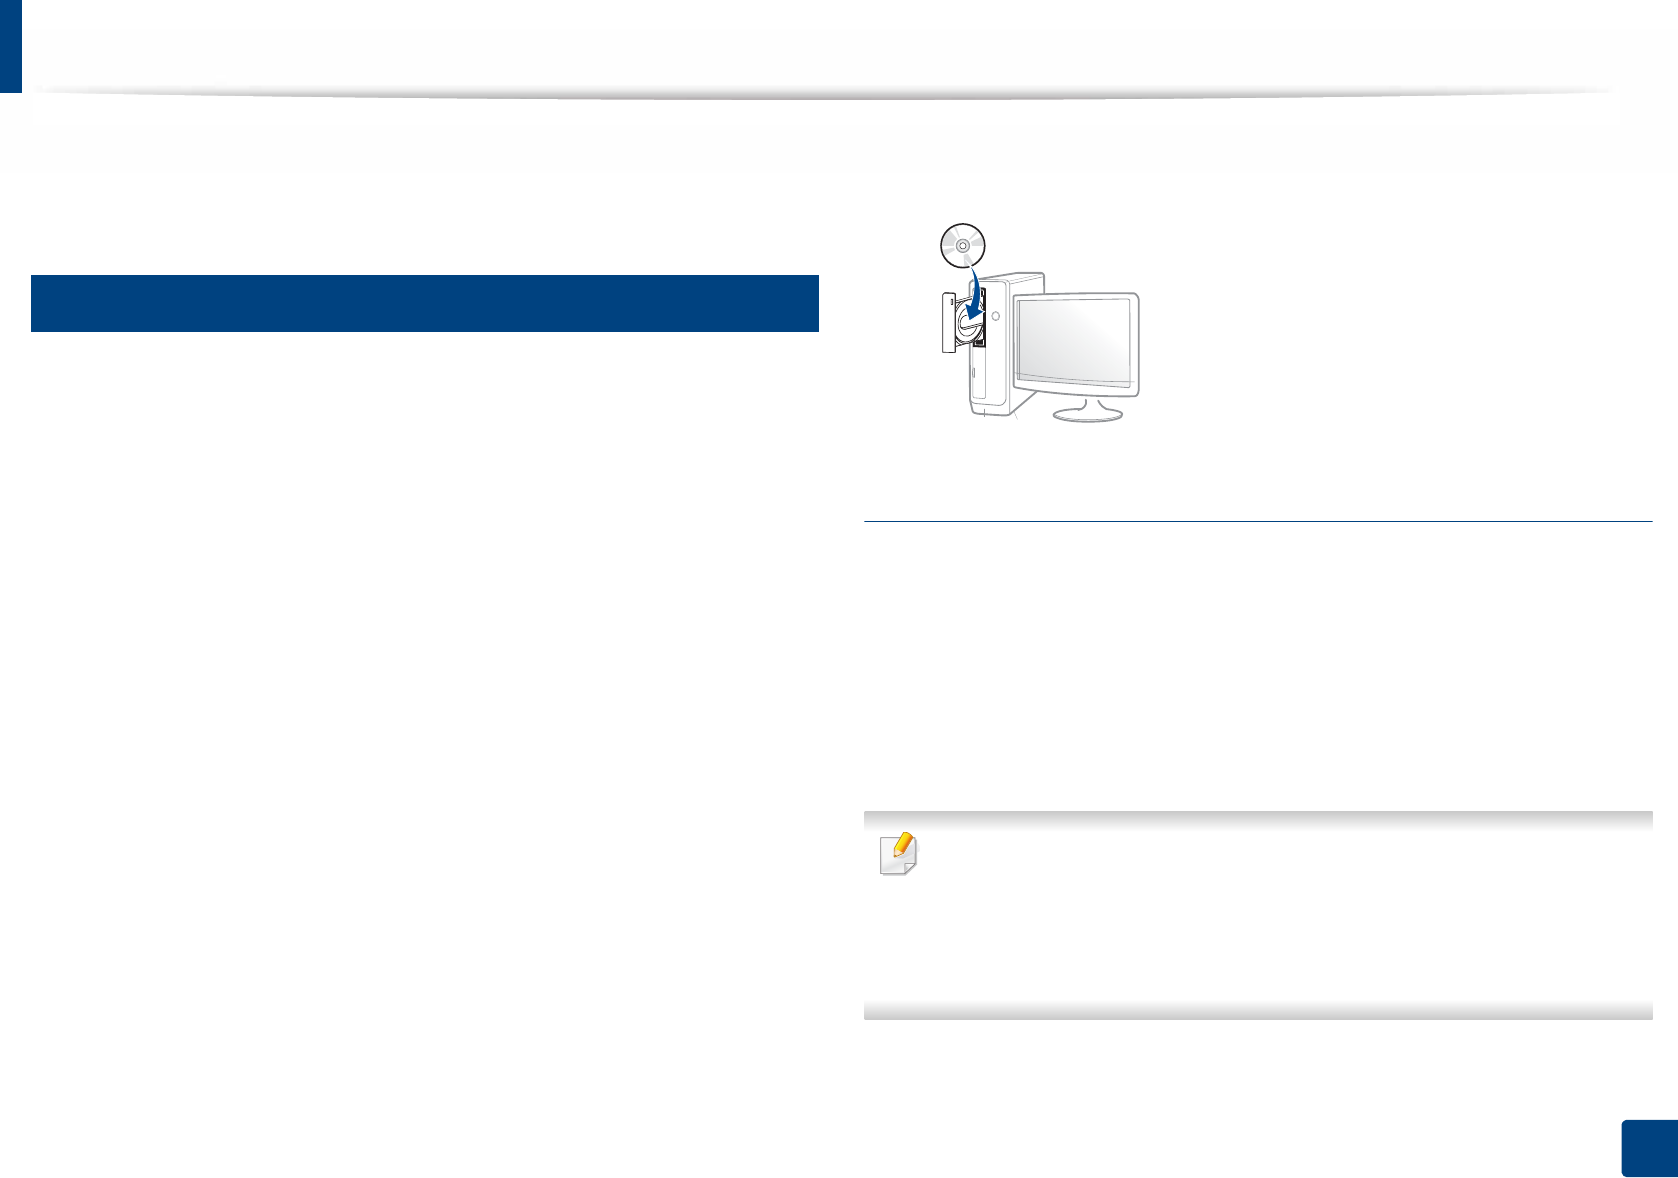
4 Insert the software CD into your CD-ROM drive and install the driver
again (see "Installing the driver locally" on page 26).
From the Windows 8 Start Screen
1Make sure that the machine is connected to your computer and
powered on.
2 Click on the Uninstall Samsung Printer Software tile in the Start
screen.
3 Follow the instructions in the window.
• If you cannot find a Samsung Printer Software tile, unintstall from the
desktop screen mode.
• If you want to uninstall Samsung’s printer management tools, from the
Start screen, right-click the app > Uninstall > right-click the program
you want to delete > Uninstall and follow the instruction in the window.

2. Menu Overview and
Basic Setup
This chapter provides information about the overall menu structure and the basic setup options.
• Menu overview 30
• Machine’s basic settings 34
• Media and tray 36
• Basic printing 51
• Basic copying 57
• Basic scanning 62
• Basic faxing 63
30
2. Menu Overview and Basic Setup
Menu overview
The control panel provides access to various menus to set up the machine or use
the machine’s functions.
• An asterisk (*) appears next to the currently selected menu.
• Some menus may not appear on the display depending on options or
models. If so, it is not applicable to your machine.
• Some menu names may differ from your machine depending on its
options or the models.
• The menus are described in the Advanced Guide (see "Useful Setting
Menus" on page 203).
1
Accessing the menu
1Select the Fax, Copy, or Scan button on the control panel depending on
the feature to be used.
2 Select (Menu) until the menu you want appears on the bottom line
of the display and press OK.
3 Press the left/right arrows until the needed menu item appears and press
OK.
4 If the setting item has sub menus, repeat step 3.
5 Press OK to save the selection.
6 Press (Stop/Clear) to return to the ready mode.

Menu overview
31
2. Menu Overview and Basic Setup
Fax Feature (see "Fax Feature" on page 209) Fax Setup (see "Sending setup" on page 210,
"Receiving setup" on page 211) Copy Feature (see "Copy feature" on page 206)
Darkness
Light+5- Light+1
Normal
Dark+1- Dark+5
Resolution
Standard
Fine
Super Fine
Photo Fax
Color Fax
Original Size
Multi Send
Delay Send
Priority Send
Send Forward
Rcv. Forward
Forward to Fax
Forward to PC
Forward & Print
Secure Receive
Off
On
Print
Add Page
Cancel Job
Sending
Redial Times
Redial Term
Prefix Dial
ECM Mode
Modem Speed
Fax Confirm.
Image TCR
Dial Modea
Receiving
Receive Mode
Fax
Tel
Ans/Fax
DRPD
Ring to Answer
Stamp Rcv Name
Rcv Start Code
Auto Reduction
Discard Size
Junk Fax Setup
DRPD Mode
Duplex Print
Change Default
Darkness
Resolution
Original Size
Manual TX/RX
Original Size
Reduce/Enlarge
Duplex
1 Sided
1->2Sided
1->2Sided Rot.
Darkness
Light+5- Light+1
Normal
Dark+1- Dark+5
Original Type
Text
Text/Photo
Photo
Collation
Layout
Normal
2-Up
4-Up
ID Copy
Adjust Bkgd.
Off
Auto
Enhance Lev.1
Enhance Lev.2
Erase Lev.1- Erase
Lev.4
a. This option may not be available depending on your country.

Menu overview
32
2. Menu Overview and Basic Setup
Copy Setup
(see "Copy Setup" on page 208)
System Setup
(see "System setup" on page 212)
Print Setup
(see "Print menu" on page 205)
Change Default
Original Size
Copies
Reduce/Enlarge
Duplex
Darkness
Original Type
Collation
Machine Setup
Machine ID
Fax Number
Date & Time
Clock Mode
Language
Default Mode
Power Save
Wakeup Event
System Timeout
Job Timeout
Altitude Adj.
Auto Continue
Paper Substit.
Toner Save
Eco Settings
Paper Setup
Paper Size
Paper Type
Paper Source
Margin
Sound/Volume
Key Sound
Alarm Sound
Speaker
Ringer
Report
Configuration
Demo Page
Network Conf.
Supplies Info.
Usage Counter
Fax Received
Fax Sent
Scheduled Jobs
Fax Confirm.
Junk Fax
PCL Font List
Address Book
Maintenance
CLR Empty Msga
Supplies Life
Image Mgr.
TonerLowAlert
ImgU.Low Alert
Serial Number
Orientation
Portrait
Landscape
Duplex
Off
Long Edge
Short Edge
Copies
Resolution
Clear Text
Auto CR
SkipBlankPages
Emulation
a. This option only appears when small amount of toner is left in the cartridge.

Menu overview
33
2. Menu Overview and Basic Setup
Network
TCP/IP (IPv4)
DHCP
BOOTP
Static
TCP/IP (IPv6)
IPv6 Activate
DHCPv6 Config
Ethernet Speed
Automatic
10Mbps Half
10Mbps Full
100Mbps Half
100Mbps Full
Wirelessa
Wi-Fi ON/OFFa
Wi-Fi Directa
WPS Settinga
WLAN Settinga
WLAN Defaulta
WLAN Signala
Protocol Mgr.
Net. Activate
Http Activate
WINS
SNMP V1/V2
UPnP(SSDP)
MDNS
SetIP
SLP
Network Conf.
Clear Setting
a. M3065FW only.
34
2. Menu Overview and Basic Setup
Machine’s basic settings
You can set the machine’s settings by using the Device Settings in
Samsung Easy Printer Manager program.
• For Windows and Mac users, you set from Samsung Easy Printer
Manager > (Switch to advanced mode) > Device Settings, see
"Device Settings" on page 267.
After installation is complete, you may want to set the machine's default
settings.
To change the machine’s default settings, follow these steps:
It may be necessary to press OK to navigate to lower-level menus for some
models.
1Select (Menu) > System Setup > Machine Setup on the control
panel.
2 Select the option you want, then press OK.
•Language: change the language that is displayed on the control
panel.
•Date & Time: When you set the time and date, they are used in delay
fax. They are printed on reports. If, however, they are not correct, you
need to change it for the correct time being.
Enter the correct time and date using arrows or numeric keypad (see
"Keypad letters and numbers" on page 221).
• Month = 01 to 12
• Day = 01 to 31
• Year = requires four digits
• Hour = 01 to 12
• Minute = 00 to 59
•Clock Mode: You can set your machine to display the current time
using either a 12-hour or 24-hour format.
•Power Save: When you are not using the machine for a while, use
this feature to save power.
When you press the (Power/Wake Up) button, start printing, or a fax is
received, the product will wake up from the power saving mode.
•Altitude Adj.: Print quality is affected by atmospheric pressure,
which atmospheric pressure is determined by the height of the
machine above sea level. Before you set the altitude value,
determine the altitude where you are (see "Altitude adjustment" on
page 220).
3 Select the option you want, then press OK.
4 Press OK to save the selection.
Machine’s basic settings
35
2. Menu Overview and Basic Setup
5 Press (Stop/Clear) button to return to ready mode.
Refer to below links to set other settings useful for using the machine.
• See "Entering various characters" on page 221.
• See "Keypad letters and numbers" on page 221.
• See "Setting the paper size and type" on page 46.
• See "Setting up the fax address book" on page 223.

36
2. Menu Overview and Basic Setup
Media and tray
This chapter provides information on how to load print media into your
machine.
• Using print media that does not meet these specifications may cause
problems or require repairs. Such repairs are not covered by Samsung’s
warranty or service agreements.
• Make sure not to use the inkjet photo paper with this machine. It could
cause damage to the machine.
• Using inflammable print media can cause a fire.
• Use designated print media (see "Print media specifications" on page
112).
The use of inflammable media or foreign materials left in the printer may
lead to overheating of the unit and, in rare cases may cause a fire.
2
Tray overview
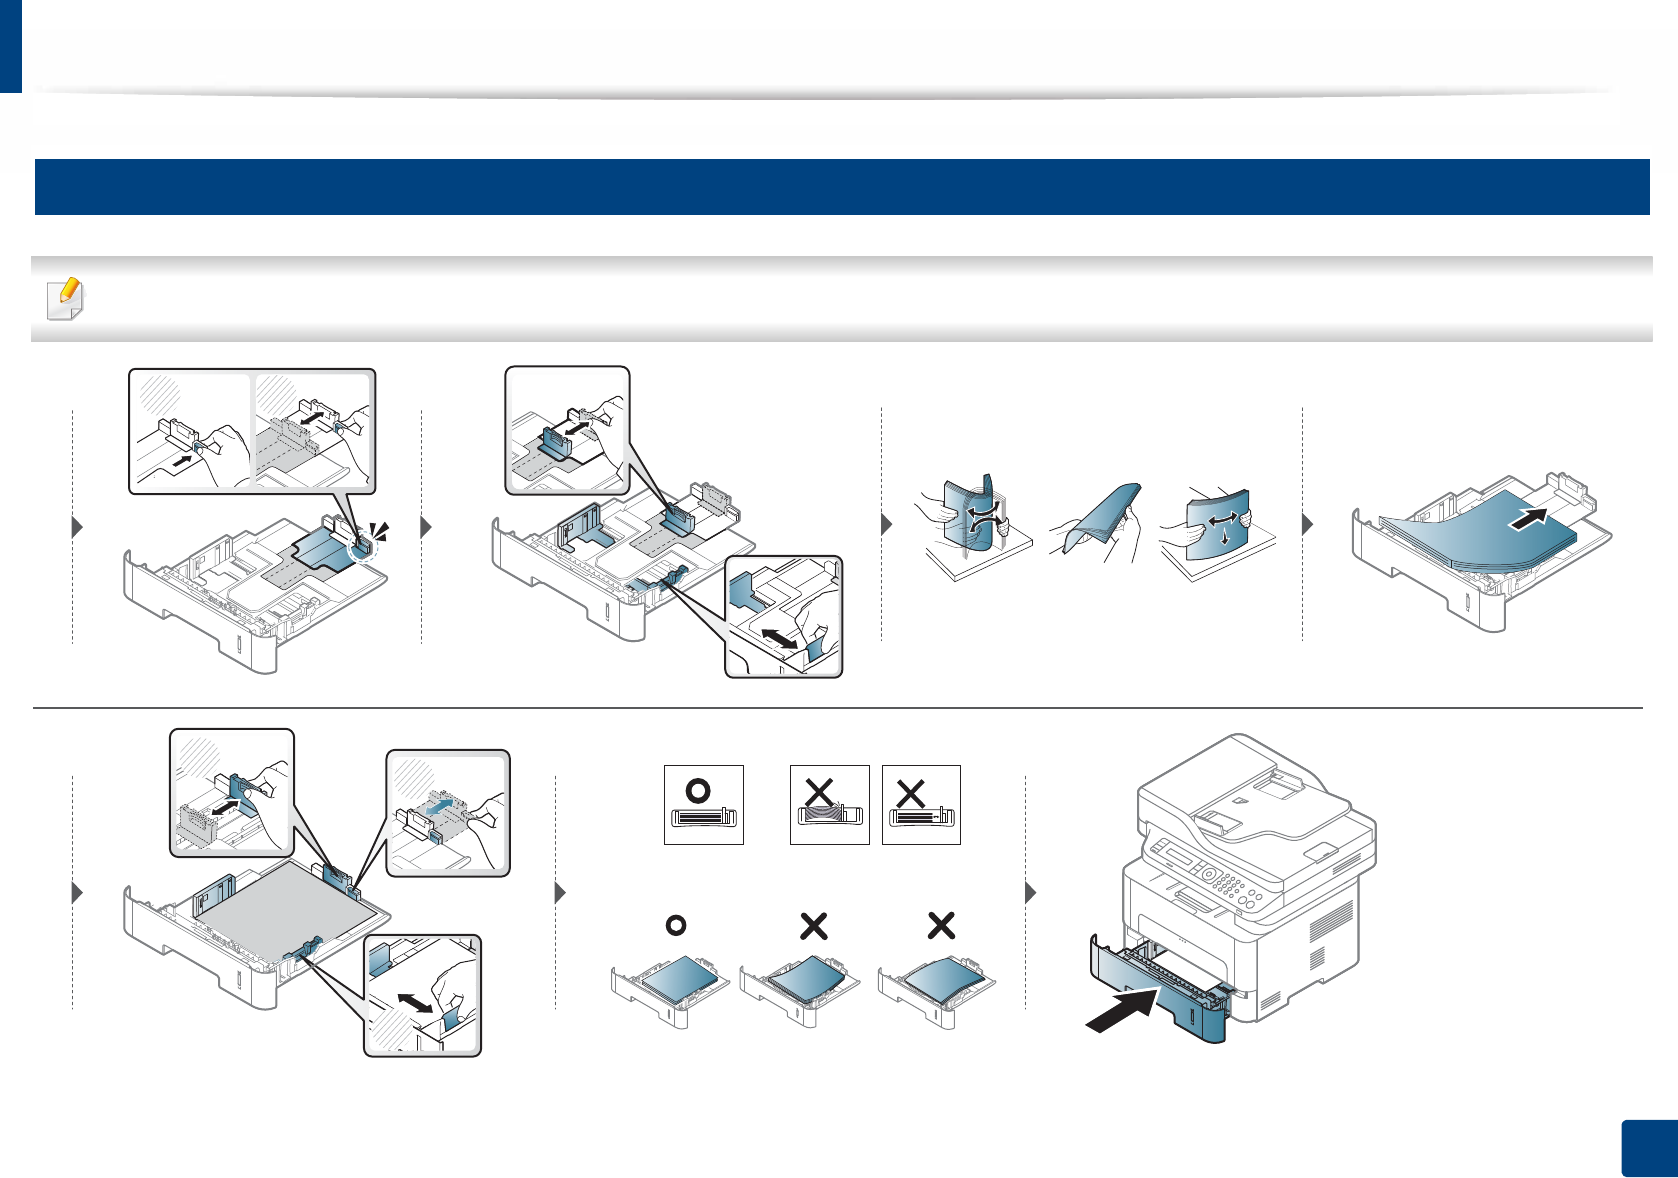
To change the size, you need to adjust the paper guides.
If you do not adjust the guide, it may cause paper registration, image skew,
or jamming of the paper.
1Tray extension guide
2Paper length guide
3Paper width guide
3
1
2

Media and tray
37
2. Menu Overview and Basic Setup
The paper quantity indicator shows the amount of paper in the tray.
1 Full
2 Empty
Paper type available for duplex printing
Duplex printing might not be available for some models (see "Features by
model" on page 7).
Depending on the power voltage your machine uses, available paper types for
duplex printing differs. Refer to the below table.
1 2
Power voltage Available paper
110V Letter, Legal, US Folio, Oficio
220V A4
Media and tray
38
2. Menu Overview and Basic Setup
3
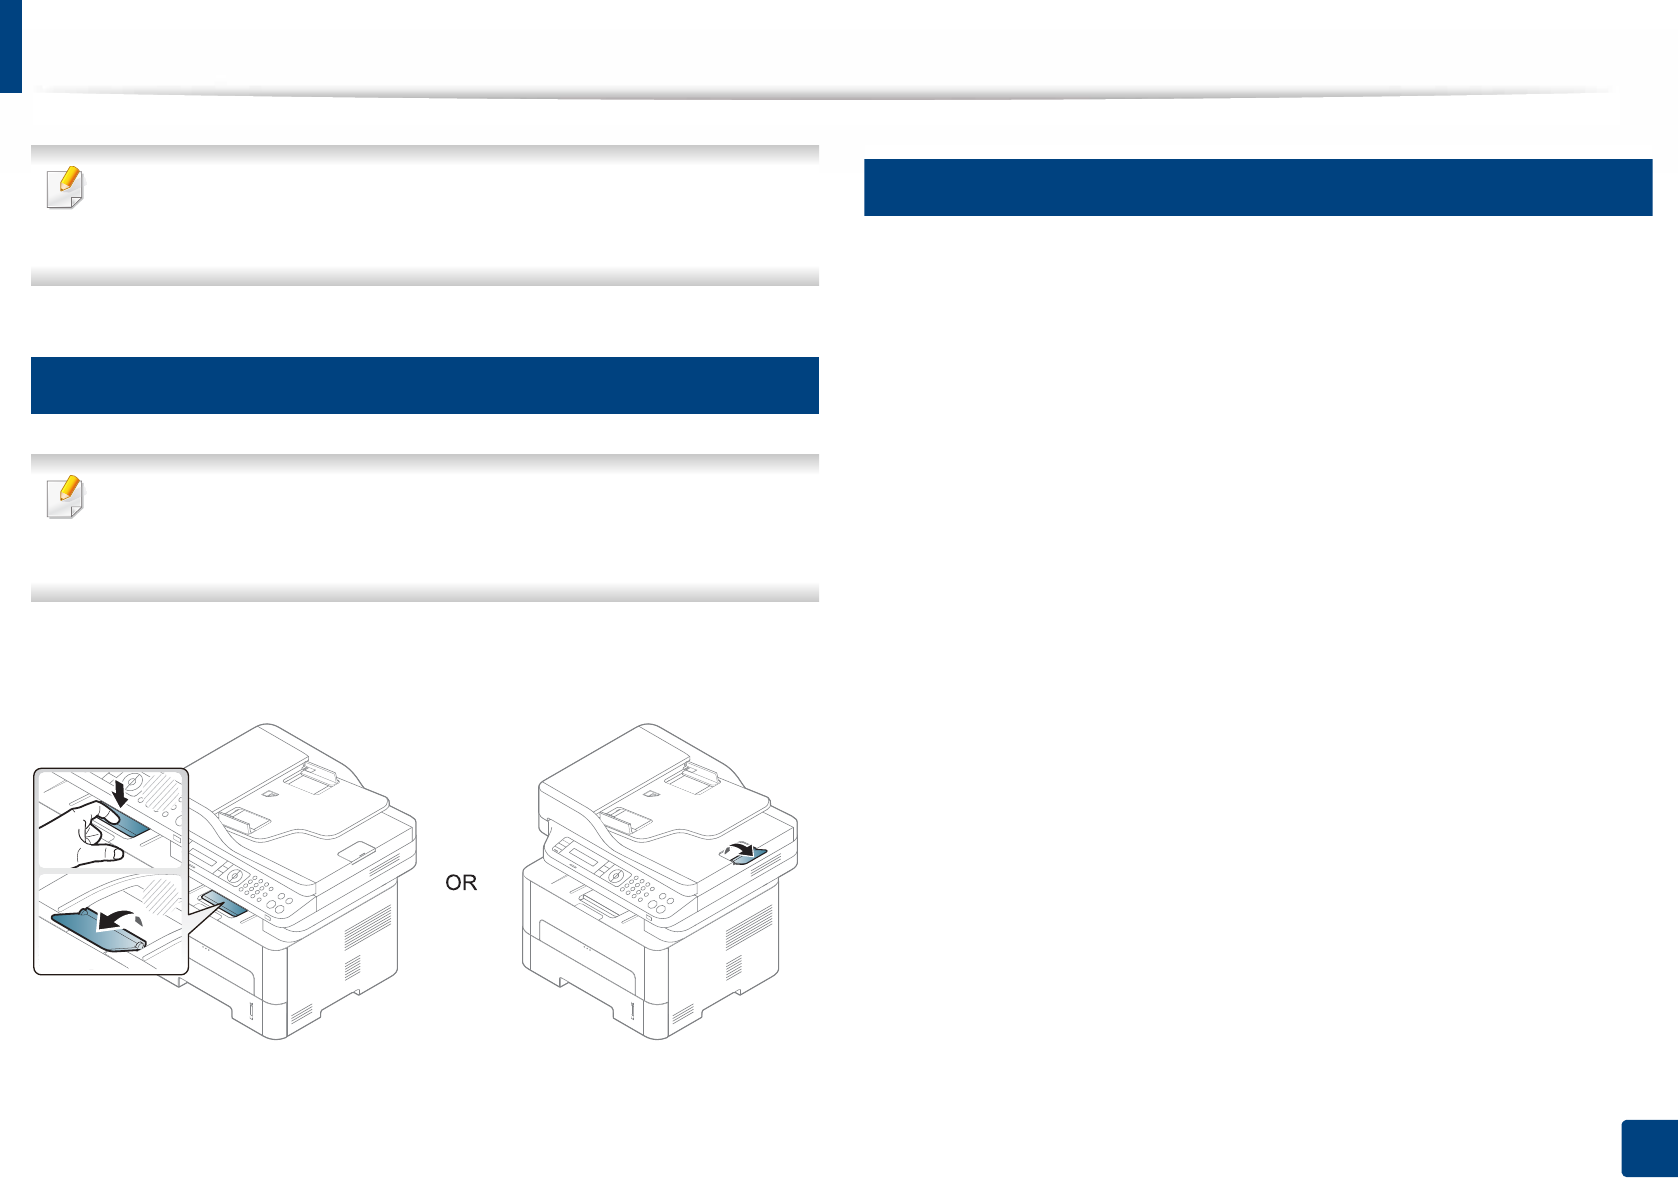
Loading paper in the tray
When printing using the tray, do not load paper on the manual feeder, it may cause a paper jam.
12
21
3

Media and tray
39
2. Menu Overview and Basic Setup
4
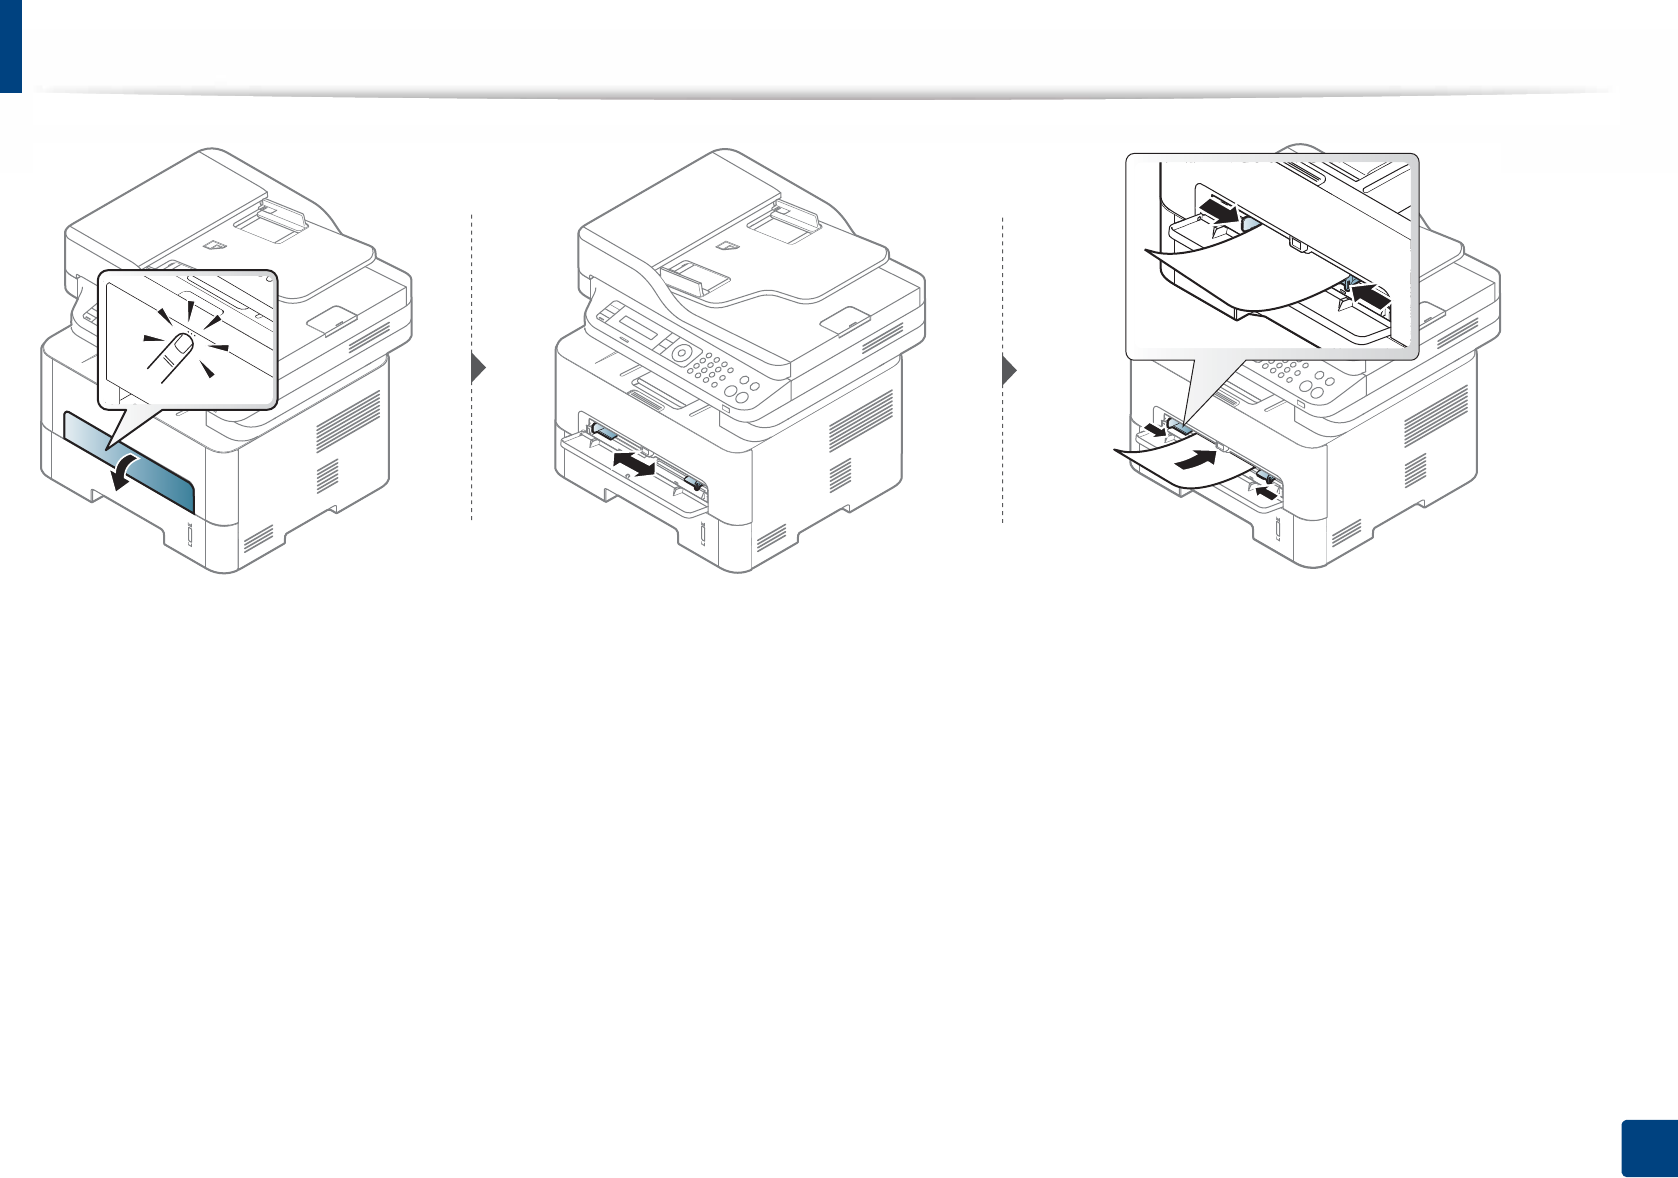
Loading in manual feeder
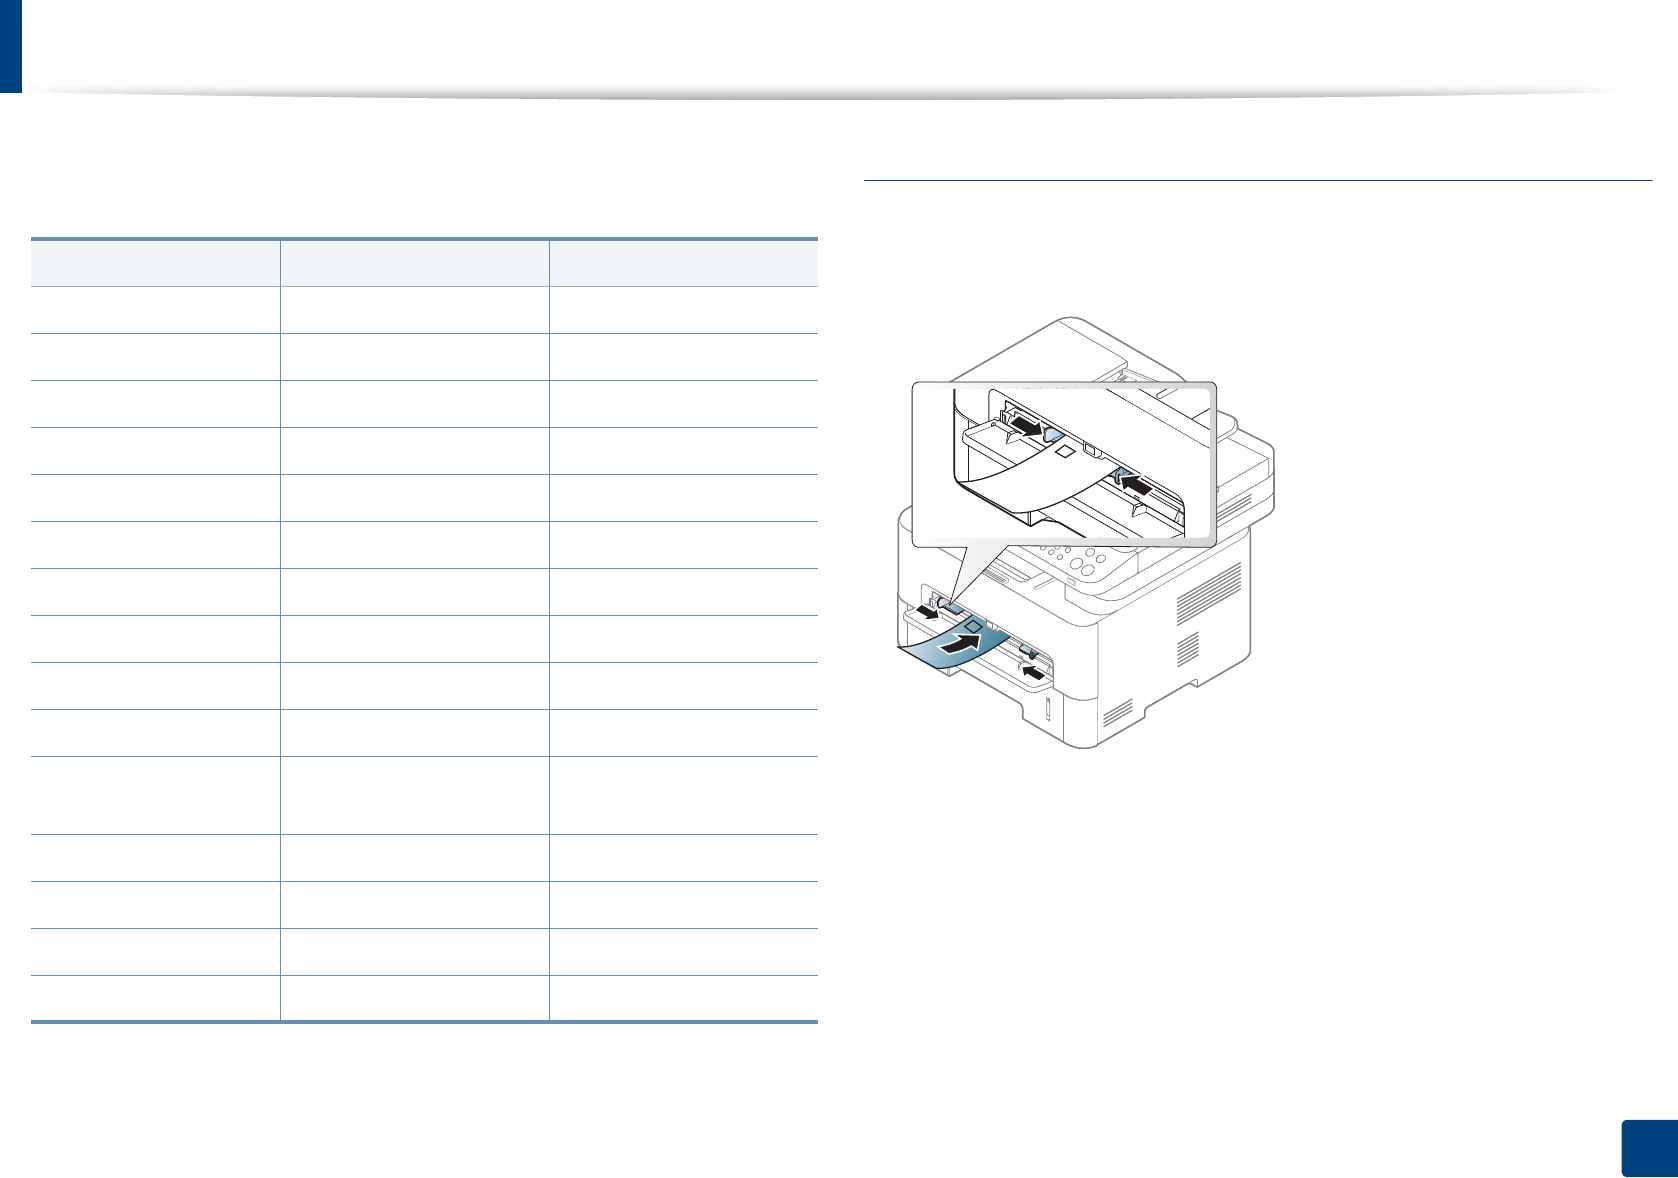
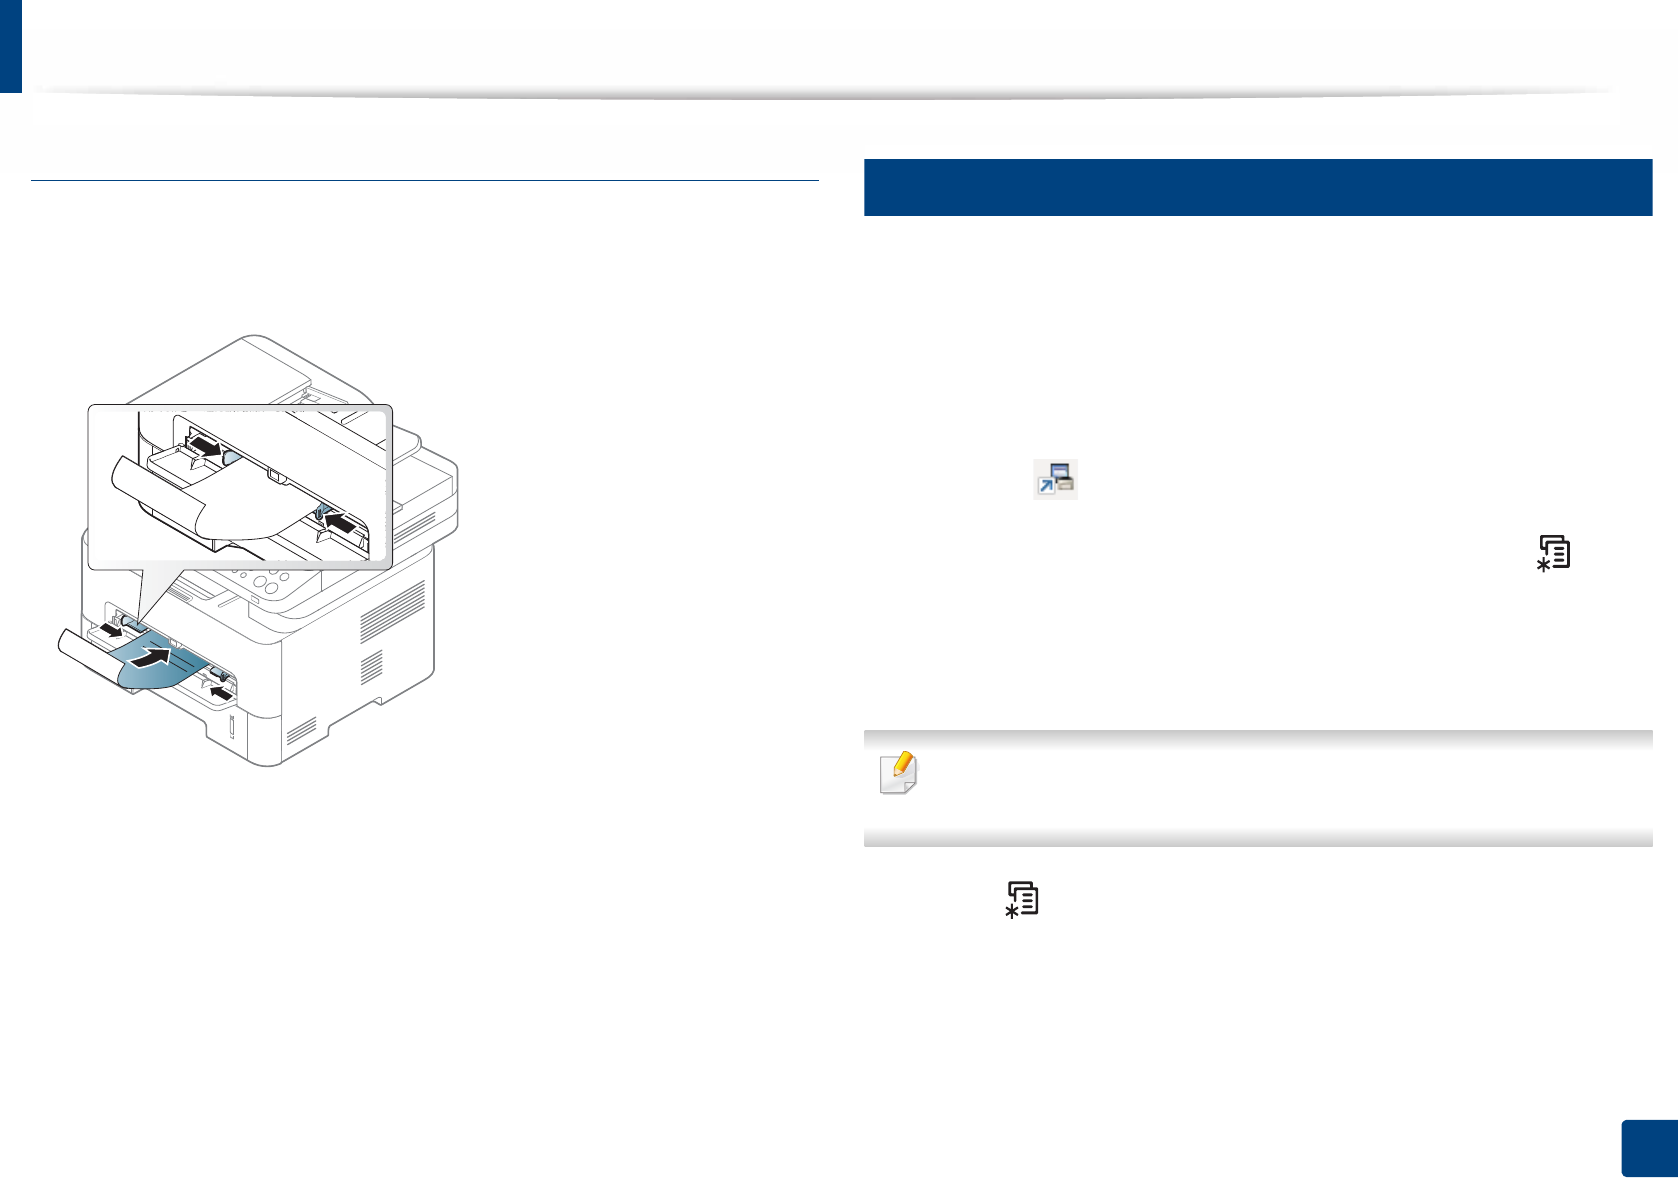
The manual feeder can hold special sizes and types of print material, such as postcards, note cards, and envelopes (see "Print media specifications" on page 112).
Tips on using the manual feeder
• Load only one type, size and weight of print media at time in the manual feeder.
• To prevent paper jams, do not add paper while printing when there is still paper in the manual feeder.
• Print media should be loaded face up with the top edge going into the manual feeder first and be placed in the center of the tray.
• To ensure printing quality and to prevent paper jams, only load the available paper (see "Print media specifications" on page 112).
• Flatten any curl on postcards, envelopes, and labels before loading them into the manual feeder.
• When printing on special media, you must follow the loading guidelines (see "Printing on special media" on page 41).
• When papers overlap when printing using the manual feeder, open tray and remove the papers then try printing again.
• When paper does not feed well while printing, push the paper in manually until it starts feeding automatically.
• When the machine is in a power save mode, the machine does not feed paper from the manual feeder. Wake up the machine by pressing the power button before
using the manual feeder.
Media and tray
40
2. Menu Overview and Basic Setup

Media and tray
41
2. Menu Overview and Basic Setup
5
Printing on special media
The table below shows the special media usable in each tray.
The paper setting in the machine and driver should match to print without a
paper mismatch error.
To change the paper setting set in the machine, from the Samsung Easy Printer
Manager select (Switch to advanced mode) > Device Settings.
Or if your machine supports a display screen, you can set it using the (Menu)
button on the control panel.
Then, set the paper type from the Printing preferences window > Paper tab >
Paper Type (see "Opening printing preferences" on page 53).
• When using special media, we recommend you feed one sheet at a time
(see "Print media specifications" on page 112).
•Printing the special media (Face up)
If special media are printed out with curl, wrinkles, crease, or black bold
lines, open the rear cover and try printing again. Keep the rear cover
opened during printing.
Media and tray
42
2. Menu Overview and Basic Setup
To see paper weights for each sheet, refer to "Print media specifications" on
page 112.
(●: Included, Blank: Not available)
Envelope
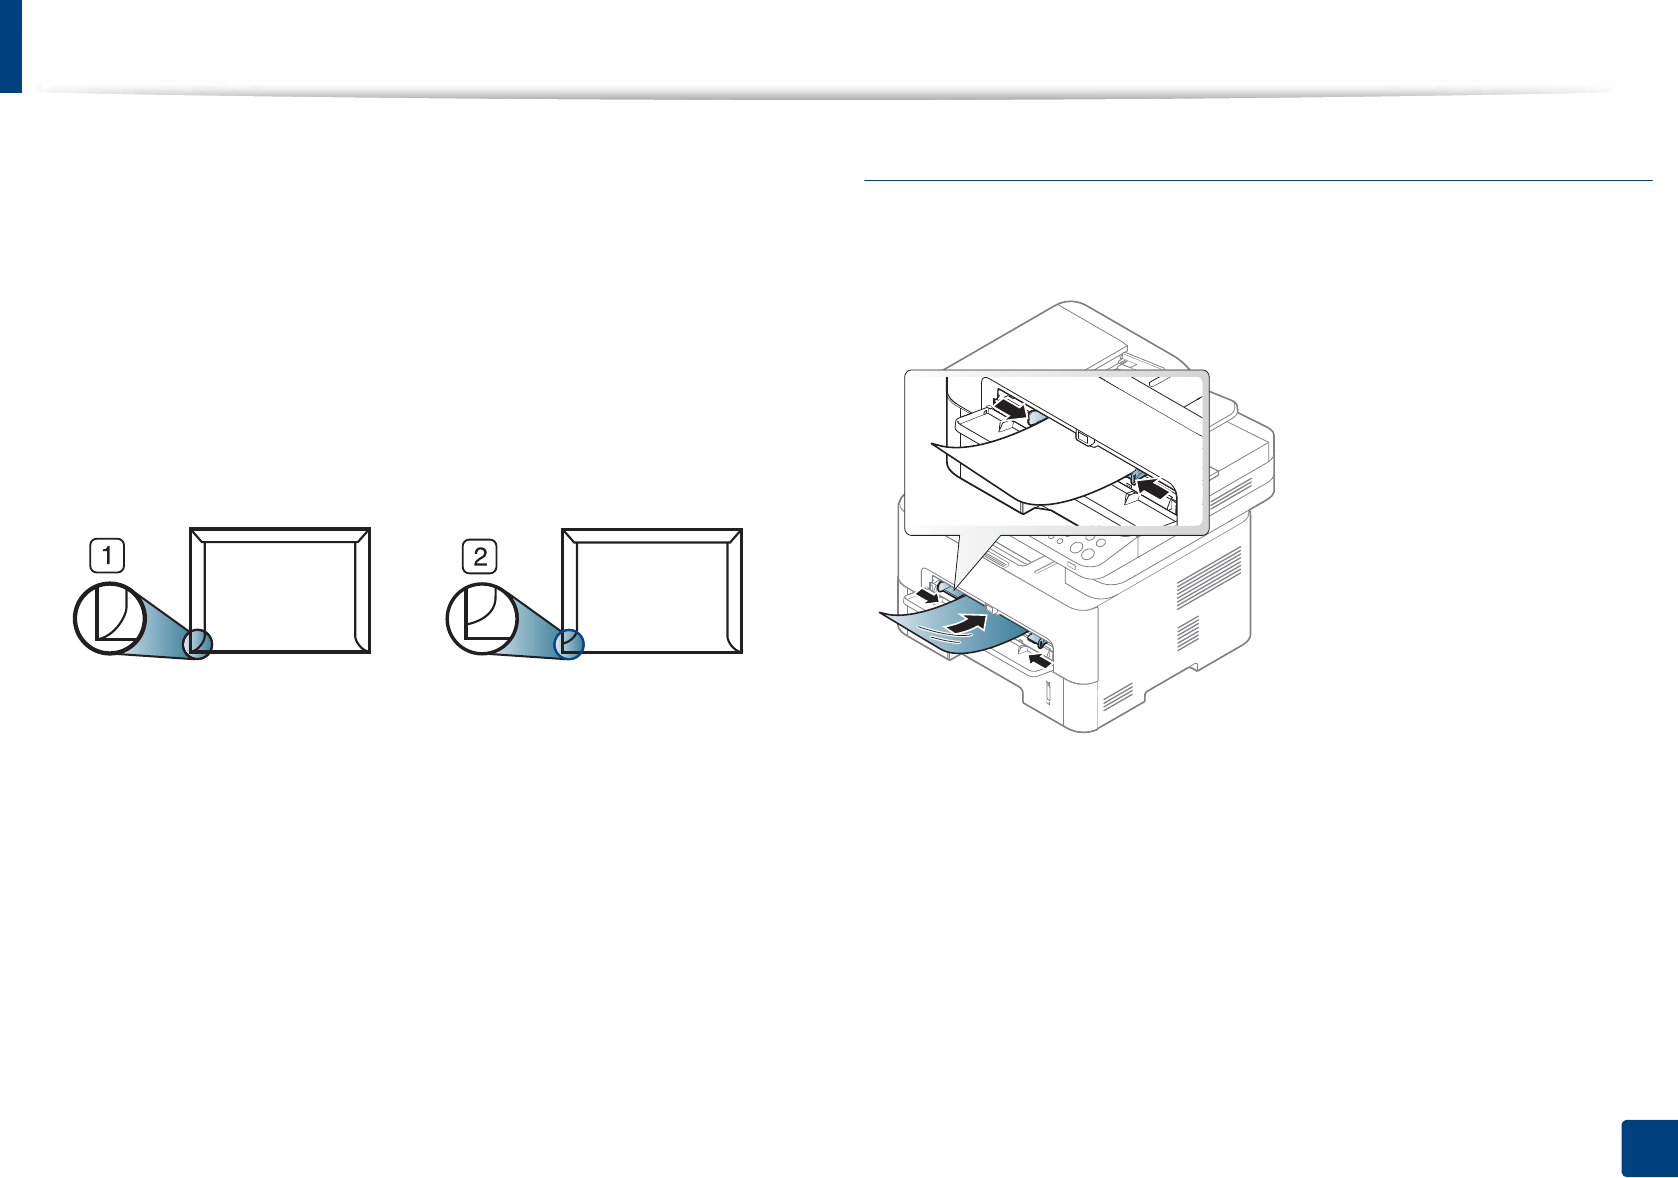
Printing successfully on envelopes depends upon the quality of the envelopes.
To print an envelope, place it as shown in the following figure.
If envelopes are printed out with wrinkles, creases, or black bold lines, open the
rear cover and try printing again. Keep the rear cover opened during printing.
• When selecting envelopes, consider the following factors:
-Weight: should not exceed 90 g/m2 otherwise; jams may occur.
-Construction: should lie flat with less than 6 mm curl and should not
contain air.
-Condition: should not be wrinkled, nicked, nor damaged.
Types Tray Manual feeder
Plain ●●
Thick ●●
Thicker ●
Thin ●●
Bond ●●
Color ●
CardStock ●●
Labels ●
Transparency ●
Envelope ●
Thick
Envelope
●
Preprinted ●
Cotton ●
Recycled ●●
Archive ●●
Media and tray
43
2. Menu Overview and Basic Setup
-Temperature: should resist the heat and pressure of the machine
during operation.
• Use only well-constructed envelopes with sharp and well-creased folds.
• Do not use stamped envelopes.
• Do not use envelopes with clasps, snaps, windows, coated lining, self-
adhesive seals, or other synthetic materials.
• Do not use damaged or poorly made envelopes.
• Be sure the seam at both ends of the envelope extends all the way to the
corner of the envelope.
1 Acceptable
2 Unacceptable
• Envelopes with a peel-off adhesive strip or with more than one flap that
folds over to seal must use adhesives compatible with the machine’s fusing
temperature for 0.1 second about 170°C (338 °F). The extra flaps and strips
might cause wrinkling, creasing, or jams, and may even damage the fuser
unit.
• For the best print quality, position margins no closer than 15 mm from the
edges of the envelope.
• Avoid printing over the area where the envelope’s seams meet.
Transparency
To avoid damaging the machine, use only transparencies designed for use in
laser printers.
• Must withstand the machine’s fusing temperature.
• Place them on a flat surface after removing them from the machine.
• Do not leave unused transparencies in the paper tray for long. Dust and dirt
may accumulate on them, resulting in spotty printing.
• To avoid smudging caused by fingerprints, handle them carefully.
• To avoid fading, do not expose printed transparencies to prolonged
sunlight.
• Ensure that transparencies are not wrinkled, curled, or have any torn edges.
Media and tray
44
2. Menu Overview and Basic Setup
• Do not use transparencies that separate from the backing sheet.
• To prevent transparencies from sticking to each other, do not let the printed
sheets stack up as they are being printed out.
• Recommended media: Transparency for a color laser printer by Xerox, such
as 3R 91331(A4), 3R 2780 (Letter).
Labels
To avoid damaging the machine, use only labels designed for use in laser
printers.
• When selecting labels, consider the following factors:
-Adhesives: Should be stable at your machine’s fusing temperature.
Check your machine’s specifications to view the fusing temperature
(about 170°C (338°F)).
-Arrangement: Only use labels with no exposed backing between them.
Labels can peel off sheets that have spaces between the labels, causing
serious jams.
-Curl: Must lie flat with no more than 13 mm of curl in any direction.
Media and tray
45
2. Menu Overview and Basic Setup
-Condition: Do not use labels with wrinkles, bubbles, or other
indications of separation.
• Make sure that there is no exposed adhesive material between labels.
Exposed areas can cause labels to peel off during printing, which can cause
paper jams. Exposed adhesive can also cause damage to machine
components.
• Do not run a sheet of labels through the machine more than once. The
adhesive backing is designed for only a single pass through the machine.
• Do not use labels that are separating from the backing sheet or are wrinkled,
bubbled, or otherwise damaged.
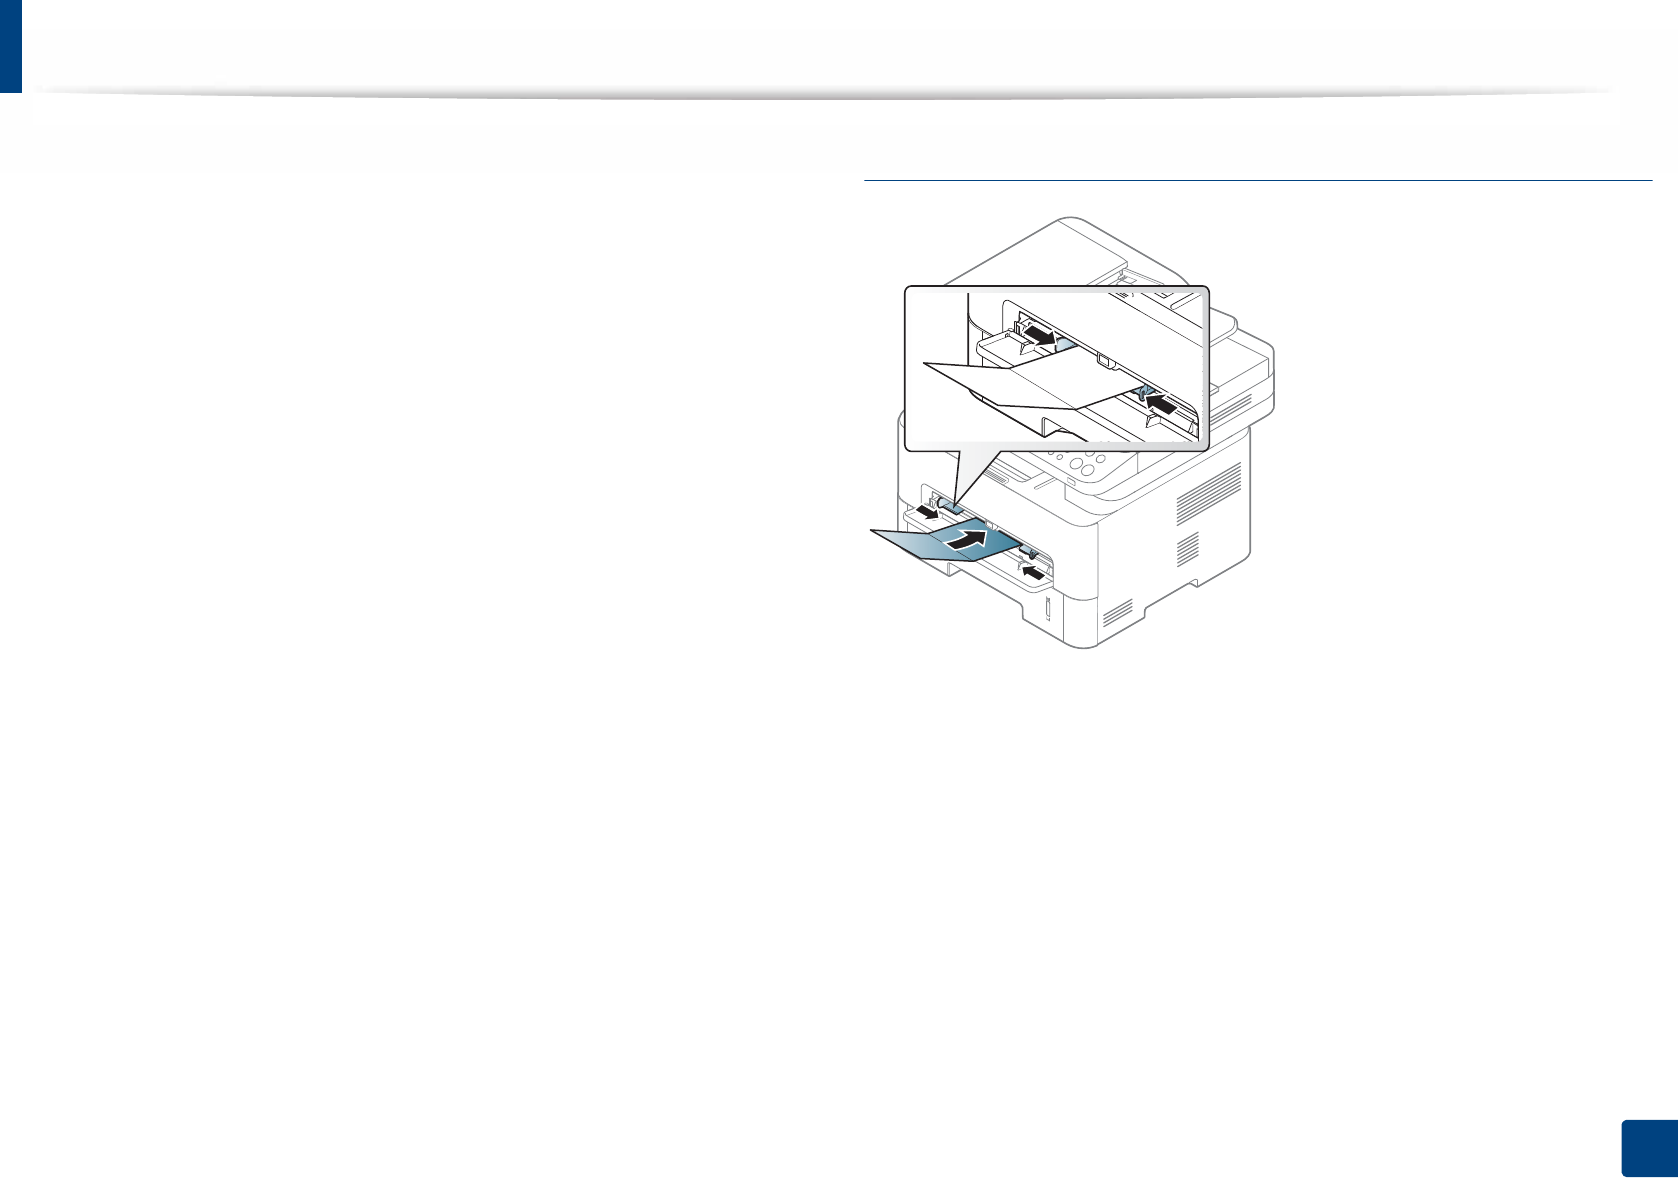
Card stock/ Custom-sized paper
• In the software application, set the margins to at least 6.4 mm (0.25 inches)
away from the edges of the material.
Media and tray
46
2. Menu Overview and Basic Setup
Preprinted paper
When loading preprinted paper, the printed side should be facing up with an
uncurled edge at the front. If you experience problems with paper feeding, turn
the paper around. Note that print quality is not guaranteed.
• Must be printed with heat-resistant ink that will not melt, vaporize, or
release hazardous emissions when subjected to the machine’s fusing
temperature for 0.1 second (about 170°C (338°F)).
• Preprinted paper ink must be non-flammable and should not adversely
affect machine rollers.
• Before you load preprinted paper, verify that the ink on the paper is dry.
During the fusing process, wet ink can come off preprinted paper, reducing
print quality.
6
Setting the paper size and type
After loading paper in the paper tray, set the paper size and type using the
control panel buttons.
The paper setting in the machine and driver should match to print without a
paper mismatch error.
To change the paper setting set in the machine, from the Samsung Easy Printer
Manager select (Switch to advanced mode) > Device Settings.
Or if your machine supports a display screen, you can set it using the (Menu)
button on the control panel.
Then, set the paper type from the Printing preferences window > Paper tab >
Paper Type (see "Opening printing preferences" on page 53).
It may be necessary to press OK to navigate to lower-level menus for some
models.
1Select (Menu) > System Setup > Paper Setup > Paper Size or
Paper Type on the control panel.
2 Select the tray and the option you want.
3 Press OK to save the selection.
Media and tray
47
2. Menu Overview and Basic Setup
• If you want to use special-sized paper such as billing paper, select the
Paper tab > Size > Edit... and set Custom Paper Size Settings in the
Printing Preferences (see "Opening printing preferences" on page 53).
7
Using the output support
The surface of the output tray may become hot if you print a large number
of pages at one. Make sure that you do not touch the surface, and do not
allow children near it.
The printed pages stack on the output support, and the output support will help
the printed pages to align. Unfold the output support.
8
Preparing originals
• Do not load paper smaller than 142 x 148 mm (5.6 x 5.8 inches) or larger than
216 x 356 mm (8.5 x 14 inches).
• Do not attempt to load the following s of paper, in order to prevent paper
jam, low print quality and machine damage.
- Carbon-paper or carbon-backed paper
- Coated paper
- Onion skin or thin paper
- Wrinkled or creased paper
- Curled or rolled paper
- Torn paper
• Remove all staples and paper clips before loading.
• Make sure any glue, ink, or correction fluid on the paper is completely dry
before loading.
• Do not load originals that include different sizes or weights of paper.
• Do not load booklets, pamphlets, transparencies, or documents with other
unusual characteristics.
2
1
Media and tray
48
2. Menu Overview and Basic Setup
9
Loading originals
You can use the scanner glass or the document feeder to load an original for
copying, scanning, and sending a fax.
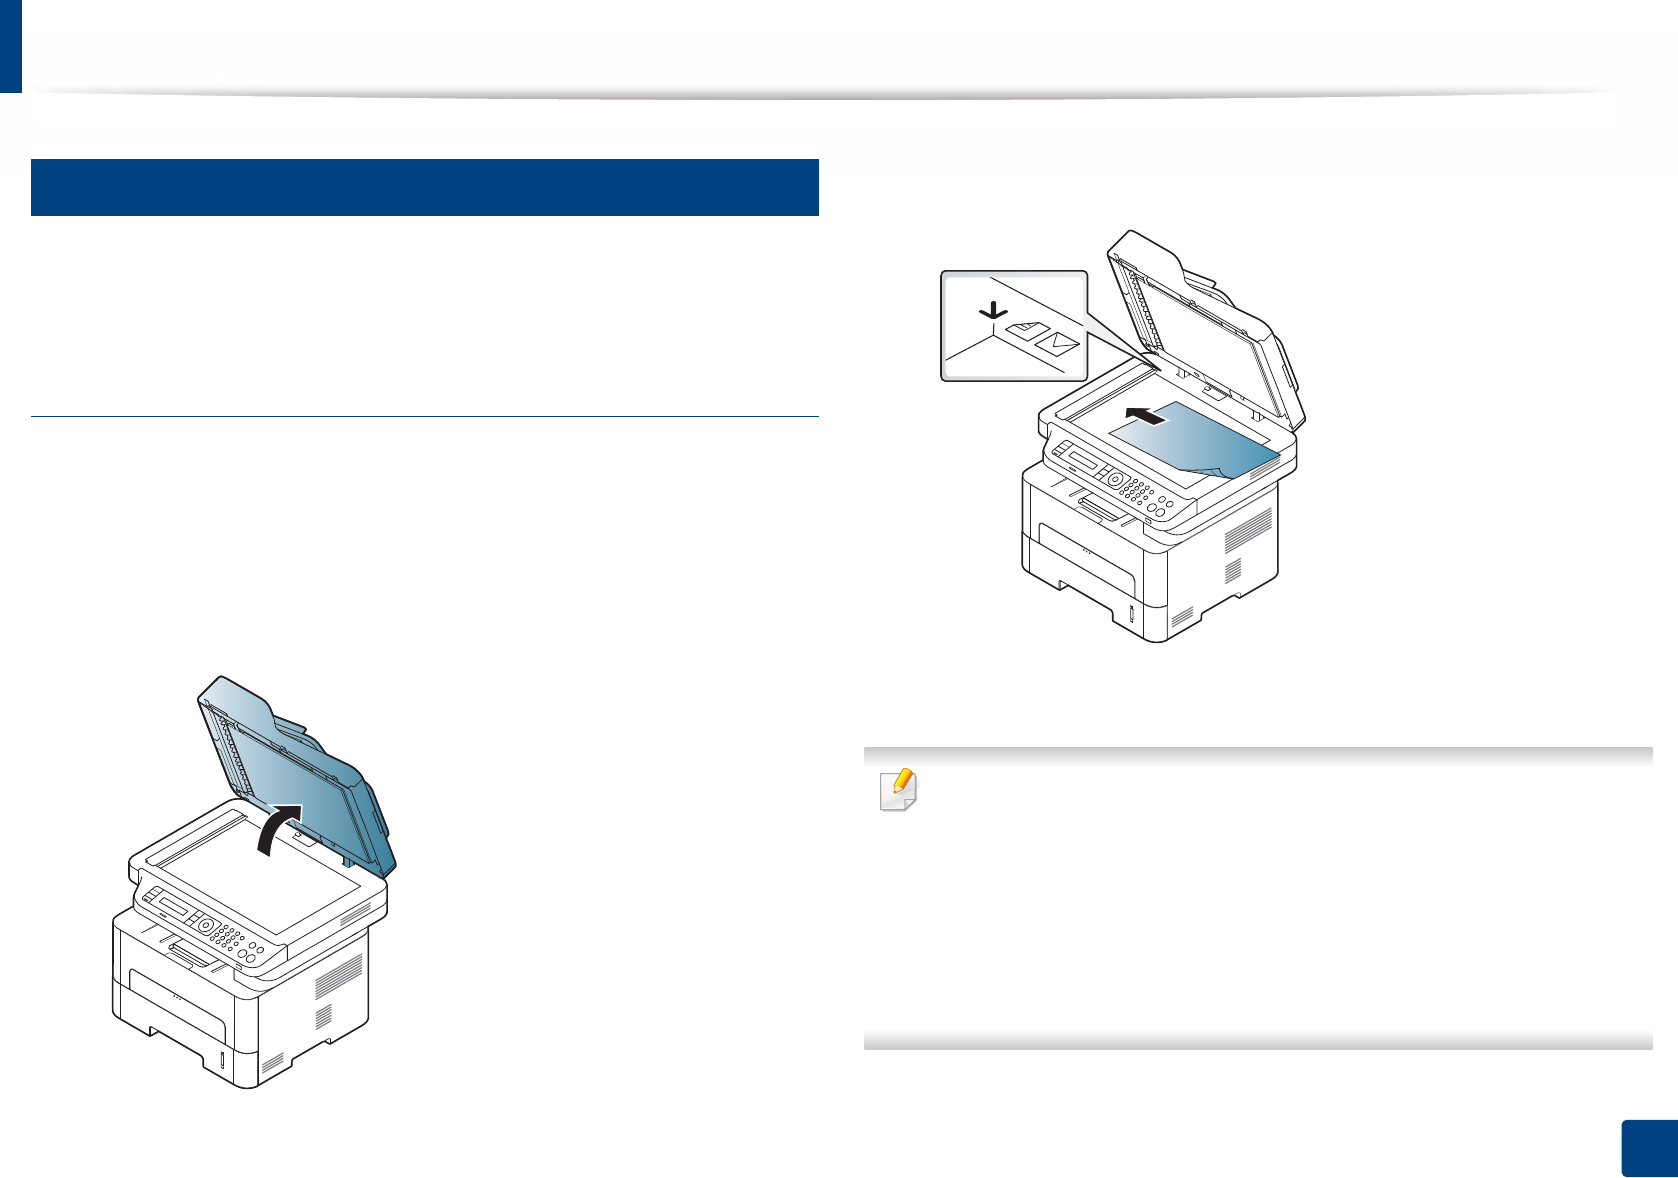
On the scanner glass
Using the scanner glass, you can copy or scan originals. You can get the best
scan quality, especially for colored or gray-scaled images. Make sure that no
originals are in the document feeder. If an original is detected in the document
feeder, the machine gives it priority over the original on the scanner glass.
1Lift and open the scanner lid.
2 Place the original face down on the scanner glass. Align it with the
registration guide at the top left corner of the glass.
3 Close the scanner lid.
• Leaving the scanner lid open while copying may affect copy quality and
toner consumption.
• Dust on the scanner glass may cause black spots on the printout. Always
keep it clean (see "Cleaning the machine" on page 81).
• If you are copying a page from a book or magazine, lift the scanner lid
until its hinges are caught by the stopper and then close the lid. If the
book or magazine is thicker than 30 mm, start copying with the scanner
lid open.
Media and tray
49
2. Menu Overview and Basic Setup
• Be careful not to break the scanner glass. You may get hurt.
• Do not put hands while closing the scanner lid. The scanner lid may fall
on your hands and get hurt.
• Do not look into the light from inside of the scanner while copying or
scanning. It is harmful to eyes.
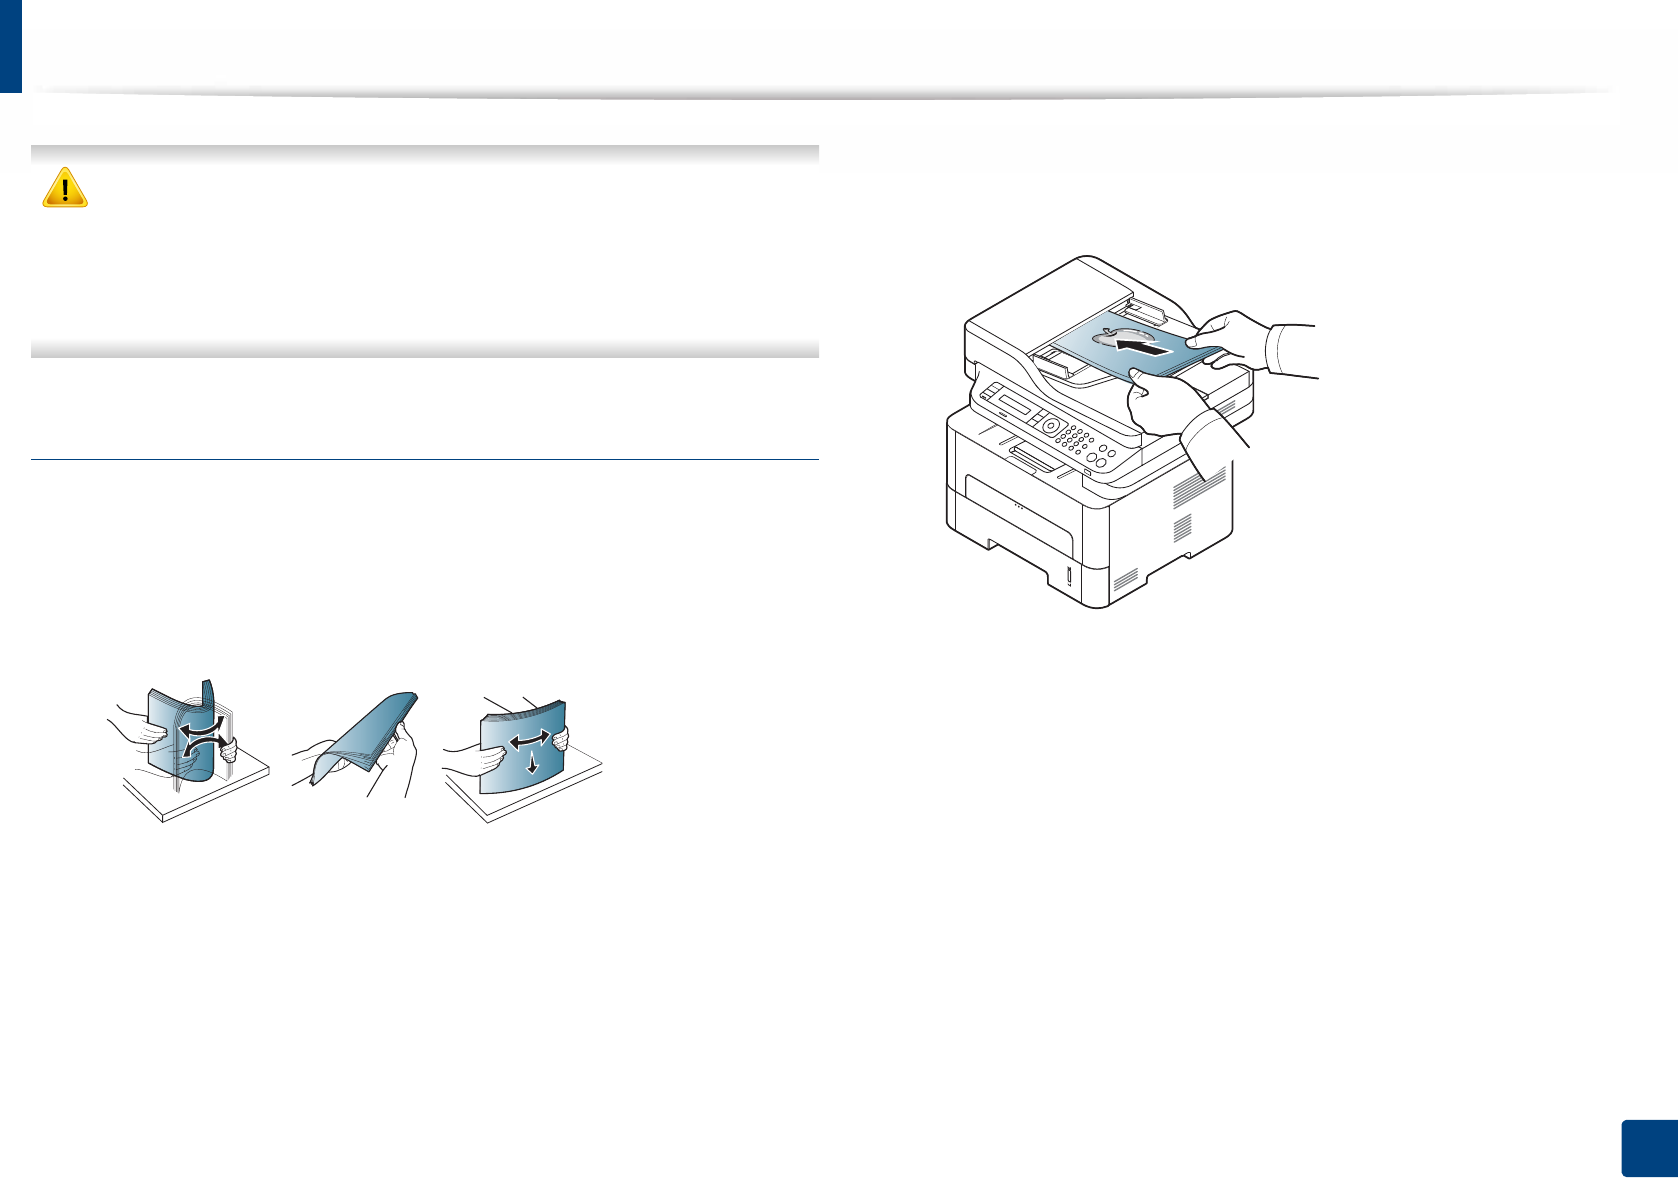
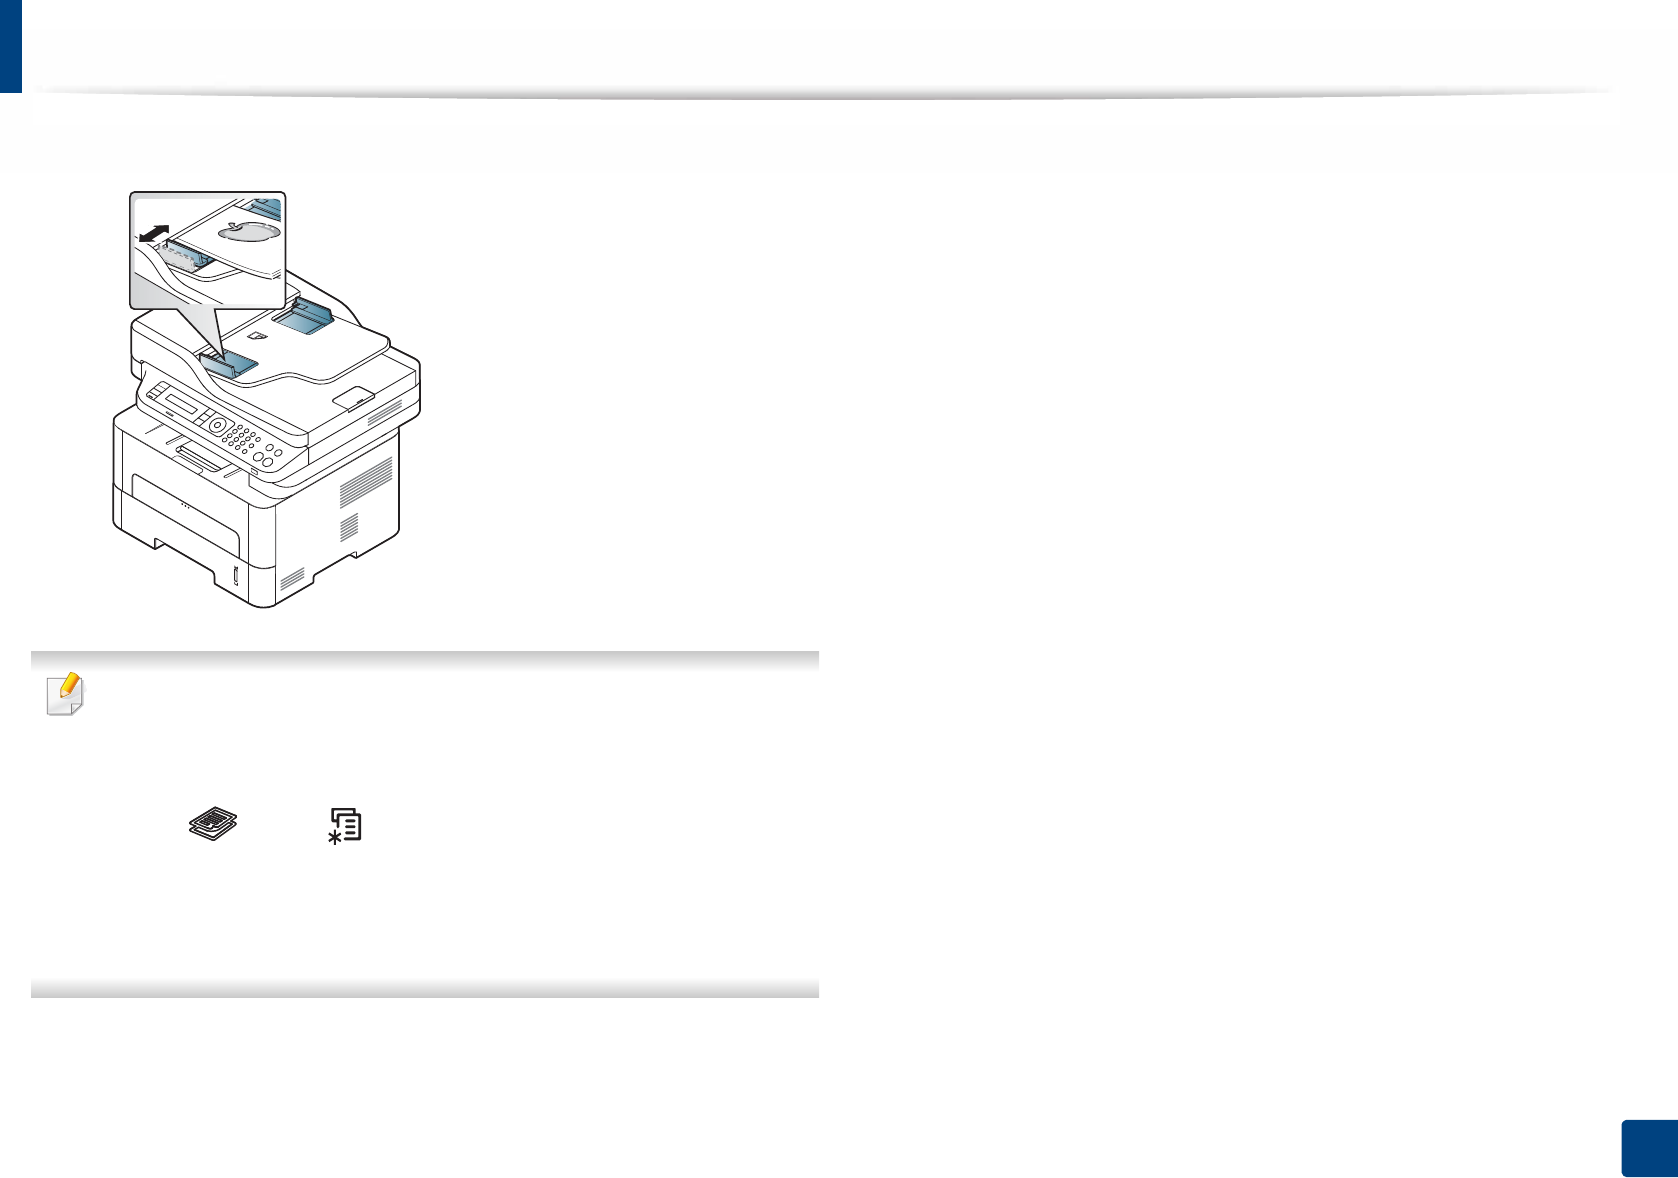
In the document feeder
Using the document feeder, you can load up to 40 sheets of paper (80 g/m2, 21
lbs bond) for one job.
1Flex or fan the edge of the paper stack to separate the pages before
loading originals.
2 Load the original face up into the document feeder input tray. Make sure
that the bottom of the original stack matches the paper size marked on
the document input tray.
Media and tray
50
2. Menu Overview and Basic Setup
3 Adjust the document feeder width guides to the paper size.
• Dust on the document feeder glass may cause black lines on the
printout. Always keep the glass clean (see "Cleaning the machine" on
page 81).
• To print on both sides of the paper using the ADF, from the control panel
press (Copy) > (Menu) > Copy Feature > Duplex > 1 -> 2
Sided or 1 -> 2 Sided Rot. and print on one side of the paper, then reload
the sheet to print on the other side.
Duplex printing might not be available for some models (see "Features
by model" on page 7).