Samsung Electronics Co SLM3065FW Multi Function Printer User Manual
Samsung Electronics Co Ltd Multi Function Printer
Contents
Users Manual Part 11

Fax features
251
4. Special Features
Forward options may not be available depending on model or optional
goods (see "Variety feature" on page 9).
3 Enter the destination fax number and press OK.
4 Press (Stop/Clear) to return to ready mode.
Subsequent sent faxes will be forwarded to the specified fax machine.
32
Forwarding a received fax
You can set the machine to forward the received fax to other destination by a fax
or a PC. If you are out of office but have to receive the fax, this feature may be
useful.
Though you sent or received a color fax, the data is forwarded in grayscale.
1Press (fax) > (Menu) > Fax Feature > Rcv. Forward > Forward
to Fax, or Forward to PC > On on the control panel.
Forward options may not be available depending on model or optional
goods (see "Variety feature" on page 9).
2 To set the machine to print out a fax when fax forwarding has been
completed, select Forward & Print.
3 Enter the destination fax number and press OK.
4 Enter the starting tim and ending time, then press OK.
5 Press (Stop/Clear) to return to ready mode.
Subsequent sent faxes will be forwarded to the specified fax machine.
Fax features
252
4. Special Features
33
Changing the receive modes
1Press (fax) > (Menu) > Fax Setup > Receiving > Receive Mode
on the control panel.
2 Select the option you want.
•Fax: Answers an incoming fax call and immediately goes into the fax
reception mode.
•Tel: Receives a fax by pressing (On Hook Dial) and then
(Start)
•Ans/Fax: Is for when an answering machine attached to your
machine. Your machine answers an incoming call, and the caller can
leave a message on the answering machine. If the fax machine
senses a fax tone on the line, the machine automatically switches to
Fax mode to receive the fax.
To use the Ans/Fax mode, attach an answering machine to the EXT socket
on the back of your machine.
•DRPD: you can receive a call using the Distinctive Ring Pattern
Detection (DRPD) feature. Distinctive Ring is a telephone company
service which enables an user to use a single telephone line to
answer several different telephone numbers. For further details, see
"Receiving faxes using DRPD mode" on page 253.
This setting may not be available depending on your country.
3 Press OK.
4 Press (Stop/Clear) to return to ready mode.
34
Receiving manually in Tel mode
You can receive a fax call by pressing (On Hook Dial) button and then
pressing (Start) when you hear a fax tone.
35
Receiving in Answering Machine/Fax mode
To use this mode, you must attach an answering machine to the EXT socket on
the back of your machine. If the caller leaves a message, the answering machine
stores the message. If your machine detects a fax tone on the line, it
automatically starts to receive the fax.

Fax features
253
4. Special Features
• If you have set your machine to this mode and your answering machine
is switched off, or no answering machine is connected to EXT socket,
your machine automatically goes into Fax mode after a predefined
number of rings.
• If the answering machine has a user-selectable ring counter, set the
machine to answer incoming calls within 1 ring.
• If the machine is in Tel mode, disconnect or switch off the answering
machine with the fax machine. Otherwise, the outgoing message from
the answering machine will interrupt your phone conversation.
36
Receiving faxes with an extension telephone
When you are using an extension telephone connected to the EXT socket, you
can receive a fax from someone you are talking to on the extension telephone,
without going to the fax machine.
When you receive a call on the extension phone and hear fax tones, press the
keys *9* on the extension phone. The machine receives the fax.
*9* is the remote receive code preset at the factory. The first and the last
asterisks are fixed, but you can change the middle number to whatever you
want.
While you are talking over the telephone connected to the EXT socket, copy
and scan features are not available.
37
Receiving faxes using DRPD mode
Distinctive Ring is a telephone company service which enables an user to use a
single telephone line to answer several different telephone numbers. This
feature is often used by answering services who answer telephones for many
different clients and need to know which number someone is calling in on to
properly answer the phone.
1Select (fax) > (Menu) > Fax Setup > Receiving > DRPD >
Waiting Ring on the control panel.
2 Call your fax number from another telephone.
3 When your machine begins to ring, do not answer the call. The machine
requires several rings to learn the pattern.
When the machine completes learning, the display shows Completed
DRPD Setup. If the DRPD setup fails, Error DRPD Ring appears.
4 Press OK when DRPD appears and start over from step 2.
• DRPD must be set up again if you re-assign your fax number, or connect
the machine to another telephone line.
• After DRPD has been set up, call your fax number again to verify that the
machine answers with a fax tone. Then have a call placed to a different
number assigned to that same line to be sure the call is forwarded to the
extension telephone or answering machine plugged into the EXT socket.
Fax features
254
4. Special Features
38
Receiving in secure receiving mode
This feature may not be available depending on model or optional goods
(see "Features by model" on page 7).
You may need to prevent your received faxes from being accessed by
unauthorized people. Turn on secure receiving mode, then all incoming faxes
go into memory. You can print the incoming faxes by entering the password.
To use the secure receiving mode, activate the menu from (fax) >
(Menu) > Fax Feature > Secure Receive on the control panel.
Printing received faxes
1Select (fax) > (Menu) > Fax Feature > Secure Receive > Print
on the control panel.
2 Enter a four-digit password and press OK.
3 The machine prints all of the faxes stored in memory.
39
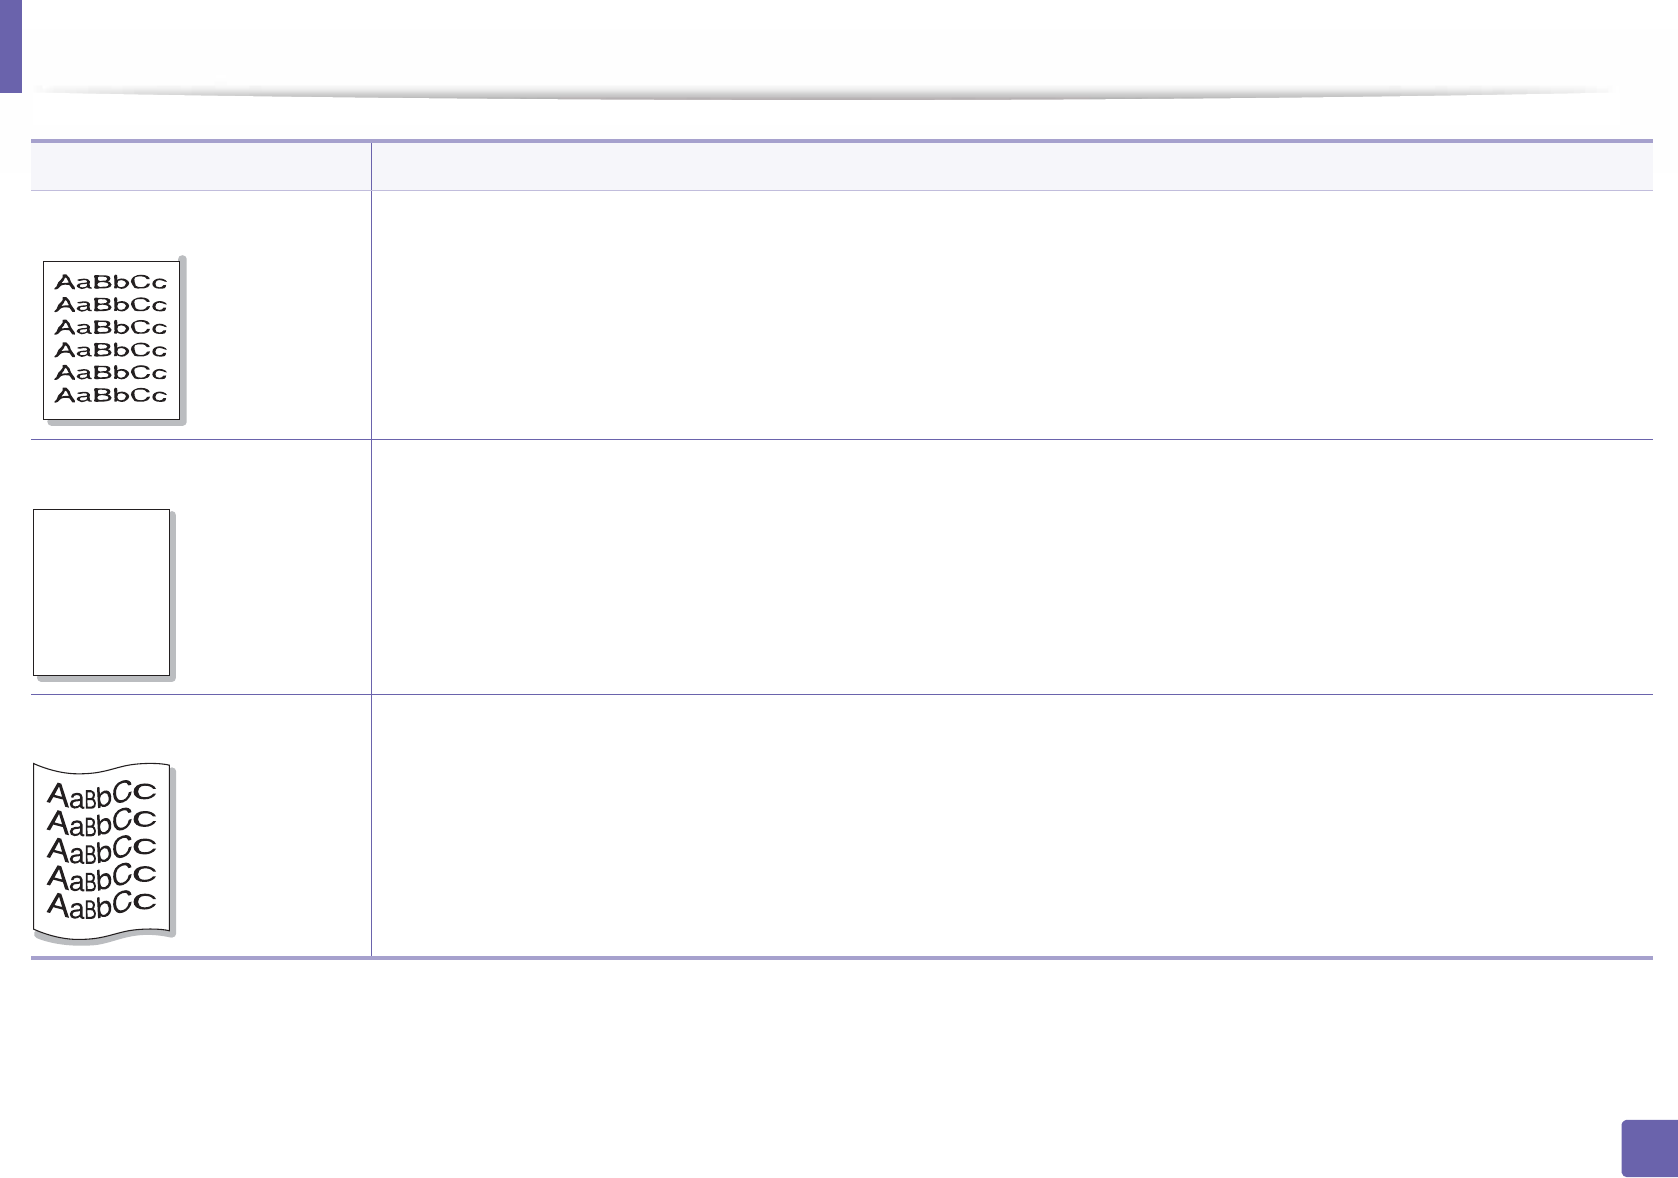
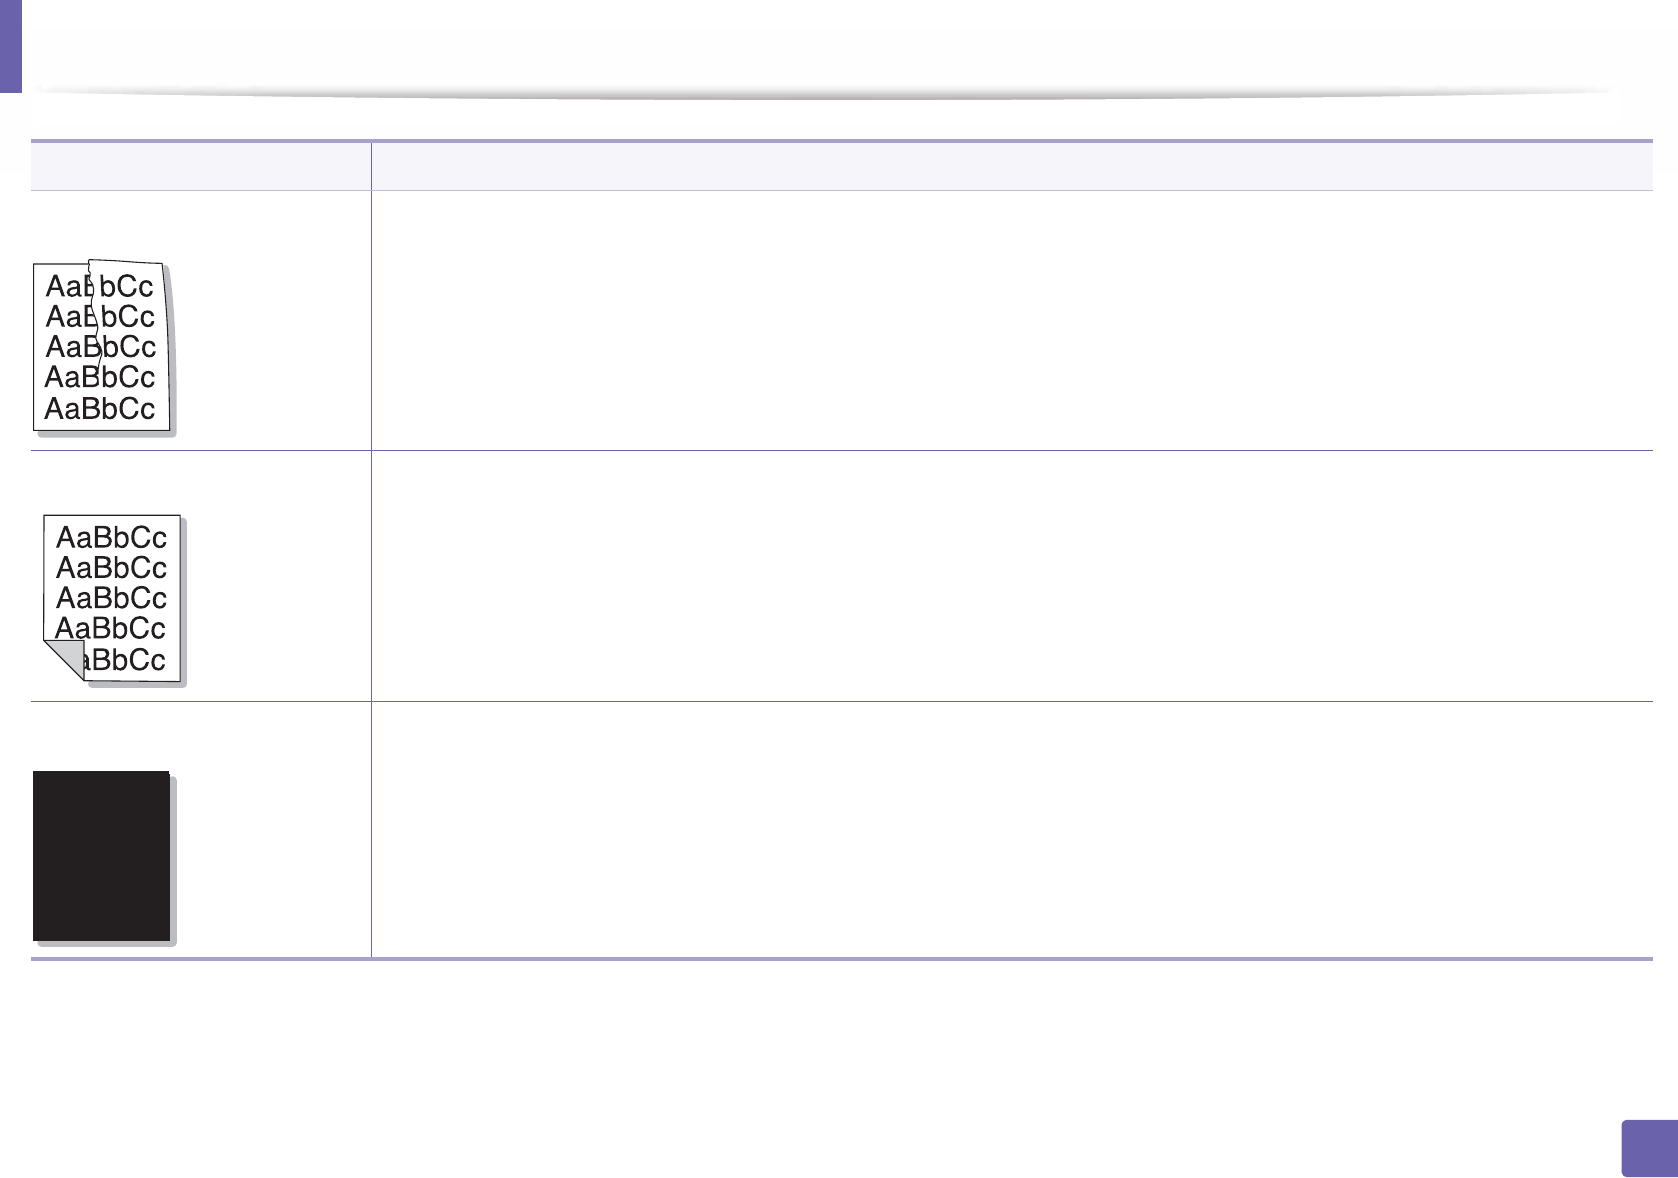
Printing faxes on both sides of the paper
• Some menus may not appear on the display depending on options or
models. If so, it is not applicable to your machine.
• This feature may not be available depending on model or optional goods
(see "Features by model" on page 7).
1Place a single document face down on the document glass, or load the
documents face up into the document feeder.
2 Press (fax) > (Menu) > Fax Setup > Receiving > Duplex Print
on the control panel.
•Off: Prints in Normal mode.
•Long Edge: Prints pages to be read like a book.
•Short Edge: Prints pages to be read by flipping like a note pad.
2
5
3

Fax features
255
4. Special Features
3 Press OK.
4 Press (Stop/Clear) to return to ready mode.
40
Receiving faxes in memory
Since your machine is a multi-tasking device, it can receive faxes while you are
making copies or printing. If you receive a fax while you are copying or printing,
your machine stores incoming faxes in its memory. Then, as soon as you finish
copying or printing, the machine automatically prints the fax.
If fax is received and being printed, other copy and print jobs cannot be
processed at the same time.
41
Printing sent fax report automatically
You can set the machine to print a report with detailed information about the
previous 50 communication operations, including time and dates.
1Press (fax) > (Menu) > System Setup > Report > Fax Sent on
the control panel.
2 Press (Stop/Clear) to return to ready mode.

5. Useful Management
Tools
This chapter introduces management tools provided to help you make full use of your machine.
• Accessing management tools 257
• Easy Capture Manager 258
• Samsung AnyWeb Print 259
• Easy Eco Driver 260
• Using SyncThru™ Web Service 261
• Using Samsung Easy Document Creator 264
• Using Samsung Easy Printer Manager 265
• Using Samsung Printer Status 268
• Using Samsung Printer Experience 270

257
5. Useful Management Tools
Accessing management tools
Samsung provides a variety of management tools for Samsung printers.
1Make sure that the machine is connected to your computer and powered on.
2 From the Start menu, select Programs or All Programs.
• For Windows 8, from the Charms, select Search > Apps.
3 Find Samsung Printers.
4 Under Samsung Printers, you can see installed management tools.
5 Click the management tool you want to use.
• After installing the driver, for some management tools, you can access them directly from the Start menu > Programs or All Programs.
• For Windows 8, after installing the driver, for some management tools, you can access them directly from the Start screen by clicking on the corresponding tile.

258
5. Useful Management Tools
Easy Capture Manager
• Available for Windows OS users only.
• This feature may not be available depending on model or optional goods (see "Software" on page 7).
Capture your screen and launch Easy Capture Manager by simply pressing the Print Screen key. Now you can easily print your captured screen as captured or edited.

259
5. Useful Management Tools
Samsung AnyWeb Print
• This feature may not be available depending on model or optional goods (see "Software" on page 7).
• Available for Windows OS users only.
This tool helps you screen-capture, preview, scrap, and print Windows Internet Explorer pages more easily than when you use an ordinary program. Download the
software from the Samsung website then unpack and install it: (http://www. samsung.com > find your product > Support or Downloads).

260
5. Useful Management Tools
Easy Eco Driver
• This feature may not be available depending on model or optional goods (see "Software" on page 7).
• Available for Windows OS users only (see "Software" on page 7).
With the Easy Eco Driver, you can apply Eco features to save paper and toner before printing.
Easy Eco Driver also allows you simple editing such as removing images and texts, and more. You can save frequently used settings as a preset.
How to use:
1 Open a document to print.
2 Open printing preference window (see "Opening printing preferences" on page 53).
3 From the Favorites tab, select Eco Printing Preview.
4 Click OK > Print in the window.
A preview window appears.
5 Select the options you want to apply to the document.
You can see the preview of the applied features.
6 Click Print.
If you want to run Easy Eco Driver every time you print, check Start Easy Eco Driver before printing job checkbox in the Basic tab of the printing preference
window.
261
5. Useful Management Tools
Using SyncThru™ Web Service
• Internet Explorer 6.0 or higher is the minimum requirement for
SyncThru™ Web Service.
•SyncThru™ Web Service explanation in this user’s guide may differ from
your machine depending on its options or models.
• Network model only (see "Software" on page 7).
1
Accessing SyncThru™ Web Service
1Access a web browser, such as Internet Explorer, from Windows.
Enter the machine IP address of your printer (http://xxx.xxx.xxx.xxx) in
the address field and press the Enter key or click Go.
2 Your machine’s embedded website opens.
Logging into SyncThru™ Web Service
Before configuring options in SyncThru™ Web Service, you need to log-in as an
administrator. You can still use SyncThru™ Web Service without logging in but
you won’t have access to Settings tab and Security tab.
1Click Login on the upper right of the SyncThru™ Web Service website.
2 Type in the ID and Password then click Login.
•ID: admin
•Password: sec00000
2
SyncThru™ Web Service overview
Some tabs may not appear depending on your model.
Information tab
This tab gives you general information about your machine. You can check
things, such as remaining amount of toner. You can also print reports, such as an
error report.
•Active Alerts: Shows the alerts that have occurred in the machine and their
severity.
•Supplies: Shows how many pages are printed and amount of toner left in
the cartridge.

Using SyncThru™ Web Service
262
5. Useful Management Tools
•Usage Counters: Shows the usage count by print types: simplex and
duplex.
•Current Settings: Shows the machine’s and network’s information.
•Print information: Prints reports such as system related reports, e-mail
address, and font reports.
Settings tab
This tab allows you to set configurations provided by your machine and
network. You need to log-in as an administrator to view this tab.
•Machine Settings tab: Sets options provided by your machine.
•Network Settings tab: Shows options for the network environment. Sets
options such as TCP/IP and network protocols.
Security tab
This tab allows you to set system and network security information. You need to
log-in as an administrator to view this tab.
•System Security: Sets the system administrator’s information and also
enables or disables machine features.
•Network Security: Sets settings for IPSec, and IPv4/IPv6 filtering.
Maintenance tab
This tab allows you to maintain your machine by upgrading firmware and
setting contact information for sending emails. You can also connect to
Samsung website or download drivers by selecting the Link menu.
•Firmware Upgrade: Upgrade your machine’s firmware.
•Contact Information: Shows the contact information.
•Link: Shows links to useful sites where you can download or check
information.
3
E-mail notification setup
You can receive emails about your machine’s status by setting this option. By
setting information such as IP address, host name, e-mail address and SMTP
server information, the machine status (toner cartridge shortage or machine
error) will be sent to a certain person's e-mail automatically. This option may be
used more frequently by a machine administrator.
1Start a web browser, such as Internet Explorer, from Windows.
Enter the machine IP address (http://xxx.xxx.xxx.xxx) in the address field
and press the Enter key or click Go.
2 Your machine’s embedded website opens.
3 From the Settings tab, select Machine Settings > E-mail Notification.

Using SyncThru™ Web Service
263
5. Useful Management Tools
If you have not configured outgoing server environment, go to Settings >
Network Settings > Outgoing Mail Server(SMTP) to configure network
environment before setting e-mail notification.
4 Select Enable check box to use the E-mail Notification.
5 Click Add button to add e-mail notification user.
Set the recipient name and e-mail address(es) with notification items
you want to receive an alert for.
6 Click Apply.
If the firewall is activated, the e-mail may not be sent successfully. In that
case, contact a network administrator.
4
Setting the system administrator’s information
This setting is necessary for using the e-mail notification option.
1Start a web browser, such as Internet Explorer, from Windows.
Enter the machine IP address (http://xxx.xxx.xxx.xxx) in the address field
and press the Enter key or click Go.
2 Your machine’s embedded website opens.
3 From the Security tab, select System Security > System Administrator
4 Enter the name of the administrator, phone number, location, and email
address.
5 Click Apply.

264
5. Useful Management Tools
Using Samsung Easy Document Creator
Samsung Easy Document Creator is an application to help users scan, compile,
and save documents in multiple formats, including .epub format. These
documents can be shared via social networking sites or fax. Whether you’re a
student needing to organize research from the library or a stay-at-home mom
sharing scanned pictures from last year’s birthday party, Samsung Easy
Document Creator will provide you with the necessary tools.
The Samsung Easy Document Creator provides features below:
•Image Scanning: Use for scanning single or mulitple pictures.
•Document Scanning: Use for scanning documents with text or text and
images.
•Text Converting: Use for scanning documents that need to be saved in an
editable text format.
•Book Scanning: Use for scanning books with the flatbed scanner.
•SNS Upload: Provides an easy and quick way to upload scanned image or
existing images to a variety of social networking sites (SNS).
•E-Book Conversion: Provides the ability to scan multiple documents in as
one e-book or convert existing files into an e-book format.
•Plug-in: Scan, fax, and convert to E-Book directly from the Microsoft Office
program.
Click the Help ( ) button from the window and click on any option you
want to know about.
265
5. Useful Management Tools
Using Samsung Easy Printer Manager
• This feature may not be available depending on model or optional goods
(see "Software" on page 7).
• Available for Windows and Mac OS users only (see "Software" on page 7).
• For Windows, Internet Explorer 6.0 or higher is the minimum
requirement for Samsung Easy Printer Manager.
Samsung Easy Printer Manager is an application that combines Samsung
machine settings into one location. Samsung Easy Printer Manager combines
device settings as well as printing environments, settings/actions and
launching. All of these features provide a gateway to conveniently use your
Samsung machine. Samsung Easy Printer Manager provides two different user
interfaces for the user to choose from: the basic user interface and the advanced
user interface. Switching between the two interfaces is easy: just click a button.
5
Understanding Samsung Easy Printer Manager
To open the program:
For Windows,
Select Start > Programs or All Programs > Samsung Printers > Samsung
Easy Printer Manager > Samsung Easy Printer Manager.
• For Windows 8, from Charms, select Search > Apps> Samsung Printers >
Samsung Easy Printer Manager > Samsung Easy Printer Manager.
For Mac,
Open the Applications folder > Samsung folder > Samsung Easy Printer
Manager.
The Samsung Easy Printer Manager interface is comprised of various basic
sections as described in the table that follows:
The screenshot may differ depending on the operating system you are
using.
1
Printer list The Printer List displays printers installed on your
computer and network printers added by network
discovery (Windows only).

Using Samsung Easy Printer Manager
266
5. Useful Management Tools
Select the Help menu or click the button from the window and click on
any option you want to know about.
6
Advanced settings user interface overview
The advanced user interface is intended to be used by the person responsible
for managing the network and machines.
2
Printer
information
This area gives you general information about your
machine. You can check information, such as the machine’s
model name, IP address (or Port name), and machine
status.
You can view the online User’s Guide.
Troubleshooting button: This button opens the
Troubleshooting Guide when an error occurs.
You can directly open the necessary section in the
user’s guide.
3
Application
information
Includes links for changing to the advanced settings,
preference, help, and about.
The button is used to change the user
interface to the advanced settings user interface
(see "Advanced settings user interface overview"
on page 266).
4
Quick links Displays Quick links to machine specific functions. This
section also includes links to applications in the advanced
settings.
If you connect your machine to a network, the
SyncThru™ Web Service icon is enabled.
5
Contents area Displays information about the selected machine,
remaining toner level, and paper. The information will vary
based on the machine selected. Some machines do not
have this feature.
6
Order supplies Click on the Order button from the supply ordering
window. You can order replacement toner cartridge(s)
from online.

Using Samsung Easy Printer Manager
267
5. Useful Management Tools
Some menus may not appear in the display depending on options or
models. If so, it is not applicable to your machine.
Device Settings
You can configure various machine settings such as machine setup, paper,
layout, emulation, network, and print information.
Scan to PC Settings
This menu includes settings to create or delete scan to PC profiles.
•Scan Activation: Determines whether or not scanning is enabled on the
device.
•Basic tab: Contains general scan and device settings.
•Image tab: Contains settings related to image altering.
Fax to PC Settings
This menu includes settings related to the basic fax functionality of the selected
device.
•Disable: If Disable is On, incoming faxes will not be received on this device.
•Enable Fax Receiving from Device: Enables faxing on the device and
allows more options to be set.
Alert Settings (Windows only)
This menu includes settings related to error alerting.
•Printer Alert: Provides settings related to when alerts will be received.
•Email Alert: Provides options relating to receiving alerts via email.
•Alert History: Provides a history of device and toner related alerts.
Job Accounting
Provides querying of quota information of the specified job accounting user.
This quota information can be created and applied to devices by job accounting
software such as SyncThru™ or CounThru™ admin software.

268
5. Useful Management Tools
Using Samsung Printer Status
The Samsung Printer Status is a program that monitors and informs you of the
machine status.
• The Samsung Printer Status window and its contents shown in this user’s
guide may differ depending on the machine or operating system in use.
• Check the operating system(s) that are compatible with your machine
(see "Specifications" on page 110).
• Available for Windows OS users only (see "Software" on page 7).
7
Samsung Printer Status overview
If an error occurs while operating, you can check the error from the Samsung
Printer Status. Samsung Printer Status is installed automatically when you install
the machine software.
You can also launch Samsung Printer Status manually. Go to the Printing
Preferences, click the Basic tab > Printer Status button.
These icons appear on the Windows task bar:
Icon Mean Description
Normal The machine is in ready mode and experiencing no
errors or warnings.
Warning The machine is in a state where an error might occur in
the future. For example, it might be in toner low status,
which may lead to toner empty status.
Error The machine has at least one error.
1
Toner Level You can view the level of toner remaining in each
toner cartridge. The machine and the number of
toner cartridge(s) shown in the above window may
differ depending on the machine in use. Some
machines do not have this feature.
2Option You can set printing job alert related settings.
Using Samsung Printer Status
269
5. Useful Management Tools
3Order Supplies You can order replacement toner cartridge(s) from
online.
4
User’s Guide You can view the online User’s Guide.
This button opens the Troubleshooting
Guide when an error occurs. You can directly
open the troubleshooting section in the
user’s guide.
5Close Close the window.
270
5. Useful Management Tools
Using Samsung Printer Experience
Samsung Printer Experience is a Samsung application that combines
Samsung machine settings and machine management into one location. You
can set device settings, order supplies, open troubleshooting guides, visit
Samsung’s web site, and check connected machine information. This
application will be automatically downloaded from the Windows Store if the
machine is connected to a computer with an Internet connection.
8
Understanding the Samsung Printer Experience
To open the application,
From the Start screen, select the Samsung Printer Experience ()
tile.
The Samsung Printer Experience interface comprises various useful features as
described in the following table:
The screenshot may differ depending on the model you are using.
1
Printer
Information
This area gives you general information about your
machine. You can check information, such as the
machine’s status, location, IP address, and remaining
toner level.
1
26
3
4
5

Using Samsung Printer Experience
271
5. Useful Management Tools
9
Adding/Deleting Printers
If you do not have any printer added to the Samsung Printer Experience, or if
you want to add/delete a printer, follow the instructions below.
You can only add/delete network connected printers.
Adding a printer
1From the Charms, select Settings.
Or, right-click the Samsung Printer Experience page and select
Settings.
2 Select Add Printer
3 Select the printer you want to add.
You can see the added printer.
If you see mark, you can also click mark to add printers.
2User Guide You can view the online User’s Guide. You need to be
connected to the Internet to use this feature.
This button opens the Troubleshooting Guide
when an error occurs. You can directly open the
troubleshooting section in the user’s guide.
3
Order
Supplies
Click on this button to order replacement toner
cartridges online. You need to be connected to the
Internet to use this feature.
4Visit Samsung Links to Samsung printer website. You need to be
connected to the Internet to use this feature.
5
Printer Settings You can configure various machine settings such as
machine setup, paper, layout, emulation, networking,
and print information through SyncThru™ Web Service.
Your machine needs to be connected to a network. This
button will be disabled if your machine is connected via
USB cable.
6
Device List &
Latest Scanned
Image
The scan list displays devices that supports Samsung
Printer Experience. Under the device, you can see the
latest scanned images. Your machine needs to be
connected to a network to scan from here.
This section is for the users with multi-functional
printers.
Using Samsung Printer Experience
272
5. Useful Management Tools
Deleting a printer
1From the Charms, select Settings.
Or, right-click the Samsung Printer Experience page and select
Settings.
2 Select Remove Printer
3 Select the printer you want to delete.
4 Click Yes.
You can see that the deleted printer is removed from the screen.
10
Printing from Windows 8
This section explains common printing tasks from the Start screen.
Basic printing
1Open the document to print.
2 From the Charms, select Devices.
3 Select your printer from the list
4 Select the printer settings, such as the number of copies and orientation.
5 Click the Print button to start the print job.

Using Samsung Printer Experience
273
5. Useful Management Tools
Cancelling a print job
If the printing job is waiting in the print queue or print spooler, cancel the job as
follows:
• You can access this window by simply double-clicking the machine icon
( ) in the Windows task bar.
• You can also cancel the current job by pressing (Stop/Clear) button on
the control panel.
Opening more settings
The screen may appear somewhat different depending on the model or
options.
You can set up more printing parameters.
1Open the document you want to print.
2 From the Charms, select Devices.
3 Select your printer from the list
4 Click More settings.
Basic tab
Basic
This option allows you to choose the basic printing settings such as copies,
orientation, and document type.
Eco settings
This option allows you to choose multiple pages per side to save media.
Using Samsung Printer Experience
274
5. Useful Management Tools
Advanced tab
Paper settings
This option allows you to set the basic paper handling specifications.
Layout settings
This option allows you to set the various ways to layout your documents.
Security tab
Some features may not be available depending on the model or options. If
this tab is not shown or disabled, it means that these features are not
supported.
Job Accounting
This option allows you to print with the given permission.
Confidential Printing
This option is used for printing confidential documents. You need to enter a
password to print using it.
Using Samsung Printer Experience
275
5. Useful Management Tools
11
Scanning from Windows 8
This section is for the users with multi-functional printers.
Scanning with your machine lets you turn pictures and text into digital files that
can be stored on your computer.
Scanning from Samsung Printer Experience
The most frequently used printing menus are displayed for quick scanning.
1Place a single document face down on the document glass, or load the
documents face up into the document feeder.
2 Click the Samsung Printer Experience tile on the Start screen.
3 Click Scan ().
4 Set up the scanning parameters such as image type, document size, and
resolution.
5 Click Prescan ( )to check the image.
6 Adjust the prescanned image with scanning operation functions such as
rotate and mirror.
7 Click Scan ( )and save the image.
• When you place the originals in the ADF (or DADF), Prescan ( ) is not
available.
• You can skip step 5, if the Prescan option is selected.

6. Troubleshooting
This chapter gives helpful information for what to do if you encounter an error.
• Paper feeding problems 277
• Power and cable connecting problems 278
• Printing problems 279
• Printing quality problems 283
• Copying problems 291
• Scanning problems 292
• Faxing problems 294
• Operating system problems 296

277
6. Troubleshooting
Paper feeding problems
Condition Suggested solutions
Paper jams during printing. Clear the paper jam.
Paper sticks together. • Check the maximum paper capacity of the tray.
• Make sure that you are using the correct type of paper.
• Remove paper from the tray and flex or fan the paper.
• Humid conditions may cause some paper to stick together.
Multiple sheets of paper do not feed. Different types of paper may be stacked in the tray. Load paper of only one type, size, and weight.
Paper does not feed into the machine. • Remove any obstructions from inside the machine.
• Paper has not been loaded correctly. Remove paper from the tray and reload it correctly.
• There is too much paper in the tray. Remove excess paper from the tray.
• The paper is too thick. Use only paper that meets the specifications required by the machine.
The paper keeps jamming. • There is too much paper in the tray. Remove excess paper from the tray. If you are printing on special materials, use the
manual feeding in tray.
• An incorrect type of paper is being used. Use only paper that meets the specifications required by the machine.
• There may be debris inside the machine. Open the front cover and remove any debris.
Transparencies stick together in the paper
exit.
Use only transparencies specifically designed for laser printers. Remove each transparency as it exits from the machine.
Envelopes skew or fail to feed correctly. Ensure that the paper guides are against both sides of the envelopes.
278
6. Troubleshooting
Power and cable connecting problems
Condition Suggested solutions
The machine is not receiving power,
or the connection cable between the
computer and the machine is not
connected properly.
• Connect the machine to the electricity supply first. If the machine has a (Power/Wake Up) button on the control,
press it.
• Disconnect the machine’s cable and reconnect it.
279
6. Troubleshooting
Printing problems
Condition Possible cause Suggested solutions
The machine does not
print.
The machine is not receiving power. Connect the machine to the electricity supply first. If the machine has a (Power/
Wake Up) button on the control, press it.
The machine is not selected as the default
machine.
Select your machine as your default machine in Windows.
Check the machine for the following:
• The cover is not closed. Close the cover.
• Paper is jammed. Clear the paper jam (see "Clearing paper jams" on page 94).
• No paper is loaded. Load paper (see "Loading paper in the tray" on page 38).
• The toner cartridge is not installed. Install the toner cartridge (see "Replacing the toner cartridge" on page 75).
• Make sure the protect cover and sheets are removed from the toner cartridge (see "Replacing the toner cartridge" on page 75).
If a system error occurs, contact your service representative.
The connection cable between the computer and
the machine is not connected properly.
Disconnect the machine cable and reconnect it (see "Rear view" on page 20).
The connection cable between the computer and
the machine is defective.
If possible, attach the cable to another computer that is working properly and print a job.
You can also try using a different machine cable.
The port setting is incorrect. Check the Windows printer settings to make sure that the print job is sent to the correct
port. If the computer has more than one port, make sure that the machine is attached to
the correct one.

Printing problems
280
6. Troubleshooting
The machine does not
print.
The machine may be configured incorrectly. Check the Printing Preferences to ensure that all of the print settings are correct.
The printer driver may be incorrectly installed. Uninstall and reinstall the machine’s driver.
The machine is malfunctioning. Check the display message on the control panel to see if the machine is indicating a
system error. Contact a service representative.
The document size is so big that the hard disk
space of the computer is insufficient to access the
print job.
Get more hard disk space and print the document again.
The output tray is full. Once the paper is removed from the output tray, the machine resumes printing.
The machine selects print
materials from the wrong
paper source.
The paper option that was selected in the
Printing Preferences may be incorrect.
For many software applications, the paper source selection is found under the Paper tab
within the Printing Preferences (see "Opening printing preferences" on page 53).
Select the correct paper source. See the printer driver help screen (see "Using help" on
page 54).
A print job is extremely
slow.
The job may be very complex. Reduce the complexity of the page or try adjusting the print quality settings.
Half the page is blank. The page orientation setting may be incorrect. Change the page orientation in your application (see "Opening printing preferences" on
page 53). See the printer driver help screen (see "Using help" on page 54).
The paper size and the paper size settings do not
match.
Ensure that the paper size in the printer driver settings matches the paper in the tray.
Or, ensure that the paper size in the printer driver settings matches the paper selection
in the software application settings you use (see "Opening printing preferences" on
page 53).
The machine prints, but
the text is wrong,
garbled, or incomplete.
The machine cable is loose or defective. Disconnect the machine cable and reconnect. Try a print job that you have already
printed successfully. If possible, attach the cable and the machine to another computer
that you know works and try a print job. Finally, try a new machine cable.
Condition Possible cause Suggested solutions
Printing problems
281
6. Troubleshooting
The wrong printer driver was selected. Check the application’s printer selection menu to ensure that your machine is selected.
The software application is malfunctioning. Try printing a job from another application.
The operating system is malfunctioning. Exit Windows and reboot the computer. Turn the machine off and back on again.
Pages print, but they are
blank.
The toner cartridge is defective or out of toner. Redistribute the toner, if necessary.
If necessary, replace the toner cartridge.
• See "Redistributing toner" on page 73.
• See "Replacing the toner cartridge" on page 75.
The file may have blank pages. Check the file to ensure that it does not contain blank pages.
Some parts, such as the controller or the board,
may be defective.
Contact a service representative.
The machine does not
print PDF files correctly.
Some parts of graphics,
text, or illustrations are
missing.
Incompatibility between the PDF file and the
Acrobat products.
Printing the PDF file as an image may enable the file to print. Turn on Print As Image
from the Acrobat printing options.
It will take longer to print when you print a PDF file as an image.
The print quality of
photos is not good.
Images are not clear.
The resolution of the photo is very low. Reduce the photo size. If you increase the photo size in the software application, the
resolution will be reduced.
Before printing, the
machine emits vapor near
the output tray.
Using damp paper can cause vapor during
printing.
This is not a problem. Just keep printing.
Condition Possible cause Suggested solutions

Printing problems
282
6. Troubleshooting
The machine does not
print special-sized paper,
such as billing paper.
Paper size and paper size setting do not match. Set the correct paper size in the Custom in Paper tab in Printing Preferences (see
"Opening printing preferences" on page 53).
The printed billing paper
is curled.
The paper type setting does not match. Change the printer option and try again. Go to Printing Preferences, click Paper tab,
and set type to Thick (see "Opening printing preferences" on page 53).
Condition Possible cause Suggested solutions
283
6. Troubleshooting
Printing quality problems
If the inside of the machine is dirty or paper has been loaded improperly, there might be a reduction in print quality. See the table below to clear the problem.
Condition Suggested solutions
Light or faded print • If a vertical white streak or faded area appears on the page, the toner supply is low. Install a new toner cartridge (see "Replacing the
toner cartridge" on page 75).
• The paper may not meet paper specifications; for example, the paper may be too moist or rough.
• If the entire page is light, the print resolution setting is too low or the toner save mode is on. Adjust the print resolution and turn
the toner save mode off. See the help screen of the printer driver.
• A combination of faded or smeared defects may indicate that the toner cartridge needs cleaning. Clean the inside of your machine
(see "Cleaning the machine" on page 81).
• The surface of the LSU part inside the machine may be dirty. Clean the inside of your machine (see "Cleaning the machine" on page
81). If these steps do not correct the problem, contact a service representative.
The top half of the paper is
printed lighter than the rest of
the paper
The toner might not adhere properly to this type of paper.
• Change the printer option and try again. Go to Printing Preferences, click the Paper tab, and set the paper type to Recycled (see
"Opening printing preferences" on page 53).
Printing quality problems
284
6. Troubleshooting
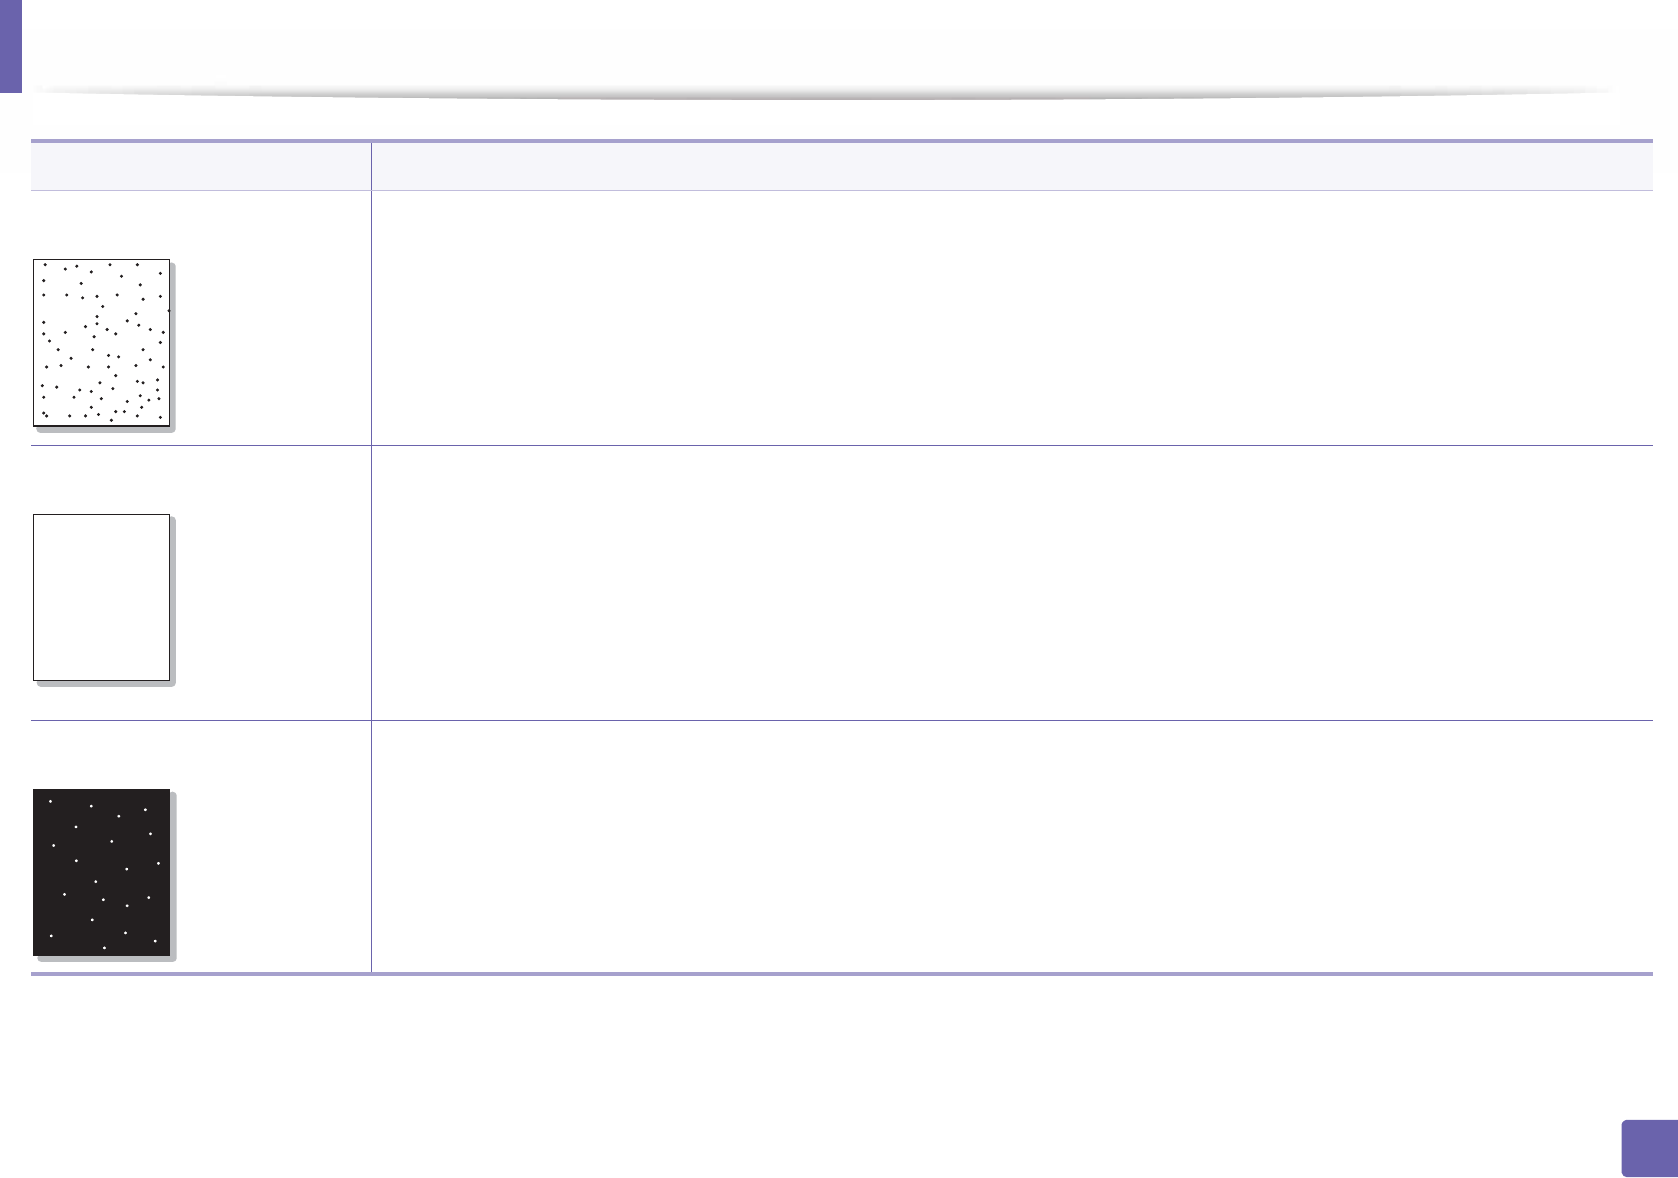
Toner specks • The paper may not meet specifications; for example, the paper may be too moist or rough.
• The transfer roller may be dirty. Clean the inside of your machine (see "Cleaning the machine" on page 81).
• The paper path may need cleaning. Contact a service representative (see "Cleaning the machine" on page 81).
Dropouts If faded areas, generally rounded, occur randomly on the page:
• A single sheet of paper may be defective. Try reprinting the job.
• The moisture content of the paper is uneven or the paper has moist spots on its surface. Try a different brand of paper.
• The paper lot is bad. The manufacturing processes can cause some areas to reject toner. Try a different kind or brand of paper.
• Change the printer option and try again. Go to Printing Preferences, click the Paper tab, and set type to Thick (see "Opening
printing preferences" on page 53).
If these steps do not correct the problem, contact a service representative.
White Spots If white spots appear on the page:
• The paper is too rough and a lot of dirt from paper falls to the inner components within the machine, so the transfer roller may be
dirty. Clean the inside of your machine (see "Cleaning the machine" on page 81).
• The paper path may need cleaning. Clean the inside of your machine (see "Cleaning the machine" on page 81).
If these steps do not correct the problem, contact a service representative.
Condition Suggested solutions
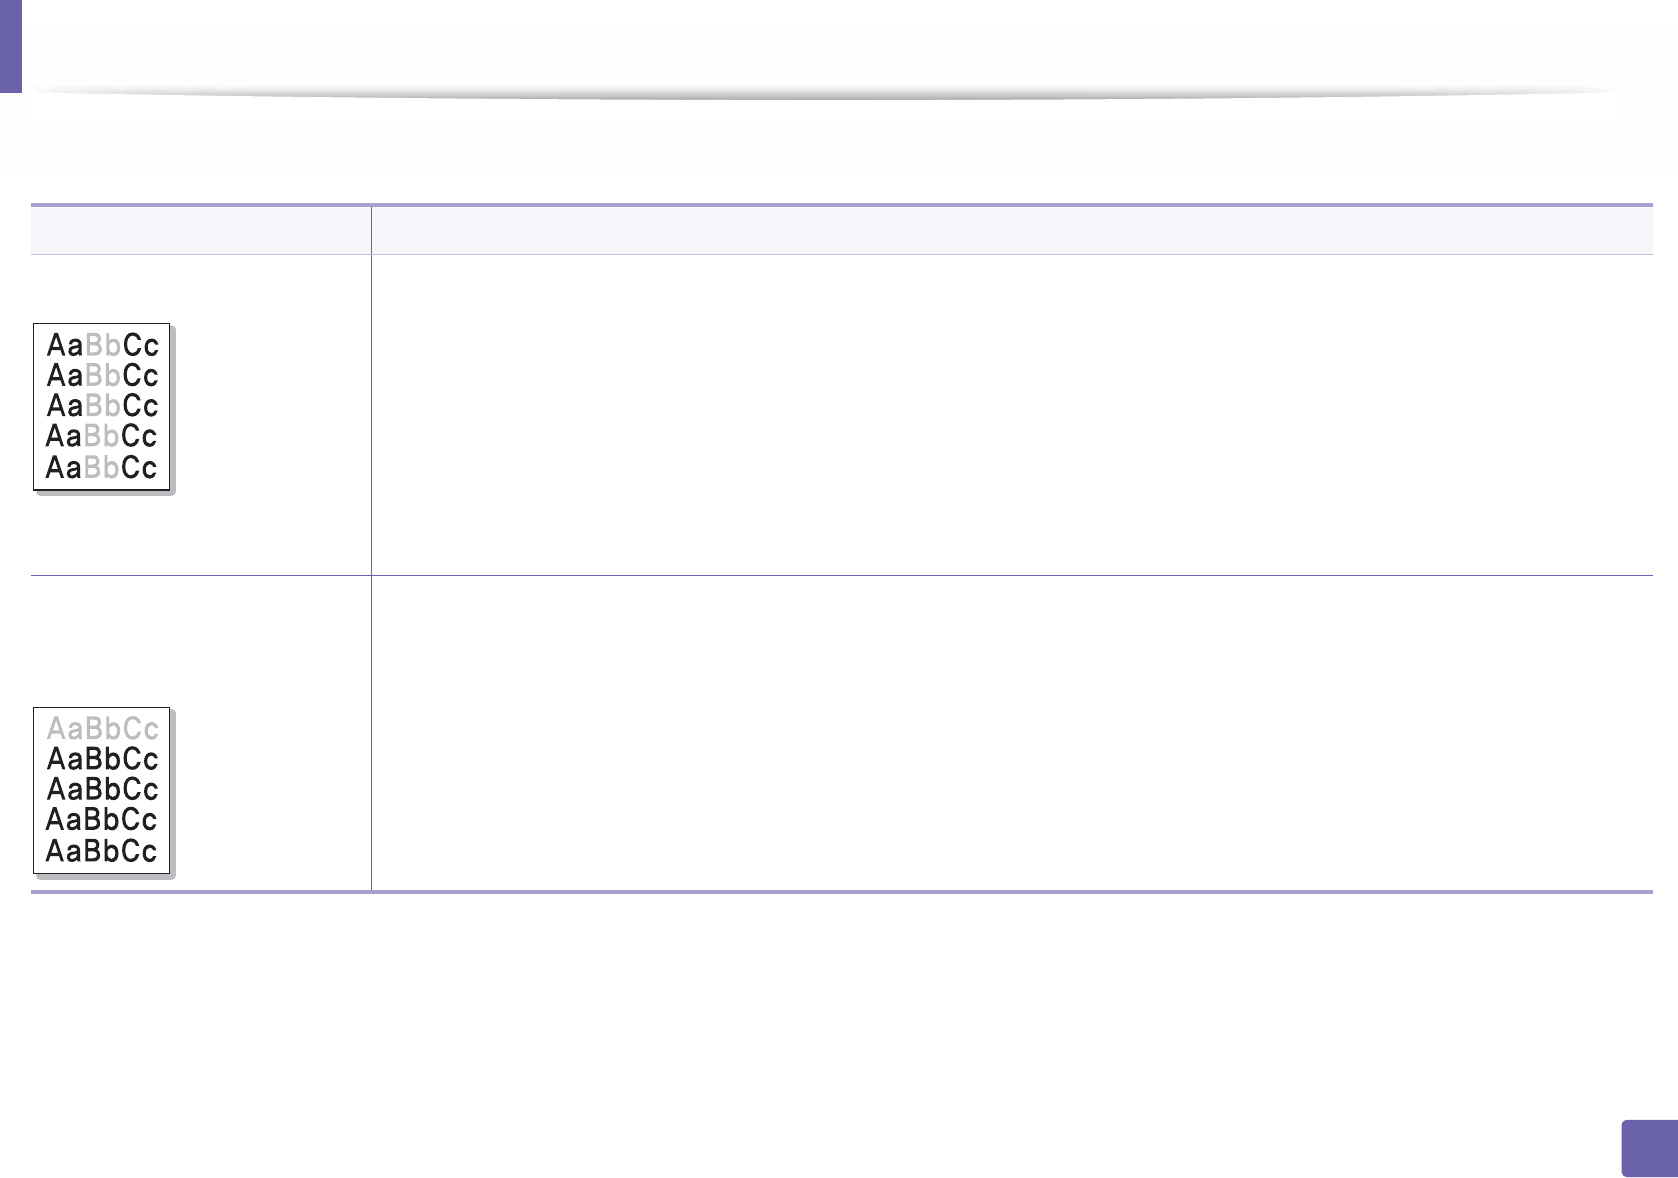
AaBbCc
AaBbCc
AaBbCc
AaBbCc
AaBbCc
AaBbC
AaBbC
AaBbC
AaBbC
AaBbC
Printing quality problems
285
6. Troubleshooting
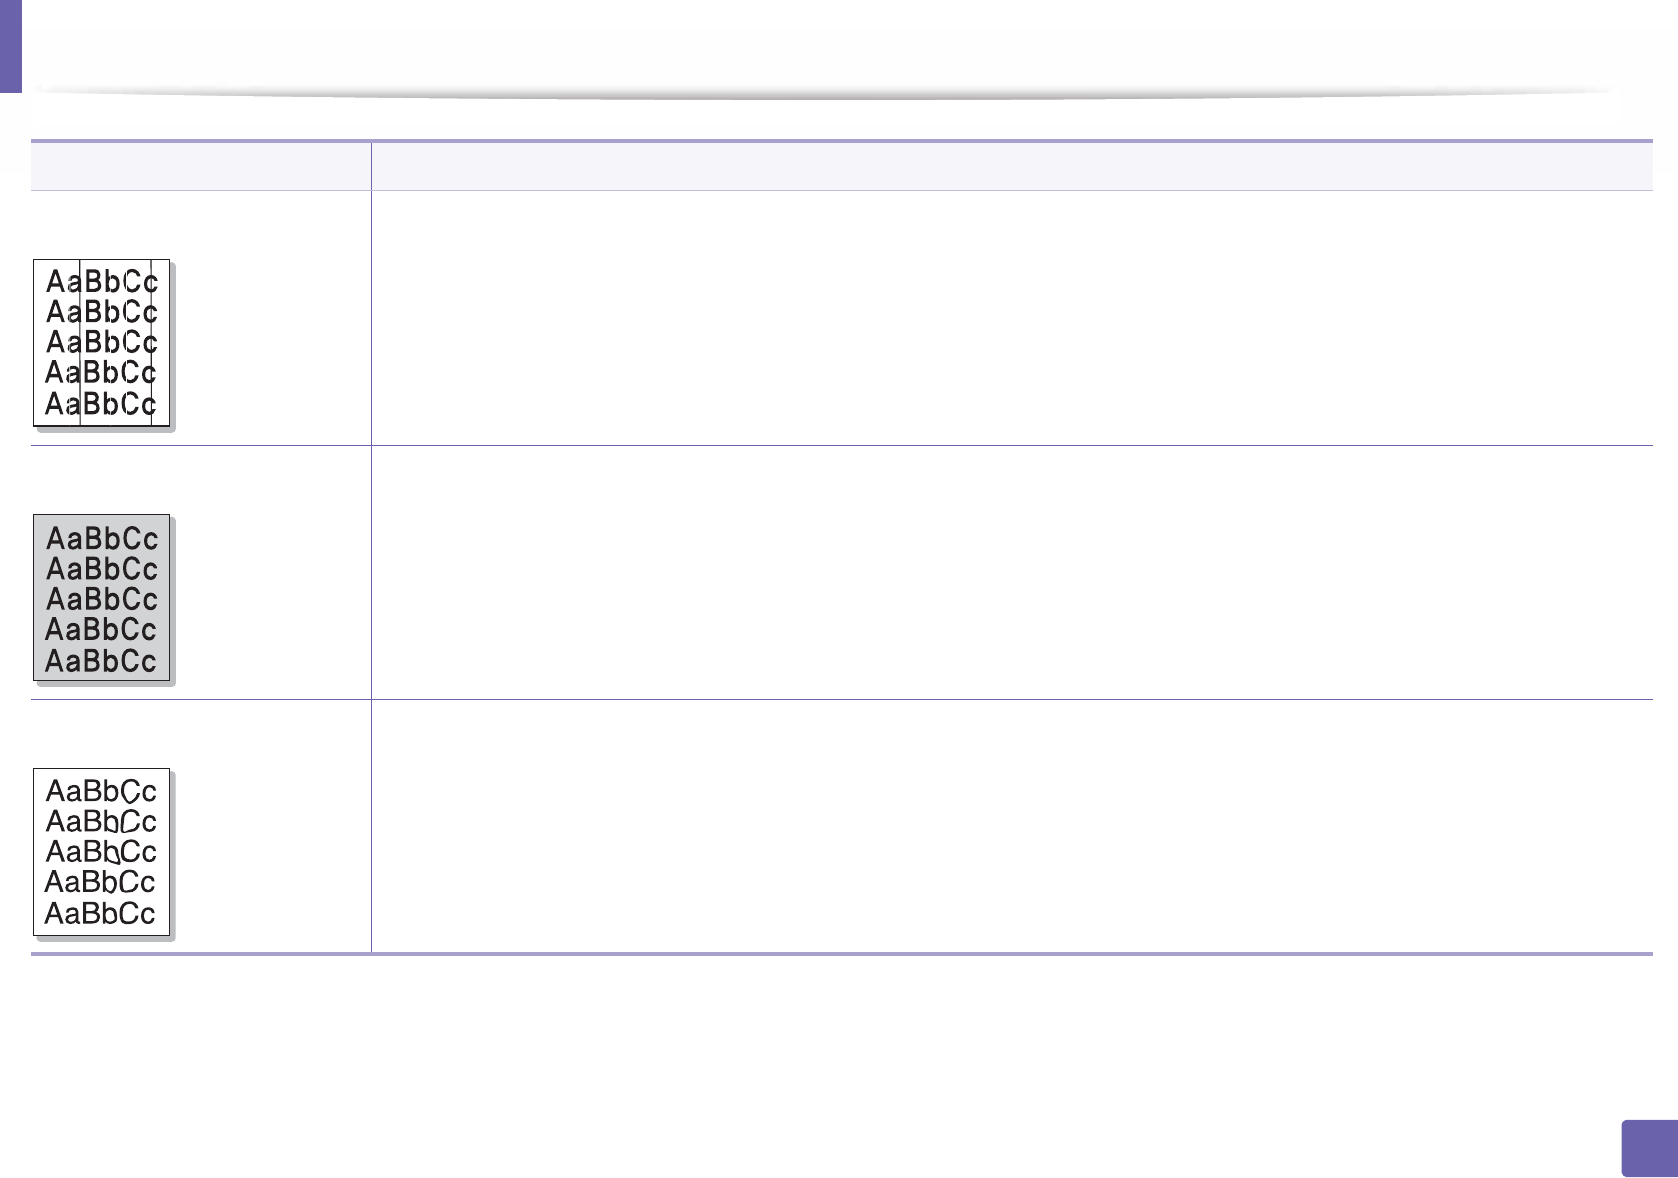
Vertical lines If black vertical streaks appear on the page:
• The surface (drum part) of the cartridge inside the machine has probably been scratched. Remove the cartridge and install a new
one (see "Replacing the toner cartridge" on page 75, "Replacing the imaging unit" on page 77).
If white vertical streaks appear on the page:
• The surface of the LSU part inside the machine may be dirty. Clean the inside of your machine (see "Cleaning the machine" on page
81). If these steps do not correct the problem, contact a service representative.
Black or color background If the amount of background shading becomes unacceptable:
• Change to a lighter weight paper.
• Check the environmental conditions: very dry conditions or a high level of humidity (higher than 80% RH) can increase the amount
of background shading.
• Remove the old toner cartridge and install a new one (see "Replacing the toner cartridge" on page 75).
• Thoroughly redistribute the toner (see "Redistributing toner" on page 73).
Toner smear • Clean the inside of the machine (see "Cleaning the machine" on page 81).
• Check the paper type and quality.
• Remove the toner cartridge and install a new one (see "Replacing the toner cartridge" on page 75).
Condition Suggested solutions
Printing quality problems
286
6. Troubleshooting
Vertical repetitive defects If marks repeatedly appear on the printed side of the page at even intervals:
• The toner cartridge may be damaged. If you still have the same problem, remove the toner cartridge and, install a new one (see
"Replacing the toner cartridge" on page 75).
• Parts of the machine may have toner on them. If the defects occur on the back of the page, the problem will likely correct itself after
a few more pages.
• The fusing assembly may be damaged. Contact a service representative.
Background scatter Background scatter results from bits of toner randomly distributed on the printed page.
• The paper may be too damp. Try printing with a different batch of paper. Do not open packages of paper until necessary so that
the paper does not absorb too much moisture.
• If background scatter occurs on an envelope, change the printing layout to avoid printing over areas that have overlapping seams
on the reverse side. Printing on seams can cause problems.
Or select Thick from the Printing Preferences window (see "Opening printing preferences" on page 53).
• If background scatter covers the entire surface area of a printed page, adjust the print resolution through your software application
or in Printing Preferences (see "Opening printing preferences" on page 53). Ensure the correct paper type is selected. For example:
If Thicker Paper is selected, but Plain Paper actually used, an overcharging can occur causing this copy quality problem.
• If you are using a new toner cartridge, redistribute the toner first (see "Redistributing toner" on page 73).
Toner particles are around bold
characters or pictures
The toner might not adhere properly to this type of paper.
• Change the printer option and try again. Go to Printing Preferences, click the Paper tab, and set the paper type to Recycled (see
"Opening printing preferences" on page 53).
• Ensure the correct paper type is selected. For example: If Thicker Paper is selected, but Plain Paper actually used, an overcharging
can occur causing this copy quality problem.
Condition Suggested solutions
A
Printing quality problems
287
6. Troubleshooting
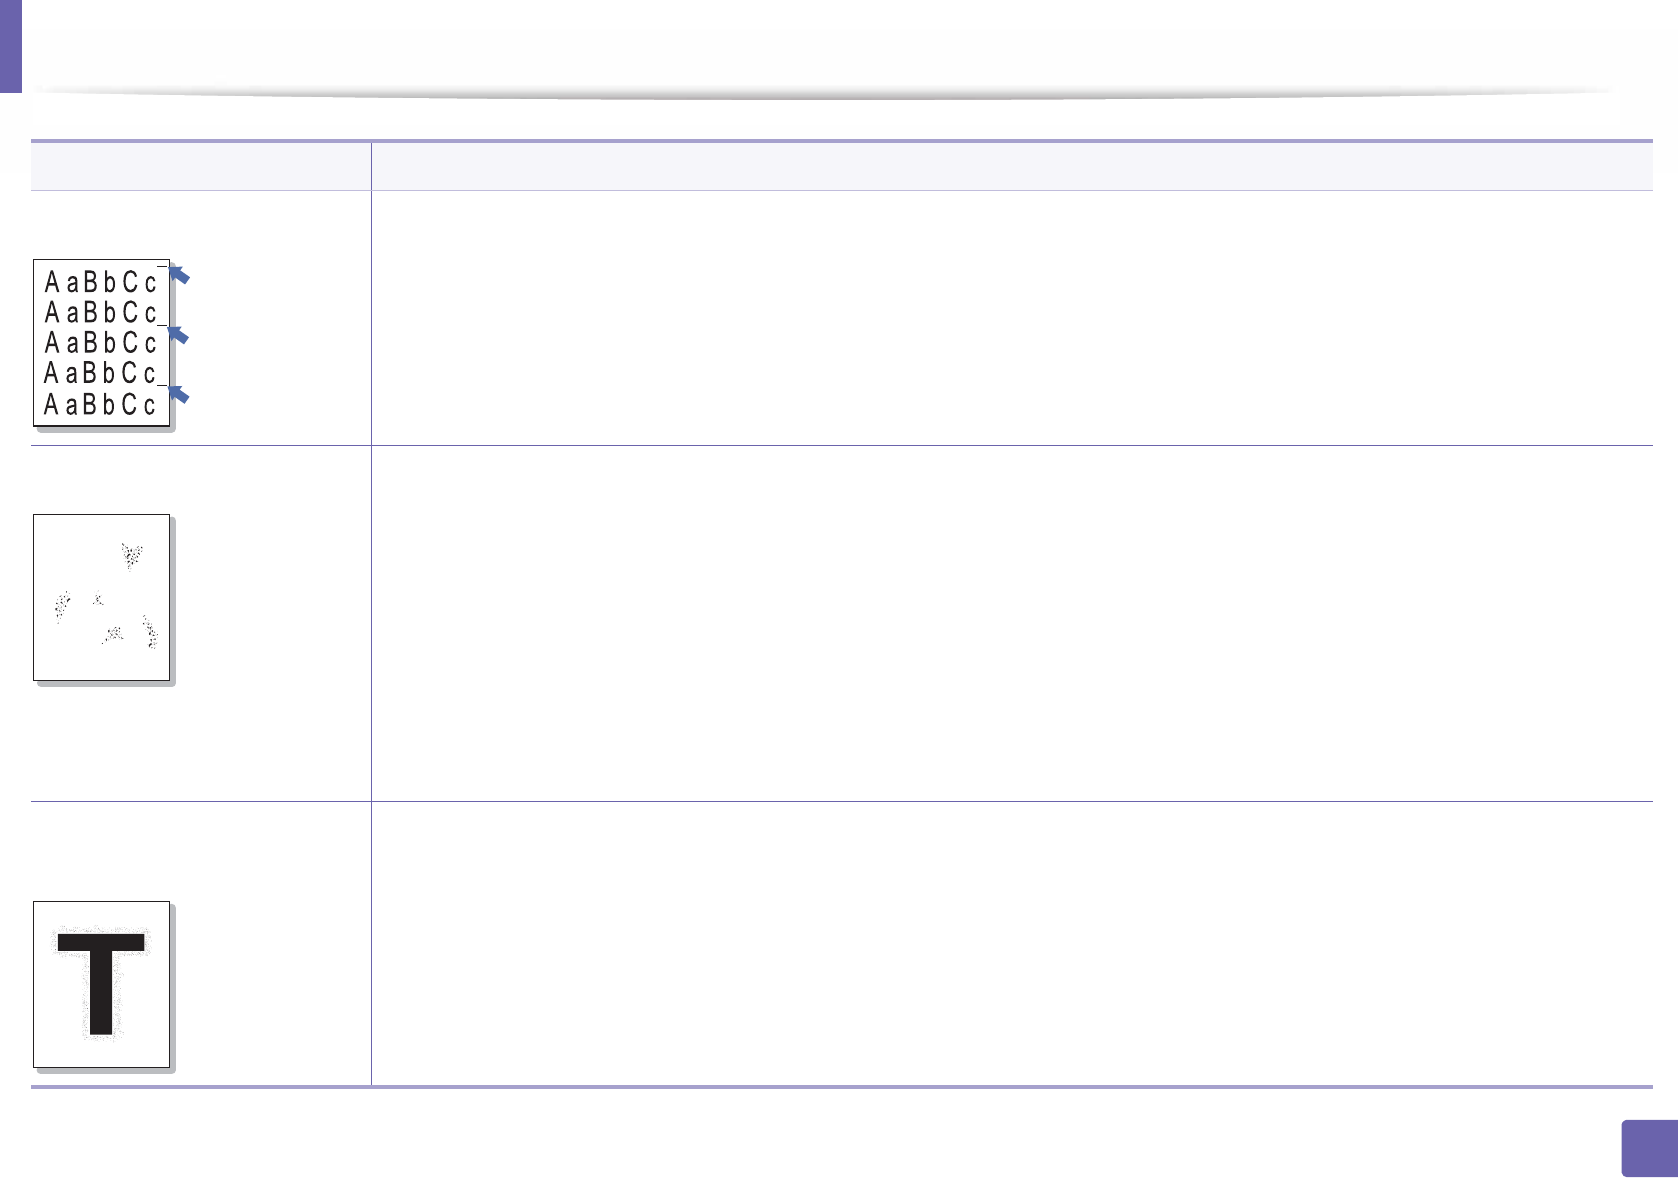
Misformed characters • If characters are improperly formed and producing hollow images, the paper stock may be too slick. Try different paper.
Page skew • Ensure that the paper is loaded properly.
• Check the paper type and quality.
• Ensure that the guides are not too tight or too loose against the paper stack.
Curl or wave • Ensure that the paper is loaded properly.
• Check the paper type and quality. Both high temperature and humidity can cause paper curl.
• Turn the stack of paper over in the tray. Also try rotating the paper 180° in the tray.
Condition Suggested solutions
AaBbC
AaBbC
AaBbC
AaBbC
AaBbCc
Printing quality problems
288
6. Troubleshooting
Wrinkles or creases • Ensure that the paper is loaded properly.
• Check the paper type and quality.
• Turn the stack of paper over in the tray. Also try rotating the paper 180° in the tray.
Back of printouts are dirty • Check for leaking toner. Clean the inside of the machine (see "Cleaning the machine" on page 81).
Solid color or black pages • The toner cartridge may not be installed properly. Remove the cartridge and reinsert it.
• The toner cartridge may be defective. Remove the toner cartridge and install a new one (see "Replacing the toner cartridge" on
page 75).
• The machine may require repairing. Contact a service representative.
Condition Suggested solutions
A

Printing quality problems
289
6. Troubleshooting
Loose toner • Clean the inside of the machine (see "Cleaning the machine" on page 81).
• Check the paper type and quality.
• Remove the toner cartridge and then, install a new one (see "Replacing the toner cartridge" on page 75).
If the problem persists, the machine may require repair. Contact a service representative.
Character voids Character voids are white areas within parts of characters that should be solid black:
• If you are using transparencies, try another type of transparency. Because of the composition of transparencies, some character
voids are normal.
• You may be printing on the wrong surface of the paper. Remove the paper and turn it around.
• The paper may not meet paper specifications.
Horizontal stripes If horizontally aligned black streaks or smears appear:
• The toner cartridge may be installed improperly. Remove the cartridge and reinsert it.
• The toner cartridge may be defective. Remove the toner cartridge and install a new one (see "Replacing the toner cartridge" on
page 75).
If the problem persists, the machine may require repairing. Contact a service representative.
Condition Suggested solutions
A
Printing quality problems
290
6. Troubleshooting
Curl If the printed paper is curled or paper does not feed into the machine:
• Turn the stack of paper over in the tray. Also try rotating the paper 180° in the tray.
• Change the printer’s paper option and try again. Go to Printing Preferences, click the Paper tab, and set type to Thin (see
"Opening printing preferences" on page 53).
• An unknown image
repetitively appears on a few
sheets
• Loose toner
• Light print or contamination
occurs
Your machine is probably being used at an altitude of 1,000 m (3,281 ft) or above.
The high altitude may affect the print quality, such as loose toner or light imaging. Change the altitude setting for your machine (see
"Altitude adjustment" on page 220).
Condition Suggested solutions

291
6. Troubleshooting
Copying problems
Condition Suggested solutions
Copies are too light or too dark. Adjust the darkness in copy feature to lighten or darken the backgrounds of copies (see "Changing the settings for each copy" on page
58).
If the defect still appears after
cleaning the machine.
set the Copy Feature > Adjust Bkgd. > Auto. (see "Menu overview" on page 30).
Smears, lines, marks, or spots
appear on copies.
• If the defects are on the original, adjust darkness in copy feature to lighten the background of your copies.
• If there are no defects on the original, clean the scan unit (see "Cleaning the scan unit" on page 86).
Copy image is skewed. • Ensure that the original is aligned with the registration guide.
• The transfer roller may be dirty. Clean the inside of your machine (see "Cleaning the machine" on page 81).
Blank copies print out. Ensure that the original is face down on the scanner glass or face up in the document feeder.
If these steps do not correct the problem, contact a service representative.
Image rubs off the copy easily. • Replace the paper in the tray with paper from a new package.
• In high humidity areas, do not leave paper in the machine for extended periods of time.
Frequent copy paper jams
occur.
• Fan the paper, then turn it over in the tray. Replace the paper in the tray with a fresh supply. Check/adjust the paper guides, if
necessary.
• Ensure that the paper is the proper type and weight (see "Print media specifications" on page 112).
• Check for copy paper or pieces of copy paper remaining in the machine after a paper jam has been cleared.
Toner cartridge produces fewer
copies than expected before
running out of toner.
• Your originals may contain pictures, solids, or heavy lines. For example, your originals may be forms, newsletters, books, or other
documents that use more toner.
• The scanner lid may be left open while copies are being made.
• Turn the machine off and back on.

292
6. Troubleshooting
Scanning problems
Condition Suggested solutions
The scanner does not work. • Make sure that you place the original to be scanned face down on the scanner glass, or face up in the document feeder (see
"Loading originals" on page 48).
• There may not be enough available memory to hold the document you want to scan. Try the Prescan function to see if that works.
Try lowering the scan resolution rate.
• Check that the machine printer cable is connected properly.
• Make sure that the machine printer cable is not defective. Switch the printer cable with a known good cable. If necessary, replace
the printer cable.
• Check that the scanner is configured correctly. Check scan setting in the application you want to use to make certain that the
scanner job is being sent to the correct port (for example, USB001).
The unit scans very slowly. • Check if the machine is printing received data. If so, scan the document after the received data has been printed.
• Graphics are scanned more slowly than text.
• Communication speed slows in scan mode because of the large amount of memory required to analyze and reproduce the scanned
image. Set your computer to the ECP printer mode through BIOS setting. It will help to increase the speed. For details about how
to set BIOS, refer to your computer user’s guide.

Scanning problems
293
6. Troubleshooting
Message appears on your
computer screen:
• Device can’t be set to the H/W
mode you want.
• Port is being used by another
program.
•Port is disabled.
• Scanner is busy receiving or
printing data. When the
current job is completed, try
again.
• Invalid handle.
• Scanning has failed.
• There may be a copying or printing job in progress. Try your job again when that job is finished.
• The selected port is currently being used. Restart your computer and try again.
• The machine printer cable may be improperly connected or the power may be off.
• The scanner driver is not installed or the operating environment is not set up properly.
• Ensure that the machine is properly connected and the power is on, then restart your computer.
• The USB cable may be improperly connected or the power may be off.
Condition Suggested solutions

294
6. Troubleshooting
Faxing problems
Condition Suggested solutions
The machine is not working,
there is no display, or the
buttons are not working.
• Unplug the power cord and plug it in again.
• Ensure that there is power being supplied to the electrical outlet.
• Ensure that the power is turned on.
No dial tone. • Check that the phone line is properly connected (see "Rear view" on page 20).
• Check that the phone socket on the wall is working by plugging in another phone.
The numbers stored in memory
do not dial correctly.
Make sure that the numbers are stored in memory correctly. To check that, print an address book list.
The original does not feed into
the machine.
• Make sure that the paper is not wrinkled and you are inserting it in correctly. Check that the original is the right size, not too thick
or thin.
• Make sure that the document feeder is firmly closed.
• The document feeder rubber pad may need to be replaced. Contact a service representative.
Faxes are not received
automatically.
• The receiving mode should be set to fax (see "Changing the receive modes" on page 252).
• Make sure that there is paper in the tray (see "Print media specifications" on page 112).
• Check to see if the display shows any error message. If it does, clear the problem.
The machine does not send. • Make sure that the original is loaded in the document feeder or on the scanner glass.
• Check the fax machine you are sending to, to see if it can receive your fax.
The incoming fax has blank
spaces or is of poor-quality.
• The fax machine sending you the fax may be faulty.
• A noisy phone line can cause line errors.
• Check your machine by making a copy.
• A toner cartridge has almost reached its estimated cartridge life. Replace the toner cartridge (see "Replacing the toner cartridge"
on page 75).

Faxing problems
295
6. Troubleshooting
Some of the words on an
incoming fax are stretched.
The fax machine sending the fax had a temporary document jam.
There are lines on the originals
you sent.
Check your scan unit for marks and clean it (see "Cleaning the scan unit" on page 86).
The machine dials a number,
but the connection with the
other fax machine fails.
The other fax machine may be turned off, out of paper, or cannot answer incoming calls. Speak with the other machine operator and
ask them to solve the problem on their side.
Faxes do not store in memory. There may not be enough memory space to store the fax. If the display indicating the memory status shows, delete any faxes you no
longer need from the memory, and then try to store the fax again. Call for service.
Blank areas appear at the
bottom of each page or on
other pages, with a small strip
of text at the top.
You may have chosen the wrong paper settings in the user option setting. Check the paper size and type again.
Condition Suggested solutions
296
6. Troubleshooting
Operating system problems
1
Common Windows problems
Refer to the Microsoft Windows User’s Guide that came with your computer for further information on Windows error messages.
Condition Suggested solutions
“File in Use” message appears
during installation.
Exit all software applications. Remove all software from the startup group, then restart Windows. Reinstall the printer driver.
“General Protection Fault”,
“Exception OE”, “Spool 32”, or
“Illegal Operation” messages
appear.
Close all other applications, reboot Windows and try printing again.
“Fail To Print”, “A printer
timeout error occurred”
message appear.
These messages may appear during printing. Just keep waiting until the machine finishes printing. If the message appears in ready
mode or after printing has completed, check the connection and/or whether an error has occurred.
Samsung Printer Experience is
not shown when you click more
settings.
Samsung Printer Experience is not installed. Download the app. from the Windows Store and install it.
Machine information is not
displayed when you click the
device in the Devices and
Printers.
Check the Printer properties. Click the Ports tab.
(Control Panel > Devices and Printers > Right-click on your printer icon and select Printer properties)
If the port is set to File or LPT, uncheck them and select TCP/IP, USB, or WSD.
Operating system problems
297
6. Troubleshooting
2
Common Mac problems
Refer to the Mac User’s Guide that came with your computer for further information on Mac error messages.
Condition Suggested solutions
The machine does not print PDF files
correctly. Some parts of graphics, text, or
illustrations are missing.
Printing the PDF file as an image may enable the file to print. Turn on Print As Image from the Acrobat printing options.
It will take longer to print when you print a PDF file as an image.
Some letters are not displayed normally
during cover page printing.
Mac OS cannot create the font while printing the cover page. The English alphabet and numbers are displayed normally on
the cover page.
When printing a document in Mac with
Acrobat Reader 6.0 or higher, colors
print incorrectly.
Make sure that the resolution setting in your machine driver matches the one in Acrobat Reader.

Operating system problems
298
6. Troubleshooting
3
Common Linux problems
Refer to the Linux User’s Guide that came with your computer for further information on Linux error messages.
Condition Suggested solutions
There is no xsane nor simple-scan application on my
Linux machine.
For some Linux distributions, there might be no default scan application. To use scan features, install one of scan
applications using download center supplied by the OS(ex. Ubuntu Software Center for Ubuntu, Install/Remove
Software for openSUSE, Software for Fedora).
Scanner can not be found via network. For some Linux distributions, strong firewall is enabled and it may block our installer from opening the necessary
port for searching network devices. In such a case, open the snmp port - 22161 manually or disable the firewall
temporarily while using the device.
When printing more than one copy, the second copy
does not print.
The problem occurs on Ubuntu 12.04 due to the problem in standard CUPS filter 'pdftops'. Update 'cups-filters'
package to version 1.0.18 to fix the problem ('pdftops' is a part of 'cups-filters' package).
Unchecking the collate option in the Print Dialog
does not work.
For some distributions, GNOME Print Dialog has an issue handling the collate option. As workaround, set the
default value of collate option to False using the system's printing utility(execute "system-config-printer" in the
Terminal program).
Printing always works with duplex. This duplex issue was in Ubuntu 9.10 CUPS package. Update CUPS version to 1.4.1-5ubuntu2.2.
Printer is not added through system's printing
utility.
The problem occurs on Debian 7 due to the defect in 'system-config-printer' package of the Debian 7 (http://
bugs.debian.org/cgi-bin/bugreport.cgi?bug=662813 in Debian bug tracking system). Please use another way to
add printer (CUPS WebUI for example)
Paper size and orientation are disabled in the Print
Dialog when opening text files.
The problem occurs on Fedora 19 and it's related to 'leafpad' text editor on Fedora 19. Please use other text
editors like 'gedit'.
299
Contact SAMSUNG worldwide
Contact SAMSUNG worldwide
If you have any comments or questions regarding Samsung products, contact
the Samsung customer care center.
Country/Region Customer Care Center WebSite
ALGERIA 021 36 11 00 www.samsung.com/
n_africa/support
ARGENTINE 0800-333-3733 www.samsung.com/
ar/support
ARMENIA 0-800-05-555 www.samsung.com/
support
AUSTRALIA 1300 362 603 www.samsung.com/
au/support
AUSTRIA 0800 - SAMSUNG (0800 -
7267864)
www.samsung.com/
at/support
AZERBAIJAN 0-88-555-55-55 www.samsung.com/
support
BAHRAIN
8000-GSAM (8000-4726) www.samsung.com/
ae/support (English)
www.samsung.com/
ae_ar/support (Arabic)
BELARUS 810-800-500-55-500 www.samsung.com/
support
BANGLADESH 09612300300 www.samsung.com/
in/support
BELGIUM
02-201-24-18 www.samsung.com/
be/support (Dutch)
www.samsung.com/
be_fr/support (French)
BOLIVIA 800-10-7260
[HHP] 4828210
www.samsung.com/
cl/support
BOSNIA 051 331 999 www.samsung.com/
support
BOTSWANA 8007260000 www.samsung.com/
support
BRAZIL
0800-124-421 (Demais cidades e
regiões)
4004-0000 (Capitais e grandes
centros)
www.samsung.com/
br/support
BULGARIA 800 111 31 , Безплатна
телефонна линия
www.samsung.com/
bg/support
BURUNDI 200 www.samsung.com/
support
CAMEROON 7095- 0077 www.samsung.com/
africa_fr/support
Country/Region Customer Care Center WebSite

Contact SAMSUNG worldwide
300
Contact SAMSUNG worldwide
CANADA
1-800-SAMSUNG (726-7864) www.samsung.com/
ca/support(English)
www.samsung.com/
ca_fr/support (French)
CHILE 800-SAMSUNG (726-7864)
[HHP] 02-24828200
www.samsung.com/
cl/support
CHINA 400-810-5858 www.samsung.com/
cn/support
COLOMBIA
Bogotá 600 12 72
Gratis desde cualquier parte del
país 01 8000 112 112 ó desde su
celular #SAM(726)
www.samsung.com/
co/support
COSTA RICA
0-800-507-7267
00-800-1-SAMSUNG (726-7864)
www.samsung.com/
latin/support
(Spanish)
www.samsung.com/
latin_en/support
(English)
CROATIA 072 726 786 www.samsung.com/
hr/support
Cote D’ Ivoire 8000 0077 www.samsung.com/
africa_fr/support
Country/Region Customer Care Center WebSite
CYPRUS 8009 4000 only from landline, toll
free
www.samsung.com/
gr/support
CZECH 800-SAMSUNG (800-726786) www.samsung.com/
cz/support
DENMARK 70 70 19 70 www.samsung.com/
dk/support
DOMINICA
1-800-751-2676 www.samsung.com/
latin/support
(Spanish)
www.samsung.com/
latin_en/support
(English)
DRC 499999 www.samsung.com/
support
ECUADOR
1-800-10-72670
1-800-SAMSUNG (72-6786)
www.samsung.com/
latin/support
(Spanish)
www.samsung.com/
latin_en/
support(English)
EGYPT 08000-726786
16580
www.samsung.com/
eg/support
Country/Region Customer Care Center WebSite