Samsung Electronics Co SLM3065FW Multi Function Printer User Manual
Samsung Electronics Co Ltd Multi Function Printer
Contents
Users Manual Part 10
Google Cloud Print™
201
2. Using a Network-Connected Machine
1Open the Chrome browser.
2 Visit www.google.com.
3 Sign in to the Google website with your Gmail™ address.
4 Enter your printer’s IP address in the address field and press the Enter key
or click Go.
5 Click Login in the upper right corner of the SyncThru™ Web Service
website.
6 If it’s your first time logging into SyncThru™ Web Service you need to
log-in as an administrator. Type in the below default ID and Password.
We recommend you to change the default password for security
reasons.
•ID: admin
•Password: sec00000
If the network environment is using a proxy server, you need to configure
the proxy’s IP and port number from Settings > Network Settings >
Google Cloud Print > Proxy Setting. Contact your network service
provider or network administrator for more information.
7 When the SyncThru™ Web Service window opens, click Settings >
Network Settings > Google Cloud Print.
8 Enter your printer’s name and description.
9 Click Register.
The confirmation pop-up window appears.
If you set the browser to block pop-ups, the confirmation window will not
appear. Allow the site to show pop-ups.
10 Click Finish printer registration.
11 Click Manage your printers.
Now your printer is registered with Google Cloud Print™ service.
Google Cloud Print™-ready devices will appear in the list.
Google Cloud Print™
202
2. Using a Network-Connected Machine
33
Printing with Google Cloud Print™
The printing procedure varies depending on the application or the device you
are using. You can see the application list that supports Google Cloud Print™
service.
Make sure the printer is turned on and connected to a wired or wireless
network that has access to the Internet.
Printing from an application on mobile device
The following steps are an example of using the Google Docs™ app from
Android mobile phone.
1Install the Cloud Print application on your mobile device.
If you do not have the application, download it from the application store
such as Android Market or App Store.
2 Access the Google Docs™ application from your mobile device.
3 Tap the option button of the document that you want to print.
4 Tap the send button.
5 Tap the Cloud Print button.
6 Set the printing options if you want.
7 Tap Click here to Print.
Printing from the Chrome browser
The following steps are an example of using the Chrome browser.
1Run Chrome.
2 Open the document or email that you want to print.
3 Click the wrench icon in the browser’s top right corner.
4 Click Print. A new tab for printing appears.
5 Select Print with Google Cloud Print.
6 Click the Print button.

3. Useful Setting Menus
This chapter explains how to browse the current status of your machine, and the method of setting for advanced
machine setup.
• Before you begin reading a chapter 204
• Print menu 205
• Copy menu 206
• Fax menu 209
• System setup 212

204
3. Useful Setting Menus
Before you begin reading a chapter
This chapter explains all the features available for this series' models to help users easily understand the features.
You can check the features available for each model in the Basic Guide (see "Menu overview" on page 30).
The following are tips for using this chapter
• The control panel provides access to various menus to set up the machine or use the machine’s functions. These menus can be accessed by pressing (Menu).
• Some menus may not appear on the display depending on options or models. If so, it is not applicable to your machine.
• For models that do not have the (Menu) on the control panel, this feature is not applicable (see "Control panel overview" on page 21).
• Some menu names may differ from your machine depending on its options or the models.
205
3. Useful Setting Menus
Print menu
Some menus may not appear in the display depending on options or
models. If so, it is not applicable to your machine (see "Menu overview" on
page 30).
To change the menu options:
• Press (Menu) > Print Setup on the control panel.
Item Description
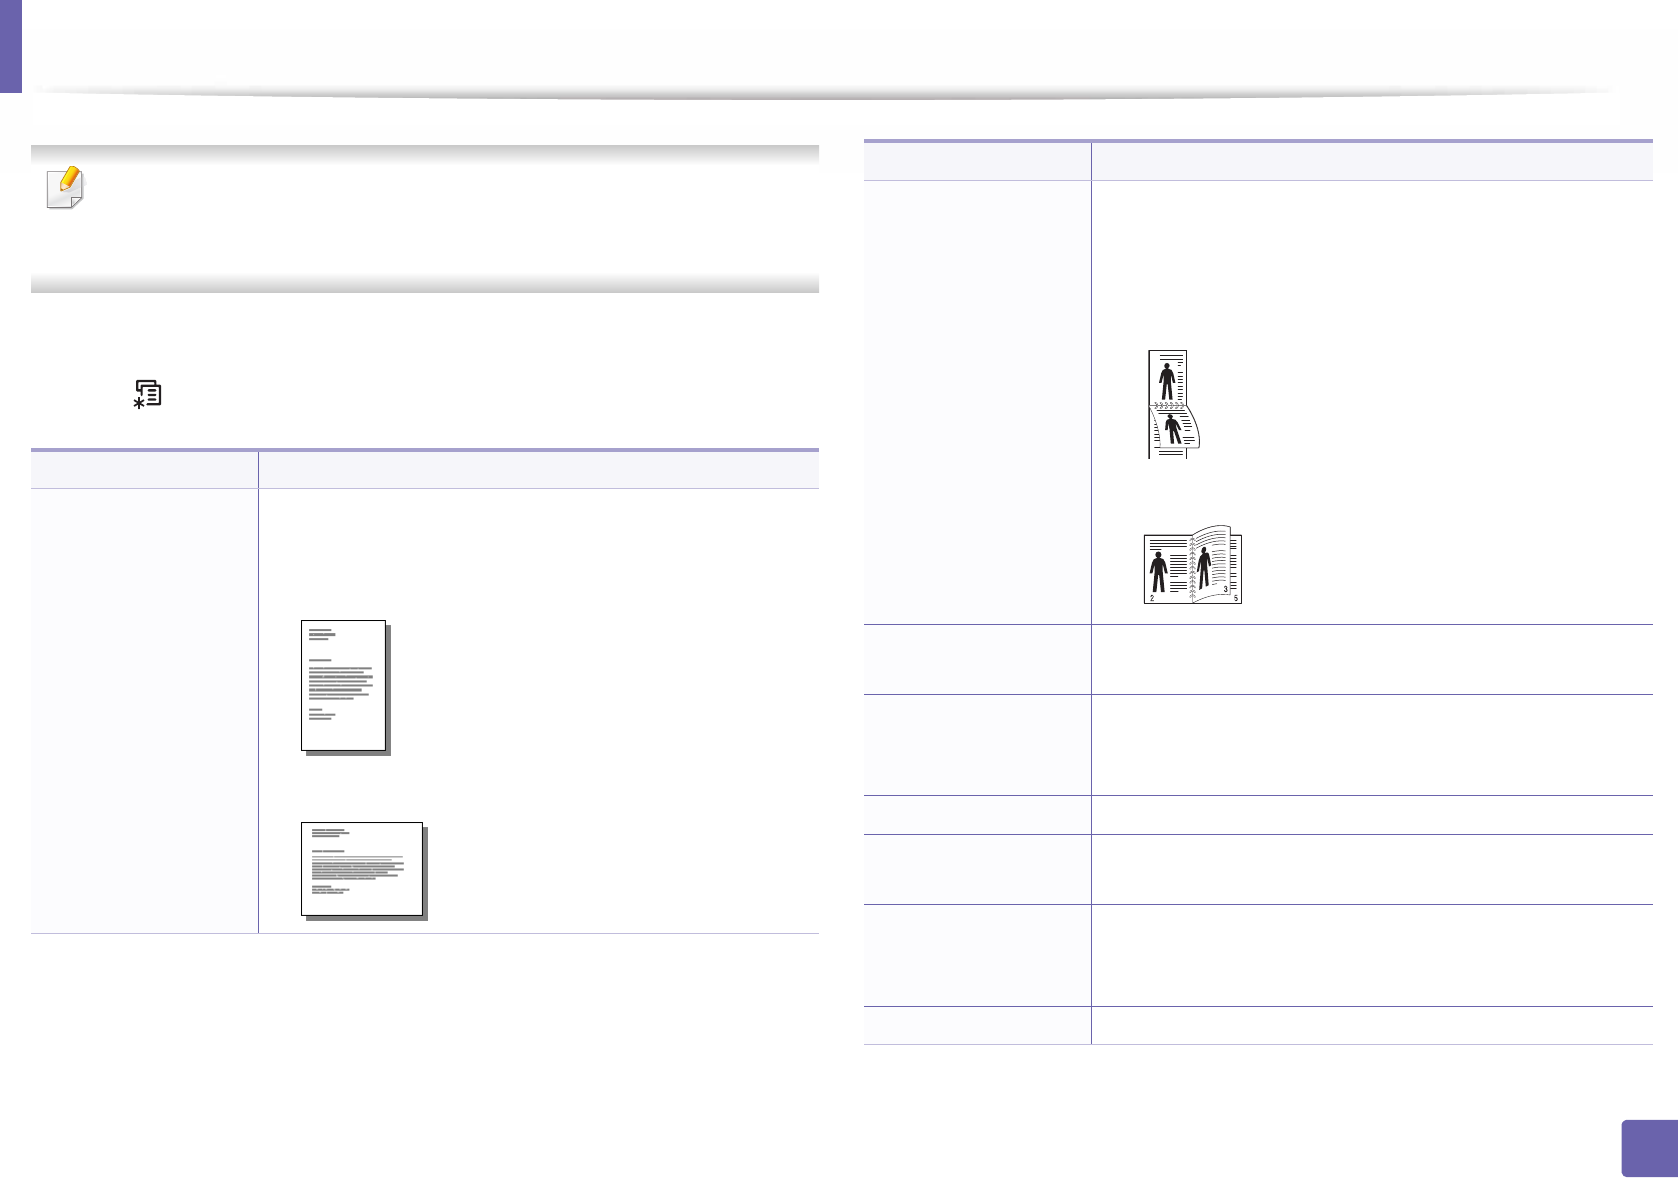
Orientation
Selects the direction in which information is printed on a
page.
•Portrait
•Landscape
Duplex
You can set the machine to print copies on both sides of
paper.
•Off: Prints in normal mode.
•Short Edge
•Long Edge
Copies You can enter the number of copies using the number
keypad.
Resolution
Specifies the number of dots printed per inch (dpi). The
higher the setting, the sharper printed characters and
graphics.
Clear Text Prints text darker than on a normal document.
Auto CR Allows you to append the required carriage return to
each line feed, which is useful for Unix or DOS users.
SkipBlankPages
The printer detects the pritning data from computer
whether a page is empty or not. You can set to skip the
blank pages.
Emulation Sets the emulation type and option.
Item Description
2
5
3
206
3. Useful Setting Menus
Copy menu
1
Copy feature
Some menus may not appear in the display depending on options or
models. If so, it is not applicable to your machine (see "Menu overview" on
page 30).
To change the menu options:
• Press (copy) > (Menu) > Copy Feature on the control panel.
Item Description
Original Size Sets the image size.
Reduce/Enlarge
Reduces or enlarges the size of a copied image (see
"Reduced or enlarged copy" on page 59).
If the machine is set to Eco mode, reduce and
enlarge features are not available.
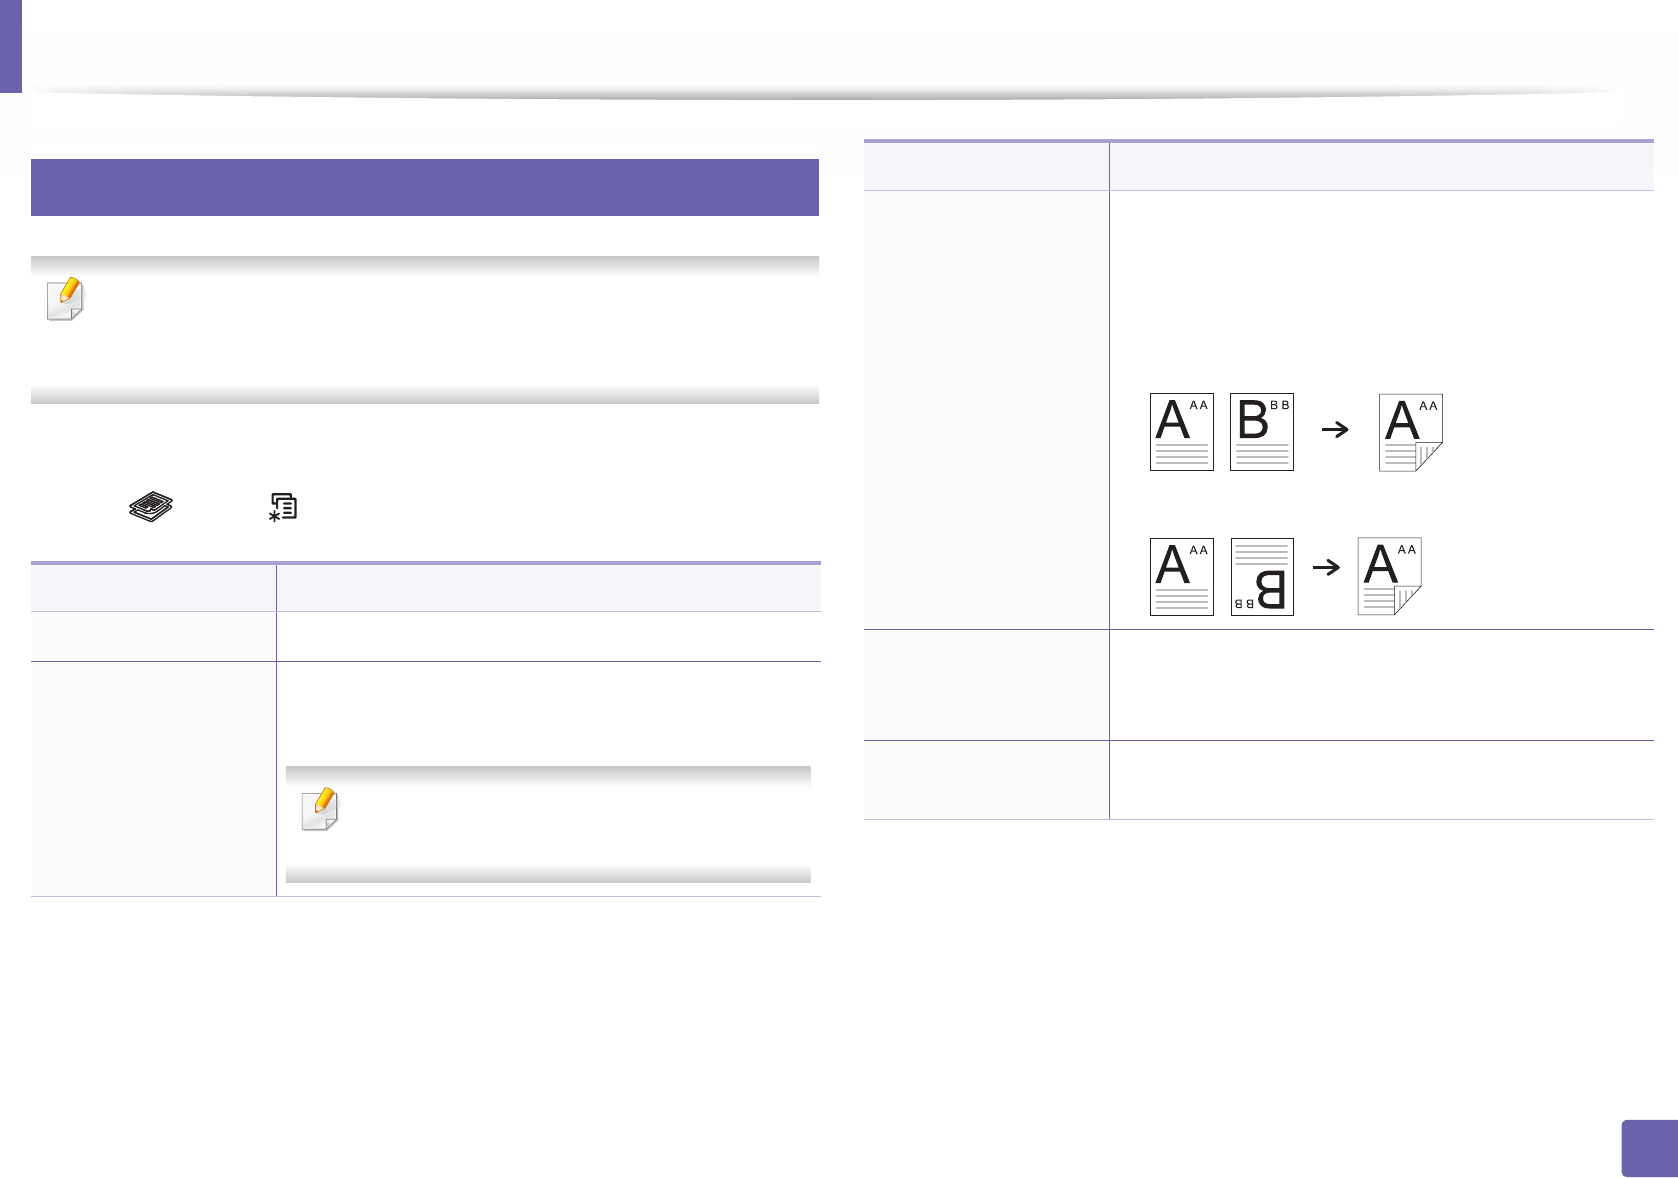
Duplex
You can set the machine to print copies on both sides of
paper.
•1 Sided: Scans one side of an original and prints it on
one side of the paper.
•1->2Sided
•1->2Sided Rotated
Darkness
Adjusts the brightness level to make a copy that is
easier to read, when the original contains faint
markings and dark images (see "Darkness" on page 58)
Original Type Improves the copy quality by selecting the document
type for the current copy job (see "Original" on page 58)
Item Description
Copy menu
207
3. Useful Setting Menus
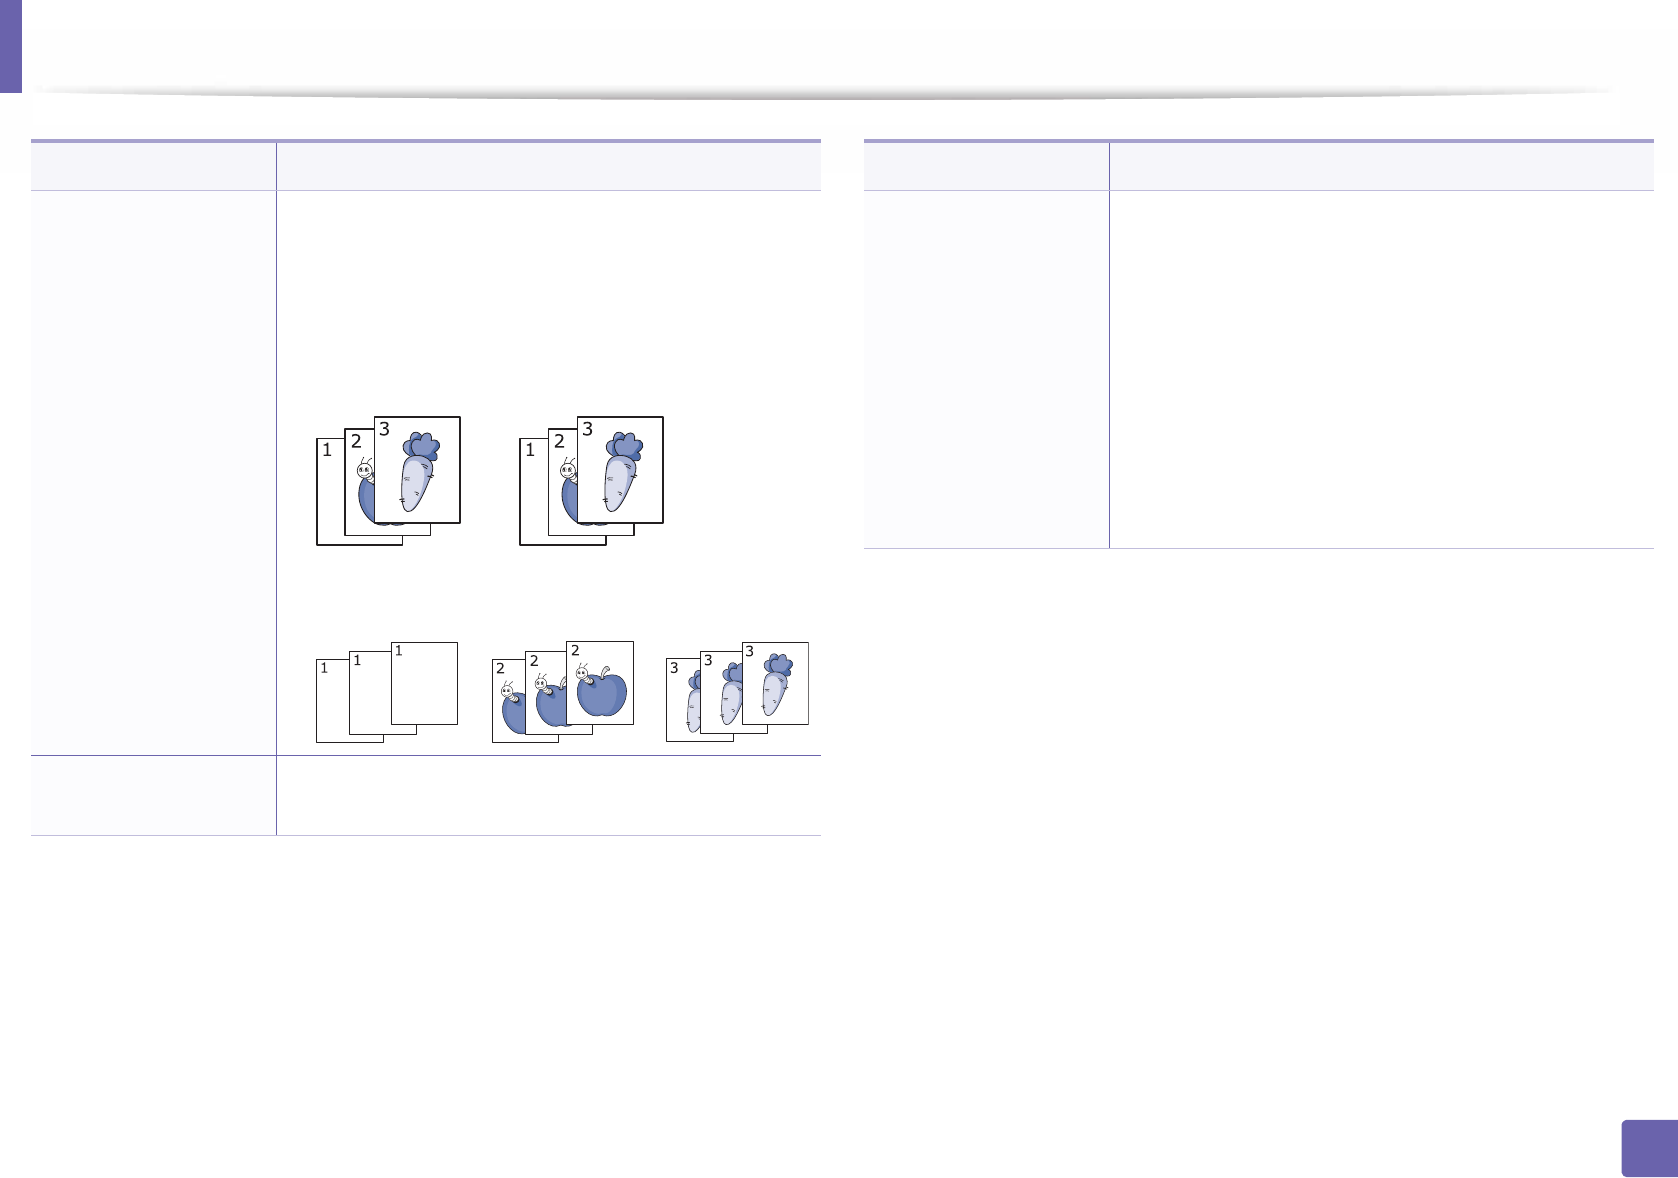
Collation
Set the machine to sort the copy job. For example, if you
make 2 copies of a 3 page original, one complete 3 page
document will print followed by a second complete
document.
•On: Prints output in sets to match the sequence of
originals.
•Off: Prints output sorted into stacks of individual
pages.
Layout Adjusts the layout format such as ID copy, 2/4-up, and
booklet.
Item Description
Adjust Bkgd.
Prints an image without its background. This copy
feature removes the background color and can be
helpful when copying an original containing color in
the background, such as a newspaper or a catalog.
•Off: Does not use this feature.
•Auto: Optimizes the background.
•Enhance Lev.1~2: The higher the number is, the
more vivid the background is.
•Erase Lev.1~4: The higher the number is, the lighter
the background is.
Item Description

Copy menu
208
3. Useful Setting Menus
2
Copy Setup
Some menus may not appear in the display depending on options or
models. If so, it is not applicable to your machine (see "Menu overview" on
page 30).
To change the menu options:
Press (copy) > (Menu) > Copy Setup on the control panel.
Item Description
Change Default Resets the value or setting to the printer’s out-of-box
state.
209
3. Useful Setting Menus
Fax menu
3
Fax Feature
• Some menus may not appear in the display depending on options or
models. If so, it is not applicable to your machine (see "Menu overview"
on page 30).
• Some features and optional goods may not be available depending on
model or country (see "Features by model" on page 7).
To change the menu options:
• Press (fax) > (Menu)> Fax Feature on the control panel.
Item Description
Darkness
Adjusts the brightness level to scan an original that is
easier to read, when the original contains faint
markings and dark images (see "Darkness" on page 66).
Resolution
The default document settings produce good results
when using typical text-based originals. However, if you
send originals that are of poor quality, or contain
photographs, you can adjust the resolution to produce
a higher quality fax (see "Resolution" on page 65).
Original Size Sets the image size.
Multi Send
Sends a fax to multiple destinations (see "Sending a fax
to multiple destinations" on page 64).
You cannot send a color fax using this feature.
Delay Send
Sets your machine to send a fax at a later time when you
will not be present (see "Delaying a fax transmission" on
page 248).
You cannot send a color fax using this feature.
Priority Send
Scans the original into memory and immediately
transmits it when the current operation is finished.
Priority transmission will interrupt a sending to multiple
destinations between stations (example, when the
transmission to station A ends, before transmission to
station B begins) or between redial attempts (see
"Sending a priority fax" on page 250).
Send Forward/ Rcv.
Forward
Forwards the received or sent fax to other destination
by a fax or PC. If you are out of office but have to receive
the fax, this feature may be useful.
• See "Forwarding a sent fax to another destination"
on page 250.
• See "Forwarding a received fax" on page 251.
Item Description

Fax menu
210
3. Useful Setting Menus
4
Sending setup
Some menus may not appear in the display depending on options or
models. If so, it is not applicable to your machine (see "Menu overview" on
page 30).
To change the menu options:
• Press (fax) > (Menu) > Fax Setup > Sending on the control panel.
Secure Receive
Stores the received fax in memory without printing out.
To print received documents, you need to enter the
password. You can prevent your received faxes from
being accessed by unauthorized people (see "Receiving
in secure receiving mode" on page 254).
Add Page
Adds additional documents to a reserved delay fax job
(see "Adding documents to a reserved fax" on page
249).
Cancel Job Cancels the delayed fax job which is saved in memory
(see "Canceling a reserved fax job" on page 249).
Item Description
Item Description
Redial Times Sets the number of redial attempts. If you enter 0, the
machine will not redial.
Redial Term Sets the time interval before automatic redialling.
Prefix Dial
Sets a prefix of up to five digits. This number dials
before any automatic dial number is started. It is useful
for accessing a PABX exchange.
ECM Mode
Sends faxes using error correction mode (ECM) to
makes sure the faxes are sent smoothly without any
error. It may take more time.
Modem Speed Select the maximum modem speed you want if the
phone line fails to sustain a higher modem speed.
Fax Confirm.
Sets the machine to print a report whether a fax
transmission was successfully completed or not. If you
select On-Error, the machine prints a report only when
a transmission is not successful.
Image TCR Prints a transmission report with a minimized image of
the first page of the fax sent.
Dial Mode
Sets the dialing mode to either tone or pulse. This
setting may not be available depending on your
country.
Fax menu
211
3. Useful Setting Menus
5
Receiving setup
Some menus may not appear in the display depending on options or
models. If so, it is not applicable to your machine (see "Menu overview" on
page 30).
To change the menu options:
• Press (fax) > (Menu) > Fax Setup > Receiving on the control panel.
Item Description
Receive Mode Selects the default fax receiving mode.
Ring to Answer Specifies the number of times the machine rings before
answering an incoming call.
Stamp Rcv Name
Automatically prints the page number, and the date
and time of reception at the bottom of each page of a
received fax.
Rcv Start Code
Initiates fax reception from an extension phone
plugged into the EXT socket on the back of the
machine. If you pick up the extension phone and hear
fax tones, enter the code. It is preset to *9* at the
factory.
Auto Reduction Automatically reduces an incoming fax page to fit the
size of the paper loaded in the machine.
Discard Size Discards a specific length from the end of the received
fax.
Junk Fax Setup
Blocks any unwanted faxes that you stored in the
memory as junk fax numbers. This setting may not be
available depending on your country.
DRPD Mode
Enables a user to use a single telephone line to answer
several different telephone numbers. You can set the
machine to recognize different ring patterns for each
number. This setting may not be available depending
on your country (see "Receiving faxes using DRPD
mode" on page 253).
Duplex Print Prints the received fax data on both sides of the paper.
You can save the paper usage.
Change Default Resets the value or setting to the printer’s out-of-box
state.
Manual TX/RX
Setting this option to ON provides the ability to send or
receive a fax while the line is busy. You can select to
send or receive a fax by either picking up the extension
phone receiver and pressing the Start button or by
pressing the (On Hook Dial) button and pressing
the Start button.
Item Description

212
3. Useful Setting Menus
System setup
6
Machine setup
Some menus may not appear in the display depending on options or
models. If so, it is not applicable to your machine (see "Menu overview" on
page 30).
To change the menu options:
• Press (Menu) > System Setup > Machine Setup on the control panel.
Item Description
Machine ID Sets the machine ID which will be printed at the top of
each fax page that you send.
Fax Number Sets the fax number which will be printed at the top of
each fax page that you send.
Date & Time Sets the date and time.
Clock Mode Selects the format for displaying time between 12 hr. and
24 hr.
Language Sets the language of the text that appears on the control
panel display.
Default Mode Sets the machine’s default mode among fax mode and
copy mode.
PowerSave
Sets how long the machine waits before going to power
save mode.
When the machine does not receive data for an extended
period of time, power consumption is automatically
lowered.
Wakeup Event
You can set the condition to wake up from power-save
mode.
•On: The machine wake up from the power save mode
on the following cases:
- Pressing any button
- Opening or closing the paper tray
- Inserting paper in the document feeder
•Off: The machine wake up from the power save mode
only when the (Power/Wake Up) button is
pressed.
System Timeout
Sets the time that the machine remembers previously
used copy settings. After the timeout, the machine
restores the default copy settings.
Job Timeout
Sets the length of time the printer waits before printing
the last page of a print job that does not end with a
command to print the page.
Altitude Adj. Optimize print quality according to the machine’s
altitude.
Item Description
System setup
213
3. Useful Setting Menus
Auto Continue
Determine whether or not the machine continues
printing when it detects the paper does not match the
paper settings.
•0 Sec: This option allows you to continue printing
when the paper size you have set is mismatched with
the paper in the tray.
•30 Sec: If a paper mismatch occurs, an error message
will display. The machine waits for about 30 second,
then automatically clear the message and continue
printing.
•Off: If a paper mismatch occurs, the machine waits
until you insert the correct paper.
Paper Substit.
Automatically substitutes the printer driver’s paper size
to prevent the paper mismatch between Letter and A4.
For example, if you have A4 paper in the tray but you set
the paper size to Letter in the printer driver, the machine
prints on A4 paper and vice versa.
Toner Save
Activating this mode extends the life of your toner
cartridge and reduces your cost per page beyond what
one would experience in the normal mode, but it reduces
print quality.
Item Description
Eco Settings
Allows you to save print resources and enables eco-
friendly printing.
•Default Mode: Select whether to turn the Eco mode
on or off.
On force (On-Forced): Sets the Eco mode on with
password. If a user wants to turn the Eco mode
on/off, the user needs to enter the password.
•Select Temp.: Selects the eco template set from the
SyncThru™ Web Service.
Item Description

System setup
214
3. Useful Setting Menus
7
Paper setup
Some menus may not appear in the display depending on options or
models. If so, it is not applicable to your machine (see "Menu overview" on
page 30).
To change the menu options:
• Press (Menu) > System Setup > Paper Setup on the control panel.
8
Sound / Volume
Some menus may not appear in the display depending on options or
models. If so, it is not applicable to your machine (see "Menu overview" on
page 30).
To change the menu options:
• Press (Menu) > System Setup > Sound/Volume on the control panel.
Item Description
Paper Size Sets the paper size as A4, Letter, or other paper sizes,
according to your requirements.
Paper Type Chooses the type of the paper for each tray.
Paper Source Selects from which tray the paper is used.
Margin Sets the margins for the document.
Item Description
Key Sound Turns the key sound on or off. With this option set to on,
a tone sounds each time a key is pressed.
Alarm Sound
Turns the alarm sound on or off. With this option set to
on, an alarm tone sounds when an error occurs or fax
communication ends.
System setup
215
3. Useful Setting Menus
9
Report
Some menus may not appear in the display depending on options or
models. If so, it is not applicable to your machine (see "Menu overview" on
page 30).
To change the menu options:
• Press (Menu) > System Setup > Report on the control panel.
Speaker
Turns on or off the sounds from the telephone line
through the speaker, such as a dial tone or a fax tone.
With this option set to Comm. which means the speaker
is on until the remote machine answers.
You can adjust the volume level using (On
Hook Dial). You can adjust the speaker volume
only when the telephone line is connected.
a Press (fax) on the control panel.
b Press (On Hook Dial). A dial tone sounds
from the speaker.
c Press the arrows until you hear the volume you
want.
d Press (On Hook Dial) to save the change
and return to ready mode.
Ringer Adjusts the ringer volume. For the ringer volume, you can
select off, low, middle, and high level.
Item Description
Item Description
Configuration Prints a report on the machine's overall
configuration.
Demo Page Prints the demo page to check whether your
machine is printing properly or not.
Network Conf. Prints information on your machine’s network
connection and configuration.
Supplies Info. Prints supplies’ information page.
Usage Counter Prints a usage page. The usage page contains the
total number of pages printed.
Fax Received Prints information on the faxes you have recently
received.
System setup
216
3. Useful Setting Menus
10
Maintenance
Some menus may not appear in the display depending on options or
models. If so, it is not applicable to your machine (see "Menu overview" on
page 30).
To change the menu options:
• Press (Menu) > System Setup > Maintenance on the control panel.
Fax Sent Prints information on the faxes you have recently
sent.
Scheduled Jobs
Prints the document list currently stored for
delayed faxes along with the starting time and
type of each operation.
Fax Confirm. Sets the machine to print a report whether a fax
transmission was successfully completed or not.
JunkFax Prints the fax numbers specified as junk fax
numbers.
PCL Font List Prints the PCL font list.
Address Book Prints all of the email addresses currently stored
in the machine’s memory.
Item Description
Item Description
CLR Empty Msg. When toner cartridge is empty, this option appears. You
can clear the empty message.
Supplies Life Shows the supply life indicators (see "Monitoring the
supplies life" on page 79.)
Image Mgr.
Allows you to adjust the image setting such as density.
•Custom Color: adjusts contrast.
-Default: optimizes density automatically.
-Print Density: allows you to manually adjust the
contrast. It is recommended to use the Default
setting for best quality.
TonerLow Alert Customizes the level to alert toner low or toner empty
(see "Setting the toner low alert" on page 80).
ImgU.Low Alert Allows you to set the alarm for when the imaging unit is
low.
Serial Number
Shows the machine’s serial number. When you call for
service or register as a user on the Samsung website, you
can find this.
System setup
217
3. Useful Setting Menus
11
Network setup
Some menus may not appear in the display depending on options or
models. If so, it is not applicable to your machine (see "Menu overview" on
page 30).
• Press (Menu)> Network on the control panel,
Option Description
TCP/IP (IPv4)
Selects the appropriate protocol and configure
parameters to use the network environment.
There are lots of parameters to be set. If you are
not sure, leave as is, or consult the network
administrator.
TCP/IP (IPv6) Selects this option to use the network environment
through IPv6 (see "IPv6 configuration" on page 157).
Ethernet Speed Configure the network transmission speed.
Wireless Selects this option to use the wireless network.
Protocol Mgr.
You can activate or deactivate the following protocols.
•Net. Activate: : You can set whether to use Ethernet
on or off.
•Http Activate: You can sets whether to use
SyncThru™ Web Service or not.
•WINS: You can configure the WINS server.
WINS(Windows Internet Name Service) is used in the
Windows operating system.
•SNMP V1/V2: You have to enable this option to use
SNMP V1/V2 protocol. Administrator’s can use SNMP
to monitor and manage machines on the network.
•UPnP(SSDP): You have to enable this option to use
UPnP(SSDP) protocol.
Turn the power off and on after you change
above options.
Option Description
System setup
218
3. Useful Setting Menus
Protocol Mgr.
(continued.)
•MDNS: You have to enable this option to use MDNS
(Multicast Domain Name System) protocol.
•SetIP: You have to enable this option to use SetIP
protocol.
•SLP: You can configure SLP (Service Location
Protocol) settings. This protocol allows host
applications to find services in a local area network
without prior configuration.
Turn the power off and on after you change this
option.
Network Conf. This list shows information on your machine’s network
connection and configuration.
Clear Setting Reverts the network settings to the default values.
(Reboot required.)
Option Description
4. Special Features
This chapter explains special copying, scanning, faxing, and printing features.
• Altitude adjustment 220
• Entering various characters 221
• Setting up the fax address book 223
• Printing features 226
• Scan features 240
• Fax features 247
• The procedures in this chapter are mainly based on Windows 7.
• It may be necessary to press OK to navigate to lower-level menus for some models.
220
4. Special Features
Altitude adjustment
Print quality is affected by atmospheric pressure, which is determined by the
height of the machine above sea level. The following information will guide you
on how to set your machine for the best print quality.
Before you set the altitude value, determine the altitude where you are.
• Normal: 0-1,000 m(3,280 ft)
• High1: 1,000 m(3,280 ft)-2,000 m(6,561 ft)
• High2: 2,000 m(6,561 ft)-3,000 m(9,842 ft)
• High3: 3,000 m(9,842 ft)-4,000 m(13,123 ft)
• High4: 4,000 m(13,123 ft)-5,000 m(16,404 ft)
You can set the altitude value from Device Settings in Samsung Easy Printer
Manager program or Machine section in Printer Settings Utility program.
• For Windows and Mac users, you set from Samsung Easy Printer Manager
> (Switch to advanced mode) > Device Settings, see "Device
Settings" on page 267.
• If your machine is connected to the network, you can set the altitude via
SyncThru™ Web Service (see "Using SyncThru™ Web Service" on page
261).
• You can also set the altitude in System Setup option on the machine’s
display (see "Menu overview" on page 30).
221
4. Special Features
Entering various characters
As you perform various tasks, you may need to enter names and numbers. For
example, when you set up your machine, you enter your name or your
company’s name, and the fax number. When you store fax numbers or email
addresses in memory, you may also enter the corresponding names.
1
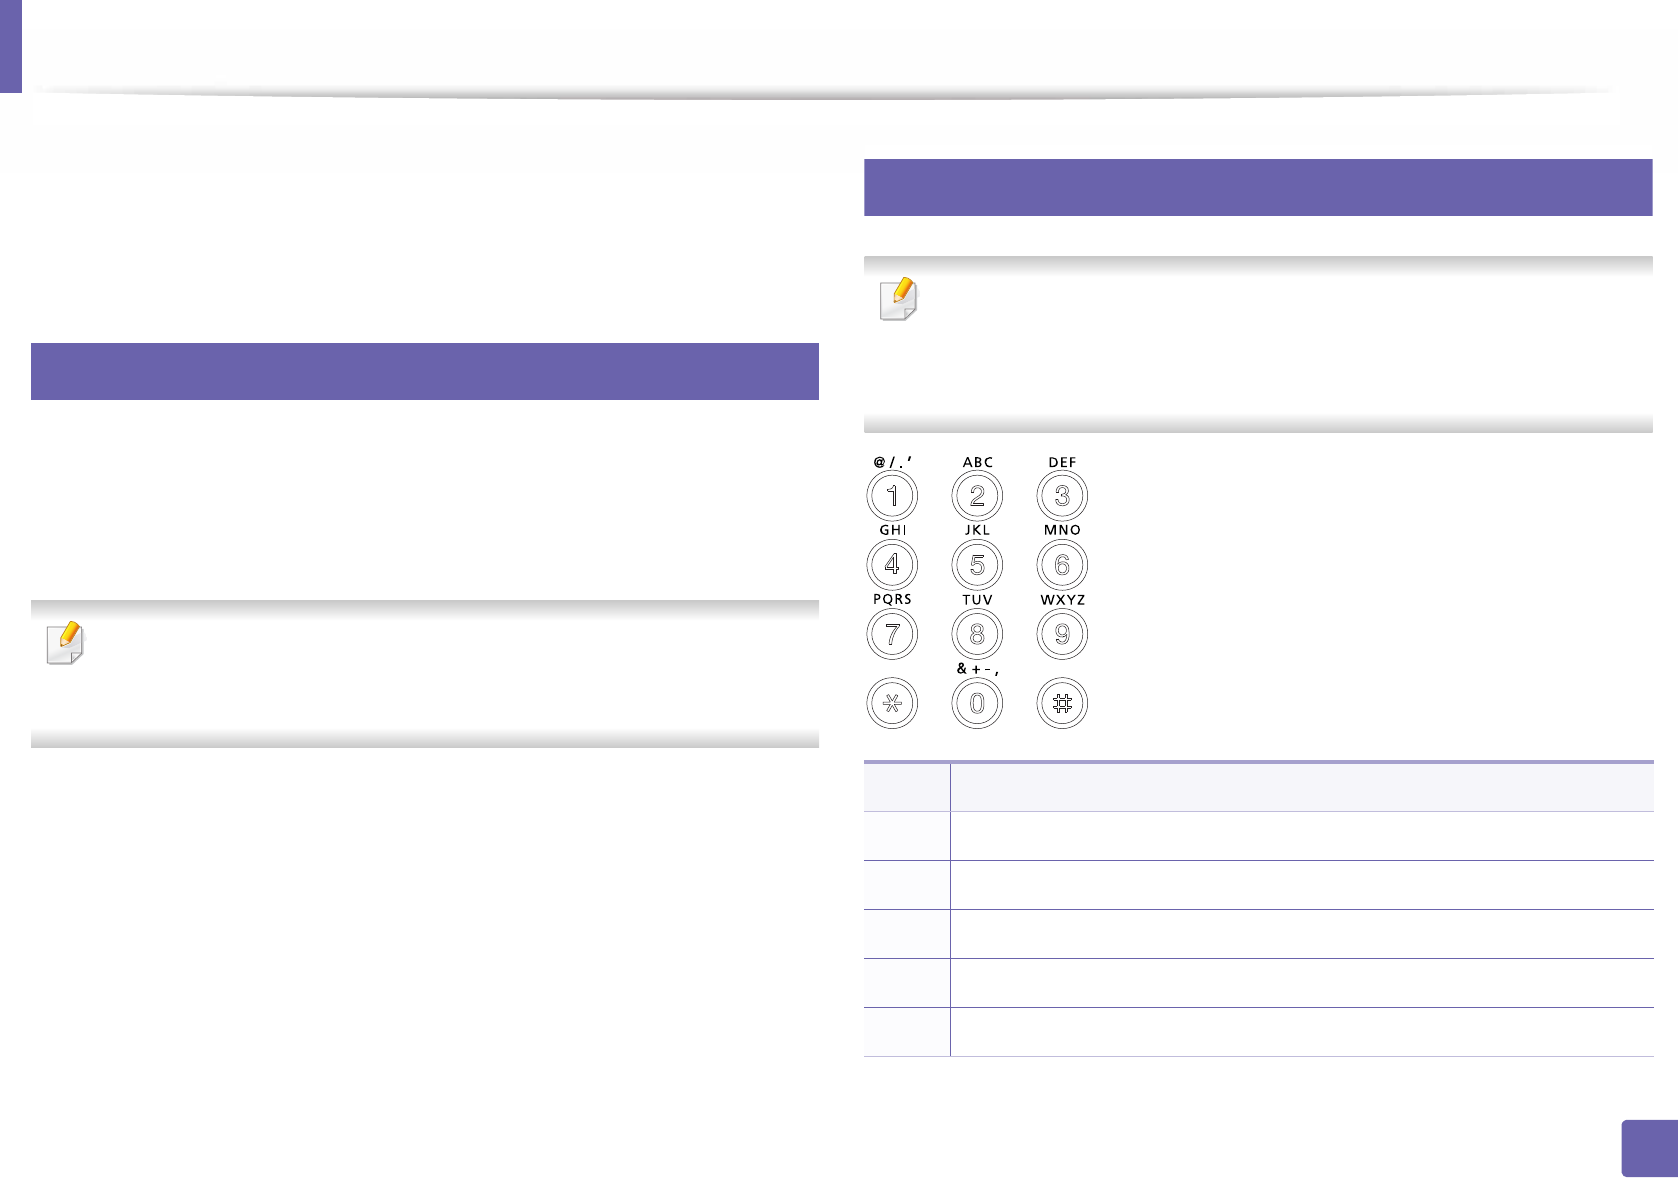
Entering alphanumeric characters
Press the button until the correct letter appears on the display. For example, to
enter the letter O, press 6, labeled with MNO. Each time you press 6, the display
shows a different letter, M, N, O, m, n, o and finally 6. To find the letter that you
want to enter, see "Keypad letters and numbers" on page 221.
• You can enter a space by pressing 1 twice.
• To delete the last digit or character, press the left/right or up/down arrow
button.
2
Keypad letters and numbers
• Special character sets may differ from your machine depending on its
options or the models.
• Some of the follow key values may not appear depending on the job you
are doing.
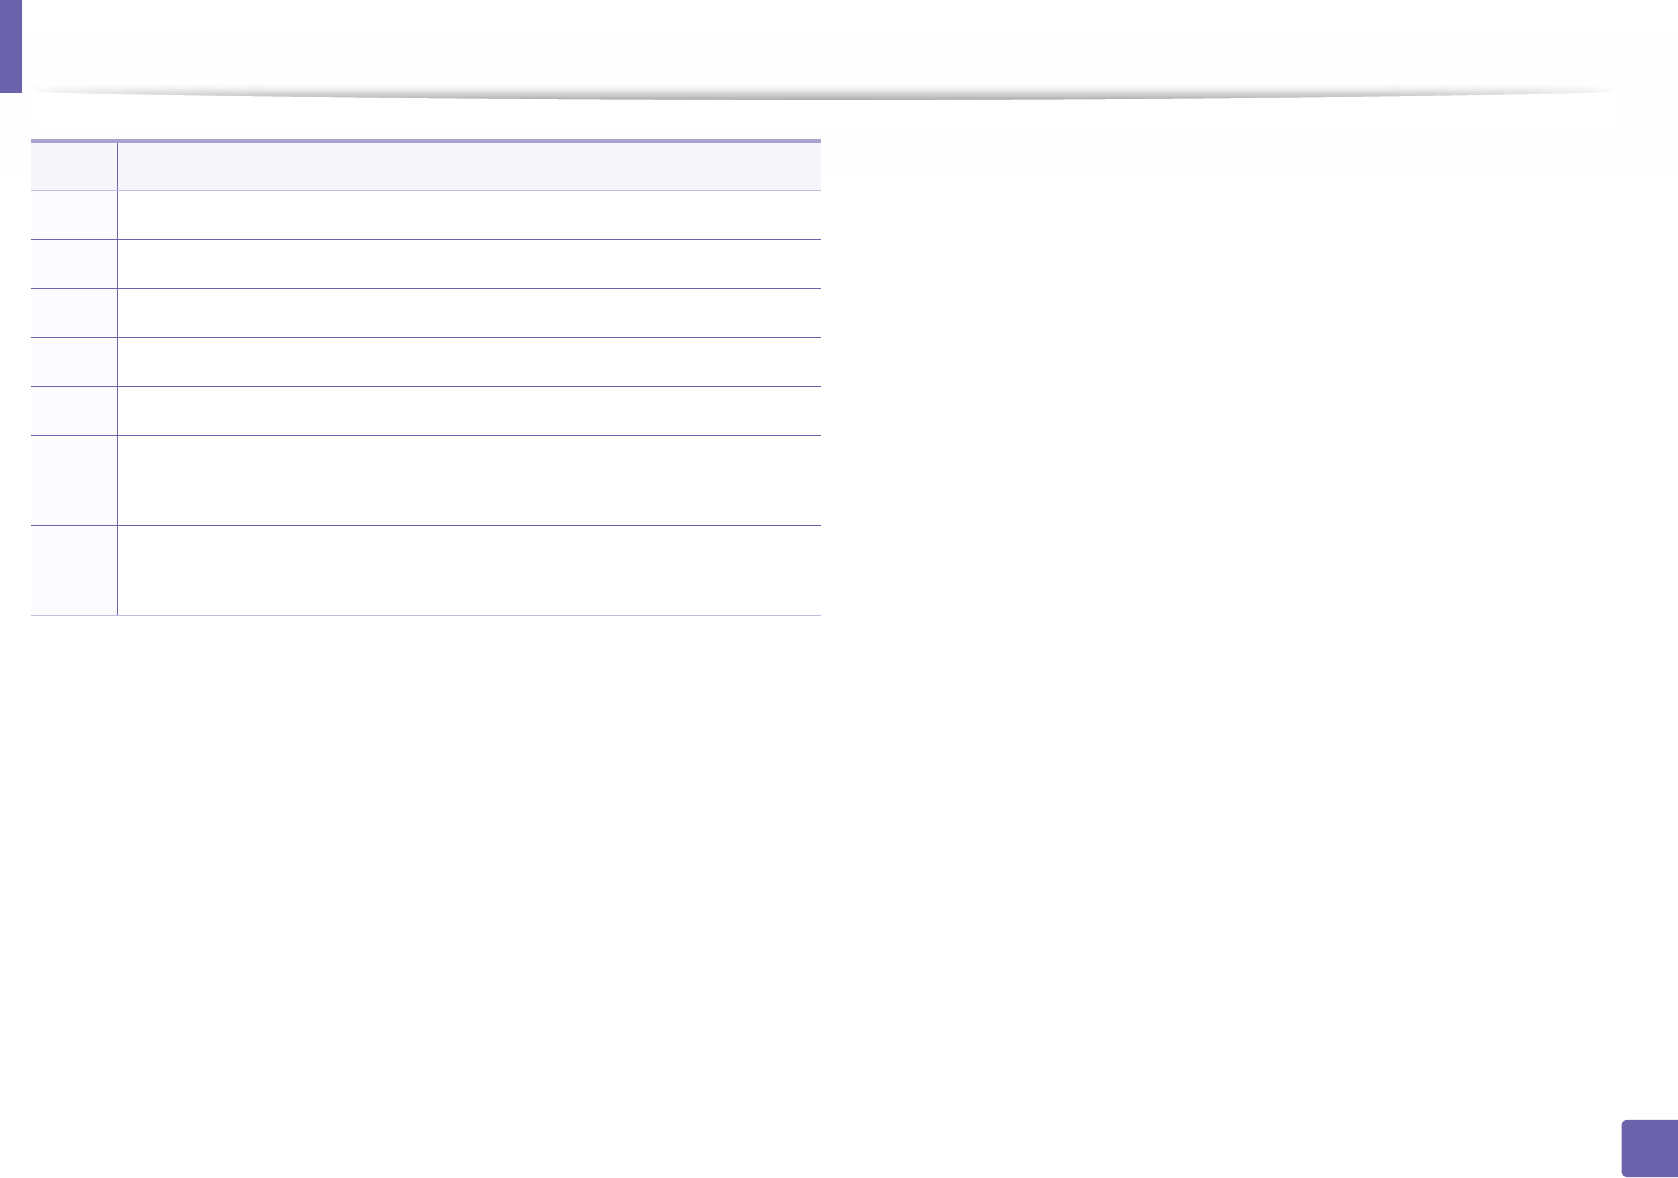
Key Assigned numbers, letters, or characters
1@ / . ‘ 1
2A B C a b c 2
3D E F d e f 3
4 G H I g h i 4
5J K L j k l 5
Entering various characters
222
4. Special Features
6 M N O m n o 6
7P Q R S p q r s 7
8 T U V t u v 8
9W X Y Z w x y z 9
0& + - , 0
**
(These symbols are available when you type for network authentication.)
##
(These symbols are available when you type for network authentication.)
Key Assigned numbers, letters, or characters
223
4. Special Features
Setting up the fax address book
You can set up speed number with the fax numbers you use frequently via
SyncThru™ Web Service and then easily and quickly enter fax numbers by
entering the location numbers assigned to them in address book.
3
Registering a speed dial number
1Select (fax) > (Address Book) > New & Edit > Speed Dial on
the control panel.
2 Enter a speed dial number and press OK.
If an entry is already stored in the number you choose, the display shows the
message to allow you to change it. To start over with another speed dial
number, press (Back).
3 Enter the name you want and press OK.
4 Enter the fax number you want and press OK.
5 Press the (Stop/Clear) button to return to ready mode.
4
Using speed dial numbers
When you are prompted to enter a destination number while sending a fax,
enter the speed dial number at which you stored the number you want.
• For a one-digit (0-9) speed dial number, press and hold the
corresponding digit button on the number keypad for more than 2
seconds.
• For a two- or three-digit speed dial number, press the first digit button(s)
and then hold down the last digit button for more than 2 seconds.
• You can print the address book list by selecting (fax) >
(Address Book) > Print.
5
Editing speed dial numbers
1Select (fax) > (Address Book) > New & Edit > Speed Dial on
the control panel.
2 Enter the speed dial number you want to edit and press OK.
3 Change the name and press OK.
4 Change the fax number and press OK.
Setting up the fax address book
224
4. Special Features
5 Press (Stop/Clear) to return to ready mode.
6
Registering a group dial number
1Select (fax) > (Address Book) > New & Edit > Group Dial on
the control panel.
2 Enter a group dial number and press OK.
If an entry is already stored in the number you choose, the display shows the
message to allow you to change it. To start over with another speed dial
number, press (Back).
3 Search by entering the first few letters of the speed dial’s name to put in
the group.
4 Select the name and number you want and press OK.
5 Select Yes when Another Number? appears.
6 Repeat step 3 to include other speed dial numbers into the group.
7 When you have finished, select No when Another Number? appears
and press OK.
8 Press (Stop/Clear) to return to ready mode.
7
Editing group dial numbers
1Select (fax) > (Address Book) > New & Edit > Group Dial on
the control panel.
2 Enter the group dial number you want to edit and press OK.
3 Enter a new speed dial number to add and press OK, then Add? appears.
Enter a speed dial number stored in the group and press OK, Delete?
appears.
4 Press OK to add or delete the number.
5 Repeat step 3 to add or delete more numbers.
6 Select No at the Another Number? and press OK.
7 Press (Stop/Clear) to return to ready mode.

Setting up the fax address book
225
4. Special Features
8
Searching address book for an entry
There are two ways to search for a number in memory. You can either scan from
A to Z sequentially, or you can search by entering the first letters of the name
associated with the number.
1Select ct (fax) > (Address Book) > Search & Dial > Speed Dial
or Group Dial on the control panel.
2 Enter All or ID and press OK.
3 Press the name and number or the keypad button labeled with the letter
you want to search.
For example, if you want to find the name “MOBILE,” press the 6 button,
which is labeled with “MNO.”
4 Press (Stop/Clear) to return to ready mode.
9
Printing address book
You can check your (Address Book) settings by printing a list.
1Select ct (fax) > (Address Book) > Print on the control panel.
2 The machine begins printing.