Samsung Electronics Co XE300TZC Tablet PC with 802.11 abgn + BT, GPS User Manual Part 2
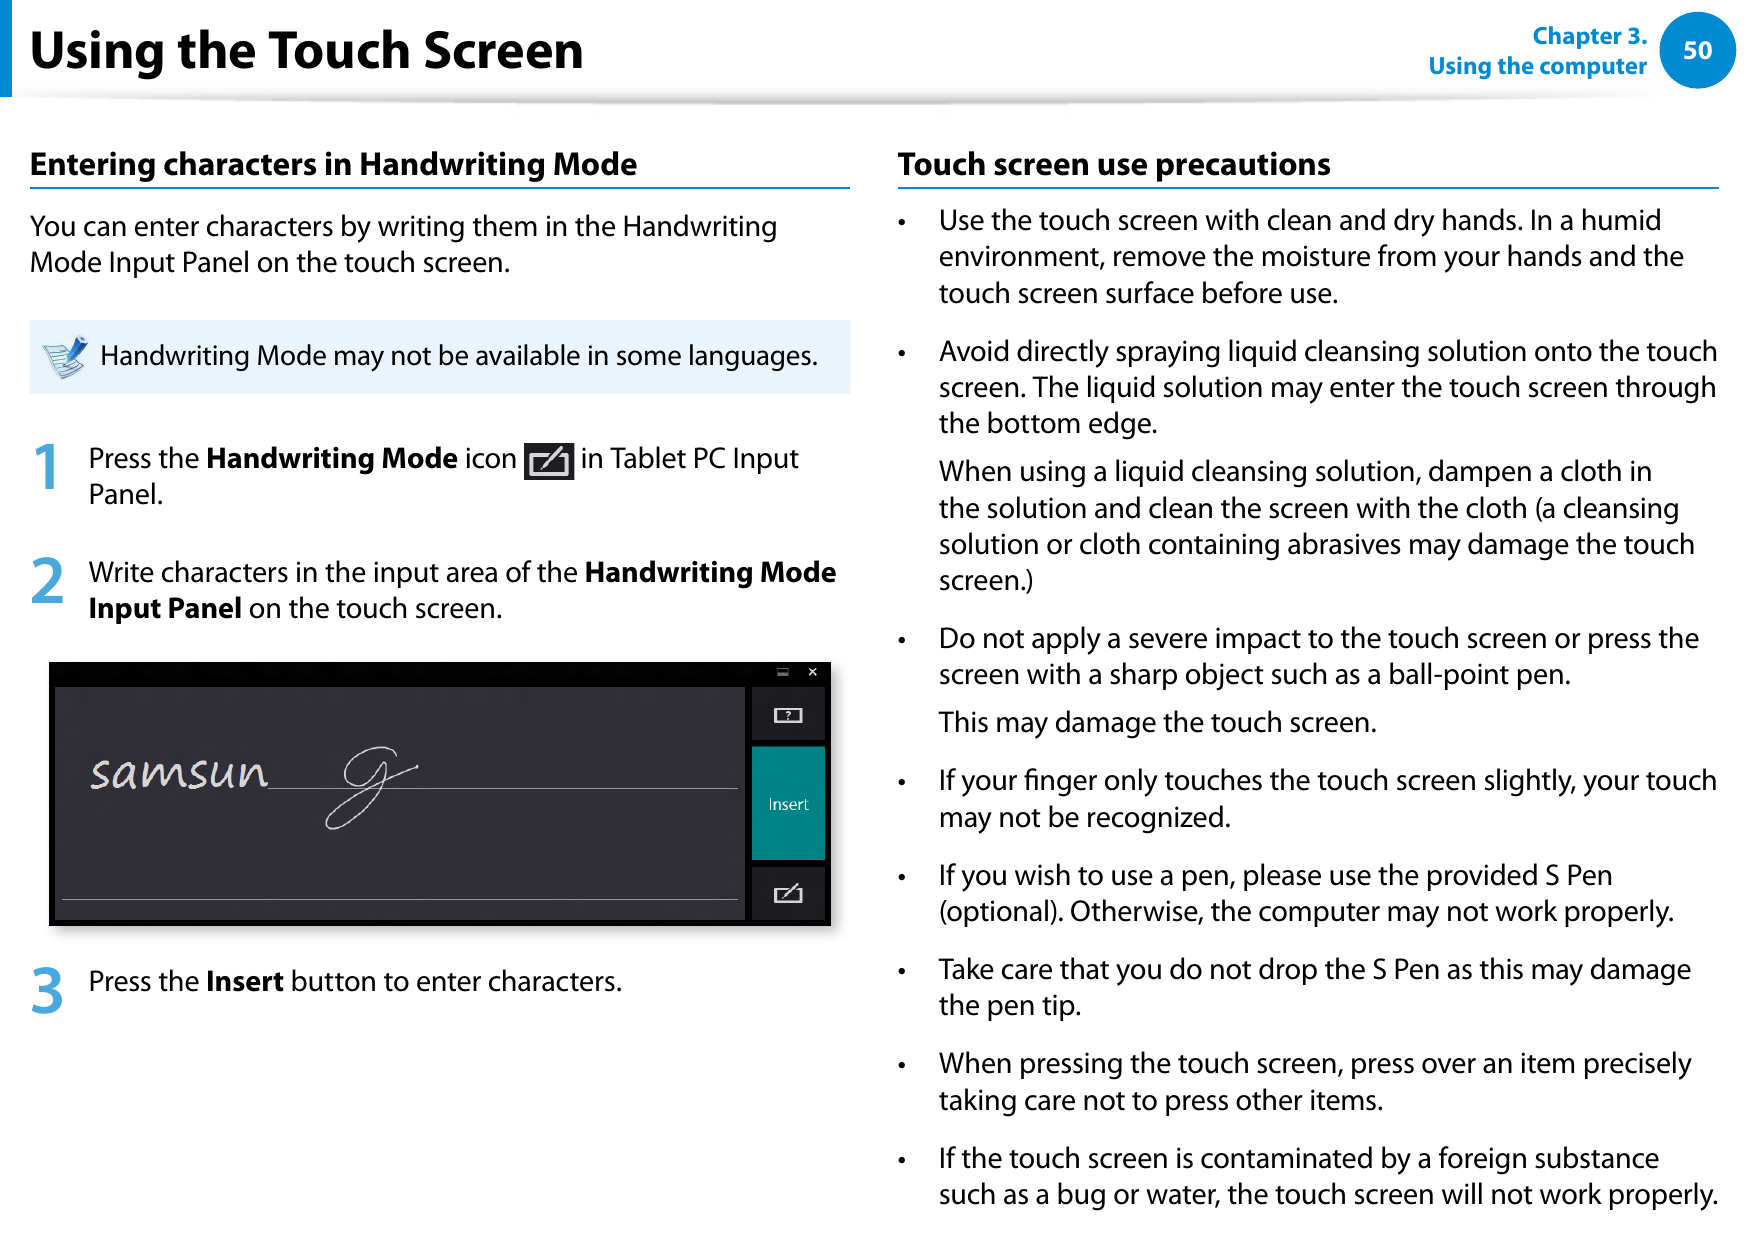
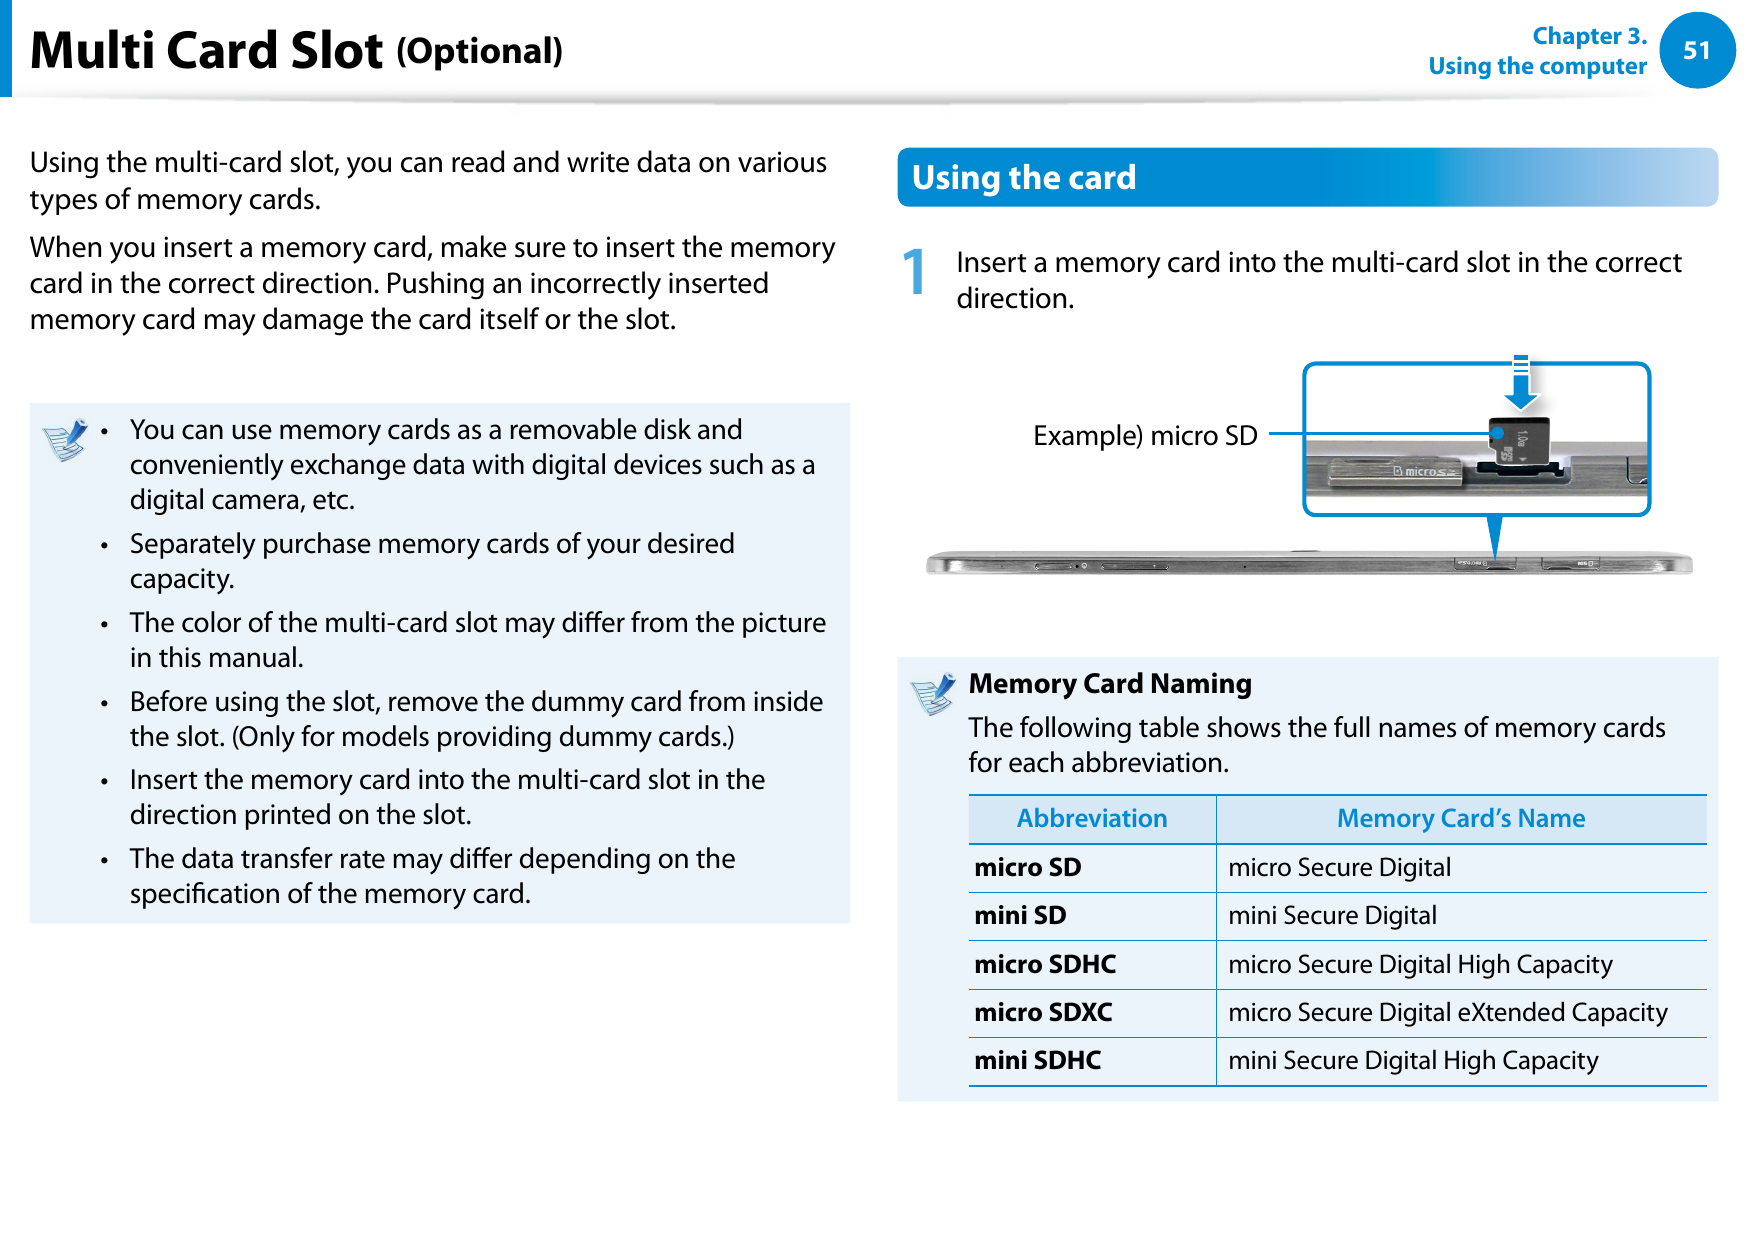
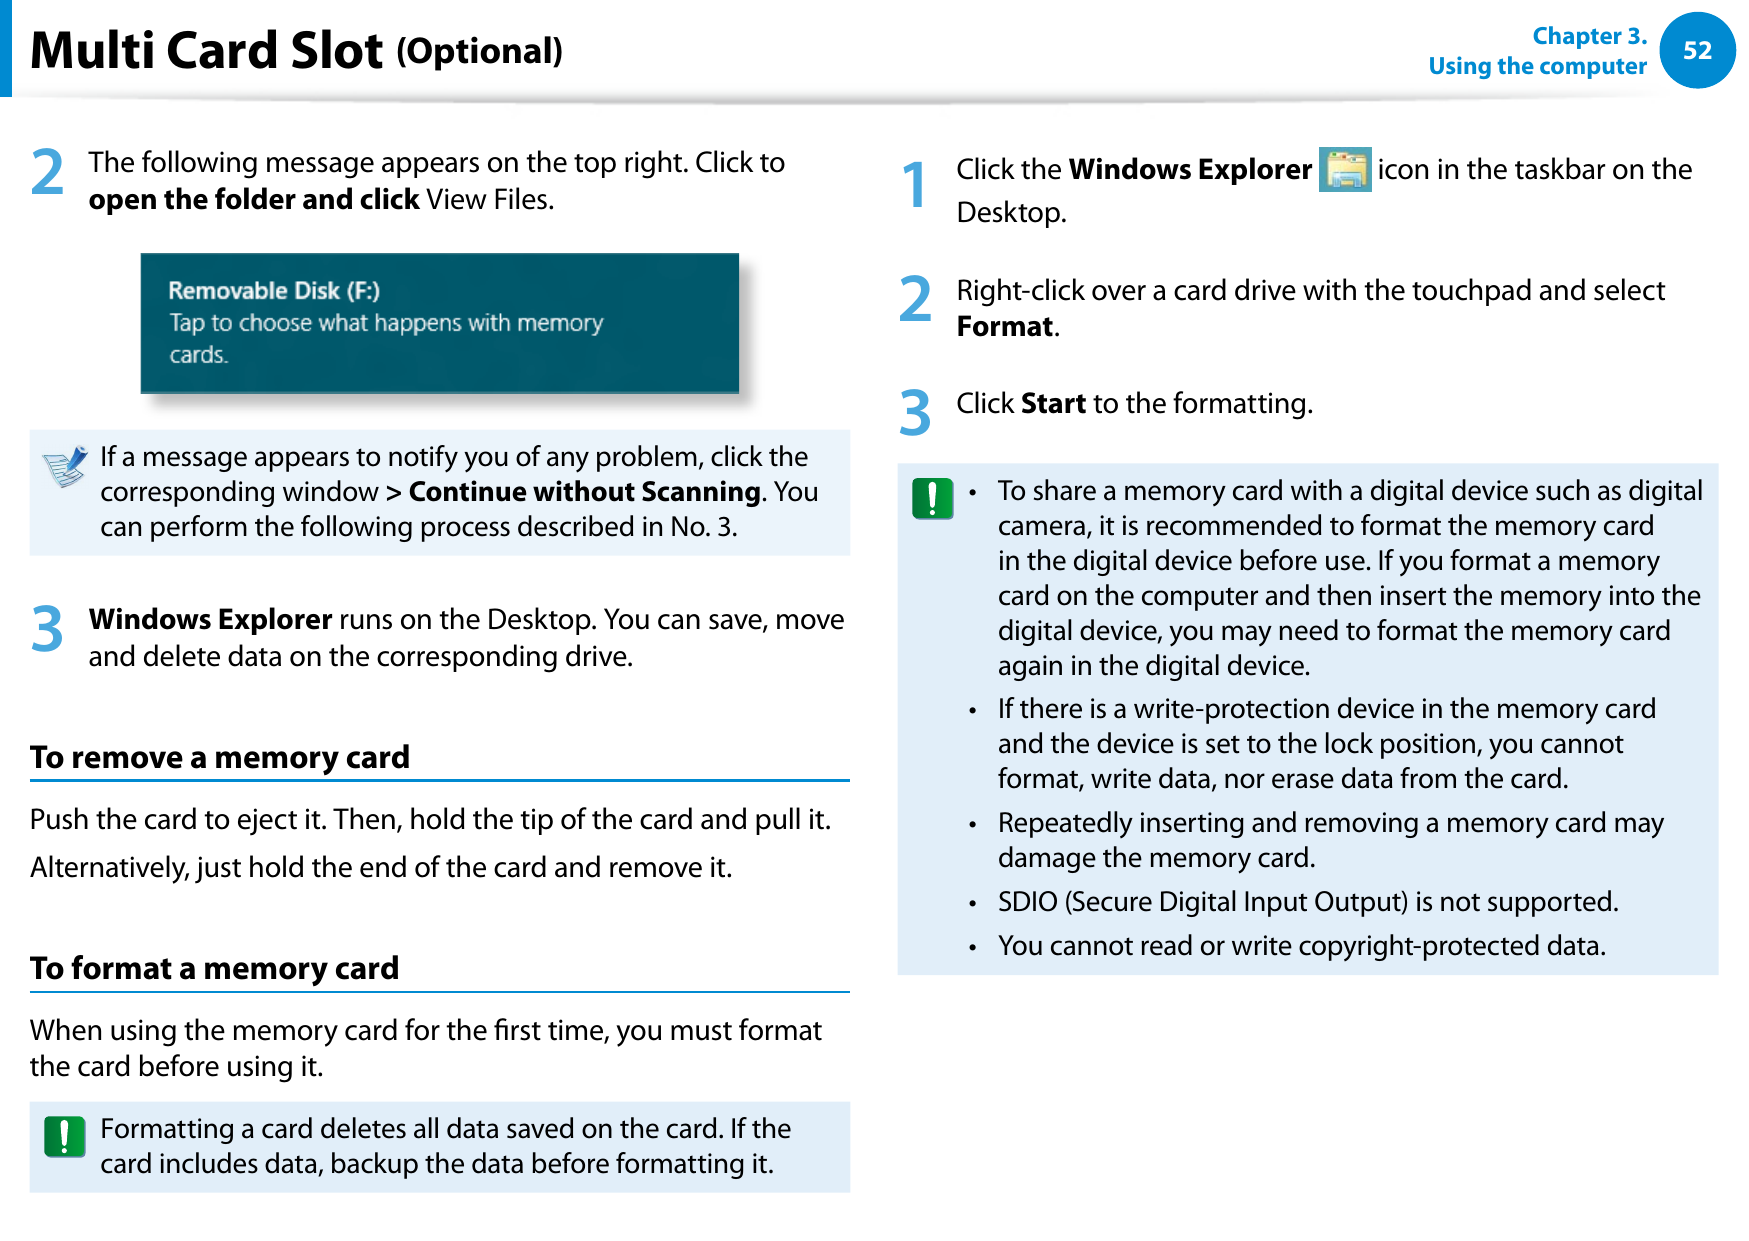
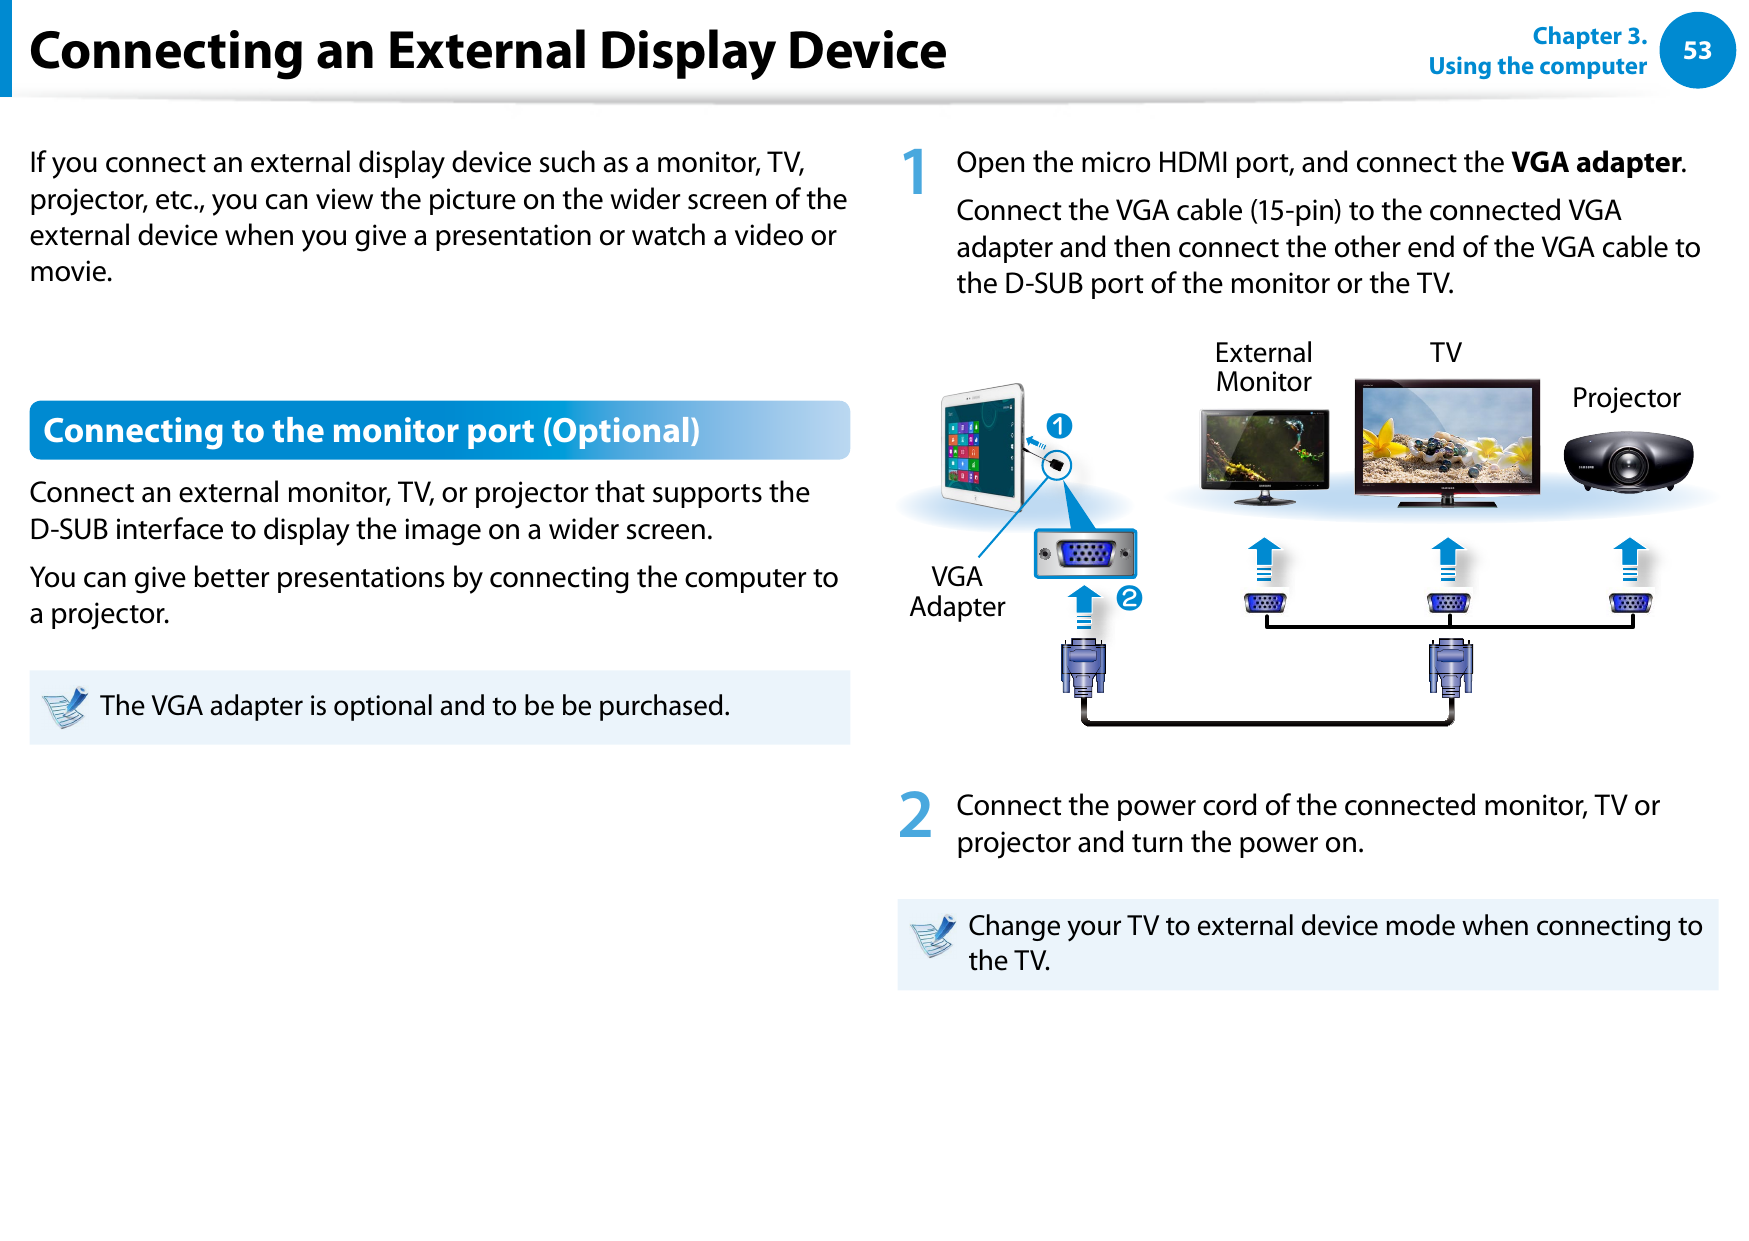
Samsung Electronics Co Ltd Tablet PC with 802.11 abgn + BT, GPS Part 2
Contents
- 1. User Manual Part 1
- 2. User Manual Part 2
- 3. User Manual Part 3
- 4. User Manual Part 4
- 5. User Manual Part 5
User Manual Part 2
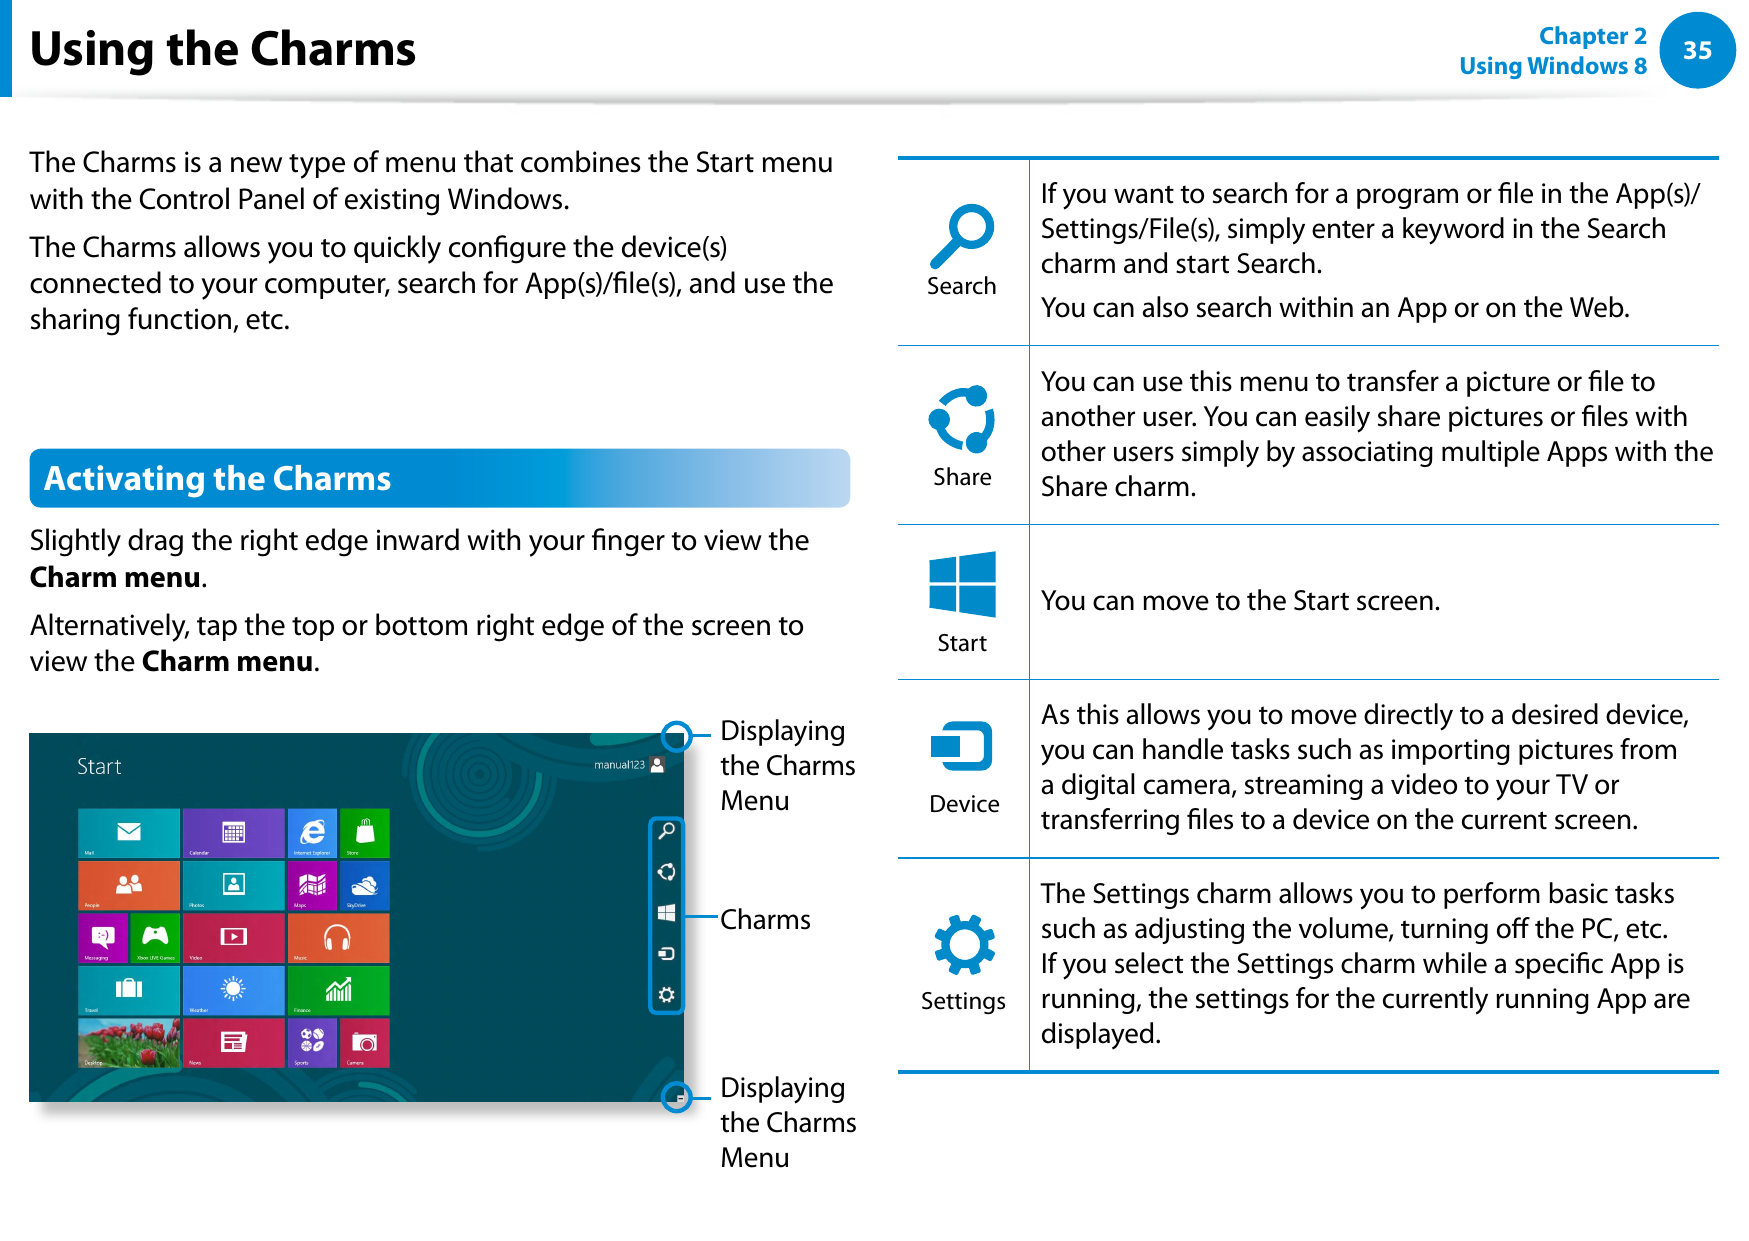
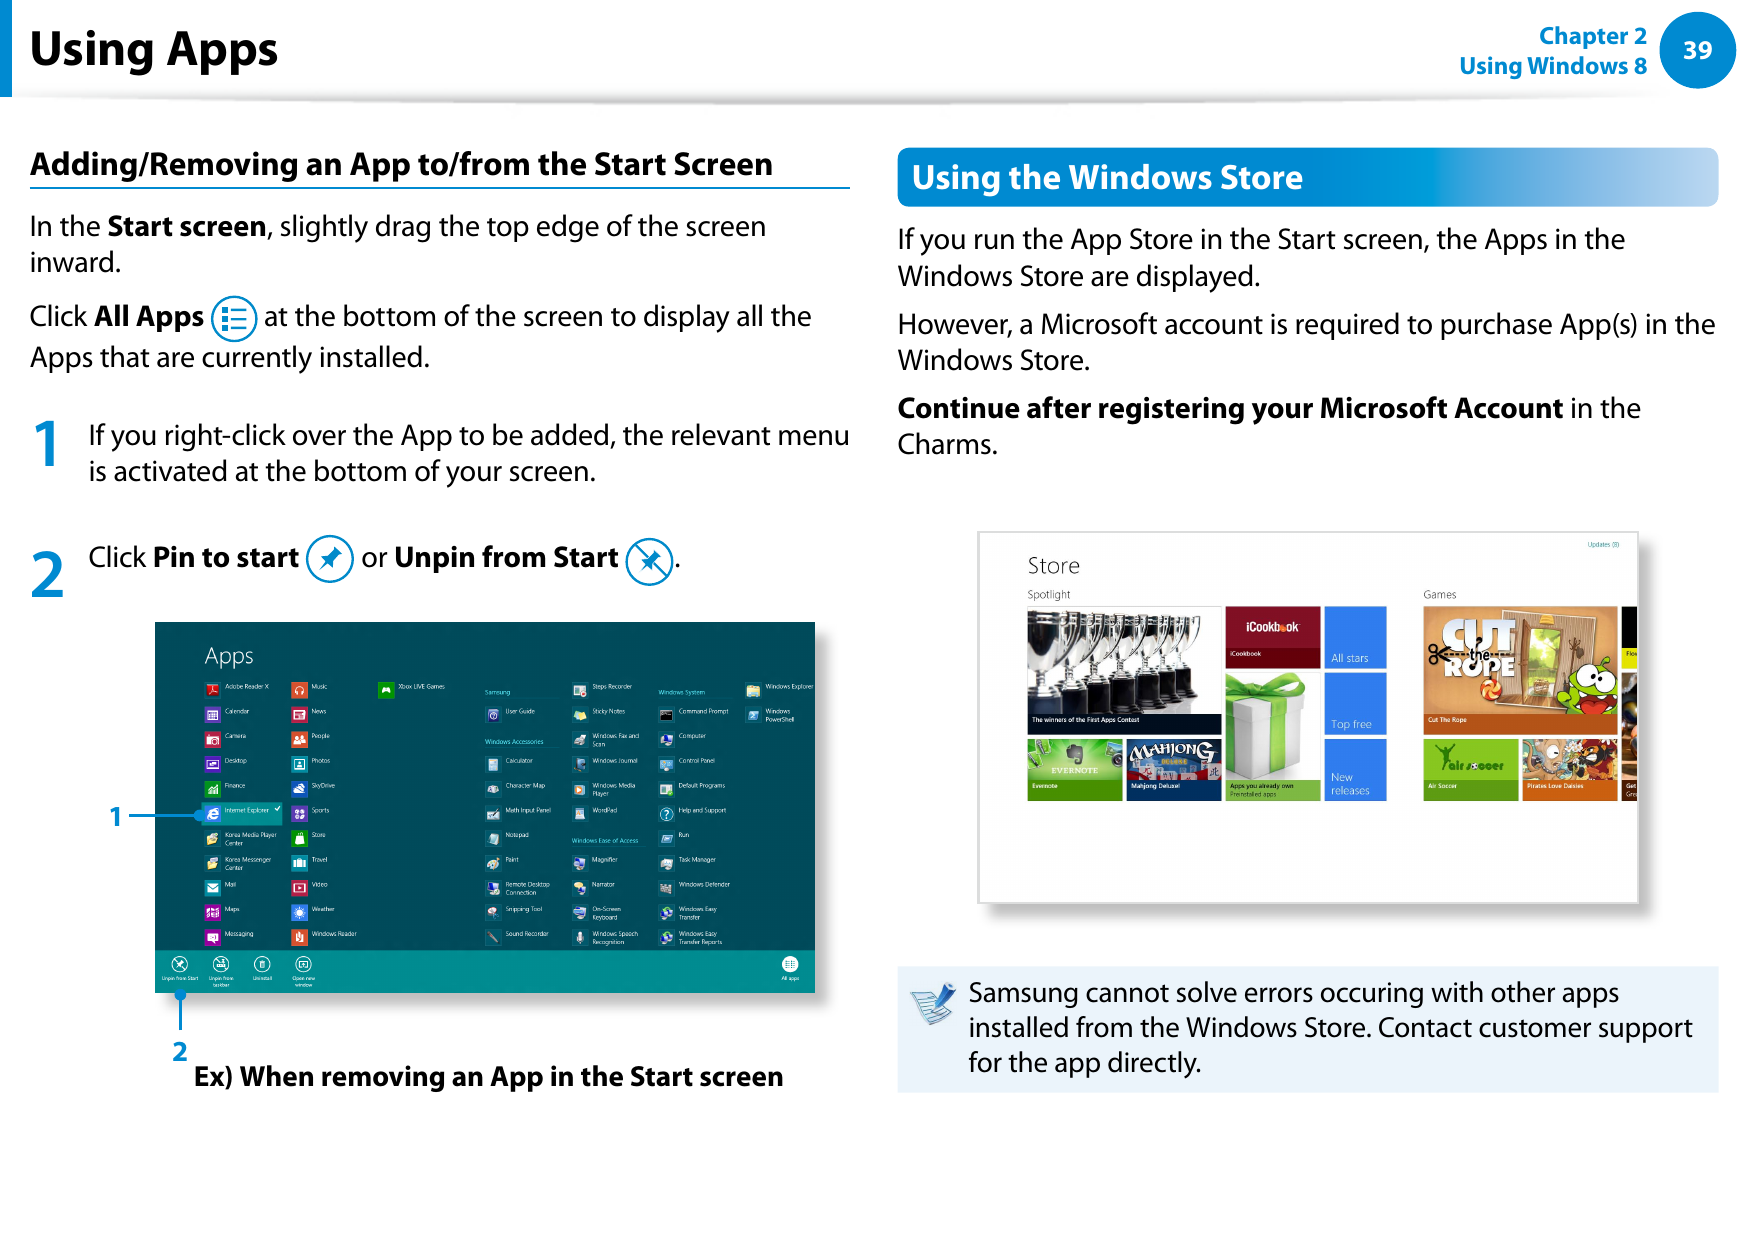
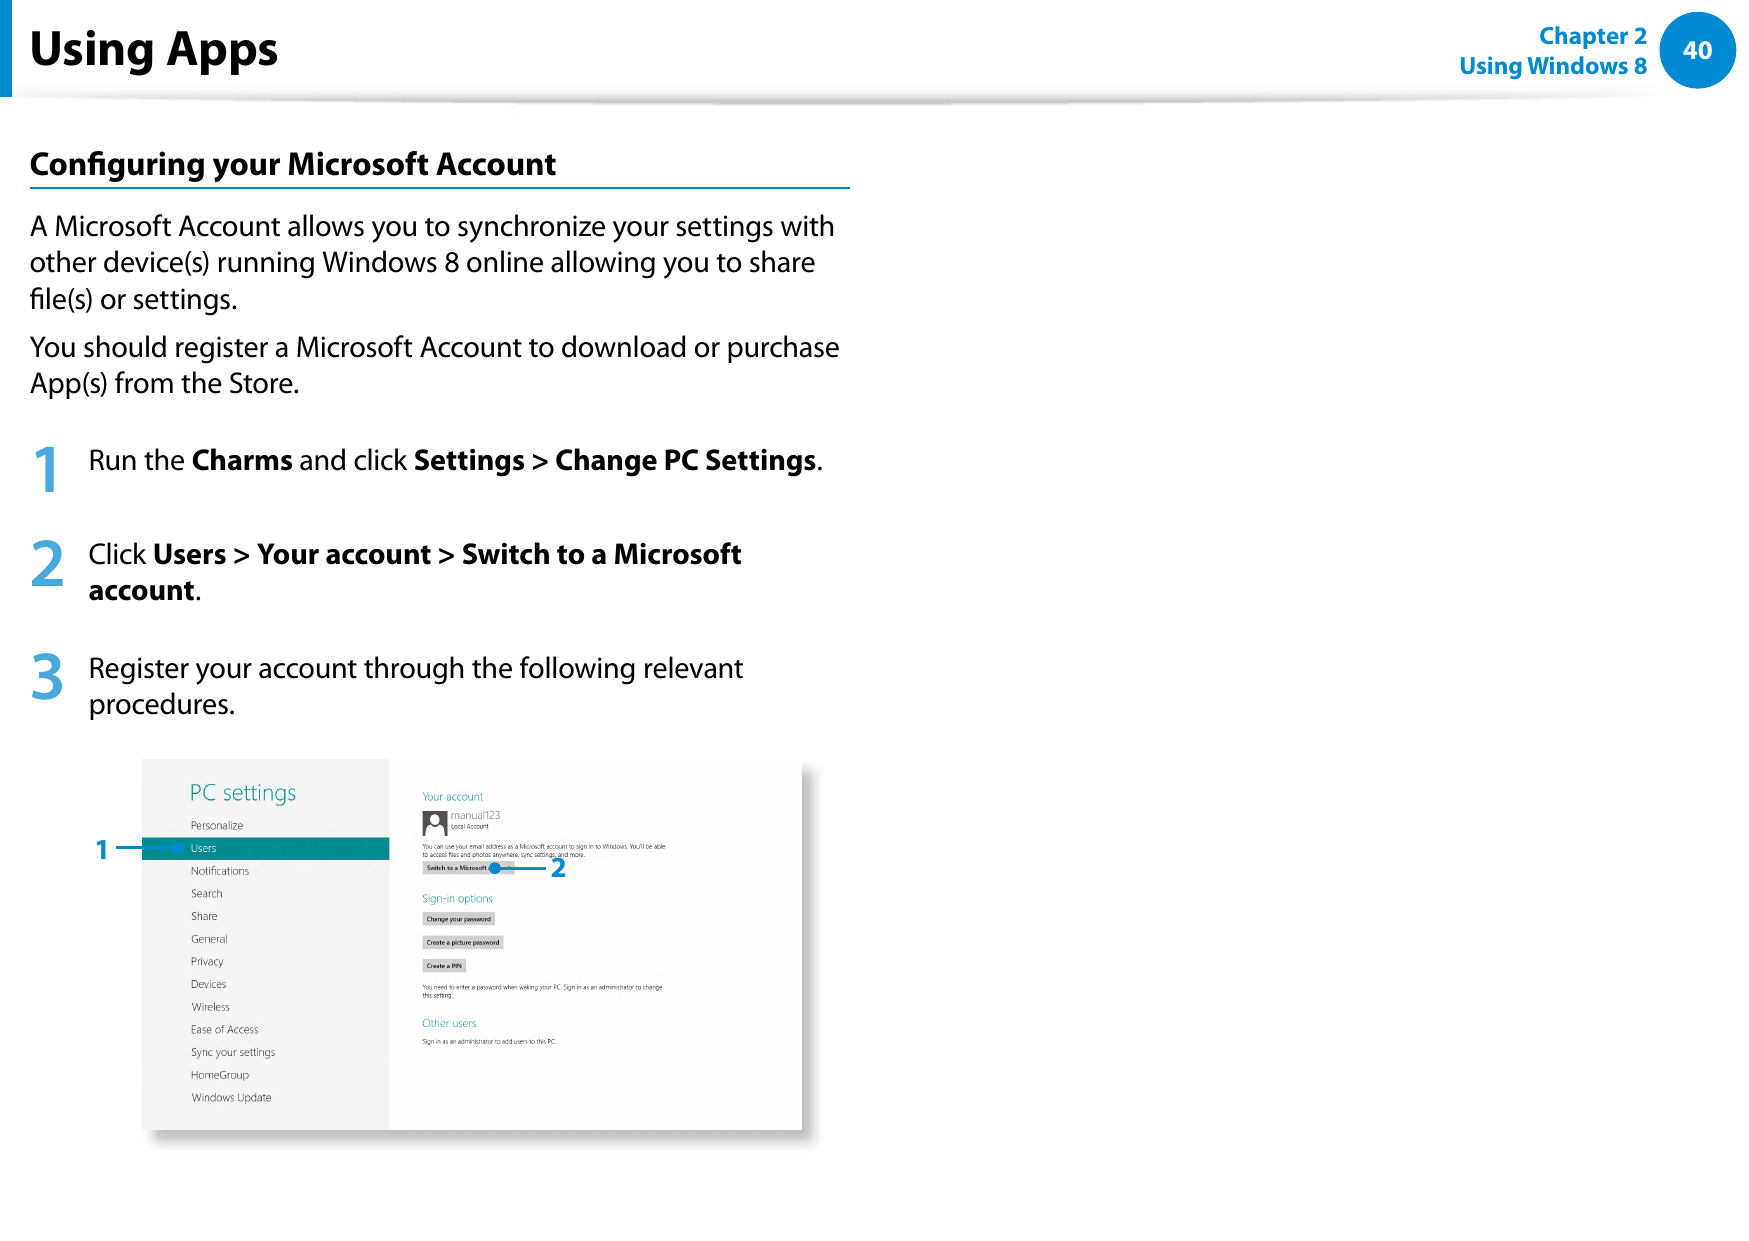
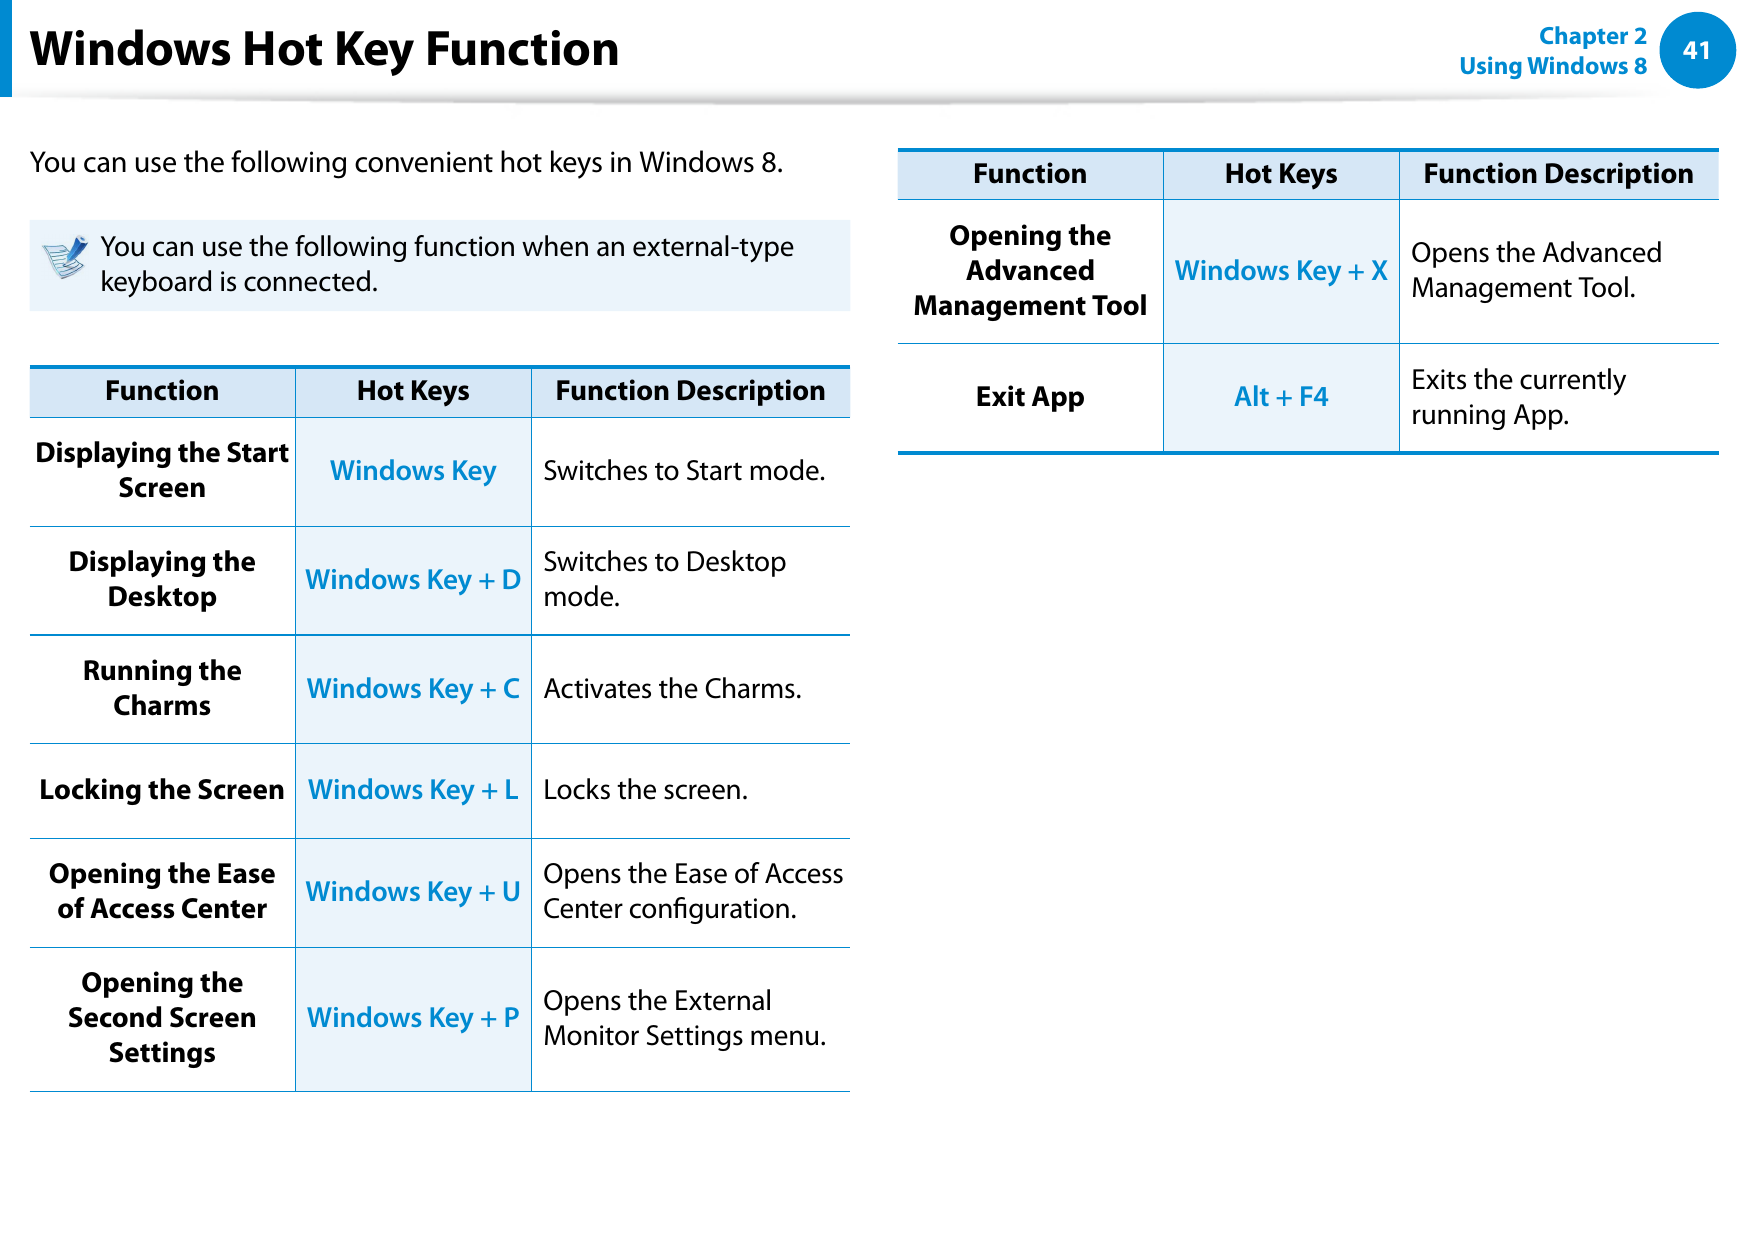
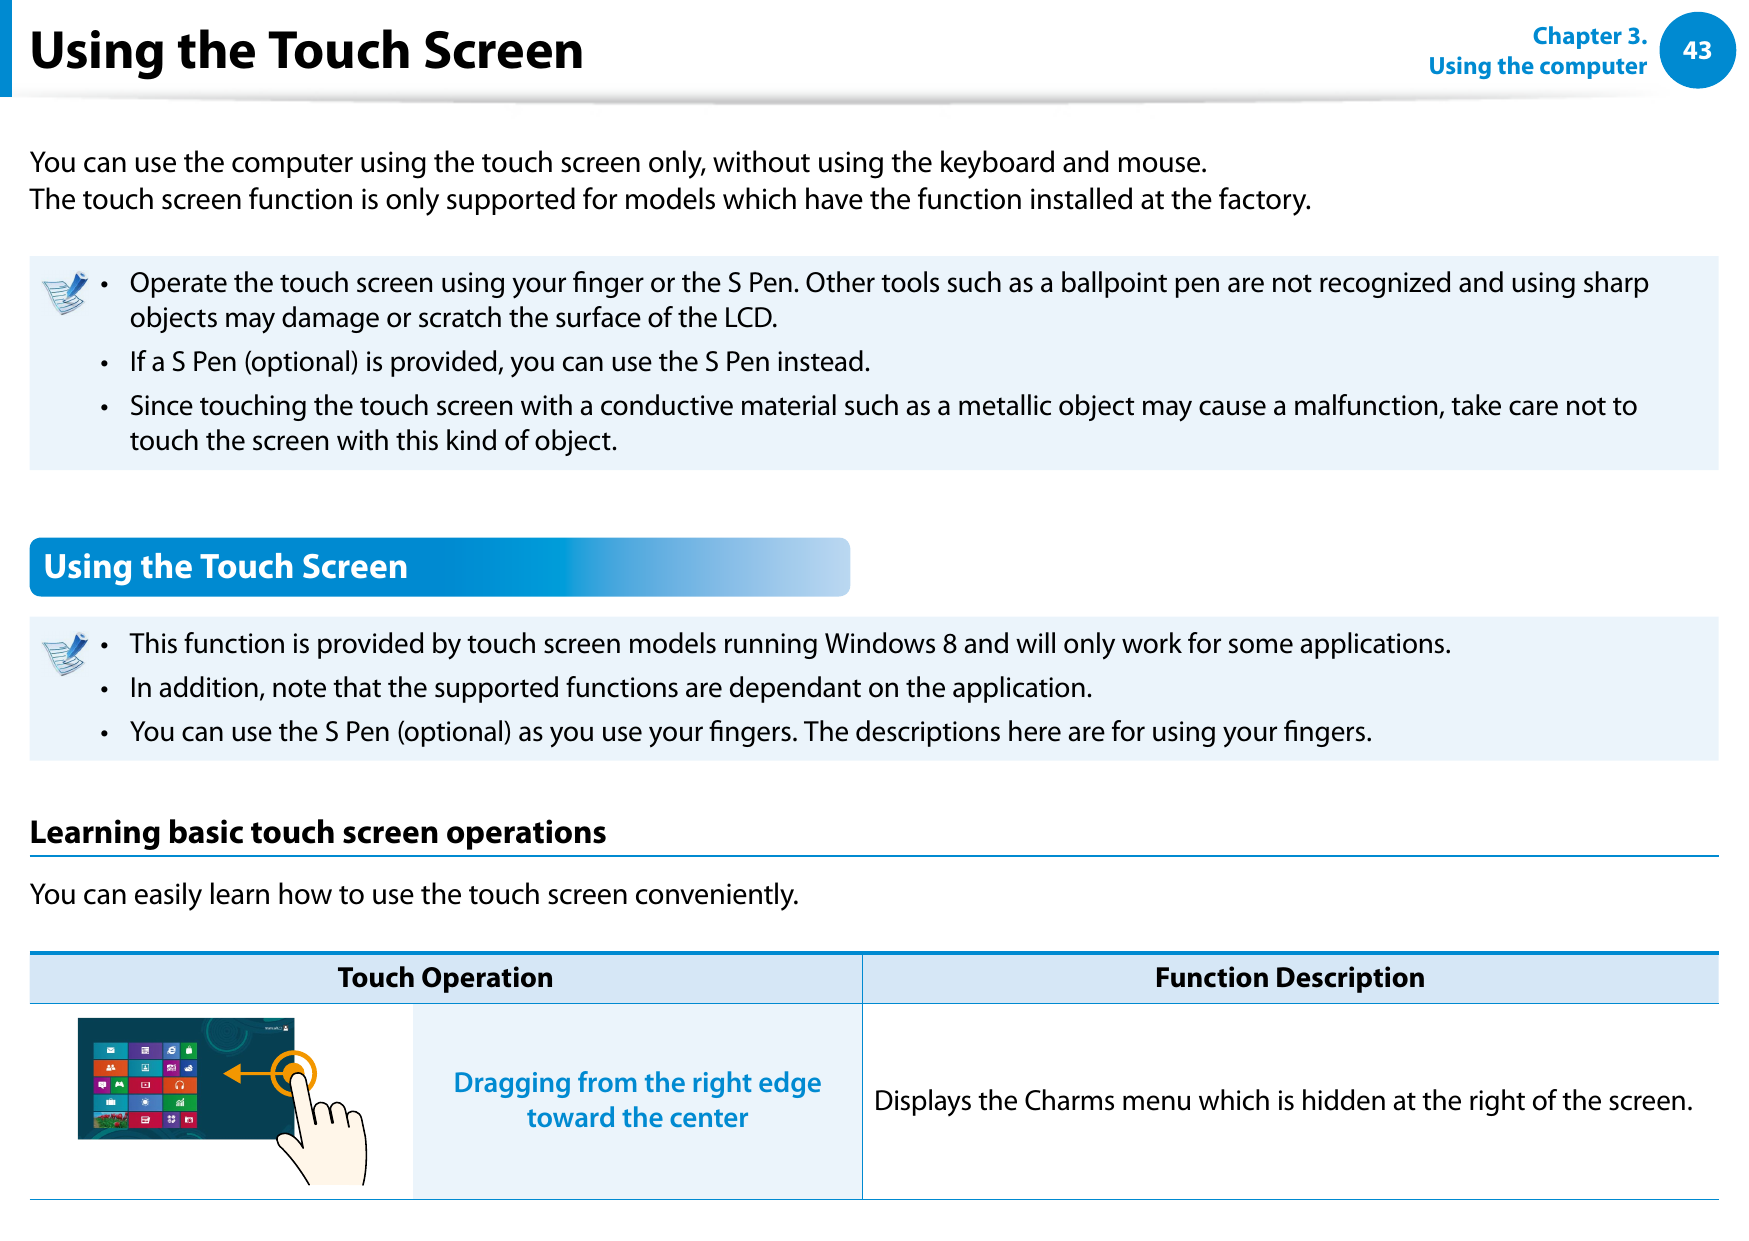
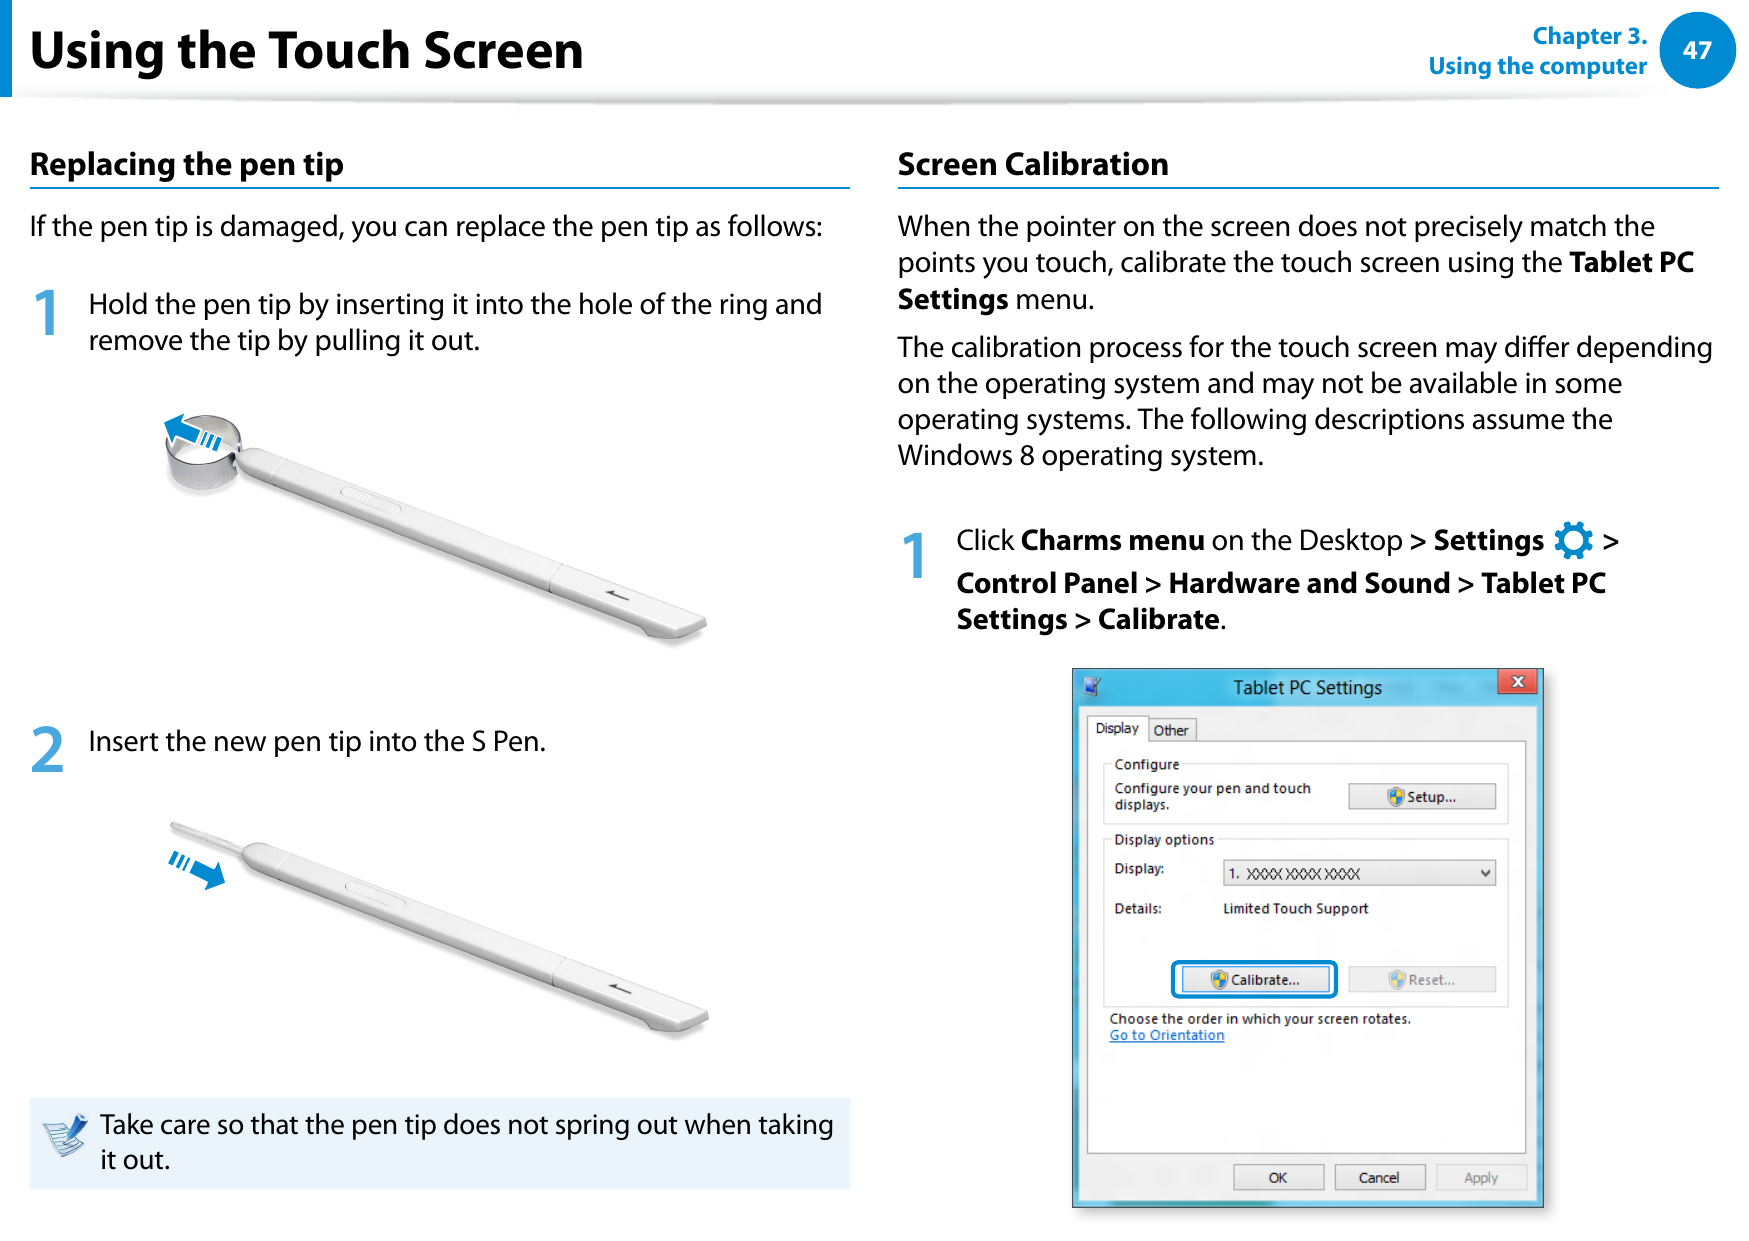
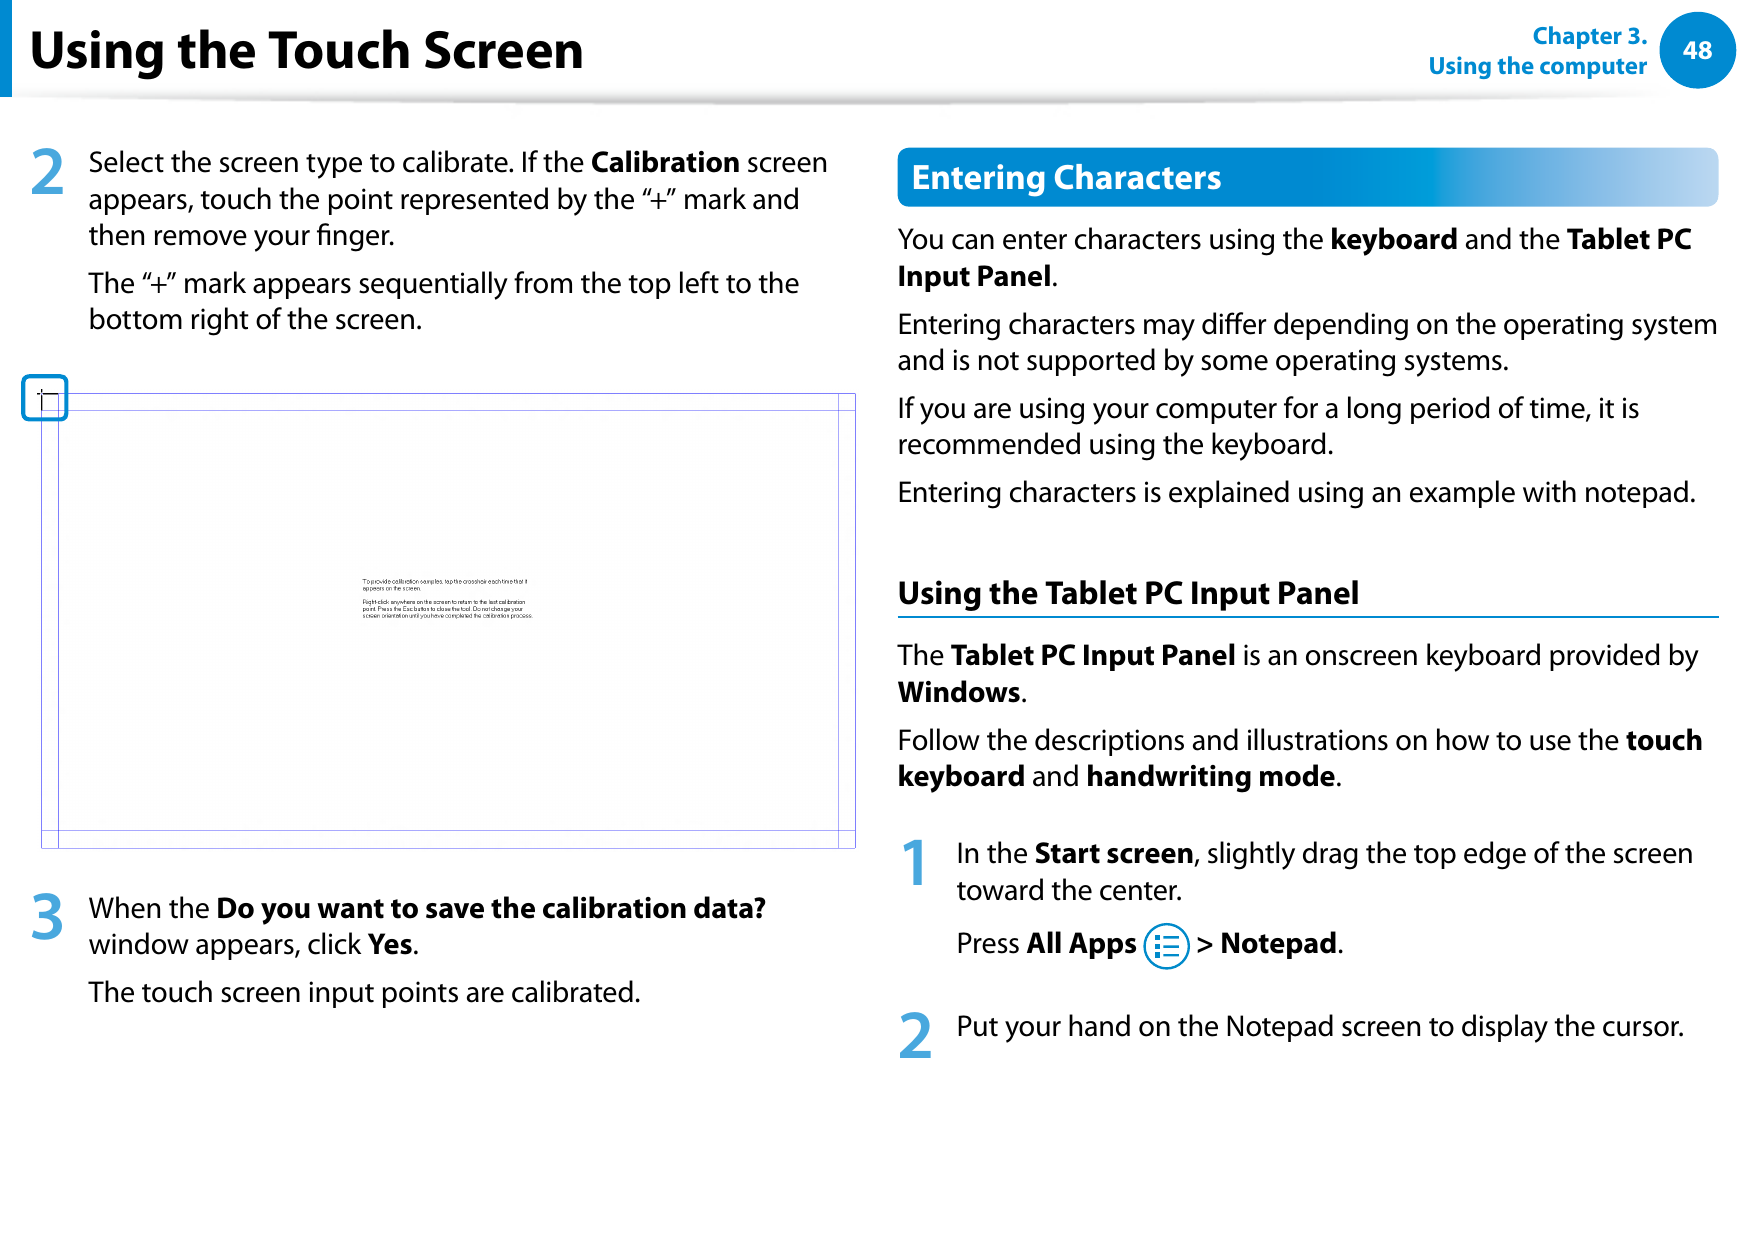
![4849Chapter 3. Using the computerUsing the Touch Screen3 On the Desktop, press the at the right of the taskbar to display the Tablet PC Input Panel.Touch KeyboardTouch Keyboard (displays the Numeric Key Pad in the middle.)Handwriting Mode[Input Mode]Entering characters using the Touch KeyboardThe Touch keyboard has the standard keyboard layout which allows you to select keys to enter characters.1 Press the Touch Keyboard icon in the Tablet PC Input Panel.2 Press the keys to enter your characters.](https://usermanual.wiki/Samsung-Electronics-Co/XE300TZC.User-Manual-Part-2/User-Guide-2057550-Page-23.png)