Samsung Electronics Co XE300TZC Tablet PC with 802.11 abgn + BT, GPS User Manual Part 3
Samsung Electronics Co Ltd Tablet PC with 802.11 abgn + BT, GPS Part 3
Contents
- 1. User Manual Part 1
- 2. User Manual Part 2
- 3. User Manual Part 3
- 4. User Manual Part 4
- 5. User Manual Part 5
User Manual Part 3
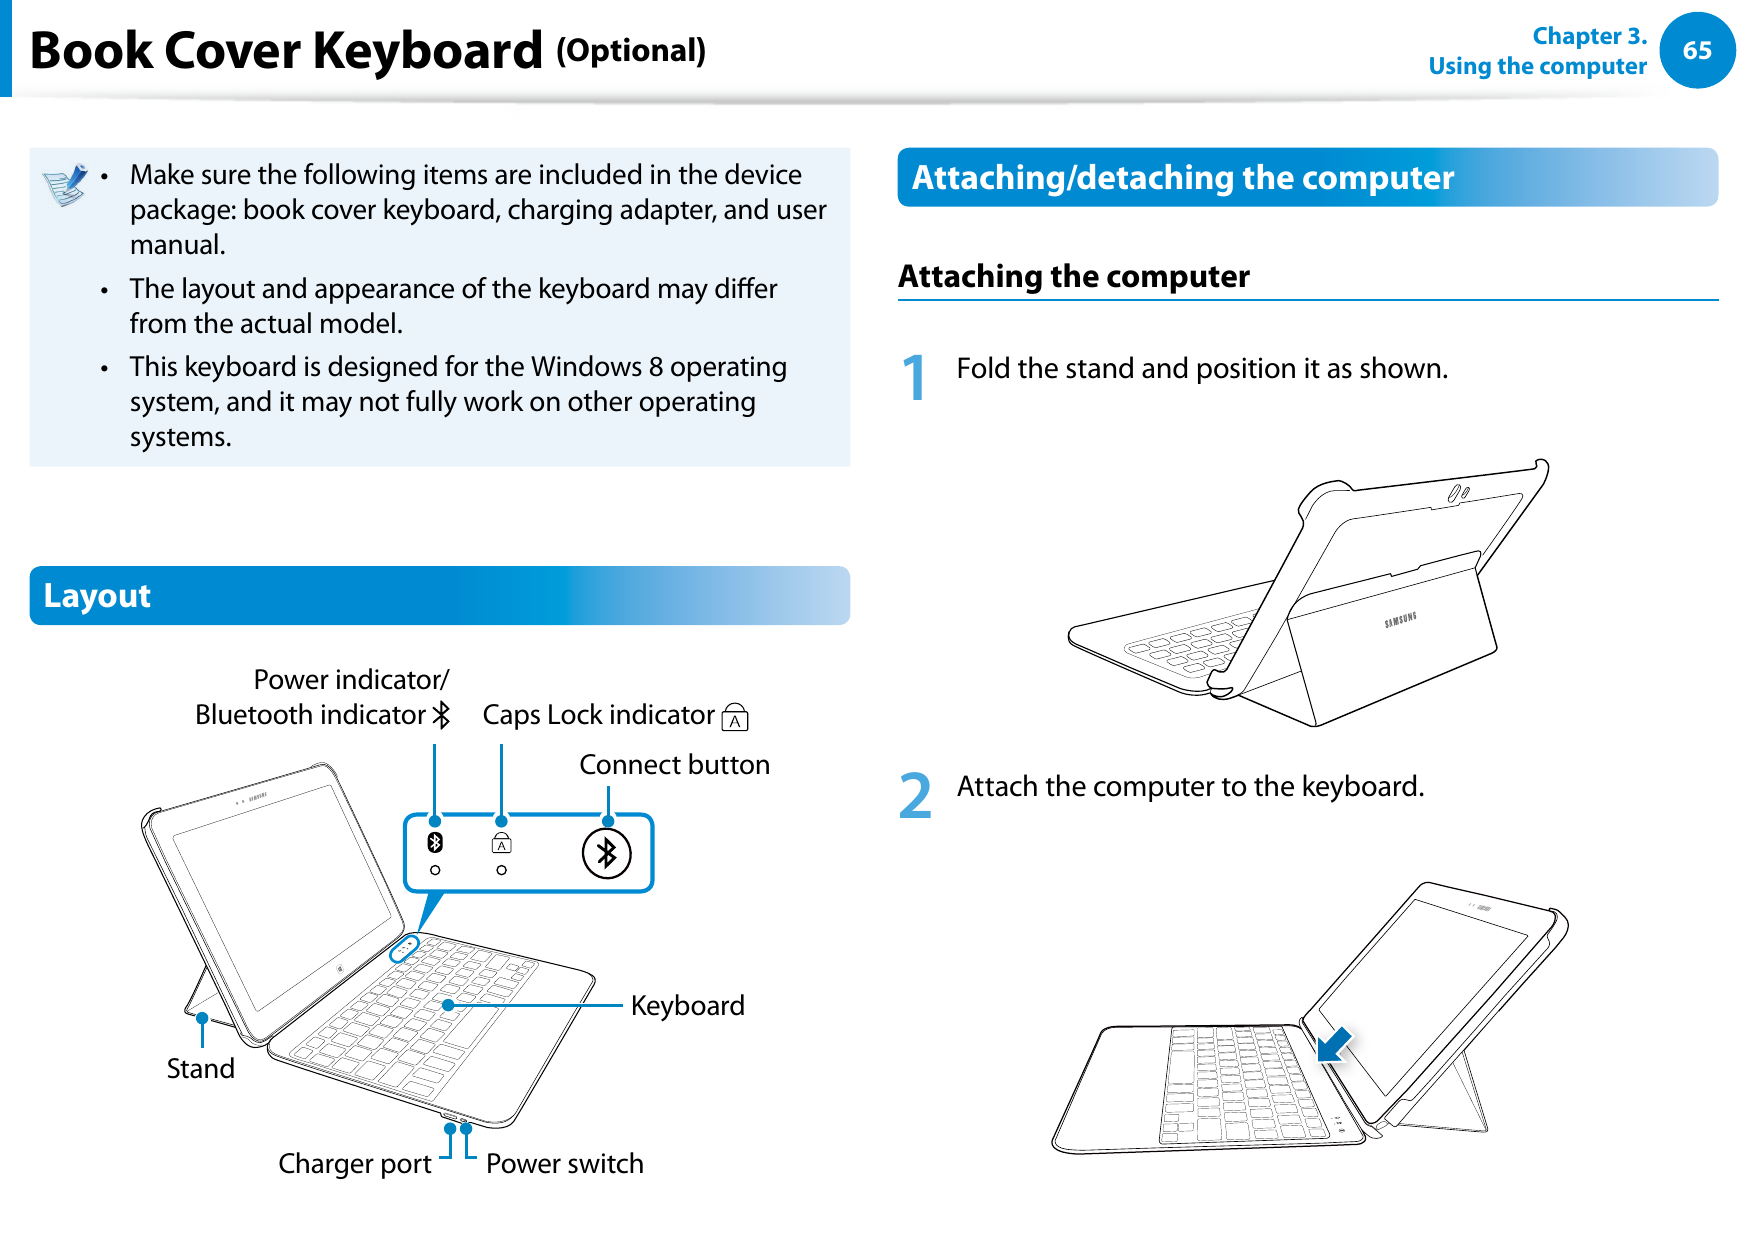
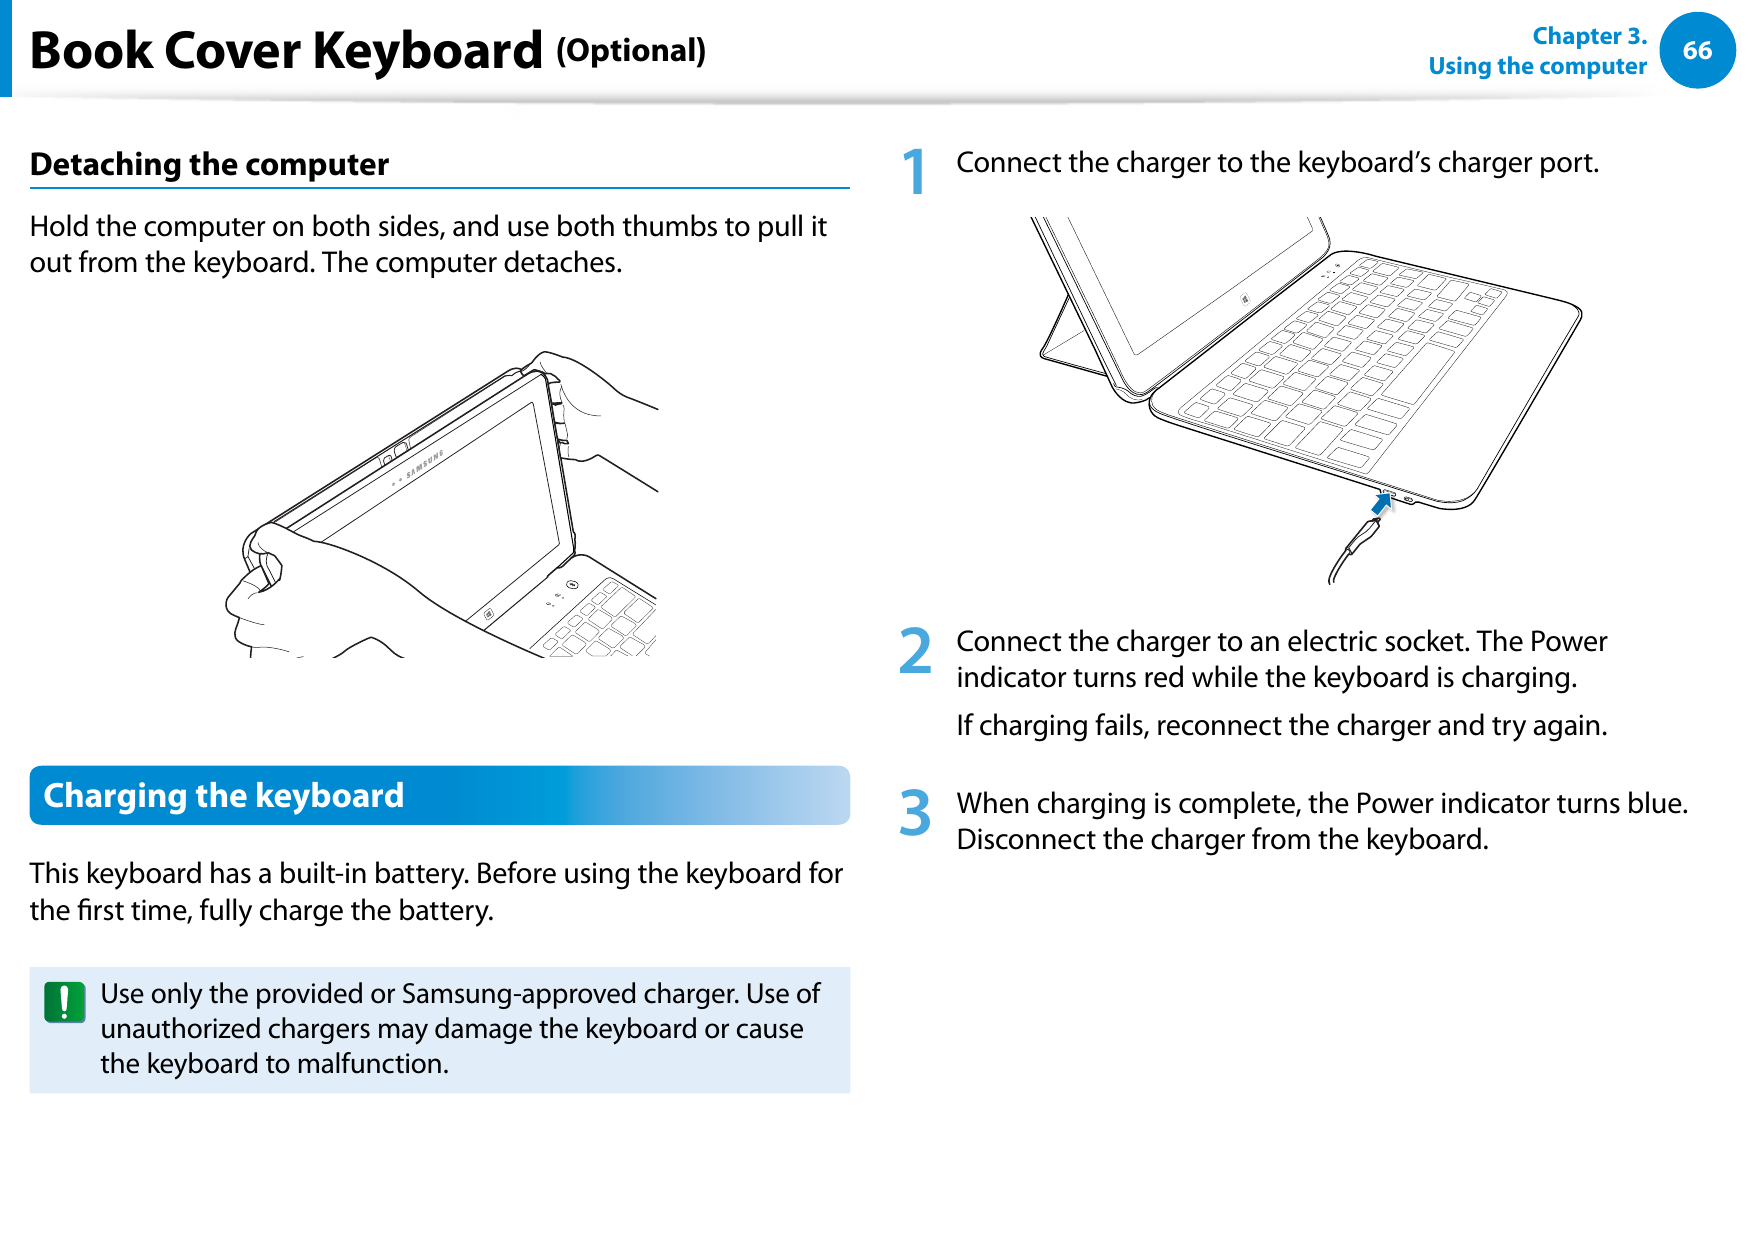
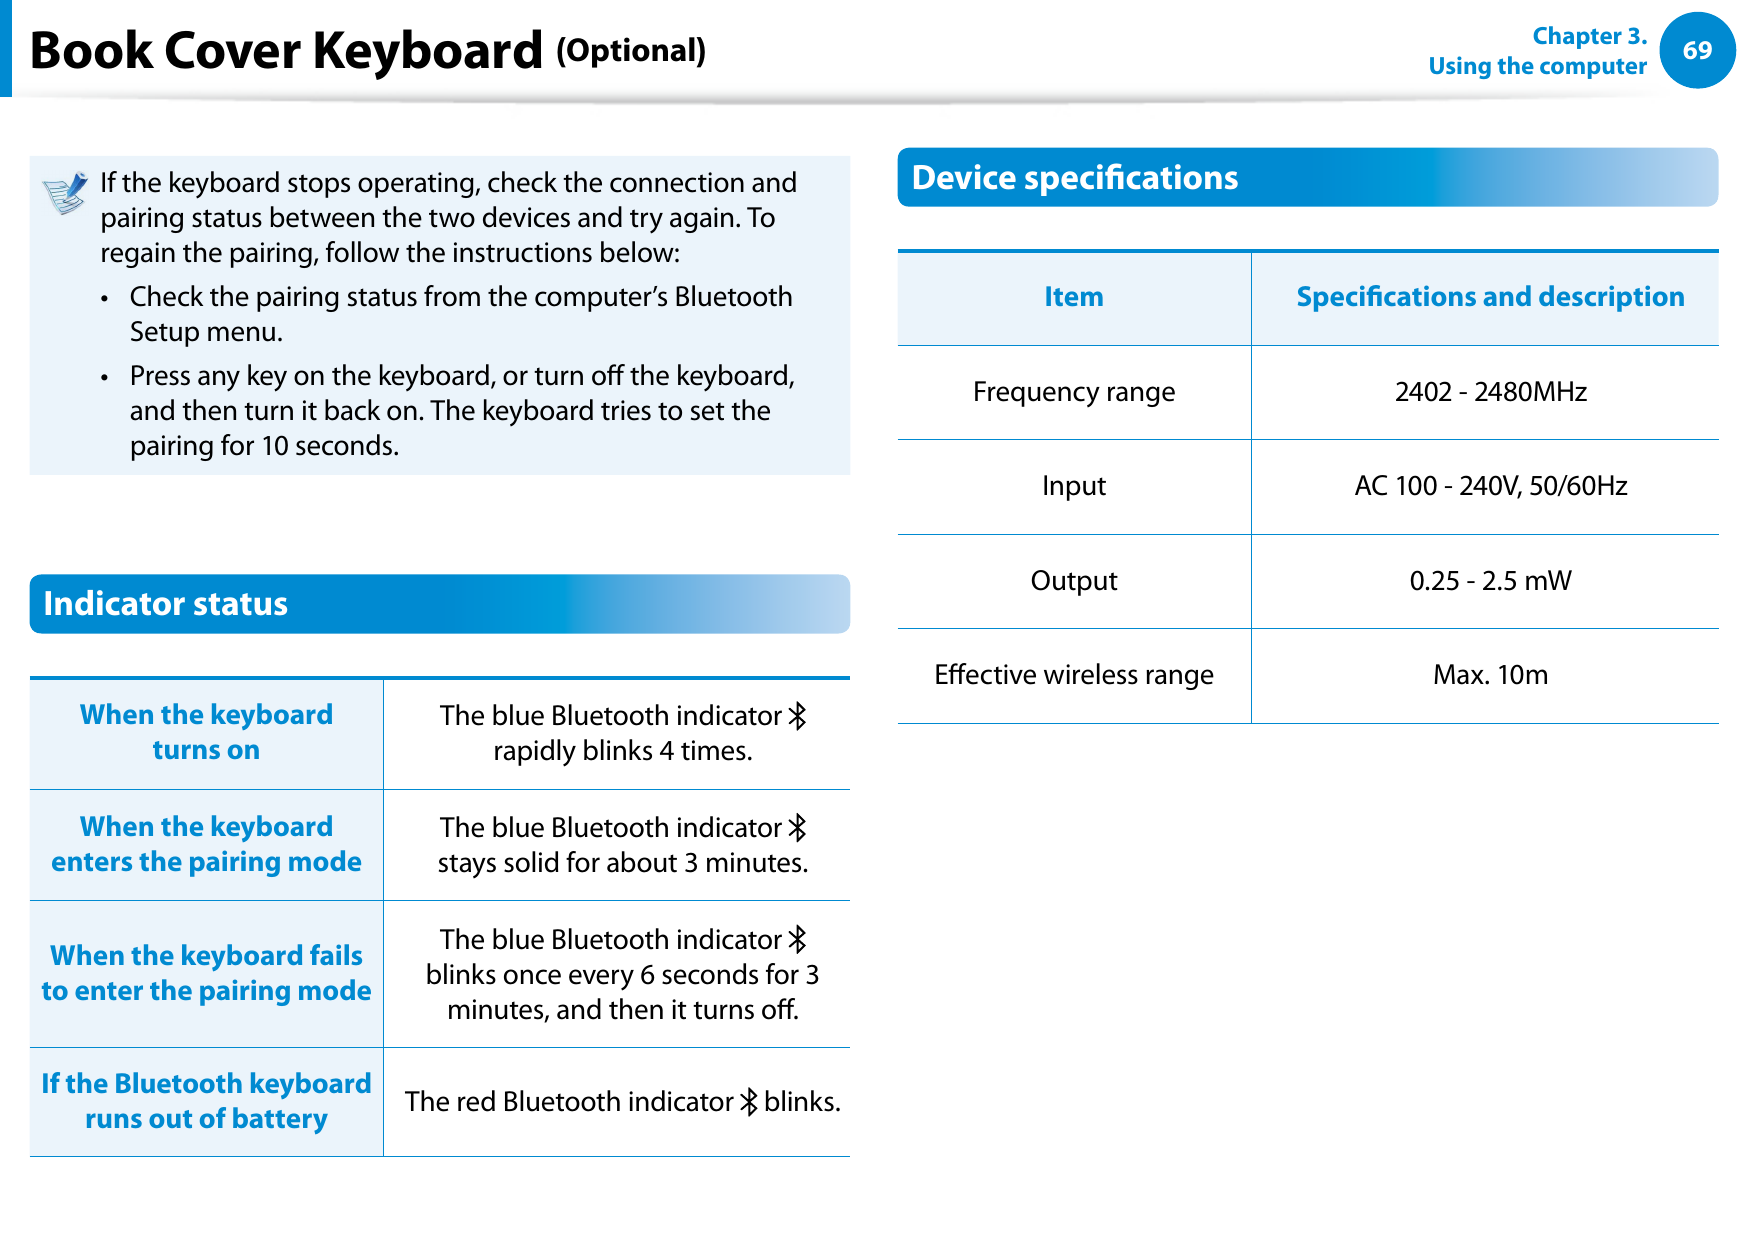
![6667Chapter 3. Using the computerBook Cover Keyboard (Optional)Standard usable time according to the charging timeCharging time Standard usable timeApprox. 2 hoursNormal usage StandbyApprox. 100 hours Approx. 1 monthThe charging time and the keyboard’s usable time may • dier depending on the usage conditions.The built-in battery is consumable, of which the usable • time decreases naturally over time.Checking the remaining battery capacityTo check the keyboard’s remaining capacity, press and hold the left [Ctrl] key for 3 seconds. The Bluetooth indicator blinks 5 times in the following colours:Remaining capacity Indicator colourAbove 80% Blue20% - 80% VioletBelow 20% Red](https://usermanual.wiki/Samsung-Electronics-Co/XE300TZC.User-Manual-Part-3/User-Guide-2057551-Page-14.png)