Shin Chuan Computer SC600PDT-BW Portable Data Terminal User Manual SC600 revised by Joy
Shin Chuan Computer Co., Ltd. Portable Data Terminal SC600 revised by Joy
Contents
Manual Pt7
3
-
31
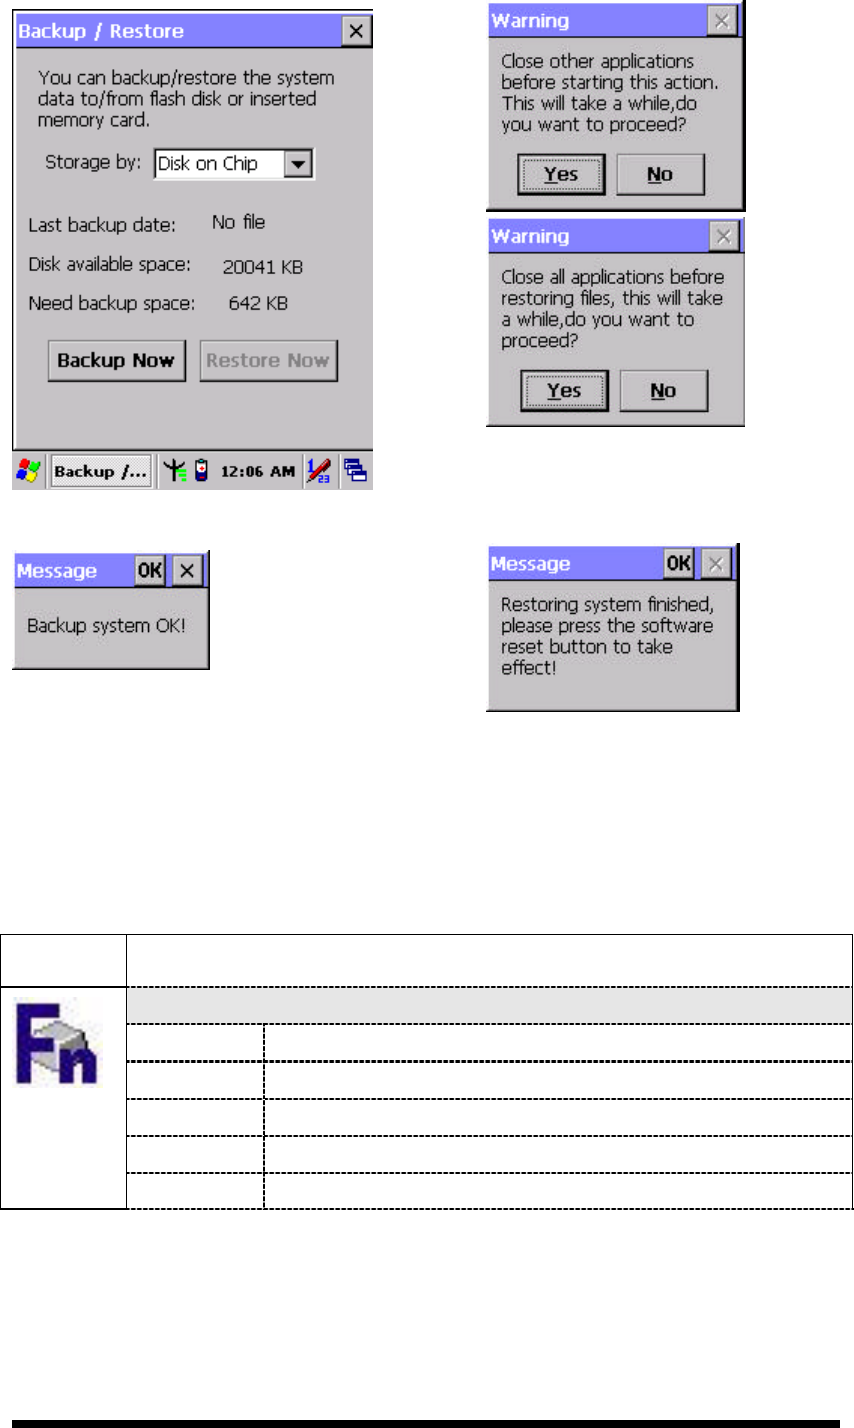
Figure 3-38 Backup Restore Figure 3-39 Backup & Restore Start
Figure 3-40 Backup OK Figure 3-41 Restore OK
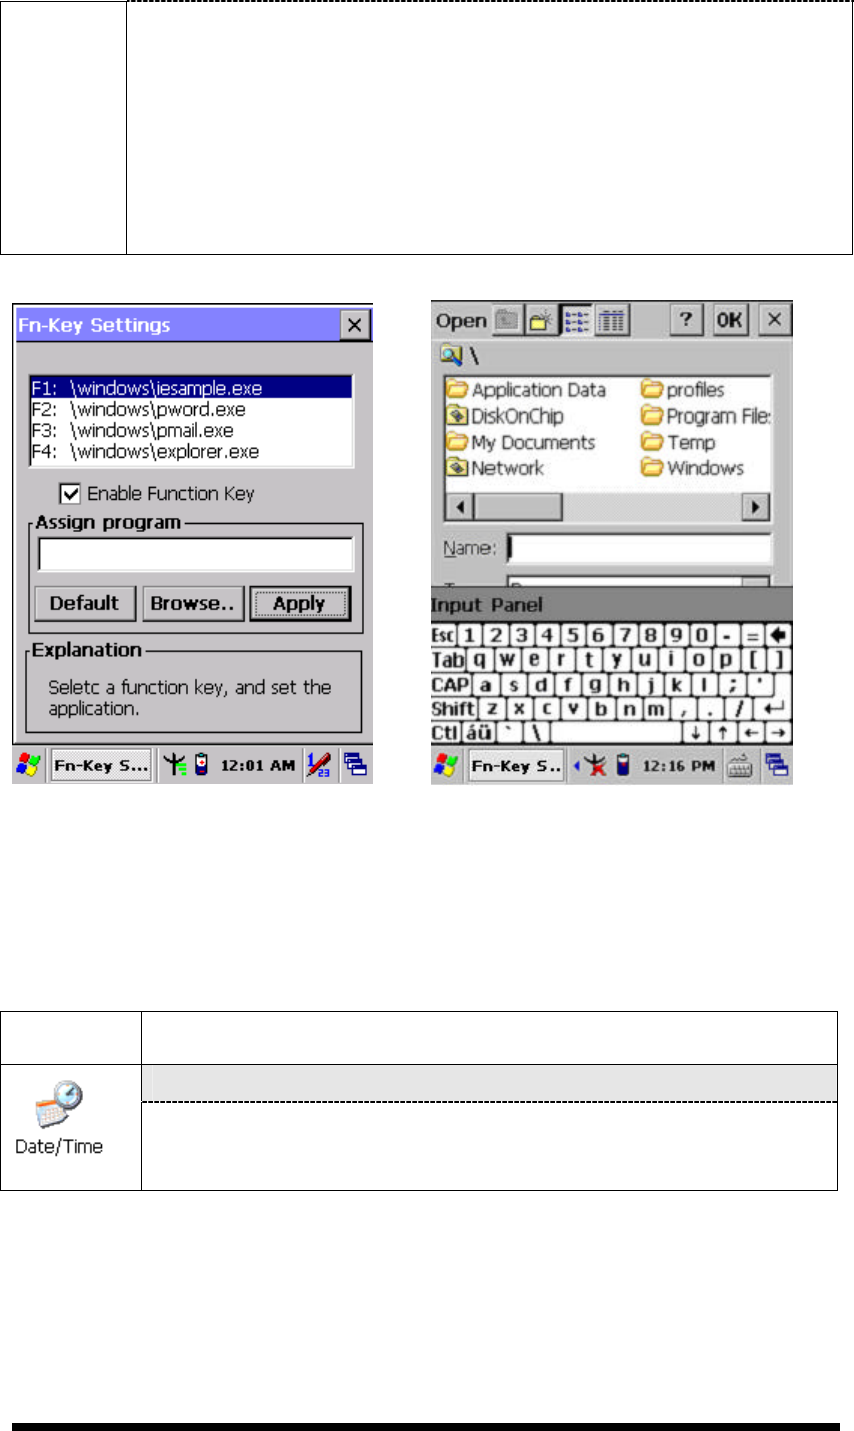
3.2.5.4 Fn-key Settings
Table 3-23 Fn-Key
ICON ITEM & FUNCTION
l “AP Settings” Tab(Figure 3-34)
Fn Key The Application Program of default setting
F1 Internet Explorer
F2 Microsoft WordPad
F3 Inbox
F4 My Computer
3
-
32
ü To assign your favorite application program to F1, F2, F3 and F4
hot keys.
ü Choose one of F1, F2, F3 and F4 from pull-down list.(Figure 3-42)
ü To tap “Browse…” inside “Assign program” applet.
ü Select one application program you want from program list, then,
choose “OK”. (Figure 3-43)
ü To tap “Default” to return back to default setting. (Figure 3-42)
Figure 3-42 Fn-Key Settings Figure 3-43 Fn-Key Settings
3.2.6 Date/Time
Table 3-25 Date/Time
ICON ITEM & FUNCTION
l “Date/Time” Tab :( Figure 2-14)
ü Please see the detail information of 2.5.1 Setting Time and
Date on P2-21
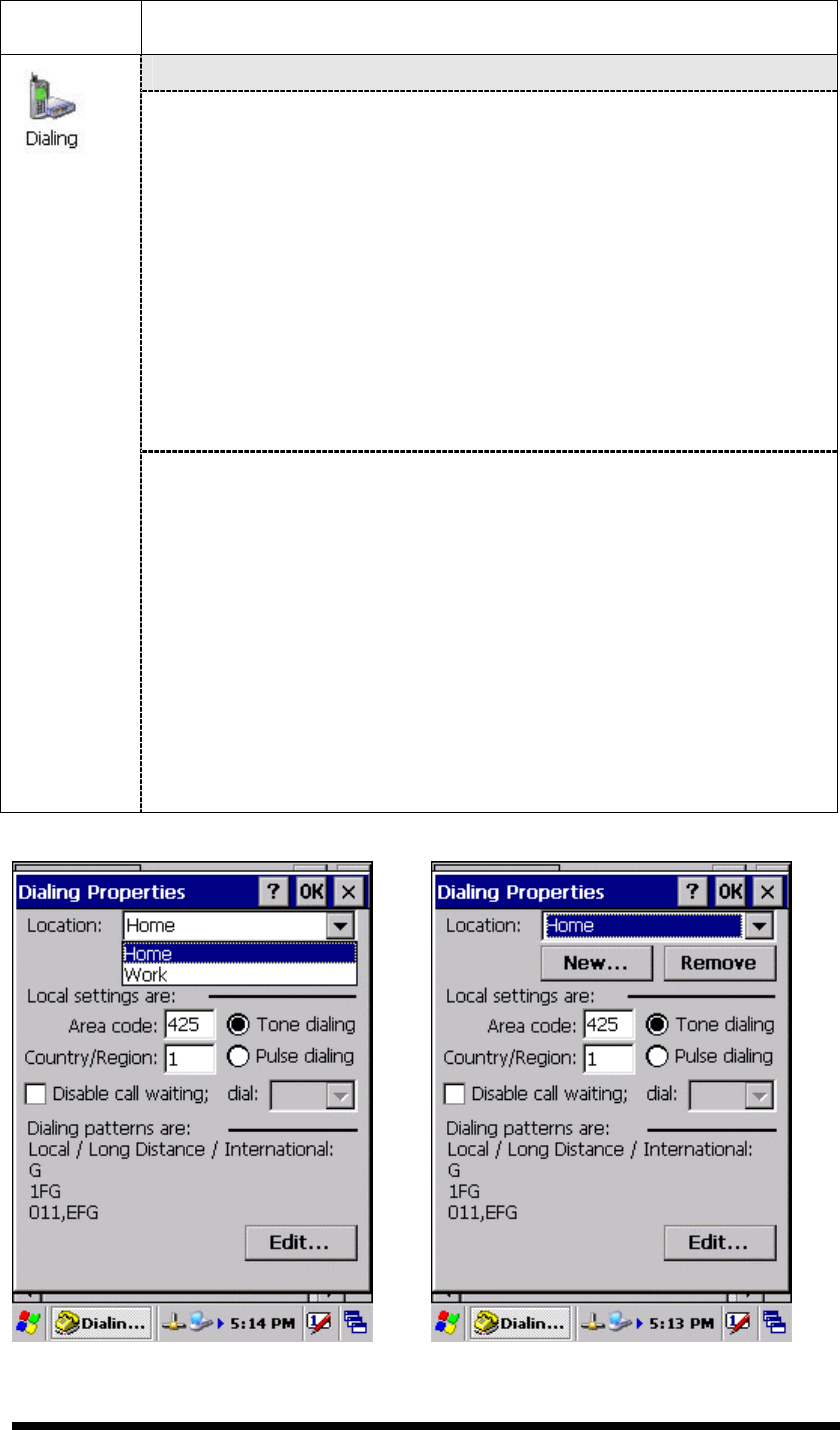
3.2.7 Dialing Properties
Table 3-26 Dialing properties
3
-
33
ICON ITEM & FUNCTION
l “Dialing Properties” Tab :( Figure 3-44)
ü In the When dialing from list, select the “Location” where you
want to change settings.(Figure 3-45)
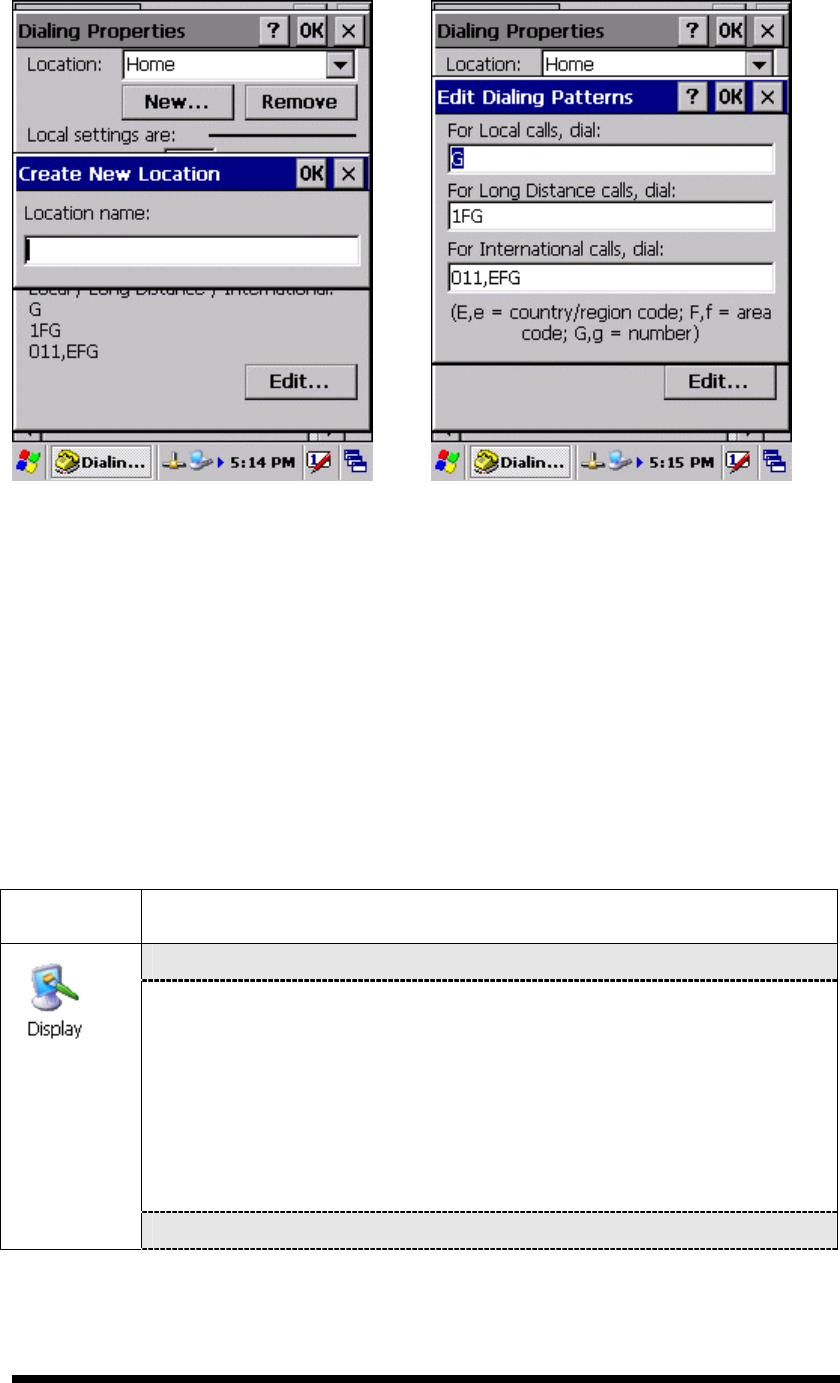
ü To create a new location, select “New”. Enter the name of the
location, and then select “OK”.(Figure 3-46)
ü Enter or edit the area code and local country code as needed.
ü In Dial using, select “Tone dialing” or “Pulse dialing”. Most
phone lines are tone.
ü To automatically disable call waiting, select “□ Disable call
waiting by dialing”, select the appropriate number sequence in
the list, or enter a new sequence.
l Editing dialing patterns (Figure 3-47)
ü Using the codes listed in the topic; revise the dialing patterns as
needed.
Notes:
n If you need to use character other than the ones listed here,
use manual dialing.
n Hyphens and spaces in dialing strings are ignored.
n Some modems may not respond to the following characters,
even though your device lets you add them to the dial
string.
Figure 3-44 Dialing Properties Figure 3-45 Dialing Properties
3
-
34
Figure 3-46 Dialing Properties Figure 3-47 Dialing Properties
3.2.8 Display Properties
Table 3-27 Display properties
ICON ITEM & FUNCTION
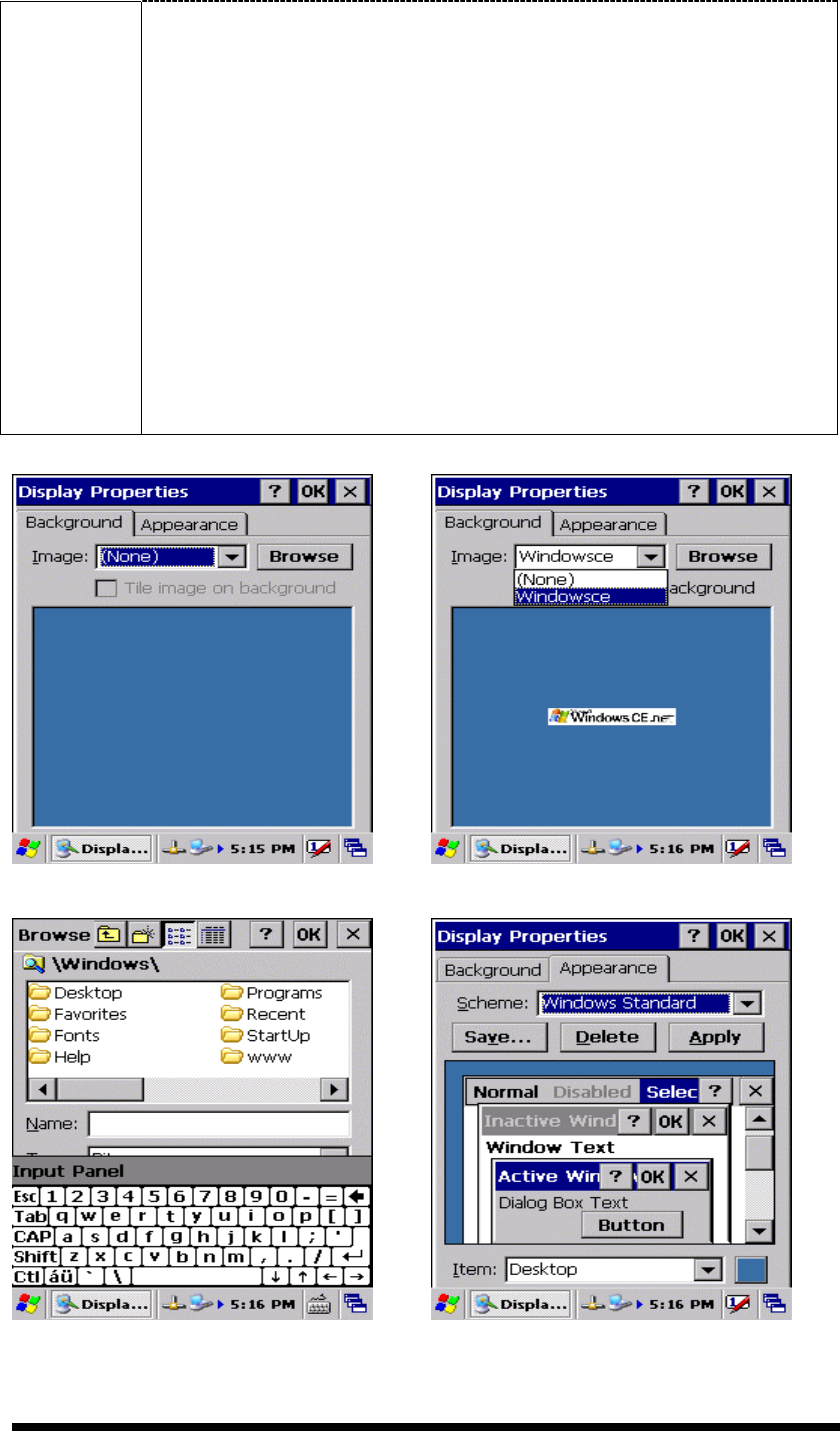
l “Background” Tab :( Figure 3-48)
ü From the “Image” list, select an image you want as the
background of the desktop.(Figure 3-49)
ü To locate an image in another folder, select “Browse”.(Figure
3-50)
ü To have the image cover the entire background, select “ □Tile
image on background”
l “Appearance” Tab(Figure 3-51)
3
-
35
ü Change the color scheme :( Figure 3-52)
Ø From the” Scheme” list, select a scheme.
Ø View your choice in the preview box. If you like the scheme,
select “Apply”.
ü Create a custom color scheme:
Ø From the “Item” list, select a display item.
Ø From the “Basic colors” list, select a color, and select “OK”.
Ø View your color selection(s) in the Preview box.
Ø To save the scheme, select “Save”.
Ø In the “Save this color scheme as” box, enter a name for the
scheme, and select “OK”.
Ø Select “Apply”.
Figure 3-48 Display properties Figure 3-49 Display properties
Figure 3-50 Display properties Figure 3-51 Display properties
3
-
36
Figure 3-52 Display properties
3.2.9 Input Panel
Table 3-28 Display properties
ICON ITEM & FUNCTION
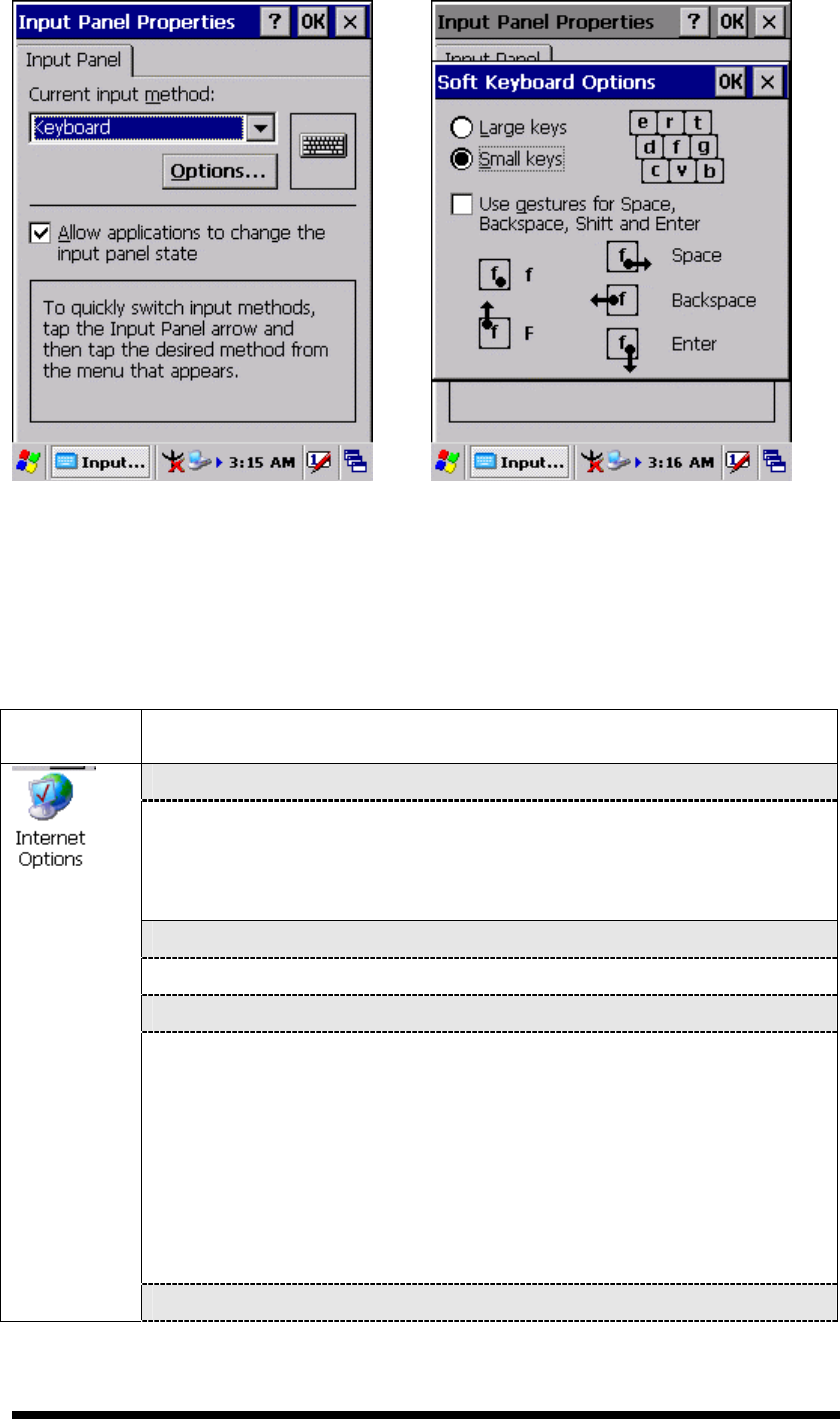
l “Input panel” Tab :( Figure 3-53)
ü Select the input method you want to change.
ü To change the Soft Keyboard Options , tap “Option” (Figure
3-54) .
l “Input panel” Tab :
ü Change the soft keyboard options as desired, selecting from:
Ø Large or small keys
Ø Using gestures for space, black-space shift, and enter.
ü To exit the soft keyboard Options, press “OK” on the control
bar, or press the <Enter> key on the keypad.
ü To exit the Input Panel, press “OK” on the control bar, or press
the <Enter> key on the keypad.
.
3
-
37
Figure 3-53 Input Panel Properties Figure 3-54 Input Panel Properties
3.2.10 Internet Options
Table 3-29 Internet Options
ICON ITEM & FUNCTION
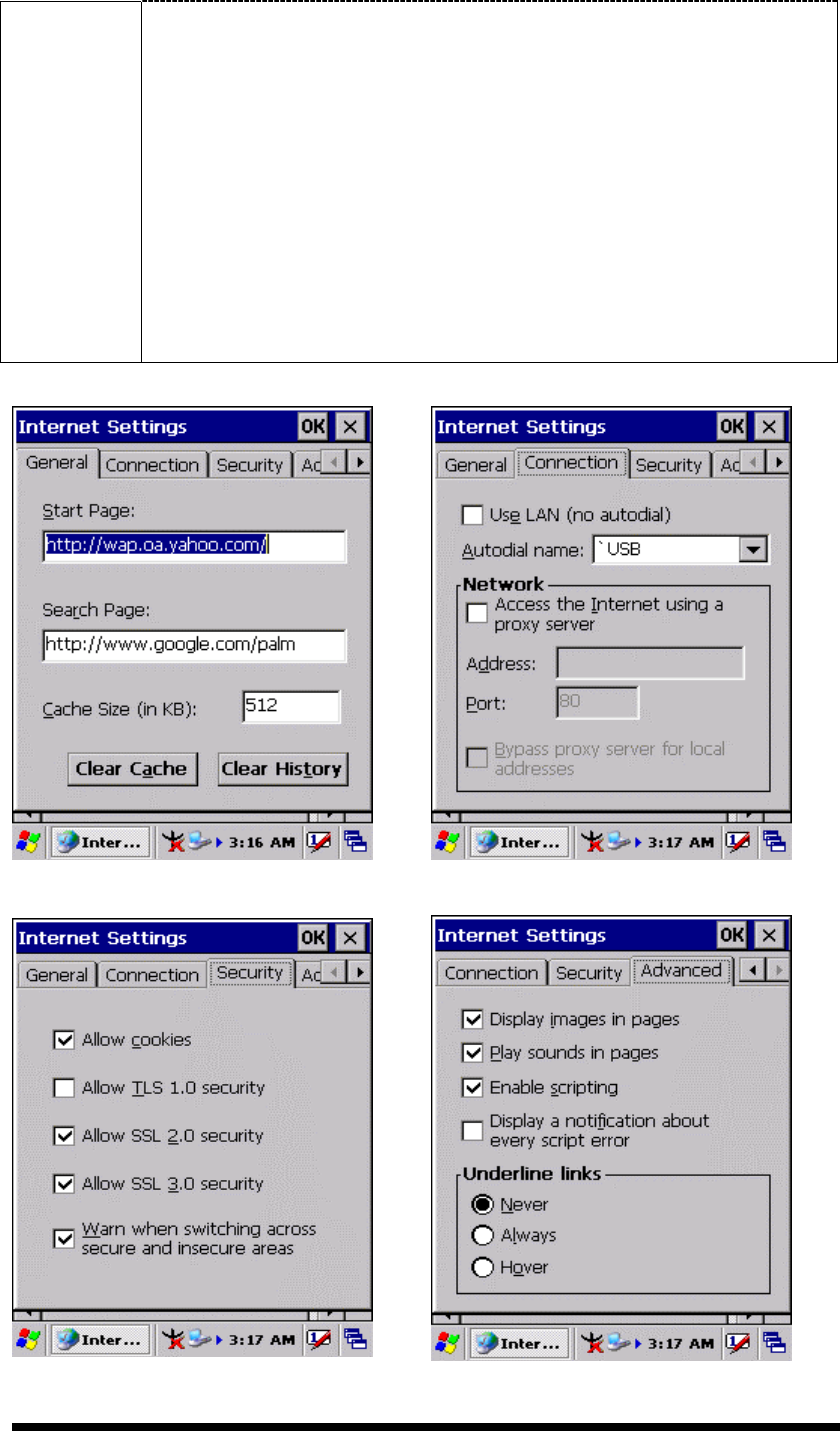
l “General” Tab :( Figure 3-55)
ü Type in the URL of desired start page and the desired search
engine. You also change the Cache Size, clear the Cache and
Clear the History..
l “Connection” Tab :( Figure 3-56)
ü Modify the network access setting as desired.
l “Security” Tab (Figure 3-57)
ü Modify the security settings as desired. You can enable any of
the following by tapping the checkbox:
Ø Allow cookies
Ø Allow TLS 1.0 security
Ø Allow SSL 2.0 security
Ø Allow SSL 3.0 security
Ø Warm when switching across secure and insecure areas.
l “Advanced” Tab (Figure 3-58)
3
-
38
ü Modify the security settings as desired. You can enable any of
the following by tapping the checkbox:
Ø Display Image in pages
Ø Play sounds in pages
Ø Enable scripting
Ø Display a notification about every script error
Ø Underline links-
○ Never
○ Always
○ Hover
Figure 3-55 Internet Settings Figure 3-56 Internet Settings
3
-
39
Figure 3-57 Internet Settings Figure 3-58 Internet Settings
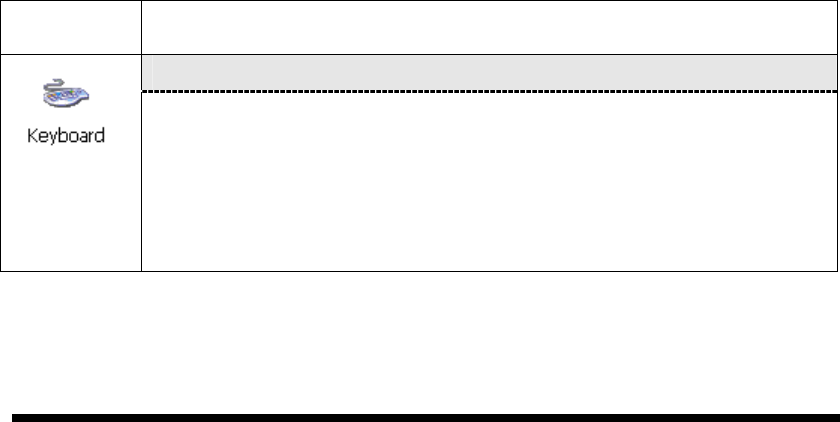
3.2.11 Keyboard
Table 3-30 Keyboard
ICON ITEM & FUNCTION
l “Repeat” Tab :( Figure 3-59)
ü To change the amount of time between depressions before
repetition starts, adjust the Repeat delay slider
ü To change the repeat rate, adjust the Repeat rate slider.
ü Test your new setting.
ü Tap “ OK” to exit the “Keyboard” Tab.
3
-
40
Figure 3-59 Keyboard Properties
3.2.12 Network and Dial-up Connections
Table 3-31 Network and Dial-up Connections
ICON ITEM & FUNCTION
l “Connection” Tab :
ü To create a “Dial-up Connection”:
Ø Double-tap the “Make New connection”.
Ø In the “Make New Connection” dialog box, enter a name for
the connection.
Ø Select “Dial-Up Connection”.
Ø Select the “Next” button.
Ø Select the modem you want use.
Ø Select “Configure”
Ø Under “Connection Reference”, use the default settings
provided. If you can’t connect using these settings, see your
ISP or network administrator for specific information. If you
want to always enter a phone number before connecting,
Select “Manual Dial”. Select “OK”.