Shin Chuan Computer SC600PDT-BW Portable Data Terminal User Manual SC600 revised by Joy
Shin Chuan Computer Co., Ltd. Portable Data Terminal SC600 revised by Joy
Contents
Manual Pt9

3
-
51
3.2.19 Storage Manager
Table 3-38 Storage Manager
ICON ITEM & FUNCTION
l “Storage Manager” Tab : (Figure 3-83)
ü To change Storage properties control panel default settings:
Insert. Compact Flash(CF) or Secure digital (SD) storage card into
the unit.
Ø Select Start > Settings > Control Panel > Storage Properties
Ø From the “Storage Info” pull-down list, select the desired
storage device.
Ø You can also format, dismount, and create partitions on storage
devices using this control panel.
Ø To save and exit the Storage Properties control panel, press
“OK” from the control bar, or press the <Enter> key on the
keypad.
Caution: Dismounting or formatting the DiskOnChip will
erase all files and program stored in Flash Memory
Figure 3-83 Storage Manager
3
-
52
3.2.20 Stylus
Table 3-39 Stylus
ICON ITEM & FUNCTION
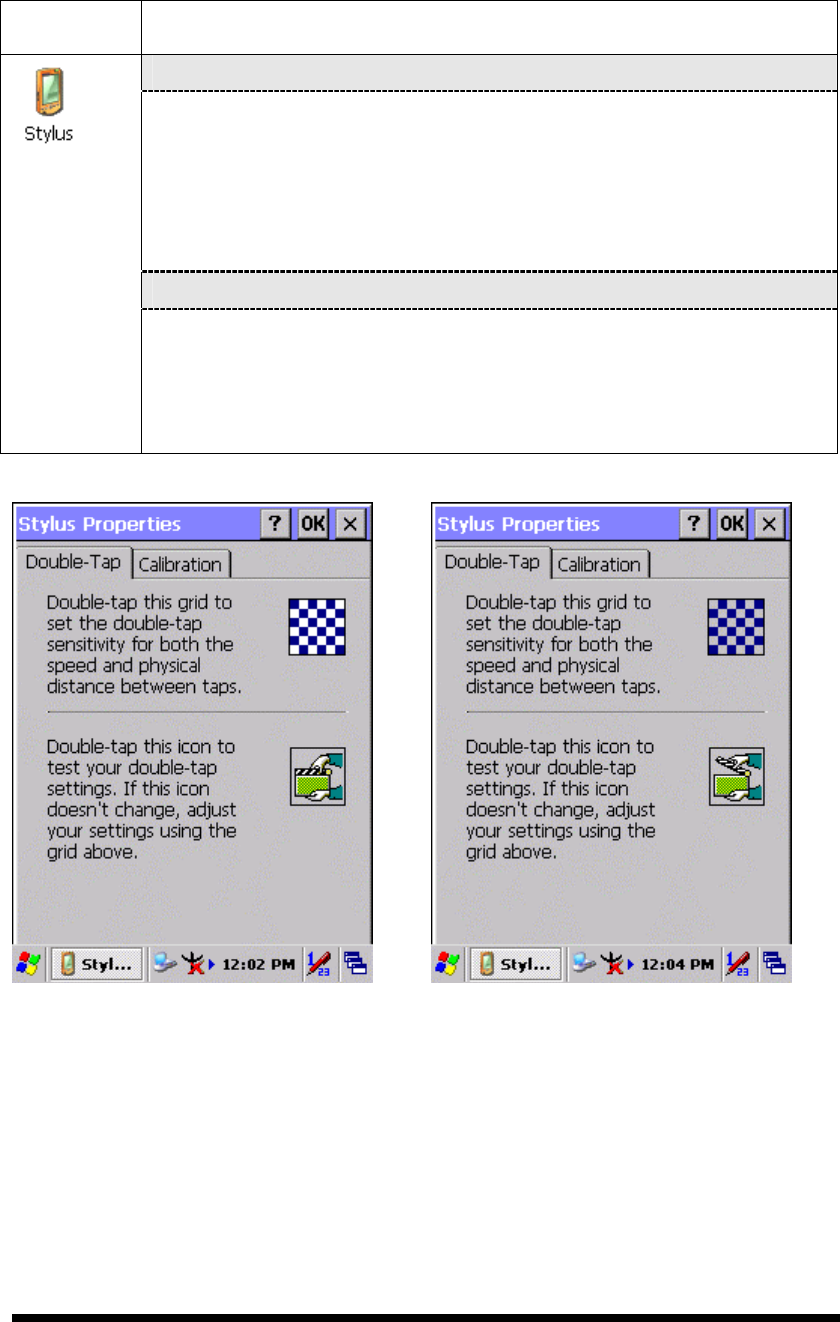
l “Double-Tap” Tab : (Figure 3-86,Figure 3-87)
ü Double-tap the checkerboard grip at a comfortable speed.
ü Double-tap clapboard to test your settings
ü The function is OK if the figures are changed from Figure 3-86
to Figure 3-87.
ü To tap “OK” to exit the Stylus Properties.
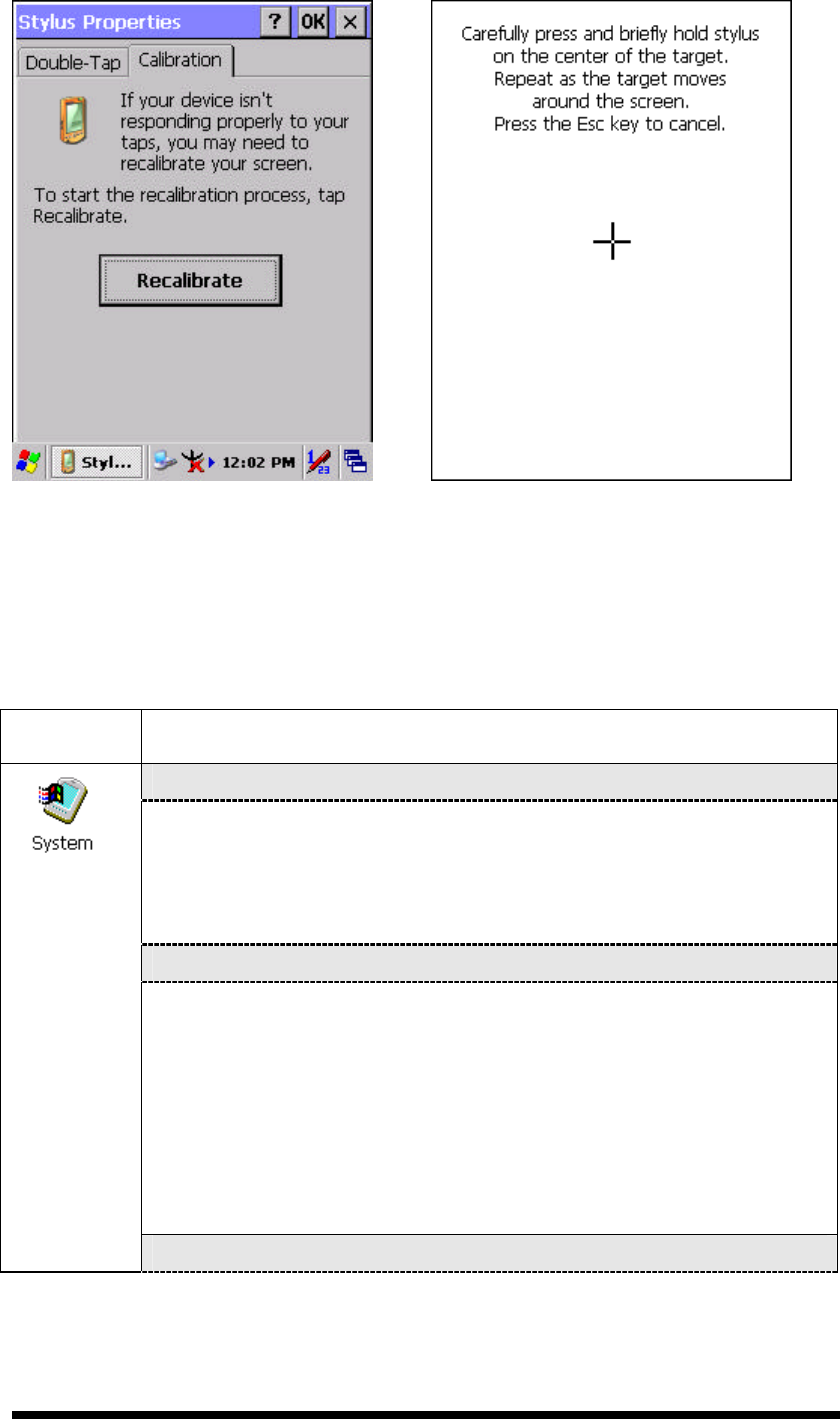
l “Calibration”: (Figure 3-88, Figure 3-89)
ü In the Welcome Wizard, you tapped a target with the stylus to set
the amount of pressure needed for the screen to respond to your
stylus taps.
ü Please also see 2.4.3 Calibration of the touch Screen
Figure 3-84 Stylus Properties Figure 3-85 Stylus Properties
3
-
53
Figure 3-86 Stylus Properties Figure 3-87 Stylus Properties
3.2.21 System
Table 3-40 System
ICON ITEM & FUNCTION
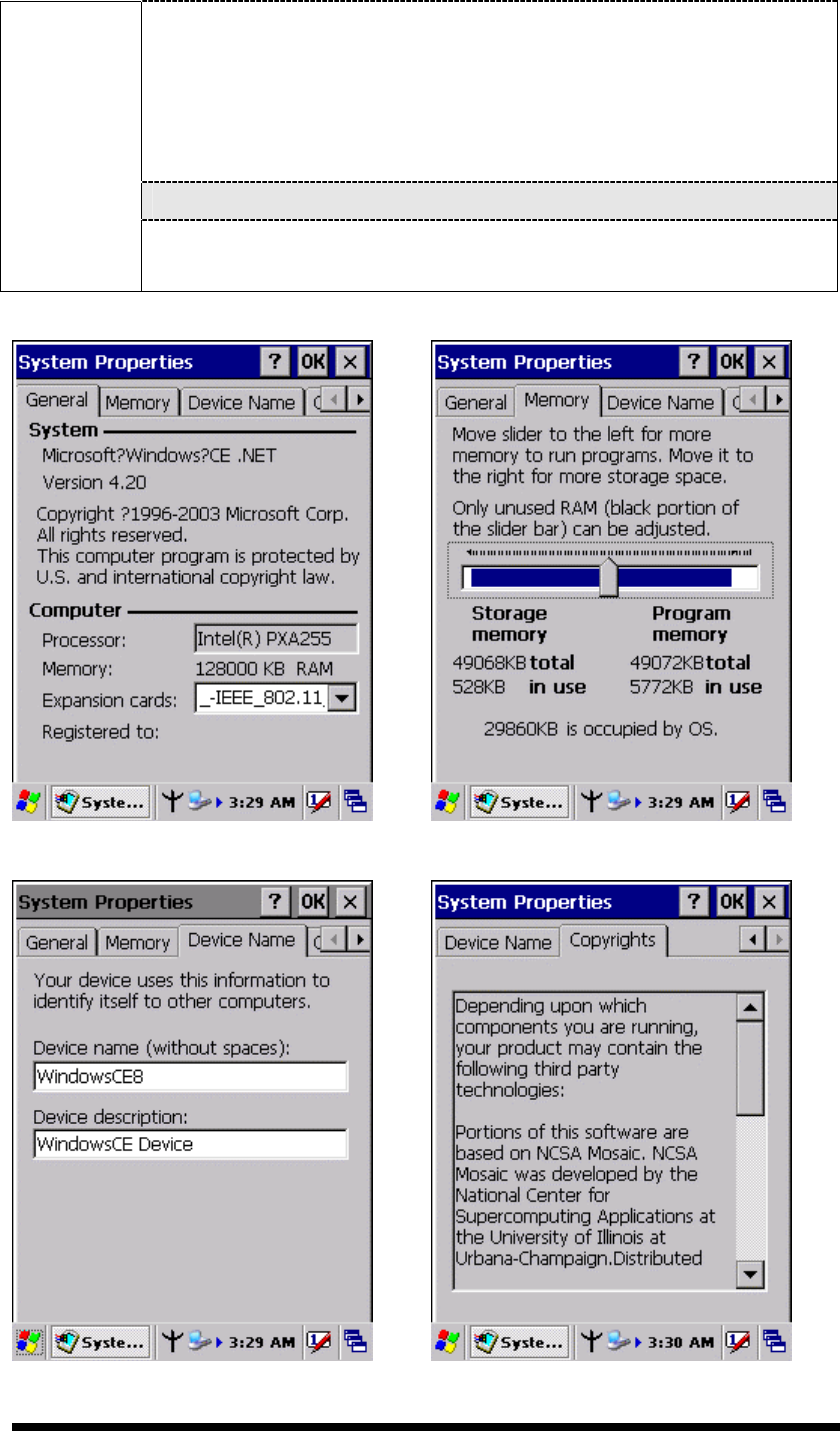
l “General” Tab : (Figure 3-90)
ü To show:
Ø Firmware information
Ø Information about Processor type, Memory size, Expansion
card
l “Memory”: (Figure 3-91)
ü Move the slider to adjust memory allocation. Default storage
memory is normally is normally set to about 8MB with the
reminder assigned to Program memory.
ü Press the “OK” key on the Keypad.
Note: the difference is occupied by OS between the RAM size in
Information properties and total memory size of storage memory
and program memory
l “Device Name” Tab : (Figure 3-92)
3
-
54
ü Your device uses this information to identify itself to other
computers.
ü The input panel will open to facilitate data entry.
ü To close the Device Name, press the “OK” button, or press the
<Enter> key on keypad.
l “Copyrights” Tab: (Figure3-93)
ü Refer to this tab for specific copyright data. As a user, you are
responsible to read this statement.
Figure 3-88 System Properties Figure 3-89 System Properties
3
-
55
Figure 3-90 System Properties Figure 3-91 System Properties
3.2.22 Volume & Sounds Properties
Table 3-41 Volume & Sound
ICON ITEM & FUNCTION
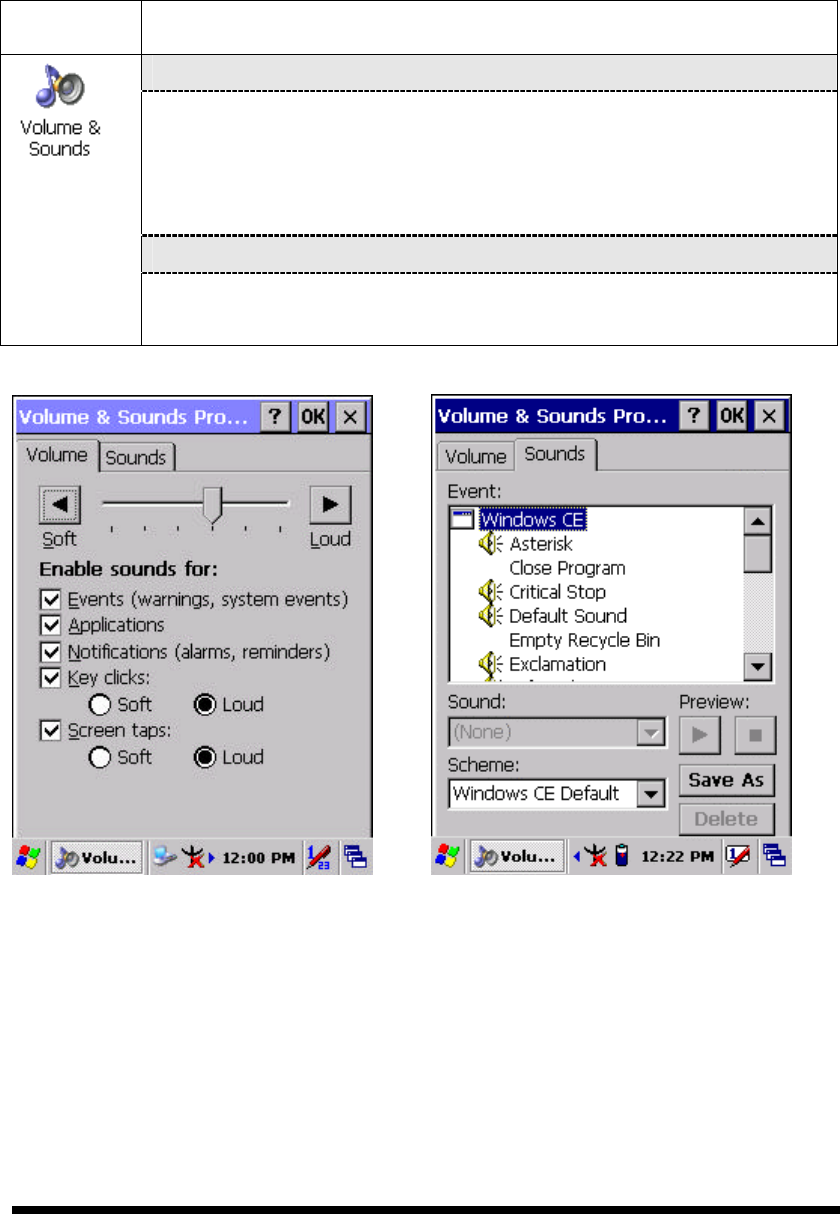
l “Volume” Tab : (Figure 3-94)
ü The factory default for Volume is the forth level. You can adjust
the volume to your environment and comfort.
Ø Set the volume by adjusting the slider from Soft to Loud,
or press Right or Left edge of Navigation keys
l “Sounds ” Tab: (Figure3-95)
ü Enable the desired sounds for key clicks, screen taps,
notifications, and applications.
Figure 3-92 Volume & Sound Figure 3-93 Volume & Sound

3
-
56
3.3 Taskbar and Start Menu
Table 3-42 Taskbar and Start menu
ICON ITEM & FUNCTION
l “General” Tab :
ü In this tab, You can change the position of the Taskbar and Start
menu
Ø Is always on top or not
Ø Auto hide or not
Ø Show Clock or not
l “Advanced ” Tab:
Taskbar and
Start Menu
ü Tap the “Clear” button to remove the contents of the Documents
Menu.
ü Enable “□ Expand Control Panel” to list all icons of
Control Panel from top to bottom.

4
-
1
Chapter 4. Communication
4.1 Installing & Setting Up Microsoft ActiveSync
4.1.1 Installing Microsoft ActiveSync on the Host PC
Microsoft ActiveSync is a file transfer tool to synchronize the files on a PC with the
files on your PDT.
To install Microsoft ActiveSync, complete the following steps on the PC:
1. Go to the Microsoft Windows CE.NET website and download the latest current
version of ActiveSync:
http://www.microsoft.com/mobile/pockeypc/downloads/ .
2. Install the latest version of Microsoft ActiveSync on the host PC.
3. Open ActiveSync.
4. Select File > Communication Settings from AtiveSync’s menu bar.
5. Go to “Using ActiveSync” on page 4-1 to continue using ActiveSync.
4.1.2 Connecting PDT to Host PC
1. You can use either the USB/Serial (RS232) port of Single Dock or a USB/Serial
(RS232) cable to connect the PDT to the Host PC.
l To use the dock, you must first insert the PDT into the slot, making sure that the
unit is firmly seated the dock.
l To use the cable, connect the USB/Serial cable to the PDT.
2. Connect the USB/Serial dock or cable to the Host PC’s serial port or USB port.
3. Connect the dock or PDT to the power adapter and power source.
4.2 Using ActiveSync
Use ActiveSync to transfer and synchronize files between the PDT and the Host PC.
4.2.1 Setting up a Partnership
During the Microsoft ActiveSync installation, you were prompted to create a
partnership with your mobile device. When you set up a partnership, you select
synchronization and file conversation settings, which are contained in a file on your
desktop computer. This file enables your desktop computer to recognize your device.
4
-
2
Only devices that have a partnership with a desktop computer can synchronize
information between the two computers.
For more information on partnerships, please refer to your Microsoft ActiveSync
documentation or help file.
Transferring Files:
To transfer files, complete the following steps on the host PC:
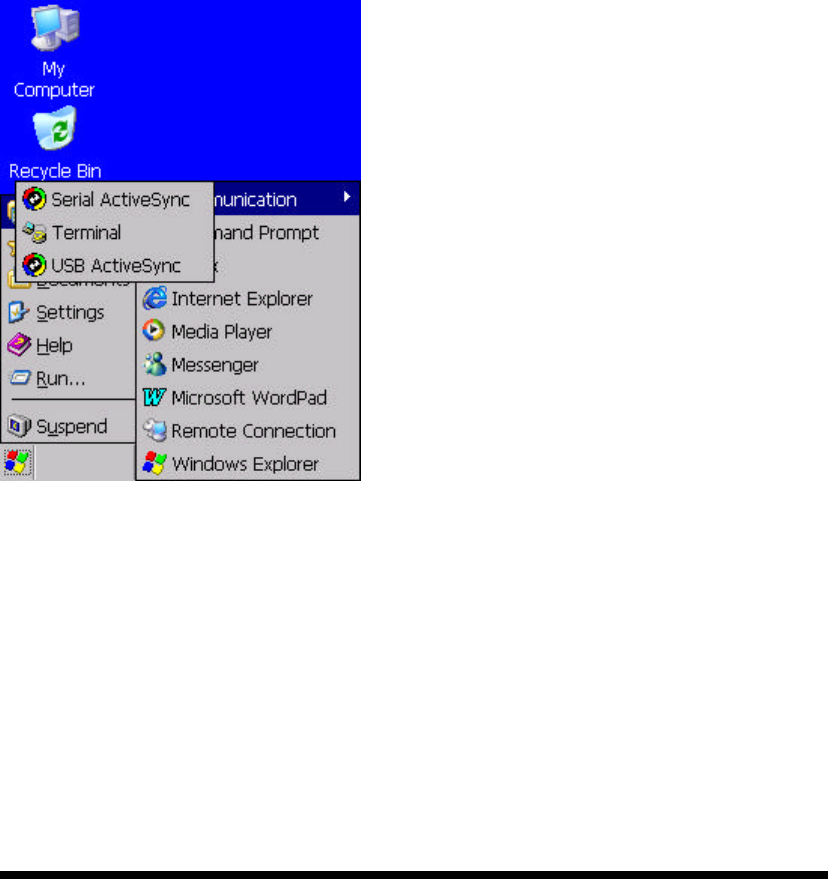
ü Select Start> Programs >Communication > (Serial, or USB) Activesync.
ü Double-click on the selected ActiveSync icon
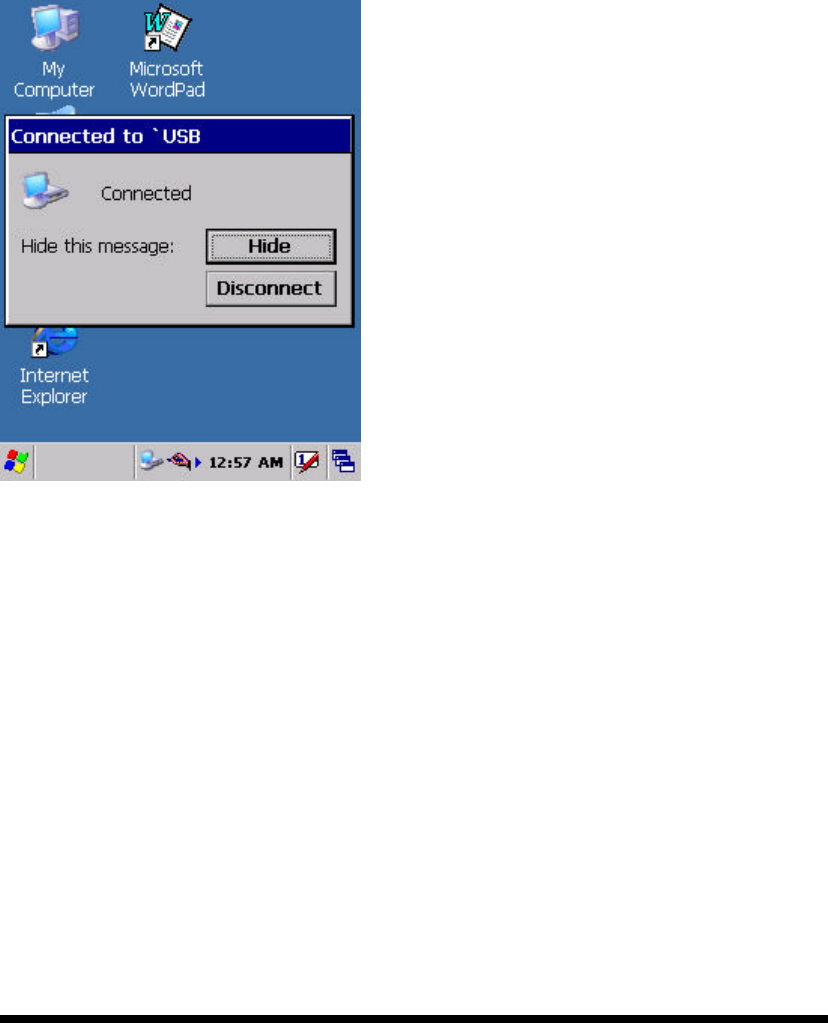
ü After you have established a connection with PDT, tap the “Explore” button at
the top of the ActiveSync window (or select Explore from the File menu).
ü Navigate to the target directory on your PDT and copy the desired file by using
the Copy/paste method or dragging and dropping the desired file(s) into the
folder.
Figure 4-1 Communication
4
-
3
4.2.2 ActiveSync File Synchronization
ActiveSync files synchronization requires an ActiveSync partnership between the
PDT and the Host PC. Refer to “Setting up a Partnership”, above:
ü Select the files in the synchronization configuration for the PDT partnership.
ü Select Tools > Options from the ActiveSync command bar to configure the
synchronization options.
ü Place the file to be synchronized in the Synchronization folder created you’re
My Documents directory. Defaults to the desktop. During the ActiveSync
connection, all files in the Synchronization folder will be synchronized to the
\My Documents directory on the PDT.
Figure 4-2 Connected
4.3 Networking
Please see the 3.2.14 Owner, Table 3-33 Owner on page 3-45 for setting up the
network ID. And see the 2.5.6 Setting Up Wireless LAN RF to setup the 802.11b
Wireless LAN for RF connecting.

5
-
1
Chapter 5. Software Applications
5.1 Introduction
The PDT includes Calculator, Inbox,…..
You can switch to any software program by tapping the Start Menu.
5.2 Software Applications
5.2.1 Calculator
It can process the basic numeric calculation with “+”, “-“ “*” and “/“.
ü Procedure:
Ø Tap numeric number
Ø Tap one operator “+”, “-“, “*” or “/”
Ø Then, tap another numeric number
Ø Tap another operator or numeric number if needed
Ø Tap “=” to get result
ü Button Function:
Ø “MC” – Clear memory
Ø “MS” – Store the displayed numeric number to memory
Ø “MR” – Read the newest stored numeric number
Ø “M+” – Add stored numeric number into the displayed numeric number.
Ø “Backspace” – Same as “ backspace” key
Ø “CE” – Clear current keying numeric number. Same as “ Delete” key
Ø “C” – Clear the current calculation. Same as “ESC” key.
5.2.2 Inbox
Use Inbox to send and receive e-mail messages in the following ways:
ü Synchronize e-mail messages with Microsoft Exchange or Outlook on the
Host Computer.
ü Send and receive e-mail messages by connecting directly to an e-mail server
through an Internet server provider (ISP) or a network.

5
-
2
To setup “Inbox”:
ü Select Start> Programs> Inbox to open it.
ü Select Service> Options from the command bar. Drag the dialog to show the
right edge to configure e-mail.
ü Select “Add… ” (Note 1)
ü In the “Service Type” list, select POP3 Mail or IMAP4 Mail. (POP3 is the
most common mail protocol for ISPs).Enter a unique name for e-mail service
in the “Service name” field. This name cannot be changed later.
ü Select “OK”.
ü The Mail Service Setup wizard appears after you add a service. If you are
adjusting the setting of an existing service, select Service> Options, select the
service you are using, and then Properties. In the Service Definition dialog
box, complete the following entries as needed:
Ø Connection: Select the name of the connection you created to connect to
the mail server. If you are receiving e-mail through a network(Ethernet)
connection, select Network Connection. If you want Inbox to use your
current connection, select (none). If you have not created a connection,
select Create new connection. Double-tap the “Make new Connection”
icon, and follow the instructions in wizard. When finished, select Inbox
in the Taskbar and continue setting up Inbox.
Ø POP3 Host(POP3 only): Enter the name of the mail server you use to
receive and send messages.
Ø Server(IMPA4 only): Enter the name of he mail server you use to
receive and send messages.
Ø User ID: Enter the user name or mailbox ID assigned to you.
Ø Password: Enter the password you use to access this mail account. If
you do not want to be prompted to enter the password each time you
connect, select “Save password”.
Ø Domain(Windows NT): Enter your Windows NT domain name. This
name is required only when connecting to networks, such as a corporate
network, that use Windows NT domain security. This is not required for
most ISP accounts. If you have trouble connecting, try clearing this box.
Ø SMTP Host: If your mail service uses a separate server for SMTP, enter
the name in the box. If you’re setting up a POP3 Mail service with an
ISP, the ISP must use an SMTP mail gateway.
Ø Return Address: By default, the return address is set to
username@POP3host or username@Servername. Depending on the
service you are using. If this is not your e-mail address, enter the correct

5
-
3
address in the box.
ü Set general preferences:
If you are adjusting the setting of an existing service, select Service> Options,
select the service you are using, select Properties, and then select Next. In the
General Preferences dialog box, choose any of the following setting settings, all
of which are optional:
Ø Disconnect service after actions are performed: Select to automatically
disconnect from the server upon completion of all pending actions. This
option minimizes connect time and cost.
Ø Check for new messages every: select the time interval(in minutes) at
which you want the device to check for new mail. If this option is turned off,
you must check for new mail manually by selecting Services>
Send/Receive Mail.
Ø Display a message box when new mail arrives (POP3 only): Select to be
informed that new mail has arrived.
Ø Display a message box when new mail arrives (IMAP4 only): Select to be
informed that new mail has arrived.
Ø Send using MIME format (POP3 only): Select to send messages with
extended characters.
Ø Only display messages from last 3 days: Select how many day’s messages
you want downloaded.
ü Set inbox preferences
If you are adjusting the settings of an existing service, select Services> Options,
select the service you are using, select Properties, and then select New twice. In
the Inbox Preferences dialog box, choose any of the following options:
Ø Get message headers only: Select to save storage space and time by
downloading only headers. You can download a full copy of the message
later by selecting the message and then Services> Get Full Copy.
Ø Include <number> lines: Select to set the message length (approximate
number of lines) that you want to download.
Ø Get Full Copy of messages: Select to receive a full copy of all messages. In
addition to the message body, any options you select in When getting full
copy will be downloaded. Selecting this option increases the amount of time
needed to download messages.
Ø Only synchronize folder hierarchy under Inbox (IMAP4 only): Select to
speed download time by preventing the complete downloaded of the folder
list every time you connect.
Ø Get meeting requests (POP3 only): Select to download and store copies of

5
-
4
meeting requests when getting full copies of messages. This setting applies
whether you have chosen to download full copies of messages by default, or
you selectively download full copies of messages by opening the message
and selecting Services> Get Full Copy Limitations apply.
Ø Get file attachments (POP3 only): Select to download and save message
attachments when getting full copies of messages. This option may use
significant RAM and slow download time. This setting applies whether you
have chosen to download full copies of messages by default, or if you
selectively download full copies of messages and selecting Services> Get
Full Copy.
Ø Get file attachments and meeting requests (IMAP4 only): Select to
download and store meeting requests and message attachments when getting
full copies of messages. This setting applies you have chosen to download
full copies of messages by default, or if you selectively download full
copies of messages by opening the message and selecting Services> Get
Full Copy Limitations apply.
Ø Only if small than (IMAP4 only): Select to restrict the size of the attachments
you download. Set to 10K if you want to receive meeting requests only.
ü Include the original message in a reply:
Ø Select Services> Options> Compose tab.
Ø Under Reply, select Include Body. This setting will place a copy of the
original message beneath your response text.
Ø To indent the original message, select Indent.
Ø To add leading characters (such as>) to the original message lines, select
Add leading character, and enter the character you want.
ü Save copies of sent messages:
By default, sent messages are not saved on your device.
Ø Select Services> Options> Compose tab.
Ø Select Keep copy of sent mail in Sent folder.
ü Set the action to follow deleting, moving, or responding to a message:
Ø Select Services> Options > Read tab.
Ø Select desired options.
ü Delete a message:
Select the message and select File> Delete. Messages are moved to Deleted
(local) folder and deleted according to the option you have selected in Services>
Options> Delete tab:
Ø On connect/disconnect: Deletes messages when you connect or disconnect

5
-
5
from your mail service or exit Inbox.
Ø Immediately: Deletes messages as soon as you select File> Delete.
Ø Manual: Deletes messages when you select File> Empty Deleted (local)
Note: If you are working offline, messages that have been deleted from the device the
next time you connect.
ü Empty the Deleted (local) folder:
Ø Select File> Empty Deleted (local). This permanently deletes messages in
the Deleted (local) folder.
Ø To check or adjust the current settings for deleting messages, select
Services> Options> Delete tab.
ü Move or copy a message:
Caution: When you move a message that you have received through POP3 or
synchronization to a folder you created on your device, the copy of the message on
the server is deleted. This prevents duplicate copies of messages. Although the
complete message is moved, message attachments will be deleted if you have not
selected the option to download attachments. Once the message is moved, you will be
able to access the message only from your device.
Ø Select the message
Ø Select File> Move To or File> Copy To.
Ø Select the destination folder. If you are working offline, the message will be
moved or copied from the server the next time you connect.
ü Folder-
u Create a folder:
Ø Select File> Folder> New Folder
Ø Type a name for the folder.
u Delete a folder:
Ø Select the folder you want to delete
Ø Select File> Delete
u Designate a folder as offline:
Only IMAP4 folders can be designated as offline. All IMAP4 default folders,
such as Inbox, are automatically designated as offline. Messages in offline
folders can be viewed when you are disconnected from your mail server. If a
folder is not designated as offline, you will be able to read and respond to
messages in that folder only when connected to the server.
Ø To designate a folder as offline, select the folder and then select Service >
Offline Folder.

5
-
6
u Rename a folder:
Ø Select the folder you want to rename.
Ø Select File> Folder> Rename Folder.
Ø Type the new name for the folder.
Notes:
l Default folders, such as Inbox, can’t be renamed.
l Folders you create for IMAP4 mail servers can’t be renamed.
u Synchronize folders while connected:
When you synchronize folders, the contents of your device folders and mail
server folders are compared and updated. New mail messages are downloaded,
and messages in your device Outbox folder are sent. The synchronization
behavior depends on how you connect to your mail server.
Ø When you connect to a POP3 server, the Inbox and Outbox folders on
your device are synchronized with the corresponding folders on the mail
server. To synchronize after the initial connection, select Services>
Send/Receive Mail.
Ø When you connect to an IMAP4 server, Inbox, Outbox, and all folders
marked as offline are synchronized. To synchronize all folders after the
initial connection, select Services> Synchronize Folders. To
synchronize just the selected folder and the Outbox folder, select
Services> Send/Receive Mail.
ü Compose and send a message:
Ø In list view, select Compose> New Message
Ø Enter the address of one or more recipients, separating them with a
semicolon. If the recipient is listed in the Address Book, enter a few
letters of the recipient’s name and select Compose> Check Name. If
there is only one match, the e-mail address is inserted. If there is more
than one match, select the correct address from the Choose E-mail
Recipients dialog box. If there is no match then add a new e-mail address
through Choose E-mail Recipients.
Ø To attach a file, select File> attachments> Add Attachment.
Ø Select File> Send. If you are working offline, the message is moved to
the Outbox folder and will be sent the next time you connect.
Tip: to see more header information, select the triangle in the lower-right corner of
the header area. Select the triangle again to collapse the header area.
ü Save a message:
Ø Select File> Save to save the message you are composing or editing.

5
-
7
The message is not sent and is saved in the inbox folder of the active service.
ü Reply to or forward a message:
Ø Open the message, and then select Compose> Reply to Sender, Reply to
All, or Forward.
Ø Enter your response.
Ø Select File> Send.
Tips:
l Selections in the Options dialog box determine whether the original text is
included.
l To see more header information, select the inverted triangle in the lower-right
corner of the header area. Select the triangle again to collapse the header area.
ü Check Inbox status:
Ø In list view, select Compose> Status. You can view details such as the
number of messages to be sent, deleted, and copied, and the number of
attachments to be downloaded.
ü Download message from the server:
When you download messages, you need to create two connections: a remote
connection and a mail server connection. The remote connection connects you
and your ISP or network. The mail server connection downloads messages from
your mail server to Inbox on your device. When you select Services> Connect in
Inbox, Inbox starts a remote connection using the connection you specified when
setting up the current mail service. If you are already connected through a remote
connection other than the one you specified in the service, you will be asked if
you want to use the current connection. If you choose not to, you will need to
disconnect from the current connection before you can check for new messages.
Ø Select the Services menu and make sure that the service you want to use
is selected (the selected service has a bullet next to it.)
Ø Select Services> Connect. The messages on your device and mail
server are synchronized: new messages are downloaded to the device
Inbox folder, messages in the device Outbox folder are sent, and
messages that have been deleted on the server are removed from the
device Inbox. Double-tap a message list to open it.
Ø If you read a message and decide that you need the full copy, select
File> Get Full Copy while in the message window or Services> Get
Full Copy while in list view. This will also download message
attachments and meeting requests if you have those options selected in
the Inbox Preferences dialog box. You can also choose to download

5
-
8
full copies of messages by default.
Ø When finished, select Services> Connect to disconnect. You also need
to disconnect your dial-up connection by double-tapping the icon in the
status bar and selecting Disconnect.
Notes:
l Receiving entire messages consumes storage memory.
l The size column in the Inbox list view displays the local size and server size of
a message. Even when a message has been downloaded fully, these numbers
may differ because the size of a message can very between the server and the
device.
l When using IMAP4 to get Outlook + data, you will see the contents of your
Journal folder. File editing transactions and documents (such as Task items,
e-mail message, and Word documents) attached using drag and drop will appear
as shortcuts on the device. A copy of the document will not be moved to your
device, and the shortcut on the device cannot be used to access the documents
associated with a journal entry to the device, attach the document to the entry
rather than dragging and dropping it. Also, be sure to set your IMAP4 service to
receive full copies of messages, attachments, and meeting requests. For more
information on using Journal, see the Help for the desktop version of Outlook.
ü Working with Message Attachments:
Ø If you receive messages through a remote mail server, in Inbox on the device,
select the Get file attachments and meeting requests (IMAP4) or Get
meeting requests (POP3) setting in the Inbox Preferences dialog box. For
more information, see Set Inbox preferences.
Notes:
l Embedded images and OLE objects cannot be received as attachments
l Embedded messages can be viewed as an attachment when using IMAP4 to
receive e-mail. However, this features does not work if TNEF is enabled so
that you can receive meeting requests.
ü Check attachments status:
Ø An attachment sent with an e-mail message, whether it has been downloaded
or not, will appear as an icon at the bottom of the message in its own window
pane. If you don’t see this pane, select File> Attachments> Show
Attachments. If TNEF is turned on so you can receive meeting requests, you
will not see attachments until they are fully downloaded.
Ø To mark an attachment for downloading in a POP3 or IMAP4 service,
double-click it. The attachment will be downloaded the next time you

5
-
9
connect. You can also set Inbox to download attachments automatically when
you get a full copy of a message. For more information, see Receive
attachments.
ü Open an attachment:
Ø With the message open, double-tap the attachment’s icon at the bottom of the
message. If you don’t see this pane, select File> Attachments> Show
Attachments.
ü Store an attachment:
Ø Select Service> Options> Storage tab.
Ø Select to store attachments on internal RAM or a storage card.
Ø If you use more than one storage card, select it from the list.
Note: Once you make the above selection, all attachments will be moved to the
selected card.
ü Delete an attachment:
Ø To delete an attachment from a message you are sending, select the
attachment, and then select Edit> Clear or press the DEL key on the
keypad.
Ø To delete an attachment you have received, delete the message.
ü Attach a file to a message:
Ø With the message open, select File> Attachments> Add Attachment.
Ø Select the file you want to attach.
Note:
OLE objects cannot be attached to Inbox messages.
Note 1: To add a mail service, select “Add”, To remove a mail service, select the
service from the Installed service box and select “Remove”. To view a mail service’s
properties, select the service from the Installed service box and then select
Properties.
5
-
10
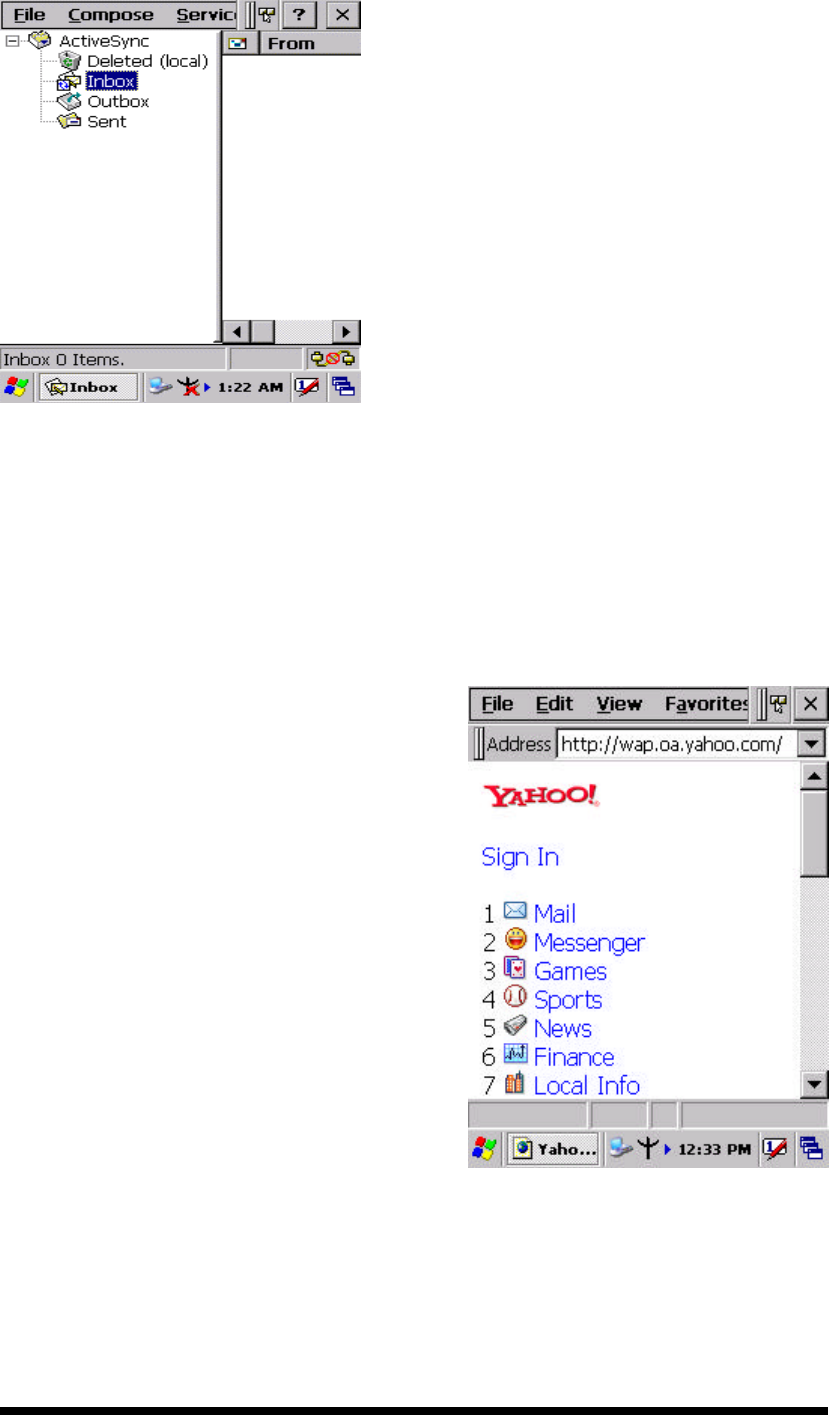
Figure 5-1 Inbox
5.2.3 Internet Explorer
With Internet Explorer, you can view Web or intranet Web pages on your device. You
will need to use a modem or WLAN to connect to an Internet server provider (ISP) or
network.
5.2.3.1 Connect to the Internet
Before you can view Web pages, you must
set up a remote connection to your ISP or
network.
5.2.3.2 Start Internet Explorer
ü Open Internet Explorer by selecting Start
> Programs > Internet Explorer.
ü To get default home page, navigate to the
desired default web page.
ü Select View > Internet Options from the
command bar.
ü Enter the desired URL in the Start page
field.
ü Press the OK button.
Figure 5-2 Internet Explorer
5.2.3.3 Navigation Control
Internet Explorer uses sliding menus for application and navigation control. Tap and
drag the sliding menus to the left or right to see the hidden menu items and toolbars.

5
-
11
To achieve more screen real estate in Internet Explorer, you can hide the Status bar
and View menu. From the top menubar, go to View > Hide Toolbars.
Once it is hidden, you must cold reset to access these features again. Refer to 2.7.2
“Cold Reset “for more information.
5.2.3.4 Set up a proxy server
Proxy servers are often used when connecting to the Internet through a local network,
such as a corporate network, for added security.
ü Select View > Internet Options > Connection Tab.
ü Select Access the Internet using a proxy server.
ü Enter the proxy server address and port. For more information, see your
administrator.
ü To bypass the proxy server for local address, such as corporate intranet pages,
select Bypass proxy for local address.
5.2.3.5 Enable Cookies
A cookie file contains information about your identity and preferences so that a
Web site can tailor information to your needs. The Web site sends the file and it
is stored on your mobile device.
ü Select View > Internet Options > Security Tab.
ü Select Allow cookies.
5.2.3.6 Search for an Internet Site
ü Select View > Go > Search to search the web.
5.2.3.7 Go to an Internet address
ü Select Address Bar, if necessary to display the Address bar
ü Enter the address
ü Press “ENTER” key.
5.2.3.8 View previously visited sites
ü Tap the Arrow button at the right site of Address Bar
ü Select the Web Address you want to view.
5.2.3.9 Add and view Favorites
ü Go to the page you want add
ü Select Favorites > Add To Favorites.
ü If necessary, locate the folder you want.
ü Confirm or change the name.

5
-
12
ü To view your favorite Web sites, select Favorites and the Web site you
want to view.
Note:
To organize your Favorites list, select Favorites > Organize Favorites.
5.2.2.10 Browse Web pages
ü To move to a page you have previously view, select View > Back
ü To move to the next page (provided you have viewed it previously), Select
View > Forward.
ü To return to your Home page, select View > Go > Home.
5.2.2.11 Refresh current page
ü Select View > Refresh.
5.2.2.12 Stop loading a page
ü Select View > Stop.
5.2.2.13 View current page
ü Select View > Internet Options
ü To view the protocol, page type, size, and address, selects the General tab.
ü To view security information about the page, select the Security tab.
5.2.2.14 View HTML source code
ü While viewing the page, select File > Save As and save the file as .txt file.
ü Open the file in a word processing program, such as WordPad.
5.2.2.15 Change home and search page settings
ü Open the page you want to use as your home or search page.
ü Select View > Go > Home or Search.
5.2.3.16 Save a copy of current page
You can save Web pages and view them later when you’re disconnected from the
Internet or Intranet without using cached memory.
ü Select File > Save As
ü Specify a folder location and give the file name.
5.2.2.17 Copy a Web page to a document
ü Select all or part of the Web page you want to copy.
ü Select Edit > Copy.
5
-
13
ü Go to the document where you want to place the information and select the
location.
ü Select Edit > Paste.
5.2.2.18 Select security Options
ü Select View > Internet Options > Security tab
ü Select the security protocols you want.
5.2.2.19 Change the font size
ü Select View > Text Size and select the desired size.
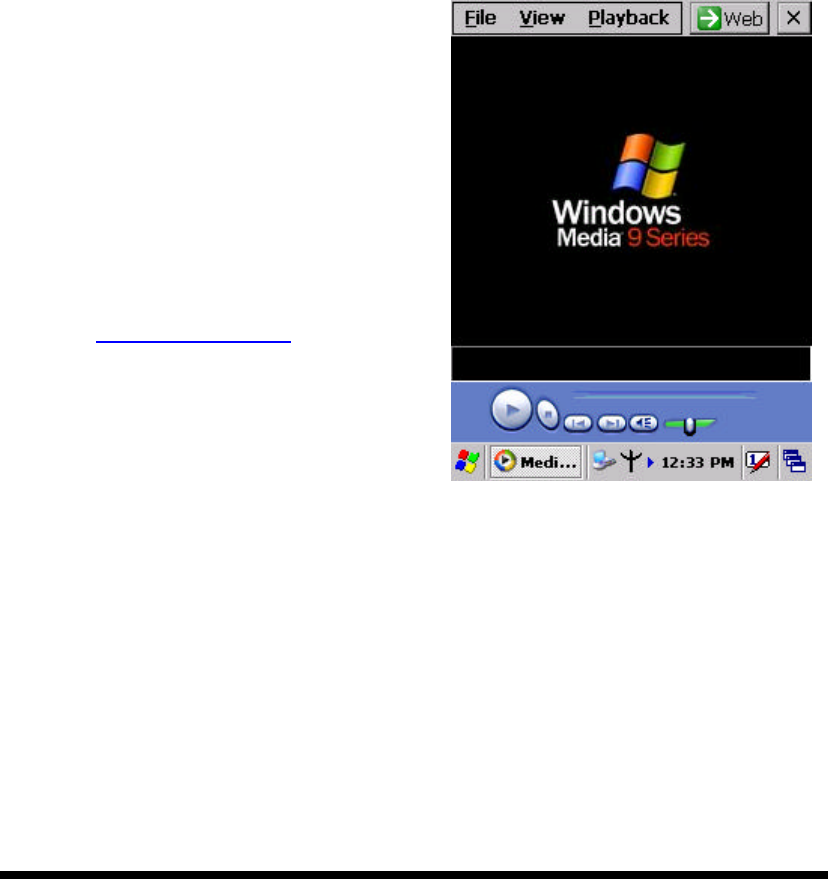
5.2.3 Media Player
The PDT comes with Media Player for
Windows CE.NET installed.
ü Open Media Player by selecting
Start > Programs > Media
Player from the desktop.
ü Select File > Open to open a new
media file.
ü Please refer to
www.microsoft.com for additional
information and help with your
Microsoft Windows Media Player.
Figure 5-3 Media Player
5.2.4 Messenger
The Windows CE Messenger client application in Windows CE.NET allows you
to communicate real-time using text-based messaging, VOIP, and more.
ü See who’s online. See when your colleagues are online. You can also post
your presence information to a list of watchers that you define.
ü Talk instead of type Stop typing Talk with a colleague anywhere in the
world using the microphone and speakers on your device. Windows
5
-
14
Messenger supports high-quality voice calling r Windows CE device.
ü Communicate using Session Initiation Protocol (SIP) or Hotmail contacts
Windows Messenger supports. Communication with your colleagues in the
enterprise with a SIP based communications service. You can also talk to
your Hotmail contacts using the .NET Messenger.
5.2.5 Microsoft WordPad
You can create and edit documents and templates in WordPad, using buttons and
menu commands that are similar to those used in the desktop version of
Microsoft Word. You can work with files Normal or Outline view.
WordPad documents are usually saved as .pwd files, but you can also save
documents in other file formats, such as .rtf or .doc.
5.2.5.1 Selecting and Editing Text
ü Select text
To select Do this
Any amount of text Drag the stylus over the text.
A word Double-tap the word.
A single paragraph Triple-tap within the paragraph.
An entire document Select Edit > Select All
An picture Tap the picture
ü Find text
Ø To search for text in one part of a document, select that part. Otherwise, the
whole document is searched.
Ø Select Edit > Find
Ø Enter the text you want to find. For a paragraph, enter ^p. For a tab stop,
enter ^t.
Ø Select the search options you want.
Ø To continue searching, select Edit > Find > Next.
ü Replace text
Ø To replace text in one part of document, select that part. Otherwise, the
whole document is searched.
Ø Select Edit > Replace.
Ø Enter the text you want to find and the text you want to replace it with. For

5
-
15
a paragraph, enter ^p. For a tab stop, enter ^t.
Ø Select the replacement options you want.
Ø Select Find Next.
Ø On the Find/Replace toolbar, select the appropriate button.
ü Move, copy, or delete text
Ø Select the text you want to move, copy, or delete.
Ø To move or delete text, select the Cut button. To copy the text, select the
Copy button.
Ø To paste the information, move the insertion point to the desired location,
and select the Paste button.
Notes:
l To undo an action, select Edit > Undo.
l To restore the action, select Edit > Redo.
5.2.5.2 Formatting Text
ü Create bulleted and numbered lists
Ø Select the Bullets or Numbering button.
Ø Type the first item.
Ø Press ENTER, type the next item, and repeat as needed.
Ø Select the button again to end list formatting.
Note: To change the number style for the selected list, select Format > Paragraph,
In the Format list, select the style you want.
ü Set the default font
Ø Select Format > Font.
Ø Select the font you want.
Ø Select Set As Default
Ø To confirm that your changes will be applied to subsequent documents you
create, select Yes.
Note: To apply the default font and stylus to selected text, select Apply Default.
ü Select a different font
Ø Select the text you want to change. To select all text, select Edit > Select All.
Ø From the Font list, select the font you want.
Ø From the Font Size list, select a size.
Note: To see more formatting options, select Format > Font.
ü Change font formatting

5
-
16
Ø Select desired text.
Ø Select the Bold, Italic, or Underline button.
Ø To change the color, select Format > Font and select the color you want from
the Color list.
ü Adjust the paragraph alignment
Ø Select the paragraph you want to align.
Ø Select the Align Left, Center, or Align Right button.
Note: To see more formatting options, select Format > Paragraph.
ü Indent a paragraph
Ø Select the paragraph you want to indent.
Ø Select Format > paragraph.
Ø Adjust the indentation settings as needed.
ü Set tabs
Ø Select Format > Tabs.
Ø Change the tab settings as needed.
5.2.5.3 Adjusting the Display
ü Wrap text in the window
Ø Select View > Wrap to Window.
ü Display the document using the full screen
Ø Select View > Full Screen.
Ø To exit Full Screen view, select Restore.
Ø To move the Restore button, drag the bar on the left side.
ü Display or hide scroll bars
Ø Select View > Horizontal Scroll Bar or Vertical Scroll Bar.
ü Zoom in or out
Ø Select View > Zoom, and select the desired percentage.
Note: For Custom, enter the exact percentage and select OK.
5.2.5.4 Working in Outline View
ü Switch between Normal and Outline views
Ø Select View > Normal or Outline.

5
-
17
ü Assign and change outline levels
Ø Select View > Outline.
Ø Select the appropriate buttons on the toolbar.
5.2.5.5 Inserting Symbols
ü Place the insertion point where you want to insert the symbol.
ü Select Tools > Insert Symbols.
ü Select the symbol you want, and then select Insert.
Tips:
If you select a different font ( or subset of a font), a different set of Symbols will
be displayed.
5.2.5.6 Printing a Document
ü Select File > Print.
ü Select the printing options you want.
Tips:
l Port list the available printer ports
l If Network is selected from the Port list, enter the path to the network
printer to the Net Path box.
5.2.5.7 Setting a password for a Document
ü Select File > password.
ü Type and verify the password.
ü You must save the document (File > Save) to return the password.
5.2.5.8 Converting Documents
ü About document conversion
If an e-mail program is installed on your device and you receive an attached
Word document or template created in Word version 6.0 or later, WordPad will
convert the file on your device. To view the document, simply open the
attachment in your e-mail program or open the file in the WordPad.
During conversion, some formatting attributes may be changed or lost. To avoid
losing these attributes permanently, close the file after viewing it rather saving
the file on your device. If you save the file, save with a different file name.
For more information about conversion performed on your device, see the
following topics.

5
-
18
ü Changes caused by Word document conversion
Ø Formatting
l Borders and Shading
Borders and shading are not displayed in WordPad, but are restored when
converted back to a Word document. Shading is not restored when used in a
table, but simple borders are restored.
l Character formatting
Bold, italic, strikethrough, superscript, subscript, and hidden text are
retained and displayed. Other effects are changed or removed.
l Colors
Colors are retained and mapped to colors available on your device.
l Fonts and font sizes
Fonts not supported by your mobile device are mapped to the closest font
available in WordPad.
l Page Formatting
Headers, footers, footnotes, columns, pages setup information, and style
sheets are removed during conversion to WordPad. WordPad supports
built-in headings.
l Paragraph formatting
Tabs, alignment, bullets, indentation, simple numbered lists, and paragraph
spacing are retailed and displayed in WordPad.
Ø Pictures
Pictures are removed during conversion.
Ø Table of Contents
Table of Contents text and some formatting are preserved. However, any text set
at right-aligned tab stops may wrap to the next line.
Ø Index
Index text and some formatting are preserved.
Ø Tables
Tables appear as tab-delimited text. Cells containing wrapped text, tabs, or
paragraph markers may be difficult to read. Simple tables are displayed
accurately and restored when you convert the WordPad file back to a WordPad
document.
5
-
19
Ø OLE Objects
OLE Objects are removed during conversion.
Ø Revisions marks, annotations, and comments
Revision marks are visible but cannot be changed. Annotations and documents
are removed during conversion.
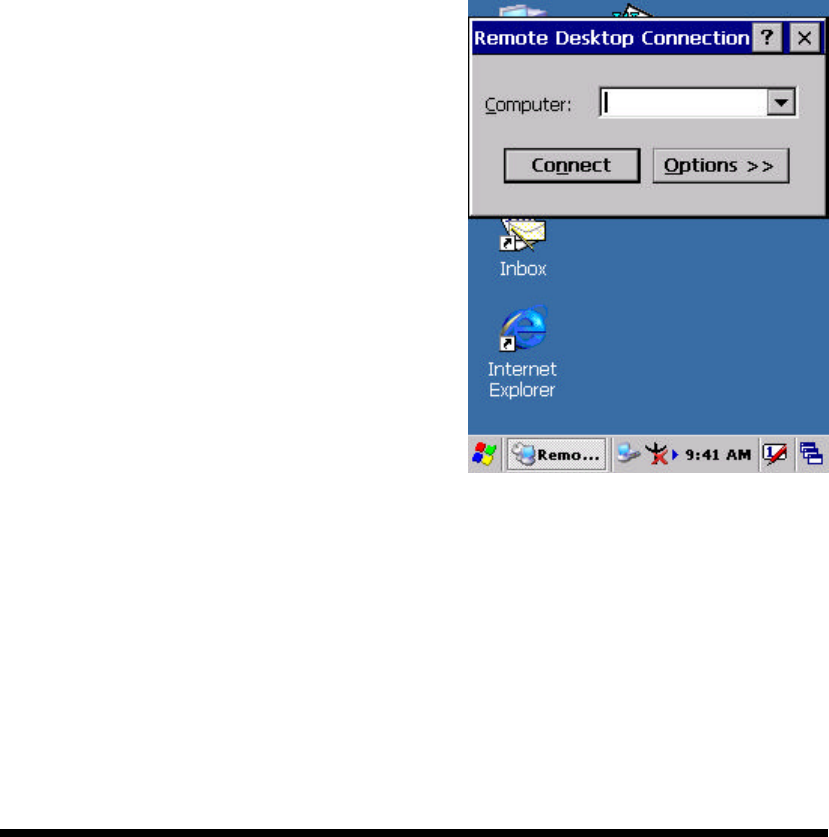
5.2.6 Remote Connection
Using Remote Desktop Connection, you can log on to Windows Terminal Server and
use all programs installed on this server. For example, instead of running Microsoft
Pocket Word, you can run the desktop version
of Microsoft Word.
5.2.6.1 Connecting to Terminal Server
ü Select Start > Programs > Remote
Connection, or run ‘CETSC’ from the
command prompt.
ü In the Server box, type or select a
Terminal Server name or TCP/IP address,
or select a server in the drop-down list.
ü Select Connect.
ü In the Remote Connection window, type
your user name, password, and domain(if
required), and then select OK.
Figure 5-4 Remote Connected
5.2.6.2 Disconnecting Without Ending a Session
ü In the Remote Connection window, select Start > Shutdown.
ü Select Disconnect > OK.
Note: If you previously disconnected from a Terminal Server without ending the
session, the Terminal Server will continue to execute any running processes and
Remote Connection can later reconnect to this same session(if your
5
-
20
administrator has configured Remote Connection to reconnect to disconnected
sessions).
5.2.6.3 Disconnecting and Ending a Session
ü In the Remote Connection window, select Start > Shutdown.
ü Select Log Off > OK.
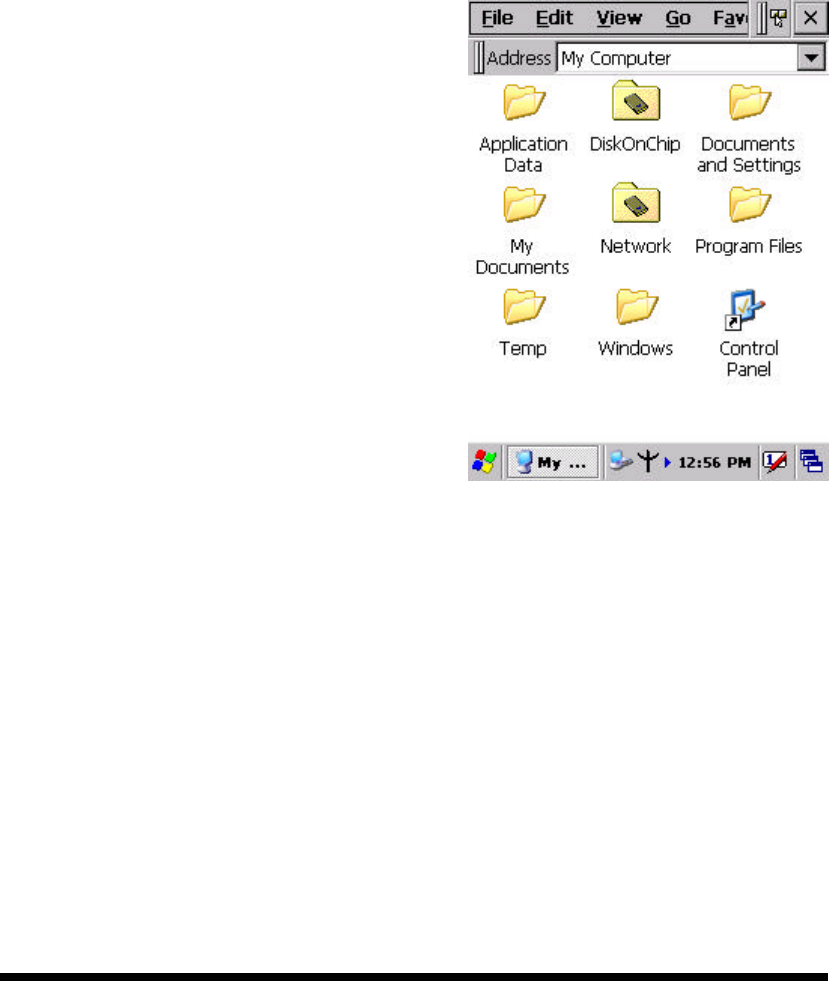
5.2.7 Windows Explorer
Windows Explorer works almost the same on
your PDT as it does on your PC. See the
topics below for information about the
difference in Windows Explorer on your
device.
5.2.7.1 Navigating in File View
ü Go forwards and Back
Ø To go to the previous folder, select
Go > Back.
Ø To go to the next folder (which you
have just viewed), select Go >
Forward.
Figure 5-5 Windows Explorer
ü Use the Go menu
Ø To quickly access the My Documents folder, select Go > My Documents
Ø To see all of the folders you have accessed, select Go > History. Double-tap
a folder to return to it.
5.2.7.2 Viewing Files as Icons Lists
ü To view icons, select View > Large Icons or Small Icons.
ü To view a list, select View > Details.
5.2.7.3 Working with Files and Folders
ü Create a new folder

5
-
21
Ø If necessary, open the folder where you want the new folder to reside.
Ø Select File > New Folder.
ü Add a folder to your Favorites list
Ø Open the folder
Ø Select Favorites > Add to Favorites.
Ø In the Name box, type the shortcut name.
Tips:
l To open a favorite file or folder, select Favorites and then select the folder.
l To organize your favorites, select Favorites > Organize Favorites.
ü Transfer a file using infrared
Ø To send a file, select it, line up the infrared ports, and select File > Send To
> Infrared Recipient.
Ø To receive a file, line up the infrared ports, and select File > Receive.
5.2.7.4. Creating Desktop Shortcuts
ü Display the file or Web page for which you want to create a Shortcut.
ü Select File > Send to.
ü Select Desktop as Shortcut.
5.2.7.5 Switch to Internet
ü Type a URL in the Address bar.
5
-
22
5.3 DiskOnChip
The DiskOnChip let the application or a data file can be stored into the Flash
Memory.
Note: The DiskOnChip storage memory persists all reset (warm/cold reboot)
conditions and software/firmware updates.
We strongly recommends installing all applications, applets, programs, and
important data files to the DiskOnChip Flash location.
Caution:
If an application or a data file is only installed or saved in RAM, a hard
reset will result in the loss of that application or data file.
5.3.1 Saving to Flash
To save an application or data to the Flash Memory, from your current
application, select File > Save As > navigate to the DiskOnChip location and
save it.
5.3.2 DiskOnChip Location
To access the contents of DiskOnChip storage:
ü Double-tap the My Computer icon on the desltop.
ü Double-tap the DiskOnChip icon to view DiskOnChip.

5
-
23
Figure 5-6 DiskOnChip
5.3.3 DiskOnChip Size
The size of the DiskOnChip will vary,
depending on the size of system
firmware.
ü Inside the DiskOnChip directory,
tap File > Properties.
ü The DiskOnChip Properties
dialog:
The number following Free is the
amount of memory currently available on
your device.
Figure 5-7 DiskOnChip Size