Sony Group DCRTRV950 Digital Video Camera Recorder TRV950 User Manual manual1
Sony Corporation Digital Video Camera Recorder TRV950 manual1
UserManual.wiki
>
Sony Group
>
DCRTRV950 User Manual
>
manual1
Contents
1.
network1
2.
network2
3.
manual1
4.
manual2
5.
manual3
6.
manual4
manual1
Navigation menu
Upload a User Manual
Namespaces
Wiki Guide
HTML
PDF
Info
Views
User Manual
Discussion / Help
Navigation
![Getting Started13Using this manualNote on TV color systemsTV color systems differ depending on the country or region. To view your recordingson a TV, you need an NTSC system-based TV.Copyright precautionsTelevision programs, films, video tapes, and other materials may be copyrighted.Unauthorized recording of such materials may be contrary to the copyright laws.Precautions on camcorder careLens and LCD screen/finder (on mounted models only)•The LCD screen and the finder are manufactured using extremely high-precisiontechnology, so over 99.99% of the pixels are operational for effective use.However, there may be some tiny black points and/or bright points (white, red,blue or green in color) that constantly appear on the LCD screen and the finder.These points are normal in the manufacturing process and do not affect therecording in any way.•Do not let your camcorder get wet. Keep your camcorder away from rain and seawater. Letting your camcorder get wet may cause your camcorder to malfunction.Sometimes this malfunction cannot be repaired [a].•Never leave your camcorder exposed to temperatures above 60°C (140°F), such as in acar parked in the sun or under direct sunlight [b].•Be careful when placing the camera near a window or outdoors. Exposing the LCDscreen, the finder or the lens to direct sunlight for long periods may causemalfunctions [c].•Do not directly shoot the sun. Doing so might cause your camcorder to malfunction.Take pictures of the sun in low light conditions such as dusk [d].[a][b][c][d]](https://usermanual.wiki/Sony-Group/DCRTRV950.manual1/User-Guide-240526-Page-13.png)
![21Getting StartedNoteInstead of DST, SUMMERTIME is displayed on the screen for some models.If you do not set the date and time“--:--:--” and “--- -- ----” are recorded on the data code of the tape and the “MemoryStick.”When using your camcorder abroadSet the clock to the local time (p. 22).If you use the camcorder in a region where daylight saving time is usedSet DST SET to ON in the menu setting.Note on the time indicatorThe internal clock of your camcorder operates on a 12-hour cycle.•12:00 AM stands for midnight.•12:00 PM stands for noon.Step 2 Setting the date and time234568SETUP MENU CLOCK SET USB STREAM LTR SIZE LANGUAGE DEMO MODESETUP MENU CLOCK SET USB STREAM LTR SIZE LANGUAGE DEMO MODE RETURN[MENU] : END[MENU] : END[MENU] : END– –:– –:– –– –:– –:– –SETUP MENU CLOCK SET USB STREAM LTR SIZE LANGUAGE DEMO MODE RETURNDST OFFDATE Y M DGMT +0.0Lisbon, LondonCLOCK SETAREA 1RrRrRRRR RRRRRR RRRrrrr rrrrrr rrr[EXEC] : NEXT ITEM[EXEC] : NEXT ITEMCLOCK SETAREA26 GMT –5.0GMT –5.0RGMT –5.0NewYork, BogotaNewYork, BogotarNewYork, BogotaDST OFFDATE Y M DDST OFFDATE Y M D DST OFFDATE Y M D [EXEC] : NEXT ITEM[EXEC] : NEXT ITEM[EXEC] : END [MENU] : ENDCLOCK SETAREA26 GMT –5.0NewYork, BogotaDATE Y M DDST OFFONCLOCK SETAREA26CLOCK SETAREA262002 JAN 1 12 : 00AM2002 JUL 4 5 : 30 PM– – – – – – – – – – – : – – – – – – – – – – – – – : – – – – – – – – – – – – – : – – RRRR RRRrrrr rrrGMT –5.0NewYork, BogotaDST OFFDATE Y M D [EXEC] : NEXT ITEMCLOCK SETAREA262002 JAN 1 12 : 00AMSETUP MENU CLOCK SET USB STREAM LTR SIZE LANGUAGE DEMO MODE RETURNJUL 4 20025:30:00 PMSTBYSTBYSTBYMENU](https://usermanual.wiki/Sony-Group/DCRTRV950.manual1/User-Guide-240526-Page-21.png)


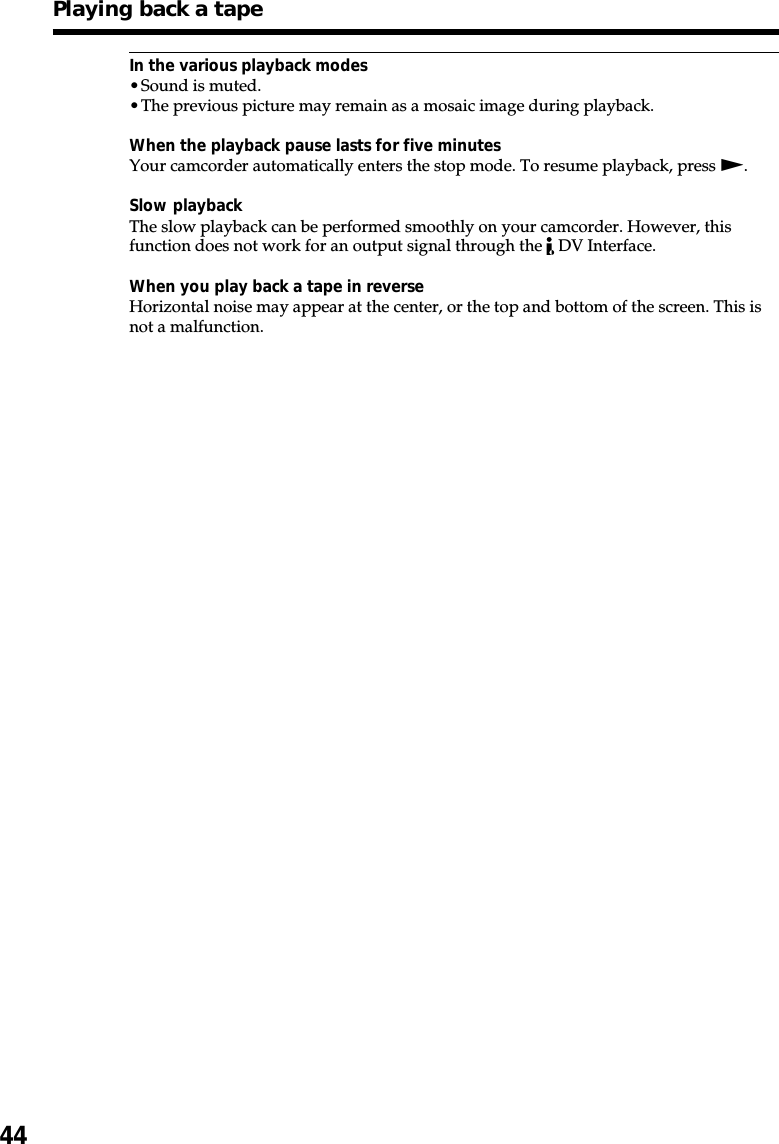
![41Playback – BasicsTo display the screen indicators – Display functionPress DISPLAY/TOUCH PANEL on your camcorder or DISPLAY on the RemoteCommander supplied with your camcorder. The indicators disappear on the screen. Tomake the indicators appear, press DISPLAY/TOUCH PANEL or DISPLAY again.About date/time and various settingsYour camcorder automatically records not only images on the tape but also therecording data (date/time or various settings when recorded) (data code).1Set the POWER switch to VCR, then play back a tape.2Press DATA CODE on your camcorder or the Remote Commander.The display changes as follows when you press the DATA CODE:date/time t various settings (SteadyShot, exposure, white balance, gain, shutterspeed, aperture value) t no indicator[a]Tape counter[b]SteadyShot OFF[c]Exposure mode[d]White balance[e]Gain[f]Shutter speed[g]Aperture valuePlaying back a tapeDISPLAY/TOUCH PANELDATA CODEDATA CODE DISPLAYDate/time Various settings[g][b][d][e][f][c][a] 60 AWBF1.8 9dB AUTOJUL 4 200212:05:56 AM50min0:00:23:0140min0:00:23:01](https://usermanual.wiki/Sony-Group/DCRTRV950.manual1/User-Guide-240526-Page-41.png)
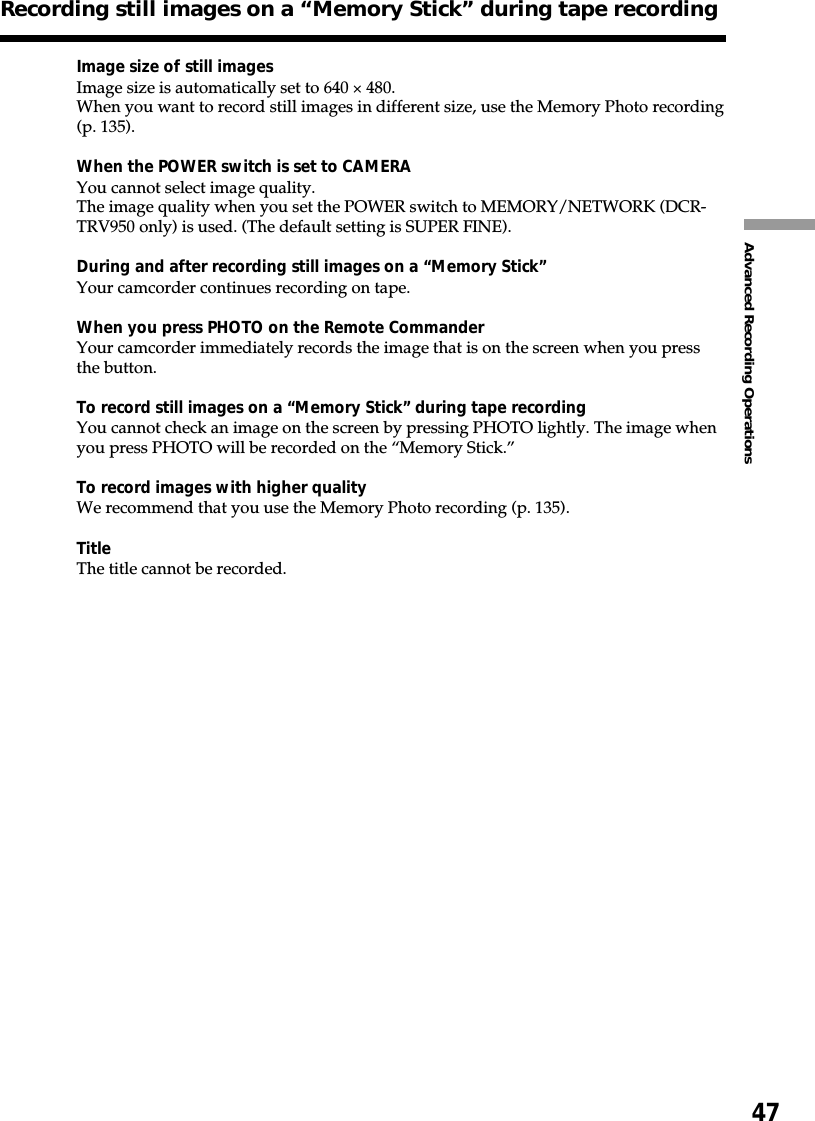
![46You can record still images on a “Memory Stick” in the tape recording or tape recordingstandby. You can also record still images on a tape (p. 51).Before operation•Insert a “Memory Stick” into your camcorder.•Set PHOTO REC in to MEMORY in the menu settings (The default setting isMEMORY).(1)In the standby, keep pressing PHOTO lightly until a still image appears. TheCAPTURE indicator appears. Recording does not start yet. To change from theselected still image to another image, release PHOTO once and press it lightlyagain.(2)Press PHOTO deeper.Recording is complete when the bar scroll indicator disappears.The image while pressing the button deeply is recorded on the “MemoryStick.”Notes•When recording a still image, do not shake your camcorder. If you do so, the imagemay flutter.•You cannot record still images on a “Memory Stick” during following operations( The indicator flashes on the screen.):–Wide mode–Fader–Picture effect–Digital effect–MEMORY MIX“Memory Stick”For details, see page 126 for more information.— Advanced Recording Operations —Recording still images on a “MemoryStick” during tape recording12PHOTOPHOTO1 / 6CAPTURESFN640SFN640[a] : Number of the recorded images[b] : Approximate number of the images that can be recorded on the “Memory Stick”[a][b]](https://usermanual.wiki/Sony-Group/DCRTRV950.manual1/User-Guide-240526-Page-46.png)

![53Advanced Recording OperationsYou can record a 16:9 wide picture to watch on a 16:9 wide-screen TV (16:9WIDE). Ifyou connect a TV compatible with the ID-1/ID-2 system, the screen size isautomatically selected.Black bands appear on the screen during recording in 16:9WIDE mode [a]. The pictureduring playback on a normal TV [b] or on a wide-screen TV [c] is compressed in thelongwise direction. If you set the screen mode of the wide-screen TV to the full mode,you can watch pictures of normal images [d].(1)In the standby, press MENU, then turn the SEL/PUSH EXEC dial to select16:9WIDE in , then press the dial (p. 209).(2)Turn the SEL/PUSH EXEC dial to select ON, then press the dial.To cancel the wide modeSet 16:9WIDE to OFF in the menu settings.Using the wide mode2ONCAMERA SET D ZOOM PHOTO REC 16:9WIDE STEADYSHOT FRAME REC INT. REC RETURN[MENU] : ENDMENU[a][c][b][d]16:9WIDE](https://usermanual.wiki/Sony-Group/DCRTRV950.manual1/User-Guide-240526-Page-53.png)
![55Advanced Recording OperationsYou can fade in or out to give your recording a more professional appearance.MONOTONEWhen fading in, the picture gradually changes from black-and-white to color.When fading out, the picture gradually changes from color to black-and-white.1) You can use the bounce when D ZOOM is set to OFF in the menu settings.2) Fade in only.Using the faderFADEROVERLAP2)WIPE2)DOT2)M. FADER(mosaic)BOUNCE1) 2)[a]RECSTBYRECSTBY[b]](https://usermanual.wiki/Sony-Group/DCRTRV950.manual1/User-Guide-240526-Page-55.png)
![56(1)When fading in [a]In the standby, press FADER until the desired fader indicator flashes.When fading out [b]In the recording, press FADER until the desired fader indicator flashes.The indicator changes as follows:FADER tM. FADER tBOUNCE tMONOTONE(no indicator)TDOT TWIPE TOVERLAPThe last selected fader is indicated first of all.(2)Press START/STOP. The fader indicator stops flashing.After fade in/out ends, your camcorder automatically returns to the normalmode.To cancel the faderBefore pressing START/STOP, press FADER until the indicator disappears.NoteYou cannot use the following functions while using the fader. Also, you cannot use thefader while using the following functions:–Recording still images on a “Memory Stick” in the tape recording or recordingstandby–Tape photo recording–Digital effect–Interval recording–Frame recordingWhen you select OVERLAP, WIPE, or DOTYour camcorder automatically stores the image recorded on a tape. While the image isbeing stored, the indicators flash fast, and the playback picture disappears. At thisstage, the picture may not be recorded clearly, depending on the tape condition.Using the faderSTART/STOP1FADERFADER](https://usermanual.wiki/Sony-Group/DCRTRV950.manual1/User-Guide-240526-Page-56.png)
![58You can digitally process images to obtain special effects like those in films or on TV.NEG. ART [a] : The color and brightness of the picture are reversed.SEPIA : The picture appears in sepia.B&W : The picture appears in monochrome (black-and-white).SOLARIZE [b] : The light intensity becomes clearer, to make the picture look more likean illustration.SLIM [c] : The picture expands vertically.STRETCH [d] : The picture expands horizontally.MOSAIC [e] : The picture appears mosaic-patterned.(1)Set the POWER switch to CAMERA. Press MENU, then select P EFFECT in with the SEL/PUSH EXEC dial, then press the dial (p. 208).(2)Turn the SEL/PUSH EXEC dial to select the desired mode, then press the dial.To cancel the picture effectSet P EFFECT to OFF in the menu settings.NoteThe following functions do not work during the picture effect–Recording still images on a “Memory Stick” in the tape recording or recordingstandby–BOUNCE–OLD MOVIEWhen you set the POWER switch to OFF (CHG)Picture effect is automatically canceled.[a] [b] [c] [d] [e]1MANUAL SET P EFFECT FLASH LVL AUTO SHTR RETURNOFFNEG. ARTSEPIAB&WSOLARIZESLIMSTRETCHMOSAIC[MENU] : ENDMENUUsing special effects – Picture effect](https://usermanual.wiki/Sony-Group/DCRTRV950.manual1/User-Guide-240526-Page-58.png)


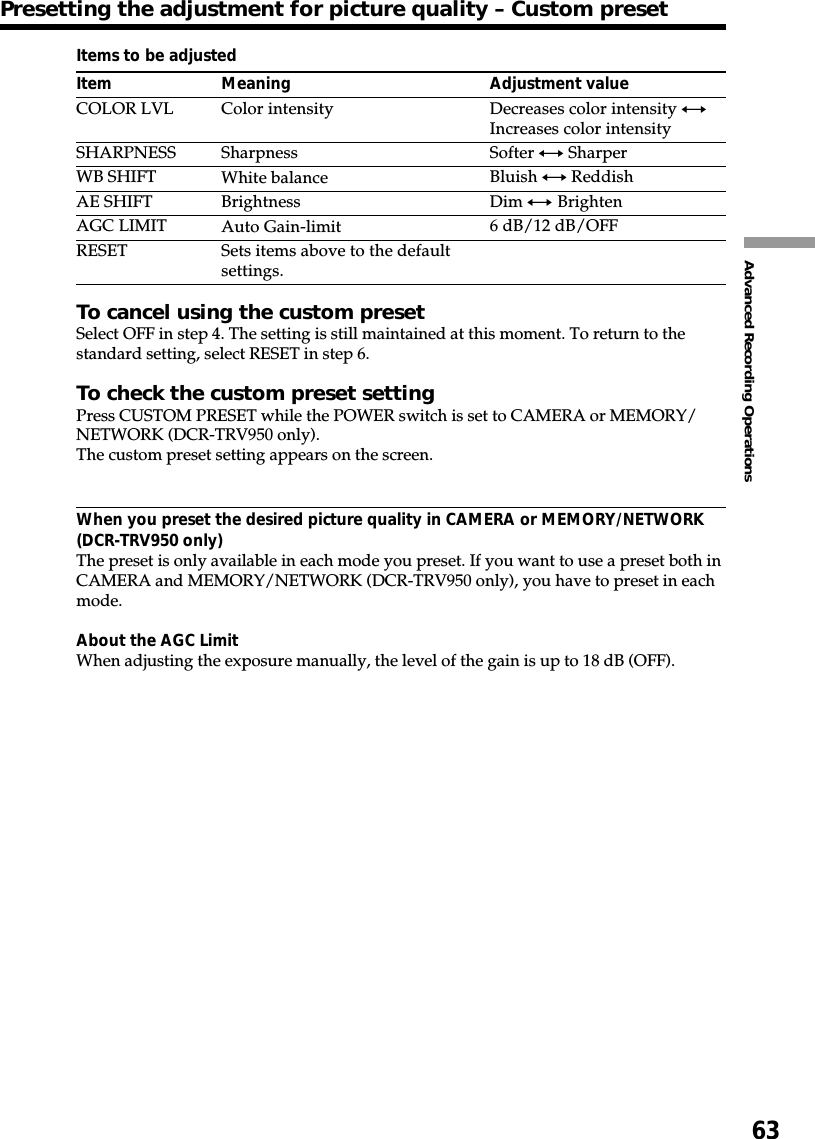
![62Presetting the adjustment for picturequality – Custom presetYou can preset the camcorder to record the picture with the desired picture quality.When presetting, adjust the picture by shooting a subject and checking the picturedisplayed on a TV (p. 45).(1)Press CUSTOM PRESET to display the CUSTOM PRESET menu while thePOWER switch is set to CAMERA or MEMORY/NETWORK (DCR-TRV950only).(2)Press the SEL/PUSH EXEC dial.(3)Turn the SEL/PUSH EXEC dial to select SET, then press the dial.(4)Turn the SEL/PUSH EXEC dial to select ON, then press the dial.(5)Turn the SEL/PUSH EXEC dial to select the desired item, then press the dial.(6)Turn the SEL/PUSH EXEC dial to adjust the selected item, then press the dial.(7)Press CUSTOM PRESET.The CUSTOM PRESET menu disappears and the indicator appears on thescreen.2-45,61CUSTOM PRESET [CP] : ENDCUSTOM PRESET STBY [CP] : ENDCUSTOM PRESET STBYSETCOLOR LVLSHARPNESSWB SH I FTAE SH I FTAGC LIMITRESET RETURNOFF [CP] : ENDCUSTOM PRESET STBYSETCOLOR LVLSHARPNESSWB SH I FTAE SH I FTAGC LIMITRESET RETURNOFFON [CP] : ENDCUSTOM PRESET STBYSETCOLOR LVLSHARPNESSWB SH I FTAE SH I FTAGC LIMITRESET RETURNON [CP] : ENDCUSTOM PRESET STBYSETCOLOR LVLSHARPNESSWB SH I FTAE SH I FTAGC LIMITRESET RETURN [CP] : ENDCUSTOM PRESET STBYCOLOR LVL [CP] : ENDSETCOLOR LVLSHARPNESSWB SH I FTAE SH I FTAGC LIMITRESETOFFOFFCUSTOMPRESET](https://usermanual.wiki/Sony-Group/DCRTRV950.manual1/User-Guide-240526-Page-62.png)
![64Using the guide frameYou can easily make the picture be on a horizontal line using the guide frame. Theguide frame is not recorded in the tape or the “Memory Stick.”(1)Set GUIDE FRAME in to ON in the menu setting while the POWERswitch is set to CAMERA or MEMORY/NETWORK (DCR-TRV950 only).(p210)(2)Press MENU to erase the menu display. The guide frame is displayed on thescreen.To clear the guide frameSelect GUIDE FRAME to OFF in the menu setting or simply press DISPLAY/TOUCHPANEL.NoteThe guide frame indicates only a rough level. The size and position of the guideframe do not affect the setting of the camcorder.If you set GUIDEFRAME to ONThe other indicators are also displayed on the screen.12MENULCD/ VF SETLCD B. L.LCD COLORVF B. L.GU I DEFRAME RETURN [MENU] : ENDOFFONLCD/ VF SETLCD B. L.LCD COLORVF B. L.GU I DEFRAME RETURN [MENU] : ENDON](https://usermanual.wiki/Sony-Group/DCRTRV950.manual1/User-Guide-240526-Page-64.png)