ZyXEL Communications P660HWD1V2 802.11g WIRELESS ADSL2+ 4-PORT GATEWAY User Manual P 660H HW W T Series V3 40 User s Guide
ZyXEL Communications Corporation 802.11g WIRELESS ADSL2+ 4-PORT GATEWAY P 660H HW W T Series V3 40 User s Guide
Contents
users manual 5
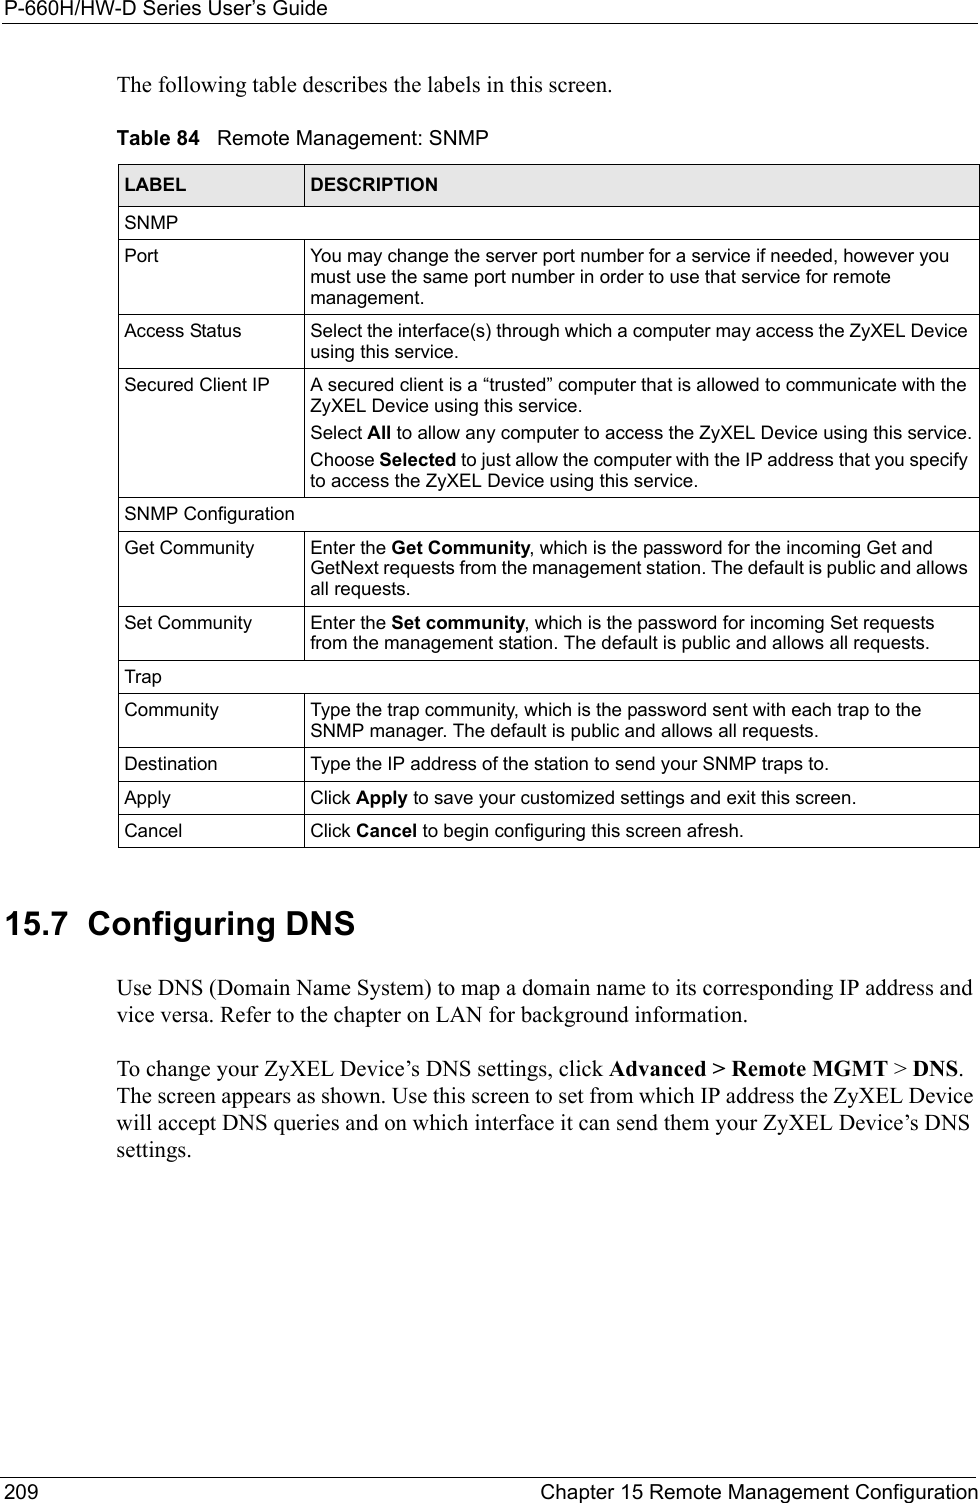
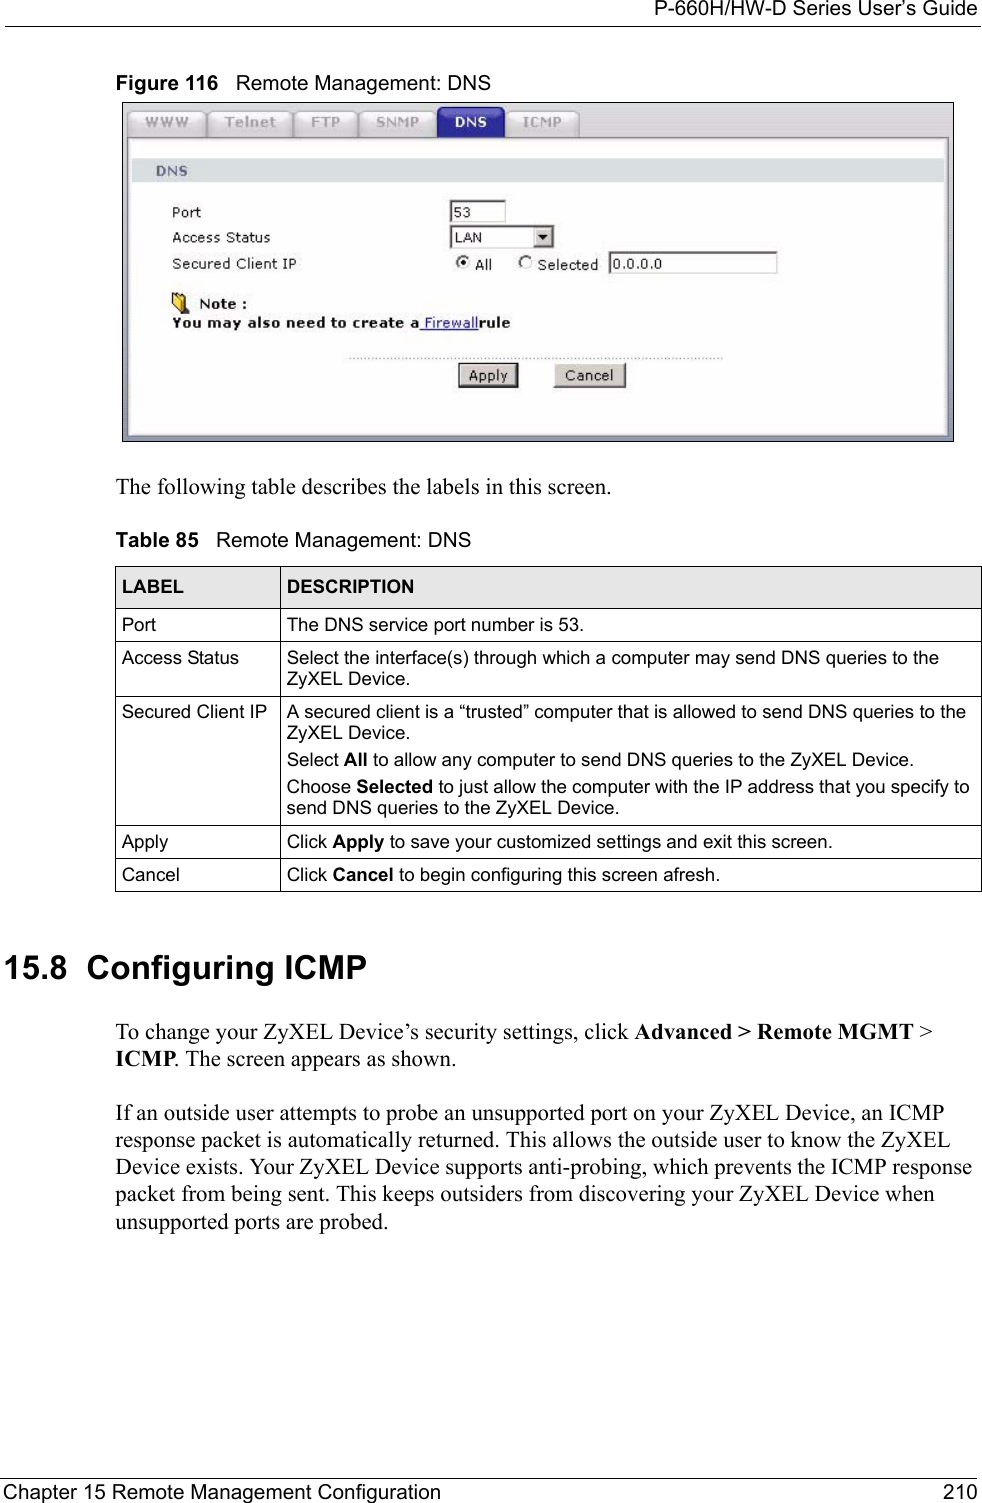
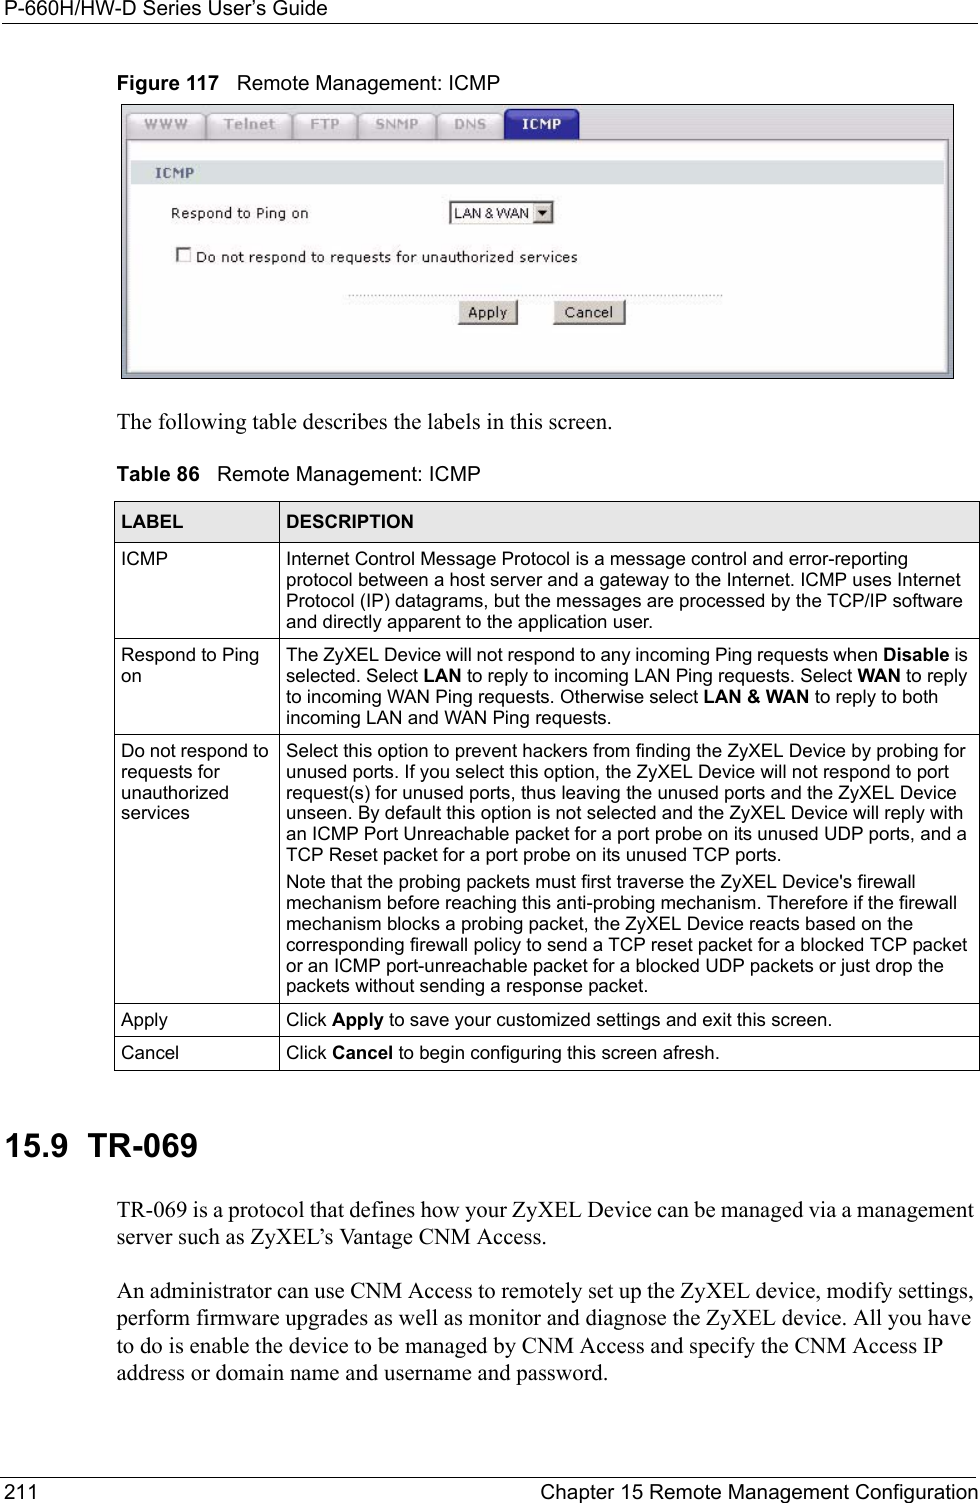
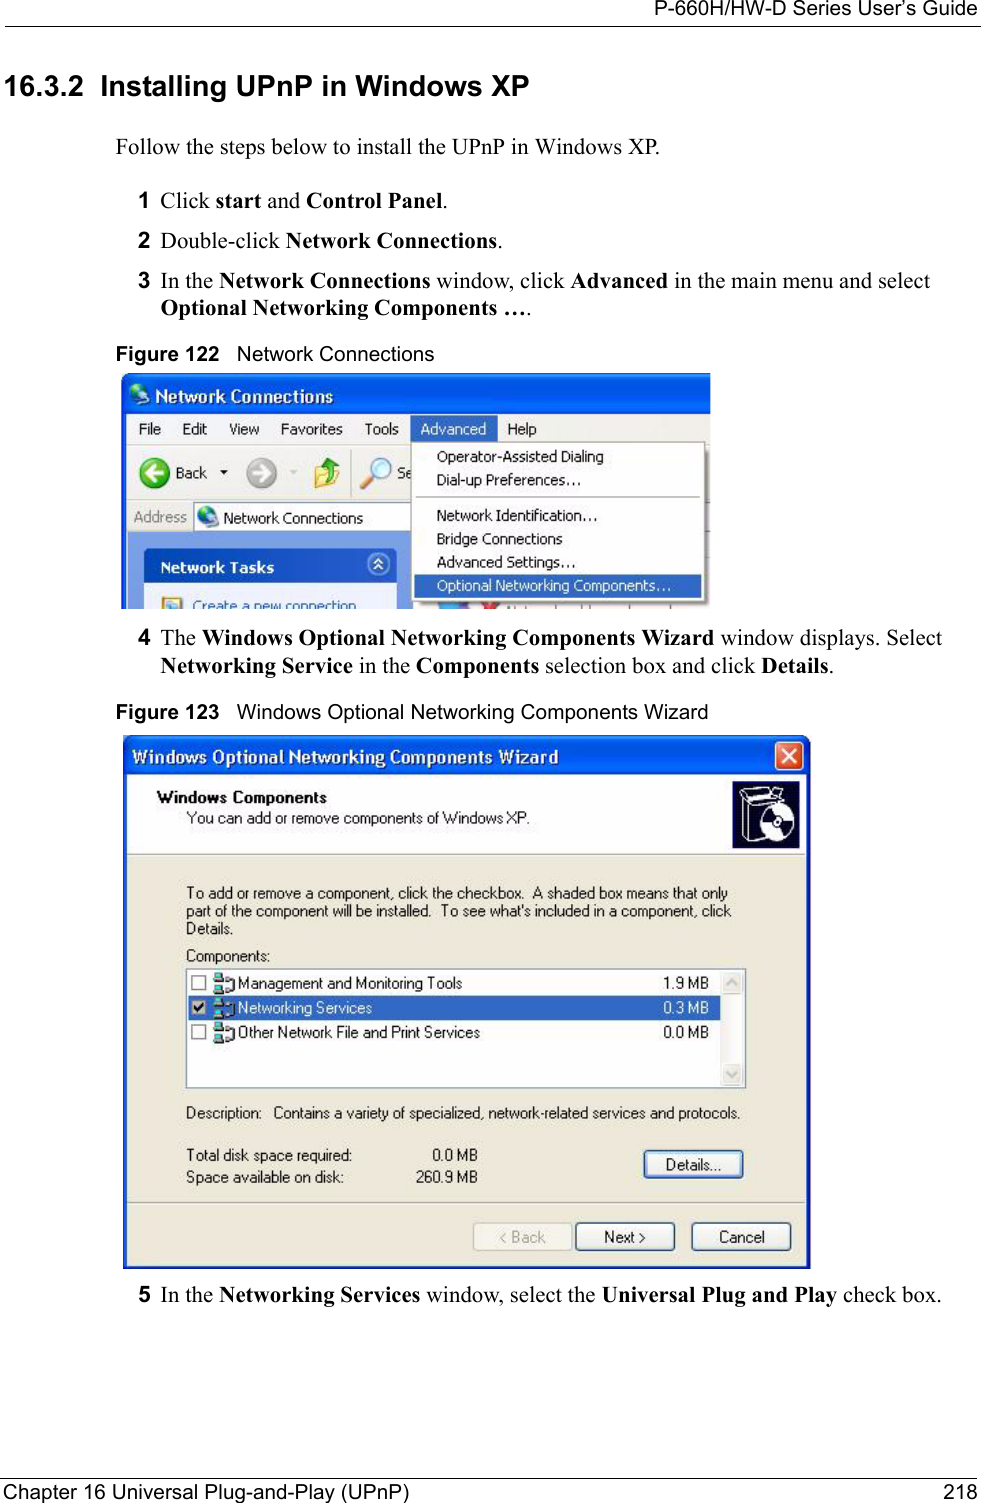
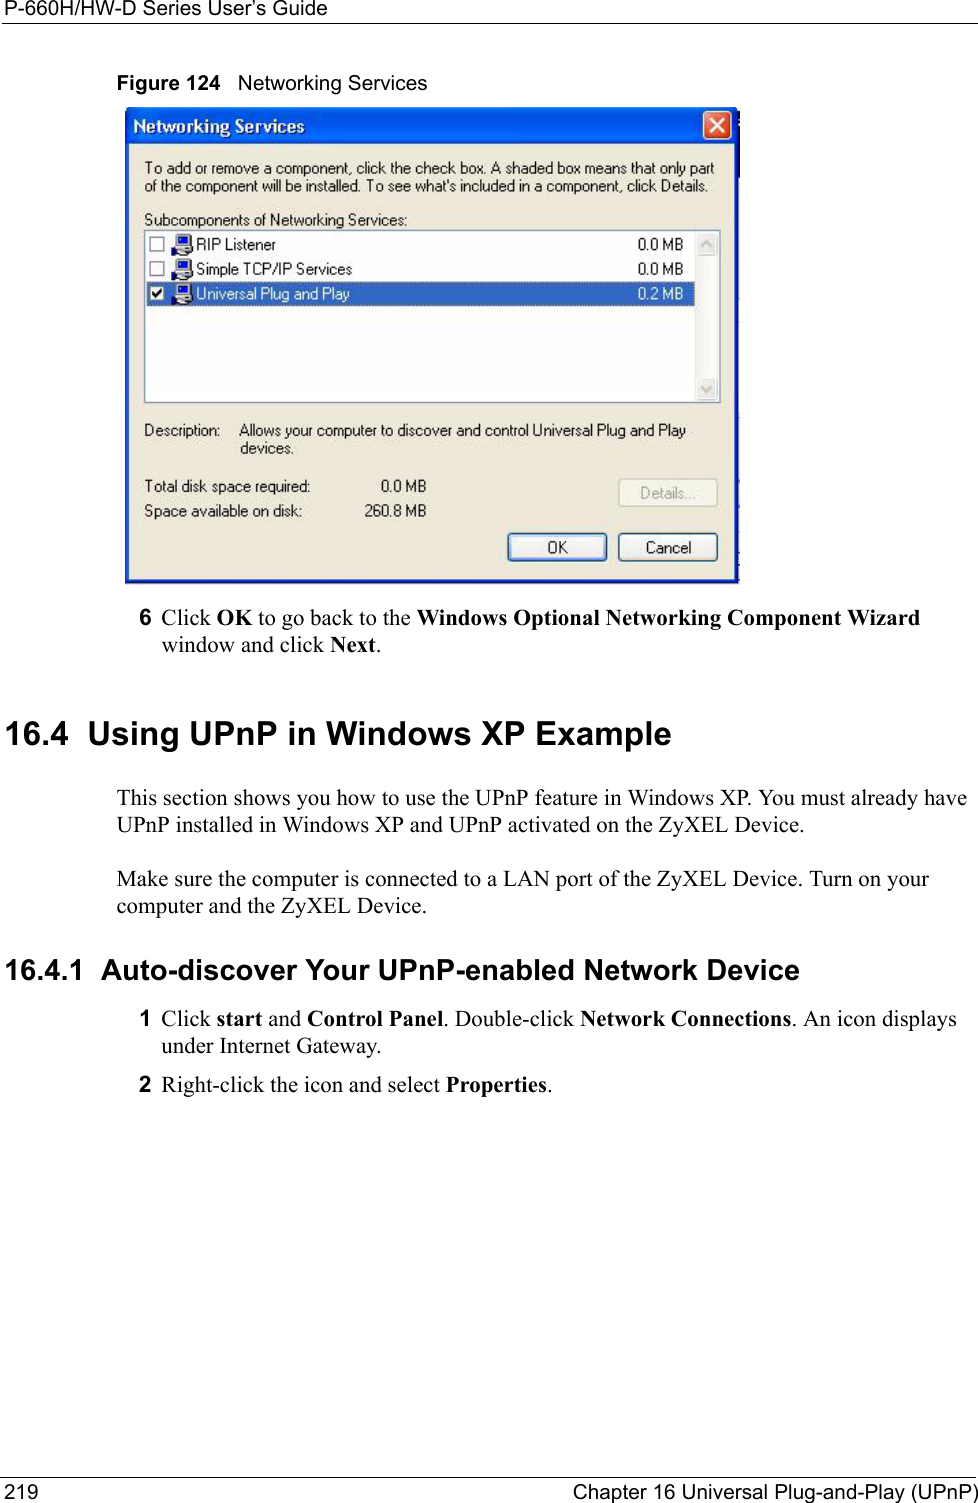
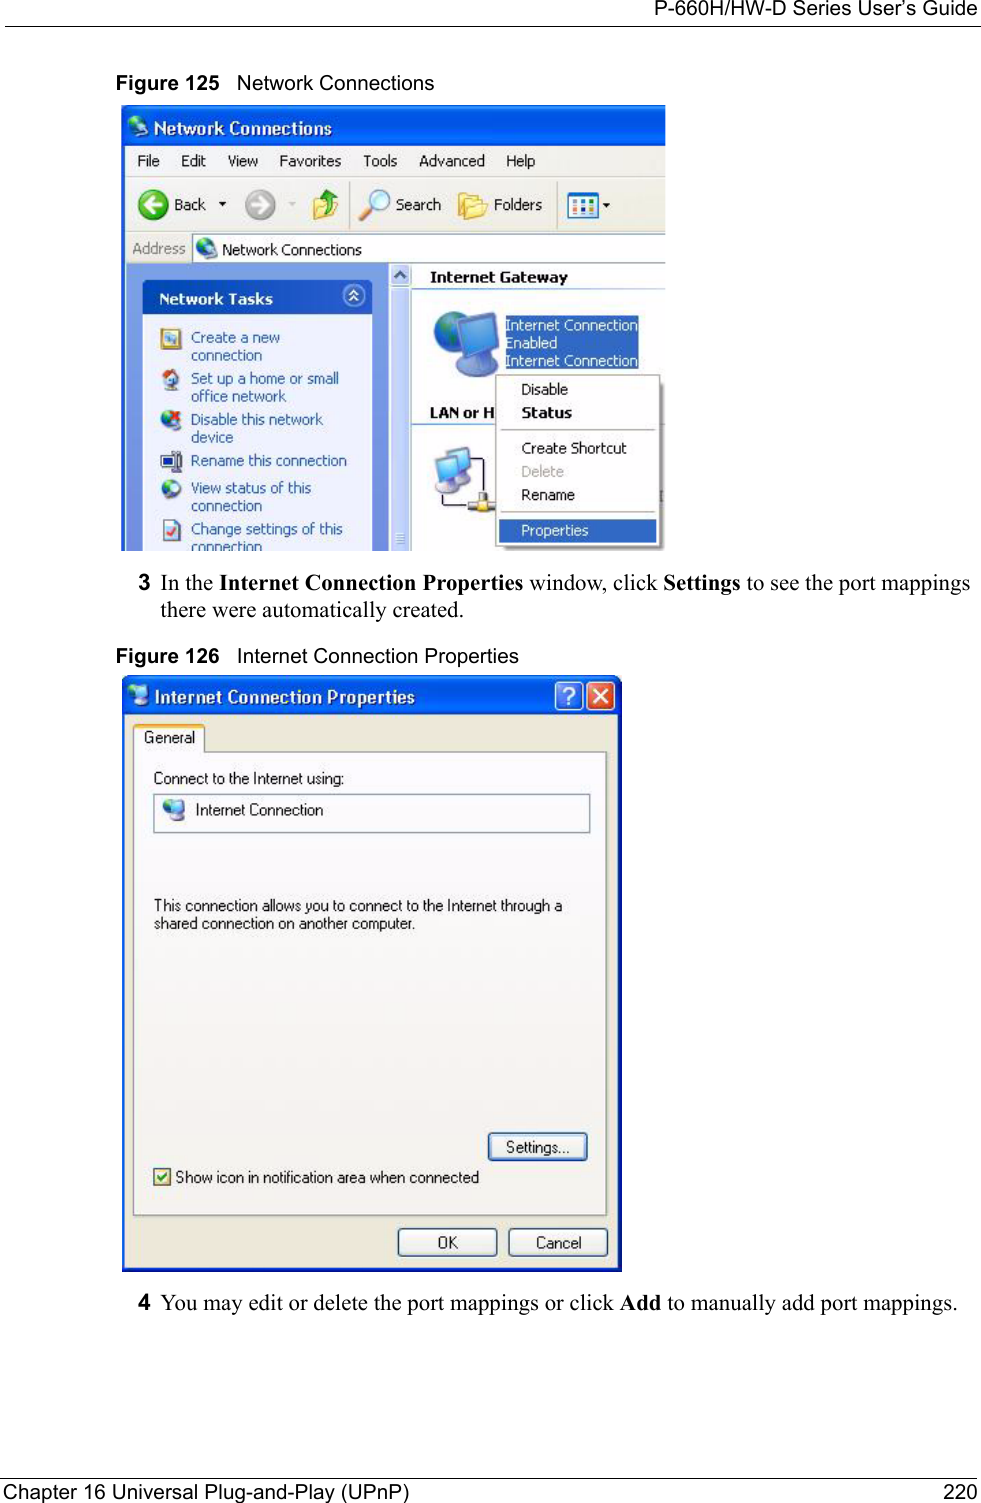
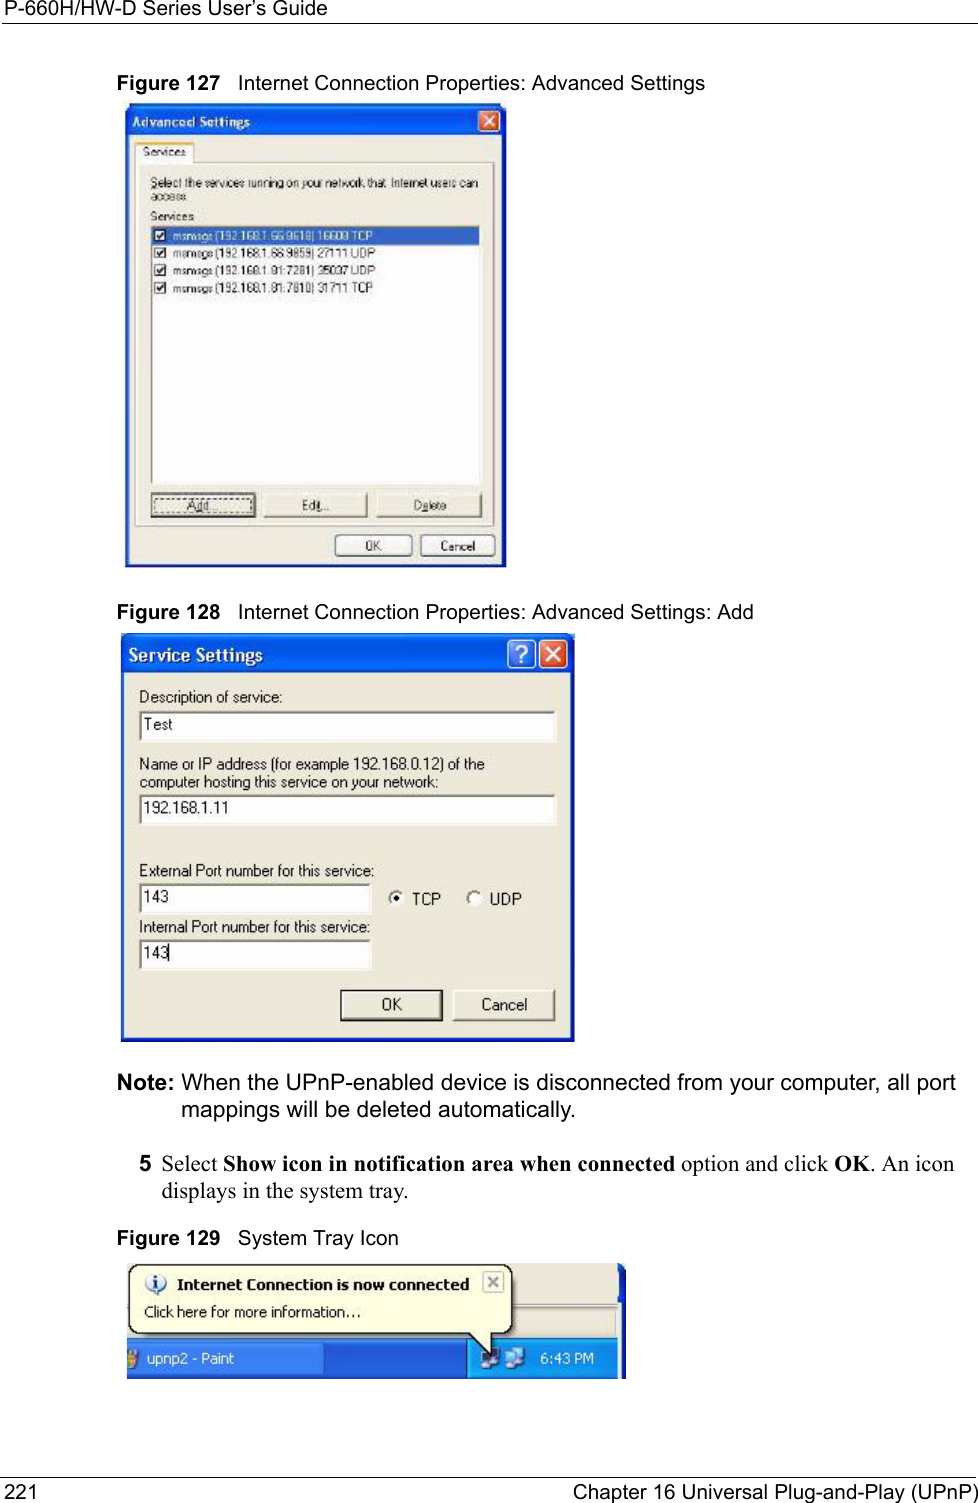
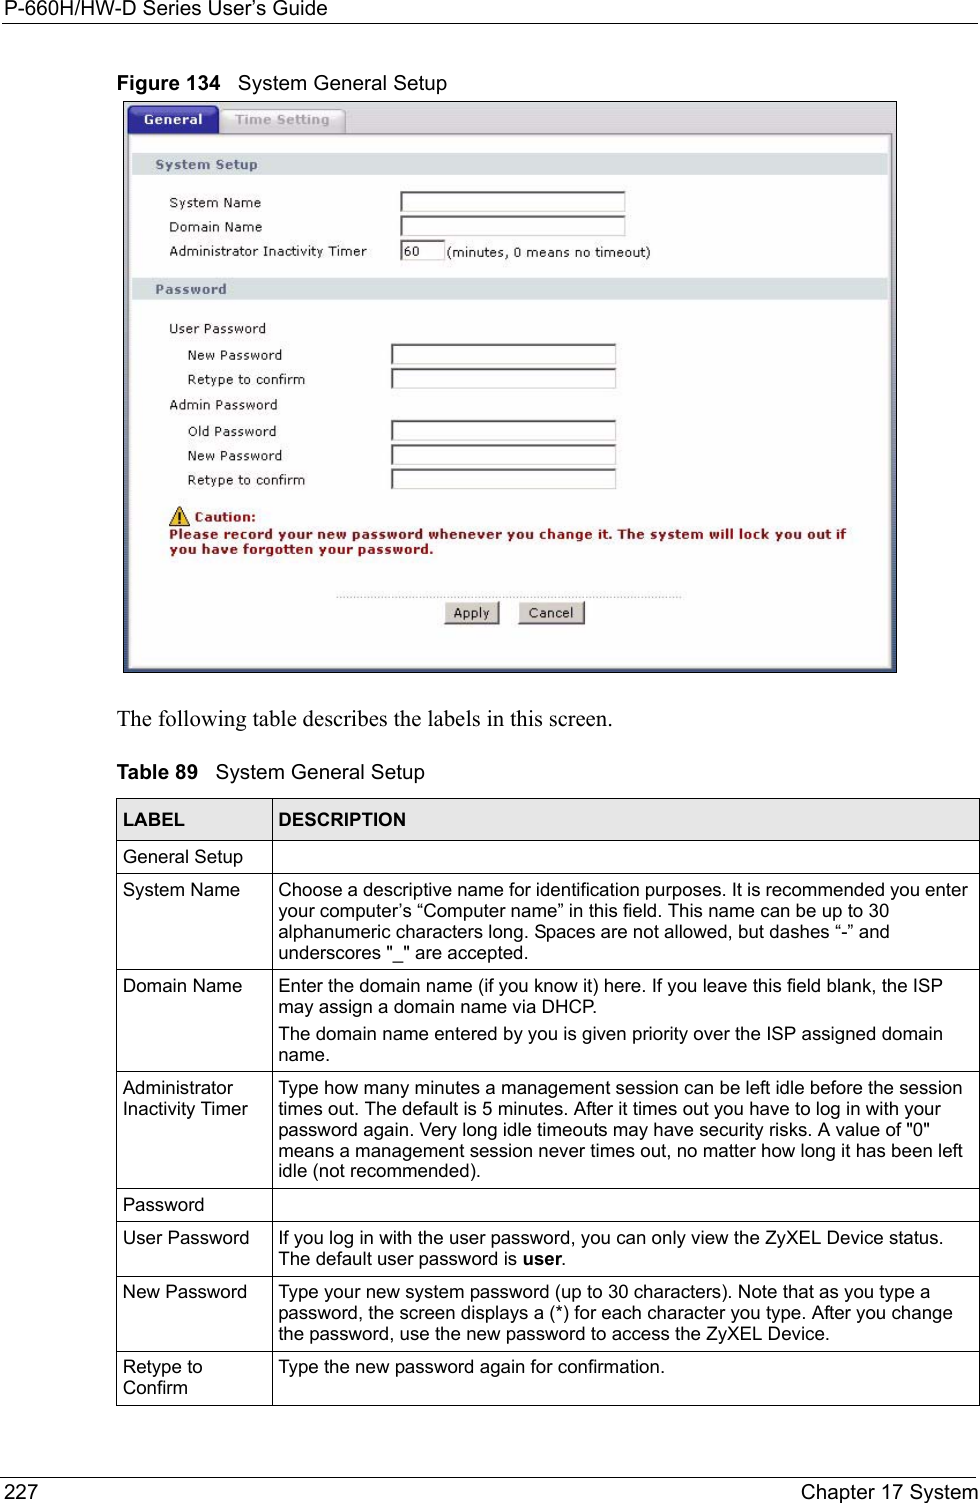
![P-660H/HW-D Series User’s GuideChapter 15 Remote Management Configuration 212Follow the procedure below to configure your ZyXEL Device to be managed by CNM Access. See the Command Interpreter appendix for information on the command structure and how to access the CLI (Command Line Interface) on the ZyXEL Device. Note: In this example a.b.c.d is the IP address of CNM Access. You must change this value to reflect your actual management server IP address or domain name. See Table 87 on page 212 for detailed descriptions of the commands.Figure 118 Enabling TR-069 The following table gives a description of TR-069 commands. ras> wan tr069 loadras> wan tr069 acsUrl a.b.c.dAuto-Configuration Server URL: http://a.b.c.dras> wan tr069 periodicEnable 1ras> wan tr069 informInterval 2400TR069 Informinterval 2400ras> wan tr069 active 1ras> wan tr069 saveTable 87 TR-069 CommandsRoot Command or Subdirectory Command Descriptionwan tr069 All TR-069 related commands must be preceded by wan tr069.load Start configuring TR-069 on your ZyXEL Device.active [0:no/1:yes]Enable/disable TR-069 operation. acsUrl <URL> Set the IP address or domain name of CNM Access. username [maxlength:15]Username used to authenticate the device when making a connection to CNM Access. This username is set up on the server and must be provided by the CNM Access administrator.password [maxlength:15]Password used to authenticate the device when making a connection to CNM Access. This password is set up on the server and must be provided by the CNM Access administrator.periodicEnable [0:Disable/1:Enable]Whether or not the device must periodically send information to CNM Access. It is recommended to set this value to 1 in order for the ZyXEL Device to send information to CNM Access.informInterval [sec]The duration in seconds of the interval for which the device MUST attempt to connect with CNM Access to send information and check for configuration updates. Enter a value between 30 and 2147483647 seconds. save Save the TR-069 settings to your ZyXEL Device.](https://usermanual.wiki/ZyXEL-Communications/P660HWD1V2.users-manual-5/User-Guide-717831-Page-16.png)