ASUSTeK Computer P505 PDA phone User Manual Appendix 1 P505 UserMan
ASUSTeK Computer Inc PDA phone Appendix 1 P505 UserMan
Contents
Manual 4
Chapter 7: Multimedia Features
7-13
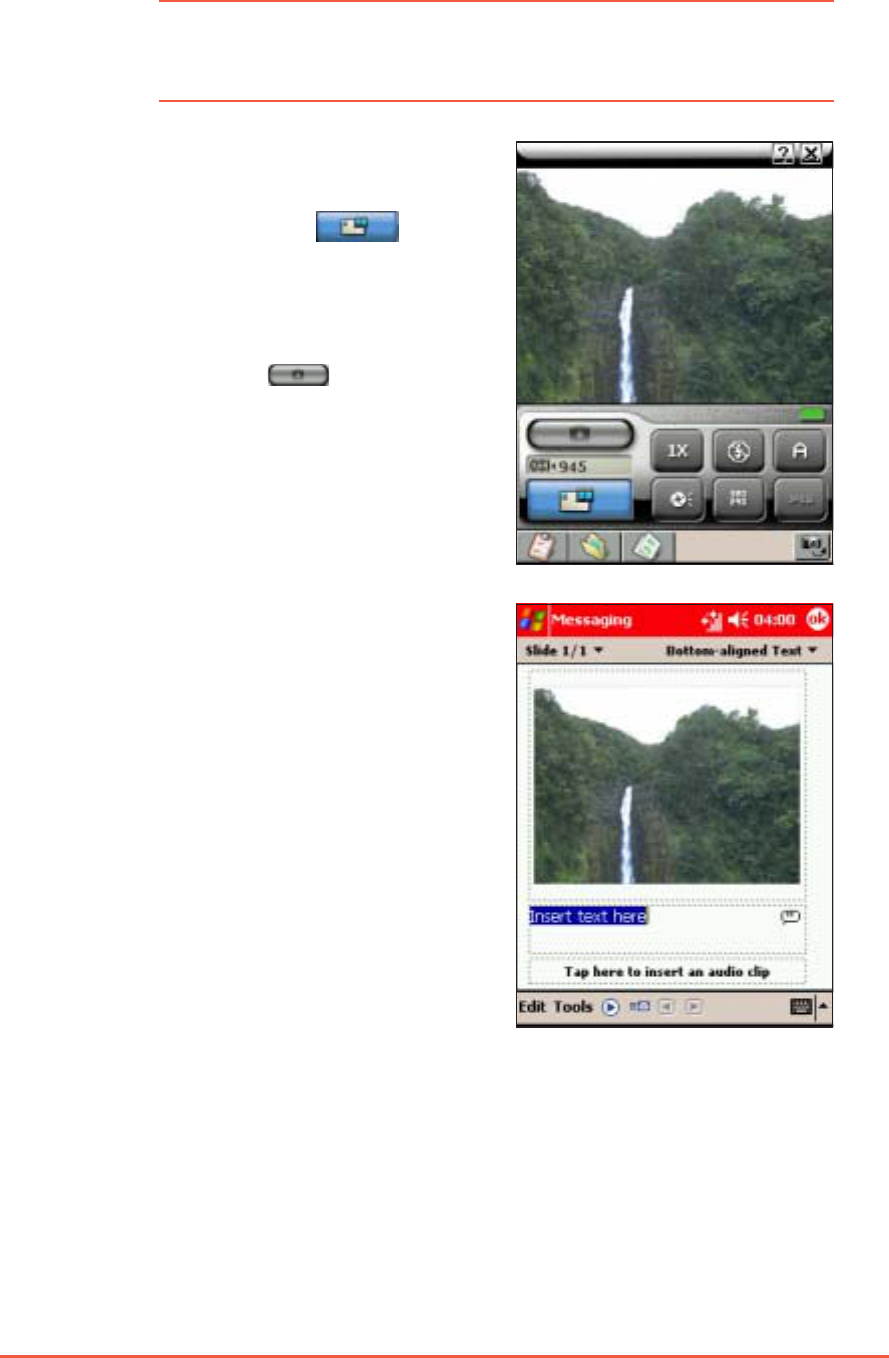
To capture a photo for an MMS message:To capture a photo for an MMS message:
To capture a photo for an MMS message:To capture a photo for an MMS message:
To capture a photo for an MMS message:
The Pocket PC closes the
Camera application, then opens
MessagingMessaging
MessagingMessaging
Messaging. The captured
photo appears in the photo/
video clip field.
4. Compose the MMS message
following the instructions on the
previous chapter, then send.
NOTENOTE
NOTENOTE
N O T E You can also use the single shot mode popup menu to
automatically insert a captured photo to an MMS message.
See the previous section for details.
1. Put the Pocket PC in camera
mode, then set the camera
capture mode to MMSMMS
MMSMMS
MMS .
2. Point the camera to your
subject, then adjust the camera
settings, if necessary.
3. When finished, tap or
press the joystick to capture the
image.
7-14
P505 Pocket PC
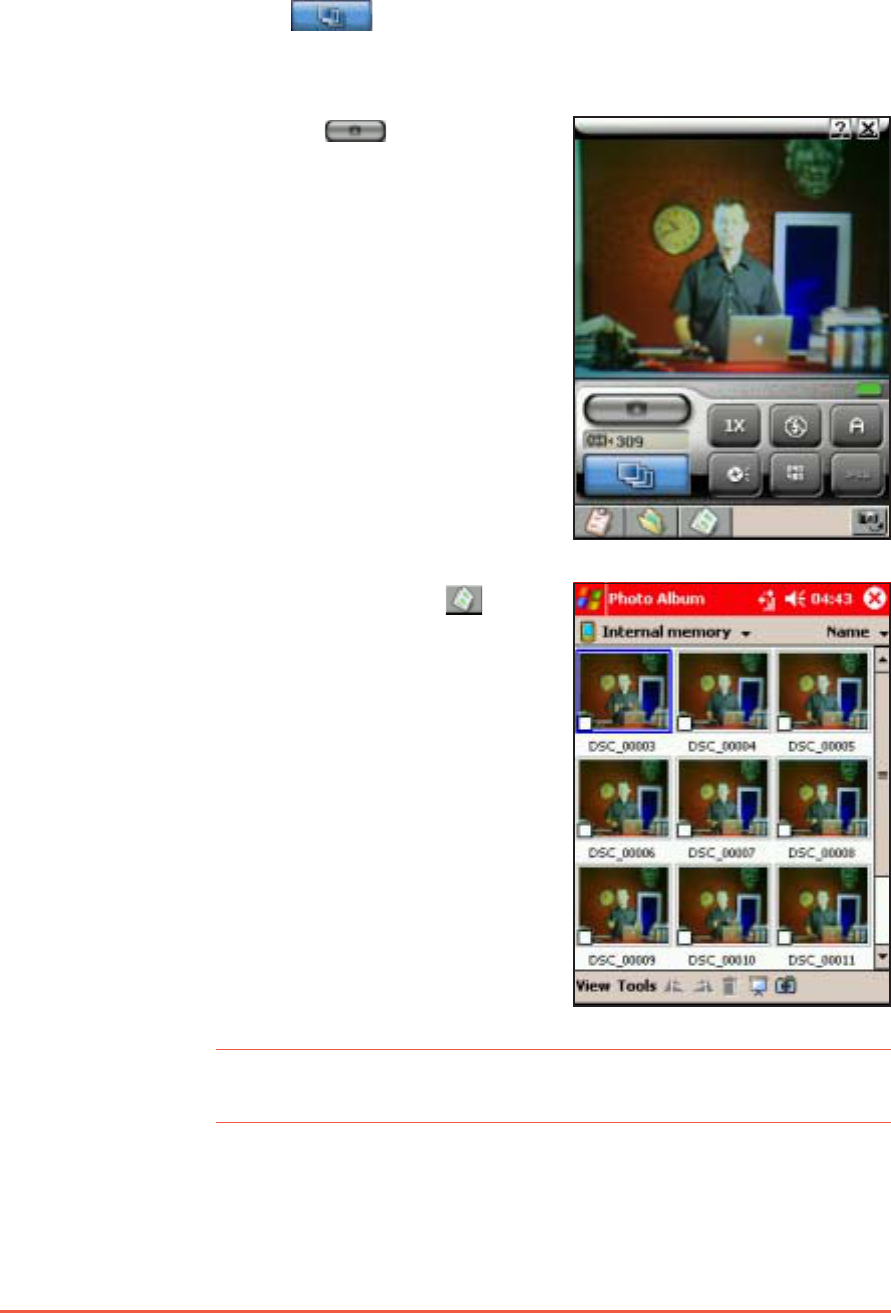
To capture multiple photos:To capture multiple photos:
To capture multiple photos:To capture multiple photos:
To capture multiple photos:
1. Put the Pocket PC in camera mode, then set the camera capture
mode to BurstBurst
BurstBurst
Burst .
2. Point the camera to your subject, then adjust the camera
settings, if necessary.
3. When finished, tap or
press the joystick to start
capturing the images.
The camera captures ten
successive photos in fixed
intervals, then saves the photos
in the Photo Album.
The camera returns to active
mode when finished.
4. Tap the Photo Album button
to view the captured photos.
Refer to the Photo AlbumPhoto Album
Photo AlbumPhoto Album
Photo Album
section for details.
NOTENOTE
NOTENOTE
N O T E The Burst Mode is best used when capturing action or
sequential photos.
Chapter 7: Multimedia Features
7-15
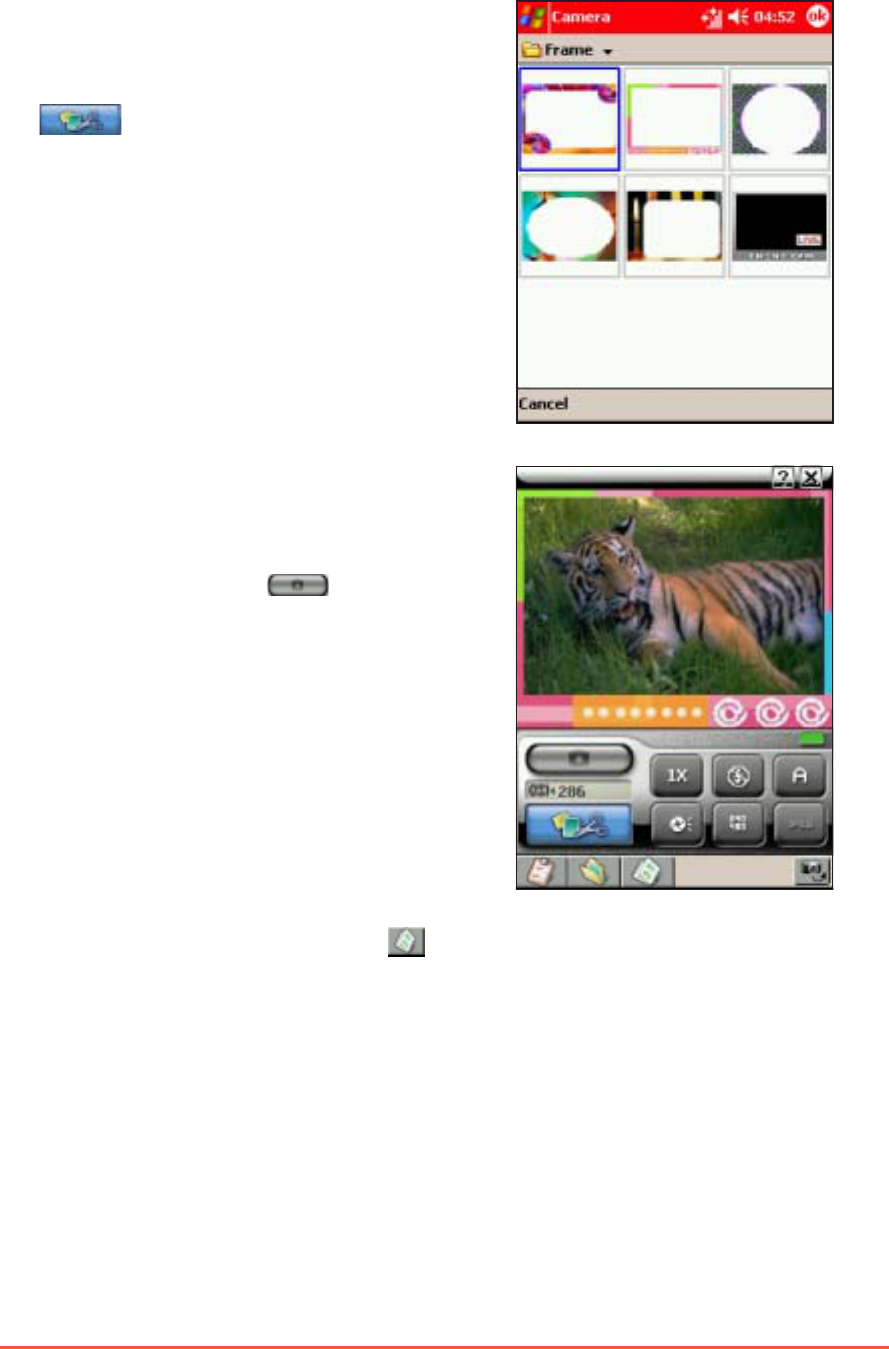
To add a frame to the photo:To add a frame to the photo:
To add a frame to the photo:To add a frame to the photo:
To add a frame to the photo:
1. Put the Pocket PC in camera
mode, then set the camera
capture mode to composition
.
2. The screen displays the available
frames. Tap a frame to select
and display to the preview
window.
Otherwise, tap CancelCancel
CancelCancel
Can cel to return
to the camera display.
5. Tap the Photo Album button , then locate the capture to view.
3. Point the camera to your
subject, then adjust the camera
settings, if necessary.
4. When finished, tap or press
the joystick to capture the
image.
7-16
P505 Pocket PC
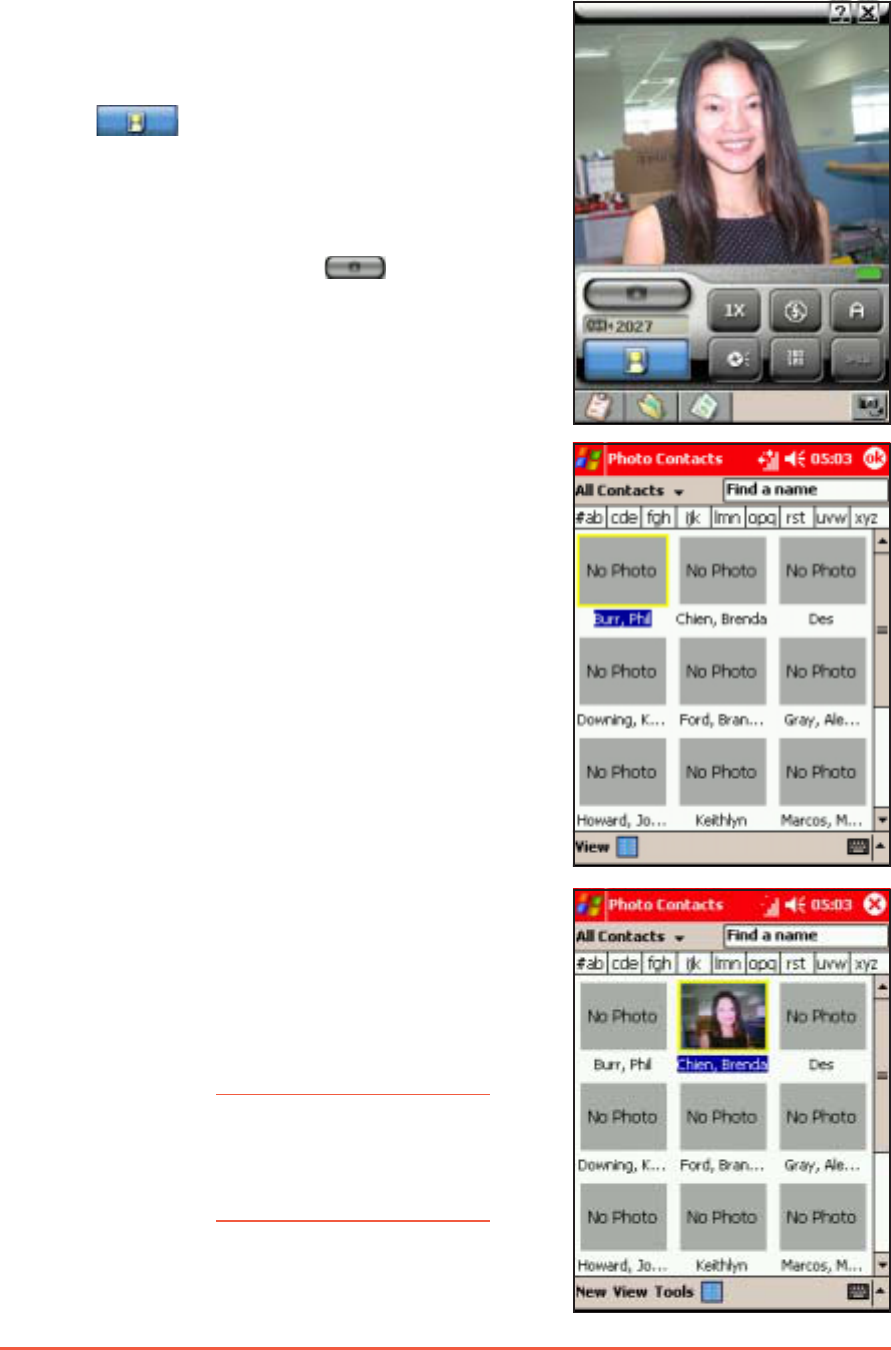
To add a photo to your contacts:To add a photo to your contacts:
To add a photo to your contacts:To add a photo to your contacts:
To add a photo to your contacts:
1. Put the Pocket PC in camera
mode, then set the camera
capture mode to caller ID mode
.
2. Point the camera to the person,
then adjust the camera settings,
if necessary.
3. When finished, tap or press
the joystick to capture the
image.
4. Select and tap the contact to
attach the captured photo.
The photo appears in the screen
everytime you place a call to or
receive a call from the person.
NOTENOTE
NOTENOTE
N O T E You can use the Photo
Contacts application to
remove or replace the
contact photo.
The Pocket PC closes the
Camera application, then opens
Photo ContactsPhoto Contacts
Photo ContactsPhoto Contacts
Photo Contacts.
Chapter 7: Multimedia Features
7-17
Capturing videoCapturing video
Capturing videoCapturing video
Capturing video
The camera is capable of capturing video in ASF, 3GP, and MP4
formats and supports three capture resolutions.
To capture video:To capture video:
To capture video:To capture video:
To capture video:
1. Put the Pocket PC in camera mode, then set the camera capture
mode to VideoVideo
VideoVideo
Video .
2. Tap the video format button to select.
3. Tap the capture resolution
button to select. The preview
area changes when you select a
capture resolution.
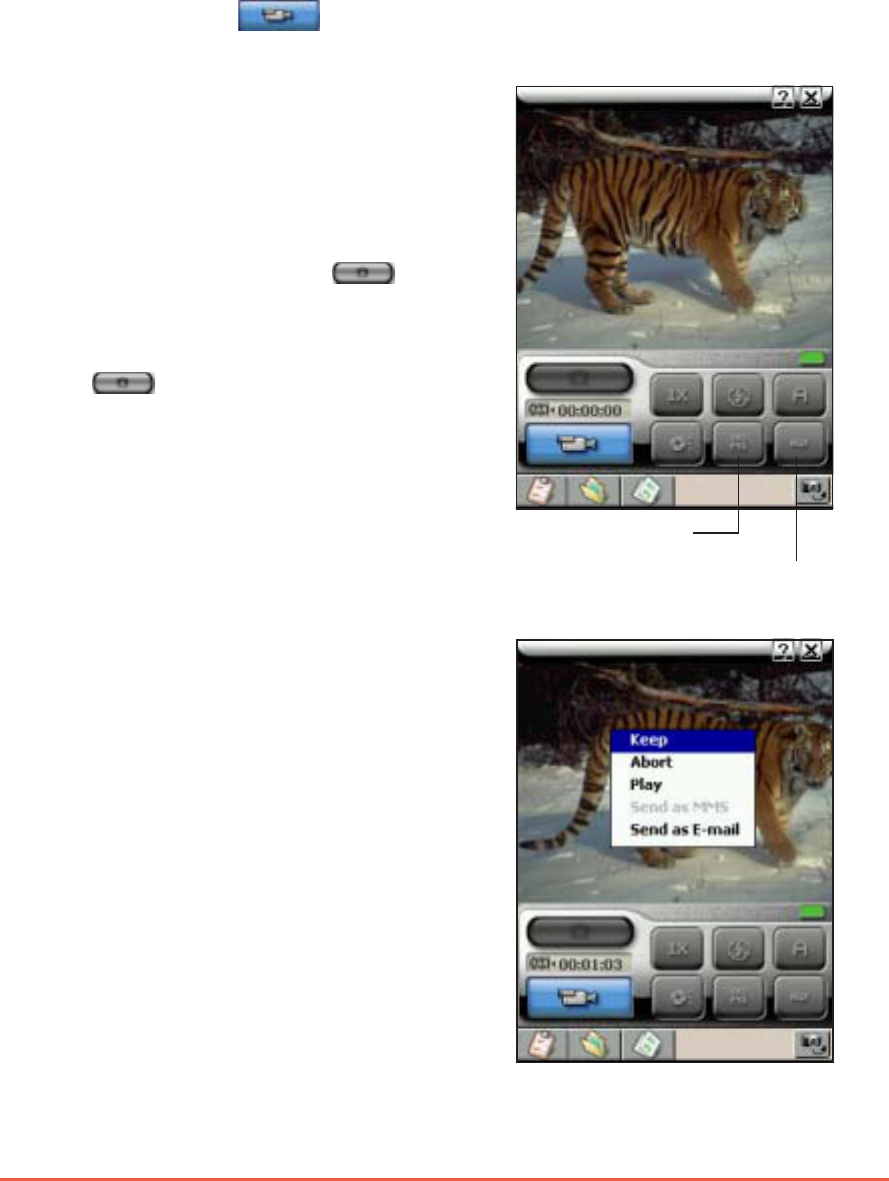
4. When finished, point the camera
to the subject, then tap or
press the joystick to start
capturing.
5. Tap or press the joystick
to stop capturing. A pop-up
menu appears.
6. Tap an option from the menu.
To save the recording, tap KeepKeep
KeepKeep
Keep.
Otherwise, tap AbortAbort
AbortAbort
Abo rt to ignore.
To preview the recording, tap
PlayPlay
PlayPlay
Pl a y. The video capture plays on
screen.
Tap Send as E-mail Send as E-mail
Send as E-mail Send as E-mail
Send as E-mail to send
the video capture to an e-mail
recipient.
Tap to select
the file format
Tap to select the
capture resolution
7-18
P505 Pocket PC
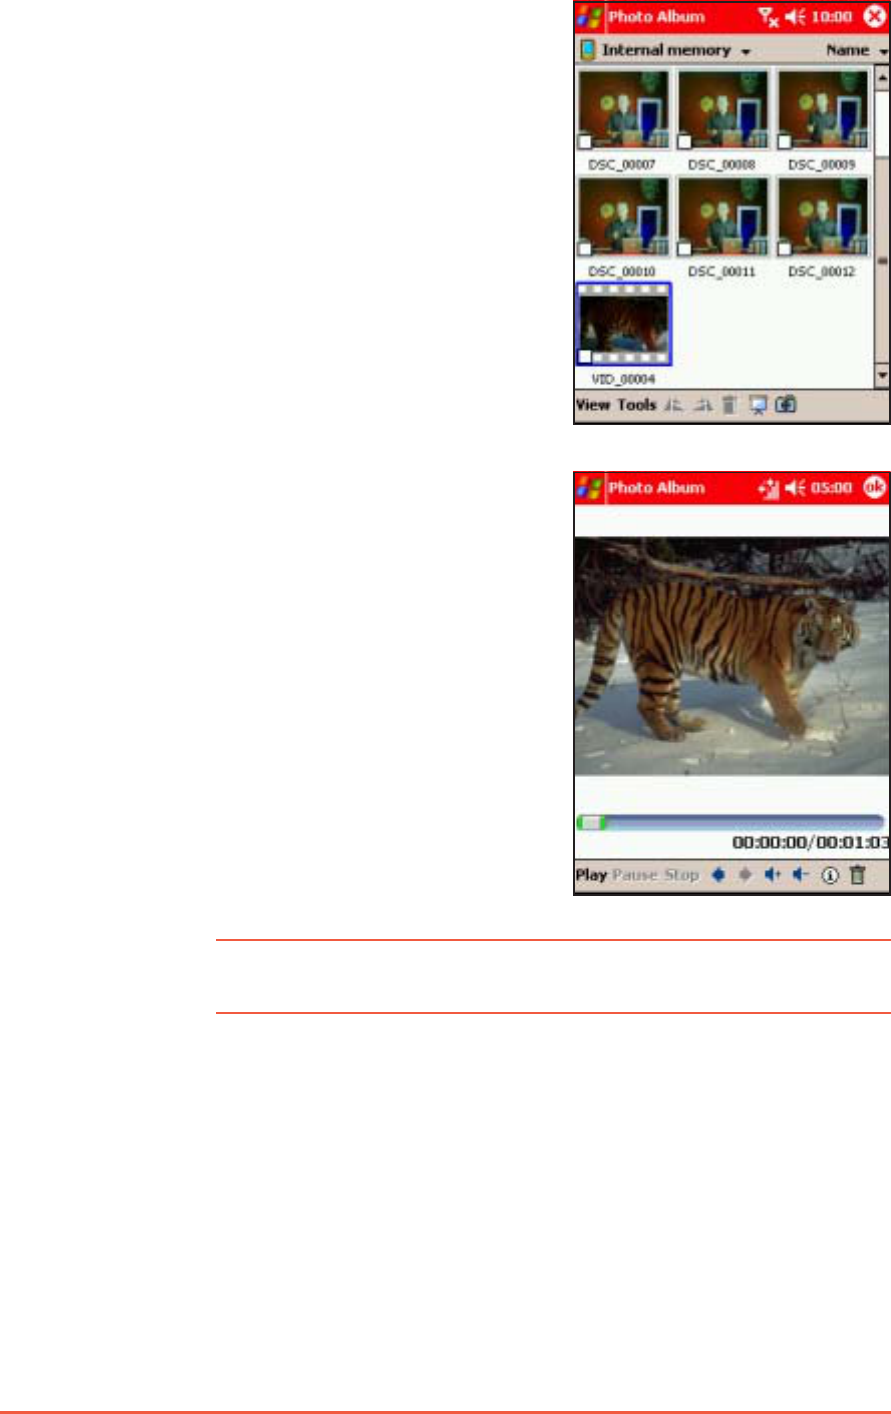
7. Open the Photo Album
application, then locate the
video capture file in the
specified folder.
8. Tap the video capture file to
preview. Pause or stop the
preview by tapping the
corresponding button on the
bottom of the screen.
NOTENOTE
NOTENOTE
N O T E Refer to the Photo Album section for details on previewing
video capture files.
Chapter 7: Multimedia Features
7-19
Using the Camera in phone modeUsing the Camera in phone mode
Using the Camera in phone modeUsing the Camera in phone mode
Using the Camera in phone mode
NOTESNOTES
NOTESNOTES
N O T E S Take note of the following when using the Camera Capture
application while the Pocket PC is on phone mode:
• The preview area is fixed at 240x180 pixels.
• The display does not support landscape mode. You must
set the preview orientation to PortraitPortrait
PortraitPortrait
Portrait mode before you
close the phone flip.
To launch Camera when the flip is open:
1. Tap .
2. Tap ProgramsPrograms
ProgramsPrograms
Programs.
3. Tap the CameraCamera
CameraCamera
Camera icon.
4. The CameraCamera
CameraCamera
Camera screen appears. Close the phone flip to display the
Camera screen. The illustration below shows the Camera
application in phone mode.
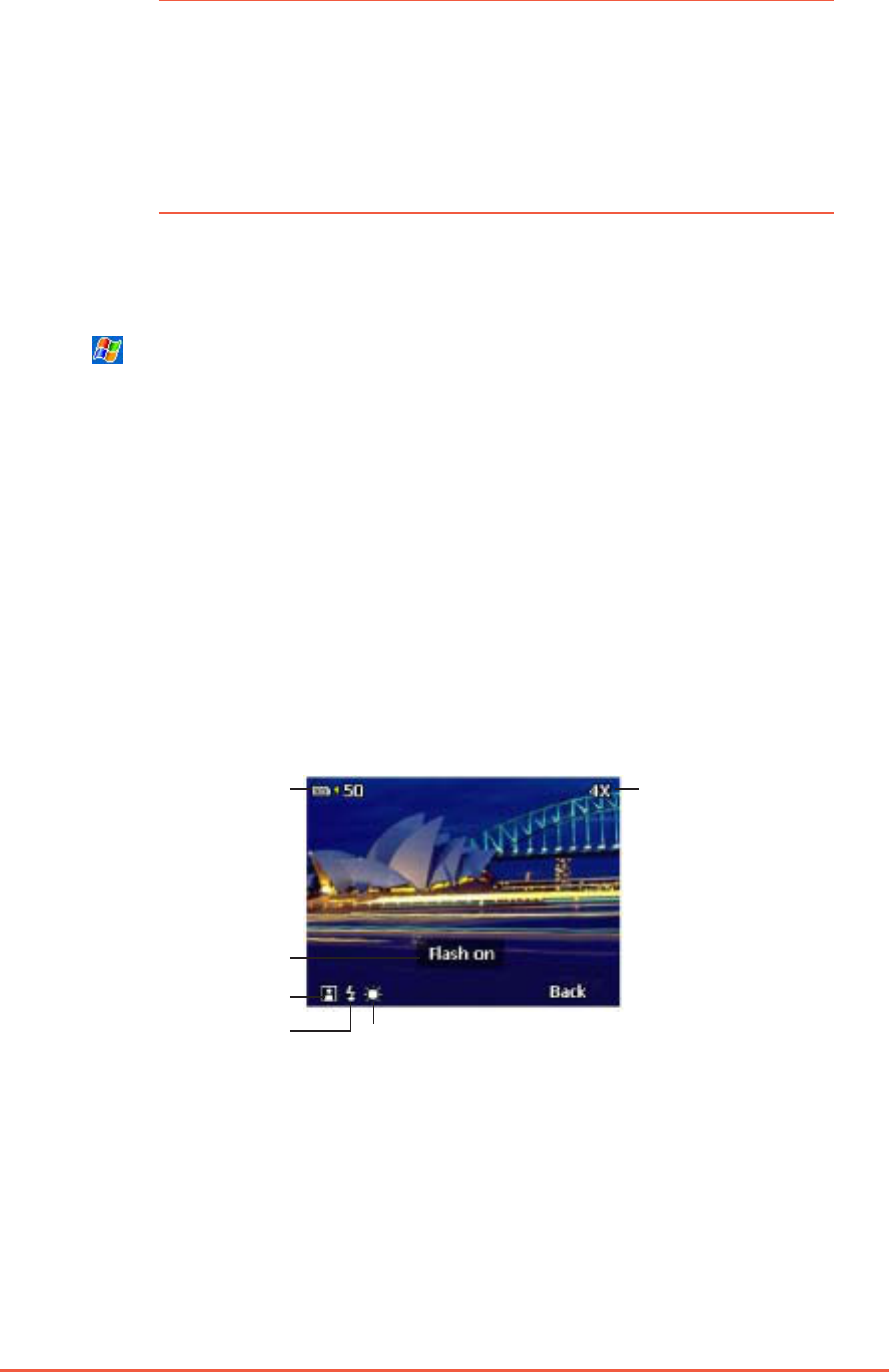
To launch Camera when the flip is closed:
Press the Camera button on the left side of the Pocket PC.
Zoom level
Storage location and
remaining memory
Displays the capture mode
and flash status
Capture mode icon
Flash icon Environment settings icon
Camera screen in phone modeCamera screen in phone mode
Camera screen in phone modeCamera screen in phone mode
Camera screen in phone mode

7-20
P505 Pocket PC
Changing the settings in phone modeChanging the settings in phone mode
Changing the settings in phone modeChanging the settings in phone mode
Changing the settings in phone mode
You can the camera settings when in phone mode using the joystick,
side buttons, and the phone keypad buttons.
SettingsSettings
SettingsSettings
Settings Can be changed byCan be changed by
Can be changed byCan be changed by
Can be changed by
Capture modeCapture mode
Capture modeCapture mode
Capture mode pressing the camera button camera button
camera button camera button
c a mera b u t t o n located on the side of the
PDA. The capture mode is set to Single Shot by default.
Press the camera button once to change to MMS mode,
press twice to Burst mode, and so on. The screen briefly
displays the selected capture mode.
FlashFlash
FlashFlash
Flash pressing the record button record button
record button record button
r e c o r d b u t t o n located on the side of the
PDA. The flash turns on or off when you press the record
button. The screen briefly displays the flash status.
EnvironmentEnvironment
EnvironmentEnvironment
Environment pressing the voice command voice command
voice command voice command
voice command on the side of the PDA. The
camera is set to Auto by default. Press the voice command
button once to change to Outdoor setting, press twice to
Flourescent setting, and so on.
ZoomZoom
ZoomZoom
Zoom pressing the button on the PDA keypad. Press the
arrow up button to increase the zoom level, or the arrow
down to decrease the zoom level.
You can adjust other camera settings when the camera application is
opened while in PDA mode.
Taking photos in phone modeTaking photos in phone mode
Taking photos in phone modeTaking photos in phone mode
Taking photos in phone mode
1. Select the capture mode by pressing the camera button located
on the side of the PDA.
2. Adjust the camera settings, if necessary, then point the camera
to your subject. See the previous section for details on changing
the camera settings.
3. Press the joystick to start capturing. For video captures, press the
joystick to stop recording.
4. Depending on the capture mode, the camera:
• saves the photo or video in the specified folder (Single shot,
Burst, Composition, and Video modes). To view the capture,
open the flip, then launch the Photo Album Photo Album
Photo Album Photo Album
Photo Album application.
• instructs you to open the flip, then launches the MessagingMessaging
MessagingMessaging
Messaging
application (MMS mode), or Photo Contacts Photo Contacts
Photo Contacts Photo Contacts
Photo Contacts application
(Caller ID mode).

Chapter 7: Multimedia Features
7-21
Photo AlbumPhoto Album
Photo AlbumPhoto Album
Photo Album
The Photo Album application allows you view, edit, and manage
multimedia files, including stock and captured photos, videos,
animations, and clips.
Launching the Photo AlbumLaunching the Photo Album
Launching the Photo AlbumLaunching the Photo Album
Launching the Photo Album
To launch Photo Album from Today screen:To launch Photo Album from Today screen:
To launch Photo Album from Today screen:To launch Photo Album from Today screen:
To launch Photo Album from Today screen:
1. Tap .
2. Tap ProgramsPrograms
ProgramsPrograms
Programs.
3. Tap the Photo Album Photo Album
Photo Album Photo Album
Photo Album icon to
open the application.
To launch Photo Album from the Vodafone Menu:To launch Photo Album from the Vodafone Menu:
To launch Photo Album from the Vodafone Menu:To launch Photo Album from the Vodafone Menu:
To launch Photo Album from the Vodafone Menu:
NOTENOTE
NOTENOTE
N O T E Make sure that the Vodafone Menu is activated. Refer to
Chapter 5 for details.
1. Open the phone flip to display
the Vodafone Menu
2. Tap the Photo AlbumPhoto Album
Photo AlbumPhoto Album
Photo Album icon to
open the application.
7-22
P505 Pocket PC
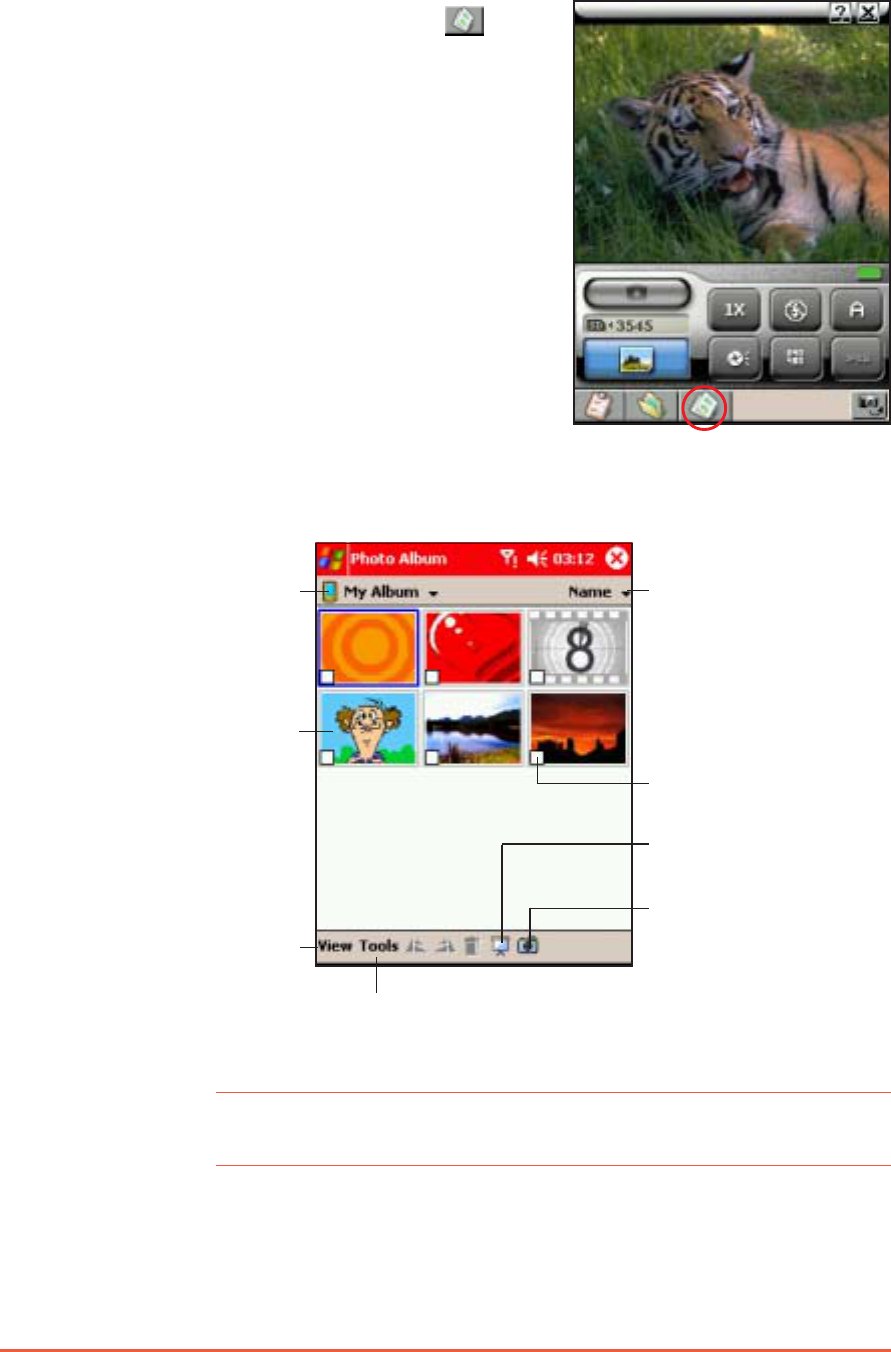
To launch Photo Album from Camera:To launch Photo Album from Camera:
To launch Photo Album from Camera:To launch Photo Album from Camera:
To launch Photo Album from Camera:
Tap the Photo Album button
on the bottom of the screen.
Photo Album main screenPhoto Album main screen
Photo Album main screenPhoto Album main screen
Photo Album main screen
NOTENOTE
NOTENOTE
N O T E By default, the Photo Album main screen displays the photos
and videos saved in the My Album My Album
My Album My Album
My Album folder.
Tap to sort the files by
name, date, size, or type
Tap to change the
viewing settings
Tap to select a file, view the
options, and application information
Tap to select another
folder or location
Tap to select the file
Tap to open the Camera
Tap to start a slideshow
of the files
Tap and hold a file to
display a pop-up menu
Chapter 7: Multimedia Features
7-23
Finding files and customising your viewFinding files and customising your view
Finding files and customising your viewFinding files and customising your view
Finding files and customising your view
To find your photos or video clips:To find your photos or video clips:
To find your photos or video clips:To find your photos or video clips:
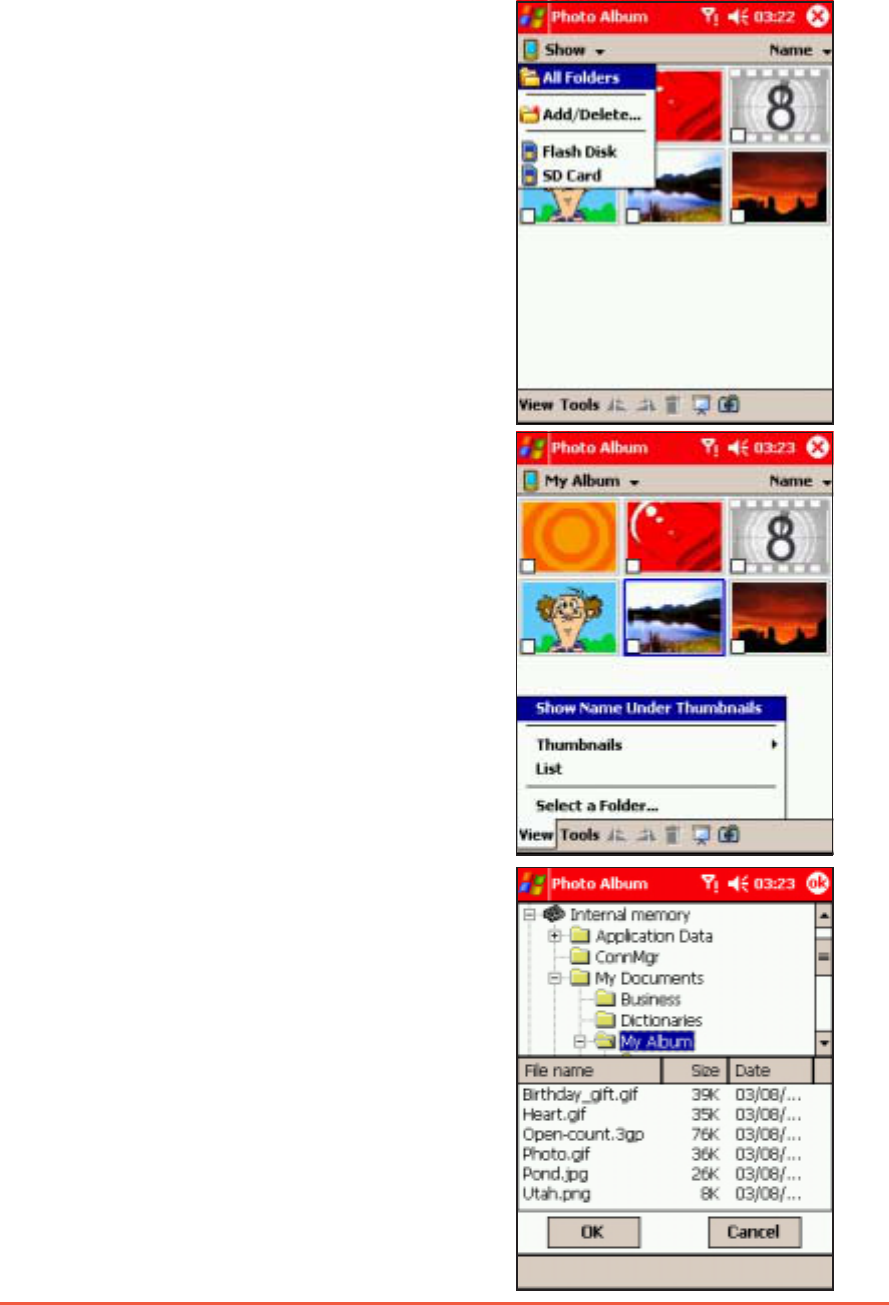
To find your photos or video clips:
1. If the file you want to view or
edit is not on the list, tap ShowShow
ShowShow
Show
or My Album My Album
My Album My Album
My Album then select
another location (Flash Disk or
SD Card).
The screen shows the contents
of the selected location.
2. If the file you want to view or
edit is in another folder, tap
ViewView
ViewView
Vi e w, then tap Select aSelect a
Select aSelect a
Select a
FolderFolder
FolderFolder
Fold er to display all other
folders.
3. Locate the folder. The lower
section of the screen shows the
media filed inside the selected
folder.
4. After selecting the folder, tap
the OKOK
OKOK
O K button to display the
contents in the main screen.
7-24
P505 Pocket PC
To view a thumbnail of the files:To view a thumbnail of the files:
To view a thumbnail of the files:To view a thumbnail of the files:
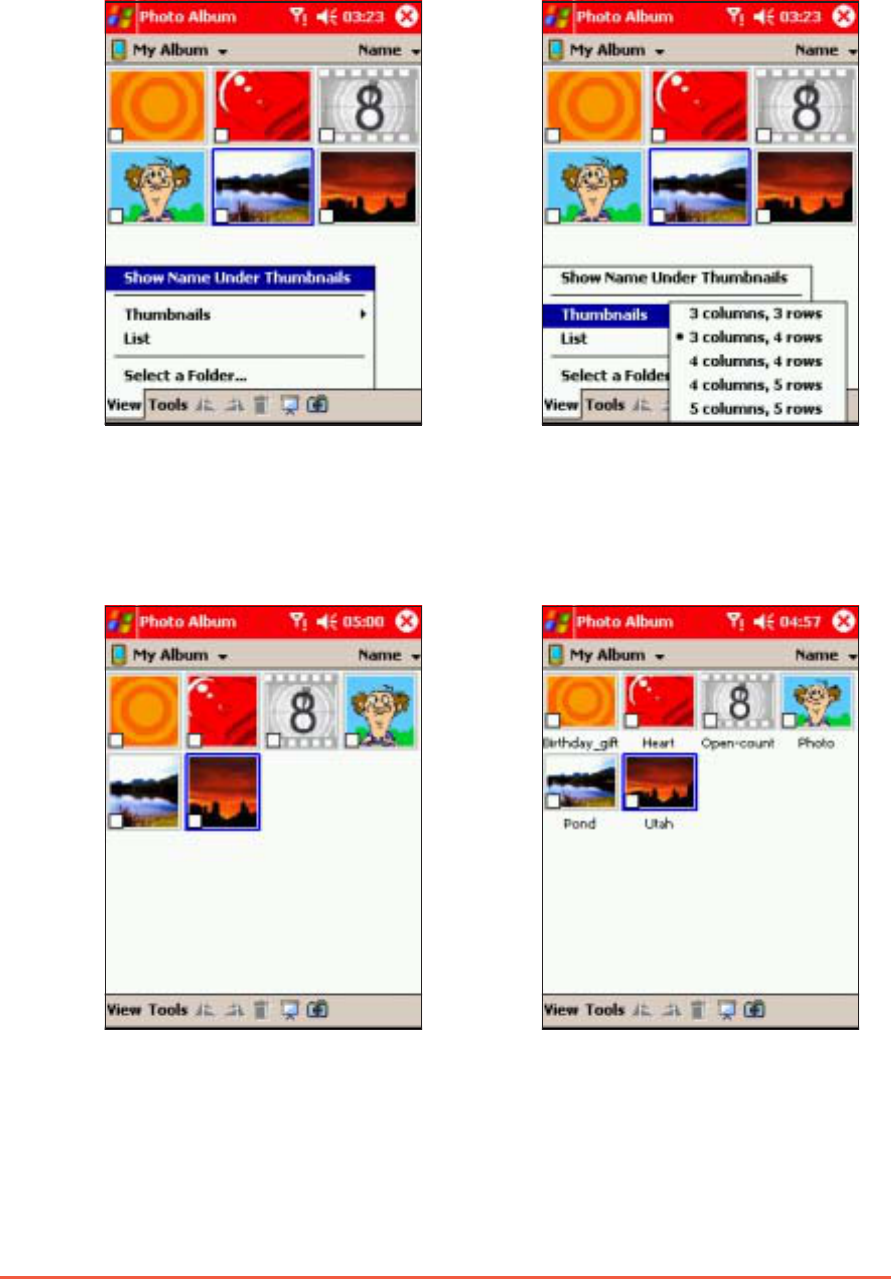
To view a thumbnail of the files:
2. Select and tap a thumbnail
setting from the popup menu.
1. Tap ViewView
ViewView
View > ThumbnailsThumbnails
ThumbnailsThumbnails
Thumbnails.
The files are displayed based
on your thumbnail settings.
3. Tap ViewView
ViewView
View > Show NameShow Name
Show NameShow Name
Show Name
Under ThumbnailsUnder Thumbnails
Under ThumbnailsUnder Thumbnails
Under Thumbnails to
display the file names.
Chapter 7: Multimedia Features
7-25
To view a file list:To view a file list:
To view a file list:To view a file list:
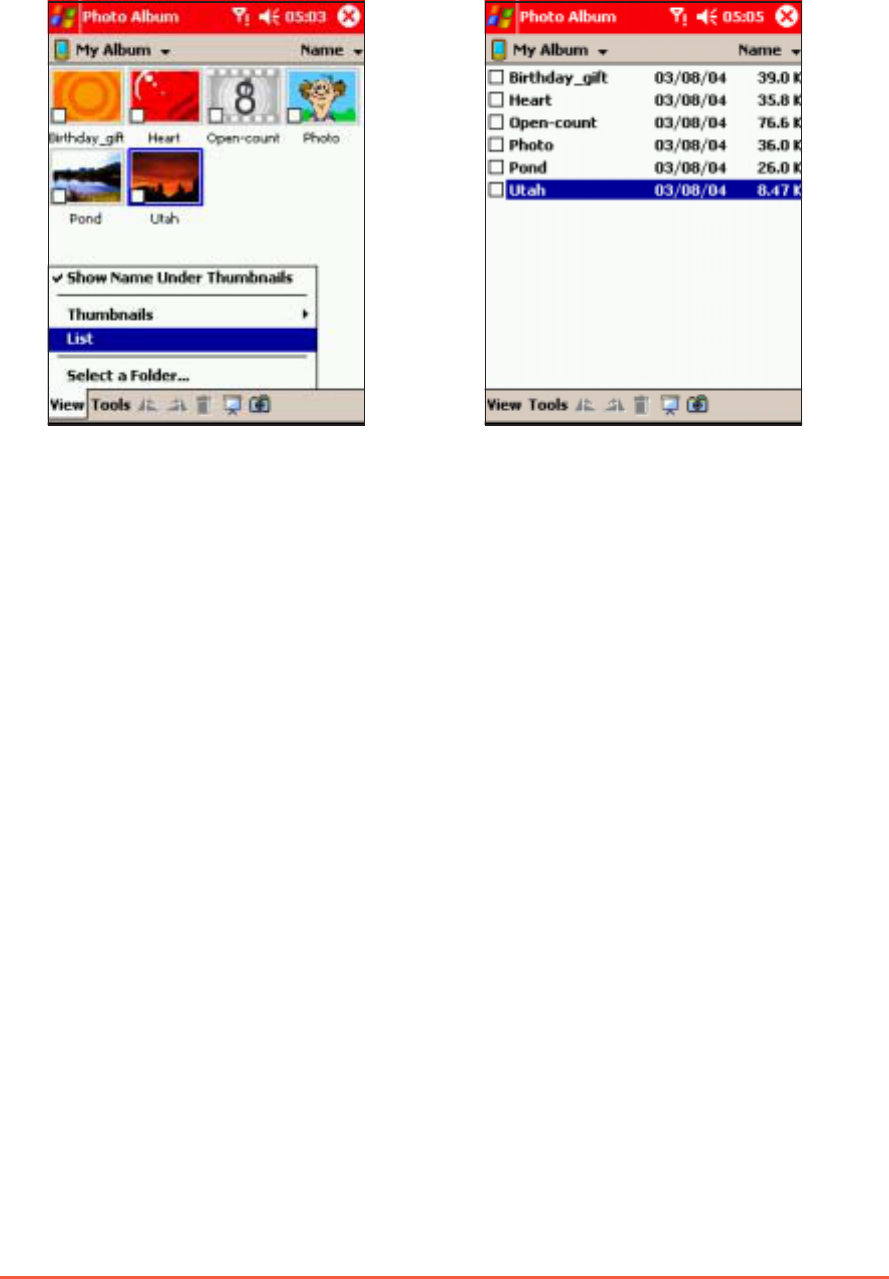
To view a file list:
The screen displays a list of
the files.
Tap ViewView
ViewView
View > ListList
ListList
List.
7-26
P505 Pocket PC
Managing photos and videosManaging photos and videos
Managing photos and videosManaging photos and videos
Managing photos and videos
To delete photos or videos:To delete photos or videos:
To delete photos or videos:To delete photos or videos:
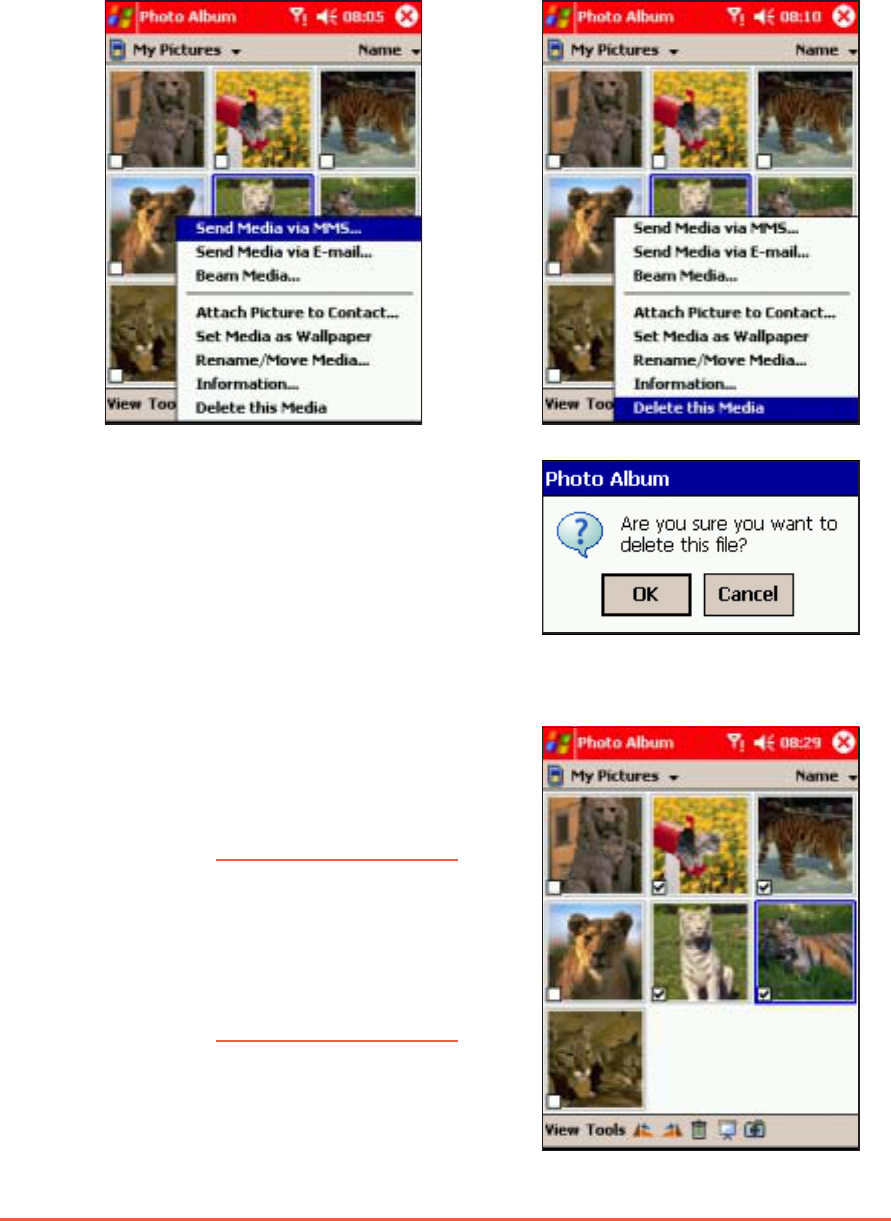
To delete photos or videos:
2. Select Delete this MediaDelete this Media
Delete this MediaDelete this Media
Delete this Media.
3. Tap OKOK
OKOK
O K when a confirmation
window appears. The selected file
is deleted.
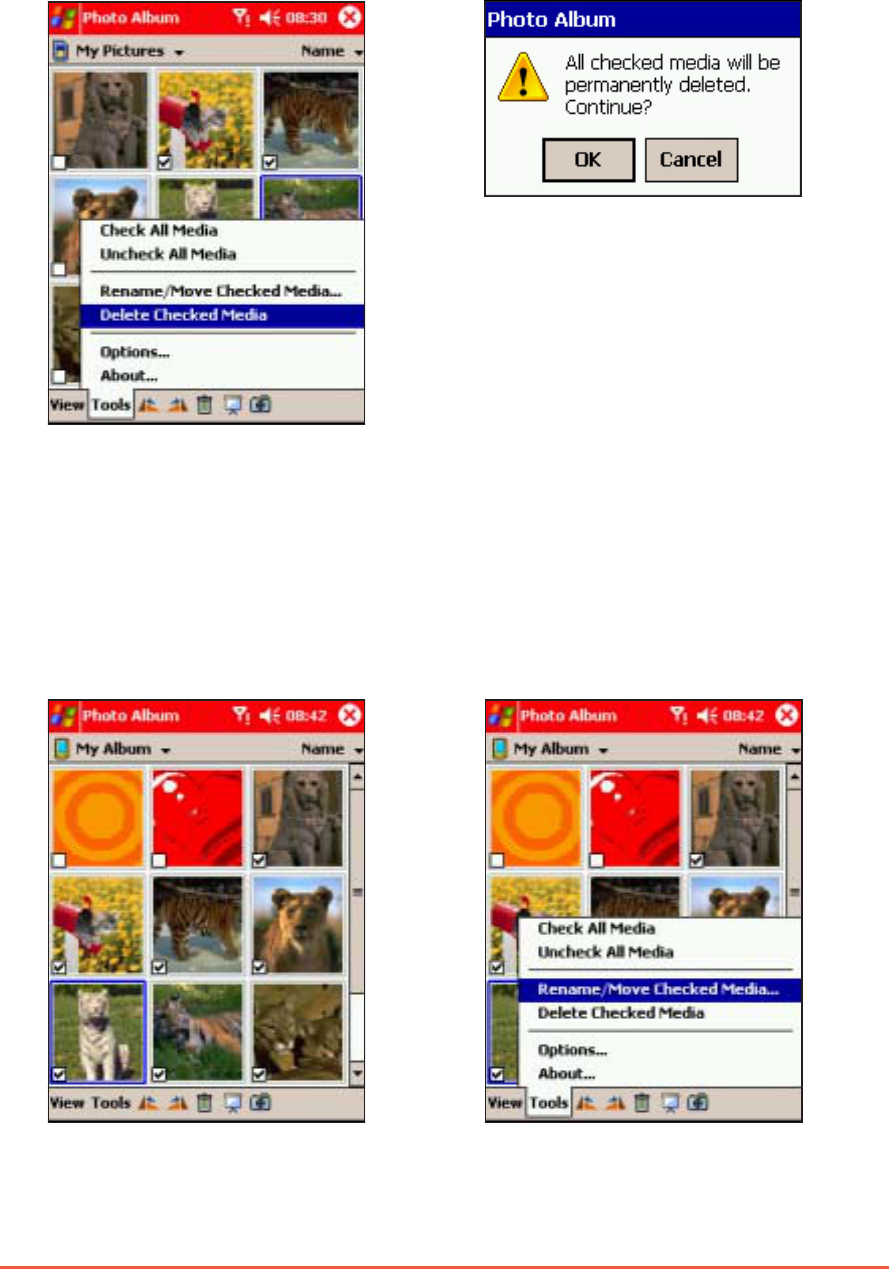
To delete multiple photos or video files:To delete multiple photos or video files:
To delete multiple photos or video files:To delete multiple photos or video files:
To delete multiple photos or video files:
1. Check the box at the bottom
left corner of the files you
want to delete.
1. Tap and hold a file to display
a popup menu.
NOTENOTE
NOTENOTE
N O T E If you want to delete
all photos and video
files in a folder, tap
ToolsTools
ToolsTools
Tools > Check AllCheck All
Check AllCheck All
Check All
MediaMedia
MediaMedia
M e d i a to select all
files.
Chapter 7: Multimedia Features
7-27
2. Tap ToolsTools
ToolsTools
To ols, then select
Delete Checked MediaDelete Checked Media
Delete Checked MediaDelete Checked Media
Delete Checked Media
from the popup menu.
3. Tap OKOK
OKOK
O K when a confirmation
window appears to delete the
files.
2. Tap ToolsTools
ToolsTools
To ols, then select
Rename/Move Media Rename/Move Media
Rename/Move Media Rename/Move Media
Rename/Move Media from
the popup menu.
1. Check the box at the bottom
left corner of the files you
want to move to another
location.
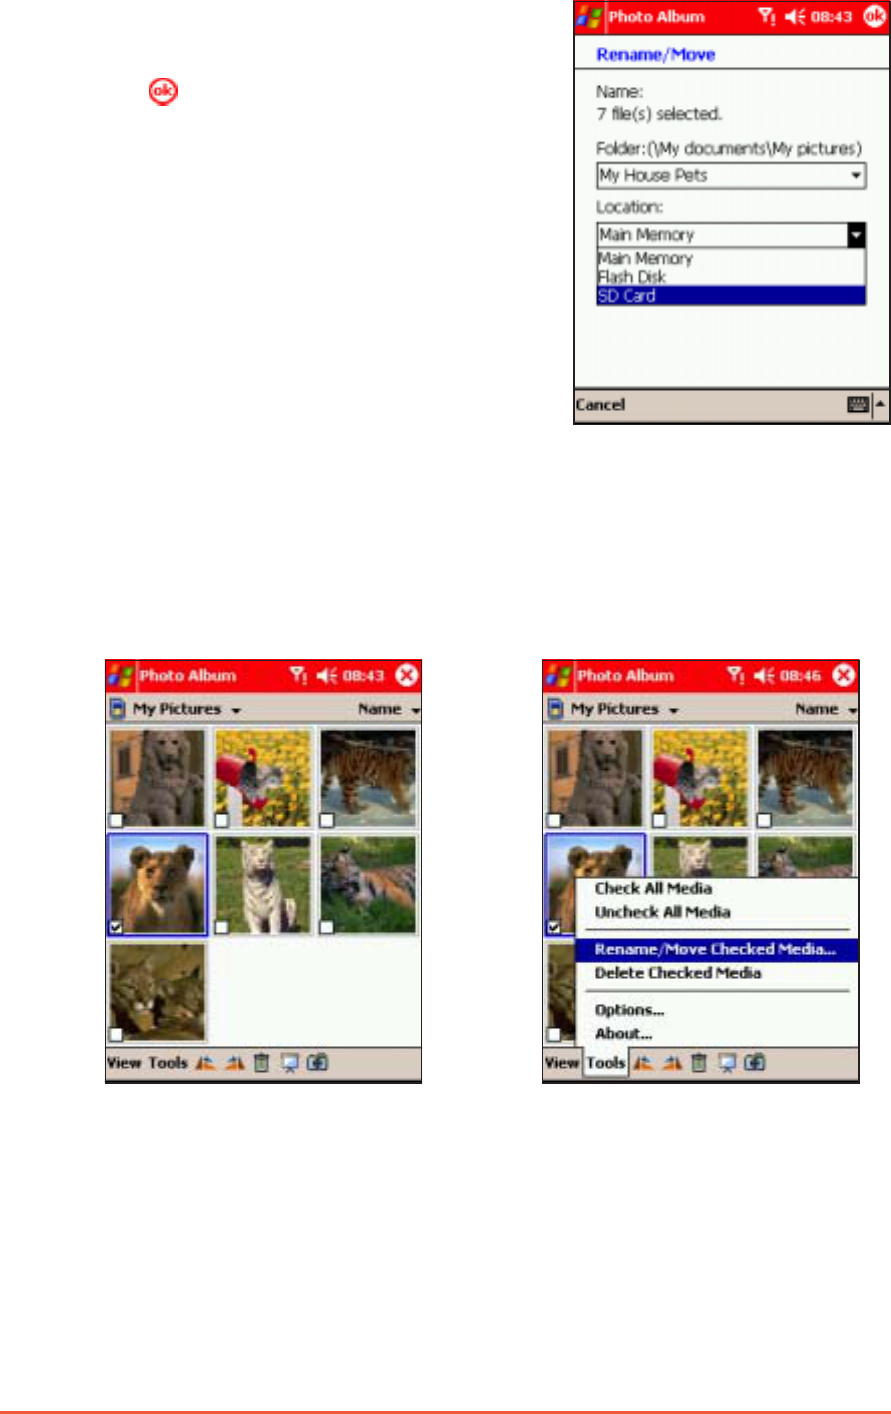
To move photos and videos to another folder:To move photos and videos to another folder:
To move photos and videos to another folder:To move photos and videos to another folder:
To move photos and videos to another folder:
7-28
P505 Pocket PC
2. Tap ToolsTools
ToolsTools
To ols, then select
Rename/Move Media Rename/Move Media
Rename/Move Media Rename/Move Media
Rename/Move Media from
the popup menu.
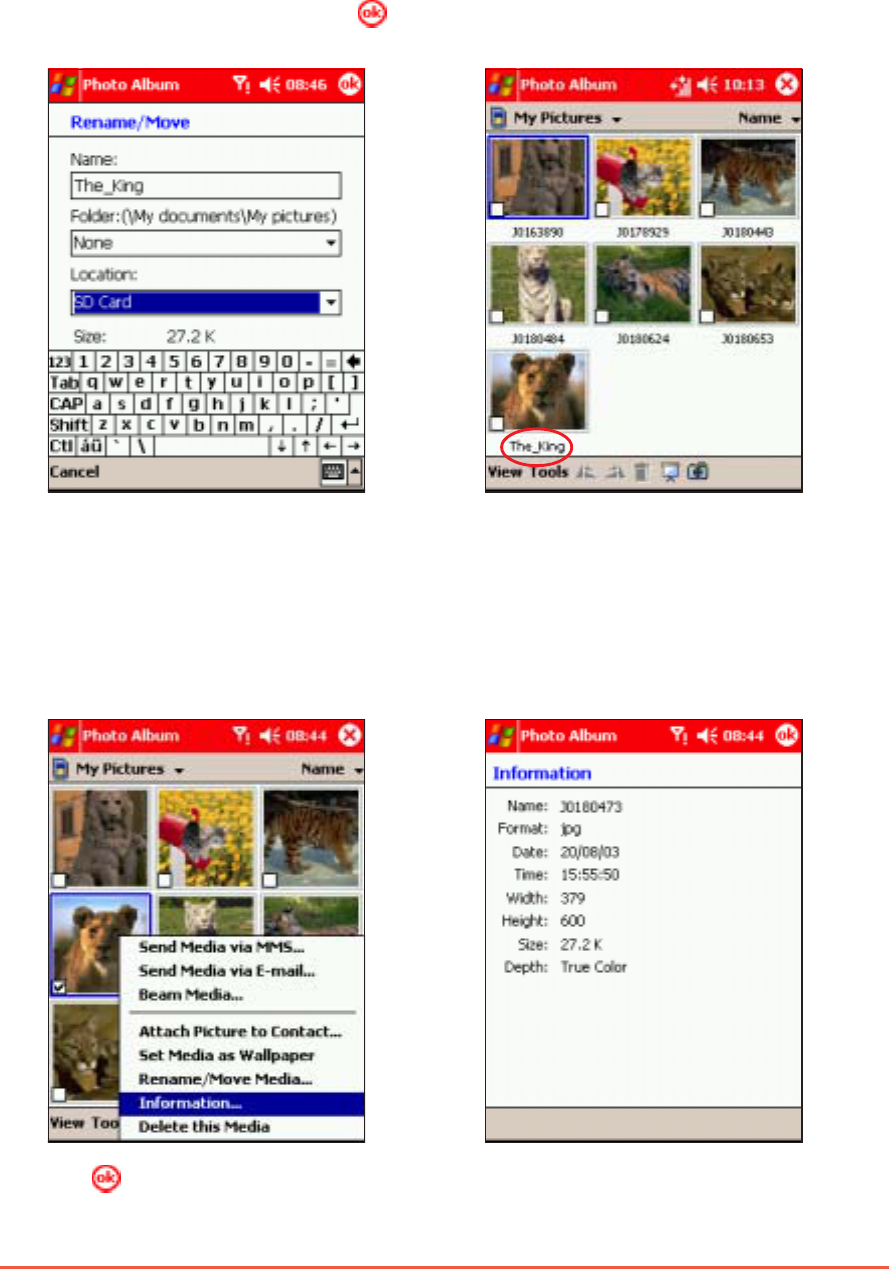
1. Check the box at the bottom
left corner of the file you
want to rename.
To rename a photo or video file:To rename a photo or video file:
To rename a photo or video file:To rename a photo or video file:
To rename a photo or video file:
3. Select the folder and location
where you want the files moved.
4. Tap to move the files.
Otherwise, tap CancelCancel
CancelCancel
Cancel to return
to the previous screen.
Chapter 7: Multimedia Features
7-29
4. Display the file names by
tapping View > ShowView > Show
View > ShowView > Show
View > Show
Name Under ThumbnailsName Under Thumbnails
Name Under ThumbnailsName Under Thumbnails
Name Under Thumbnails
to view the new file name.
3. Enter the new file name using
the soft keyboard.
Select a new folder and location
if you want to move the file
after renaming it, then click ..
..
.
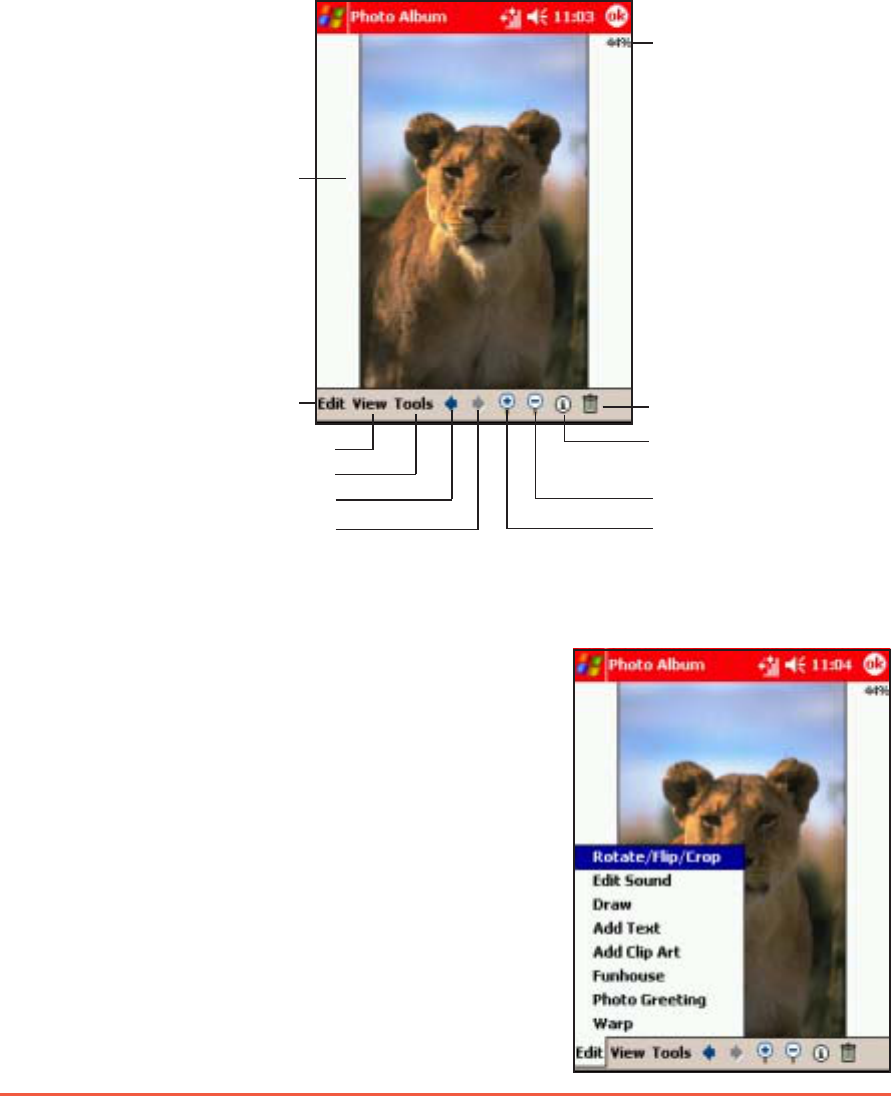
2. The screen displays the file
information including name.
format, size, depth, etc.
1. Tap and hold a file, then
select InformationInformation
InformationInformation
Information from the
popup menu.
To view a file information:To view a file information:
To view a file information:To view a file information:
To view a file information:
3. Tap to close the window and return to the previous screen
7-30
P505 Pocket PC
Editing photosEditing photos
Editing photosEditing photos
Editing photos
The Photo Album comes with several photo editing features that lets you:
• rotate, flip, crop, and warp photos
• add text, sounds, and cliparts to photos
• create funhouse photos and photo greetings
Before you can edit a photo, you must tap a photo file to display.
To rotate or flip a photoTo rotate or flip a photo
To rotate or flip a photoTo rotate or flip a photo
To rotate or flip a photo
1. Tap EditEdit
EditEdit
Edit > Rotate/Flip/CropRotate/Flip/Crop
Rotate/Flip/CropRotate/Flip/Crop
Rotate/Flip/Crop.
Current zoom level
Tap to view the
photo editing menu
Tap to adjust the view setting
Tap to delete the file
Tap to start a slideshow
of the files
Tap to display the file
information
Tap to zoom out
Tap to zoom in
Tap to open picture tools
Tap to display the previous photo
Tap to display the next photo
Preview window
Chapter 7: Multimedia Features
7-31
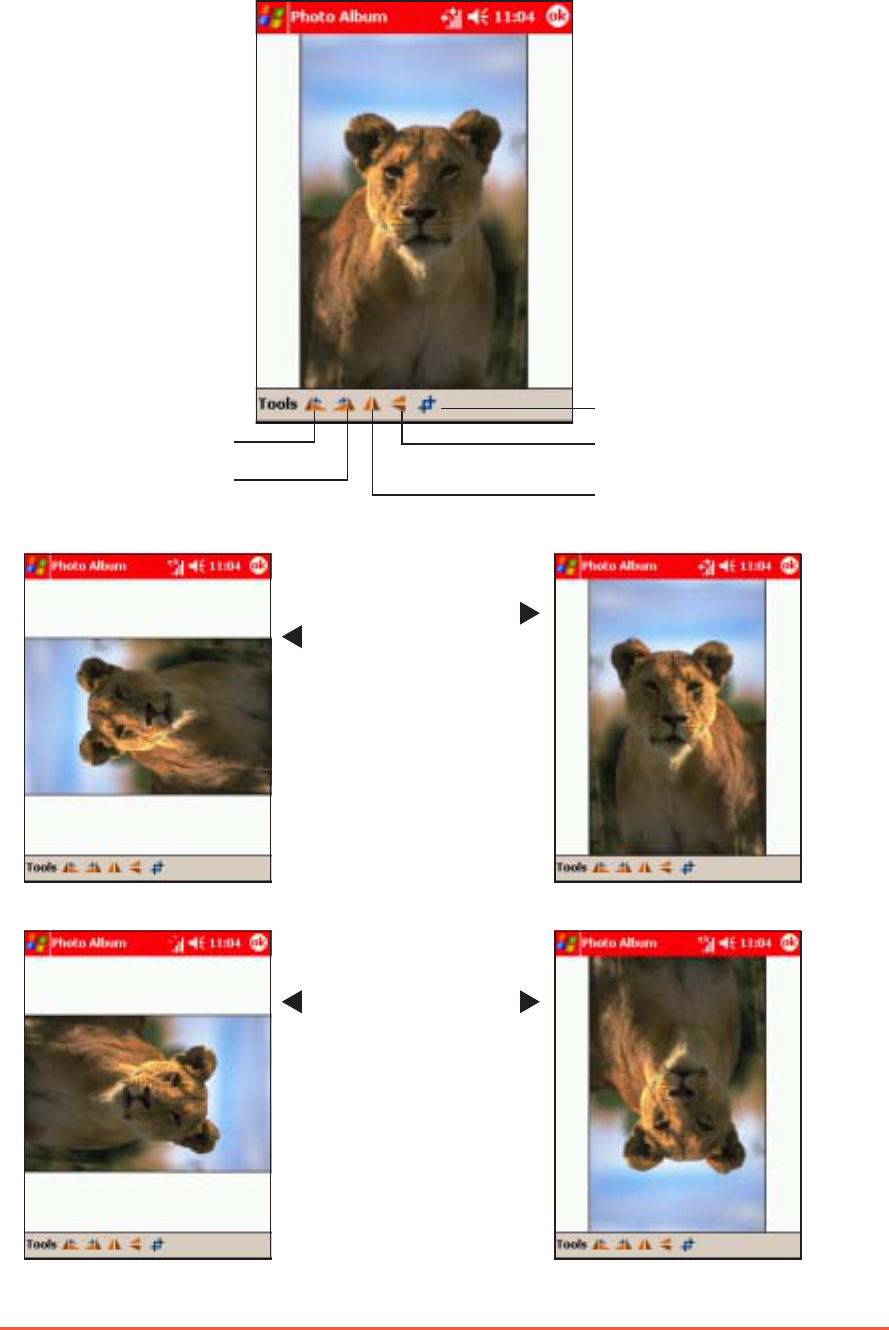
2. Tap the corresponding button to rotate or flip the photo. Refer to
the illustrations below.
Tap to crop photo
Tap to flip photo
horizontally
Tap to flip the photo
vertically
Tap to rotate the photo
counterclockwise
Tap to rotate the photo
clockwise
Rotate
counterclockwise
Rotate
clockwise
Flip vertical
Flip
horizontal
7-32
P505 Pocket PC
To crop a photo:To crop a photo:
To crop a photo:To crop a photo:
To crop a photo:
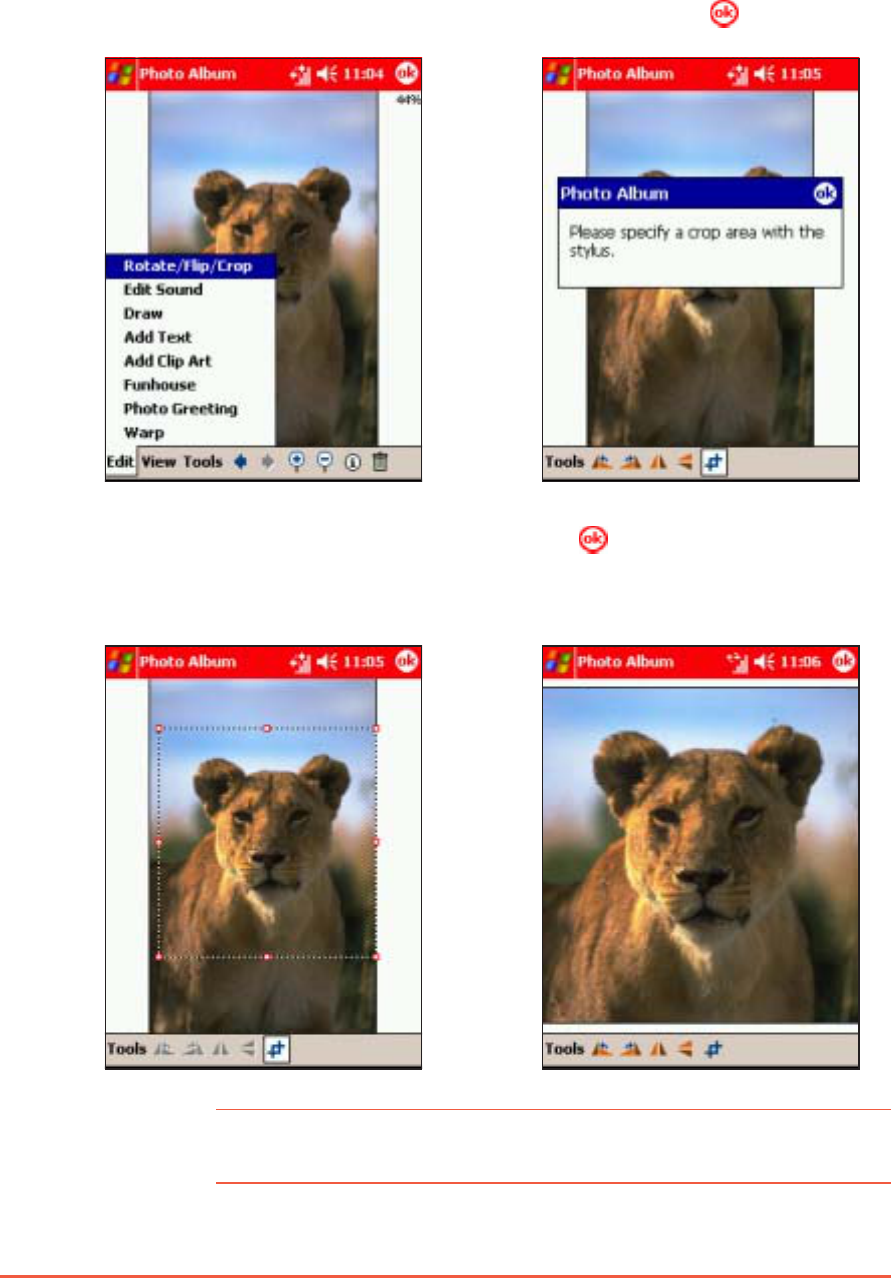
1. Tap EditEdit
EditEdit
Edit > Rotate/Flip/Crop Rotate/Flip/Crop
Rotate/Flip/Crop Rotate/Flip/Crop
Rotate/Flip/Crop. 2. The application prompts you
to specify the crop area with
the stylus. Tap to continue.
3. Drag the stylus over the area
you wish to retain after
cropping.
4. Tap to crop the photo,
then tap ToolsTools
ToolsTools
Tools to save.
NOTENOTE
NOTENOTE
N O T E If you want to revert to the original photo after cropping, tap
ToolsTools
ToolsTools
Tools > Revert to SavedRevert to Saved
Revert to SavedRevert to Saved
Revert to Saved.
Chapter 7: Multimedia Features
7-33
To warp a photo:To warp a photo:
To warp a photo:To warp a photo:
To warp a photo:
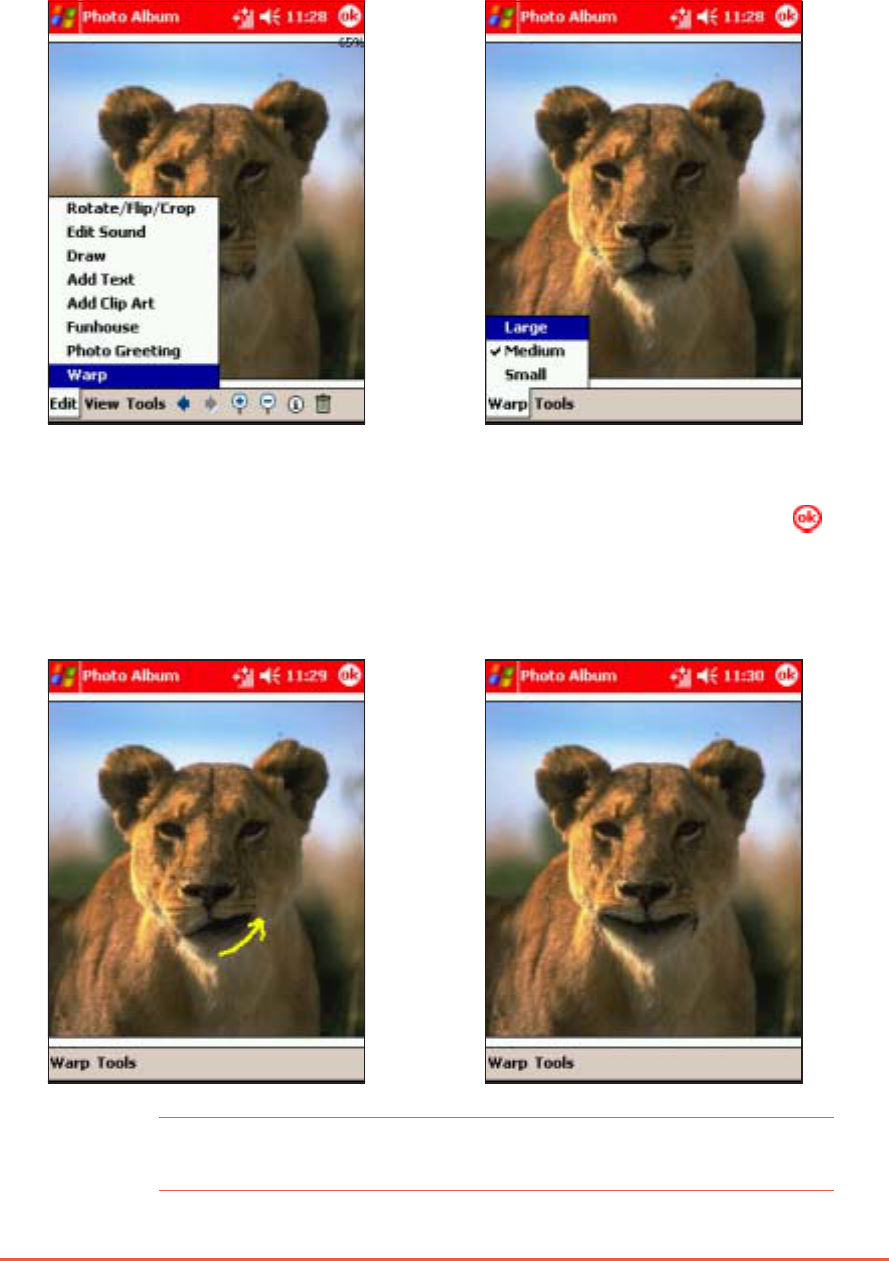
1. Tap EditEdit
EditEdit
Edit > Warp Warp
Warp Warp
Warp. 2. Tap WarpWarp
WarpWarp
Wa r p, then choose the
warping size.
3. Drag the stylus over the area
you want to warp. For
example, start from the
center of the lioness’ lip up
towards the chin.
4. Warp other areas of the
photo as desired, then tap .
Tap ToolsTools
ToolsTools
Tools to save.
NOTENOTE
NOTENOTE
N O T E If you want to revert to the original photo after warping, tap
ToolsTools
ToolsTools
Tools > Revert to SavedRevert to Saved
Revert to SavedRevert to Saved
Revert to Saved.
7-34
P505 Pocket PC
To add a recording to a photo:To add a recording to a photo:
To add a recording to a photo:To add a recording to a photo:
To add a recording to a photo:
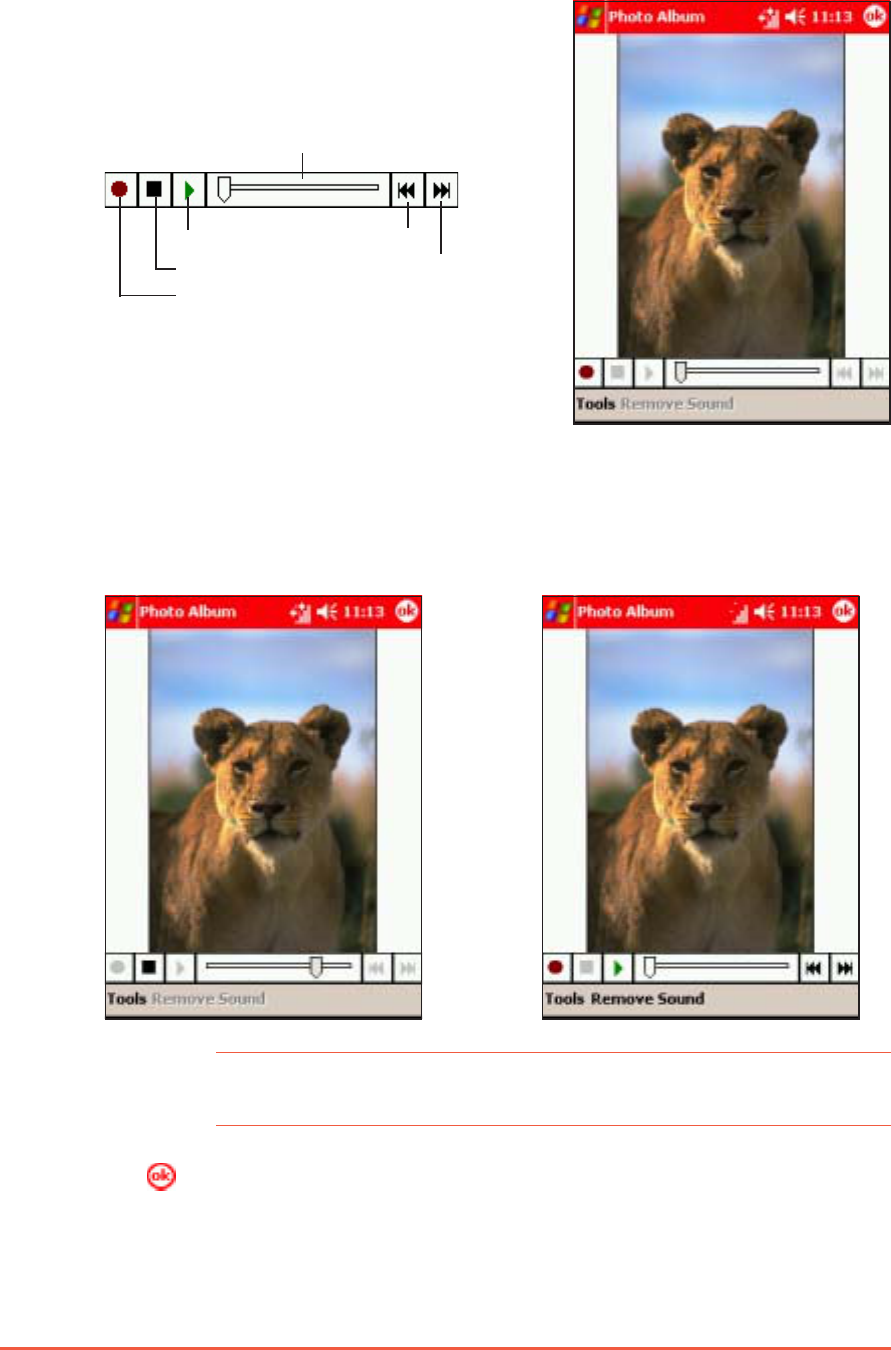
1. Tap EditEdit
EditEdit
Edit > Edit Sound Edit Sound
Edit Sound Edit Sound
Edit Sound. The
recording bar appears at the
bottom of the screen.
2. Tap the record button to
start recording. Tap the stop
button to stop recording.
NOTENOTE
NOTENOTE
N O T E Make sure to place the audio source near the device
microphone to achieve clearer recordings.
Play button
Stop button
Record button
Recording slider
Fast forward
Rewind
3. When finished, playback the
recording by tapping the play,
rewind, or fast forward buttons.
4. Tap to save the recording.
Chapter 7: Multimedia Features
7-35
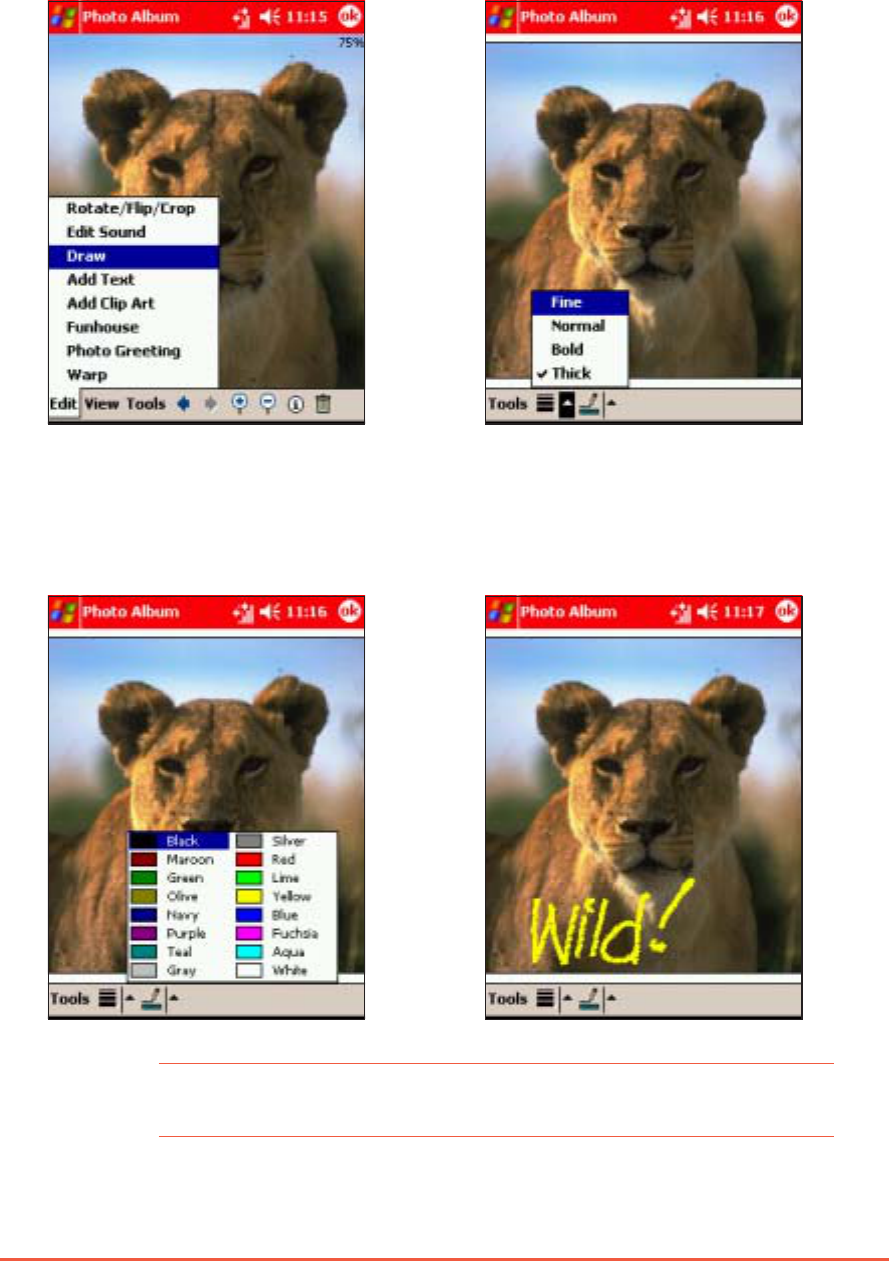
To add a drawing to a photo:To add a drawing to a photo:
To add a drawing to a photo:To add a drawing to a photo:
To add a drawing to a photo:
1. Tap EditEdit
EditEdit
Edit > Draw Draw
Draw Draw
Draw. 2. Tap the line weight button,
then select from the list.
3. Tap the line color button to
select the line color. Tap the
color of choice.
4. Use the stylus to draw objects
or texts over the photo, then
tap ToolsTools
ToolsTools
Tools to save.
NOTENOTE
NOTENOTE
N O T E If you want to revert to the original photo after drawing, tap
ToolsTools
ToolsTools
Tools > Revert to SavedRevert to Saved
Revert to SavedRevert to Saved
Revert to Saved.
7-36
P505 Pocket PC
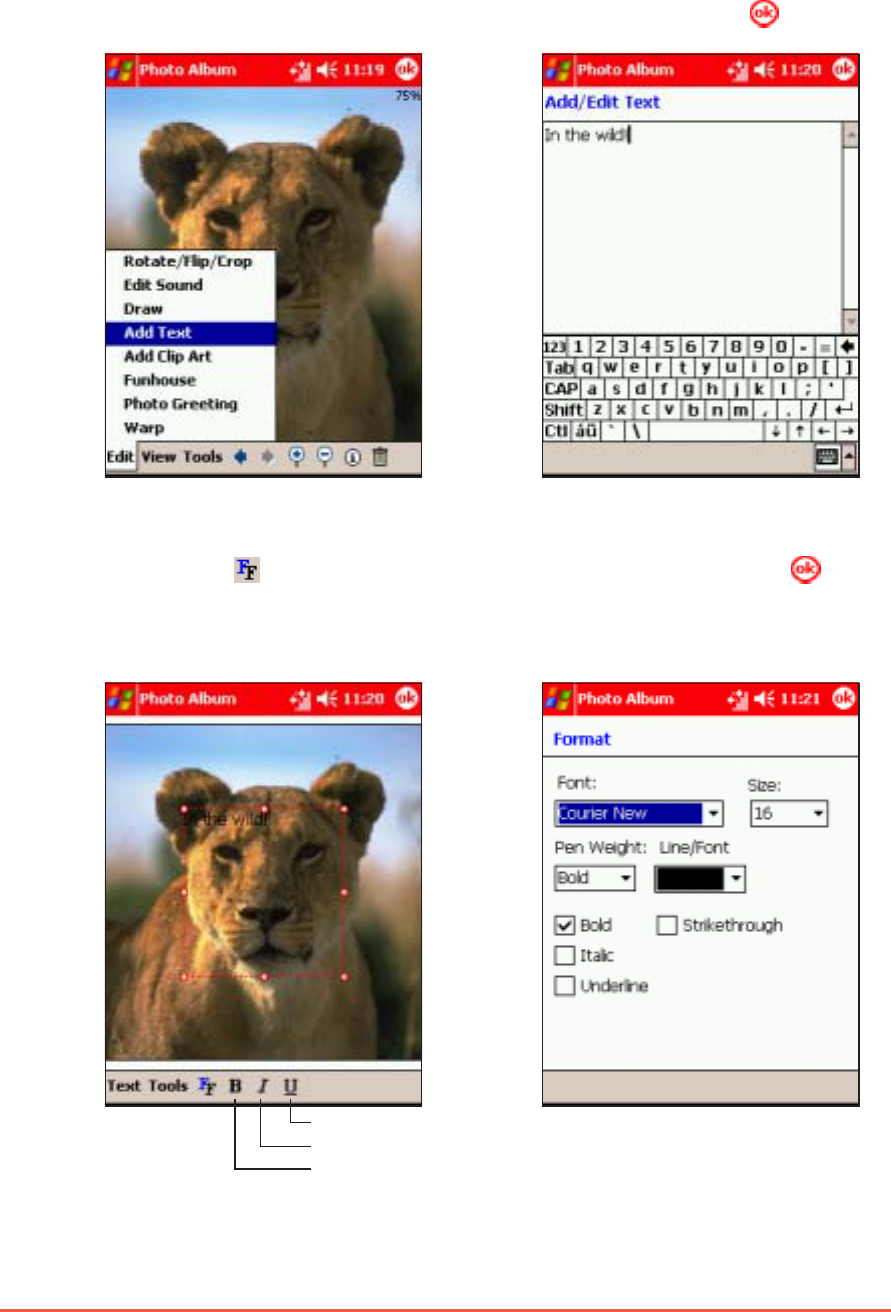
To add texts to a photo:To add texts to a photo:
To add texts to a photo:To add texts to a photo:
To add texts to a photo:
1. Tap EditEdit
EditEdit
Edit > Add Text Add Text
Add Text Add Text
Add Text. 2. Use the soft keyboard to type
the text, then tap .
3. The text is inserted in the
photo. Tap to change the
text font, size, color, and
style.
4. Change the text settings from
this window, then tap to
save the changes.
Tap to underline text
Tap to italicised text
Tap to boldface text
Chapter 7: Multimedia Features
7-37
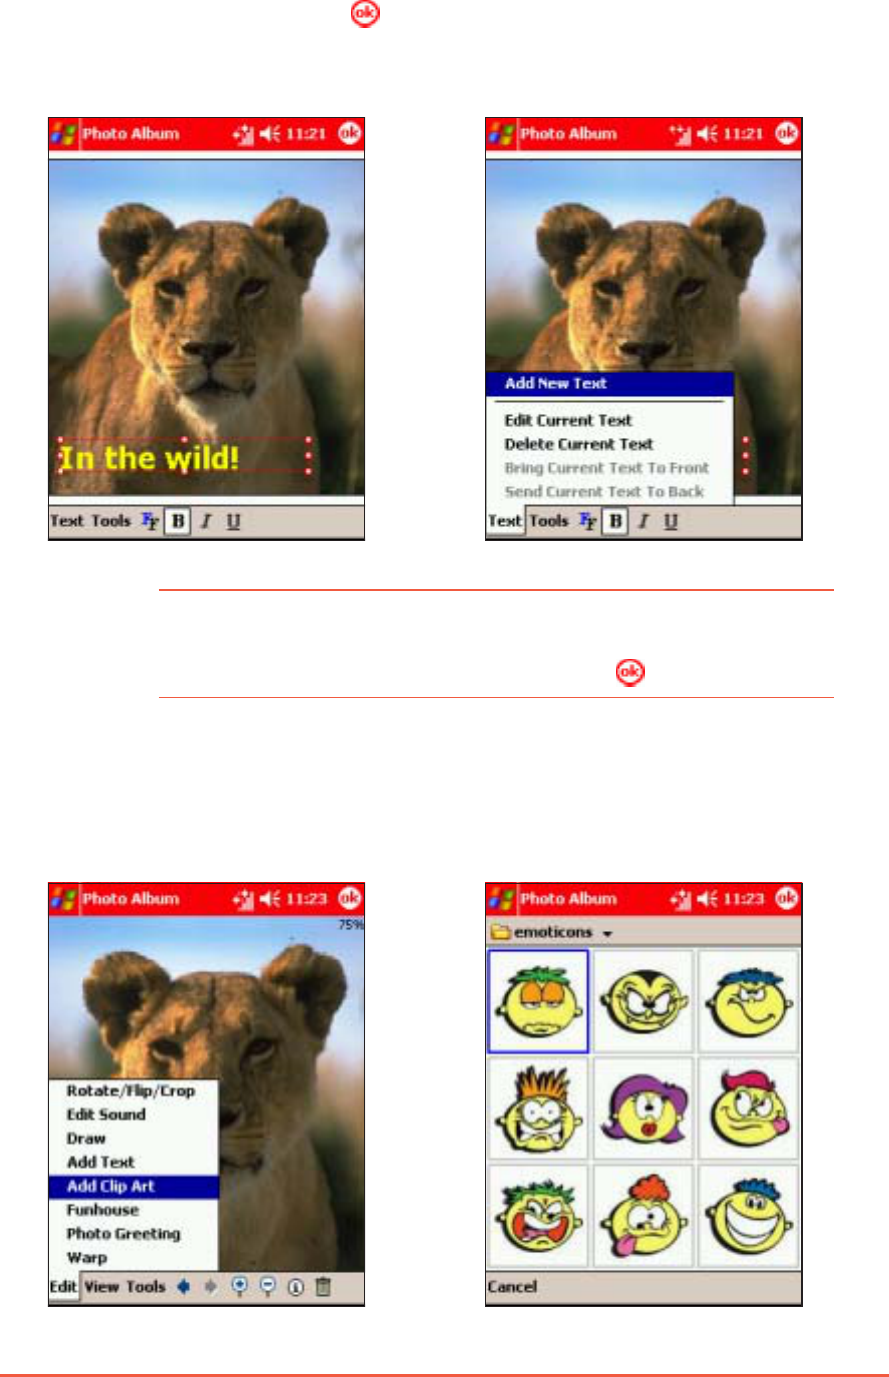
NOTENOTE
NOTENOTE
N O T E If you want to edit the inserted text, tap TextText
TextText
Text > EditEdit
EditEdit
Edit
Current Text Current Text
Current Text Current Text
C u r r e n t T e x t to display the Add/Edit Text window. Edit
the text using the soft keyboard, then tap .
5. Move the text block to the
desired location, then tap .
6. To add another text block,
tap TextText
TextText
Text > Add New TextAdd New Text
Add New TextAdd New Text
Add New Text.
Follow the same instructions
to insert another text block.
To add a clipart to a photo:To add a clipart to a photo:
To add a clipart to a photo:To add a clipart to a photo:
To add a clipart to a photo:
1. Tap EditEdit
EditEdit
Edit > Add Clip Art Add Clip Art
Add Clip Art Add Clip Art
Add Clip Art.
The cliparts appear.
2. Select and tap a clipart to
insert.
7-38
P505 Pocket PC
NOTENOTE
NOTENOTE
N O T E The Photo Album comes with two clipart categories:
emoticonsemoticons
emoticonsemoticons
emoticons and fun clipsfun clips
fun clipsfun clips
f u n c l i p s. You can switch categories by
tapping the clipart category displayed on the top left corner
of the display.
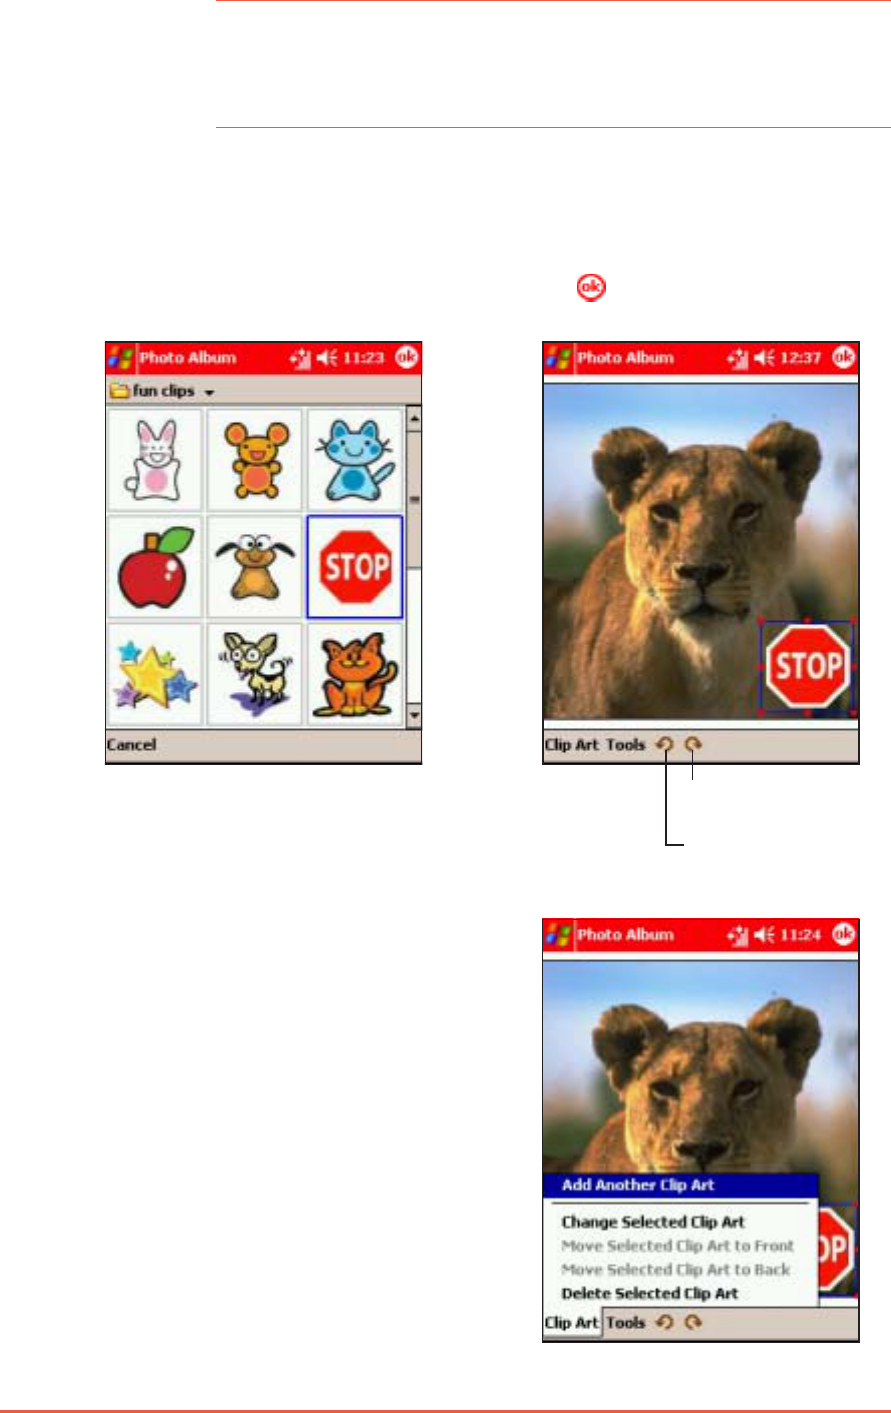
3. Tap emoticonsemoticons
emoticonsemoticons
emoticons, then select
fun clips fun clips
fun clips fun clips
fun clips to change the
clipart directory. Select and
tap a clipart to insert.
4. The clipart appears over the
photo. Drag the clipart to the
desired location using the stylus.
Tap to save the changes.
Tap to rotate the
clipart clockwise
Tap to rotate the clipart
counterclockwise
5. Tap Clip Art Clip Art
Clip Art Clip Art
Clip Art to add a new
clipart, change or delete a
selected clipart, or arrange
the clipart position.
Chapter 7: Multimedia Features
7-39
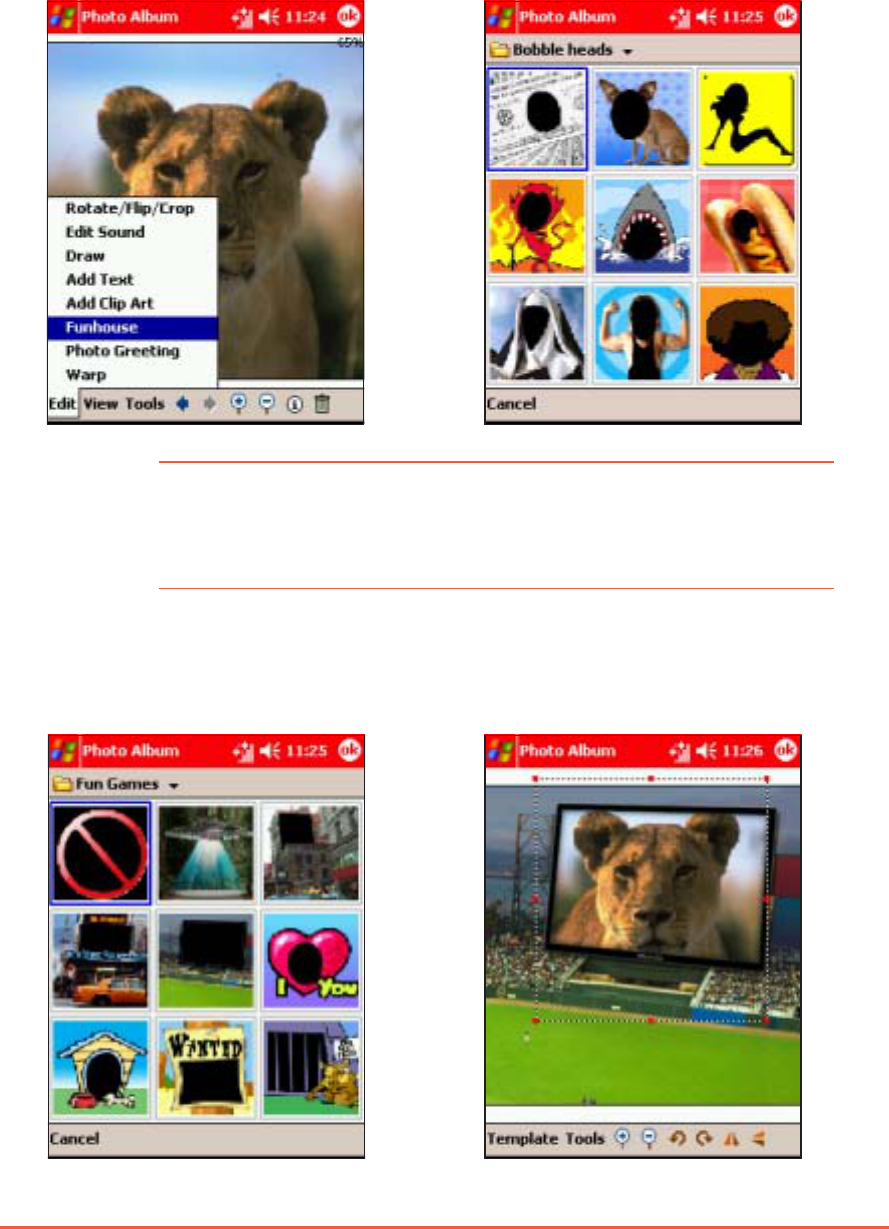
To add a Funhouse effect to a photo:To add a Funhouse effect to a photo:
To add a Funhouse effect to a photo:To add a Funhouse effect to a photo:
To add a Funhouse effect to a photo:
1. Tap EditEdit
EditEdit
Edit > Funhouse Funhouse
Funhouse Funhouse
Funhouse. The
Bobble heads effects appear.
2. Select and tap a Bobble head
effect you want to apply to
the photo.
NOTENOTE
NOTENOTE
N O T E The Photo Album comes with two Funhouse categories:
Bobble heads Bobble heads
Bobble heads Bobble heads
Bobble heads and Fun GamesFun Games
Fun GamesFun Games
F u n G a m e s. You can switch categories
by tapping the Funhouse category displayed on the top left
corner of the display.
3. Select and tap the Funhouse
effect you want to apply to
the photo.
4. Adjust the photo size, angle,
and position to match the
effect.
7-40
P505 Pocket PC
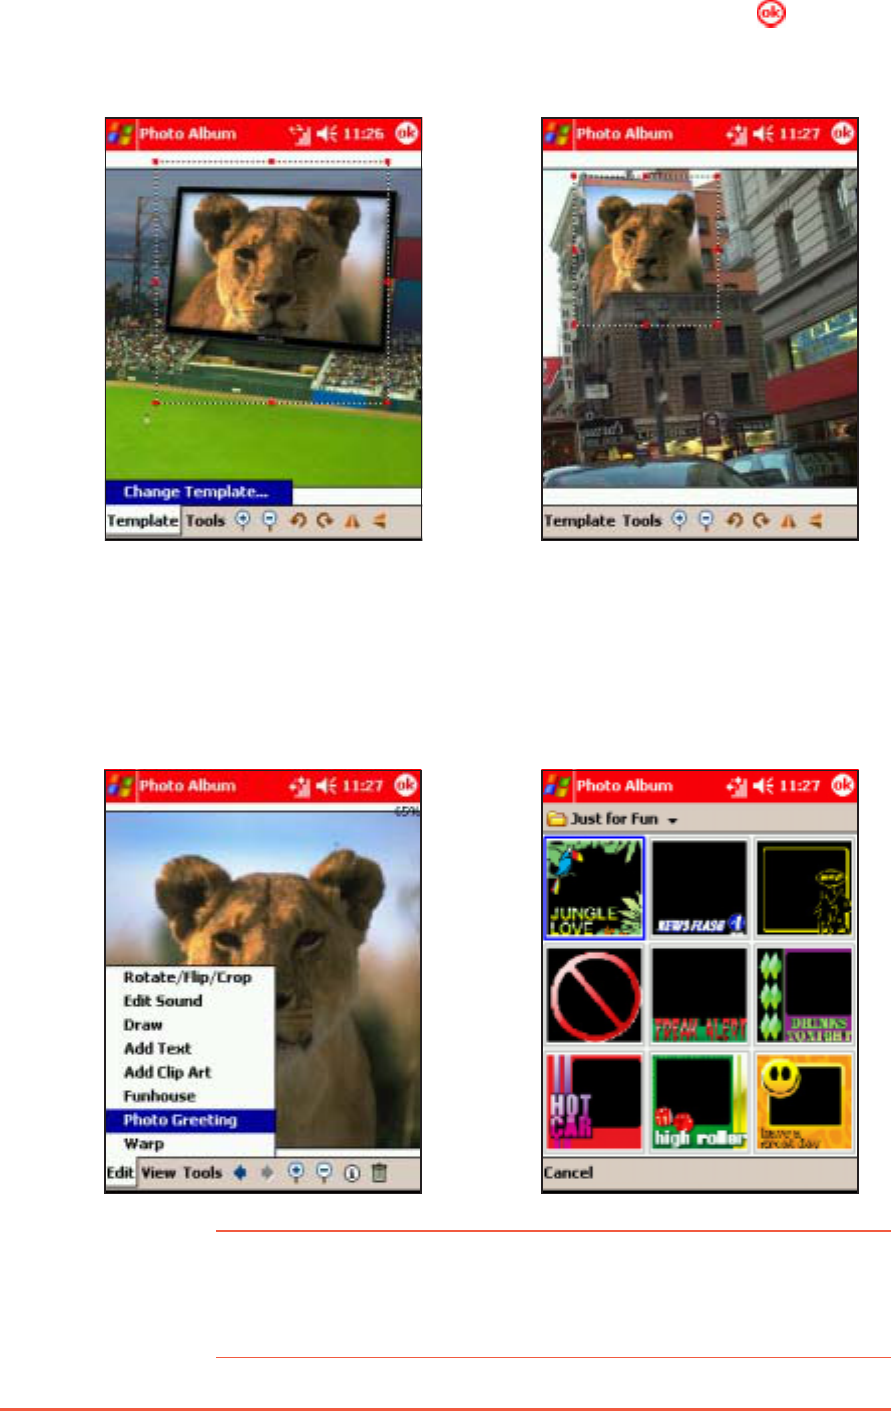
5. Tap TemplateTemplate
TemplateTemplate
Template to change the
Funhouse effect. Select
another effect to apply.
6. When finished, tap to save
the changes.
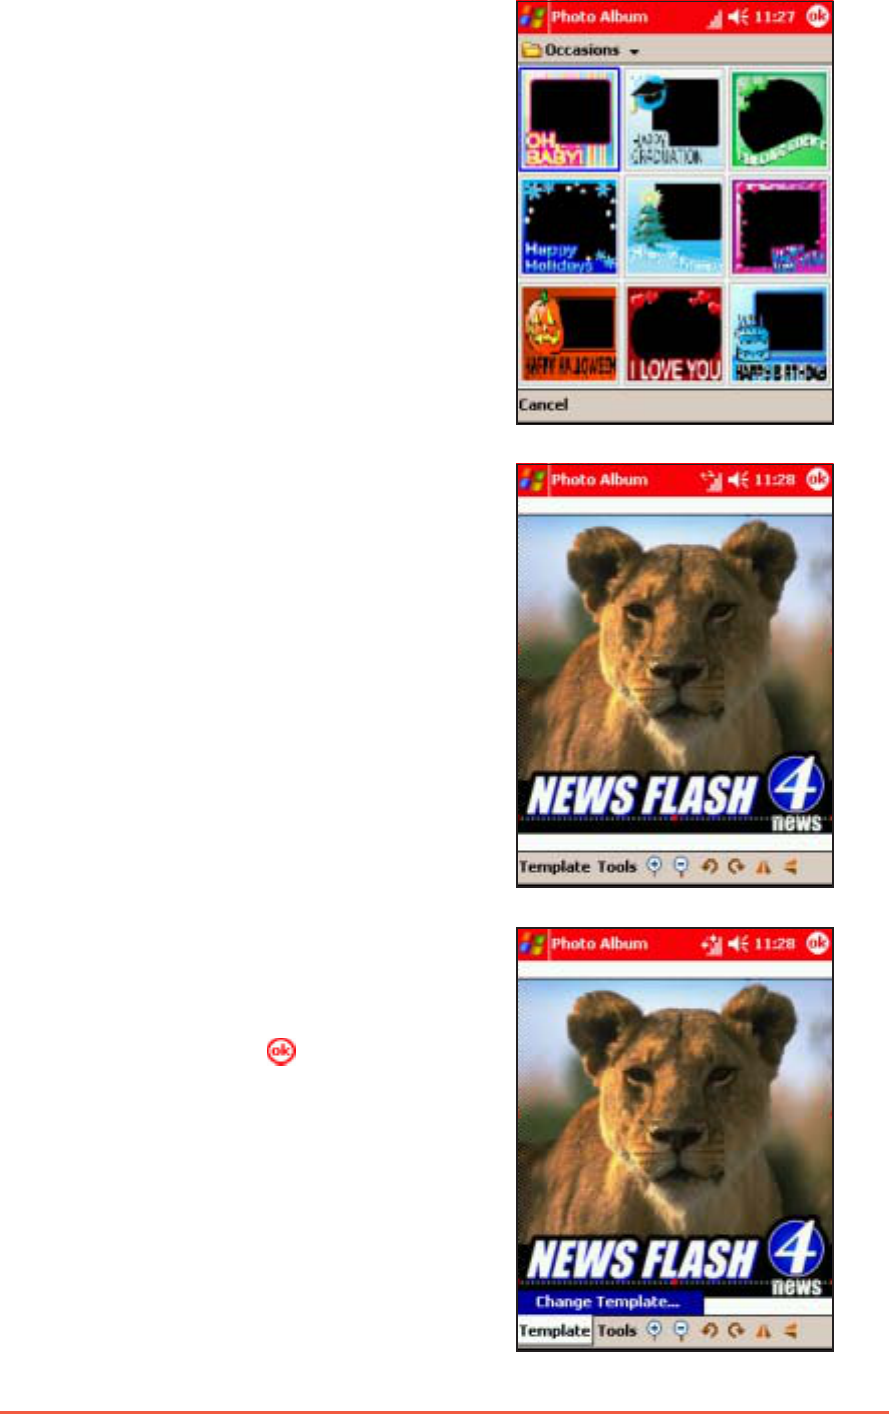
To create a photo greeting:To create a photo greeting:
To create a photo greeting:To create a photo greeting:
To create a photo greeting:
1. Tap EditEdit
EditEdit
Edit > Photo Photo
Photo Photo
Photo
GreetingGreeting
GreetingGreeting
Greeting. The Photo
Greeting frames appear.
2. Select and tap a frame you
want to apply to the photo.
NOTENOTE
NOTENOTE
N O T E The Photo Album comes with two Photo Greeting categories:
Just for Fun Just for Fun
Just for Fun Just for Fun
Just for Fun and OccassionsOccassions
OccassionsOccassions
O c c a s s i o n s. You can switch categories
by tapping the Photo Greeting category displayed on the top
left corner of the display.
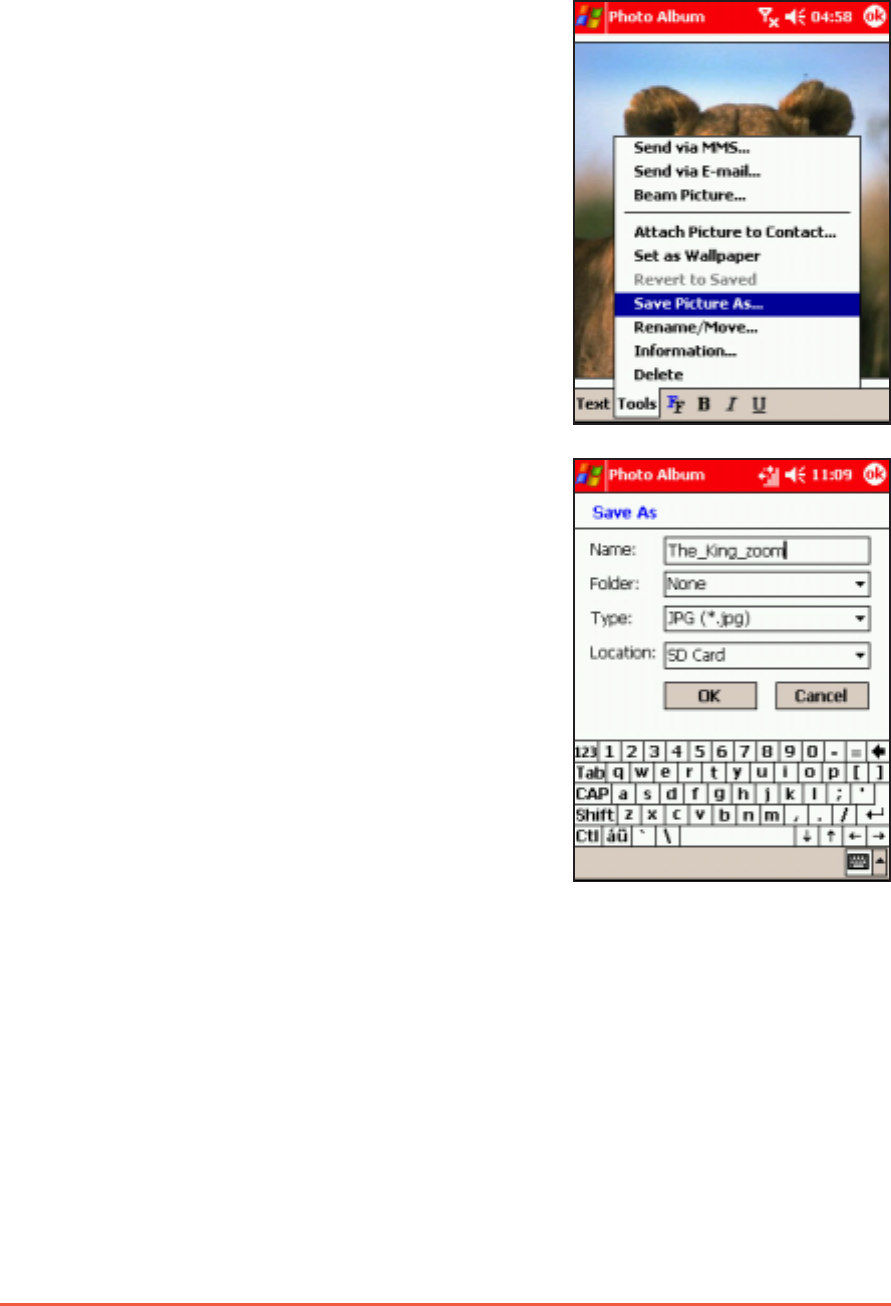
Chapter 7: Multimedia Features
7-41
3. After changing categories,
select and tap a frame you
want to apply to the photo.
4. Adjust the photo size, angle,
and position to match the
frame.
5. Tap TemplateTemplate
TemplateTemplate
Template to change the
Photo Greeting frame. Select
another frame to apply.
6. When finished, tap to save
the changes.
7-42
P505 Pocket PC
Saving photosSaving photos
Saving photosSaving photos
Saving photos
To save the photo:To save the photo:
To save the photo:To save the photo:
To save the photo:
1. Tap ToolsTools
ToolsTools
Tools > Save Picture Save Picture
Save Picture Save Picture
Save Picture
AsAs
AsAs
As. The Save As Save As
Save As Save As
Save As window
appears.
2. Use the soft keyboard to type
a file name for the photo.
3. Select the folder and location
where you want to save the
photo.
4. Select the photo file type.
You can save a photo in .jpg
or .bmp format.
5. Tap OKOK
OKOK
O K to save the photo.
Chapter 7: Multimedia Features
7-43
Sharing photosSharing photos
Sharing photosSharing photos
Sharing photos
The Photo Album lets you share photos to other PDAs using infrared
and Bluetooth™, next generation mobile phones via MMS and WAP,
and notebooks/PCs via e-mail.
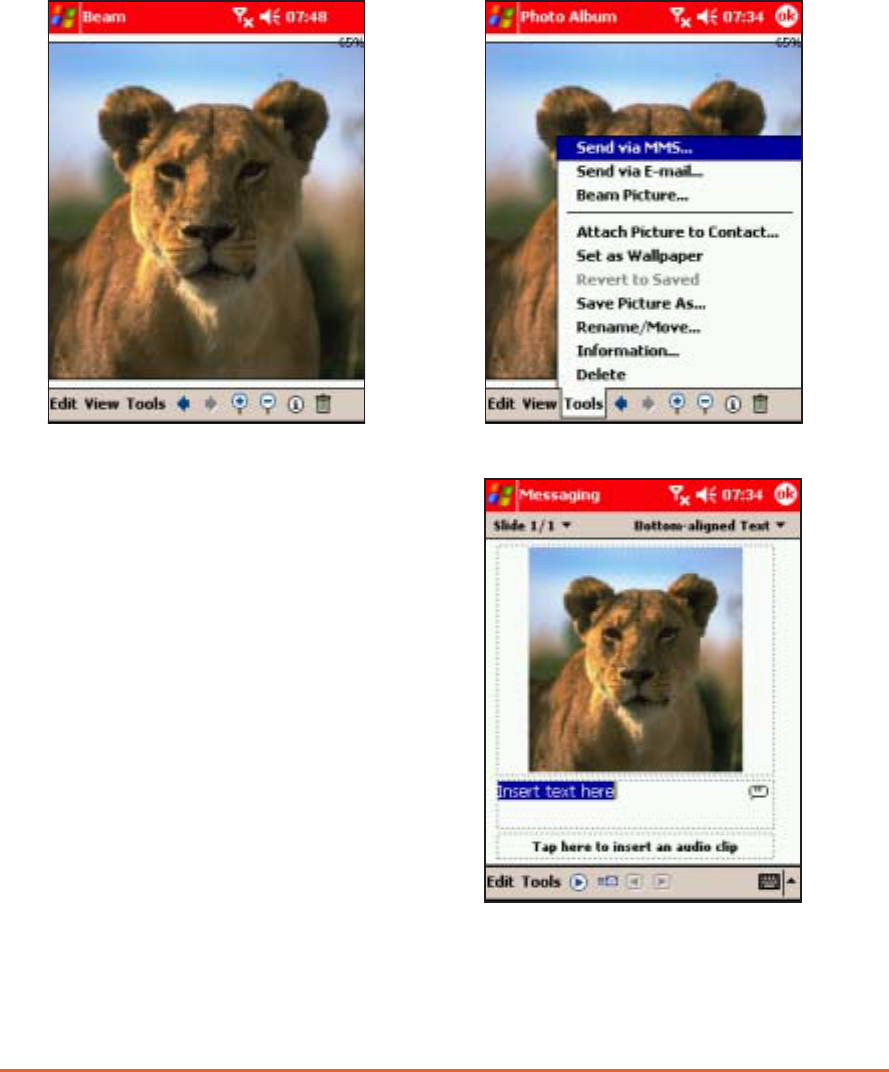
To send a photo via MMS:To send a photo via MMS:
To send a photo via MMS:To send a photo via MMS:
To send a photo via MMS:
1. From the Photo Album main
screen, tap a photo to
display.
2. Tap ToolsTools
ToolsTools
Tools > Send viaSend via
Send viaSend via
Send via
MMSMMS
MMSMMS
MMS. The MessagingMessaging
MessagingMessaging
Messaging
window appears.
3. The photo becomes an MMS
object. Compose the MMS
message following the
instructions on Chapter 6.
4. When finished, send the MMS
message.
7-44
P505 Pocket PC
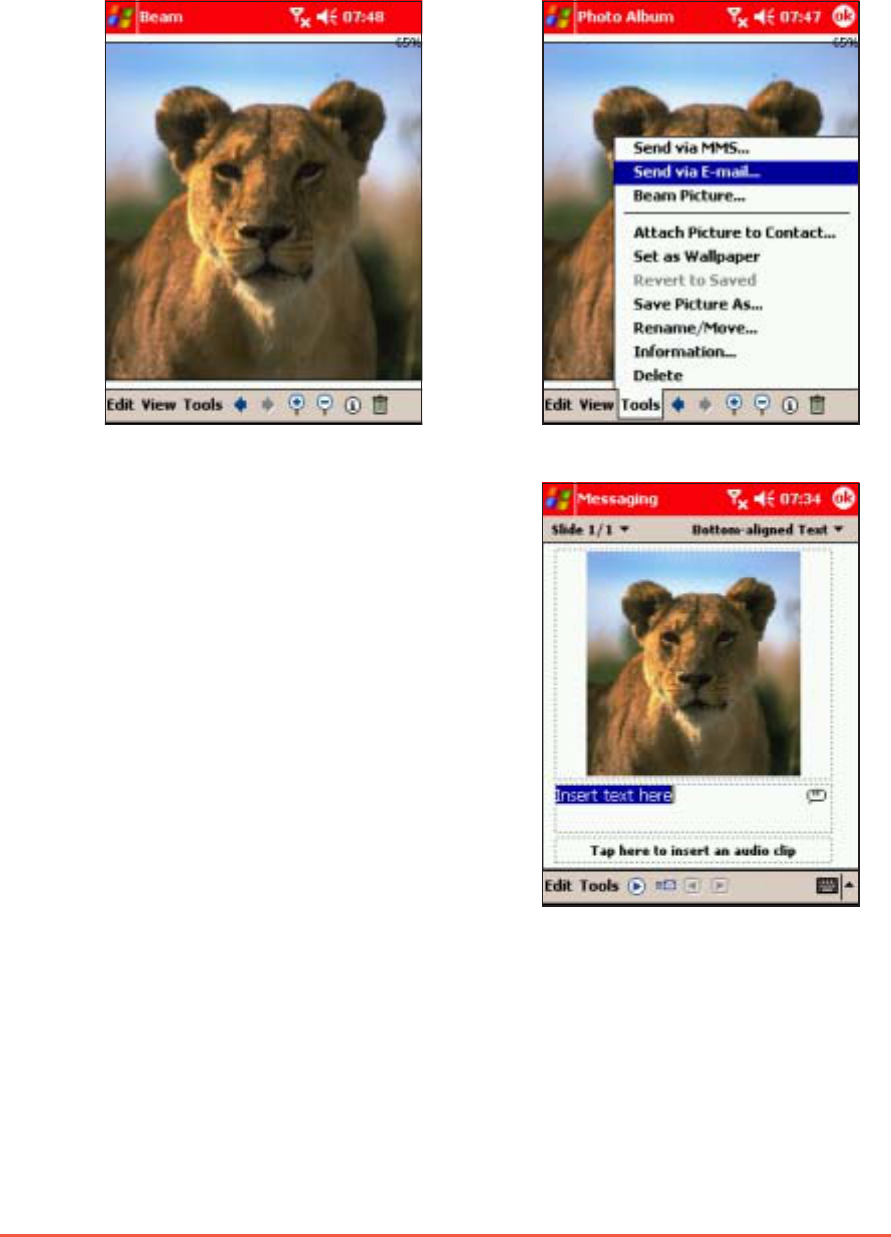
To send a photo via e-mail:To send a photo via e-mail:
To send a photo via e-mail:To send a photo via e-mail:
To send a photo via e-mail:
1. From the Photo Album main
screen, tap a photo to
display.
2. Tap ToolsTools
ToolsTools
Tools > Send viaSend via
Send viaSend via
Send via
E-mailE-mail
E-mailE-mail
E-mail. The MessagingMessaging
MessagingMessaging
Messaging
window appears.
3. The photo becomes an e-mail
attachment. Compose the
e-mail message following the
instructions in Chapter 6.
4. When finished, send the
e-mail message.
Chapter 7: Multimedia Features
7-45
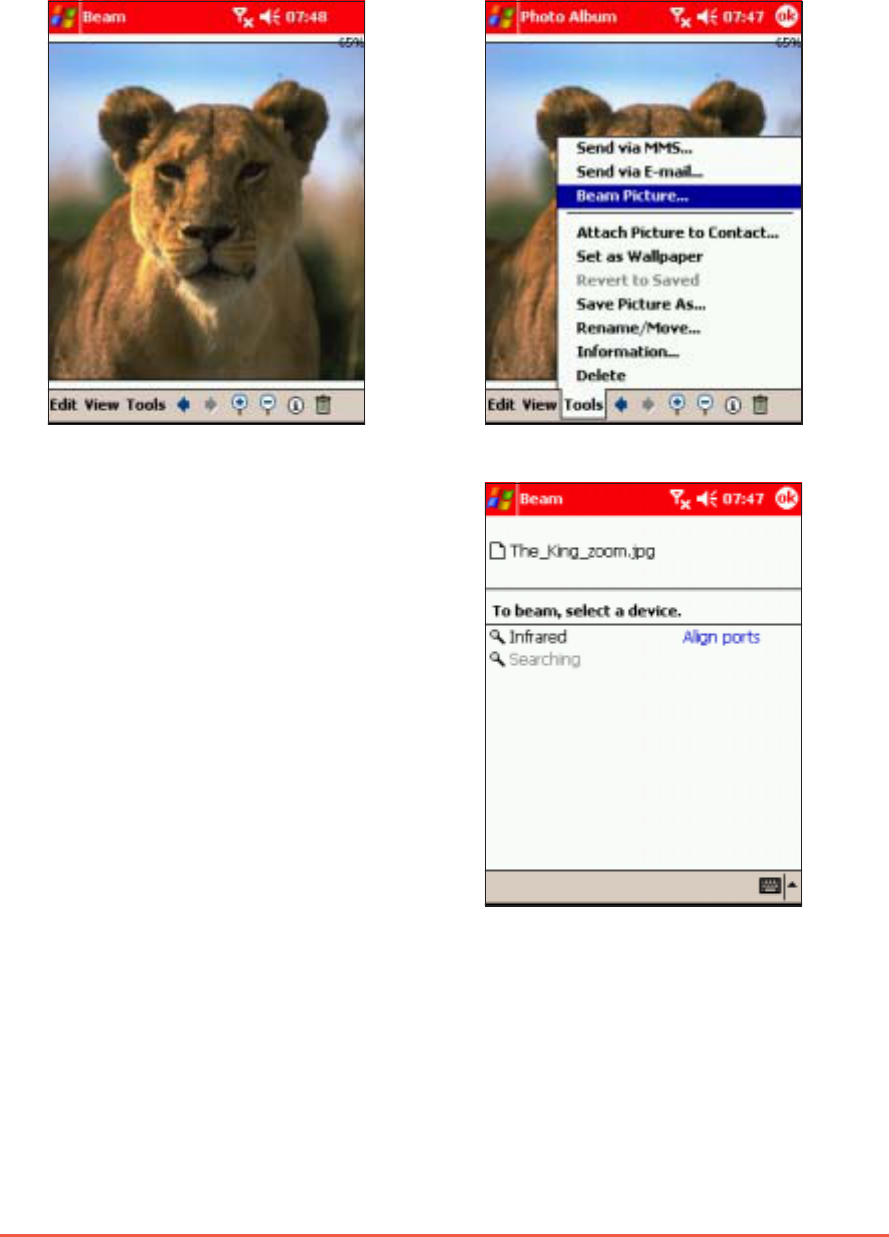
To send a photo via e-mail:To send a photo via e-mail:
To send a photo via e-mail:To send a photo via e-mail:
To send a photo via e-mail:
1. From the Photo Album main
screen, tap a photo to
display.
2. Tap ToolsTools
ToolsTools
Tools > Beam PictureBeam Picture
Beam PictureBeam Picture
Beam Picture.
3. The Pocket PC searches for
the IR port of the recipient’s
device
Beam the photo following the
instructions in Chapter 10.
7-46
P505 Pocket PC
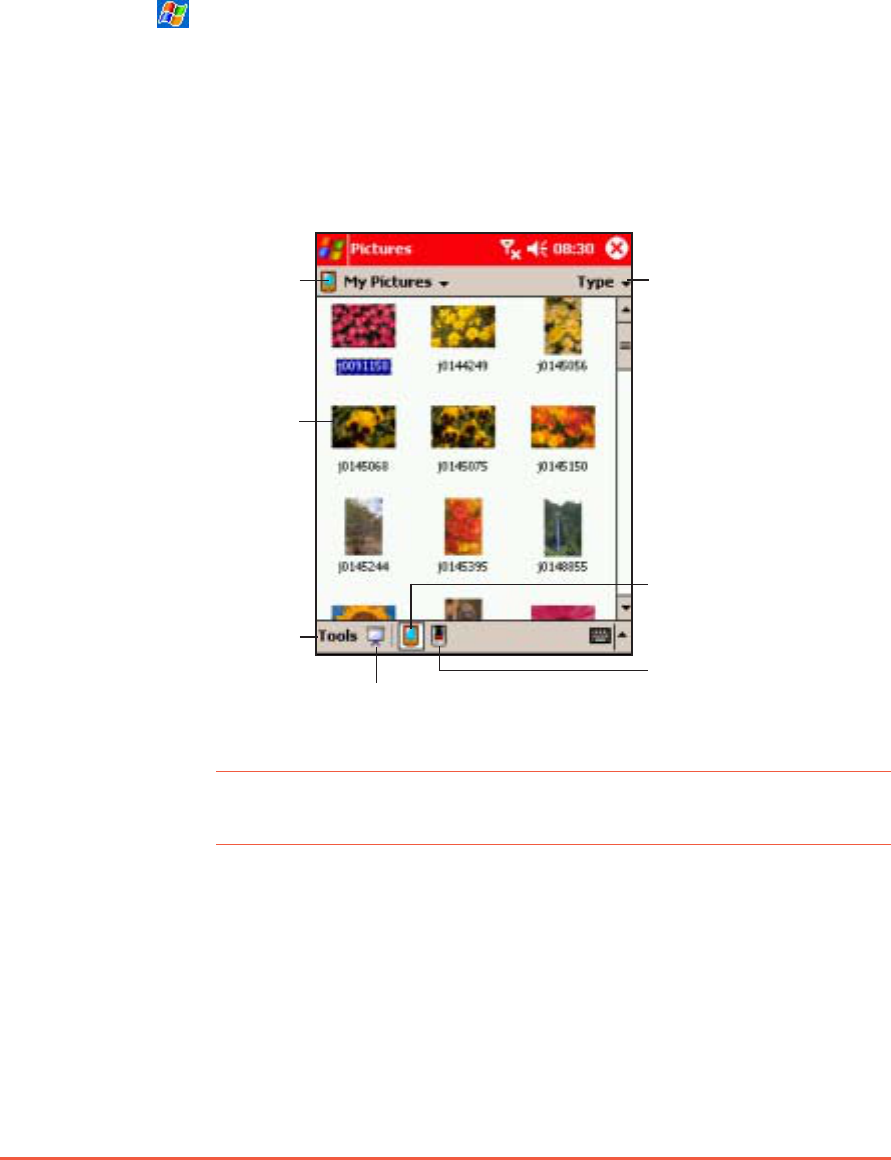
PicturesPictures
PicturesPictures
Pictures
The Pictures application allows you view and manage photos, and
create slideshows from photos saved in the Pocket PC.
Launching the PicturesLaunching the Pictures
Launching the PicturesLaunching the Pictures
Launching the Pictures
To launch Pictures:To launch Pictures:
To launch Pictures:To launch Pictures:
To launch Pictures:
1. Tap .
2. Tap ProgramsPrograms
ProgramsPrograms
Programs.
3. Tap the PicturesPictures
PicturesPictures
Pictur e s icon to open the application.
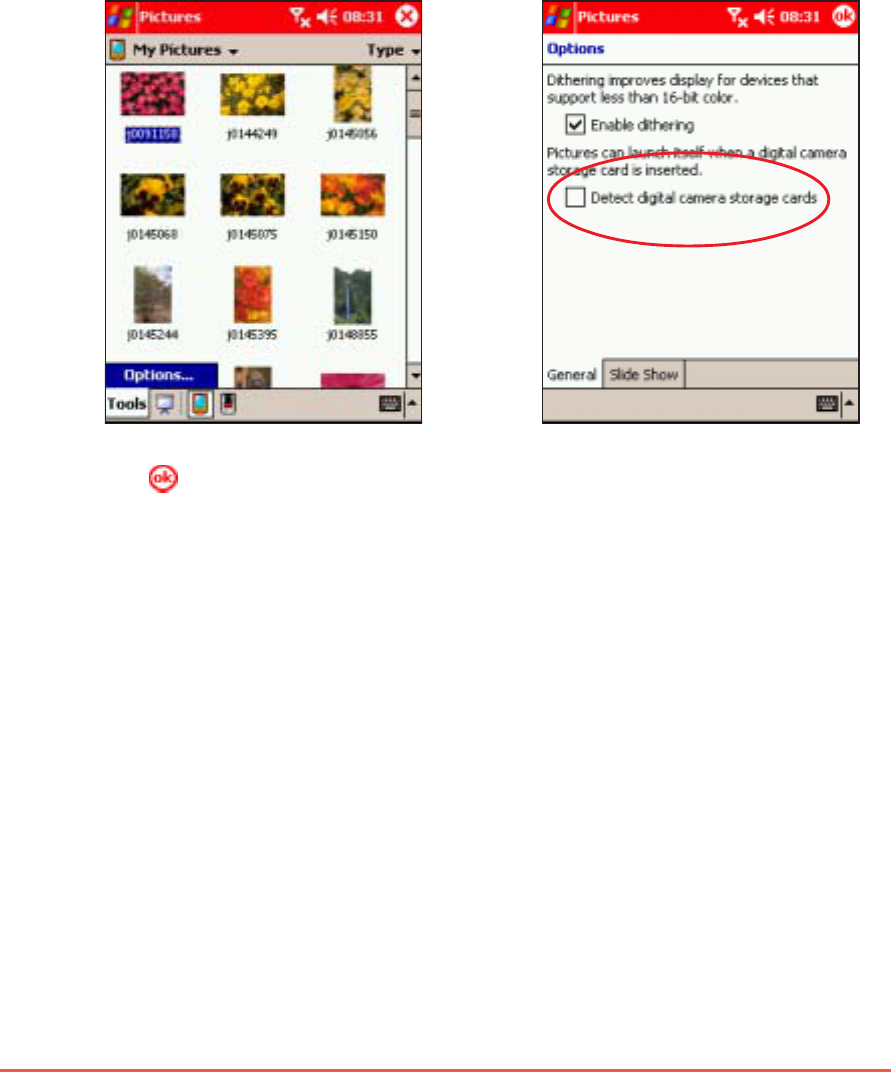
Pictures main screenPictures main screen
Pictures main screenPictures main screen
Pictures main screen
NOTENOTE
NOTENOTE
N O T E By default, the Pictures main screen displays the photos
saved in the My Pictures My Pictures
My Pictures My Pictures
My Pictures folder.
Tap to sort the files by
name, date, size, or type
Tap to access the
application options
Tap to start a slideshow
Tap to select another
folder or location
Tap and hold a file to
display a pop-up menu
Tap to display the pictures
saved in the My Pictures
folder
Tap to display the pictures
saved in the SD card
Chapter 7: Multimedia Features
7-47
Editing photos using PicturesEditing photos using Pictures
Editing photos using PicturesEditing photos using Pictures
Editing photos using Pictures
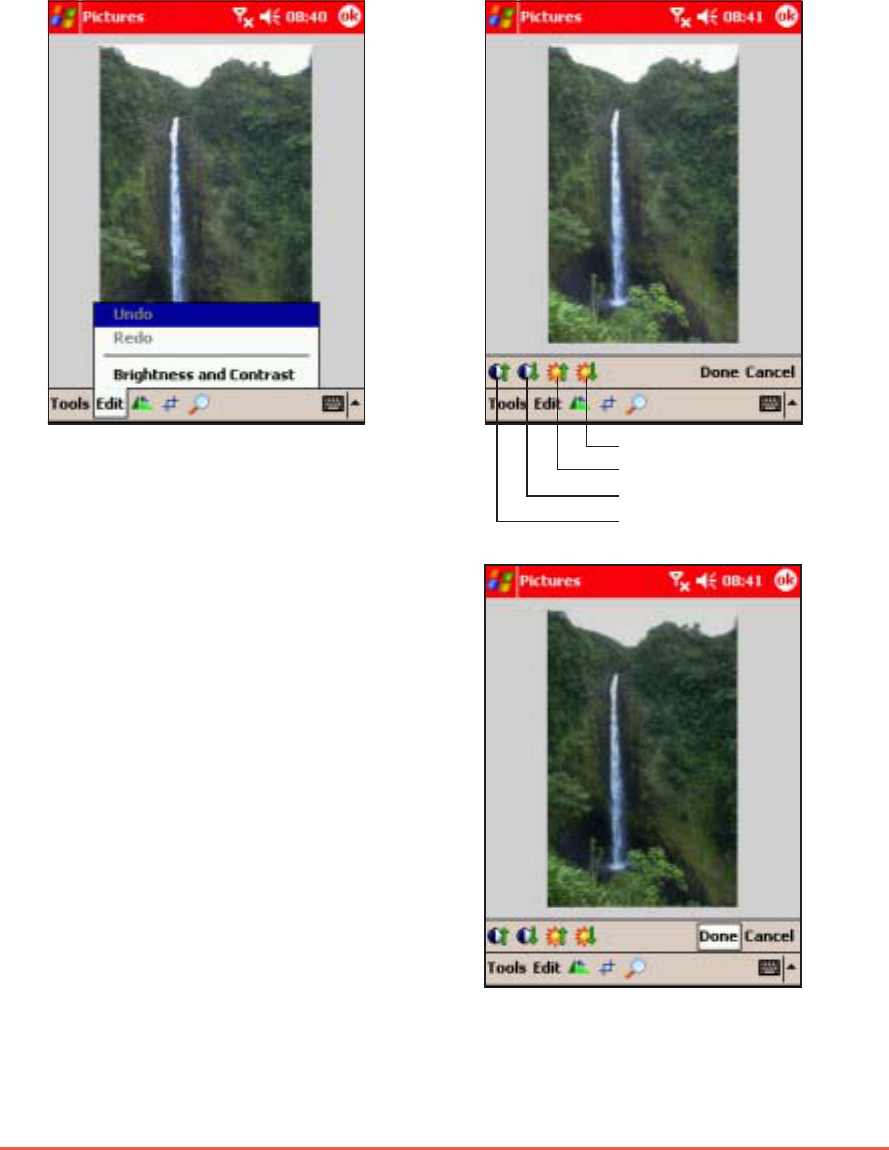
To adjust the photo brightness and contrast:To adjust the photo brightness and contrast:
To adjust the photo brightness and contrast:To adjust the photo brightness and contrast:
To adjust the photo brightness and contrast:
1. From the Pictures main
screen, tap a photo to display,
then tap EditEdit
EditEdit
Edit > BrightnessBrightness
BrightnessBrightness
Brightness
and Contrastand Contrast
and Contrastand Contrast
and Contrast.
2. Adjust the photo brightness
and contrast by tapping the
appropriate buttons.
3. Tap DoneDone
DoneDone
Don e to save your
changes.
Decrease brightness
Increase brightness
Decrease contrast
Increase contrast
7-48
P505 Pocket PC
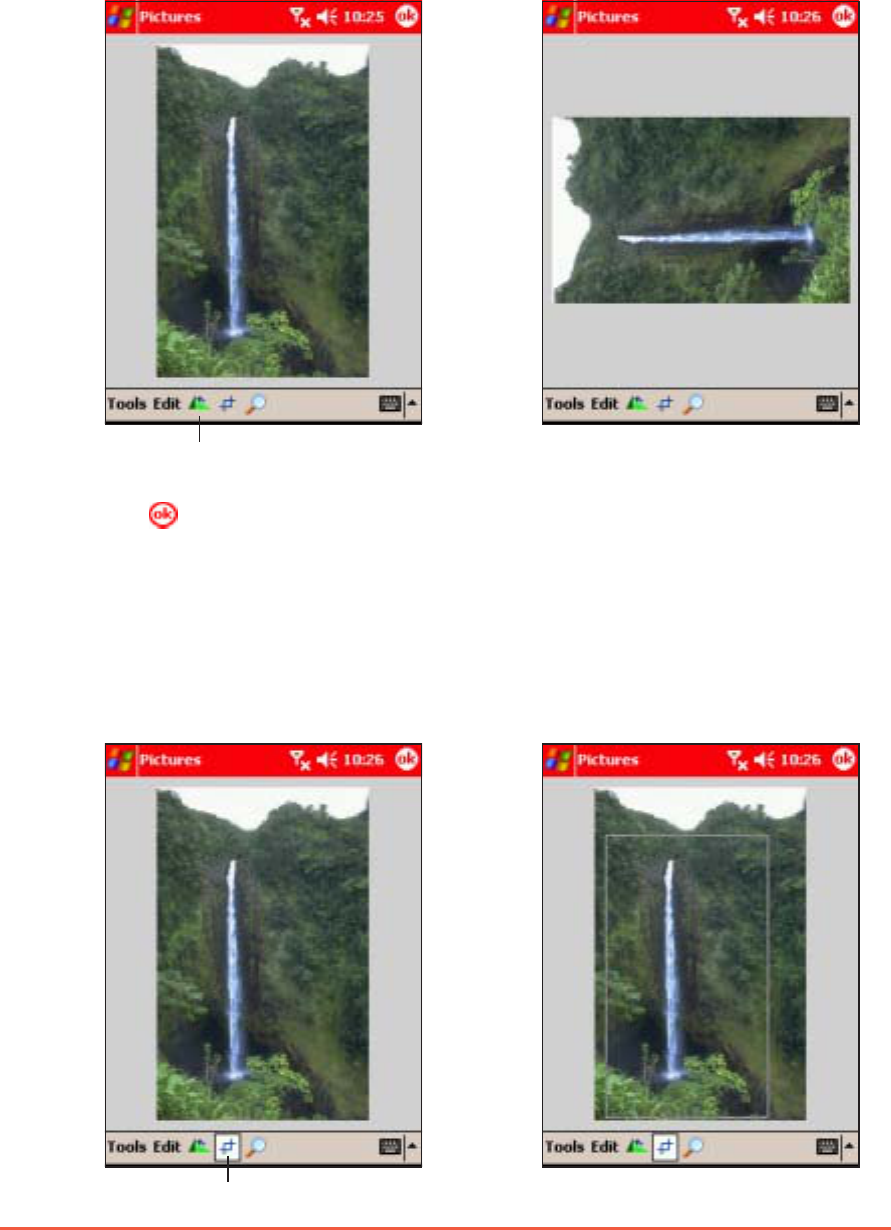
To rotate the photo:To rotate the photo:
To rotate the photo:To rotate the photo:
To rotate the photo:
1. From the Pictures main
screen, tap a photo to display.
2. Tap the rotate button to
rotate the photo 90º
counterclockwise.
3. Tap to save the changes.
Tap to rotate
To rotate the photo:To rotate the photo:
To rotate the photo:To rotate the photo:
To rotate the photo:
1. From the Pictures main
screen, tap a photo to display,
then tap the crop button.
2. Use the stylus to select the
photo area you want to retain
after cropping.
Crop button
Chapter 7: Multimedia Features
7-49
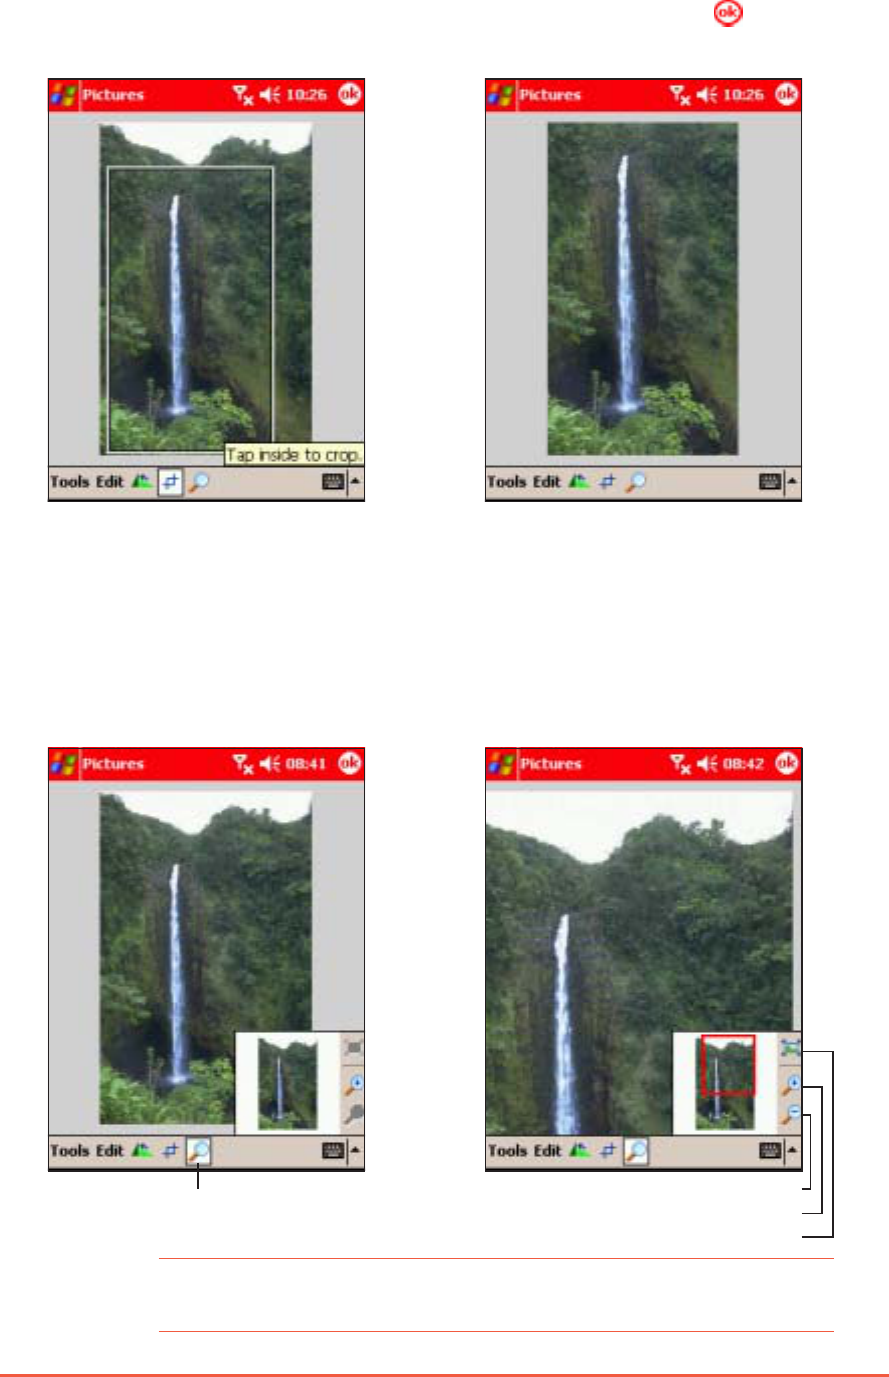
3. When prompted, tap inside
the crop to crop the photo.
4. The screen displays the
cropped photo. Tap to save
the changes.
To zoom in/out a photo:To zoom in/out a photo:
To zoom in/out a photo:To zoom in/out a photo:
To zoom in/out a photo:
1. From the Pictures main
screen, tap a photo to display,
then tap the zoom button.
2. From the zoom navigator
window, tap the zoom in or out
button to magnify the photo.
Tap to zoom in/out
NOTENOTE
NOTENOTE
N O T E Use the stylus to drag the red square inside the navigator
window to the area you want to zoom.
Zoom out
Zoom in
Fit in screen view
7-50
P505 Pocket PC
Starting a photo slide showStarting a photo slide show
Starting a photo slide showStarting a photo slide show
Starting a photo slide show
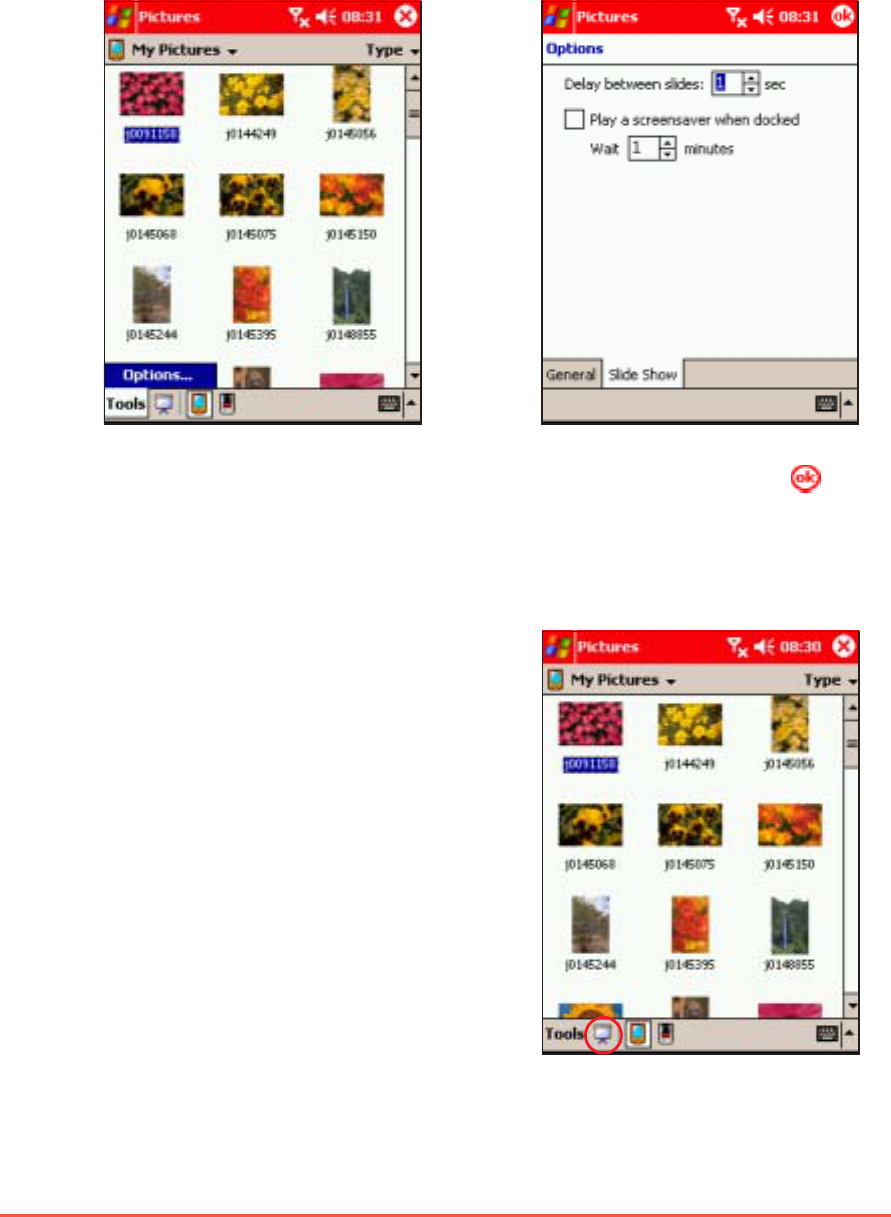
To adjust the slide show settings:To adjust the slide show settings:
To adjust the slide show settings:To adjust the slide show settings:
To adjust the slide show settings:
1. From the Pictures main screen,
tap Tools > OptionsTools > Options
Tools > OptionsTools > Options
Tools > Options.
2. Tap the Slide Show tab to
display the slide show settings.
3. Adjust the slide show settings from this window, then tap to
effect your changes.
To start a photo slide show:To start a photo slide show:
To start a photo slide show:To start a photo slide show:
To start a photo slide show:
1. From the Pictures main
screen, tap the slide show
button to begin the slide
show.
Chapter 7: Multimedia Features
7-51
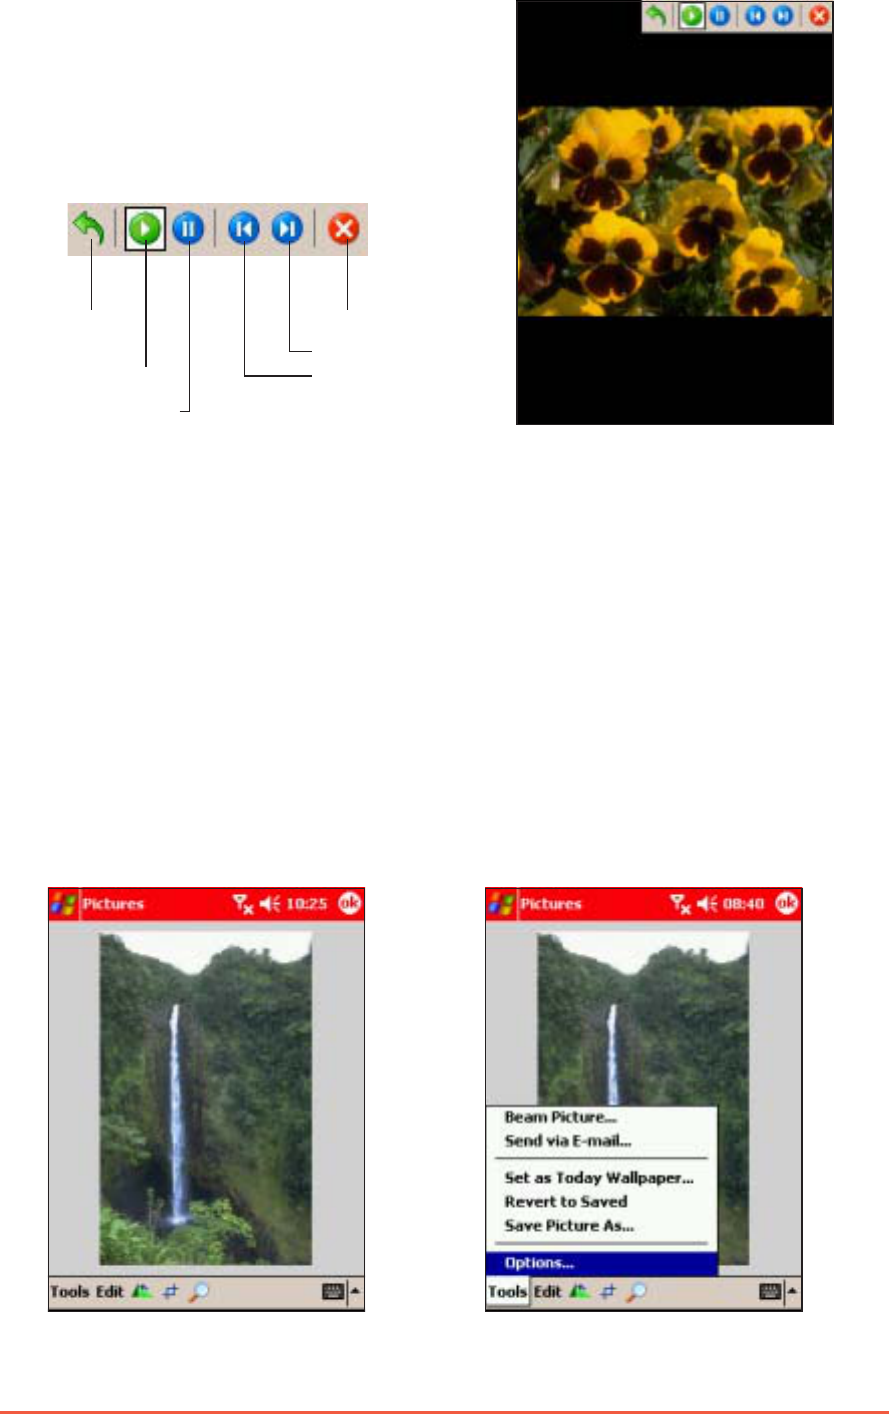
2. During the slide show, tap the
screen to display the slide
show control buttons. Refer
to the illustration below for
the button description.
Stop slideshow
Next photo
Previous photo
Play slideshow
Pause slide show
Change
orientation*
* Portrait or landscape
Using the Tools menuUsing the Tools menu
Using the Tools menuUsing the Tools menu
Using the Tools menu
The Tools menu allows you to share photos via e-mail or beam, set
the photo as wallpaper, or revert to the original photo.
To access the Tools menu:To access the Tools menu:
To access the Tools menu:To access the Tools menu:
To access the Tools menu:
1. From the Pictures main screen,
tap a photo to display, then
ToolsTools
ToolsTools
Tools.
2. Select from the available
options, then follow screen
instructions to continue.
7-52
P505 Pocket PC
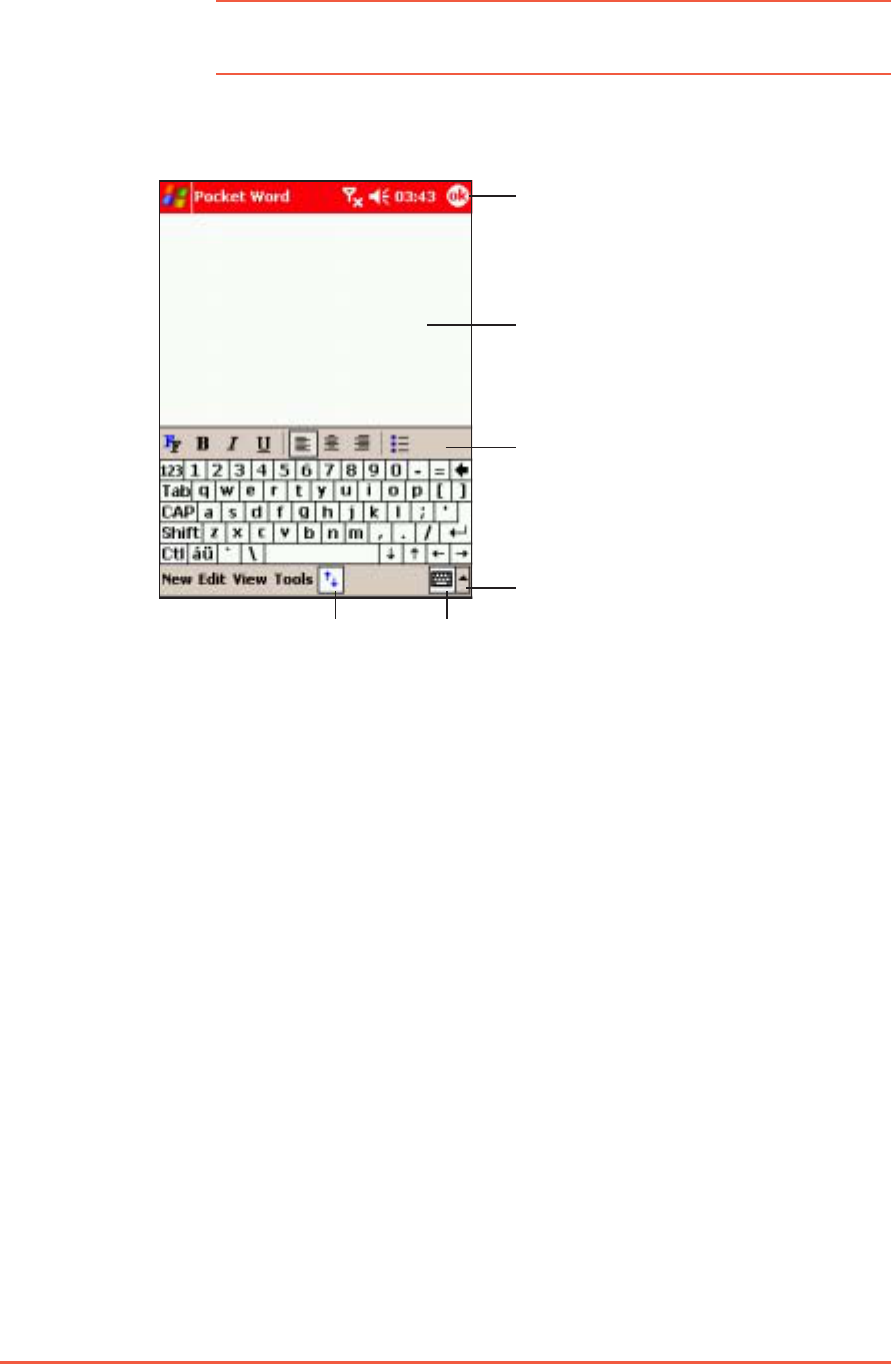
Auto-launching PicturesAuto-launching Pictures
Auto-launching PicturesAuto-launching Pictures
Auto-launching Pictures
You can auto-launch Pictures everytime you insert a digital camera SD
card to the Pocket PC SD card slot.
To auto-launch Pictures:To auto-launch Pictures:
To auto-launch Pictures:To auto-launch Pictures:
To auto-launch Pictures:
1. From the Pictures main screen,
tap ToolsTools
ToolsTools
Tools > Options > Options
> Options > Options
> Options.
2. Tap the GeneralGeneral
GeneralGeneral
General tab, then
check the option DetectDetect
DetectDetect
Detect
digital camera storagedigital camera storage
digital camera storagedigital camera storage
digital camera storage
cardscards
cardscards
cards.
3. Tap to save your settings.

Chapter 8
Using Companion Application
s
This chapter includes basic
information on how to use
Pocket Word, Pocket Excel,
MSN Messenger, and Windows
Media Player for Pocket PC.

8-2
P505 Pocket PC
Chapter summaryChapter summary
Chapter summaryChapter summary
Chapter summary
••
••
•Companion applicationsCompanion applications
Companion applicationsCompanion applications
Companion applications ................................................................
................................................................
................................ 8-38-3
8-38-3
8-3
••
••
•Pocket WordPocket Word
Pocket WordPocket Word
Pocket Word ..............................................................................................
..............................................................................................
............................................... 8-38-3
8-38-3
8-3
Creating Pocket Word documents .................................... 8-3
Modes of entering information ......................................... 8-4
Saving Pocket Word documents ...................................... 8-8
Opening an existing Pocket Word document .................. 8-10
••
••
•Pocket ExcelPocket Excel
Pocket ExcelPocket Excel
Pocket Excel ............................................................................................
............................................................................................
..............................................8-118-11
8-118-11
8-11
Creating Pocket Excel documents .................................. 8-11
Saving Pocket Excel documents ..................................... 8-12
Securing your Excel document ....................................... 8-14
Tips for working in Pocket Excel ..................................... 8-16
••
••
•MSN MessengerMSN Messenger
MSN MessengerMSN Messenger
MSN Messenger ....................................................................................
....................................................................................
..........................................8-178-17
8-178-17
8-17
Signing up ...................................................................... 8-18
Working with contacts ................................................... 8-19
Chatting with contacts .................................................. 8-20
••
••
•Windows Media Player for Pocket PCWindows Media Player for Pocket PC
Windows Media Player for Pocket PCWindows Media Player for Pocket PC
Windows Media Player for Pocket PC ..........................
..........................
.............8-218-21
8-218-21
8-21
Using the Windows
®
Media Player library ........................ 8-22
••
••
•Voice CommanderVoice Commander
Voice CommanderVoice Commander
Voice Commander ..............................................................................
..............................................................................
.......................................8-258-25
8-258-25
8-25
Changing the Voice Commander settings ...................... 8-25
Creating voice tags ........................................................ 8-26
Digit training .................................................................. 8-28
Adjusting the advanced settings ................................... 8-30
Using the Voice Commander .......................................... 8-31

Chapter 8: Using Companion Applications
8-3
Companion applicationsCompanion applications
Companion applicationsCompanion applications
Companion applications
The companion applications consist of Microsoft
®
Pocket Word,
Microsoft
®
Pocket Excel, MSN Messenger, Windows Media™ Player for
Pocket PC, Microsoft
®
Internet Explorer, and Voice Commander.
To switch to a companion program on your device, tap , then select
ProgramsPrograms
ProgramsPrograms
Programs. Tap the icon of the program that you want to open.
Pocket WordPocket Word
Pocket WordPocket Word
Pocket Word
Pocket Word works with Microsoft
®
Word on your desktop computer
to give you easy access to copies of your documents. You can create
new documents on your device, or you can copy documents from
your desktop computer to your device. Synchronise documents
between your desktop computer and your device so that you have
the most up-to-date content in both locations.
Use Pocket Word to create documents, such as letters, meeting
minutes, or trip reports.
Creating Pocket Word documentsCreating Pocket Word documents
Creating Pocket Word documentsCreating Pocket Word documents
Creating Pocket Word documents
To create a new Word document:To create a new Word document:
To create a new Word document:To create a new Word document:
To create a new Word document:
1. Tap , tap ProgramsPrograms
ProgramsPrograms
Programs, tap
Pocket WordPocket Word
Pocket WordPocket Word
Pocket Word to launch the
application.
If you have existing Microsoft
®
Word or Pocket Word
documents in your device, a
list of the documents appears.
8-4
P505 Pocket PC
2. Tap NewNew
NewNew
Ne w to display a blank document.
NOTENOTE
NOTENOTE
N O T E Tap on ToolsTools
ToolsTools
Tools, then OptionsOptions
OptionsOptions
O p t i o n s to change the format of blank
documents.
3. Use any of the input modes to enter your text. Refer to the
section “Modes of entering information” for details.
Type your text here
Tap to select an input method
Tap to show or hide
the input panel
Tap to show or hide
the formatting toolbar
Tap to save and close your document
Formatting toolbar
Modes of entering informationModes of entering information
Modes of entering informationModes of entering information
Modes of entering information
You can enter information in Pocket Word in one of four modes
(typing, writing, drawing, or recording), which are displayed on the
ViewView
ViewView
Vi ew menu. Each mode has its own toolbar that you can show or
hide by tapping the Show/Hide ToolbarShow/Hide Toolbar
Show/Hide ToolbarShow/Hide Toolbar
Show/Hide Toolbar button on the command
bar.
If you are opening a Word document created on a desktop computer,
select Wrap to WindowWrap to Window
Wrap to WindowWrap to Window
Wrap to Window on the ViewView
ViewView
Vi ew menu so that you can see
the entire document.
To change the zoom magnification:To change the zoom magnification:
To change the zoom magnification:To change the zoom magnification:
To change the zoom magnification:
1. Tap ViewView
ViewView
Vi e w, then tap ZoomZoom
ZoomZoom
Zoom.
2. Select your desired percentage.
Select a higher percentage to enter text and lower one to see
more of your document.
Chapter 8: Using Companion Applications
8-5
Typing ModeTyping Mode
Typing ModeTyping Mode
Typing Mode
Using the input panel, enter typed text into the document. For more
information on entering typed text, see Chapter 2.
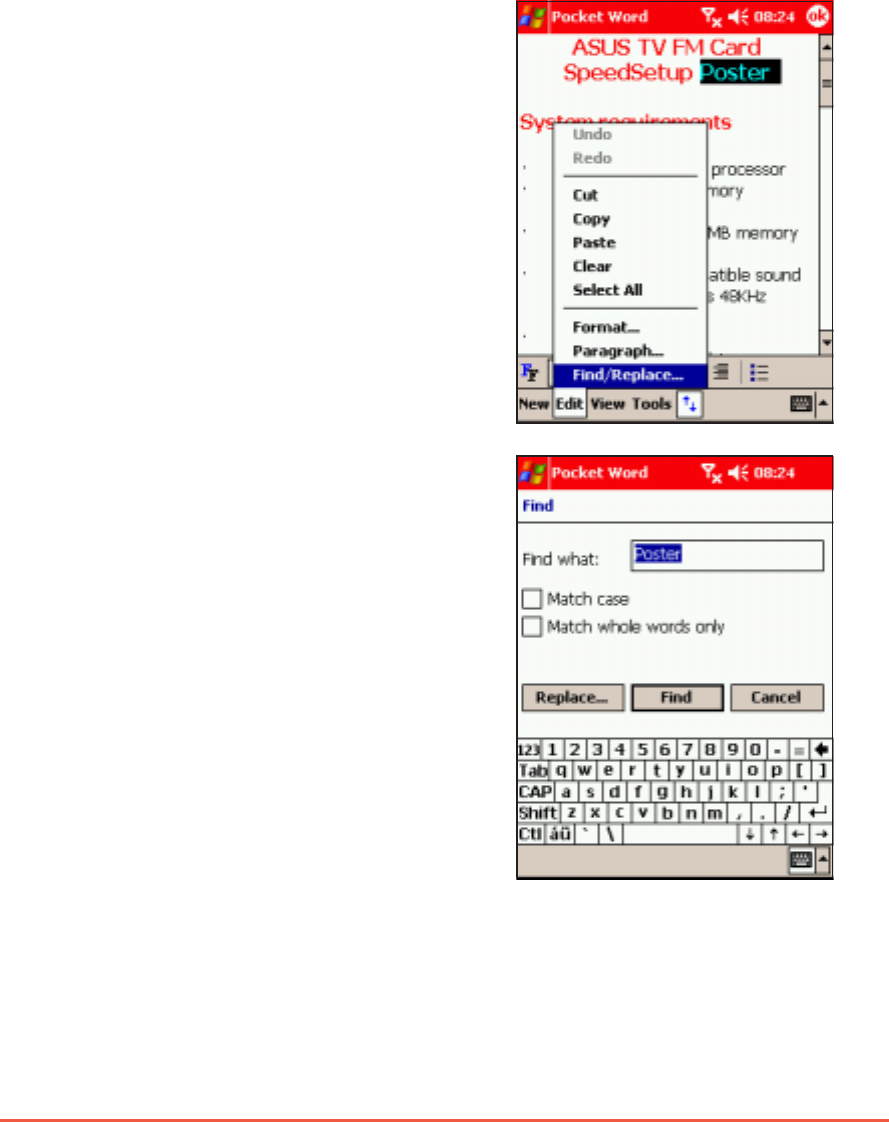
To find and replace text:To find and replace text:
To find and replace text:To find and replace text:
To find and replace text:
1. Highlight the text you wish to change by dragging the stylus
across the text.
2. Press the Back bar to remove
the text and enter new text.
OROR
OROR
OR
Tap EditEdit
EditEdit
Edit > Find/Replace.Find/Replace.
Find/Replace.Find/Replace.
Find/Replace.
3. Tap ReplaceReplace
ReplaceReplace
Replace or FindFind
FindFind
Find, then
follow screen instructions to
continue.
8-6
P505 Pocket PC
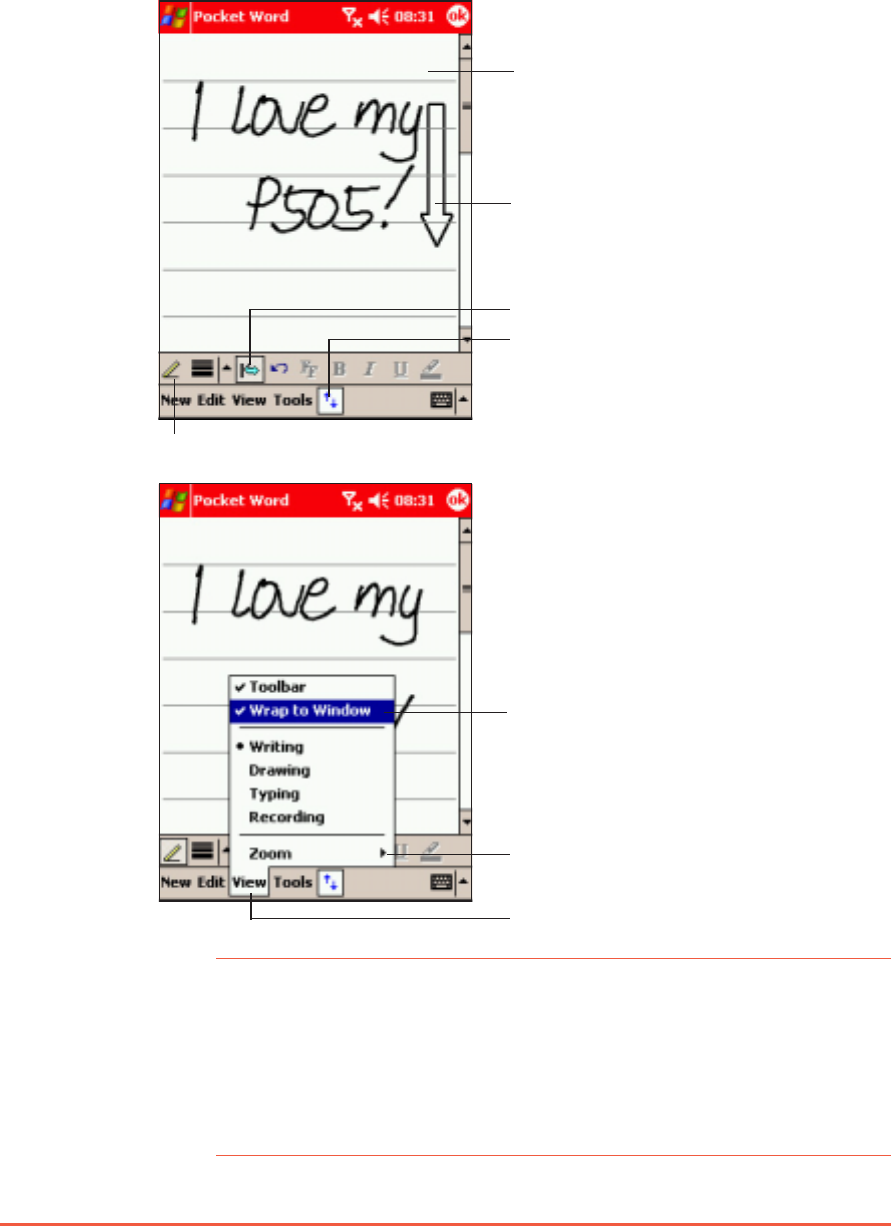
Writing modeWriting mode
Writing modeWriting mode
Writing mode
In writing mode, use your stylus to write directly on the screen. Ruled
lines are displayed as a guide, and the zoom magnification is greater
than in typing mode to allow you to write more easily. For more
information on writing and selecting writing, see Chapter 2.
NOTENOTE
NOTENOTE
N O T E • If you cross three ruled lines in a single stylus stroke, the
writing becomes a drawing, and can be edited and
manipulated as described in the next section.
• Written words are converted to graphics (metafiles) when
a Pocket Word document is converted to a Word
document on your desktop computer.
Write your text here
Click on the Space button, then tap on the
screen at the point at which you want to
insert space, dragging the arrow that
appears to move to the text to a new line.
Pen button
Tap to show or hide the
writing/formatting toolbar
Tap to display the menu
Tap to display zoom percentages
Tap to wrap text to screen
Space button
Chapter 8: Using Companion Applications
8-7
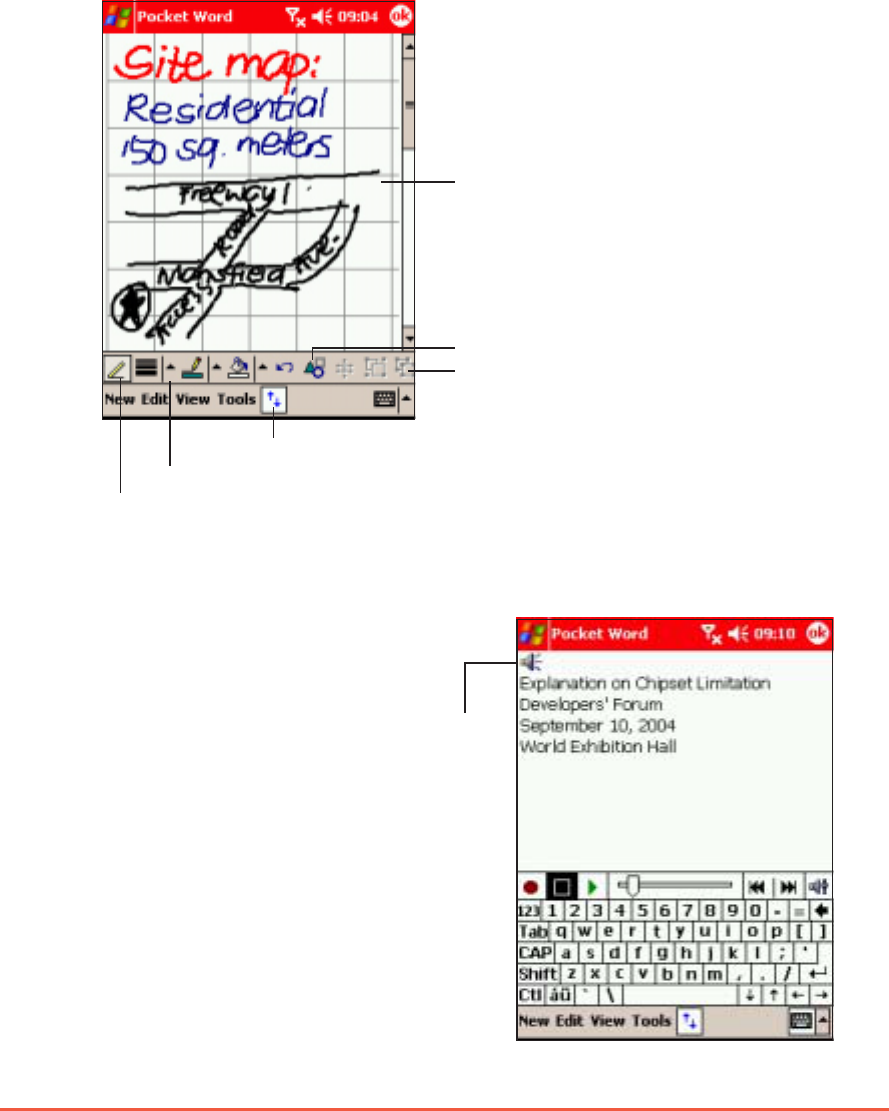
Drawing modeDrawing mode
Drawing modeDrawing mode
Drawing mode
In drawing mode, use your stylus to draw on the screen. Gridlines
appear as a guide. When you lift your stylus off the screen after the
first stroke, you will see a drawing box indicating the boundaries of
the drawing.
Every subsequent stroke within or touching the drawing bounding box
becomes part of the drawing. For more information on drawing and
selecting drawings, see Chapter 2.
Resize an object by
dragging the selection
handles
Tap an arrow to display the options
Pen button
Drawing toolbar
Tap to show or hide the drawing toolbar
Tap to select the formatting options
Recording modeRecording mode
Recording modeRecording mode
Recording mode
In recording mode, you can embed
a recording into your document.
Recordings are saved as .wav.wav
.wav.wav
.wav
files. For more information on
recording, see Chapter 2.
Embedded
recording
8-8
P505 Pocket PC
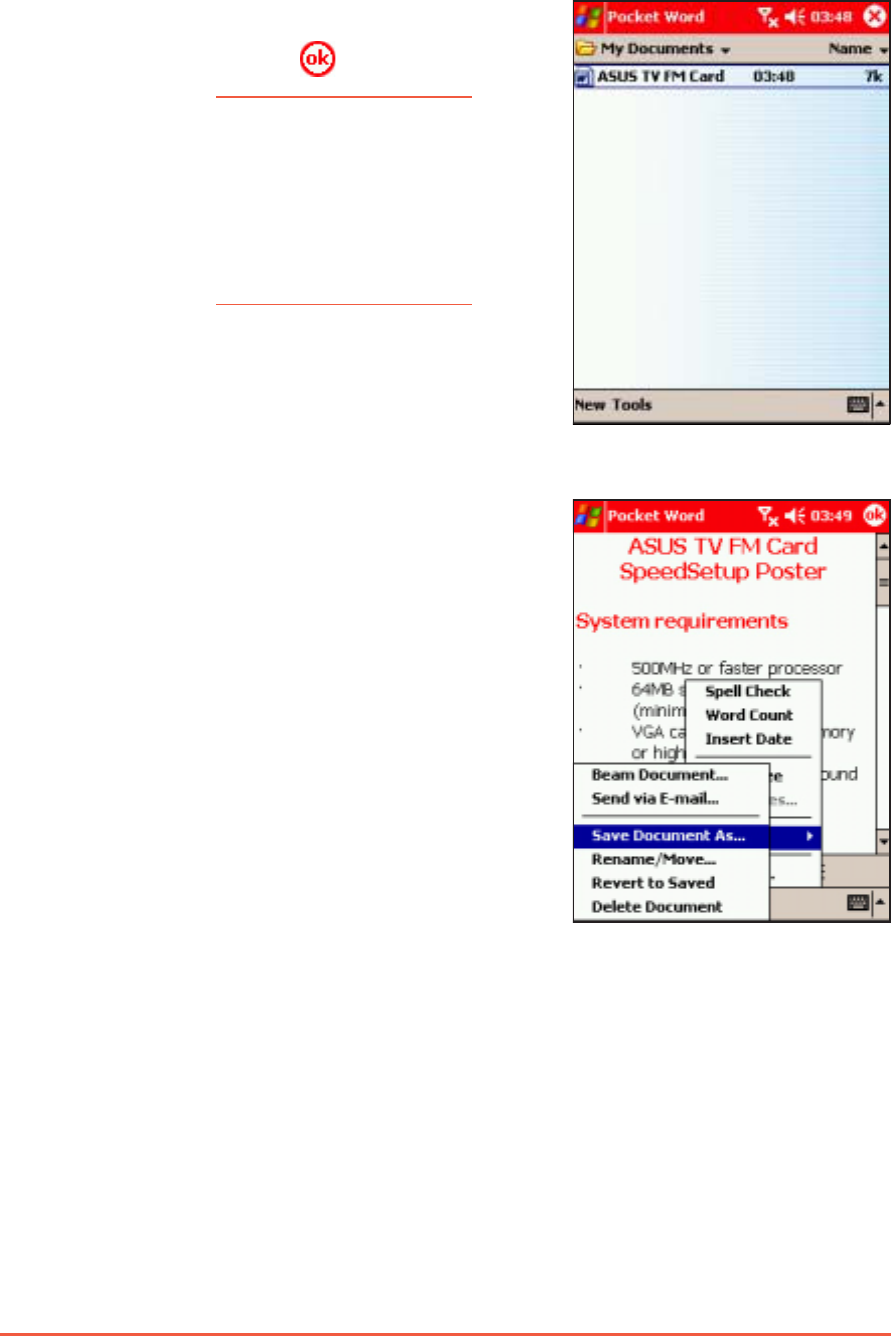
Saving Pocket Word documentsSaving Pocket Word documents
Saving Pocket Word documentsSaving Pocket Word documents
Saving Pocket Word documents
To save a Pocket Word document:To save a Pocket Word document:
To save a Pocket Word document:To save a Pocket Word document:
To save a Pocket Word document:
When you have finished editing
your document, tap .
NOTENOTE
NOTENOTE
N O T E If you do not specify a
file name for the
document using the
steps below, then the
first line of the
document is used as
the file name.
To name a file:To name a file:
To name a file:To name a file:
To name a file:
1. With the document open, tap
ToolsTools
ToolsTools
Tools.
2. From the pop-up menu, tap
FileFile
FileFile
F il e, then tap SaveSave
SaveSave
Save
Document As...Document As...
Document As...Document As...
Document As... option. The
Save As Save As
Save As Save As
Save As window appears.
Chapter 8: Using Companion Applications
8-9
To change a file name:To change a file name:
To change a file name:To change a file name:
To change a file name:
1. Hold the stylus down on the name of the file in the document list,
then select Rename/Move from the pop-up menu.
2. Enter the new name of the file, then tap .
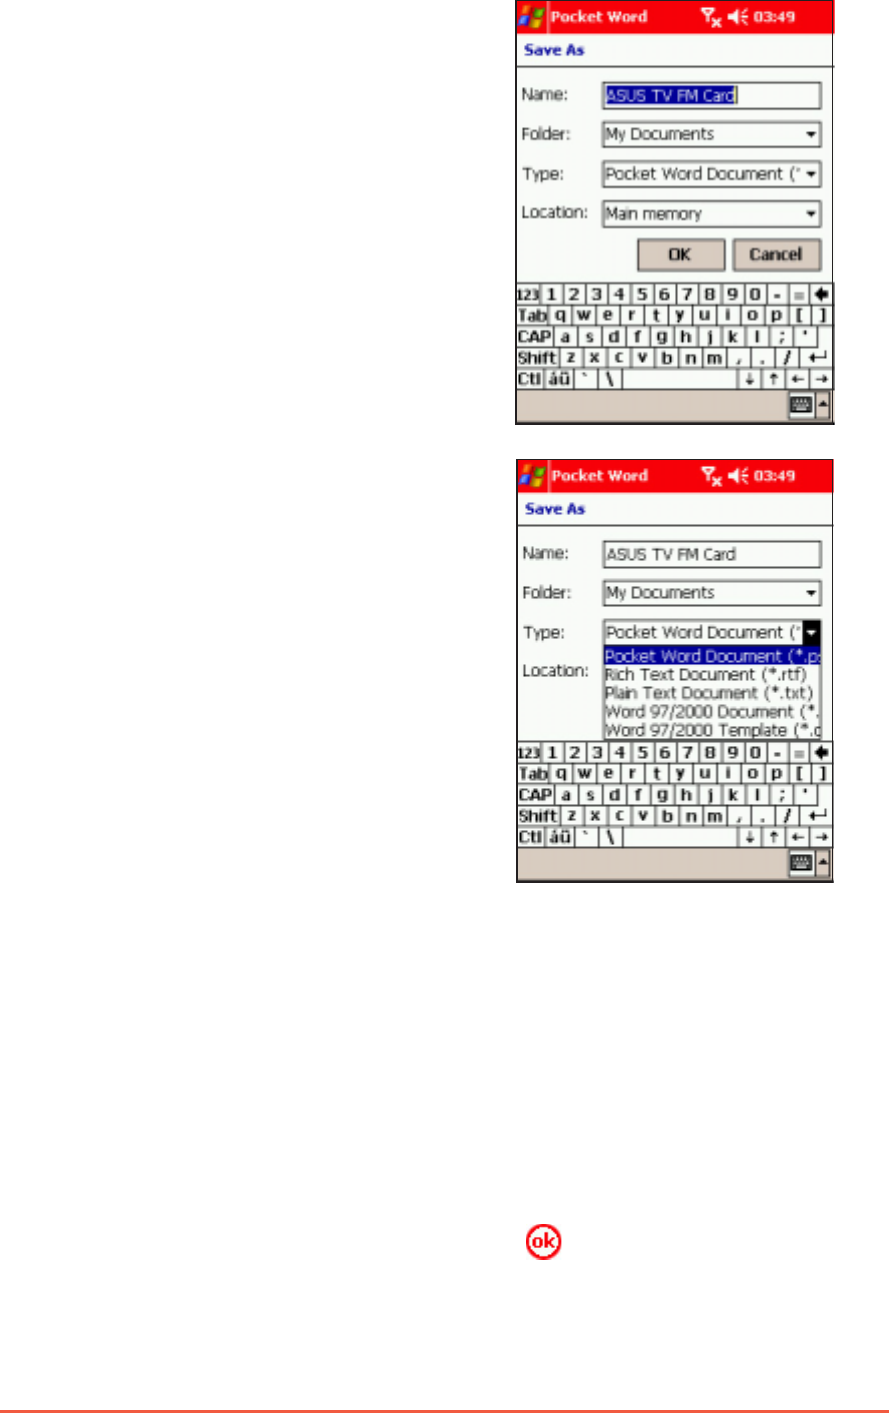
5. Tap the down arrow in the TypeType
TypeType
Type
field to select a file format.
You can save the document you
create or edit in a variety of file
formats including:
• Pocket Word Document (.psw)
• Rich Text Format (.rtf)
• Plain Text (.txt)
• Word 97/2000 Template
• Word 97/2000 Document
6. Tap the down arrow in the
LocationLocation
LocationLocation
Location field to indicate the
location of your saved file, either in the main memory of your
device, or in a storage card, if available.
7. Tap OKOK
OKOK
OK when done.
3. Change the file name by typing
a new one in the NameName
NameName
Nam e field.
4. Tap the down arrow in the
FolderFolder
FolderFolder
Folder field to select a folder
where you want to save the file.
8-10
P505 Pocket PC
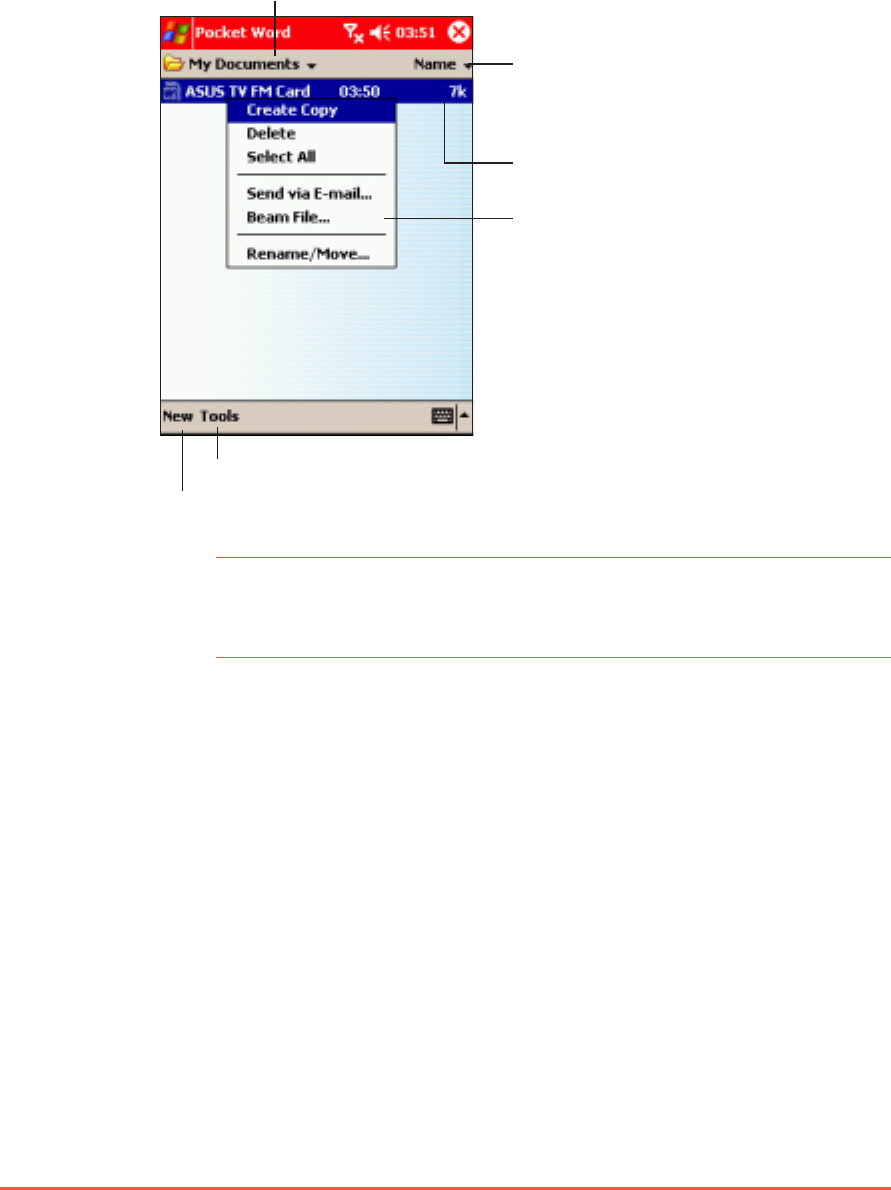
Opening an existing Pocket Word documentOpening an existing Pocket Word document
Opening an existing Pocket Word documentOpening an existing Pocket Word document
Opening an existing Pocket Word document
Pocket Word contains a list of the files stored on your device. Tap a
file in the list to open. To delete, make copies of, and send files, tap
and hold a file in the list, then select the appropriate action on the
pop-up menu.
NOTENOTE
NOTENOTE
N O T E You can open only one Pocket Word document at a time;
when you open a second document, you will be asked to save
the first.
Tap to select the folder you want to display
Tap to change the
sort order of the list
Tap to open a document; tap and
hold to display a pop-up menu
Tap to create a new document
Tap to change document settings
Tap an option from
the pop-up menu
Chapter 8: Using Companion Applications
8-11
Pocket ExcelPocket Excel
Pocket ExcelPocket Excel
Pocket Excel
Use Pocket Excel to create spreadsheets such as expense reports and
mileage logs. You can transfer spreadsheets between your device and
desktop computer and vice versa. You can also synchronise
spreadsheets between your desktop computer and your device so
that you have the most up-to-date contents in both locations.
Pocket Excel contains a list of the files stored on your device. Tap a
file in the list to open. To delete, make copies of, and send files, tap
and hold a file in the list, then select the appropriate action on the
pop-up menu.
Pocket Excel provides basic spreadsheet tools such as formulas,
functions, sorting, and filtering. To display the toolbar, tap ViewView
ViewView
View,
then tap ToolbarToolbar
ToolbarToolbar
Toolbar.
NOTENOTE
NOTENOTE
N O T E Some Excel spreadsheets may be too complex for viewing and
editing in Pocket Excel.
NOTENOTE
NOTENOTE
N O T E You can open only one Pocket Excel document at a time;
when you open a second document, you will be asked to save
the first.
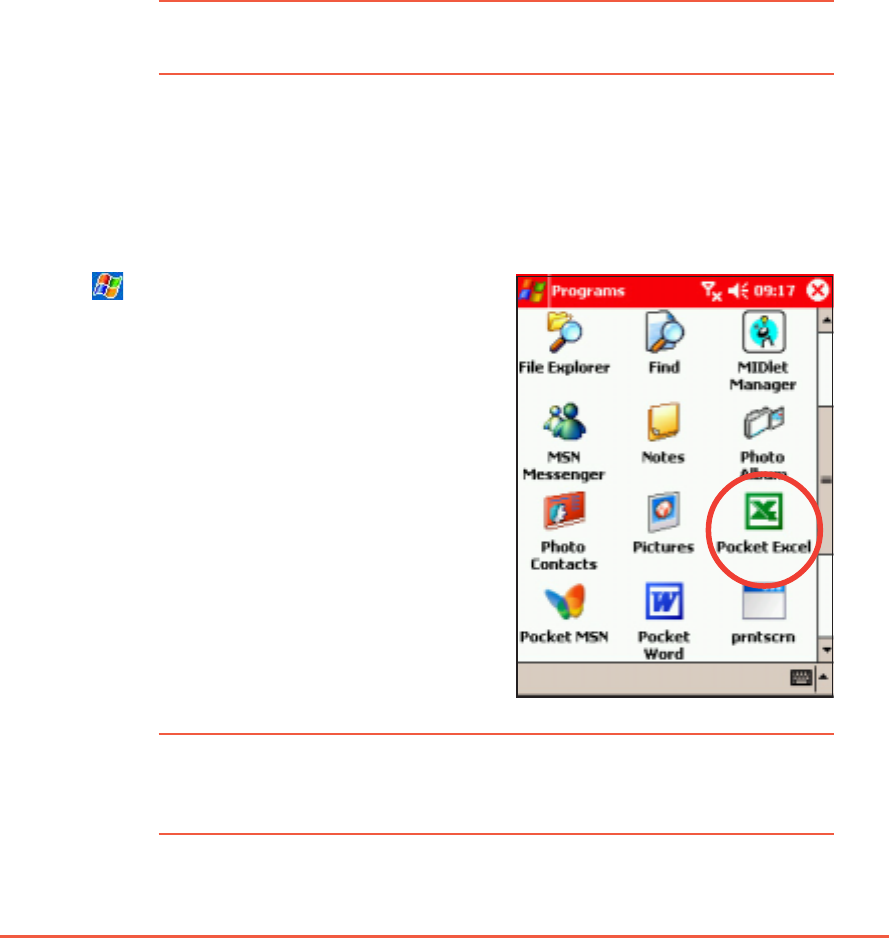
Creating Pocket Excel documentsCreating Pocket Excel documents
Creating Pocket Excel documentsCreating Pocket Excel documents
Creating Pocket Excel documents
To create a new Excel document:To create a new Excel document:
To create a new Excel document:To create a new Excel document:
To create a new Excel document:
1. Tap , tap ProgramsPrograms
ProgramsPrograms
Programs, tap
Pocket ExcelPocket Excel
Pocket ExcelPocket Excel
Pocket Excel.
8-12
P505 Pocket PC
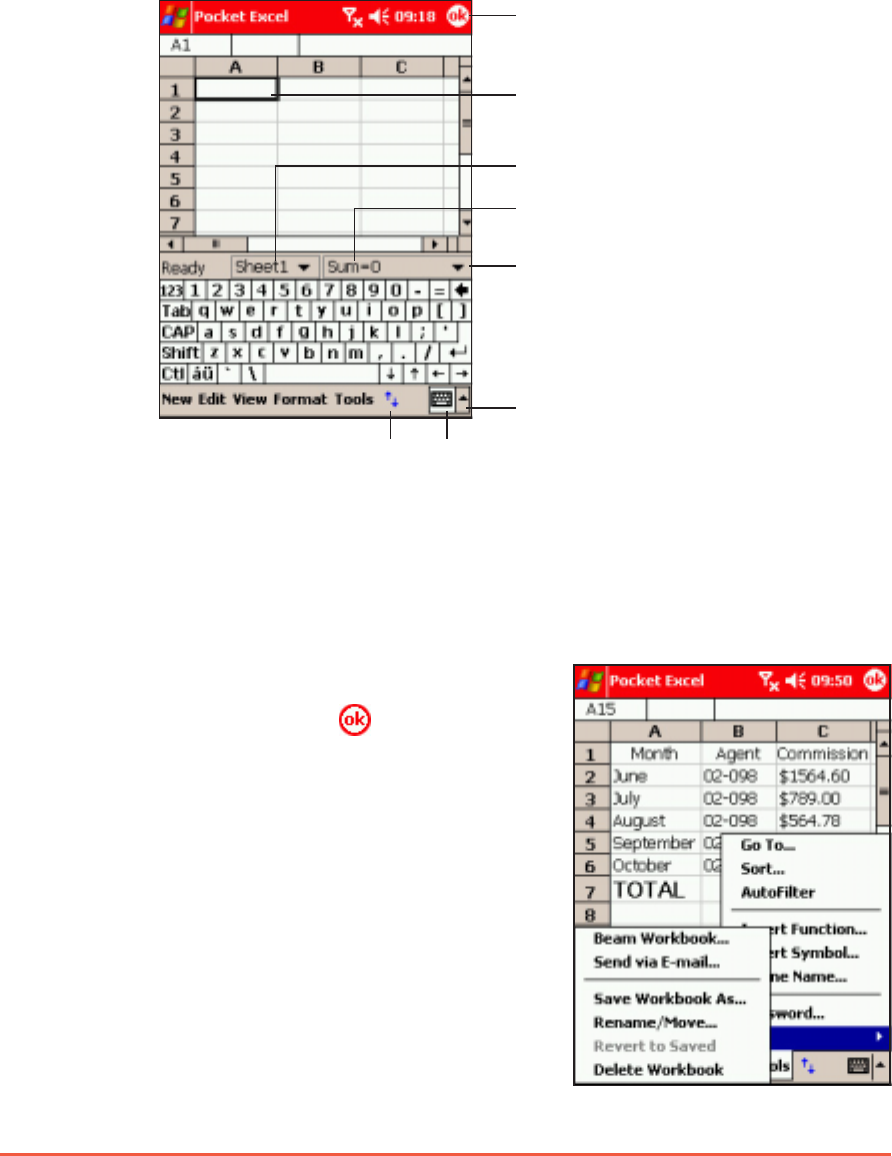
Saving Pocket Excel documentsSaving Pocket Excel documents
Saving Pocket Excel documentsSaving Pocket Excel documents
Saving Pocket Excel documents
To save an Excel document:To save an Excel document:
To save an Excel document:To save an Excel document:
To save an Excel document:
1. When you have finished editing
your document, tap .
2. Tap NewNew
NewNew
Ne w to display a blank document.
If you selected a template for new documents in the OptionsOptions
OptionsOptions
Options
dialog box, that template appears with the appropriate text and
formatting already provided.
3. A blank worksheet appears. Enter texts, numbers, and formulas
using the soft keyboard and the application buttons.
Cell contents appear here as you type,
or when you select the cell
Tap to select an input method
Tap to show or hide
the input panel
Tap to save and close your document
Formatting toolbar
Tap to auto-sum selected cells
Tap to navigate worksheets
Tap to show or hide
the formatting toolbar
Chapter 8: Using Companion Applications
8-13
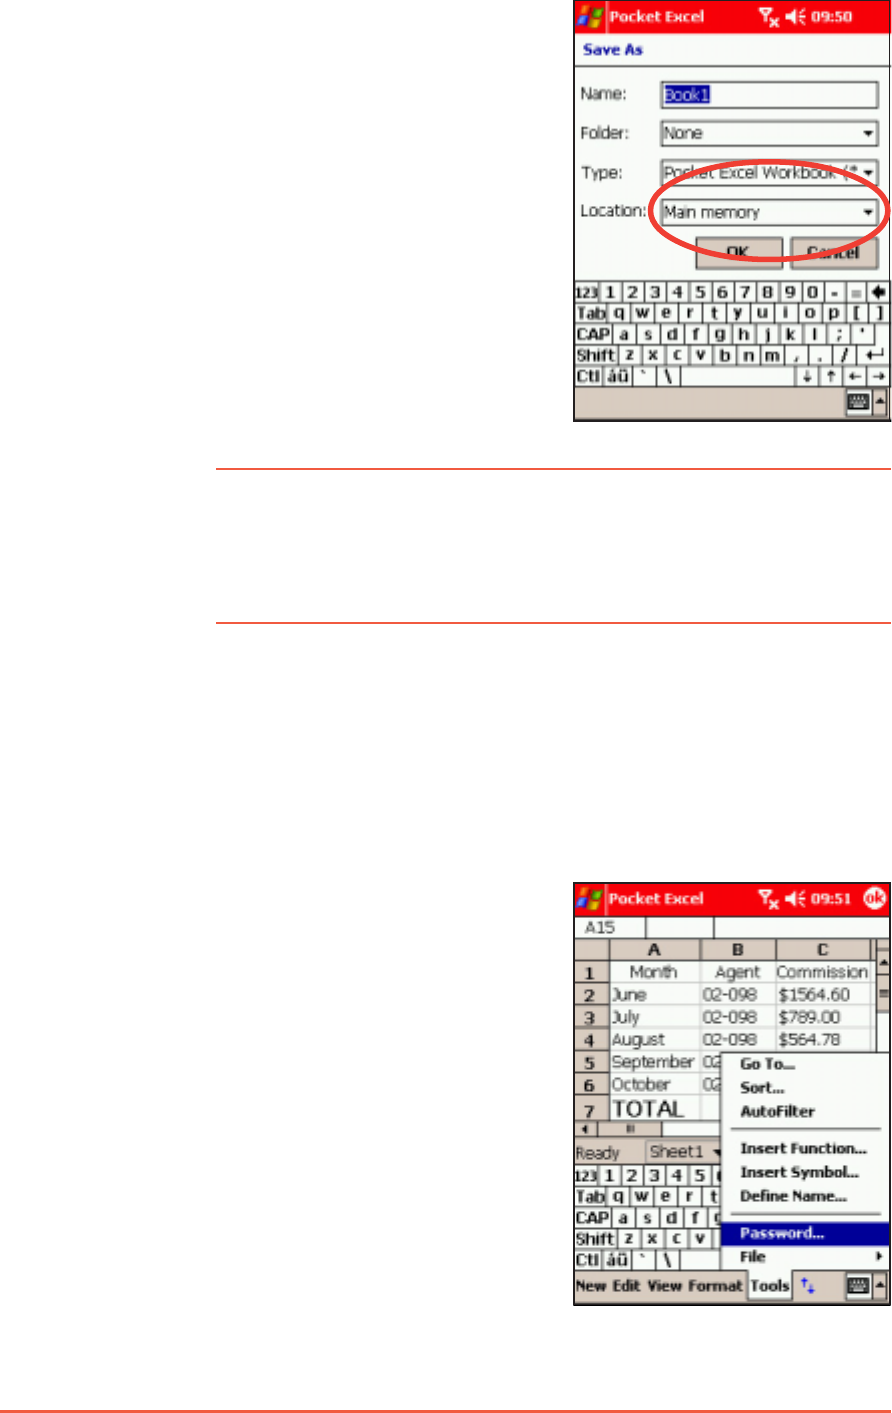
To specify save options:To specify save options:
To specify save options:To specify save options:
To specify save options:
1. With the document open, tap
ToolsTools
ToolsTools
Tools.
2. From the pop-up menu, tap
FileFile
FileFile
F il e, then tap SaveSave
SaveSave
Save
Workbook As...Workbook As...
Workbook As...Workbook As...
Workbook As... to display
the Save AsSave As
Save AsSave As
Save As screen.
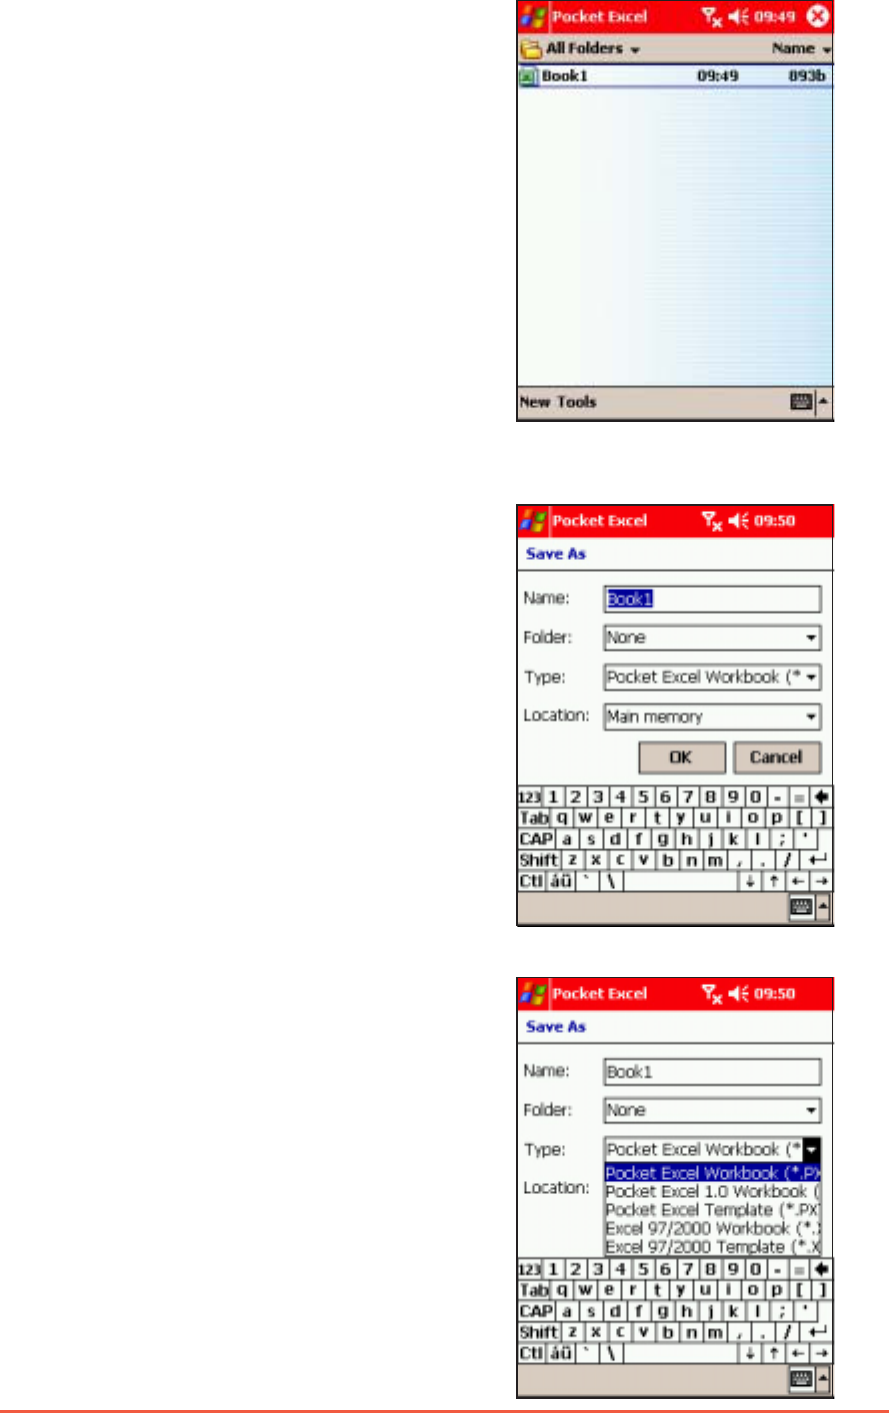
3. Change the file name by simply
typing a new one in the NameName
NameName
Name
field.
4. Tap the down arrow in the
FolderFolder
FolderFolder
Folder field to select a folder
where you wish to place the
file.
5. Tap the down arrow in the TypeType
TypeType
Type
field to select a file format.
You can save the document you
create or edit in a variety of
formats:
• Pocket Excel Workbook (.pxl)
• Pocket Excel 1.0 Workbook (.xls)
• Pocket Excel Template
• Excel 97/2000 Workbook
• Excel 97/2000 Template
2. By default, your spreadsheet
will be saved with the file name
Book1Book1
Book1Book1
Bo ok 1. You can change the
file name to one that is more
descriptive of your document.
See next section for saving
options.
8-14
P505 Pocket PC
6. Tap the down arrow in the
LocationLocation
LocationLocation
Location field to indicate the
location of your saved file,
either in the main memory of
your device, or in a storage
card, if available.
7. Tap OKOK
OKOK
OK when done.
NOTENOTE
NOTENOTE
N O T E If you do not wish to save your workbook to a different
format, but would like to change the file name, folder, and
location of your document, simply tap and hold the file from
the File Explorer window, then tap Rename/Move...Rename/Move...
Rename/Move...Rename/Move...
Rename/Move... from
the pop-up menu to make your changes.
Securing your Excel documentSecuring your Excel document
Securing your Excel documentSecuring your Excel document
Securing your Excel document
If your workbook contains sensitive or confidental information, you
can protect it with a password.
To set a password for your workbook:To set a password for your workbook:
To set a password for your workbook:To set a password for your workbook:
To set a password for your workbook:
1. Open the workbook.
2. Tap EditEdit
EditEdit
Ed it from the command
bar, then tap Password...Password...
Password...Password...
Password... to
display the password setting
screen.
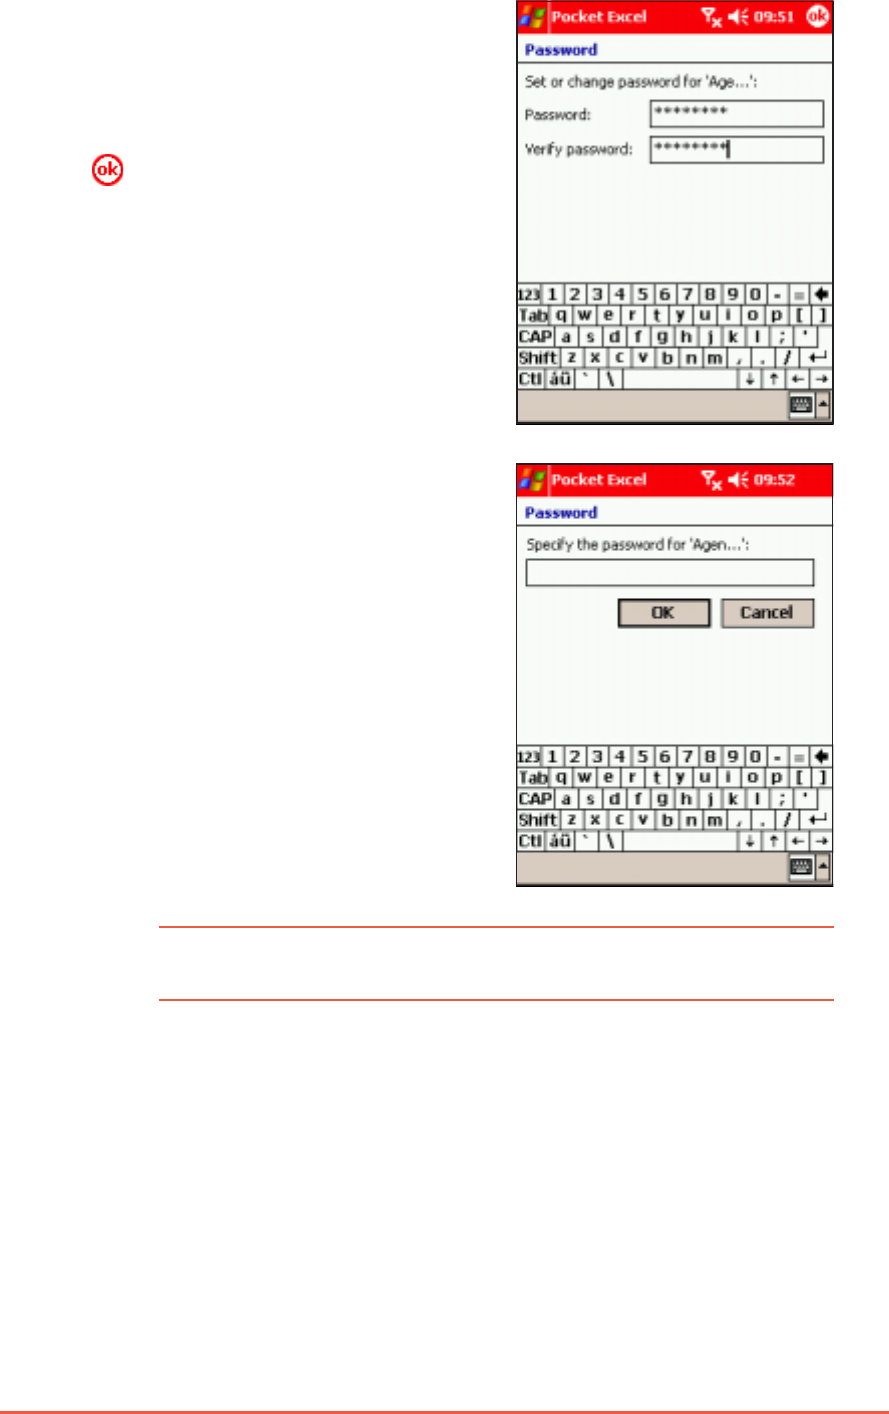
Chapter 8: Using Companion Applications
8-15
3. Type a password in the
PasswordPassword
PasswordPassword
Password field.
4. Re-type the password in the
Verify PasswordVerify Password
Verify PasswordVerify Password
Verify Password field.
5. Tap when done.
If you have set a password for your
workbook, a password screen appears
asking you to type your password
whenever you try to open the
workbook.
Type your password, then tap OKOK
OKOK
O K. If
you type in a wrong password, a
message appears telling you so.
NOTENOTE
NOTENOTE
N O T E DO NOT forget your password! You cannot open your
workbook unless you type in the correct password.

8-16
P505 Pocket PC
Tips for working in Pocket ExcelTips for working in Pocket Excel
Tips for working in Pocket ExcelTips for working in Pocket Excel
Tips for working in Pocket Excel
Take note of the following when working in large worksheets in
Pocket Excel:
•View in full-screen modeView in full-screen mode
View in full-screen modeView in full-screen mode
View in full-screen mode to see as much of your worksheet
as possible. Tap ViewView
ViewView
Vi e w, then tap Full ScreenFull Screen
Full ScreenFull Screen
Full Screen. To exit full-screen
mode, tap RestoreRestore
RestoreRestore
Restore.
•Show and hide window elements.Show and hide window elements.
Show and hide window elements.Show and hide window elements.
Show and hide window elements. Tap ViewView
ViewView
Vi e w, then tap the
elements to show or hide.
•Freeze panes on a worksheet.Freeze panes on a worksheet.
Freeze panes on a worksheet.Freeze panes on a worksheet.
Freeze panes on a worksheet. First select the cell where you
want to freeze panes. Tap ViewView
ViewView
Vi e w, then tap Freeze PanesFreeze Panes
Freeze PanesFreeze Panes
Freeze Panes. You
might want to freeze the top and leftmost panes in a worksheet
to keep row and column labels visible as you scroll through a
sheet.
•Split panes Split panes
Split panes Split panes
Split panes to view different areas of a large worksheet. Tap
ViewView
ViewView
Vi e w, then tap SplitSplit
SplitSplit
Sp lit. Drag the split bar to where you want it. To
remove the split, tap ViewView
ViewView
Vi e w, then tap Remove SplitRemove Split
Remove SplitRemove Split
Remove Split.
•Show and hide rows and columns.Show and hide rows and columns.
Show and hide rows and columns.Show and hide rows and columns.
Show and hide rows and columns. To hide a row or column,
select a cell in the row or column that you want to hide. Tap
FormatFormat
FormatFormat
Format, then tap RowRow
RowRow
Row or ColumnColumn
ColumnColumn
Colu mn, and tap HideHide
HideHide
Hide. To show a
hidden row or column, tap ToolsTools
ToolsTools
To ols, then tap Go ToGo To
Go ToGo To
Go T o, and type a
reference that is in the hidden row or column. Tap FormatFormat
FormatFormat
Format, then
tap RowRow
RowRow
Row or ColumnColumn
ColumnColumn
Colu mn, and tap UnhideUnhide
UnhideUnhide
Unhide.
For more information on using Pocket Excel, tap , then tap HelpHelp
HelpHelp
Help.
Chapter 8: Using Companion Applications
8-17
MSN MessengerMSN Messenger
MSN MessengerMSN Messenger
MSN Messenger
MSN Messenger on your device is an instant messaging program that
allows you to:
• See online friends and colleagues
• Send and receive instant messages
• Have instant message conversations with groups of contacts
To use MSN Messenger:To use MSN Messenger:
To use MSN Messenger:To use MSN Messenger:
To use MSN Messenger:
You must have a Microsoft Passport™ accountMicrosoft Passport™ account
Microsoft Passport™ accountMicrosoft Passport™ account
Microsoft Passport™ account or a MicrosoftMicrosoft
MicrosoftMicrosoft
Microsoft
Exchange e-mail accountExchange e-mail account
Exchange e-mail accountExchange e-mail account
Exchange e-mail account.
You must have a Passport to use the MSN Messenger Service. If you
have a Hotmail
®
or MSN account, you already have a passport. Once
you have obtained either a Microsoft Passport or Microsoft Exchange
account, you are ready to set up your account.
Sign up for a Microsoft Passport account at
http://www.passport.comhttp://www.passport.com
http://www.passport.comhttp://www.passport.com
http://www.passport.com.
Get a free Microsoft Hotmail e-mail address at
http://www.hotmail.comhttp://www.hotmail.com
http://www.hotmail.comhttp://www.hotmail.com
http://www.hotmail.com.
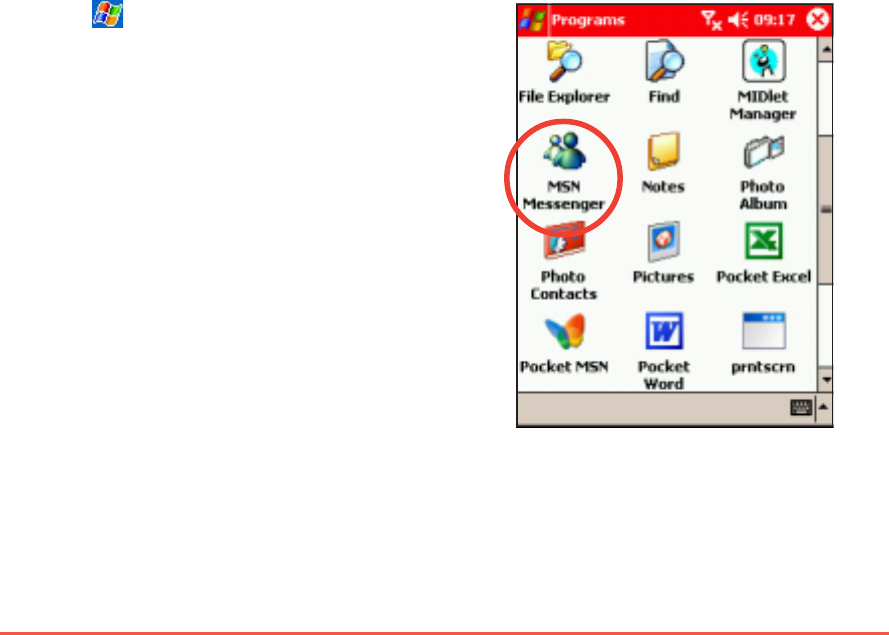
To launch MSN Messenger:To launch MSN Messenger:
To launch MSN Messenger:To launch MSN Messenger:
To launch MSN Messenger:
1. Tap , then tap ProgramsPrograms
ProgramsPrograms
Programs.
2. Tap MSN MessengerMSN Messenger
MSN MessengerMSN Messenger
MSN Messenger.
8-18
P505 Pocket PC
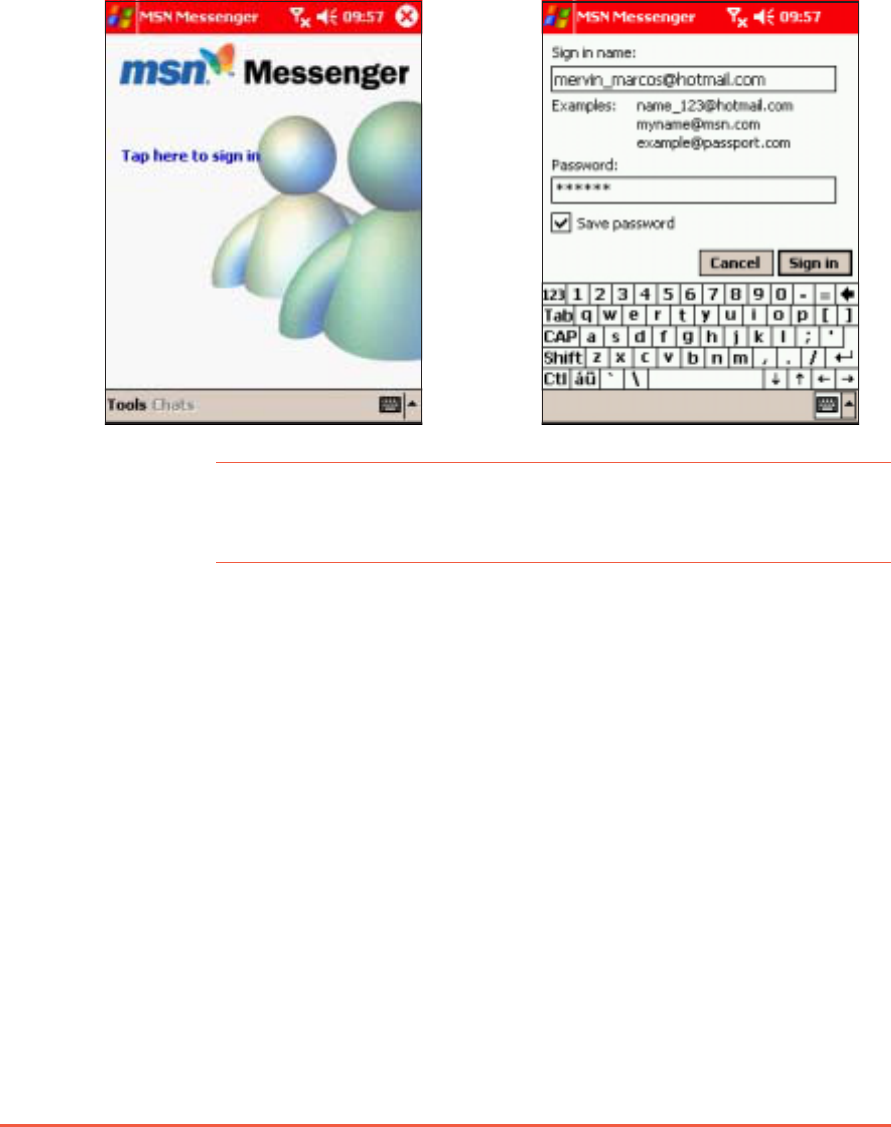
Signing upSigning up
Signing upSigning up
Signing up
To sign in to MSN Mesenger service:To sign in to MSN Mesenger service:
To sign in to MSN Mesenger service:To sign in to MSN Mesenger service:
To sign in to MSN Mesenger service:
NOTENOTE
NOTENOTE
N O T E If you already use MSN Messenger on your desktop computer,
your contacts will show up on your device without being
added again.
2. In the sign-in screen, enter
your e-mail address and
password, then tap Sign InSign In
Sign InSign In
Sign In.
1. Tap ToolsTools
ToolsTools
Tool s then tap SignSign
SignSign
Sign
in...in...
in...in...
in ... from the menu.
OROR
OROR
OR
Simply tap the screen.
Chapter 8: Using Companion Applications
8-19
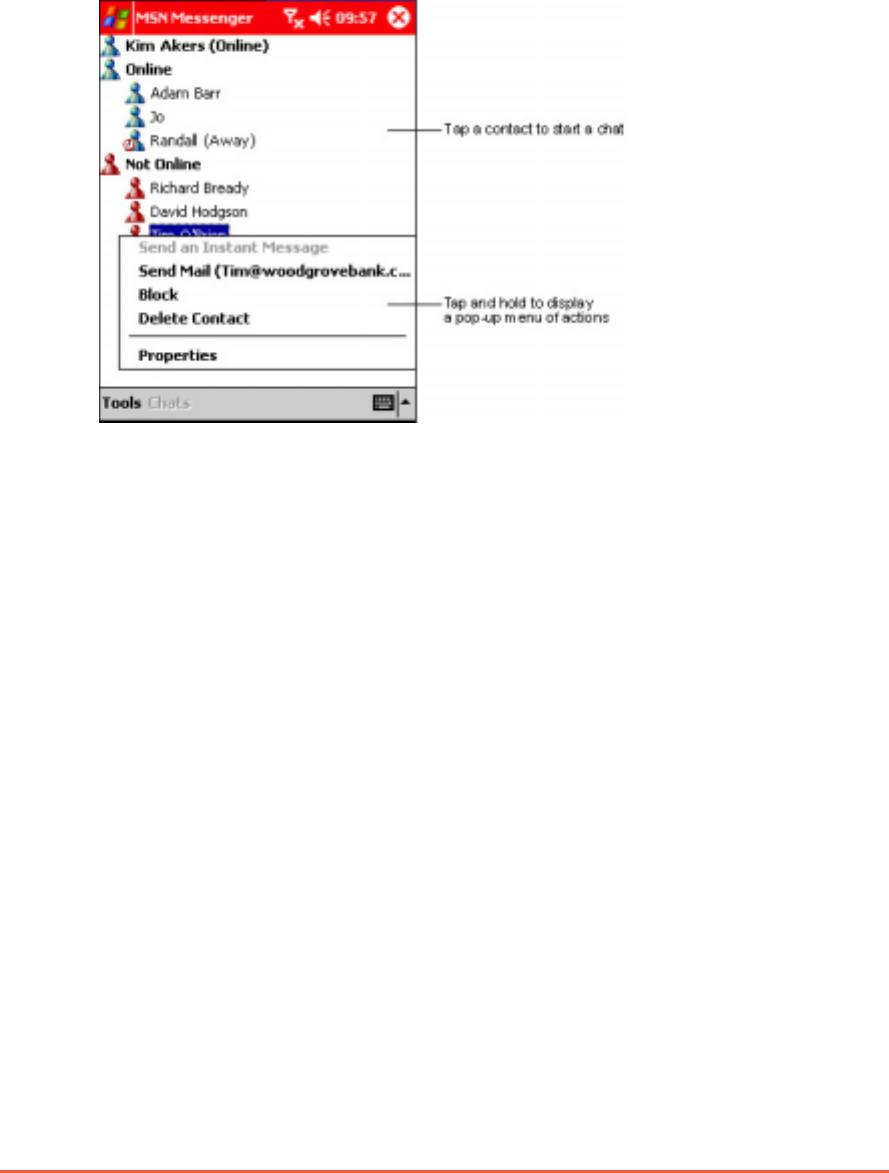
Working with contactsWorking with contacts
Working with contactsWorking with contacts
Working with contacts
The MSN Messenger window shows all of your messenger contacts at
a glance, divided into OnlineOnline
OnlineOnline
Online and Not OnlineNot Online
Not OnlineNot Online
Not Online categories. From this
view, while connected, you can chat, send an e-mail, block the
contact from chatting with you, or delete contacts from your list
using the pop-up menu.
To see others online without being seen, tap My StatusMy Status
My StatusMy Status
My Status in the
ToolsTools
ToolsTools
Tools menu and select Appear OfflineAppear Offline
Appear OfflineAppear Offline
Appear Offline.
If you block a contact, you will appear offline but will remain on the
blocked contact’s list. To unblock a contact, tap and hold the
contact, then tap UnblockUnblock
UnblockUnblock
Unblock on the pop-up menu.
8-20
P505 Pocket PC
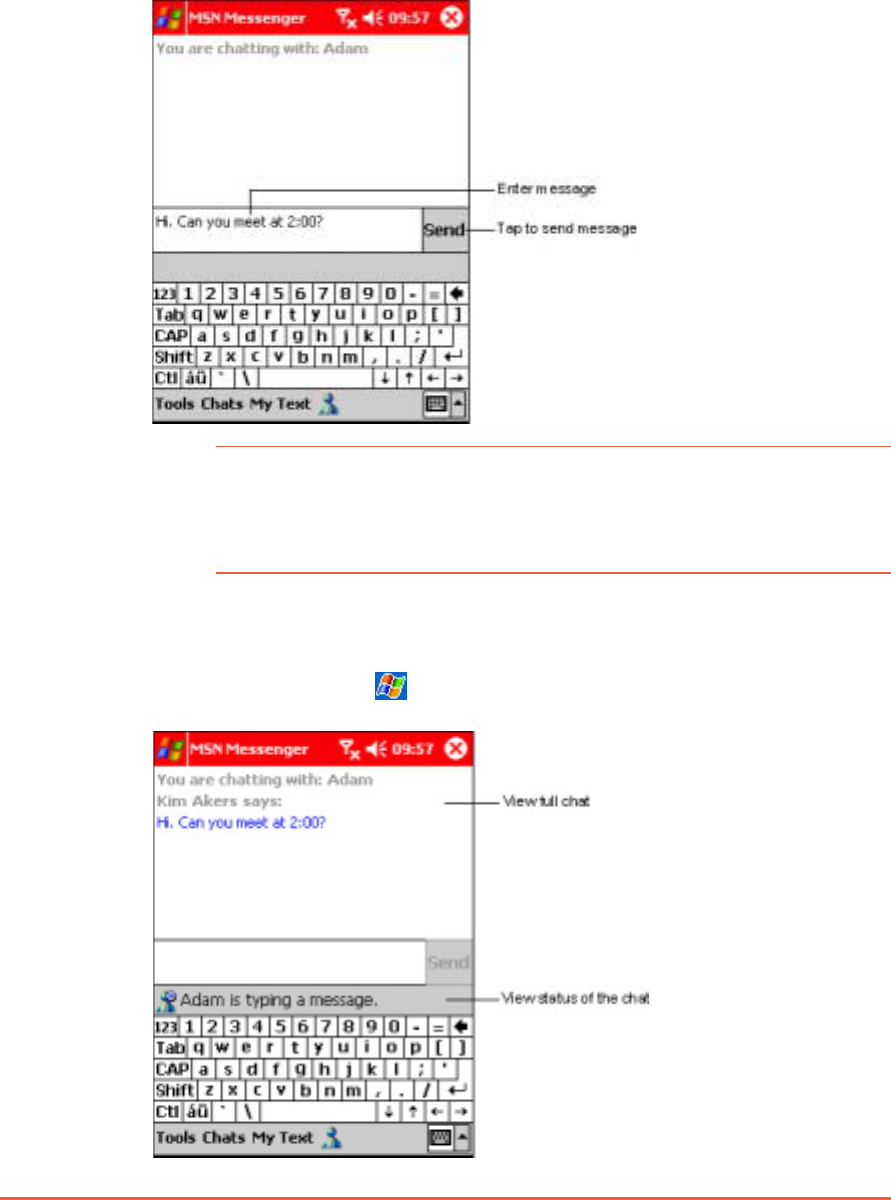
Chatting with contactsChatting with contacts
Chatting with contactsChatting with contacts
Chatting with contacts
Tap a contact name to open a chat window. Enter your message in
the text entry area at the bottom of the screen, or tap My TextMy Text
My TextMy Text
My Text to
enter a preset message, then tap SendSend
SendSend
Se n d. To invite another contact to
a multi-user chat, tap InviteInvite
InviteInvite
Invite in the ToolsTools
ToolsTools
Too ls menu, then tap the
contact that you want to invite.
NOTENOTE
NOTENOTE
N O T E To switch back to the main window without closing a chat,
tap the ContactsContacts
ContactsContacts
C o n t a c t s button. To go back to your chat window,
tap ChatsChats
ChatsChats
C h a t s and select the person whom you were chatting
with.
To know if the contact you are chatting with is responding, look for
the message under the text entry area. For more information on
using MSN Messenger, tap , then tap HelpHelp
HelpHelp
Help.