Fujitsu Technology Solutions SCENIC6651 personal computer User Manual A26361 K520 Z100 4 7619
Fujitsu Technology Solutions GmbH personal computer A26361 K520 Z100 4 7619
Contents
- 1. Manual Scenic 600 Oct 99 part 1
- 2. Manual Scenic 600 Oct 99 part 2
- 3. Manual Scenic 600 Oct 99 part 3
- 4. Manual Scenic 600 Oct 99 part 4
- 5. Manual Scenic 600 Oct 99 part 5
- 6. Manual Scenic 600 Oct 99 part 6
- 7. Manual Scenic 600 Oct 99 part 7
- 8. Scenic 600 Scenic xB May 2000 part1
- 9. Scenic 600 Scenic xB May 2000 part2
- 10. Scenic 600 Scenic xB May 2000 part3
- 11. Scenic 600 Scenic xB May 2000 part4
Manual Scenic 600 Oct 99 part 5
System expansions
A26361-K520-Z100-4-7619 33
13
2
a
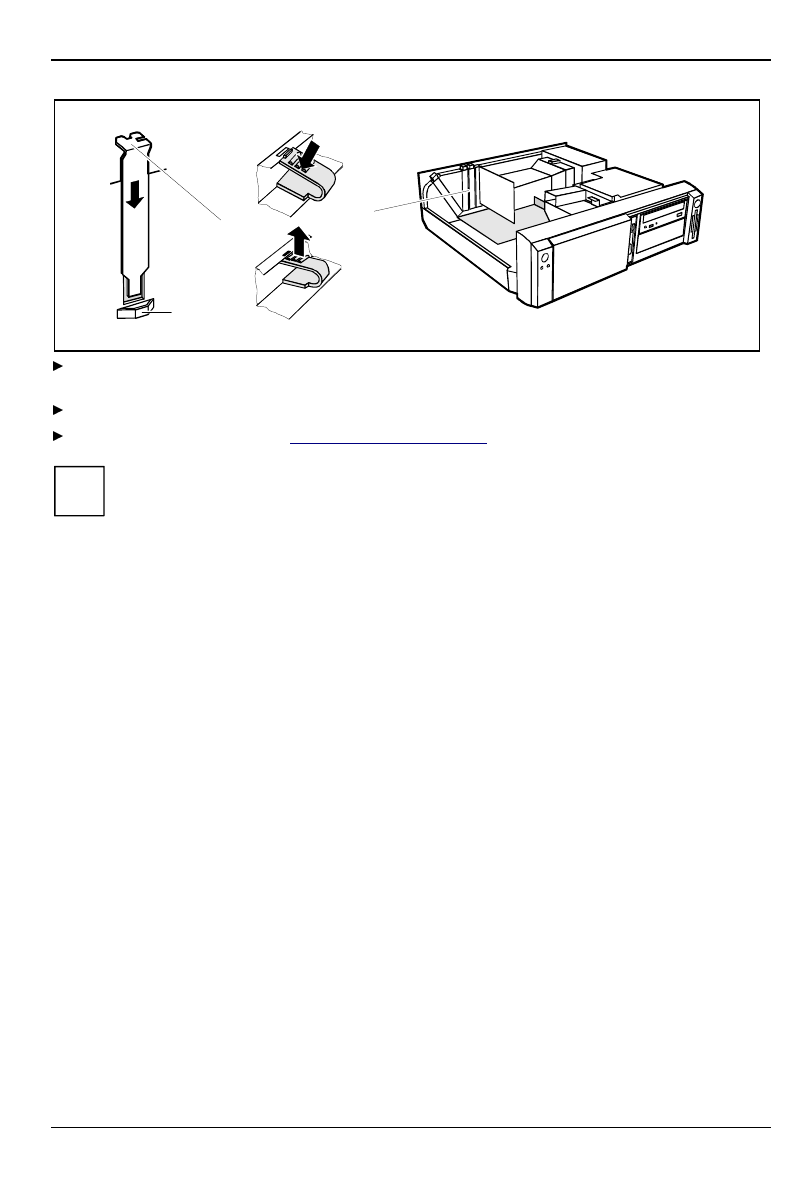
Push the rear slot cover plate into the slot (1). Ensure that the point of the cover engages into
the guide (a).
Replace the clip (2) which fixes the board. Make sure that the clip engages when released (3).
Close the system unit (see "Assembling the system unit").
iIf you have installed or removed a PCI board, please check in the BIOS Setup the settings
for the relevant PCI slot. If necessary, change the settings. Further information is provided
in the documentation for the PCI board.
Installing and removing drives
The system unit houses a total of three accessible drives (two 5 1/4-inch drives and one 3 1/2-inch
drive) and two non-accessible half-height (Slimline) drives .
IDE drives
By default four IDE drives are supported. Ideally hard disks are connected to IDE port 1, and
accessible IDE drives, for example CD-ROMs, to IDE port 2 (see also the Technical Manual for the
system board).
SCSI drives
If you want to install an SCSI drive, you require an SCSI controller and an SCSI cable. Note that:
• not every SCSI controller is suitable for operating SCSI hard disks
• each SCSI device must be assigned its own SCSI-ID.
• the SCSI cable must always be terminated at the end, either by a drive or by a terminating
resistor on the cable. The terminating resistors of all other SCSI devices attached must not be
activated or connected.
• depending on the SCSI technology (UW, U2W), an adapter may be required for connecting the
SCSI drives with a 50-pin connector.
System expansions
34 A26361-K520-Z100-4-7619
Installing an accessible drive
Open the system unit (see "Opening the system unit").
iShould the chipcard reader get in the way of the accessible drive during installation, then
remove the reader (see "Installing/removing a chipcard reader").
A
B
1
2
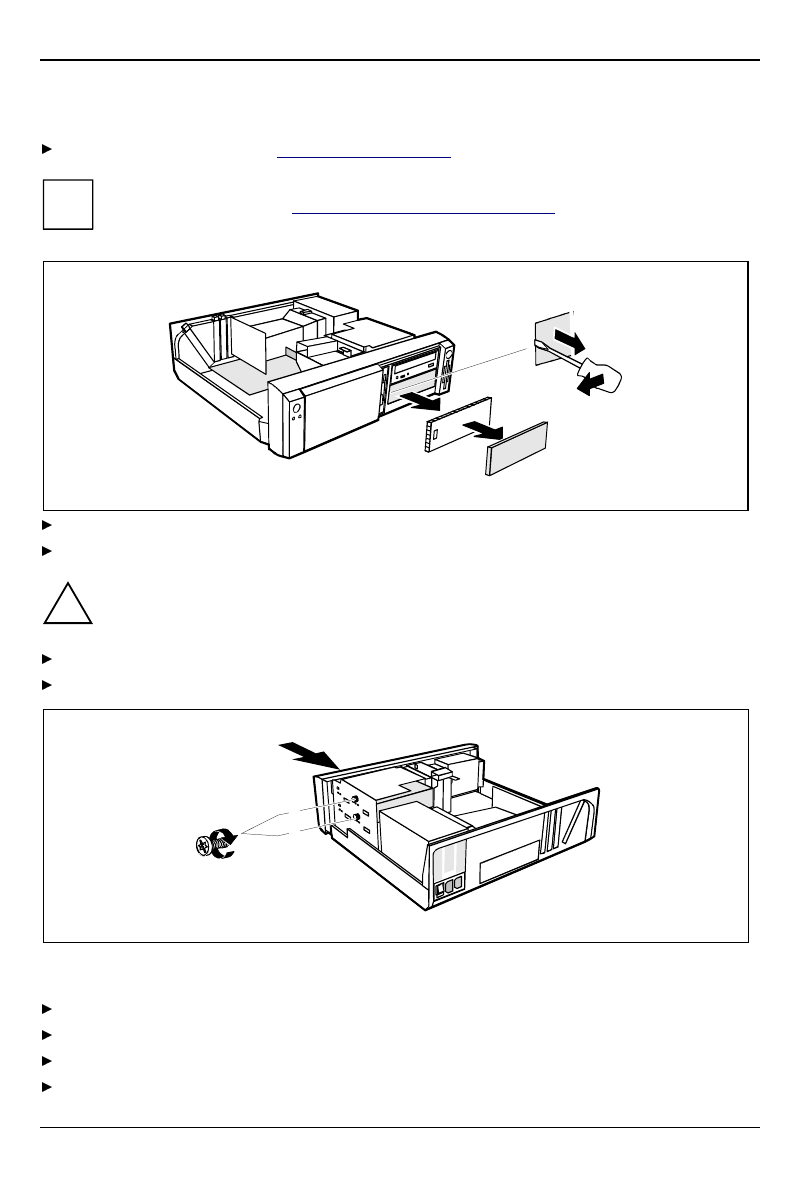
Pry the plastic drive cover (A) out of the front cover.
Pry the shielding plate (B) on left-hand side out of the bay.
!Do not throw away the covers. If you remove the drive again later, you will have to
reinstall the covers.
Take the new drive out of its packaging.
Make the required settings on the drive (if necessary, on installed drives as well).
2
1
A
B
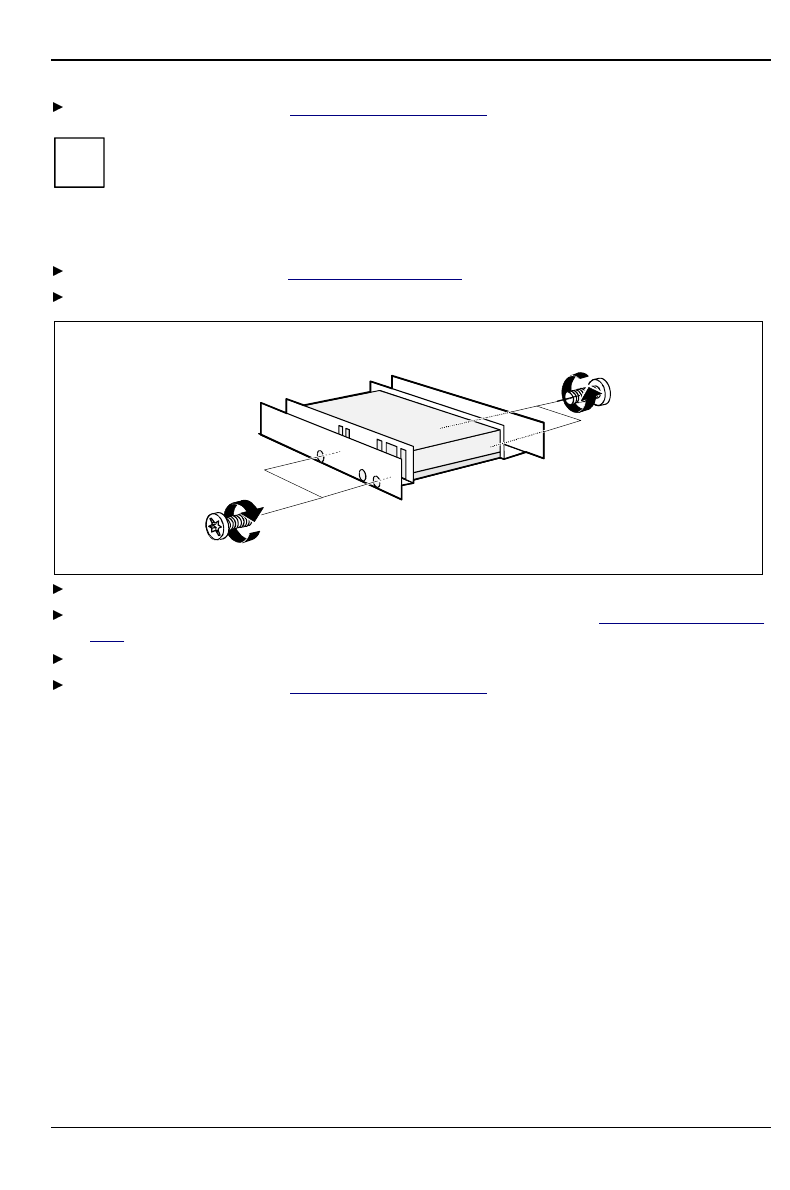
A = Position of the screw for the upper drive
B = Position of the screw for the lower drive
Slide the drive into the system unit (1).
Plug the data and the power supply connectors into the drive.
Fasten the drive with the screw (2).
If you have removed the chipcard reader, then reinstall it.
System expansions
A26361-K520-Z100-4-7619 35
Close the system unit (see "Assembling the system unit").
iIf necessary, you must adapt the entry for the drive in the Setup menu.
Installing a hard disk drive in the front bay
Open the system unit (see "Opening the system unit").
Make the required settings (e.g. master-slave) on the hard disk drives.
Fasten the drive with the four screws (2).
Install the installation frame with the drive in the desired front bay (see "Installing an accessible
drive").
Close the slot with the panel. Ensure that the cover engages.
Close the system unit (see "Assembling the system unit").
System expansions
36 A26361-K520-Z100-4-7619
Removing an accessible drive
Open the system unit (see "Opening the system unit").
Pull the data and the power supply connectors from the desired drive.
iShould the chipcard reader get in the way of the accessible drive during installation, then
remove the reader (see "Installing/removing a chipcard reader").
1
2
A
B
A = Position of the screw for the upper drive
B = Position of the screw for the lower drive
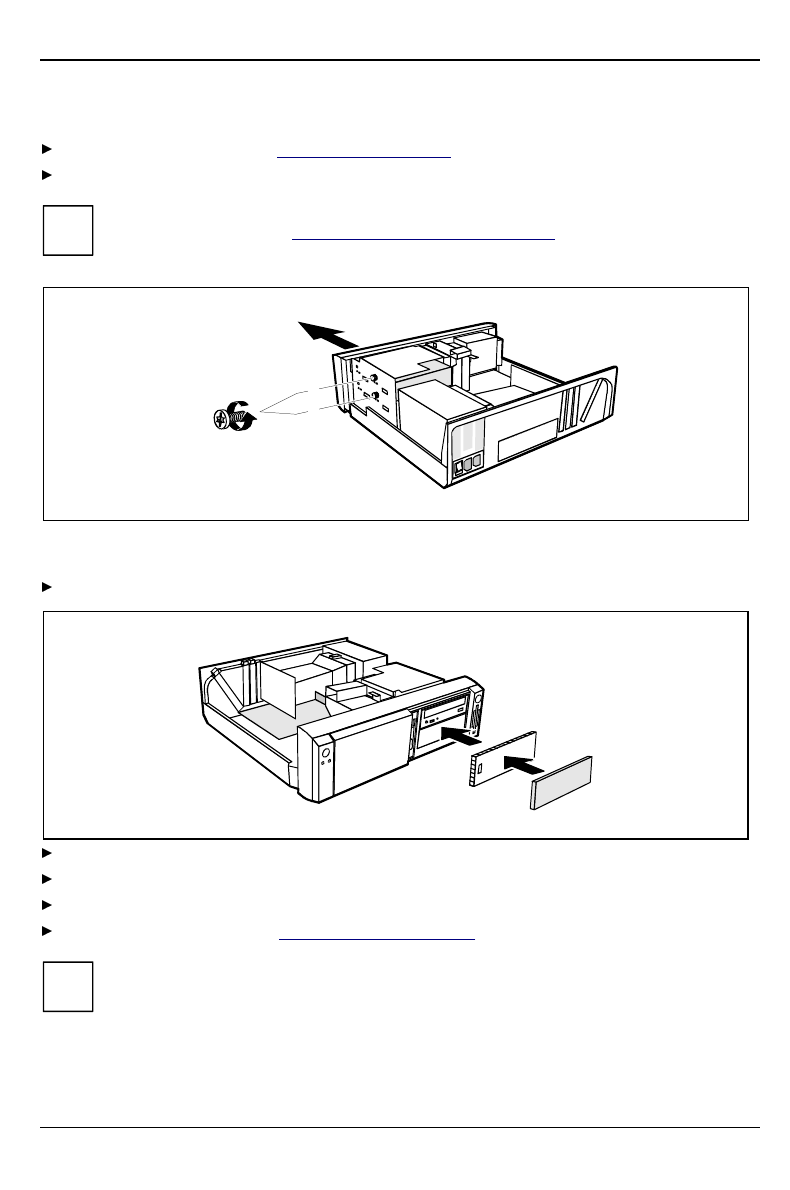
Remove the relevant screw (1) and take the drive out of the system unit (2).
A
B
Insert the shielding plate (B) on the right-hand side on the installation bay and press it in.
Press the plastic drive cover (A) into the front panel until it snaps in place.
If you have removed the chipcard reader, then reinstall it.
Close the system unit (see "Assembling the system unit").
iIf necessary, you must adapt the entry for the drive in the Setup menu.