Fujitsu Technology Solutions SCENIC6651 personal computer User Manual A26361 K520 Z100 4 7619
Fujitsu Technology Solutions GmbH personal computer A26361 K520 Z100 4 7619
Contents
- 1. Manual Scenic 600 Oct 99 part 1
- 2. Manual Scenic 600 Oct 99 part 2
- 3. Manual Scenic 600 Oct 99 part 3
- 4. Manual Scenic 600 Oct 99 part 4
- 5. Manual Scenic 600 Oct 99 part 5
- 6. Manual Scenic 600 Oct 99 part 6
- 7. Manual Scenic 600 Oct 99 part 7
- 8. Scenic 600 Scenic xB May 2000 part1
- 9. Scenic 600 Scenic xB May 2000 part2
- 10. Scenic 600 Scenic xB May 2000 part3
- 11. Scenic 600 Scenic xB May 2000 part4
Manual Scenic 600 Oct 99 part 6

System expansions
A26361-K520-Z100-4-7619 37
Changing the floppy disk drive
Open the system unit (see "Opening the system unit").
Remove the hard disk carrier (see "Installing and removing the hard disk drive").
1
2
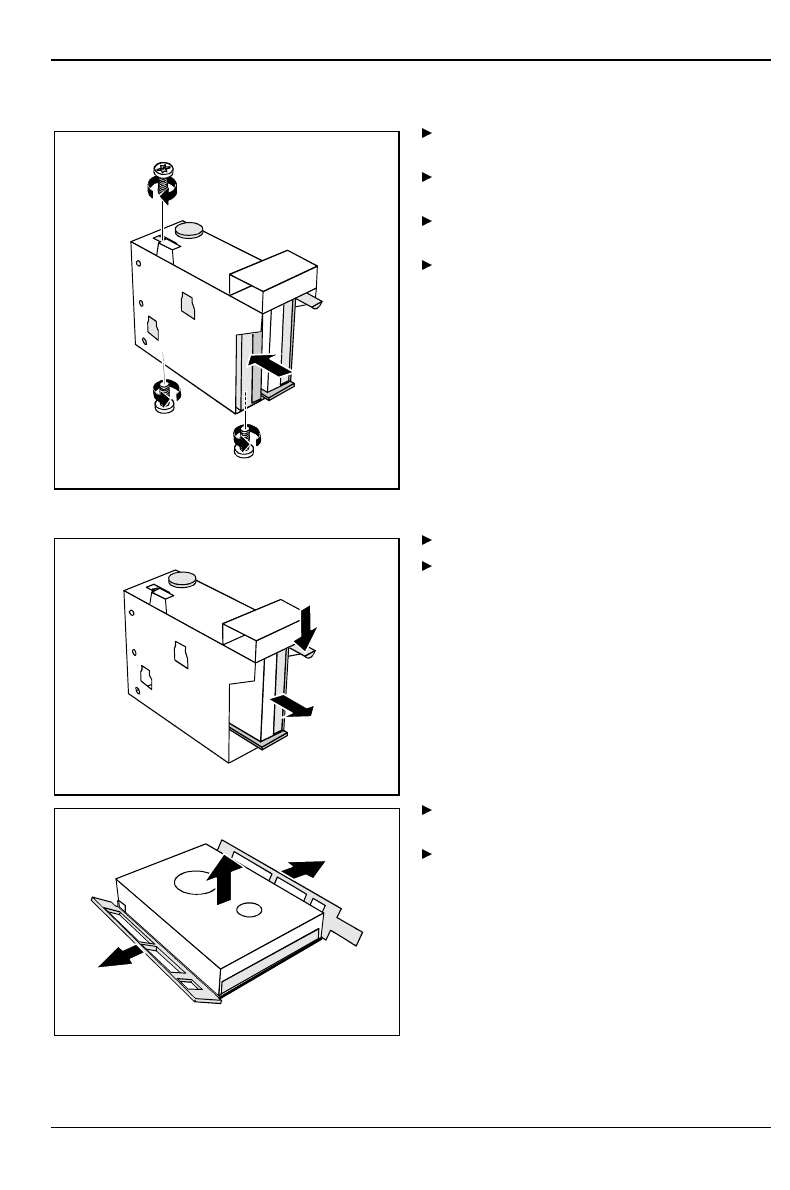
Pull the data and the power supply
connectors from the floppy disk drive.
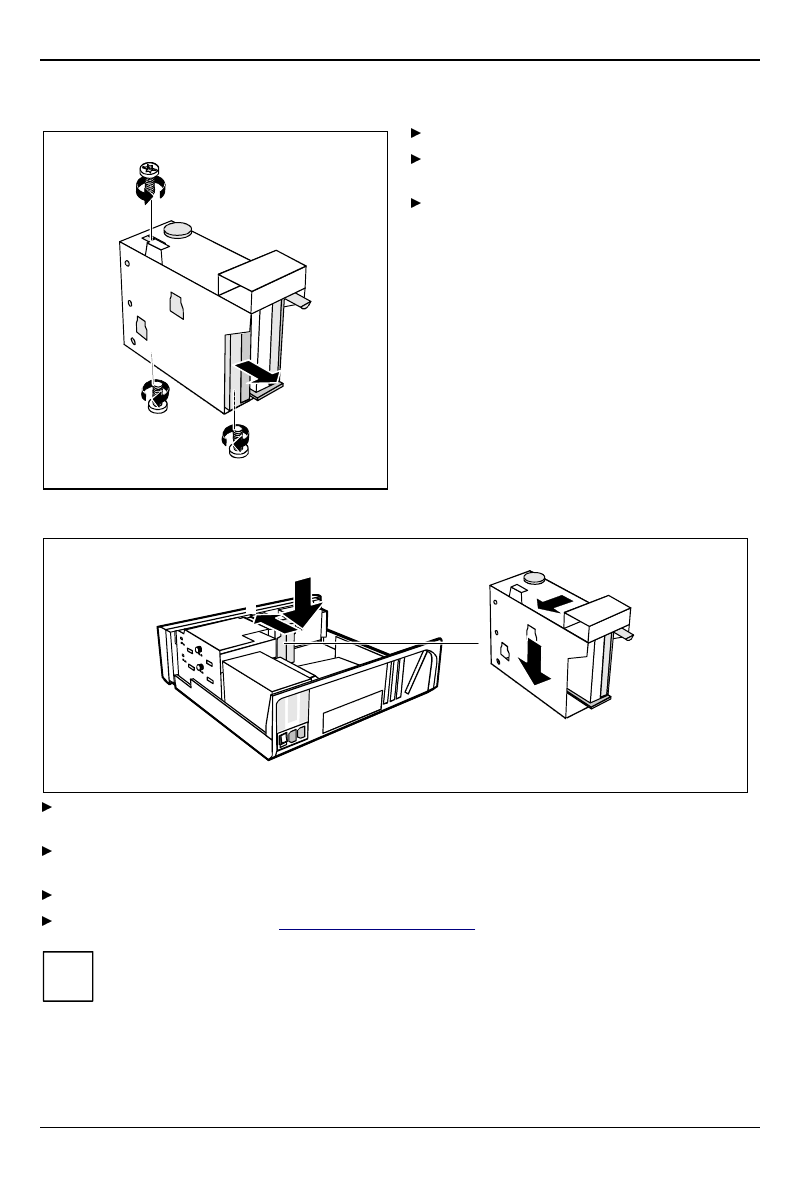
Remove the screw (1) and take the drive
out of the system unit (2).
Take the new floppy disk drive out of its
packaging.
2
1
Push the drive into the system unit (1), and
fix it with the screw (2).
Plug the data and the power supply
connectors into the floppy disk drive.
Remove the hard disk carrier (see
"Installing and removing the hard disk
drive").
Close the system unit (see "Assembling
the system unit").
iIf necessary, you must adapt the entry for the drive in the Setup menu.

System expansions
38 A26361-K520-Z100-4-7619
Installing and removing the hard disk drive
Open the system unit (see "Opening the system unit").
Removing the hard disk carrier
2
1
34
Lift the hard disk carrier out of the mounting in the direction of the arrow (1) and (2).
Lift the hard disk carrier out of the system unit in the direction of the arrow (3) and (4).
Pull the data and power supply connectors from the hard disk drive or the hard disk drives.
Installing the first hard disk drive
Take the new hard disk drive out of its packaging.
Make the required settings (e.g. master/slave, stand alone) on the drives.
2
2
1
3
Insert the hard disk drive into the plastic bracket (1). The drive must engage in the plastic
nipple.
Fold the plastic bracket in the direction of the arrow (2) on the hard disk drive.
Push the hard disk drive into the drive carrier until the plastic bracket engages (3).
System expansions
A26361-K520-Z100-4-7619 39
Installing the second hard disk drive
2
2
2
1
Take the new hard disk drive out of its
packaging.
Make the required settings (e.g.
master/slave, stand alone) on the drives.
Slide the hard disk drive into the drive
carrier (1).
Fasten the drive with the screws (2).
Removing the first hard disk drive
1
2
Lightly press on the clip (1).
Pull the hard disk drive out of the
carrier (2).
1
1
2
Fold the plastic bracket in the direction of
the arrow (1).
Remove the hard disk drive (2).
System expansions
40 A26361-K520-Z100-4-7619
Removing the second hard disk drive
2
1
1
1
Remove the screw (1).
Pull the hard disk drive out of the
carrier (2).
Make the required settings on the
remaining hard disk drive
(e.g. stand alone).
Installing the hard disk carrier
3
4
21
Plug the data and the power supply connectors into the hard disk drive or into the hard disk
drives.
Lift the hard disk carrier into the system unit in the direction shown by the arrow (1) and push it
forward until it engages (2).
Press the hard disk carrier in the direction of the arrow (3) and press it downward (4).
Close the system unit (see "Assembling the system unit").
iIf necessary, you must adapt the entry for the drive in the Setup menu.