JVC KENWOOD K2T001 Card Printer w/Built-in RFID Tag User Manual CX 120 pm65e2
JVC KENWOOD Corporation Card Printer w/Built-in RFID Tag CX 120 pm65e2
UserManual.wiki
>
JVC KENWOOD
>
K2T001 User Manual
>
Users Manual 2 of 2
Contents
1.
Users Manual 1 of 2
2.
Users Manual 2 of 2
3.
Startup Guide 1 of 3
4.
Startup Guide 2 of 3
5.
Startup Guide 3 of 3
Users Manual 2 of 2
Navigation menu
Upload a User Manual
Namespaces
Wiki Guide
HTML
PDF
Info
Views
User Manual
Discussion / Help
Navigation
4.When the following screen appears,1Select "Hardware" tab and2click on the "Device Manager" buttonDeletion of Status Monitor1.Check that the Status Monitor is not in op-eration.2.Perform uninstallation from the Start menu.3.Click button to start uninstalling.4.Click on the "Finish" button. Uninstallationis now complete.](https://usermanual.wiki/JVC-KENWOOD/K2T001.Users-Manual-2-of-2/User-Guide-521186-Page-3.png)
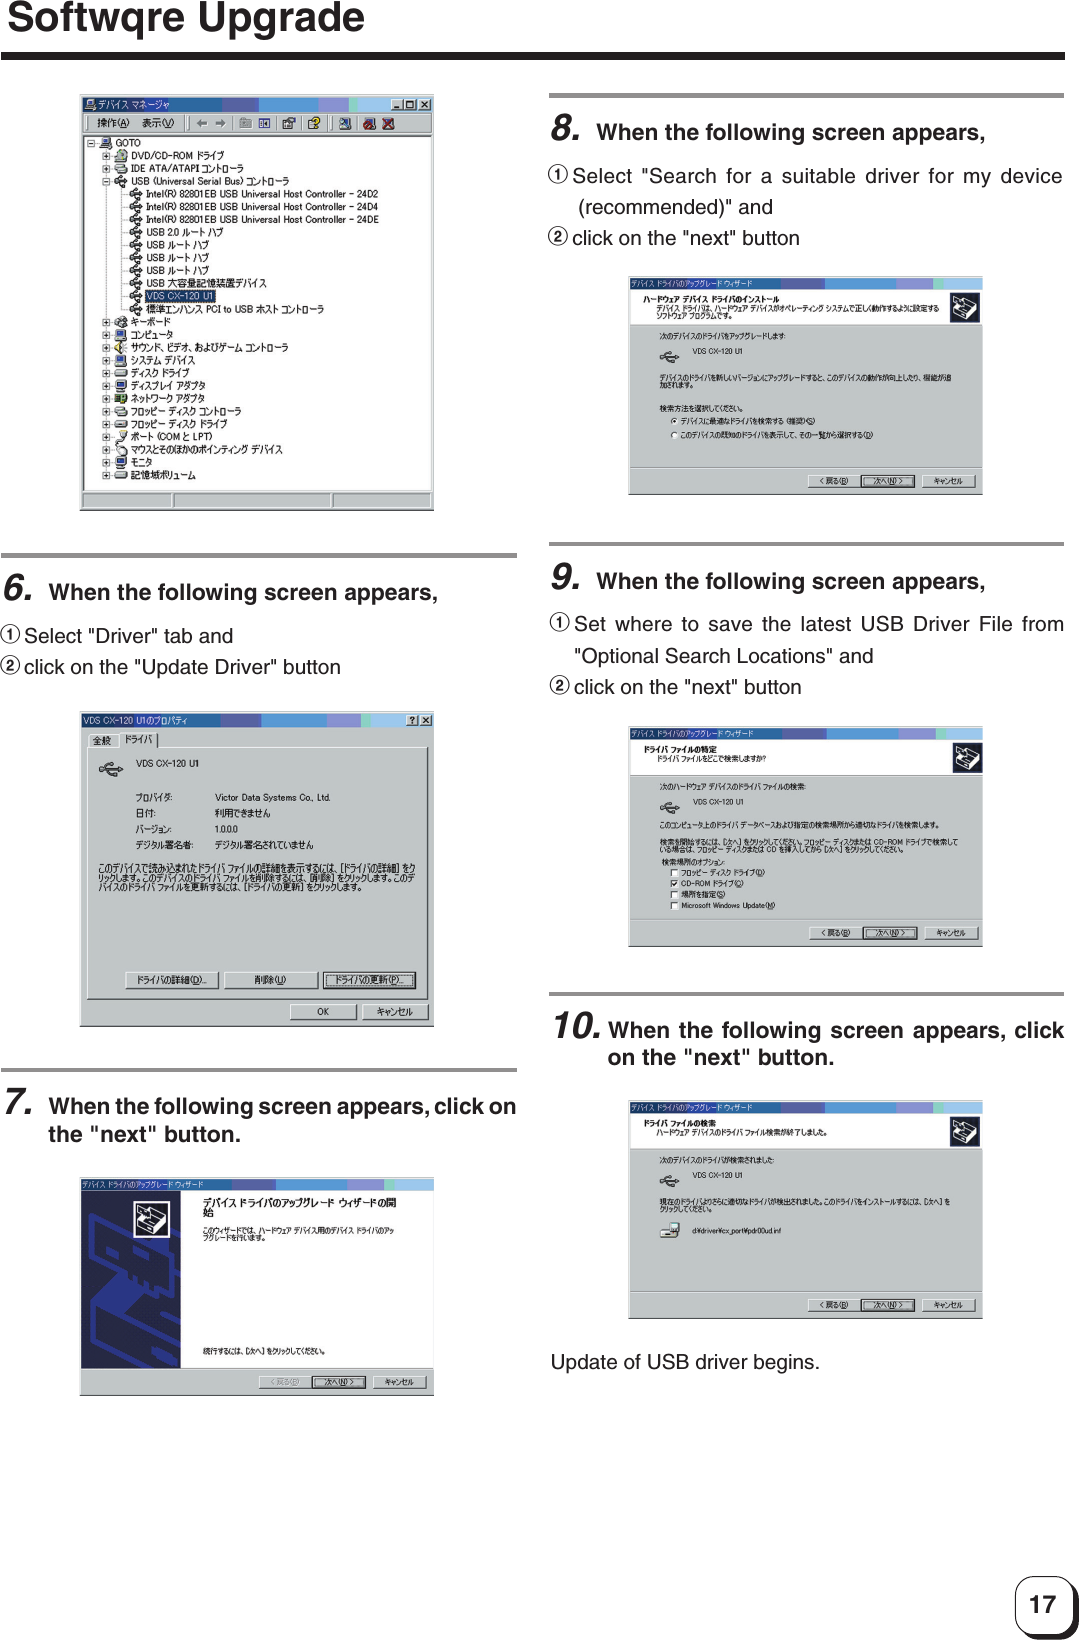
![20Deleting USB Driver - Windows20001.Check that the connection between com-puter and card printer is on.2.Switch on the card printer.3.Open "Control Panel" from "My Computer"and double-click on "System".7.When the following screen appears, click onthe "OK" button.6.When the following screen appears,1Select "Driver" tab and2click on the "Delete" buttonDeletion of USB driver is now complete.8.When the following screen appears, checkto ensure that [VDS CX-120 Un] item hasbeen deleted.Uninstalling Software](https://usermanual.wiki/JVC-KENWOOD/K2T001.Users-Manual-2-of-2/User-Guide-521186-Page-4.png)
4.When the following screen appears,1Select "Hardware" tab and2click on the "Device Manager" buttonUninstalling Software](https://usermanual.wiki/JVC-KENWOOD/K2T001.Users-Manual-2-of-2/User-Guide-521186-Page-5.png)