Samsung Electronics Co SCHI300 Dual-Band Analog/PCS Phone (AMPS/CDMA) User Manual
Samsung Electronics Co Ltd Dual-Band Analog/PCS Phone (AMPS/CDMA) Users Manual
UserManual.wiki
>
Samsung Electronics Co
>
SCHI300 User Manual
>
Users Manual Part 1
Contents
1.
Users Manual Part 1
2.
Users Manual Part 2
3.
Users Manual Part 3
4.
Users Manual Part 4
5.
Users Manual Part 5
6.
Users Manual Part 6
7.
Users Manual Part 7
Users Manual Part 1
Navigation menu
Upload a User Manual
Namespaces
Wiki Guide
HTML
PDF
Info
Views
User Manual
Discussion / Help
Navigation


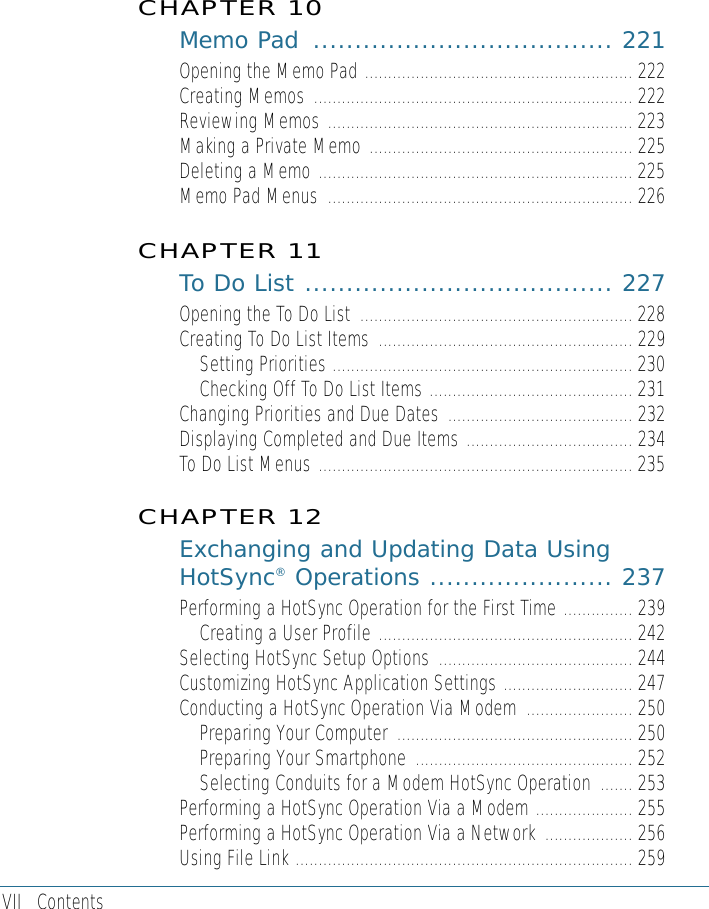
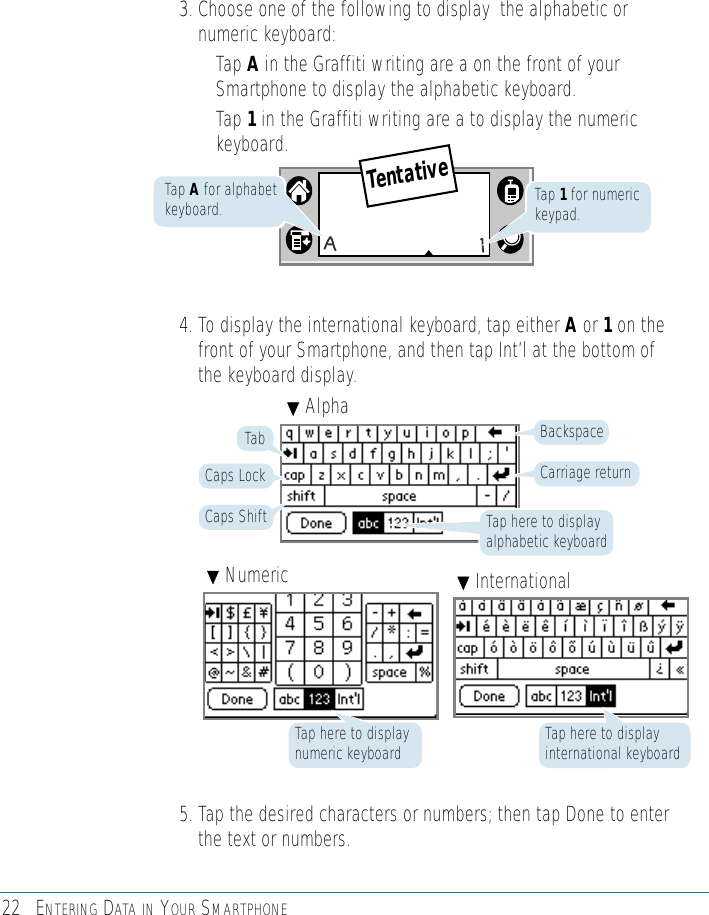

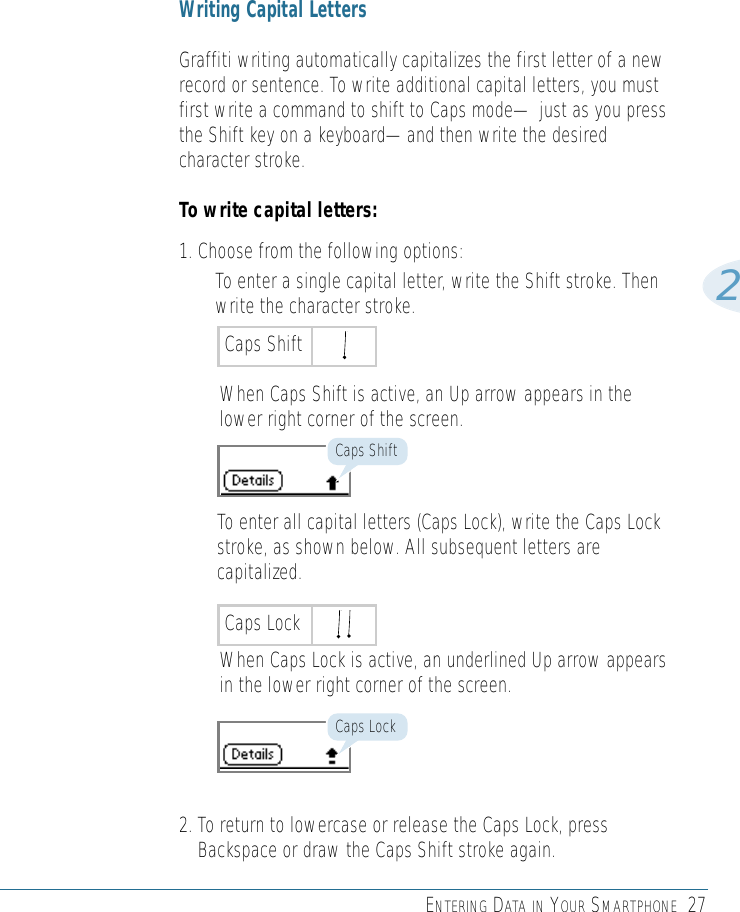
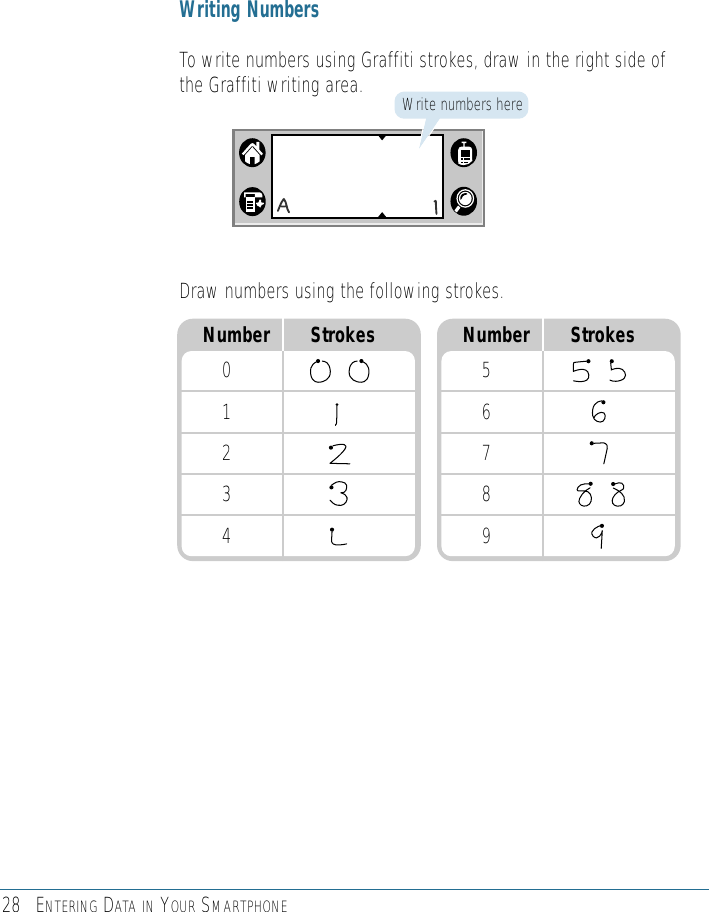
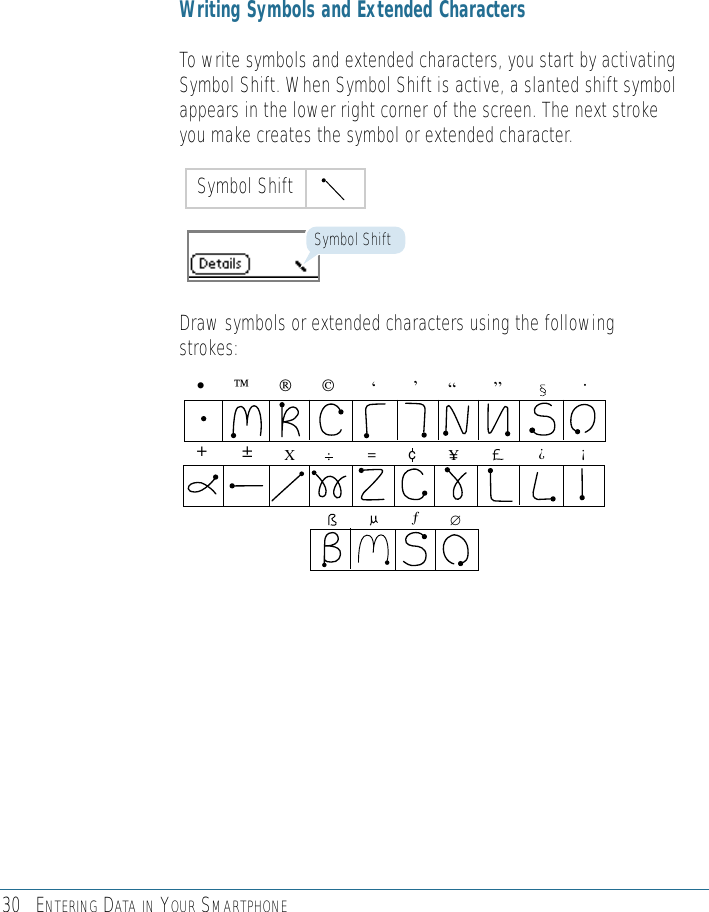
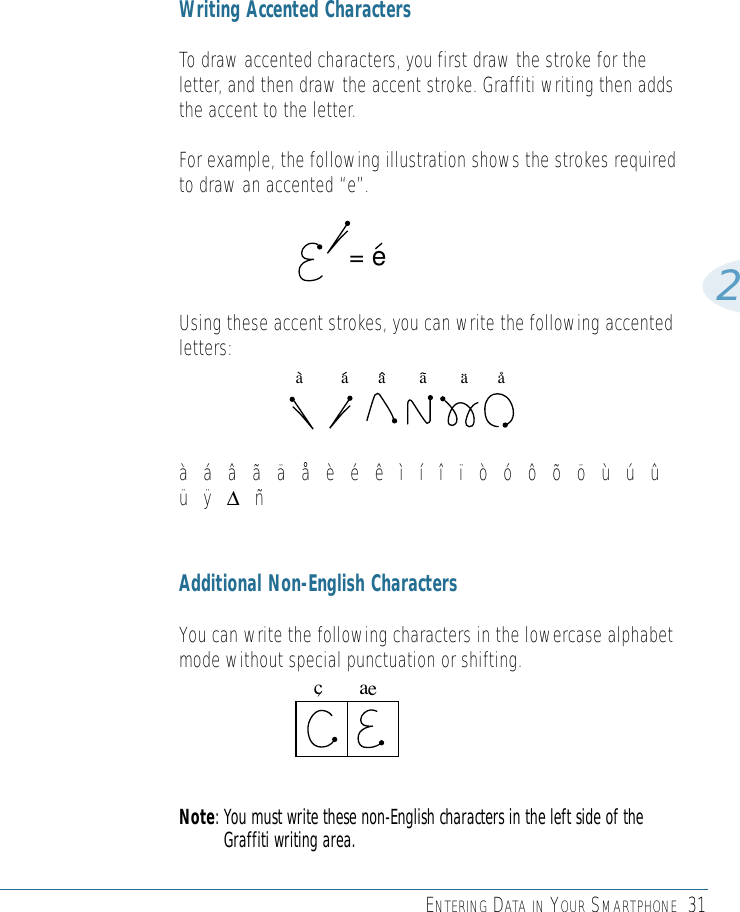
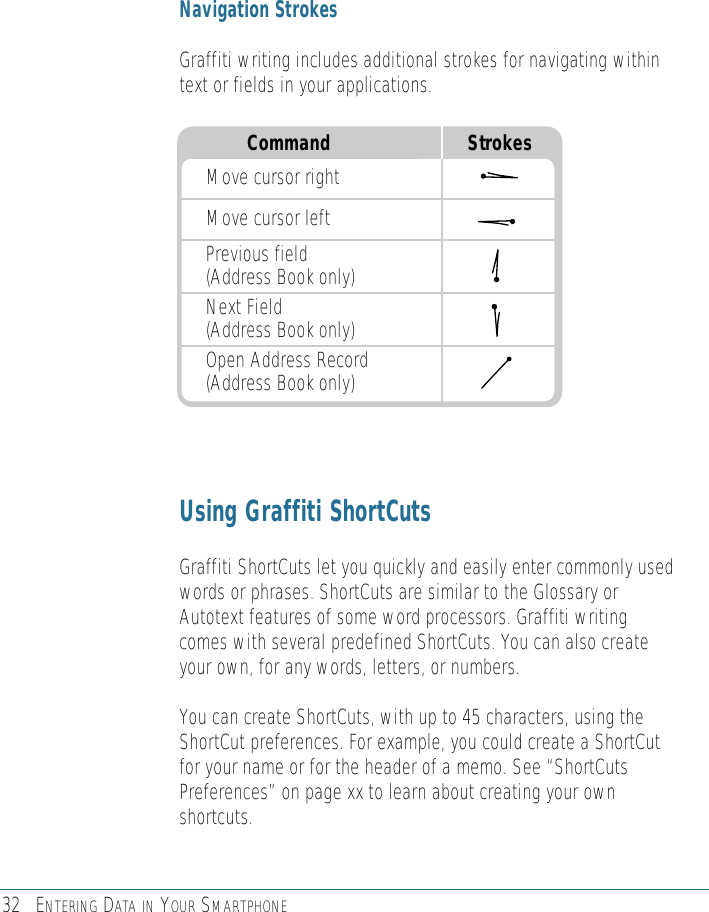
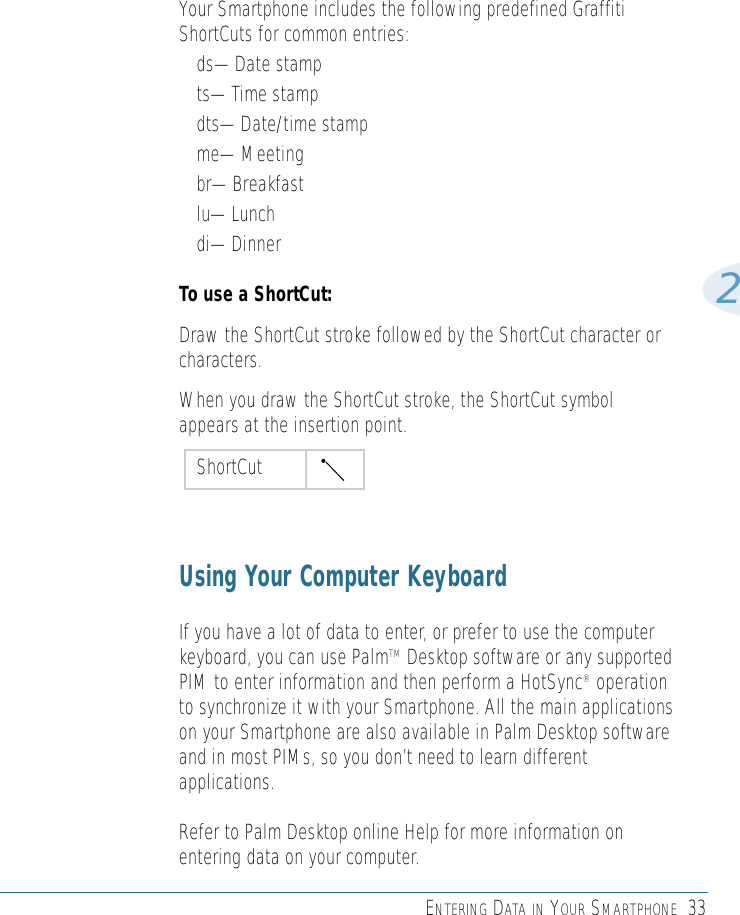
![ENTERING DATA IN YOUR SMARTPHONE 292Writing Punctuation MarksYou can create any punctuation symbol available from a standardkeyboard using Graffiti writing. All punctuation marks begin with a single tap on the Graffitiwriting area. This tap activates the Punctuation Shift, indicatedby a dot displayed above the writing area. The next stroke youmake with the stylus creates a punctuation mark. WhenPunctuation Shift is active, you can write a symbol stroke oneither side of the Graffiti writing area (the letter or number side). Create punctuation marks using the following strokes:Additional Graffiti punctuation includes the following:Symbol StrokePeriod .Comma ,Apostrophe ‘Question ?Exclamation !Symbol StrokeDash –Left Paren (Right Paren )Slash /Dollar $@ # % ^ & * < > – + = | \ { } [ ] ~ ` ; : " tabPunctuation Shift](https://usermanual.wiki/Samsung-Electronics-Co/SCHI300.Users-Manual-Part-1/User-Guide-140054-Page-42.png)