Samsung Electronics Co SLM2070W Mono Laser Multi-Function Printer User Manual Egmont F english
Samsung Electronics Co Ltd Mono Laser Multi-Function Printer Egmont F english
Contents
Users Manual 4
Installing driver over the network
146
2. Using a Network-Connected Machine
/p”<port name>” or
/P”<port name>”
Specifies printer port.
Network Port will
be created by use
of Standard TCP/IP
Port monitor. For
local port, this port
must exist on
system before
being specified by
command.
Printer port name can be
specified as IP address,
hostname, USB local port
name or IEEE1284 port
name.
For example:
• /p”xxx.xxx.xxx.xxx” in
where, “xxx.xxx.xxx.xxx”
means IP address for
network printer. /
p”USB001”, /P”LPT1:”, /
p”hostname”
• When installing the driver
silently in Korean, type in-
Setup.exe /s /L"0x0012”
or Setup.exe /s.
/a”<dest_path>” or
/A”<dest_path>”
Specifies destination path
for installation.
The destination
path should be a
fully qualified path.
Since machine drivers
should be installed on the OS
specific location, this
command applies to only
application software.
Command- line Definition Description
/i”<script
filename>” or
/I”<script
filename>”
Specifies customized install
script file for custom
operation.
The script filename
should be a fully
qualified filename.
Customized script file can be
assigned for customized
silent installation. This script
file can be created or
modified through provided
installer customizing utility
or by text editor.
This customized
script file is prior than
default installer
setting in setup
package but not
prior than
command-line
parameters.
/n”<Printer name>”
or
/N”<Printer name>”
Specifies printer name.
Printer instance shall be
created as specified printer
name.
With this parameter, you can
add printer instances as your
wishes.
Command- line Definition Description

Installing driver over the network
147
2. Using a Network-Connected Machine
/nd or
/ND
Commands not to set the
installed driver as a default
machine driver.
It indicates installed machine
driver will not be the default
machine driver on your
system if there are one or
more printer drivers
installed. If there is no
installed machine driver on
your system, then this option
won’t be applied because
Windows OS will set installed
printer driver as a default
machine driver.
/x or
/X
Uses existing machine
driver files to create printer
instance if it is already
installed.
This command provides a
way to install a printer
instance that uses installed
printer driver files without
installing an additional
driver.
/up”<printer
name>” or
/UP”<printer
name>”
Removes only specified
printer instance and not
the driver files.
This command provides a
way to remove only specified
printer instance from your
system without effecting
other printer drivers. It will
not remove printer driver
files from your system.
Command- line Definition Description
/d or
/D
Uninstalls all device drivers
and applications from your
system.
This command will remove
all installed device drivers
and application software
from your system.
/v”<share name>”
or
/V”<share name>”
Shares installed machine
and add other available
platform drivers for Point &
Print.
It will install all supported
Windows OS platform’s
machine drivers to system
and share it with specified
<share name> for point and
print.
/o or
/O
Opens Printers and Faxes
folder after installation.
This command will open
Printers and Faxes folder
after the silent installation.
/h, /H or /? Shows Command-line Usage.
Command- line Definition Description
Installing driver over the network
148
2. Using a Network-Connected Machine
7
Mac
For Mac OS X 10.4, you need to download from the Samsung website to
install the printer software (http://www.samsung.com > find your product >
Support or Downloads).
1Make sure that the machine is connected to your network and powered
on.
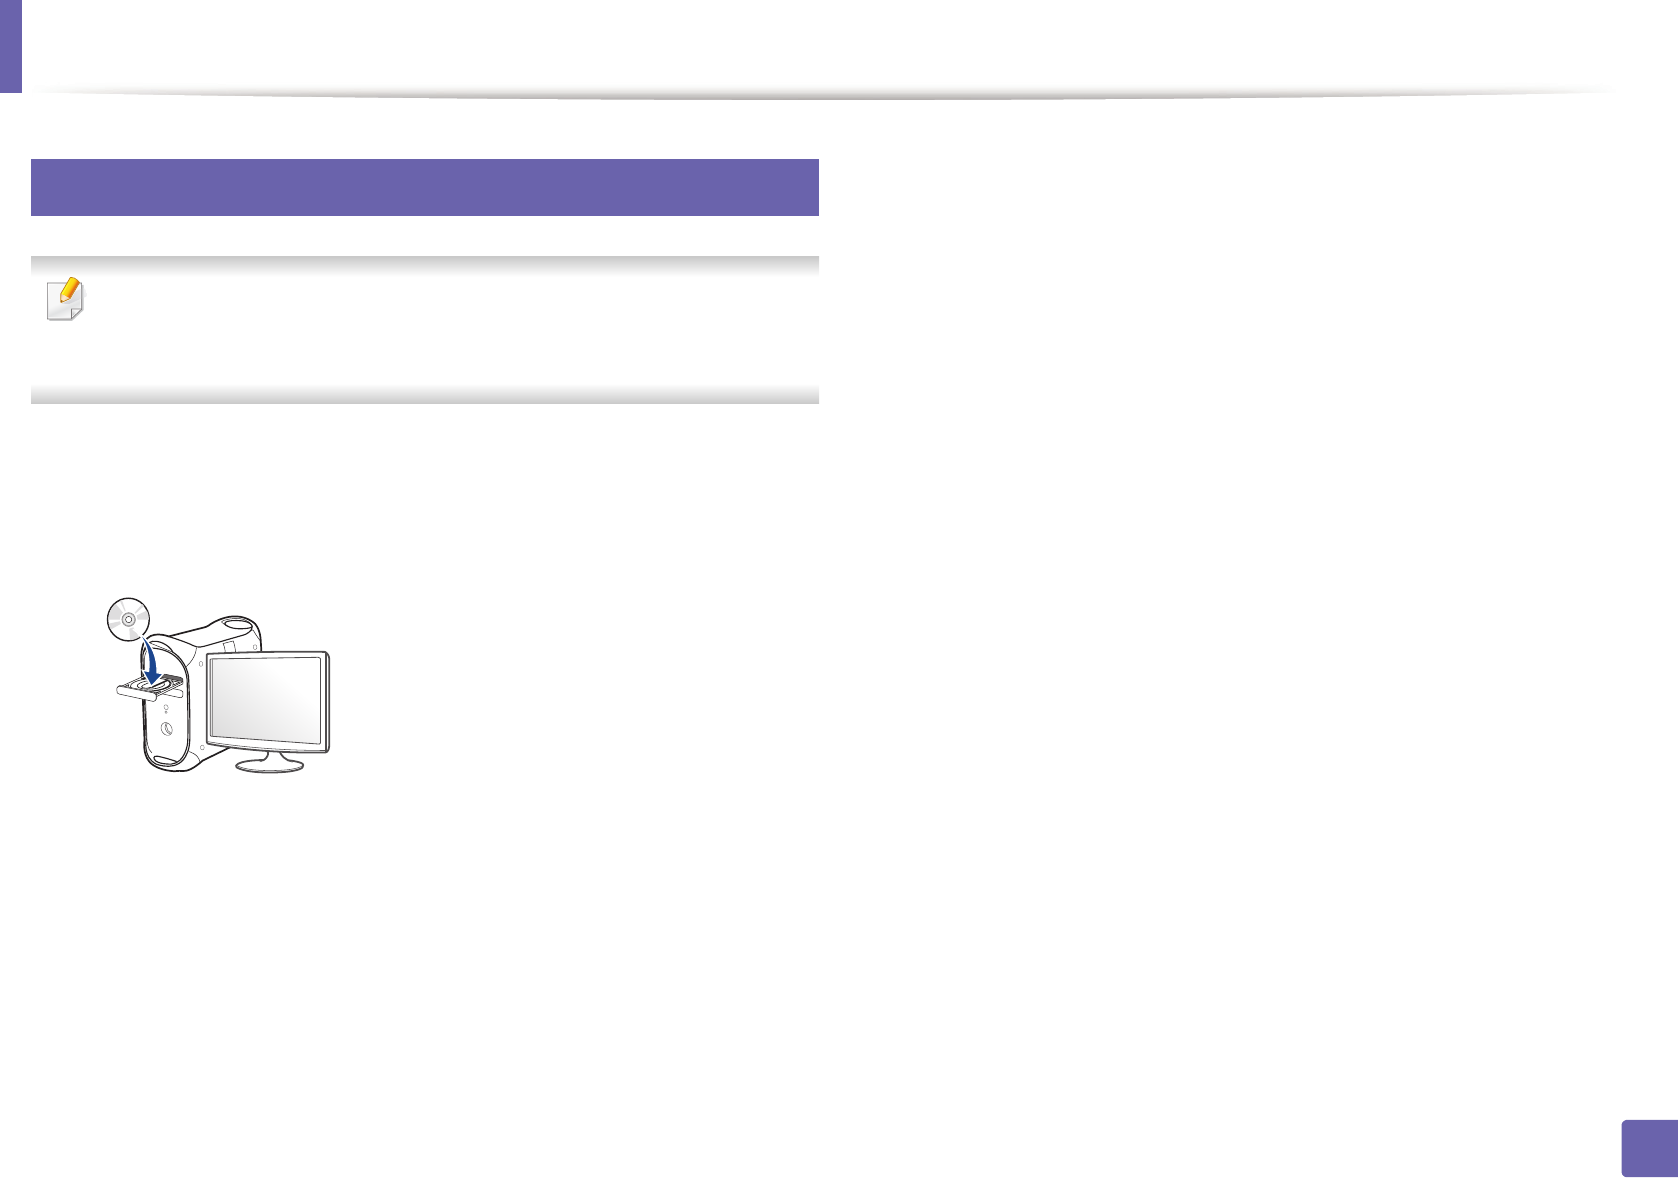
2 Insert the supplied software CD into your CD-ROM drive.
3 Double-click the CD-ROM icon that appears on your Mac desktop.
• For Mac OS X 10.8, double-click the CD-ROM that appears on Finder.
4 Double-click the MAC_Installer folder > Installer OS X icon.
5 Click Continue.
6 Read the license agreement and click Continue.
7 Click Agree to agree to the license agreement.
8 Click Install. All components necessary for machine operations will be
installed.
If you click Customize, you can choose individual components to install.
9 Enter the password and click OK.
10 Select Network Connected Printer(Wired or Wireless) on the Printer
Connection Type and click Continue.
11 Click Add Printer button to select your printer and add it to your printer
list.
12 Click IP and select HP Jetdirect - Socket in Protocol.
13 Enter the machine’s IP address in the Address input field.
14 Enter the queue name in the Queue input field. If you cannot determine
the queue name for your machine server, try using the default queue
first.
15 If Auto Select does not work properly, choose Select Printer Software
and your machine name in Print Using.
16 Click Add.
17 After the installation is finished, click Close.

Installing driver over the network
149
2. Using a Network-Connected Machine
8
Linux
You need to download Linux software packages from the Samsung website to
install the printer software (http://www.samsung.com > find your product >
Support or Downloads).
To install other software:
• See "Installing the Smart Panel" on page 137.
• See "Installing the Printer Settings Utility" on page 138.
Install the Linux driver and add network printer
1Make sure that the machine is connected to your network and powered
on. Also, your machine’s IP address should have been set.
2 Download the Unified Linux Driver package from the Samsung website.
3 Extract the UnifiedLinuxDriver.tar.gz file and open the new directory.
4 Double-click the Linux folder > install.sh icon.
5 The Samsung installer window opens. Click Continue.
6 The add printer wizard window opens. Click Next.
7 Select network printer and click Search button.
8 The machine’s IP address and model name appears on list field.
9 Select your machine and click Next.
10 Input the printer description and Next.
11 After the machine is added, click Finish.
12 When installation is done, click Finish.
Add a network printer
1Double-click the Unified Driver Configurator.
2 Click Add Printer.
3 The Add printer wizard window opens. Click Next.
4 Select Network printer and click the Search button.
5 The printer’s IP address and model name appears on list field.
6 Select your machine and click Next.
7 Enter the printer description and click Next.
8 After the machine is added, click Finish.
Installing driver over the network
150
2. Using a Network-Connected Machine
9
UNIX
• Make sure your machine supports the UNIX operating system before
installing the UNIX printer driver (see "Operating System" on page 7).
• The commands are marked with “”, when typing the commands, do not
type “”.
• Some features and optional goods may not be available depending on
model or country (see "Operating System" on page 7).
To use the UNIX printer driver, you have to install the UNIX printer driver
package first, then setup the printer. You can download the UNIX printer driver
package from the Samsung website (http://www.samsung.com > find your
product > Support or Downloads).
Installing the UNIX printer driver package
The installation procedure is common for all variants of UNIX OS mentioned.
1From the Samsung website, download and unpack the UNIX Printer
Driver package to your computer.
2 Acquire root privileges.
“su -”
3 Copy the appropriate driver archive to the target UNIX computer.
See administration guide of your UNIX OS for details.
4 Unpack the UNIX printer driver package.
For example, on IBM AIX, use the following commands.
“gzip -d < enter the package name | tar xf -”
5 Go to the unpacked directory.
6 Run the install script.
“./install”
install is the installer script file which is used to install or uninstall the
UNIX Printer Driver package.
Use “chmod 755 install” command to give the permission to the
installer script.
7 Execute the “. /install –c” command to verify installation results.
8 Run “installprinter” from the command line. This will bring up the Add
Printer Wizard window. Setup the printer in this window referring to
the following procedures.

Installing driver over the network
151
2. Using a Network-Connected Machine
On some UNIX OS, for example on Solaris 10, just added printers may not be
enabled and/or may not accept jobs. In this case run the following two
commands on the root terminal:
“accept <printer_name>”
“enable <printer_name>”
Uninstalling the printer driver package
The utility should be used to delete the printer installed in the system.
a Run “uninstallprinter” command from the terminal.
It will open the Uninstall Printer Wizard.
The installed printers are listed in the drop-down list.
b Select the printer to be deleted.
c Click Delete to delete the printer from the system.
d Execute the “. /install –d” command to uninstall the whole package.
e To verify removal results, execute the “. /install –c” command.
To re-install it, use the command “. /install” to reinstall the binaries.
Setting up the printer
To add the printer to your UNIX system, run ‘installprinter’ from the command
line. This will bring up the Add Printer Wizard window. Setup the printer in this
window according to the following steps:
1Type the name of the printer.
2 Select the appropriate printer model from the model list.
3 Enter any description corresponding to the type of the printer in the
Type field. This is optional.
4 Specify any printer description in the Description field. This is optional.
5 Specify the printer location in the Location field.
6 Type the IP address or DNS name of the printer in the Device textbox for
network-connected printers. On IBM AIX with jetdirect Queue type,
only the DNS name is possible-numeric IP address is not allowed.
7 Queue type shows the connection as lpd or jetdirect in the
corresponding list box. Additionally, usb type is available on Sun Solaris
OS.
8 Select Copies to set the number of copies.
9 Check the Collate option to receive copies already sorted.
10 Check the Reverse Order option to receive copies in the reverse order.

Installing driver over the network
152
2. Using a Network-Connected Machine
11 Check the Make Default option to set this printer as default.
12 Click OK to add the printer.
153
2. Using a Network-Connected Machine
IPv6 configuration
IPv6 is supported properly only in Windows Vista or higher.
• Some features and optional goods may not be available depending on
model or country (see "Features by models" on page 7 or "Menu
overview" on page 34).
• If the IPv6 network seems to not be working, set all the network setting
to the factory defaults and try again using Clear Setting.
In the IPv6 network environment, follow the next procedure to use the IPv6
address.
10
From the control panel
1Connect your machine to the network with a network cable.
2 Turn on the machine.
3 Print a Network Configuration Report that will check IPv6 addresses
(see "Printing a network configuration report" on page 142).
4 Select Start > Control Panel > Printers and Faxes.
5 Click Add a printer in the left pane of the Printers and Faxes windows.
6 Click Add a local printer in the Add Printer windows.
7 The Add Printer Wizard window appears. Follow the instructions in the
window.
If the machine does not work in the network environment, activate IPv6.
Refer to the next section followed by.
Activating IPv6
1Press the (Menu) button on the control panel.
2 Press Network > TCP/IP (IPv6) > IPv6 Activate.
3 Select On and press OK.
4 Turn the machine off and turn it on again.
5 Reinstall your printer driver.
IPv6 configuration
154
2. Using a Network-Connected Machine
Setting IPv6 addresses
The machine supports the following IPv6 addresses for network printing and
managements.
•Link-local Address: Self-configured local IPv6 address (Address starts with
FE80).
•Stateless Address: Automatically configured IPv6 address by a network
router.
•Stateful Address: IPv6 address configured by a DHCPv6 server.
•Manual Address: Manually configured IPv6 address by a user.
DHCPv6 address configuration (Stateful)
If you have a DHCPv6 server on your network, you can set one of the following
options for default dynamic host configuration.
1Press the (Menu) button on the control panel.
2 Press Network > TCP/IP (IPv6) > DHCPv6 Config.
3 Press OK to select the required value you want.
•DHCPv6 Addr.: Always use DHCPv6 regardless of router request.
•DHCPv6 Off: Never use DHCPv6 regardless of router request.
•Router: Use DHCPv6 only when requested by a router.
11
From the SyncThru™ Web Service
For models that do not have the display screen on the control panel, you
need to access SyncThru™ Web Service first using the IPv4 address and
follow the below procedure to use IPv6.
1Access a web browser, such as Internet Explorer, from Windows. Enter
the machine IP address (http://xxx.xxx.xxx.xxx) in the address field and
press the Enter key or click Go.
2 If it’s your first time logging into SyncThru™ Web Service you need to
log-in as an administrator. Type in the below default ID and password.
•ID: admin
•Password: sec00000
3 When the SyncThru™ Web Service window opens, move the mouse
cursor over the Settings of the top menu bar and then click Network
Settings.
4 Click TCP/IPv6 on the left pane of the website.
5 Check the IPv6 Protocol check box to activate IPv6.
6 Check the Manual Address check box. Then, the Address/Prefix text
box is activated.

IPv6 configuration
155
2. Using a Network-Connected Machine
7 Enter the rest of the address (e.g.,:3FFE:10:88:194::AAAA. “A” is the
hexadecimal 0 through 9, A through F).
8 Choose the DHCPv6 configuration.
9 Click the Apply button.
Using SyncThru™ Web Service
1Start a web browser, such as Internet Explorer, that supports IPv6
addressing as a URL.
2 Select one of the IPv6 addresses (Link-local Address, Stateless
Address, Stateful Address, Manual Address) from Network
Configuration Report (see "Printing a network configuration report" on
page 142).
3 Enter the IPv6 addresses (e.g.,: http://[FE80::215:99FF:FE66:7701]).
Address must be enclosed in '[ ]' brackets.
156
2. Using a Network-Connected Machine
Wireless network setup
• Make sure your machine supports wireless networking. Wireless
networking may not be available depending on the model (see "Features
by models" on page 7).
• If the IPv6 network seems to not be working, set all the network settings
to the factory defaults and try again using Clear Setting.
12
Getting started
Understanding your network type
Typically, you can only have one connection between your computer and the
machine at a time.
Wireless network name and Network Password
Wireless networks require higher security, so when an access point is first set up,
a network name (SSID), the type of security used, and a Network Password are
created for the network. Ask your network administrator about this information
before proceeding with the machine installation.
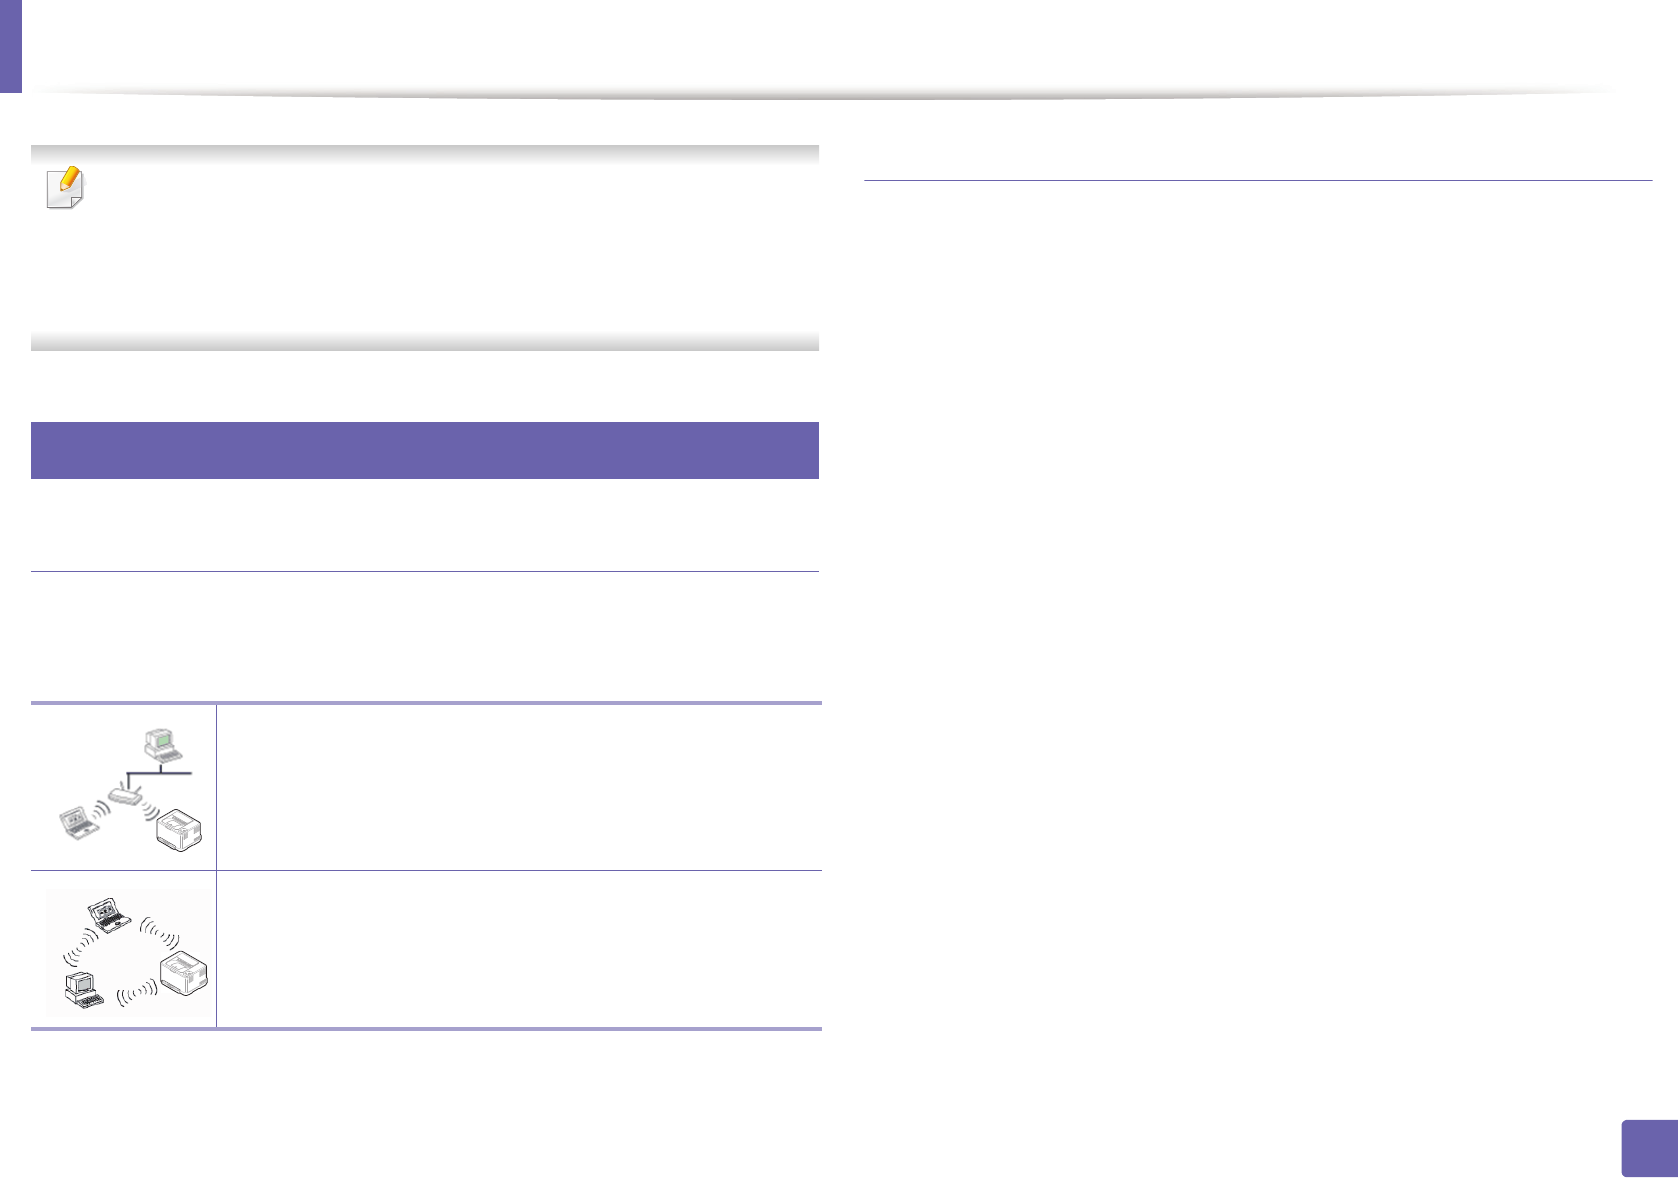
Infrastructure mode
This is an environment generally used for homes and SOHOs
(Small Office/ Home Office). This mode uses an access point to
communicate with the wireless machine.
Ad hoc mode
This mode does not use an access point. The wireless
computer and wireless machine communicate directly.
Wireless network setup
157
2. Using a Network-Connected Machine
13
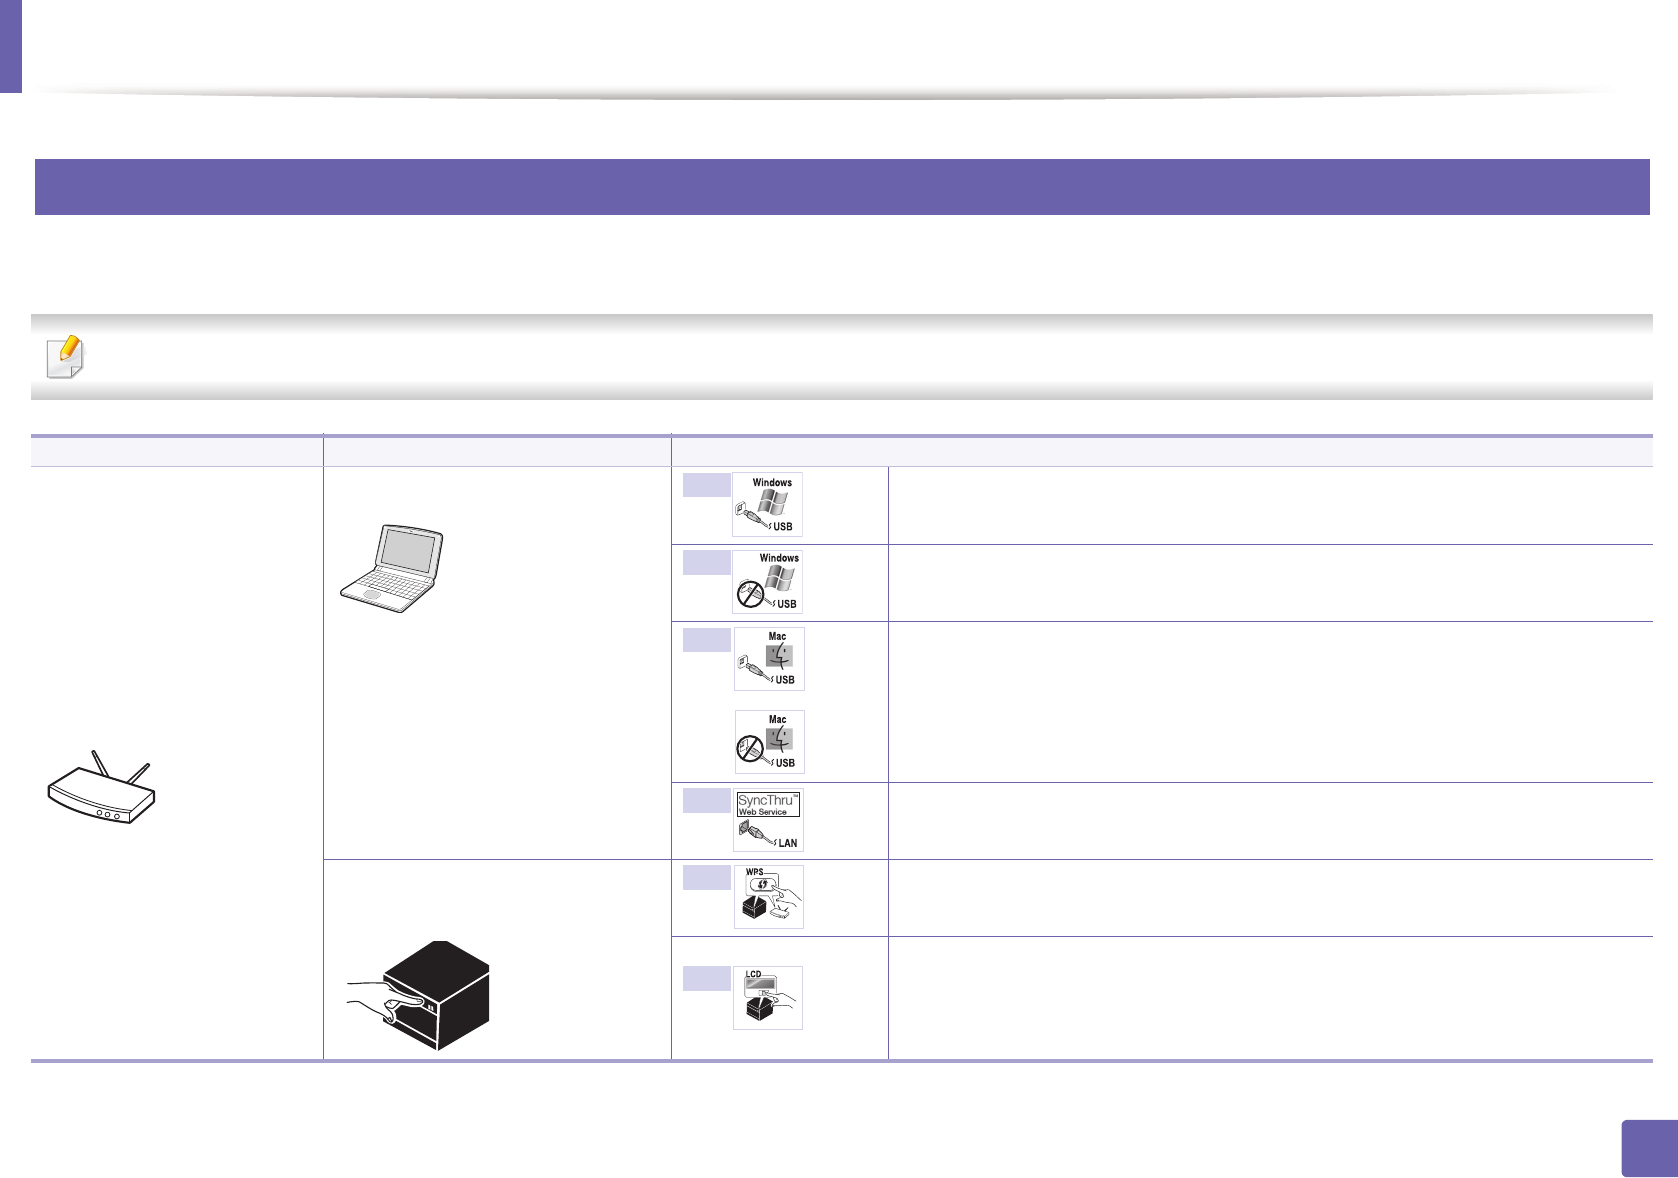
Introducing wireless set up methods
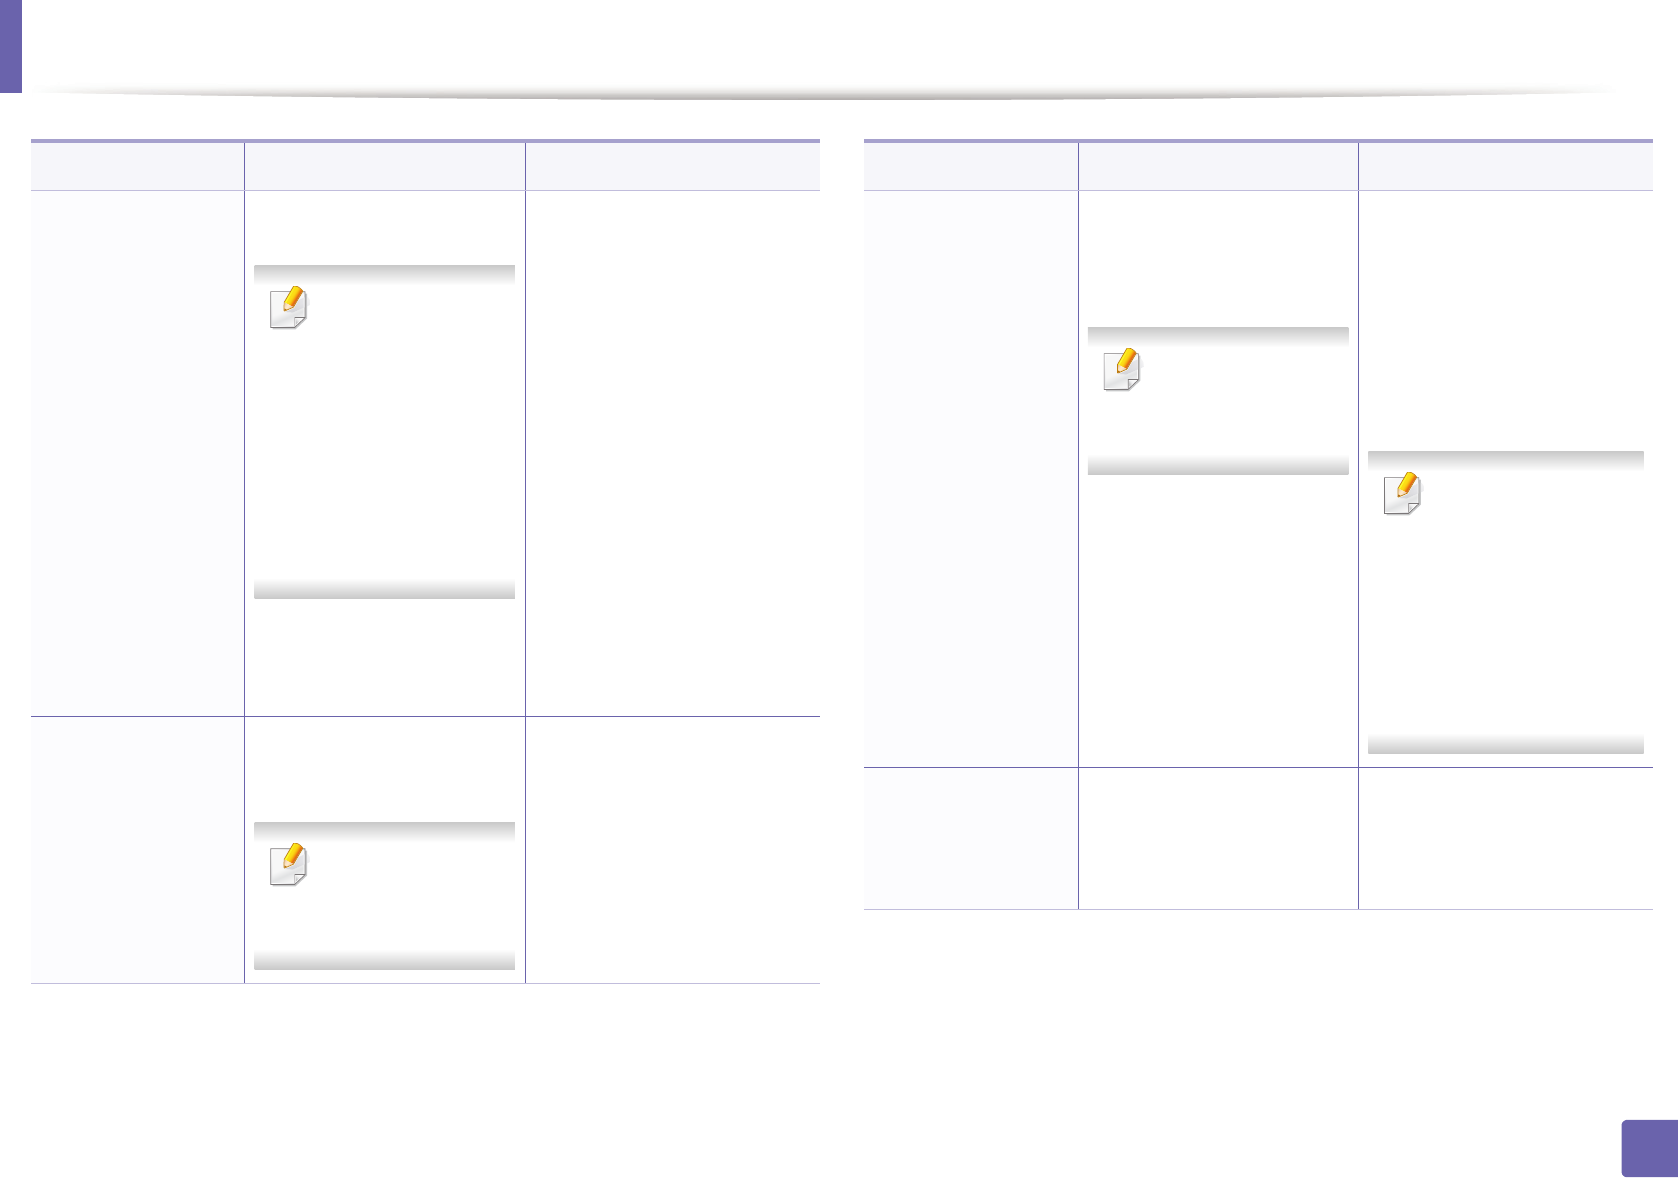
You can set wireless settings either from the machine or the computer. Choose the setting method from the below table.
Some wireless network installation types may not be available depending on the model or country.
Set up method Connecting method Description & Reference
With Access Point
From the computer Windows user, see "Access point via USB cable" on page 164.
Windows user, see "Access point without a USB cable (recommended)" on page
167.
• Mac user, see "Access point via USB cable" on page 172.
• Mac user, see "Access point without a USB cable (recommended)" on page
175
See "Using a network cable" on page 180.
From the machine’s control
panel
• See "Machines with a display screen" on page 160.
• See "Machines without a display screen" on page 161.
See "Using the menu button" on page 163.
A
B
C
OR
D
E
F
Wireless network setup
158
2. Using a Network-Connected Machine
• If problems occur during wireless set up or driver installation, refer to the troubleshooting chapter (see "Troubleshooting" on page 186).
• It is strongly recommended that you set the password on Access Points. If you do not set the password on Access Points, they might be exposed to illegal access
from unknown machines including PCs, smart phones and printers. Refer to the Access Point user' guide for password settings.
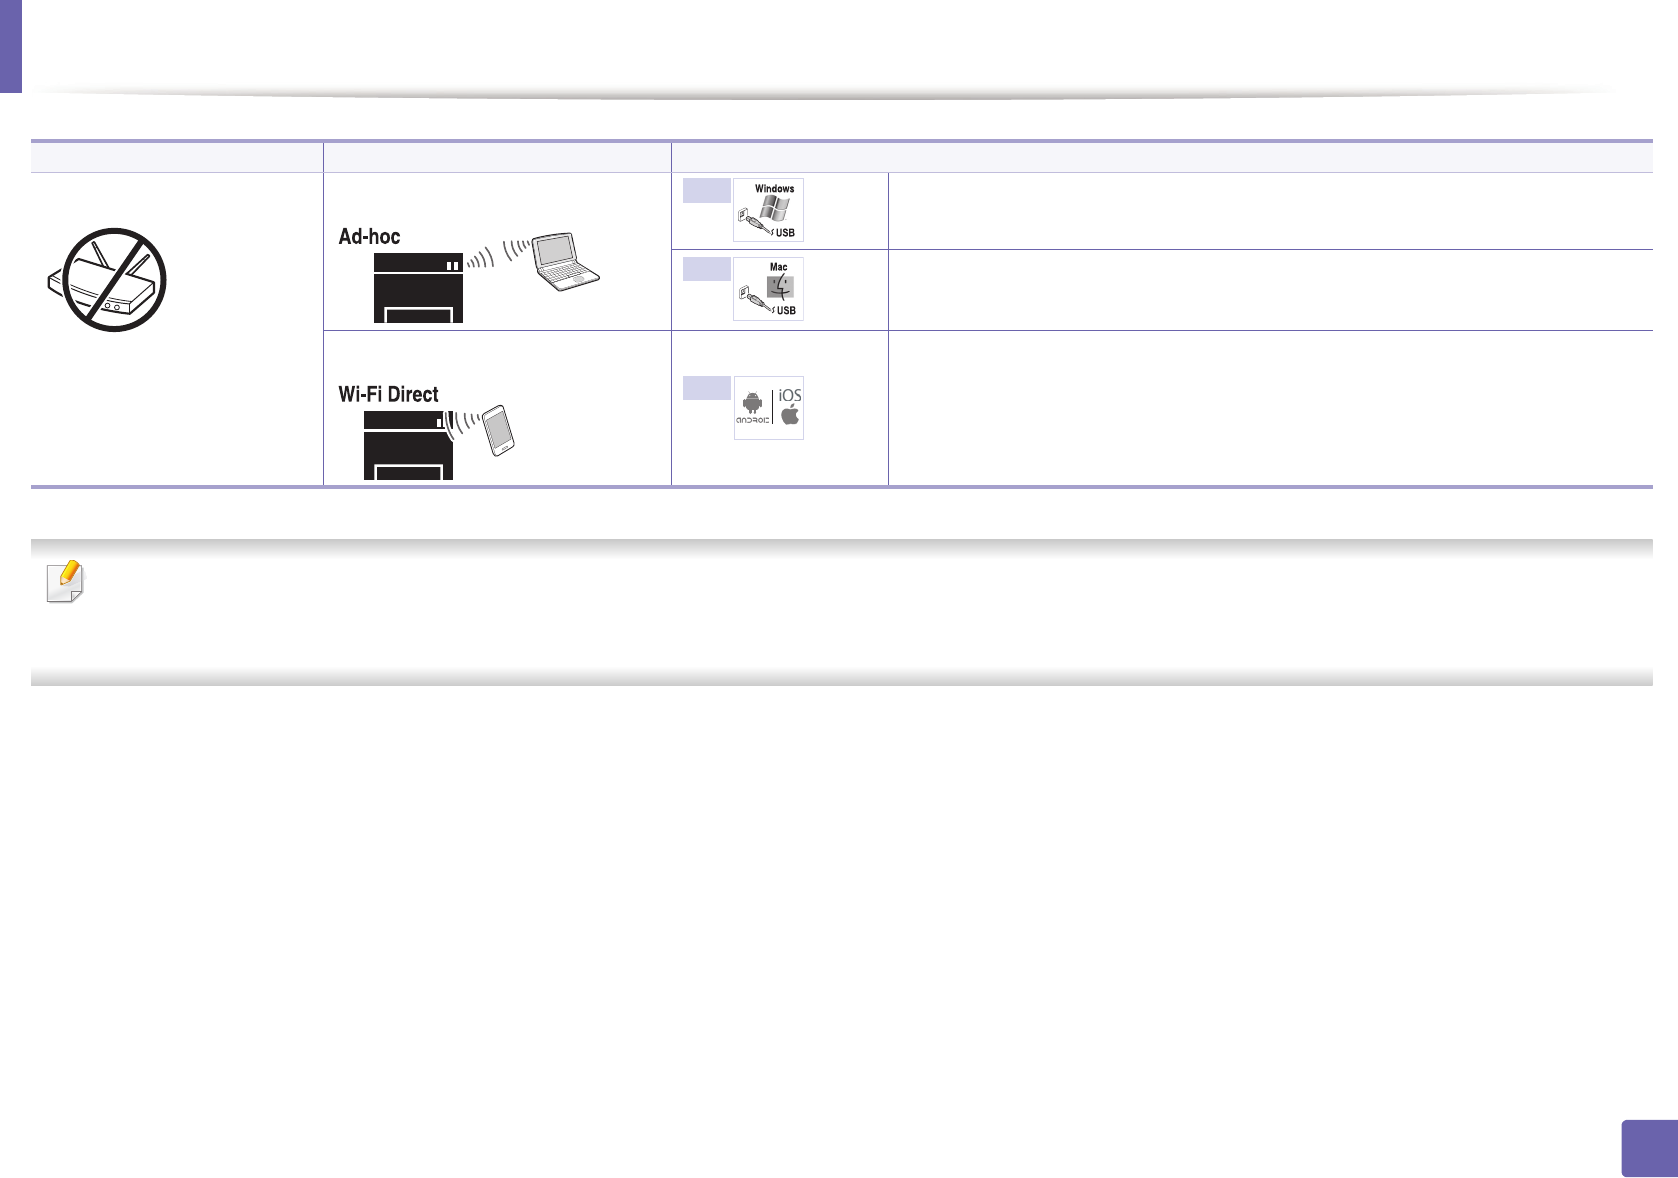
Without Access Point From the computer Windows user, see "Ad hoc via USB cable" on page 169.
Mac user, see "Ad hoc via USB cable" on page 177.
Wi-Fi Direct setup See "Setting up Wi-Fi Direct" on page 183.
Set up method Connecting method Description & Reference
G
H
I

Wireless network setup
159
2. Using a Network-Connected Machine
14
Using the WPS button
If your machine and an access point (or wireless router) support Wi-Fi Protected
Setup™ (WPS), you can easily configure the wireless network settings by
pressing the (WPS) button on the control panel without a computer.
• If you want to use the wireless network using the infrastructure mode,
make sure that the network cable is disconnected from the machine.
Using the WPS (PBC) button or entering the PIN from the computer to
connect to the access point (or wireless router) varies depending on the
access point (or wireless router) you are using. Refer to the user's guide
of the access point (or wireless router) you are using.
• When using the WPS button to set the wireless network, security settings
may change. To prevent this, lock the WPS option for the current wireless
security settings. The option name may differ depending on the access
point (or wireless router) you are using.
Items to prepare
• Check if the access point (or wireless router) supports Wi-Fi Protected
Setup™ (WPS).
• Check if your machine supports Wi-Fi Protected Setup™ (WPS).
• Networked computer (PIN mode only)
Choosing your type
There are two methods available to connect your machine to a wireless network
using the (WPS) button on the control panel.
The Push Button Configuration (PBC) method allows you to connect your
machine to a wireless network by pressing both the (WPS) button on the
control panel of your machine and the WPS (PBC) button on a Wi-Fi Protected
Setup™ WPS-enabled access point (or wireless router) respectively.
The Personal Identification Number (PIN) method helps you connect your
machine to a wireless network by entering the supplied PIN information on a Wi-
Fi Protected Setup™ WPS-enabled access point (or wireless router).
Factory default in your machine is PBC mode, which is recommended for a
typical wireless network environment.
You can change the WPS mode in control panel ( (Menu) > Network >
Wireless > OK > WPS Setting).

Wireless network setup
160
2. Using a Network-Connected Machine
Machines with a display screen
Connecting in PBC mode
1Press and hold the (WPS) button on the control panel for more than
2 seconds.
The machine starts waiting for up to two minutes until you press the WPS
(PBC) button on the access point (or wireless router).
2 Press the WPS (PBC) button on the access point (or wireless router).
The messages are displayed on the display screen in the order below:
a Connecting: The machine is connecting to the access point (or
wireless router).
b Connected: When the machine is successfully connected to the
wireless network, the WPS LED light stays on.
c AP SSID: After completing the wireless network connection process,
the AP’s SSID information appears on the display.
3 Insert the supplied CD into the CD-ROM drive and proceed to install the
software following the directions on the screen. When the "Connect
Printer" screen appears, select the Network (Ethernet/Wireless)
connection.
Connecting in PIN mode
1Press and hold the (WPS) button on the control panel for more than
2 seconds.
2 The eight-digit PIN appears on the display.
You need to enter the eight-digit PIN within two minutes on the
computer that is connected to the access point (or wireless router).
The messages are displayed on the display screen in the order below:
a Connecting: The machine is connecting to the wireless network.
b Connected: When the machine is successfully connected to the
wireless network, the WPS LED light stays on.
c SSID Type: After completing the wireless network connection
process, the AP’s SSID information is displayed on the LCD display.
3 Insert the supplied CD into the CD-ROM drive and proceed to install the
software following the directions on the screen. When the "Connect
Printer" screen appears, select Network (Ethernet/Wireless) connection.

Wireless network setup
161
2. Using a Network-Connected Machine
Machines without a display screen
Connecting in PBC mode
1Press and hold the (WPS) button on the control panel for about 2 - 4
seconds until the status LED blinks quickly.
The machine starts connecting to the wireless network. The LED blinks
slowly for up to two minutes until you press the PBC button on the
access point (or wireless router).
2 Press the WPS (PBC) button on the access point (or wireless router).
a The light blinks fast on the WPS LED. The machine is connecting to
the access point (or wireless router).
b When the machine is successfully connected to the wireless
network, the WPS LED light stays on.
3 Insert the supplied CD into the CD-ROM drive and proceed to install the
software following the directions on the screen. When the "Connect
Printer" screen appears, select the Network (Ethernet/Wireless)
connection.
Connecting in PIN mode
1The network configuration report, including PIN, must be printed (see
"Printing a network configuration report" on page 142).
In ready mode, press and hold the (Cancel or Stop/Clear) button on
the control panel for about 5 seconds. You can find your machine’s PIN.
2 Press and hold the (WPS) button on the control panel for more than
4 seconds until the status LED stays on.
The machine starts connecting to the access point (or wireless router).
3 You need to enter the eight-digit PIN within two minutes on the
computer that is connected to the access point (or wireless router).
The LED blinks slowly for up to two minutes until you enter the eight-
digit PIN.
The WPS LED blinks in the order below:
a The light blinks fast on the WPS LED. The machine is connecting to
the access point (or wireless router).
b When the machine is successfully connected to the wireless
network, the WPS LED light stays on.
4 Insert the supplied CD into the CD-ROM drive and proceed to install the
software following the directions on the screen. When the "Connect
Printer" screen appears, select the Network (Ethernet/Wireless)
connection.
Wireless network setup
162
2. Using a Network-Connected Machine
Re-connecting to a network
When the wireless function is off, the machine automatically tries to re-connect
to the access point (or wireless router) with the previously used wireless
connection settings and address.
In the following cases, the machine automatically re-connects to the
wireless network:
• The machine is turned off and on again.
• The access point (or wireless router) is turned off and on again.
Canceling the connection process
To cancel the wireless network connection when the machine is connecting to
the wireless network, press and release the (Cancel or Stop/Clear) on the
control panel. You need to wait 2 minutes to re-connect to the wireless
network.
Disconnecting from a network
To disconnect the wireless network connection, press the (WPS) button on
the control panel for more than two seconds.
•When the Wi-Fi network is in idle mode: The machine is immediately
disconnected from the wireless network and the WPS LED turns off.
•When the Wi-Fi network is being used: While the machine waits until the
current job is finished, the light blinks fast on the WPS LED. Then, the
wireless network connection is automatically disconnected and the WPS
LED turns off.
Wireless network setup
163
2. Using a Network-Connected Machine
15
Using the menu button
Some menus may not appear in the display depending on options or
models. If so, it is not applicable to your machine (see "Menu overview" on
page 34).
Before starting, you will need to know the network name (SSID) of your wireless
network and the Network Password if it is encrypted. This information was set
when the access point (or wireless router) was installed. If you do not know
about your wireless environment, please ask the person who set up your
network.
After completing the wireless network connection, you need to install a
machine driver to print from an application (see "Installing driver over the
network" on page 145).
1Press the (Menu) button on the control panel.
2 Press Network > Wireless > WLAN Settings.
3 Press the OK to select the setup method you want.
•Wizard (recommended): In this mode, the setup is automatic. The
machine will display a list of available networks from which to
choose. After a network is chosen then printer will prompt for the
corresponding security key.
•Custom: In this mode, users can give or edit manually their own SSID
, or choose the security option in detail.
Wireless network setup
164
2. Using a Network-Connected Machine
16
Setup using Windows
Shortcut to the Samsung Easy Wireless Setup program without the CD: If
you have installed the printer driver once, you can access the Samsung
Easy Wireless Setup program without the CD (see "Accessing
management tools" on page 327).
Access point via USB cable
Items to prepare
• Access point
• Network-connected computer
• Software CD that was provided with your machine
• A machine installed with a wireless network interface
• USB cable
Creating the infrastructure network
1Check wheter the USB cable is connected to the machine.
2 Turn on your computer, access point, and machine.
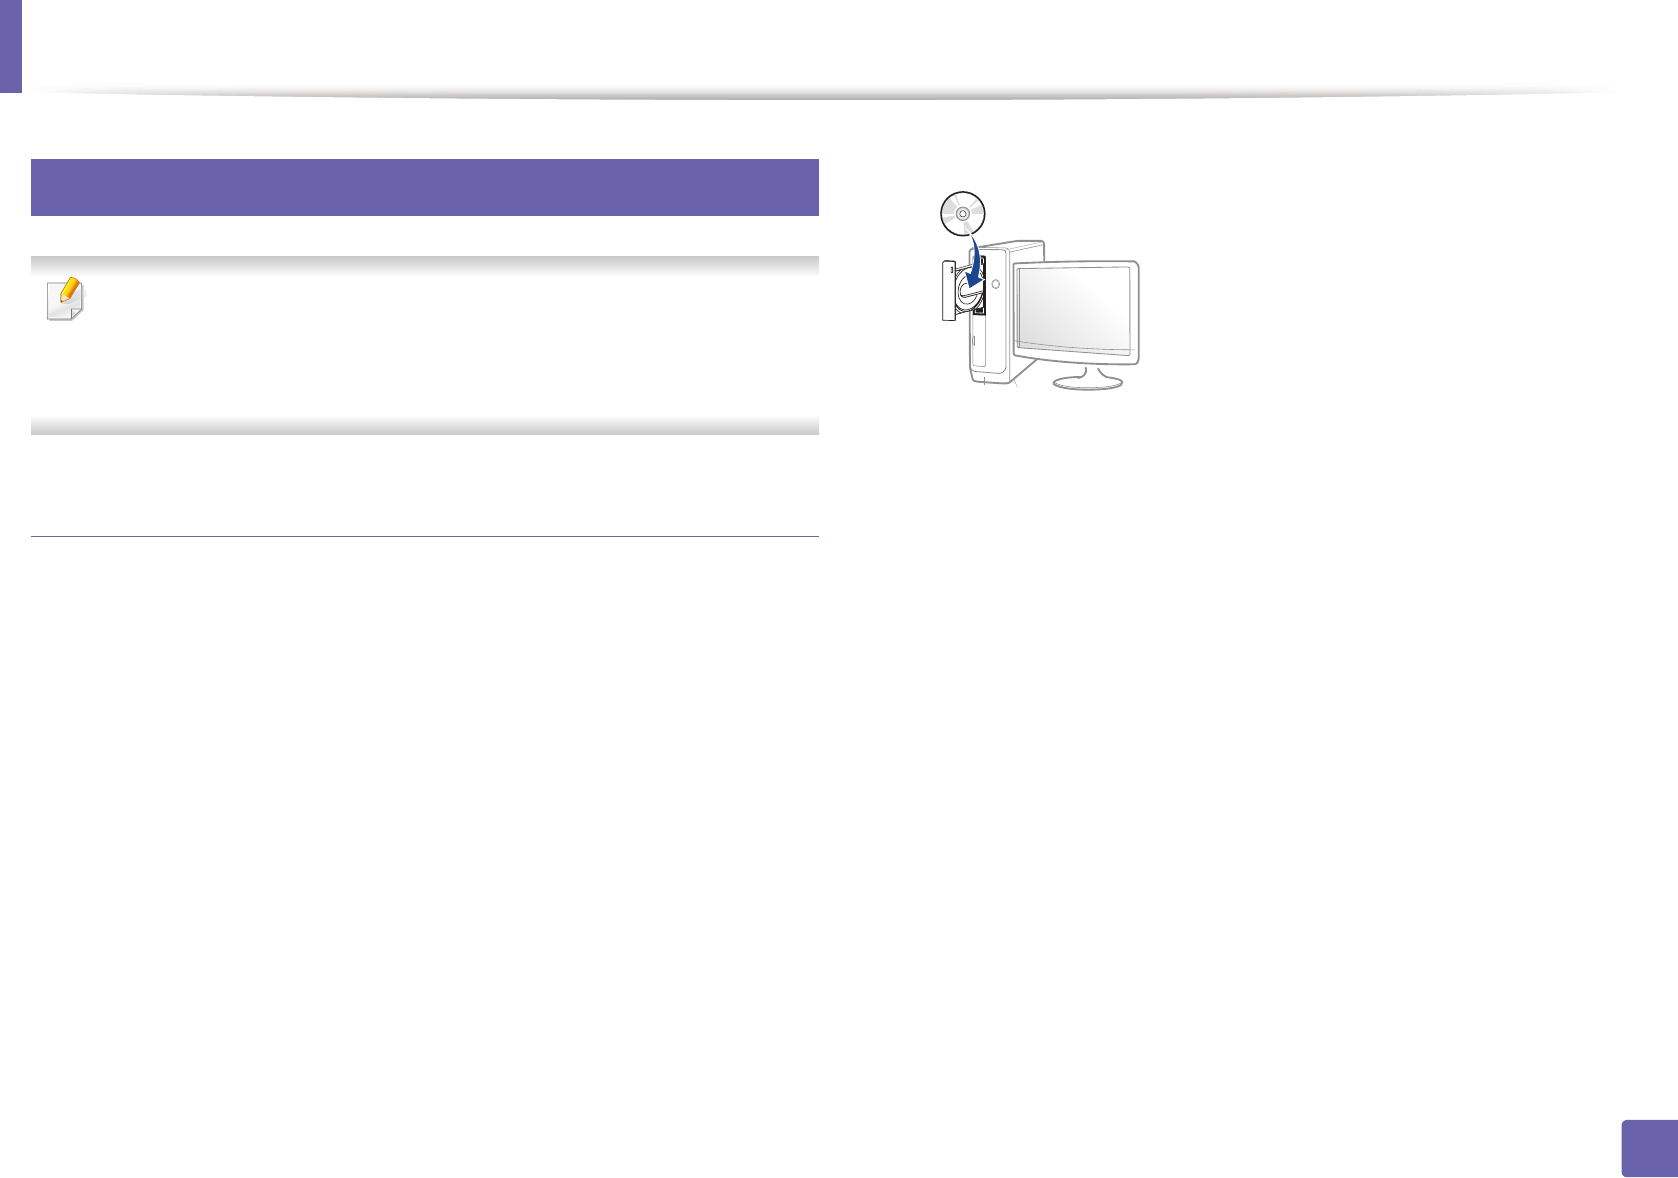
3 Insert the supplied software CD into your CD-ROM drive.
If the installation window does not appear, click Start > All programs >
Accessories > Run.
X:\Setup.exe replacing “X” with the letter, which represents your CD-
ROM drive and click OK.
4 Review and accept the installation agreements in the installation
window. Then, click Next.
Wireless network setup
165
2. Using a Network-Connected Machine
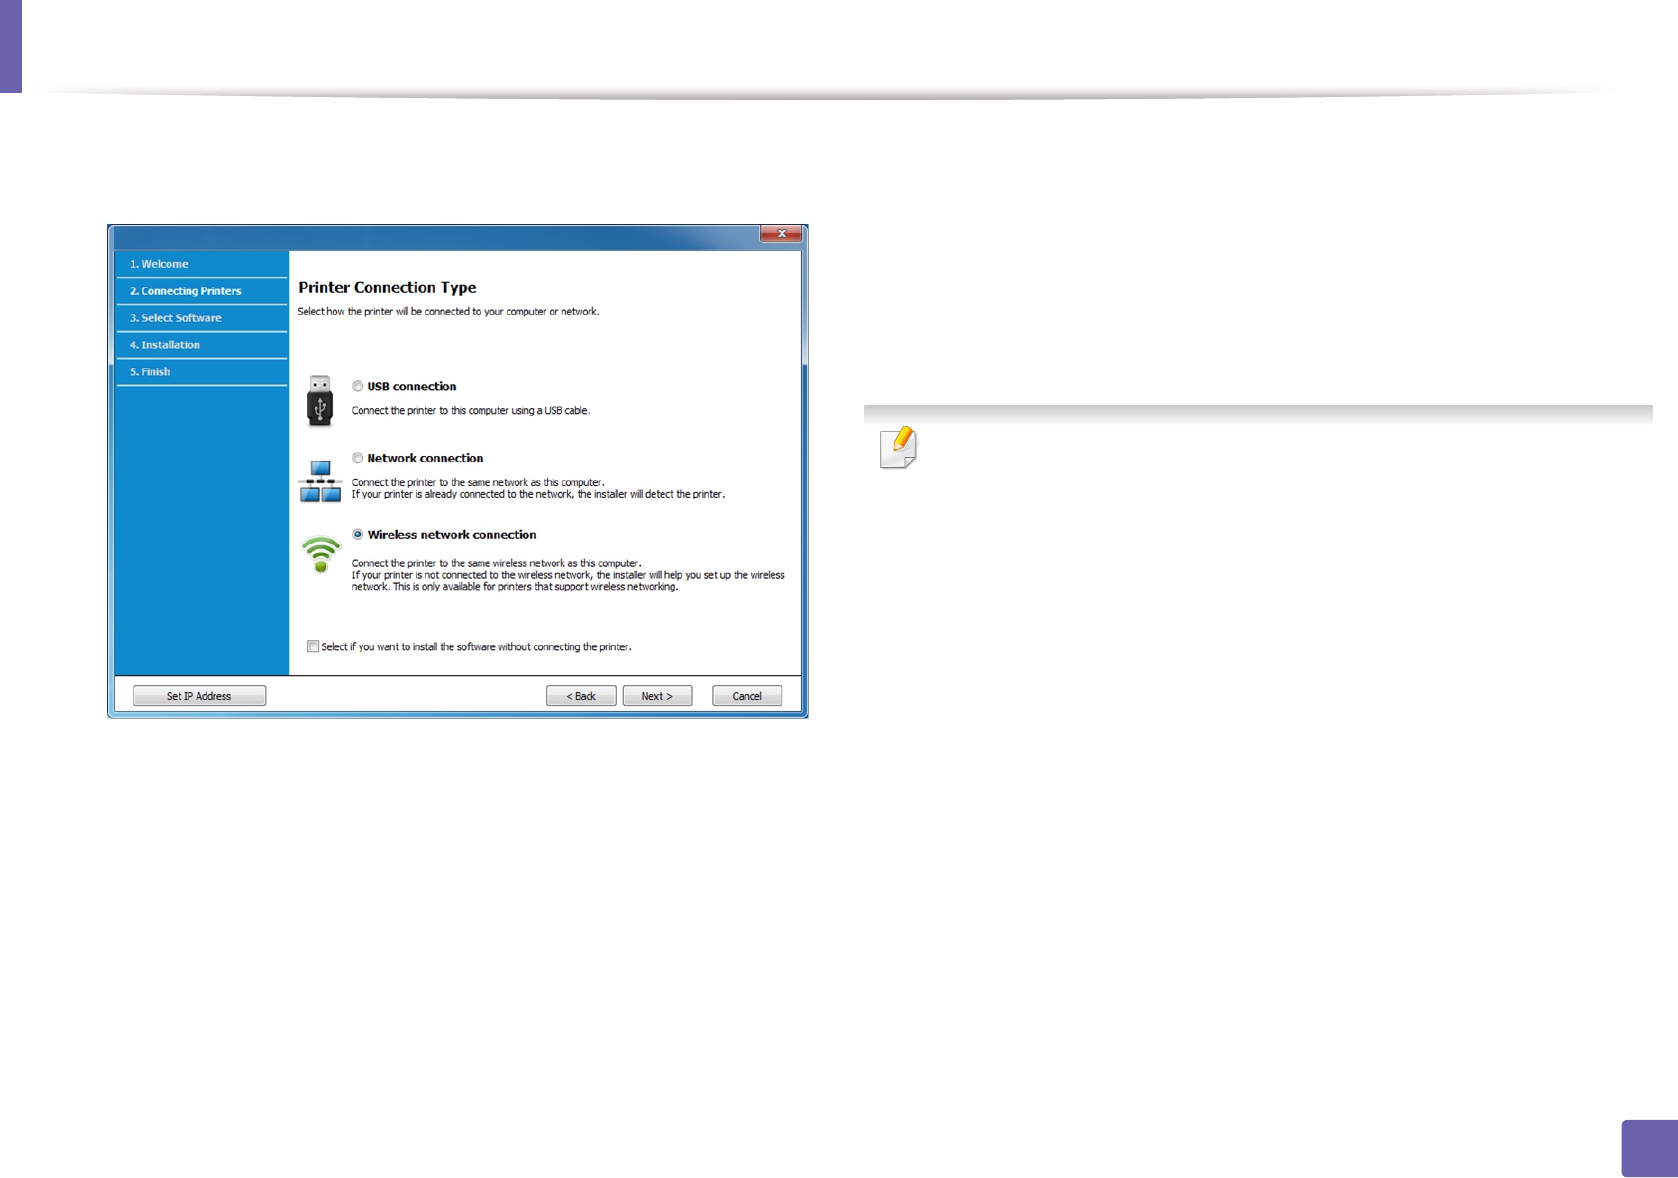
5 Select Wireless network connection on the Printer Connection Type
screen. Then, click Next.6 On the Are you setting up your printer for the first time? screen, select
Yes, I will set up my printer's wireless network. Then, click Next.
If your printer is already connected on the network, select No, my
printer is already connected to my network.
7 After searching, the window shows the wireless network devices. Select
the name (SSID) of the access point you want to use and click Next.
If you cannot find the network name you want to choose, or if you want to
set the wireless configuration manually, click Advanced Setting.
•Enter the wireless Network Name: Enter the SSID of the access point
(SSID is case-sensitive).
•Operation Mode: Select Infrastructure.
•Authentication: Select an authentication type.
Open System: Authentication is not used, and encryption may or may
not be used, depending on the need for data security.
Shared Key: Authentication is used. A device that has a proper WEP key
can access the network.
WPA Personal or WPA2 Personal: Select this option to authenticate the
print server based on a WPA Pre-Shared Key. This uses a shared secret key
(generally called Pre Shared Key pass phrase), which is manually
configured on the access point and each of its clients.
•Encryption: Select the encryption (None, WEP64, WEP128, TKIP, AES,
TKIP AES).
•Network Password: Enter the encryption network password value.
Wireless network setup
166
2. Using a Network-Connected Machine
•Confirm Network Password: Confirm the encryption network
password value.
•WEP Key Index: If you are using WEP Encryption, select the appropriate
WEP Key Index.
The wireless network security window appears when the access point has
security settings.
Enter the Network Password of the access point (or router).
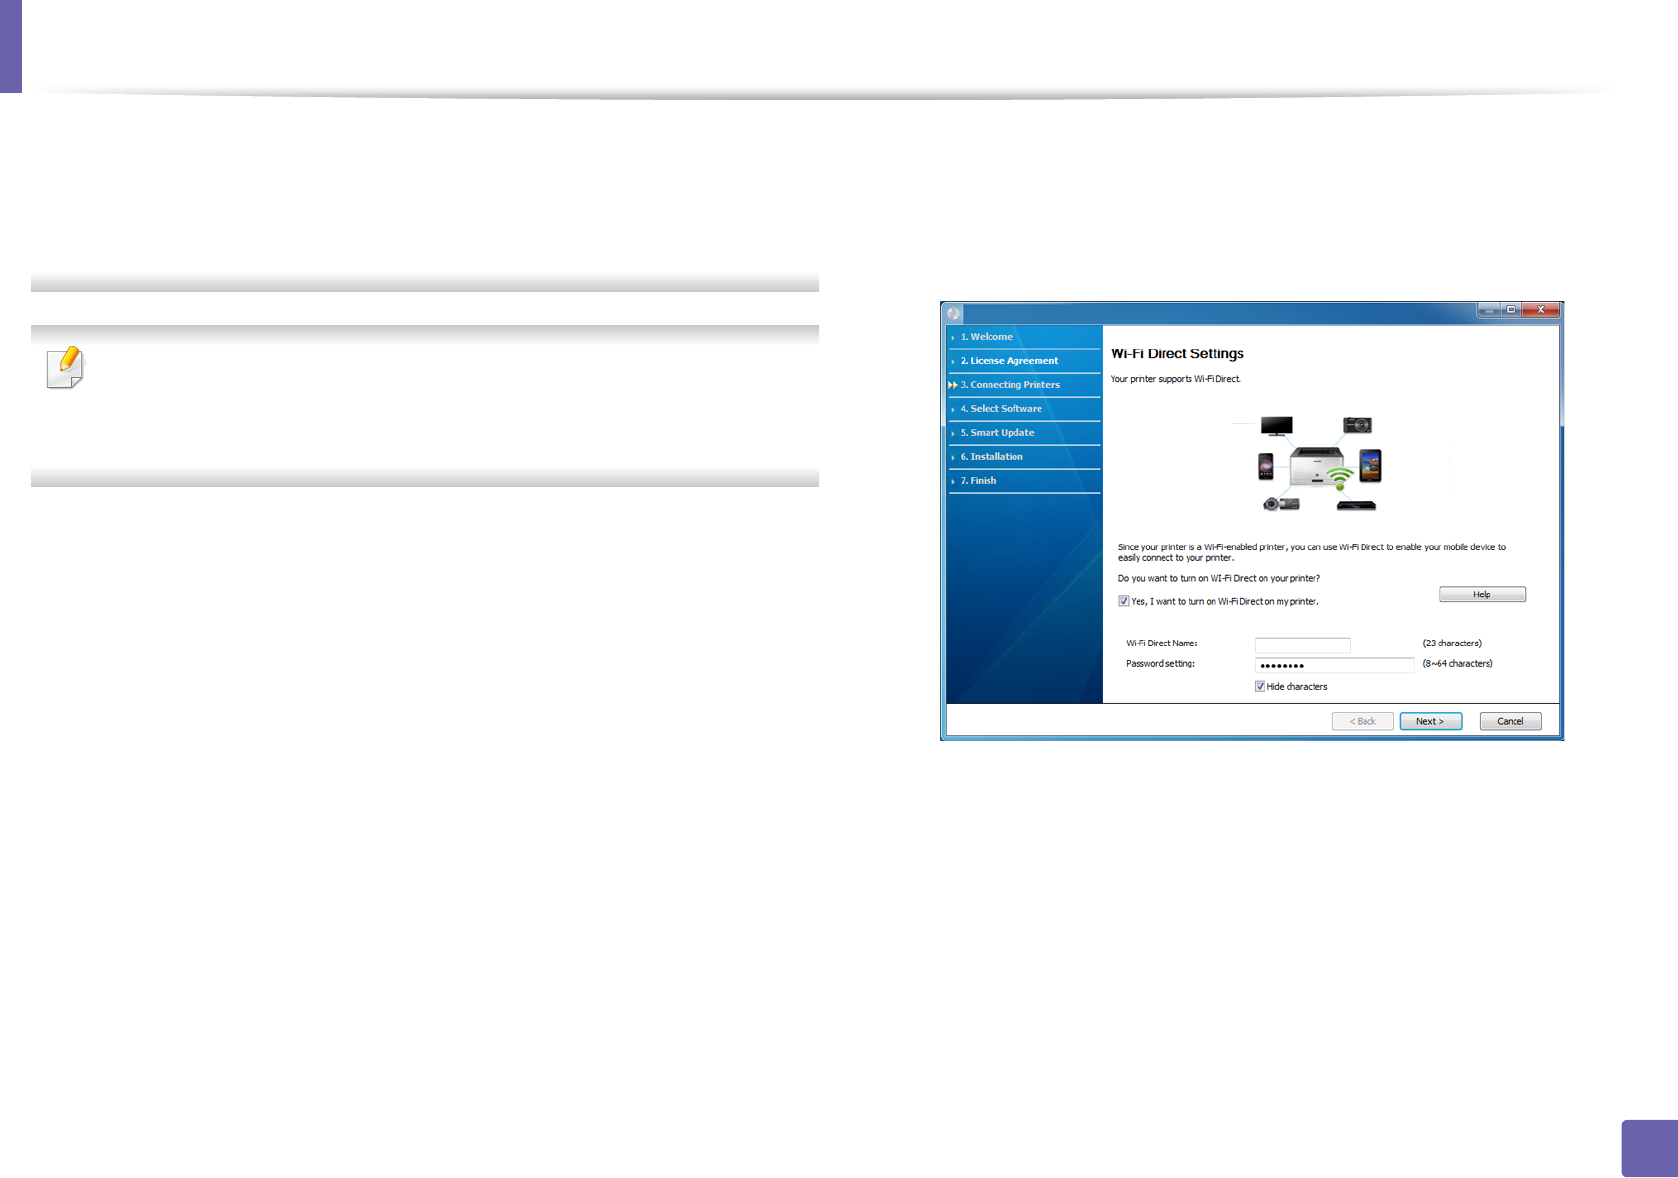
8 If your printer supports Wi-Fi Direct and this function is disabled, its
corresponding screen will appears.
If you want to enable Wi-Fi Direct, check the checkbox, and click Next. If
not, click just Next. Next.
Wireless network setup
167
2. Using a Network-Connected Machine
• Wi-Fi Direct option appears on the screen only if your printer supports
this feature.
• Can start to build Wi-Fi Direct by using Samsung Easy Printer Manager
(see "Setting up Wi-Fi Direct" on page 183).
•Wi-Fi Direct Name: The default Wi-Fi Direct Name is the model name
and the maximum length is 22 characters.
•Password setting is the numeric string, and the size is 8 ~ 64 characters.
9 When the wireless network set up is completed, disconnect the USB
cable between the computer and machine. Click Next.
10 Follow the instructions in the installation window.
Access point without a USB cable (recommended)
Items to prepare
• WiFi-enabled PC running Windows 7 or higher and an access point (router)
• Software CD that was provided with your machine
• A machine installed with a wireless network interface
While setting the wireless network, the machine uses PC's wireless LAN. You
might not be able to connect to the Internet.
Creating the infrastructure network
1Turn on your computer, access point, and machine.
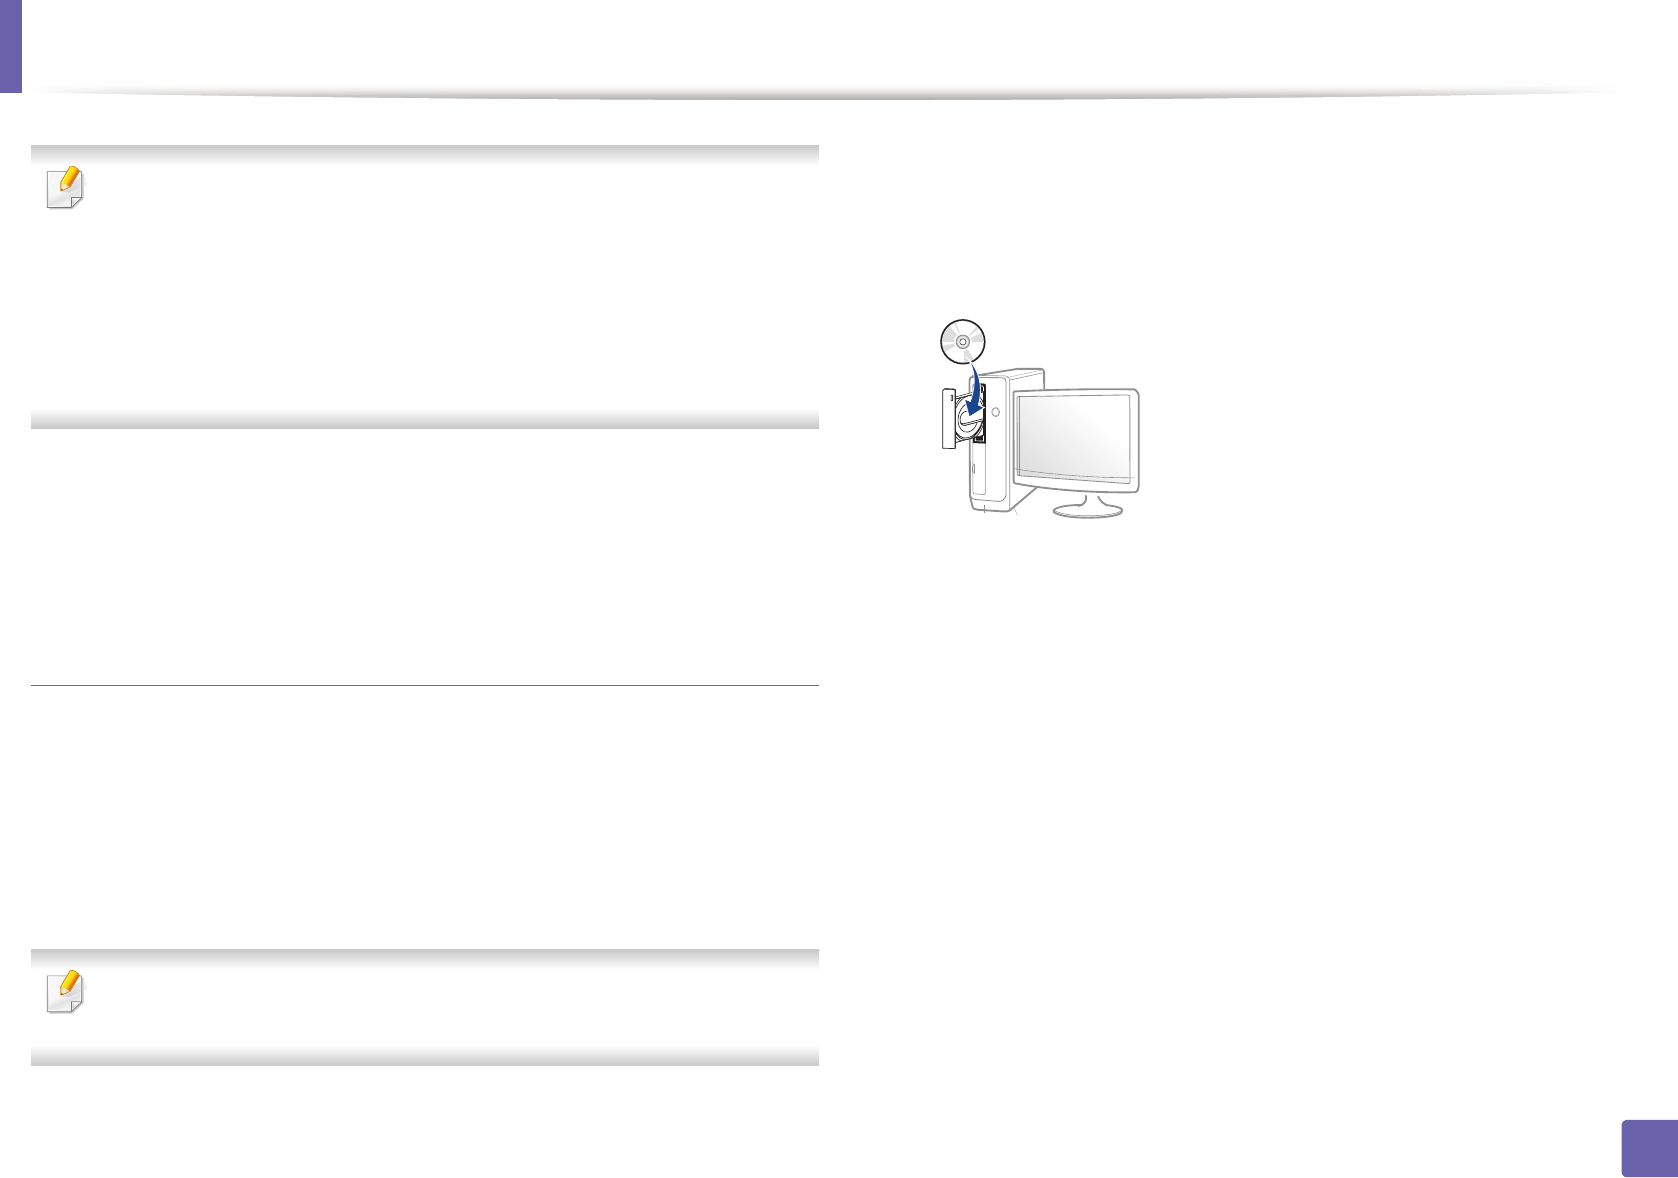
2 Insert the supplied software CD into your CD-ROM drive.
If the installation window does not appear, click Start > All programs >
Accessories > Run.
X:\Setup.exe replacing “X” with the letter, which represents your CD-
ROM drive and click OK.
3 Review and accept the installation agreements in the installation
window. Then, click Next.

Wireless network setup
168
2. Using a Network-Connected Machine
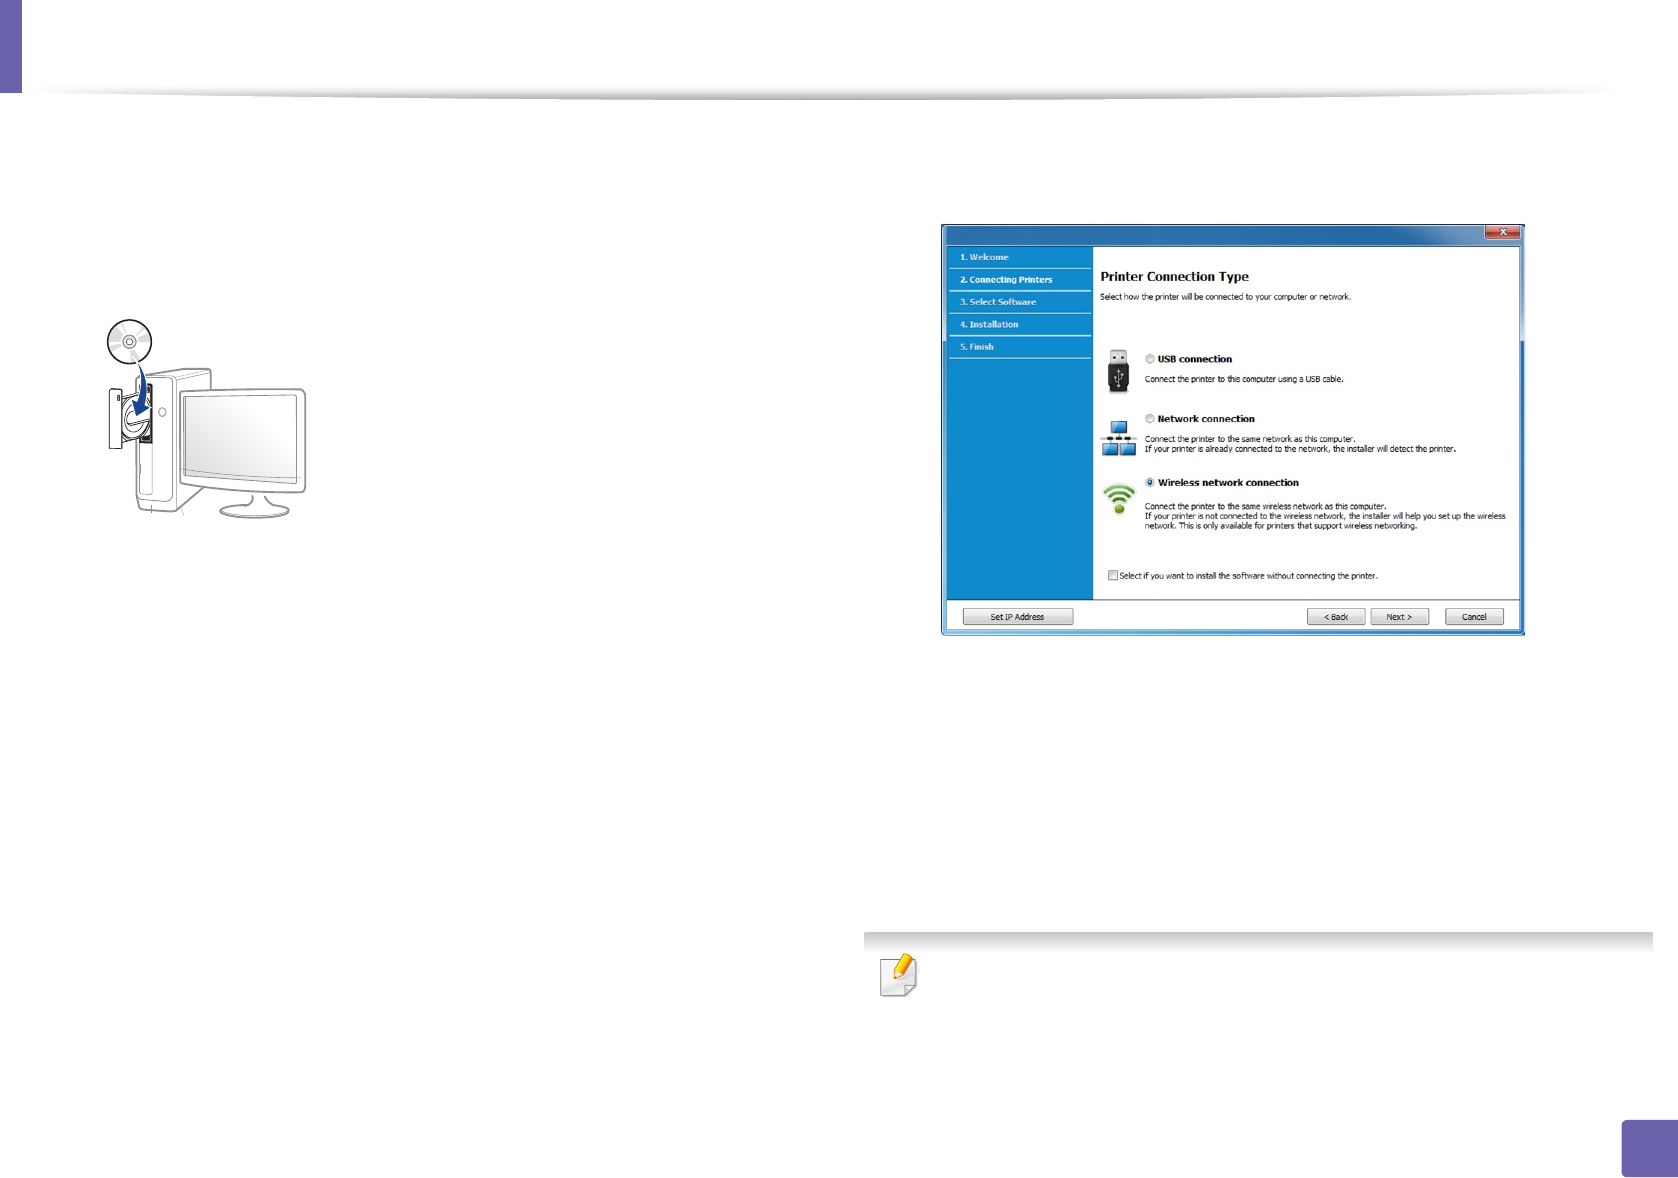
4 Select Wireless network connection on the Printer Connection Type
screen. Then, click Next.5 On the Are you setting up your printer for the first time? screen, select
Yes, I will set up my printer's wireless network. Then, click Next.
If your printer is already connected on the network, select No, my
printer is already connected to my network.
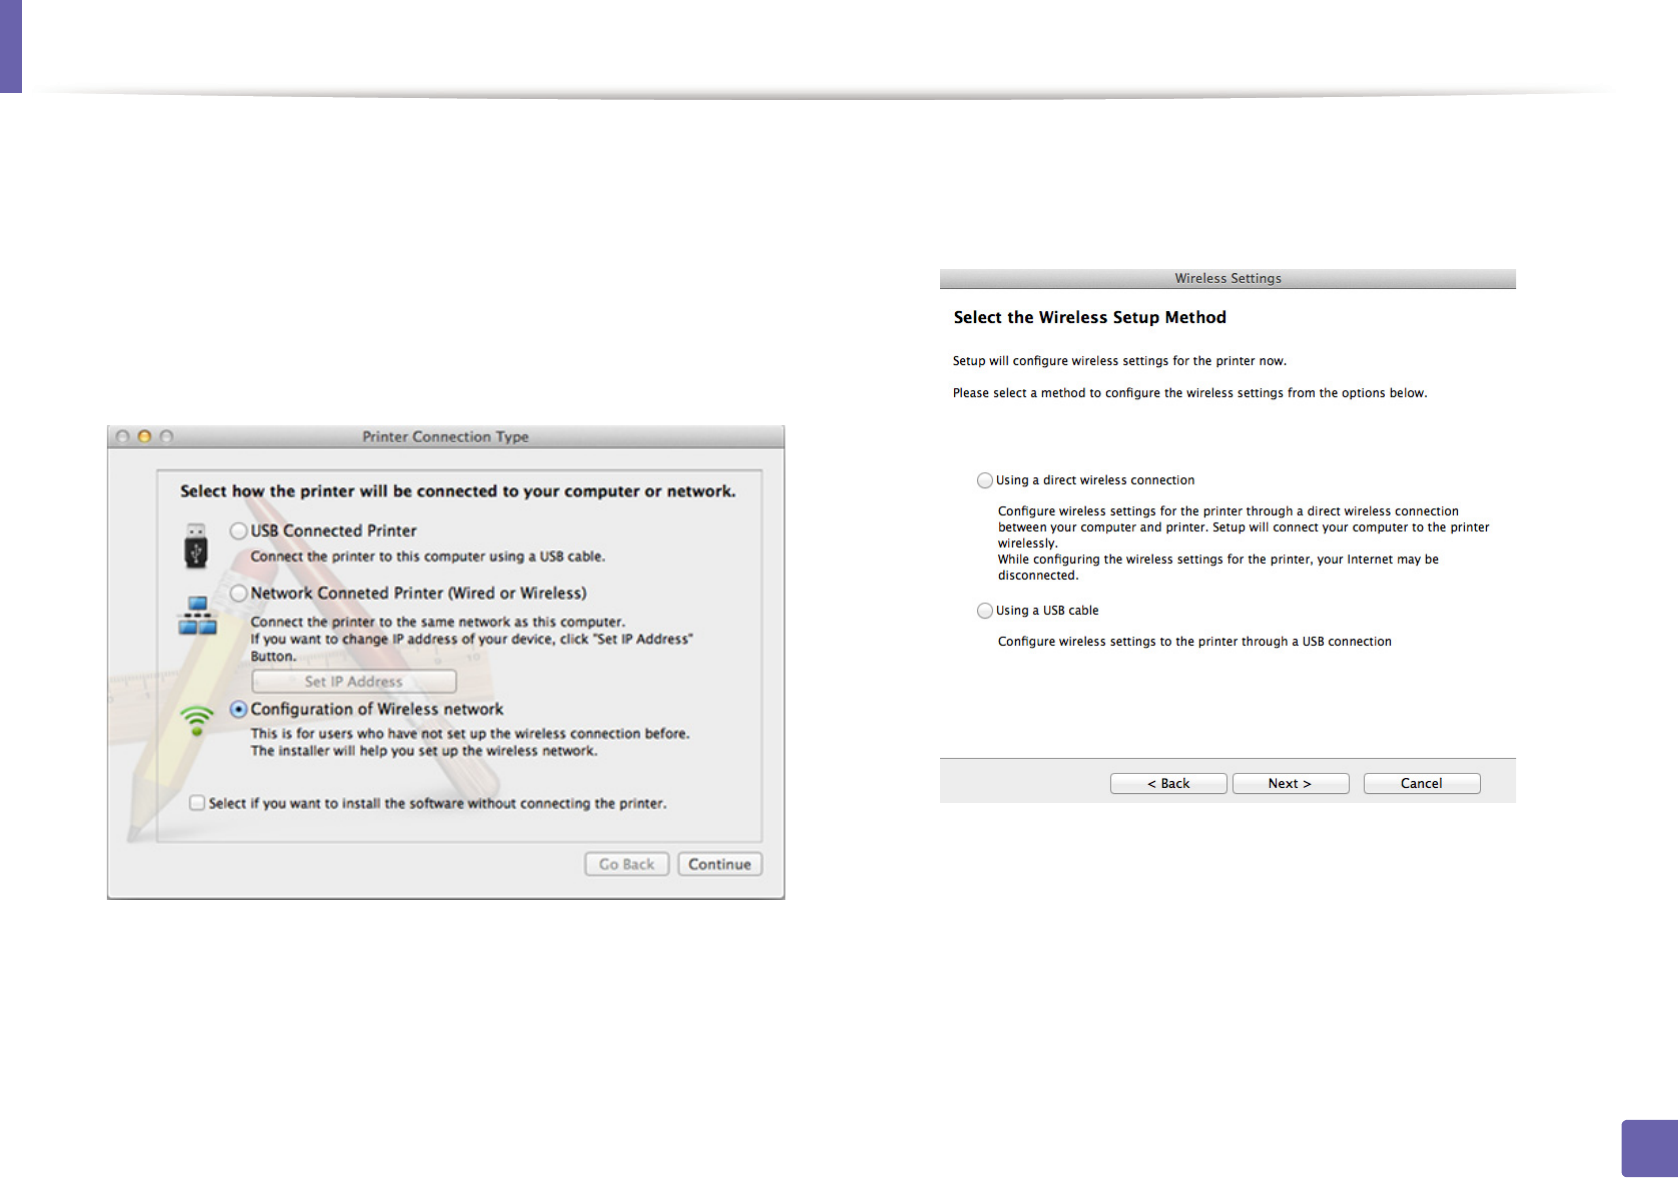
6 Select Using a direct wireless connection on the Select the Wireless
Setup Method screen. Then, click Next.
Wireless network setup
169
2. Using a Network-Connected Machine
Even if your computer is running Windows 7 or higher, you cannot use this
feature if your PC does not support wireless network. Set the wireless
network using a USB cable (see "Access point via USB cable" on page 164).
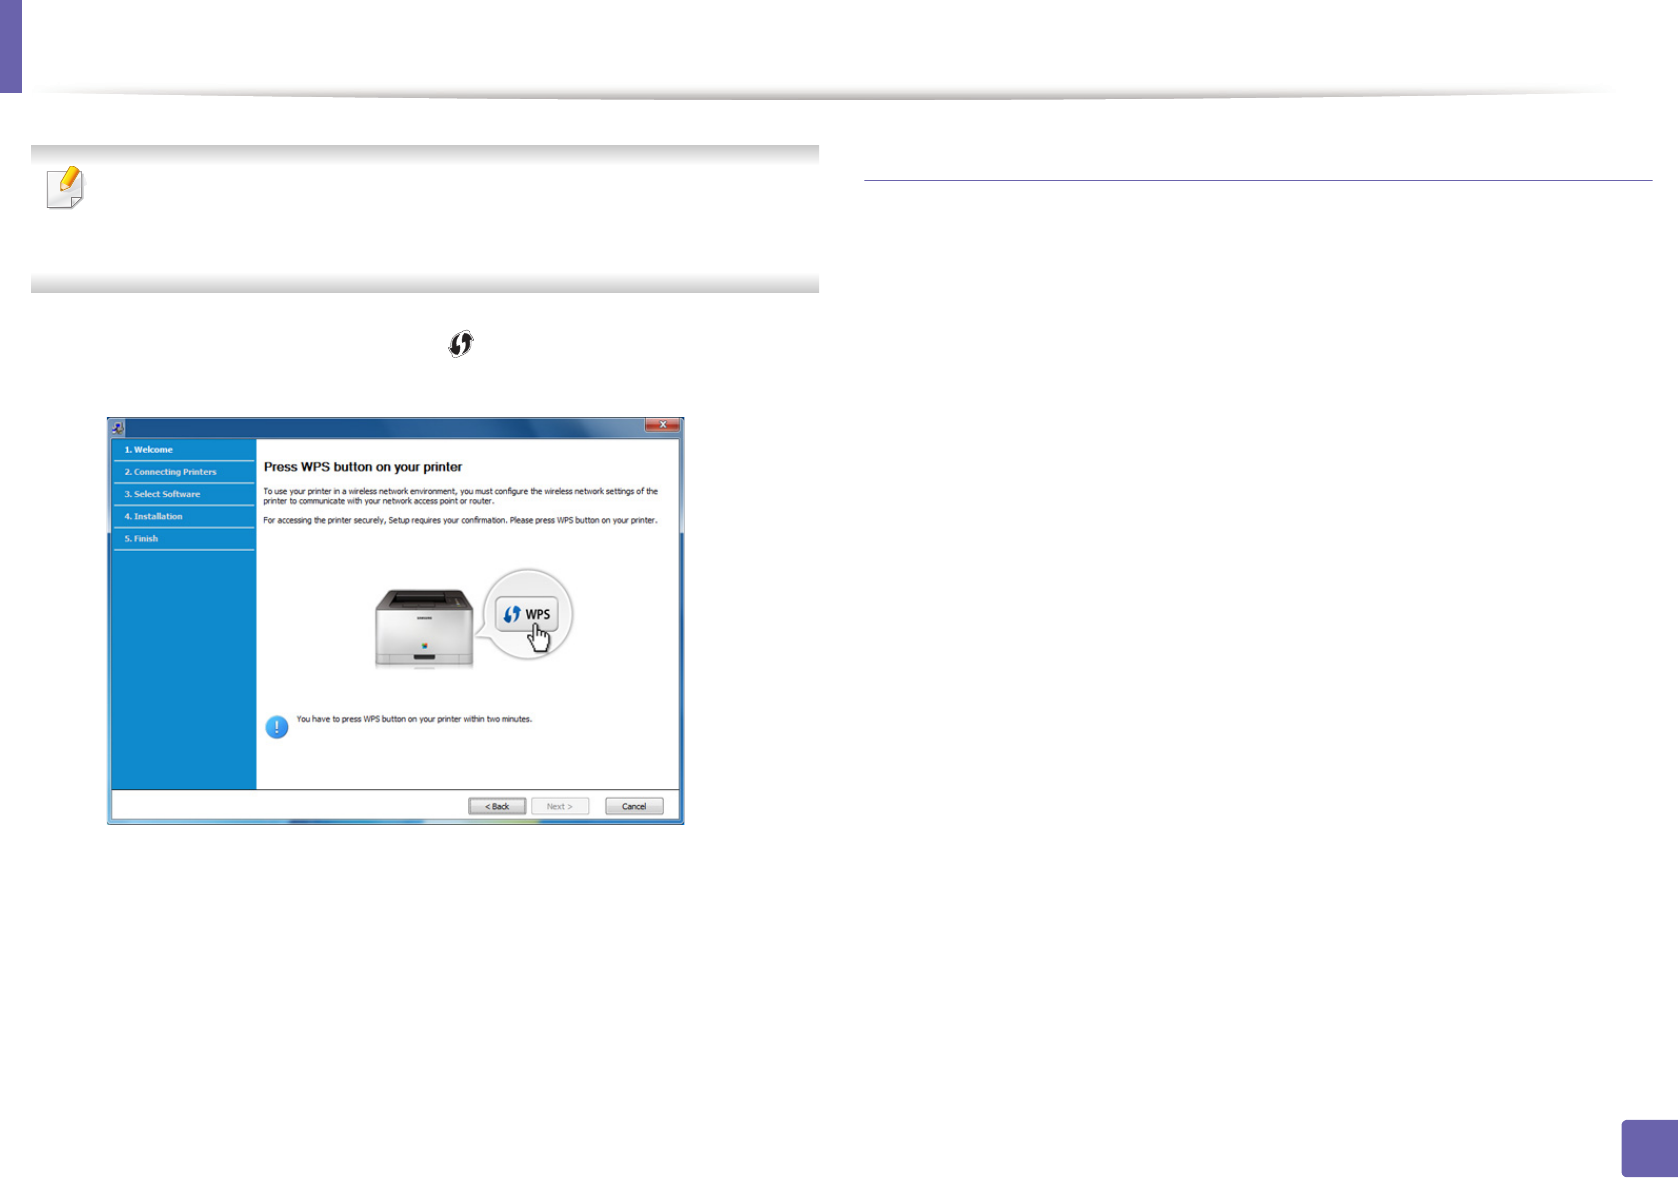
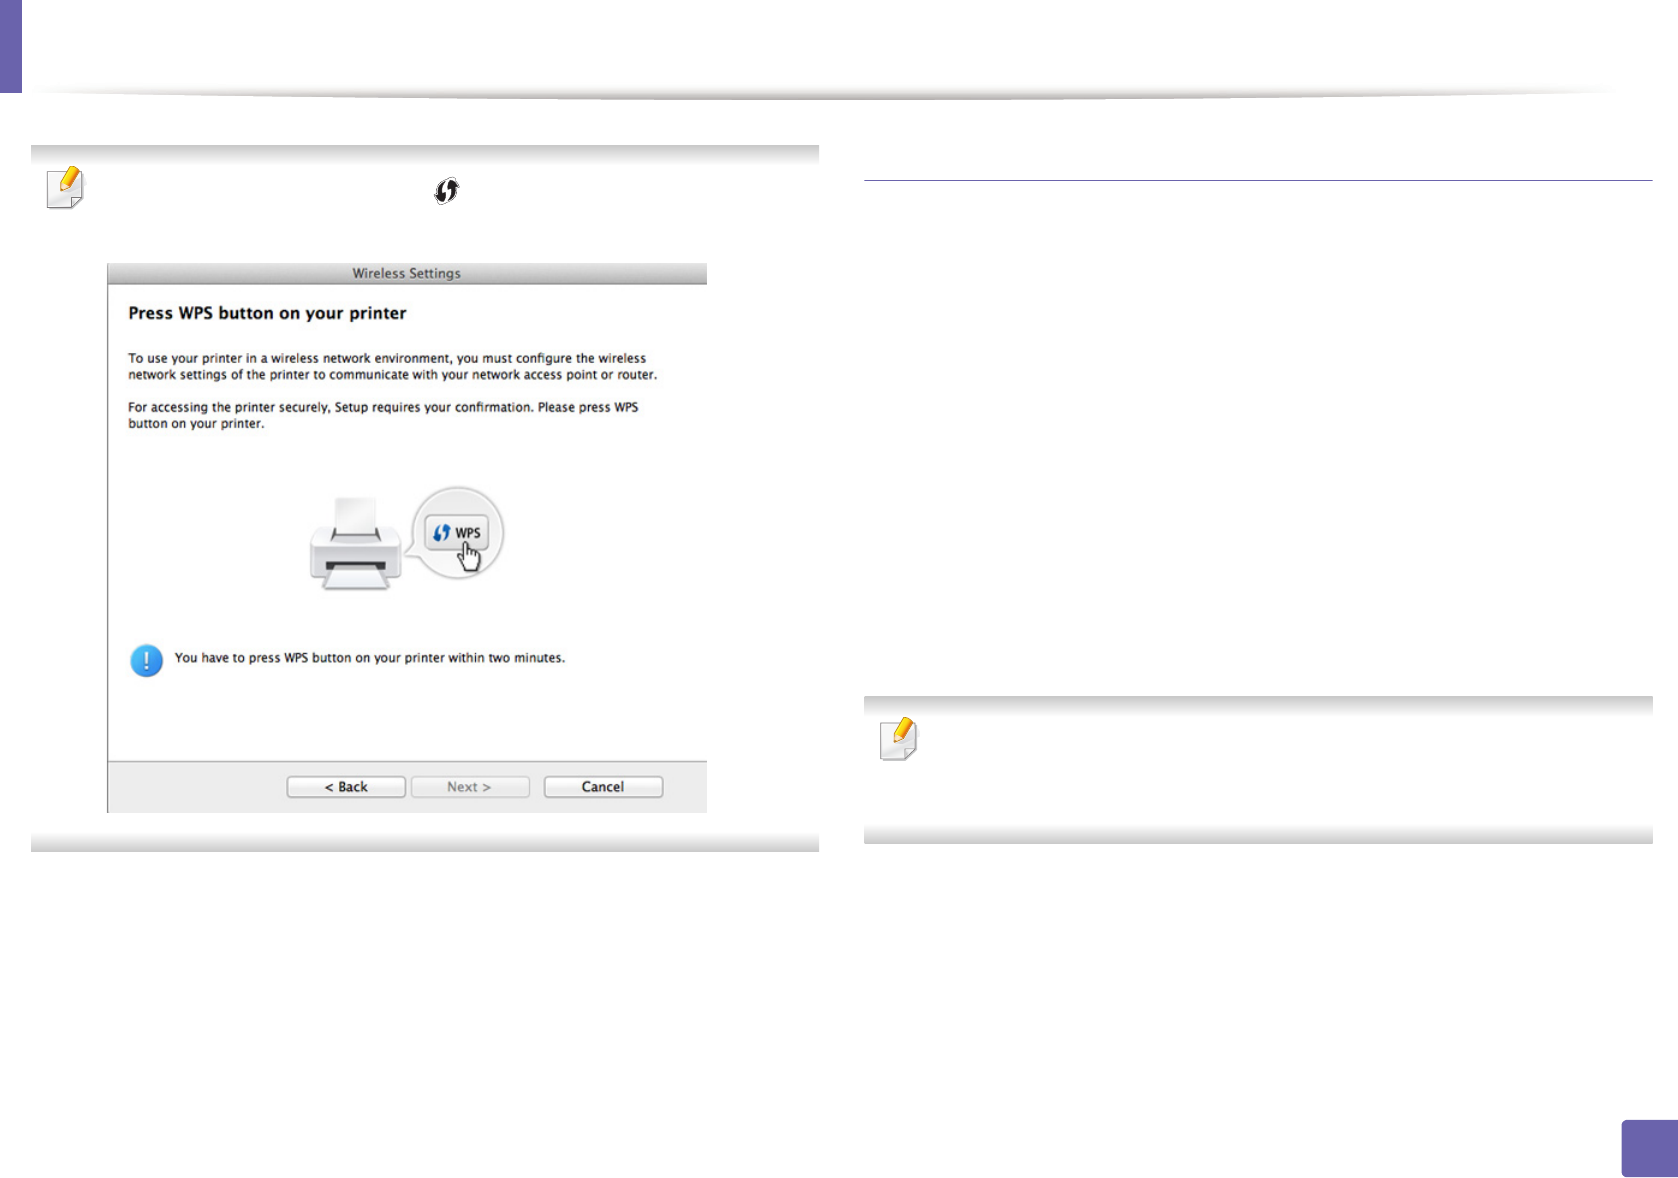
If below screen appears, press the (WPS) button from the control
panel within 2 minutes.
7 When the wireless network set up is completed, click Next.
8 Follow the instructions in the installation window.
Ad hoc via USB cable
If you do not have an access point (AP), you may still connect the machine
wirelessly to your computer by setting up an ad-hoc wireless network by
following the simple steps below.
Items to prepare
• Network-connected computer
• Software CD that was provided with your machine
• A machine installed with a wireless network interface
• USB cable
Wireless network setup
170
2. Using a Network-Connected Machine
Creating the ad hoc network in Windows
1Turn on your computer and the wireless network machine.
2 Insert the supplied software CD into your CD-ROM drive.
If the installation window does not appear, click Start > All programs >
Accessories > Run.
X:\Setup.exe replacing “X” with the letter, which represents your CD-
ROM drive and click OK.
3 Review and accept the installation agreements in the installation
window. Then, click Next.
4 Select Wireless network connection on the Printer Connection Type
screen. Then, click Next.
5 On the Are you setting up your printer for the first time? screen, select
Yes, I will set up my printer's wireless network. Then, click Next.
If your printer is already connected on the network, select No, my
printer is already connected to my network.
6 After searching the wireless networks, a list of wireless networks your
machine has searched appears. Click Advanced Setting.
•Enter the wireless Network Name: Enter the SSID name you want (SSID
is case-sensitive).
•Operation Mode: Select ad hoc.
•Channel: Select the channel. (Auto Setting or 2412 MHz to 2467 MHz).
Wireless network setup
171
2. Using a Network-Connected Machine
•Authentication: Select an authentication type.
Open System: Authentication is not used, and encryption may or may
not be used, depending on the need for data security.
Shared Key: Authentication is used. A device that has a proper WEP key
can access the network.
•Encryption: Select the encryption (None, WEP64, WEP128).
•Network Password: Enter the encryption network password value.
•Confirm Network Password: Confirm the encryption network
password value.
•WEP Key Index: If you are using WEP Encryption, select the appropriate
WEP Key Index.
The wireless network security window appears when the ad hoc network
has security enabled.
Select Open System or Shared Key for the authentication and click Next.
• WEP (Wired Equivalent Privacy) is a security protocol preventing
unauthorized access to your wireless network. WEP encrypts the data
portion of each packet exchanged on a wireless network using a 64-bit
or 128-bit WEP encryption key.
7 The window showing the wireless network setting appears. Check the
settings and click Next.
Before entering the IP address for the machine, you must know the
computer’s network configuration information. If the computer’s network
configuration is set to DHCP, the wireless network setting should also be
DHCP. Likewise, if the computer’s network configuration is set to Static, the
wireless network setting should also be Static.
If your computer is set to DHCP and you want to use the Static wireless
network setting, you must contact the network administrator to get the
static IP address.
•For the DHCP method
If the IP address assignment method is DHCP, check if DHCP is shown in
the Wireless Network Setting Confirm window. If it shows Static, click
Change TCP/IP to change the assignment method to Receive IP
address automatically (DHCP).
•For the Static method
If the IP address assignment method is Static, check if Static is shown in
the Wireless Network Setting Confirm window. If it shows DHCP, click
Change TCP/IP to enter the IP address and other network configuration
values for the machine.
For example,
If the computer’s network information is as shown follows:
- IP address: 169.254.133.42
- Subnet Mask: 255.255.0.0
Then, the machine’s network information should be as below:
- IP address: 169.254.133.43
- Subnet Mask: 255.255.0.0 (Use the computer’s subnet mask.)
- Gateway: 169.254.133.1

Wireless network setup
172
2. Using a Network-Connected Machine
8 The Wireless Network Setting Complete window appears. Click Next.
9 When the wireless network settings are completed, disconnect the USB
cable between the computer and machine. Click Next.
10 Follow the instructions in the installation window.
17
Setup using Mac
Access point via USB cable
Items to prepare
• Access point
• Network-connected printer
• Software CD that was provided with your machine
• A machine installed with a wireless network interface
• USB cable
For Mac OS X 10.4, you need to download from the Samsung website to
install the printer software (http://www.samsung.com > find your product >
Support or Downloads).
Wireless network setup
173
2. Using a Network-Connected Machine
1Make sure that the machine is connected to your computer and
powered on.
2 Insert the supplied software CD into your CD-ROM drive.
3 Double-click the CD-ROM icon that appears on your Mac desktop.
• For Mac OS X 10.8, double-click the CD-ROM that appears on Finder.
4 Double-click the MAC_Installer folder > Installer OS X icon.
5 Click Continue.
6 Read the license agreement and click Continue.
7 Click Agree to agree to the license agreement.
8 Click Install. All components necessary for machine operations will be
installed.
If you click Customize, you can choose individual components to install.
9 Enter the password and click OK.
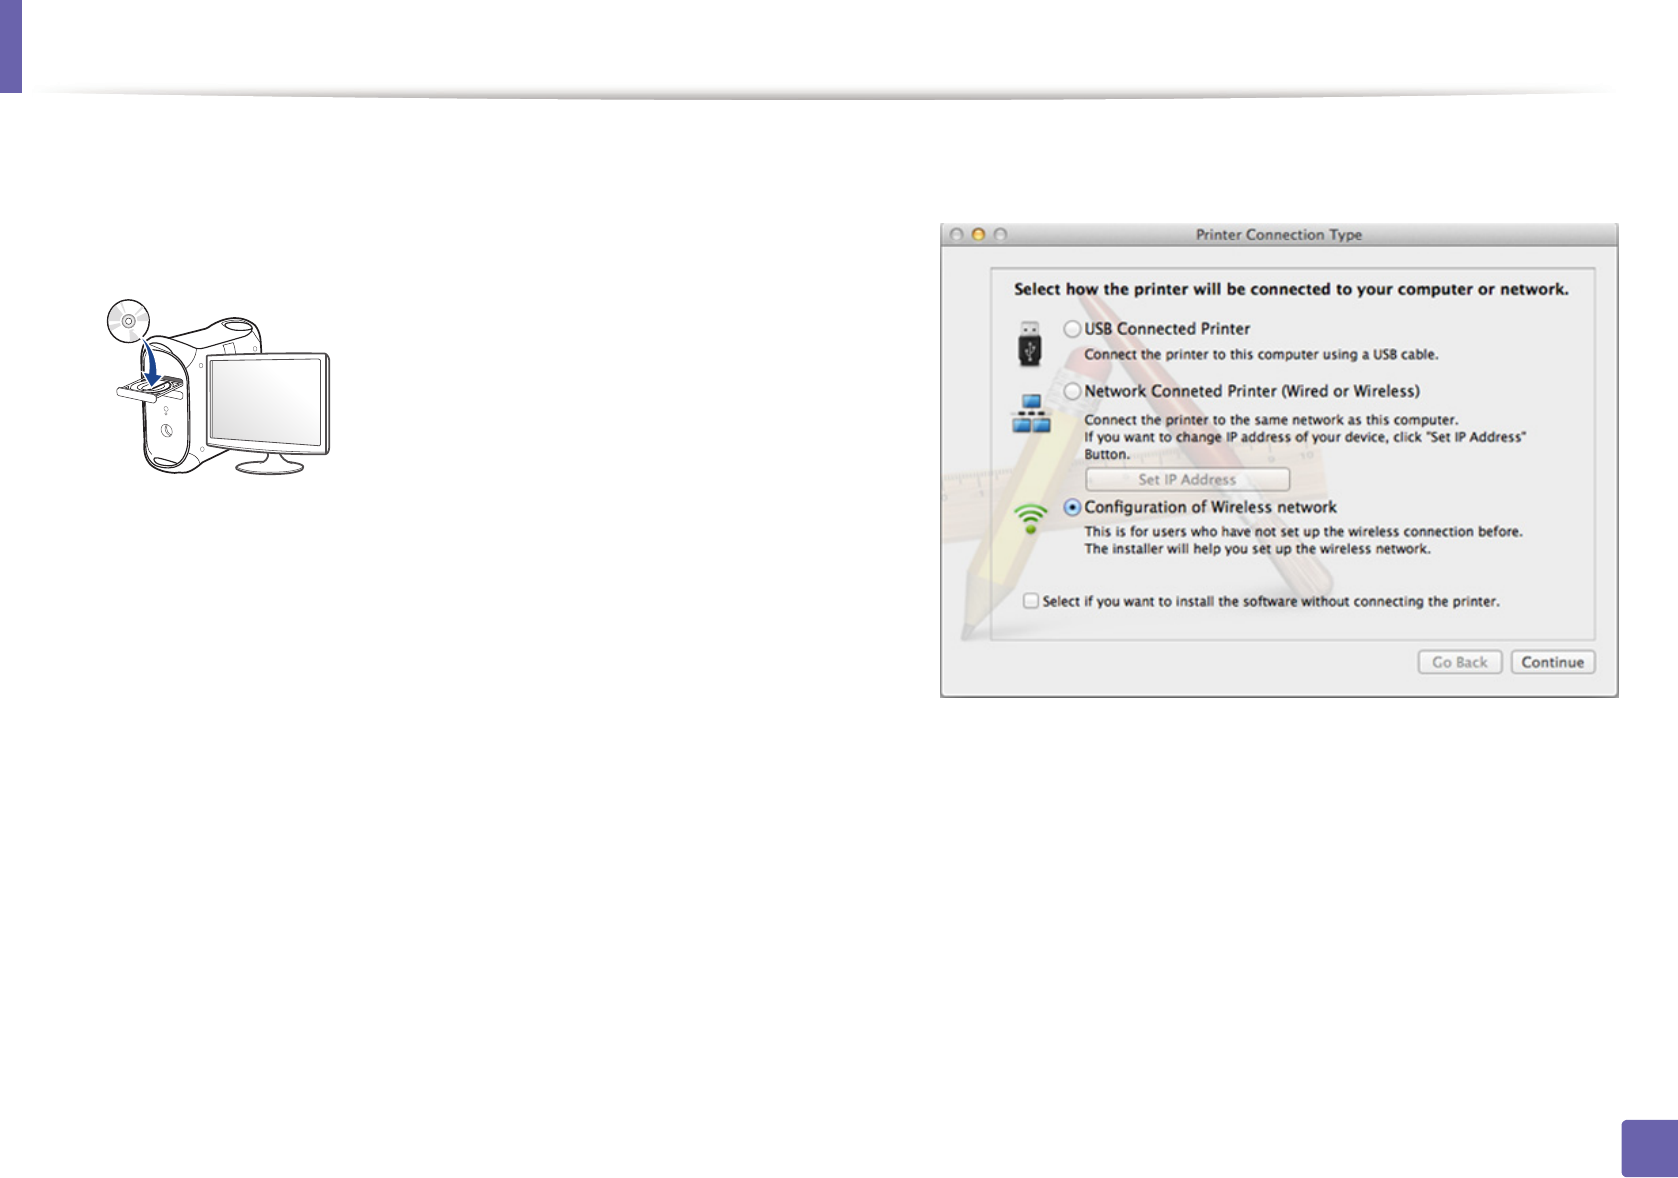
10 Select Configuration of Wireless network on the Printer Connection
Type and click Continue.
Wireless network setup
174
2. Using a Network-Connected Machine
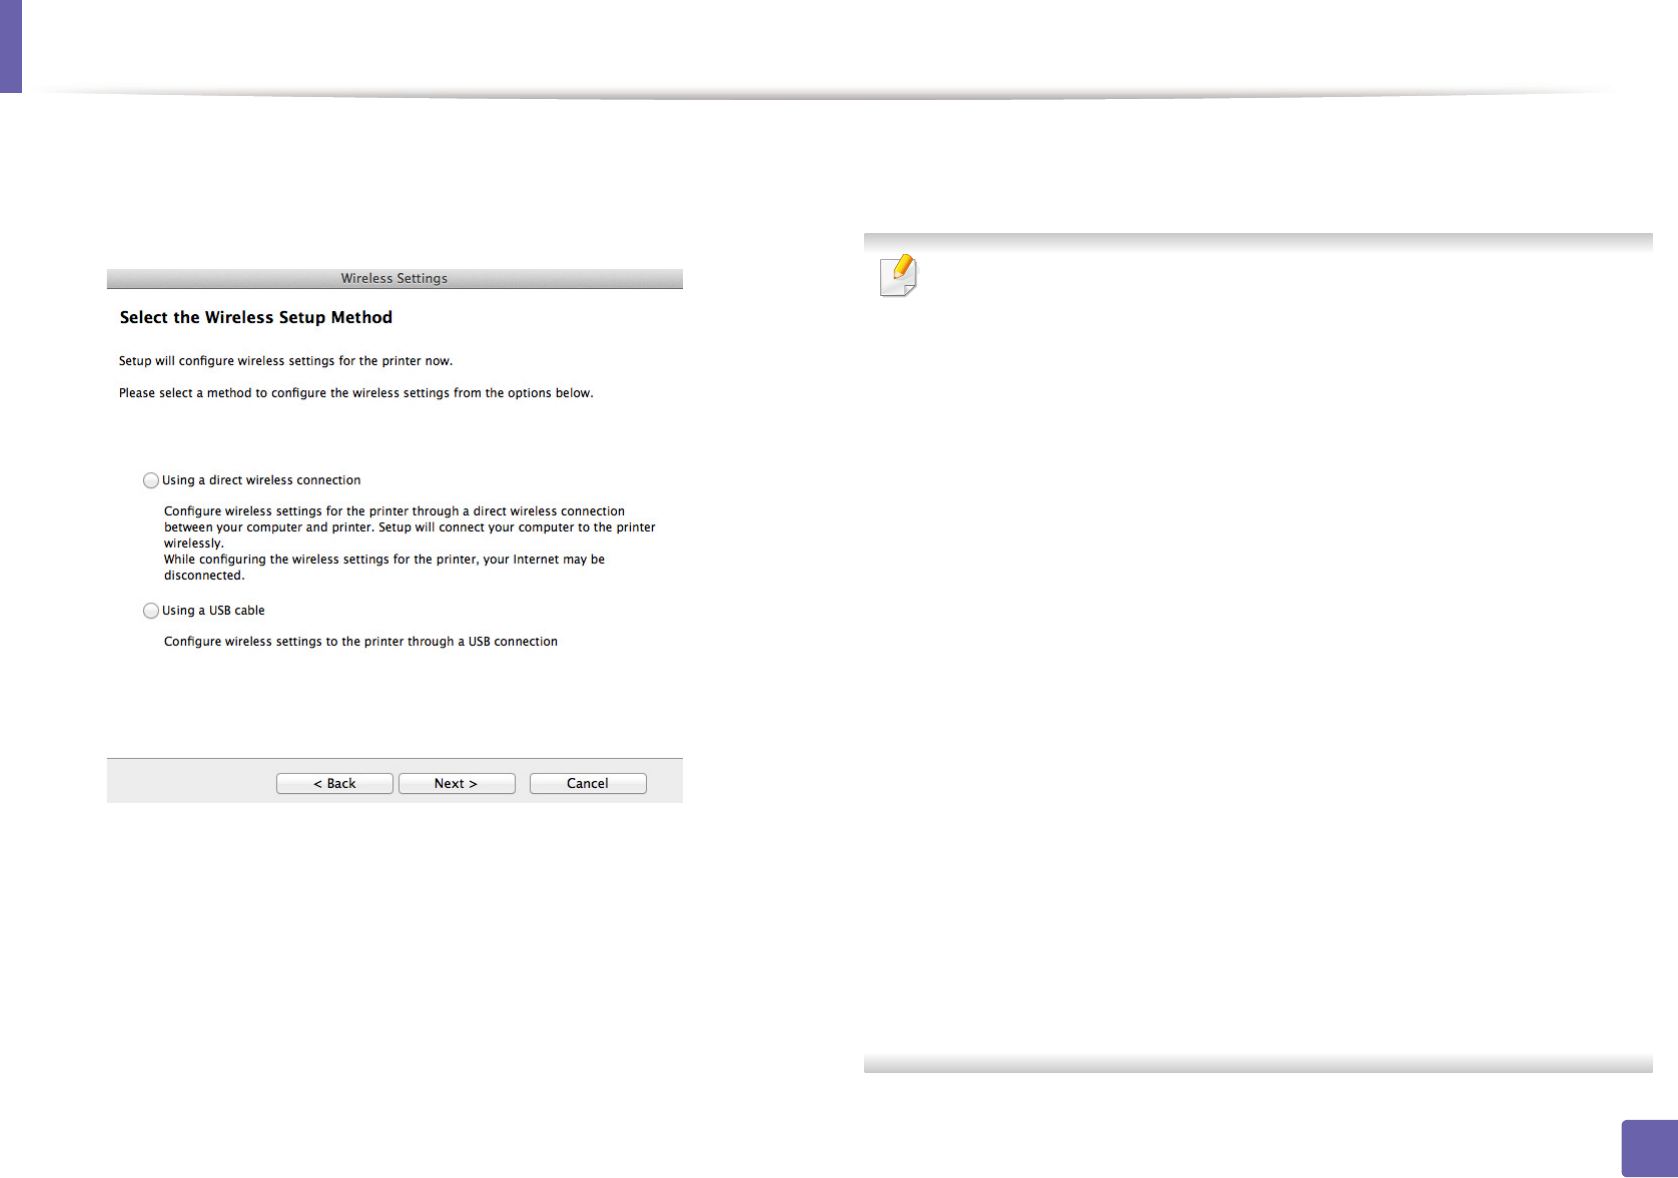
11 If Wireless Settings screen appears, select Using a USB cable and click
Next.
If the screen does not appear, go to step 15.
12 After searching, the window shows the wireless network devices. Select
the name (SSID) of the access point you want to use and click Next.
When you set the wireless configuration manually, click Advanced Setting.
•Enter the wireless Network Name: Enter the SSID of the access point
(SSID is case-sensitive).
•Operation Mode: Select Infrastructure.
•Authentication: Select an authentication type.
Open System: Authentication is not used, and encryption may or may
not be used, depending on the need for data security.
Shared Key: Authentication is used. A device that has a proper WEP key
can access the network.
WPA Personal or WPA2 Personal: Select this option to authenticate the
print server based on the WPA Pre-Shared Key. This uses a shared secret
key (generally called Pre Shared Key pass phrase) that is manually
configured on the access point and each of its clients.
•Encryption: Select the encryption. (None, WEP64, WEP128, TKIP, AES,
TKIP, AES)
•Network Password: Enter the encryption network password value.
•Confirm Network Password: Confirm the encryption network
password value.
•WEP Key Index: If you are using WEP Encryption, select the appropriate
WEP Key Index.
The wireless network security window appears when the access point has
security enabled.
Enter the Network Password of the access point (or router).
Wireless network setup
175
2. Using a Network-Connected Machine
13 The window showing the wireless network setting appears. Check the
settings and click Next.
• Wi-Fi Direct option appears on the screen only if your printer supports
this feature.
• Can start to build Wi-Fi Direct by using Samsung Easy Printer Manager
(see "Setting up Wi-Fi Direct" on page 183).
•Wi-Fi Direct Name: The default Wi-Fi Direct Name is the model name
and the maximum length is 22 characters.
•Password setting is the numeric string, and the size is 8 ~ 64 characters.
14 The Wireless Network Setting Complete window appears. Click Next.
15 When the wireless network settings are completed, disconnect the USB
cable between the computer and machine. Click Next.
Access point without a USB cable (recommended)
Items to prepare
• WiFi-enabled Mac running Mac OS 10.7 or higher and an access point
(router)
• Software CD that was provided with your machine
• A machine installed with a wireless network interface
For Mac OS X 10.4, you need to download from the Samsung website to
install the printer software (http://www.samsung.com > find your product >
Support or Downloads).
1Make sure that the machine is connected to your computer and
powered on.
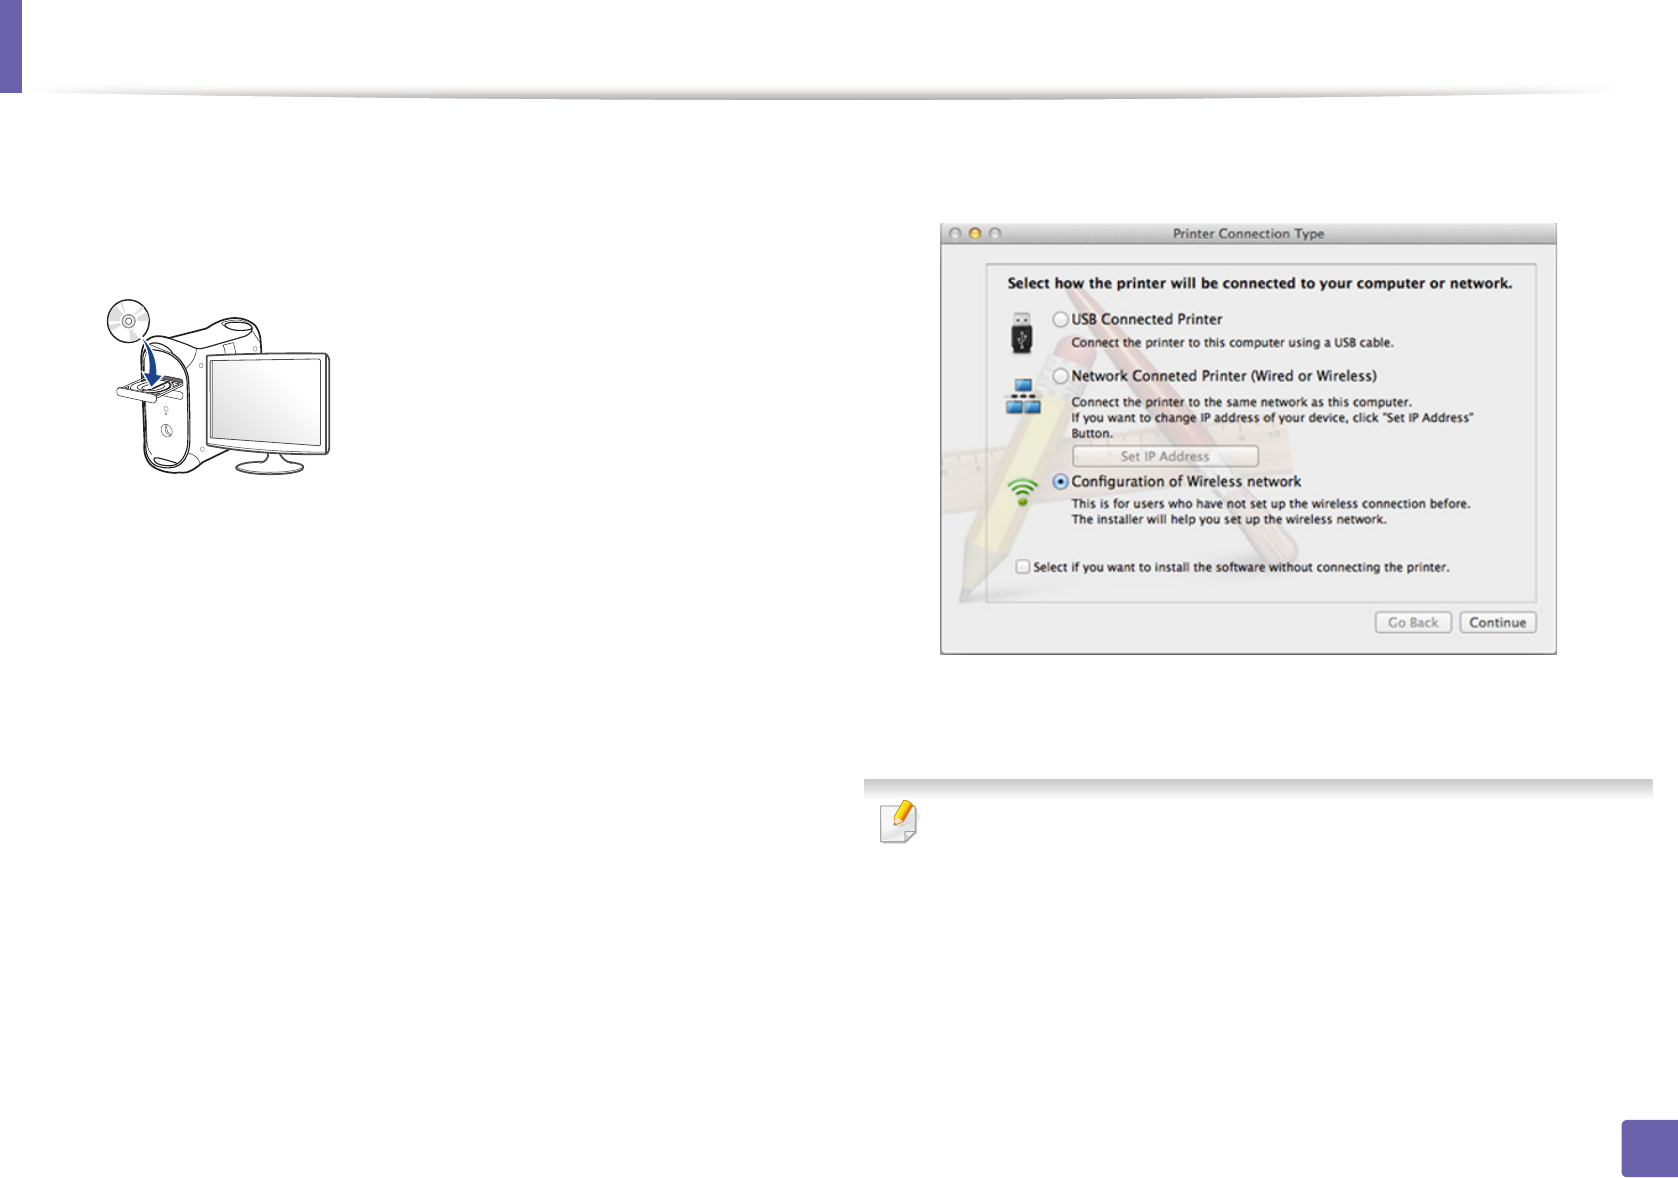
2 Insert the supplied software CD into your CD-ROM drive.
3 Double-click the CD-ROM icon that appears on your Mac desktop.
• For Mac OS X 10.8, double-click the CD-ROM that appears on Finder.
4 Double-click the MAC_Installer folder > Installer OS X icon.
5 Click Continue.
6 Read the license agreement and click Continue.
7 Click Agree to agree to the license agreement.
Wireless network setup
176
2. Using a Network-Connected Machine
8 Click Install. All components necessary for machine operations will be
installed.
If you click Customize, you can choose individual components to install.
9 Enter the password and click OK.
10 Select Configuration of Wireless network on the Printer Connection
Type and click Continue.
11 If Wireless Settings screen appears, select Using a direct wireless
connection and click Next.
If the screen does not appear, go to step 13.
Wireless network setup
177
2. Using a Network-Connected Machine
If below screen appears, press the (WPS) button from the control panel
within 2 minutes.
12 When the wireless network set up is completed, click Next.
13 After the installation is finished, click Close.
Ad hoc via USB cable
If you do not have an access point (AP), you may still connect the machine
wirelessly to your computer by setting up an ad hoc wireless network by
following these simple directions.
Items to prepare
• Network-connected computer
• Software CD that was provided with your machine
• A machine installed with a wireless network interface
• USB cable
Creating the ad hoc network in Mac
For Mac OS X 10.4, you need to download from the Samsung website to
install the printer software (http://www.samsung.com > find your product >
Support or Downloads).
Wireless network setup
178
2. Using a Network-Connected Machine
1Make sure that the machine is connected to your computer and
powered on.
2 Insert the supplied software CD into your CD-ROM drive.
3 Double-click the CD-ROM icon that appears on your Mac desktop.
• For Mac OS X 10.8, double-click the CD-ROM that appears on Finder.
4 Double-click the MAC_Installer folder > Installer OS X icon.
5 Click Continue.
6 Read the license agreement and click Continue.
7 Click Agree to agree to the license agreement.
8 Click Install. All components necessary for machine operations will be
installed.
If you click Customize, you can choose individual components to install.
9 Enter the password and click OK.
10 Select Configuration of Wireless network on the Printer Connection
Type and click Continue.
11 After searching the wireless networks, a list of wireless networks your
machine has searched appears. Click Advanced Setting.
•Enter the wireless Network Name: Enter the SSID name (SSID is case-
sensitive).
•Operation Mode: Select ad hoc.
•Channel: Select the channel (Auto Setting or 2412 MHz to 2467 MHz).
•Authentication: Select an authentication type.
Open System: Authentication is not used, and encryption may or may
not be used, depending on the need for data security.
Shared Key: Authentication is used. A device that has a proper WEP key
can access the network.
Wireless network setup
179
2. Using a Network-Connected Machine
•Encryption: Select the encryption (None, WEP64, WEP128).
•Network Password: Enter the encryption network password value.
•Confirm Network Password: Confirm the encryption network
password value.
•WEP Key Index: If you are using WEP Encryption, select the appropriate
WEP Key Index.
The wireless network security window appears when the ad hoc network
has security setting.
Select Open System or Shared Key for the authentication and click Next.
• WEP (Wired Equivalent Privacy) is a security protocol preventing
unauthorized access to your wireless network. WEP encrypts the data
portion of each packet exchanged on a wireless network using a 64-bit
or 128-bit WEP encryption key.
12 The window showing the wireless network settings appears. Check the
settings and click Next.
Before entering the IP address for the machine, you must know the
computer’s network configuration information. If the computer’s network
configuration is set to DHCP, the wireless network setting should also be
DHCP. Likewise, if the computer’s network configuration is set to Static, the
wireless network setting should also be Static.
If your computer is set to DHCP and you want to use Static wireless network
setting, you must contact the network administrator to get the static IP
address.
•For the DHCP method
If the IP address assignment method is DHCP, check if DHCP is shown in
the Wireless Network Setting Confirm window. If it shows Static, click
Change TCP/IP to change the assignment method to Receive IP
address automatically (DHCP).
•For the Static method
If the IP address assignment method is Static, check if Static is shown in
the Wireless Network Setting Confirm window. If it shows DHCP, click
Change TCP/IP to enter the IP address and other network configuration
values for the machine.
For example,
If the computer’s network information is shown as follows:
- IP address: 169.254.133.42
- Subnet Mask: 255.255.0.0
Then, the machine’s network information should be as shown below:
- IP address: 169.254.133.43
- Subnet Mask: 255.255.0.0 (Use the computer’s subnet mask.)
- Gateway: 169.254.133.1

Wireless network setup
180
2. Using a Network-Connected Machine
13 When the window that tells you that the network cable connection is
confirmed appears, disconnect the network cable and click Next..
If the network cable is connected, it may have trouble finding the
machine when configuring the wireless network.
14 The wireless network connects according to the network configuration.
15 Wireless network set up is completed. After installation is finished, click
Quit.
After completing the wireless network connection, you need to install a
machine driver to print from an application (see "Installation for Mac" on
page 135).
18
Using a network cable
Machines that do not support the network port will not be able to use this
feature (see "Rear view" on page 24).
Your machine is a network compatible machine. To enable your machine to
work with your network, you will need to perform some configuration
procedures.
• After completing the wireless network connection, you need to install a
machine driver to print from an application (see "Installing driver over
the network" on page 145).
• See your network administrator, or the person that set up your wireless
network, for information about your network configuration.
Items to prepare
• Access point
• Network-connected computer
• Software CD that was provided with your machine
• A machine installed with a wireless network interface
• Network cable
Wireless network setup
181
2. Using a Network-Connected Machine
Printing a network configuration report
You can identify the network settings of your machine by printing a network
configuration report.
See "Printing a network configuration report" on page 142.
IP setting using SetIP Program (Windows)
This program is used to manually set the network IP address of your machine
using its MAC address to communicate with the machine. The MAC address is
the hardware serial number of the network interface and can be found in the
Network Configuration Report.
See "Setting IP address" on page 142.
Configuring the machine’s wireless network
Before starting you will need to know the network name (SSID) of your wireless
network and the Network Password if it is encrypted. This information was set
when the access point (or wireless router) was installed. If you do not know
about your wireless environment, please ask the person who set up your
network.
To configure wireless parameters, you can use SyncThru™ Web Service.
Using SyncThru™ Web Service
Before starting wireless parameter configuration, check the cable connection
status.
1Check whether or not the network cable is connected to the machine. If
not, connect the machine with a standard network cable.
2 Start a web browser such as Internet Explorer, Safari, or Firefox and enter
your machine’s new IP address in the browser window.
For example,
3 Click Login on the upper right of the SyncThru™ Web Service website.
4 Type in the ID and Password then click Login.
•ID: admin
•Password: sec00000
5 When the SyncThru™ Web Service window opens, click Network
Settings.
6 Click Wireless > Wizard.
Wizard will help you setup the wireless network configuration. However, if
you want to set the wireless network directly, select Custom.
Wireless network setup
182
2. Using a Network-Connected Machine
7 Select the one Network Name(SSID) in the list.
•SSID: SSID (Service Set Identifier) is a name that identifies a wireless
network, access points, and wireless devices attempting to connect
to a specific wireless network must use the same SSID. The SSID is
case sensitive.
•Operation Mode: Operation Mode refers to the type of wireless
connections (see "Wireless network name and Network Password"
on page 156).
-Ad-hoc: Allows wireless devices to communicate directly with
each other in a peer-to-peer environment.
-Infrastructure: Allows wireless devices to communicate with
each other through an access point.
If your network’s Operation Mode is Infrastructure, select the SSID of the
access point. If the Operation Mode is Ad-hoc, select the machine’s SSID.
Note that “portthru” is the default SSID of your machine.
8 Click Next.
If the wireless security setting window appears, enter the registered
password (Network Password) and click Next.
9 The confirmation window appears, please check your wireless setup. If
the setup is right, click Apply.
Disconnect the network cable (standard or network). Your machine should
then start communicating wirelessly with the network. In case of Ad-hoc
mode, you can use a wireless LAN and wired LAN simultaneously.
10 Insert the supplied CD into the CD-ROM drive and proceed to install the
software following the directions on the screen. When the "Connect
Printer" screen appears, select the Network (Ethernet/Wireless)
connection.
Wireless network setup
183
2. Using a Network-Connected Machine
19
Turning the Wi-Fi network on/off
If your machine has a display, you can also turn on/off the Wi-Fi from the
machine’s control panel using the Network menu.
1Check whether the network cable is connected to the machine. If not,
connect the machine with a standard network cable.
2 Start a web browser such as Internet Explorer, Safari, or Firefox and enter
your machine’s new IP address in the browser window.
For example,
3 Click Login on the upper right of the SyncThru™ Web Service website.
4 Type in the ID and Password, then click Login.
•ID: admin
•Password: sec00000
5 When the SyncThru™ Web Service window opens, click Network
Settings.
6 Click Wireless > Custom.
You can also turn the Wi-Fi network on/off.
20
Setting the Wi-Fi Direct for mobile printing
Wi-Fi Direct is an easy-to-setup peer-to-peer connecting between method for
your between a printer and mobile device that supports Wi-Fi Direct that
provides a secure connection and better throughput than ad hoc mode.
With Wi-Fi Direct, you can connect your printer to a Wi-Fi Direct network while
concurrently connecting to an access point, You can also use a wired network
and a Wi-Fi Direct network simultaneously so multiple users can access and print
documents both from Wi-Fi Direct and from a wired network.
• You cannot connect to the internet through the mobile device in use Wi-
Fi Direct.
• The supported protocol list may differ from your model, Wi-Fi Direct
networks do NOT support IPv6, network filtering, IPSec, WINS, and SLP
services.
• Up to four mobile devices can connect to Wi-Fi Direct at one time.
Setting up Wi-Fi Direct
You can enable Wi-Fi Direct feature by one of the following methods.
Wireless network setup
184
2. Using a Network-Connected Machine
From the USB cable-connected computer(recommended)
• After the driver installation is complete, Samsung Easy Printer Manager can
be set and changes in the Wi-Fi Direct can be made.
Samsung Easy Printer Manager is Available for Windows
and Mac OS users only.
- From the Start menu, select Programs or All Programs > Samsung
Printers > Samsung Easy Printer Manager > Device Settings >
Network.
▪Wi-Fi Direct On/Off: Select On to enable.
▪Device Name: Enter the printer’s name for searching for your
printer on a wireless network. By default, the device name is the
model name.
▪IP Address: Enter the IP address of the printer. This IP address is
used only for the local network and not for the infrastructure wired
or wireless network. We recommend using the default local IP
address (the default local IP address of the printer for Wi-Fi Direct is
192.168.3.1 )
▪Group Owner: Activate this option to assign the printer the Wi-Fi
Direct group’s owner. The Group Owner acts similar to a wireless
access point. We recommend activating this option.
▪Network Password: If your printer is a Group Owner, a Network
Password is required for other mobile devices to connect to your
printer. You can configure a Network Password yourself, or can
remember the given Network Password that is randomly generated
by default.
From the machine (Machines with a display screen)
• Select Network > Wireless > Wi-Fi Direct from the control panel.
•Enable Wi-Fi Direct.
From the network-connected computer
If your printer is using a network cable or a wireless access point, you can enable
and configure Wi-Fi Direct from SyncThru™ Web Service.
• Access SyncThru™ Web Service, select Settings > Network Settings >
Wireless > Wi-Fi Direct.
• Enable or disable Wi-Fi Direct and set other options.
•For Linux OS users,
- Print an IP network configuration report to check the output (see
"Printing a network configuration report" on page 142).
- Access SyncThru Web Service, select Settings > Network Settings
> Wireless > Wi-Fi Direct.
- Enable or disable Wi-Fi Direct.

Wireless network setup
185
2. Using a Network-Connected Machine
Setting up the mobile device
• After setting up Wi-Fi Direct from the printer, refer to the user manual of the
mobile device you are using to set its Wi-Fi Direct.
• After setting up Wi-Fi Direct, you need to download the mobile printing
application (For example: Samsung Mobile printer) to print from your
smartphone.
• When you have found the printer you want to connect to from your
mobile device, select the printer and the printer's LED will blink. Press the
WPS button on the printer and it will be connected to your mobile
device.
• If your mobile device does not support WPS, you need to enter the
"Network Password" of a printer instead of pushing the WPS button.
21
What is Samsung Mobile Print?
Samsung Mobile Print is a free application that enables users to print photos,
documents, and web pages directly from your smartphone or tablet. Samsung
Mobile Print is not only compatible with your Android and iOS smart phones
but also with your iPod Touch and tablet PC. It connects your mobile device to a
network connected Samsung printer or to a wireless printer through a Wi-Fi
access point. Installing a new driver or configuring network settings isn’t
necessary – just simply install the Samsung Mobile Print application, and it will
automatically detect compatible Samsung printers. Besides printing photos,
web pages, and PDFs, scanning is also supported. If you have Samsung
multfunction printer, scan any document into a JPG, PDF, or PNG format for
quick and easy viewing on your mobile device.
22
Downloading Samsung Mobile Print
To download Samsung Mobile Print, go to the application store (Samsung
Apps, Play Store, App Store) on your mobile device, and just search for
“Samsung Mobile Print.” You can also visit iTunes for Apple devices on your
computer.

Wireless network setup
186
2. Using a Network-Connected Machine
23
Supported Mobile OS
• Android OS 2.1 or higher
• iOS 4.0 or higher
24
Supported devices
•iOS 4.0 or higher: iPod Touch, iPhone, iPad
•Android 2.1 or higher: Galaxy series and Android mobile device
25
Troubleshooting
Problems during setup or driver installation
Printers Not Found
• Your machine may not be turned on. Turn on your computer and the
machine.
• USB cable is not connected between your computer and machine. Connect
the machine to your computer using the USB cable.
• The machine does not support wireless networking. Check the machine's
user's guide included on the software CD supplied with your machine and
prepare a wireless network machine.
Connecting Failure - SSID Not Found
• The machine is unable to find the network name (SSID) you have selected or
entered. Check the network name (SSID) on your access point and try
connecting again.
• Your access point is not turned on. Turn on your access point.
Wireless network setup
187
2. Using a Network-Connected Machine
Connecting Failure - Invalid Security
• Security is not configured correctly. Check the configured security on your
access point and machine.
Connecting Failure - General Connection Error
• Your computer is not receiving a signal from your machine. Check the USB
cable and your machine’s power.
Connecting Failure - Connected Wired Network
• Your machine is connected with a wired network cable. Remove the wired
network cable from your machine.
PC Connection Error
• The configured network address is unable to connect between your
computer and machine.
- For a DHCP network environment
The receives the IP address automatically (DHCP) when computer is
configured to DHCP.
- For a Static network environment
The machine uses the static address when the computer is configured
to static address.
For example,
If the computer’s network information is as shown below:
▪IP address: 169.254.133.42
▪Subnet Mask: 255.255.0.0
Then the machine’s network information should be as below:
▪IP address: 169.254.133.43
▪Subnet Mask: 255.255.0.0 (Use the computer’s subnet mask.)
▪Gateway: 169.254.133.1
Other problems
If problems occur while using the machine on a network, check the following:
For information on the access point (or wireless router), refer to its own
user's guide.
• Your computer, access point (or wireless router), or machine may not be
turned on.
• Check the wireless reception around the machine. If the router is far from
the machine or there is an obstacle, you might have difficulty receiving the
signal.
• Cycle the power for the access point (or wireless router), machine, and
computer. Sometimes cycling the power can recover network
communication.

Wireless network setup
188
2. Using a Network-Connected Machine
• Check whether firewall software (V3 or Norton) is blocking the
communication.
If the computer and the machine are connected on the same network and it
cannot be found when searching, firewall software might be blocking the
communication. Refer to the user's guide for the software to turn it off and
try searching for the machine again.
• Check whether the machine's IP address is allocated correctly. You can
check the IP address by printing the network configuration report.
• Check whether the access point (or wireless router) has a configured
security (password). If it has a password, refer to the access point (or wireless
router) administrator.
• Check the machine's IP address. Reinstall the machine driver and change the
settings to connect to the machine on the network. Due to the
characteristics of DHCP, the allocated IP address could change if the
machine is not used for a long time or if the access point has been reset.
Register the product's MAC address when you confogure the DHCP server
on the access point (or wireless router). Then you can always use the IP
address that is set with the MAC address. You can identify the Mac address
of your machine by printing a network configuration report (see "Printing a
network configuration report" on page 142).
• Check the wireless environment. You might not be able to connect to the
network in the infrastructure environment where you need to type in a
user's information before connecting to the access point (or wireless router).
• This machine only supports IEEE 802.11 b/g/n and Wi-Fi. Other wireless
communication types (e.g., Bluetooth) are not supported.
• When using the ad hoc mode, in operating systems such as Windows Vista,
you might need to set the wireless connection setting every time you use
the wireless machine.
• You cannot use infrastructure mode and ad hoc mode at the same time for
Samsung wireless network machines.
• The machine is within the range of the wireless network.
• The machine is located away from obstacles that could block the wireless
signal.
Remove any large metal objects between the access point (or wireless
router) and the machine.
Make sure the machine and wireless access point (or wireless router) are not
separated by poles, walls, or support columns containing metal or concrete.
• The machine is located away from other electronic devices that may
interfere with the wireless signal.
Many devices can interfere with the wireless signal, including a microwave
oven and some Bluetooth devices.
• Whenever the configuration of your access point (or wireless router)
changes, you must do the product's wireless network setup again.
• If Wi-Fi Direct is ON, this machine only supports IEEE 802.11 b/g.
• If the access point is set to work with the 802.11n standard only, it may not
connect to your machine.

3. Useful Setting Menus
This chapter explains how to browse the current status of your machine, and the method of setting for advanced
machine setup.
• Before you begin reading a chapter 190
• Print menu 191
• Copy menu 192
• Fax menu 199
• Scan menu 203
• System setup 205
• Admin setup 218
• Custom setup 219

190
3. Useful Setting Menus
Before you begin reading a chapter
This chapter explains all the features available for this series' models to help users easily understand the features.
You can check the features available for each model in the Basic Guide (see "Menu overview" on page 34).
The following are tips for using this chapter
• The control panel provides access to various menus to set up the machine or use the machine’s functions. These menus can be accessed by pressing (Menu).
• Some menus may not appear on the display depending on options or models. If so, it is not applicable to your machine.
• For models that do not have the (Menu) on the control panel, this feature is not applicable (see "Control panel overview" on page 25).
• Some menu names may differ from your machine depending on its options or the models.
191
3. Useful Setting Menus
Print menu
Some menus may not appear in the display depending on options or
models. If so, it is not applicable to your machine (see "Menu overview" on
page 34).
To change the menu options:
• Press (Menu) > Print Setup on the control panel.
• Or press Setup > Machine Setup > Print Setup on the touch screen.
Item Description
Orientation Selects the direction in which information is printed on a
page.
Copies You can enter the number of copies using the number
keypad.
Resolution
Specifies the number of dots printed per inch (dpi). The
higher the setting, the sharper printed characters and
graphics.
Darkness
Lightens or darkens the print on the page. The Normal
setting usually produces the best result. Use the Light
toner density setting to save toner.
Darken Text Prints text darker than on a normal document.
Emulation Sets the emulation type and option.
192
3. Useful Setting Menus
Copy menu
1
Copy feature
Some menus may not appear in the display depending on options or
models. If so, it is not applicable to your machine (see "Menu overview" on
page 34).
To change the menu options:
• Press (copy) > (Menu) > Copy Feature on the control panel.
• Or press Setup > Machine Setup > Default Setting > Copy Default on the
touch screen.
• Or press Copy > select the menu item you want on the touch screen.
Item Description
•Scan Size
•Original Size
Sets the image size.
Copies You can enter the number of copies using the number
keypad.
Reduce/Enlarge
Reduces or enlarges the size of a copied image (see
"Reduced or enlarged copy" on page 62).
If the machine is set Eco mode, reduce and
enlarge features are not available.
Darkness
Adjusts the brightness level to make a copy that is
easier to read, when the original contains faint
markings and dark images (see "Darkness" on page 61)
Contrast
Adjusts the contrast level to scan an original that is
easier to read, when the original contains too faint or
too dark contents (see "Contrast" on page 61)
Original Type Improves the copy quality by selecting the document
type for the current copy job (see "Original" on page 62)
Orientation Sets the original image’s orientation.
Layout Adjusts the layout format such as poster, clone, ID copy,
2/4-up, booklet, etc.
Item Description
Copy menu
193
3. Useful Setting Menus
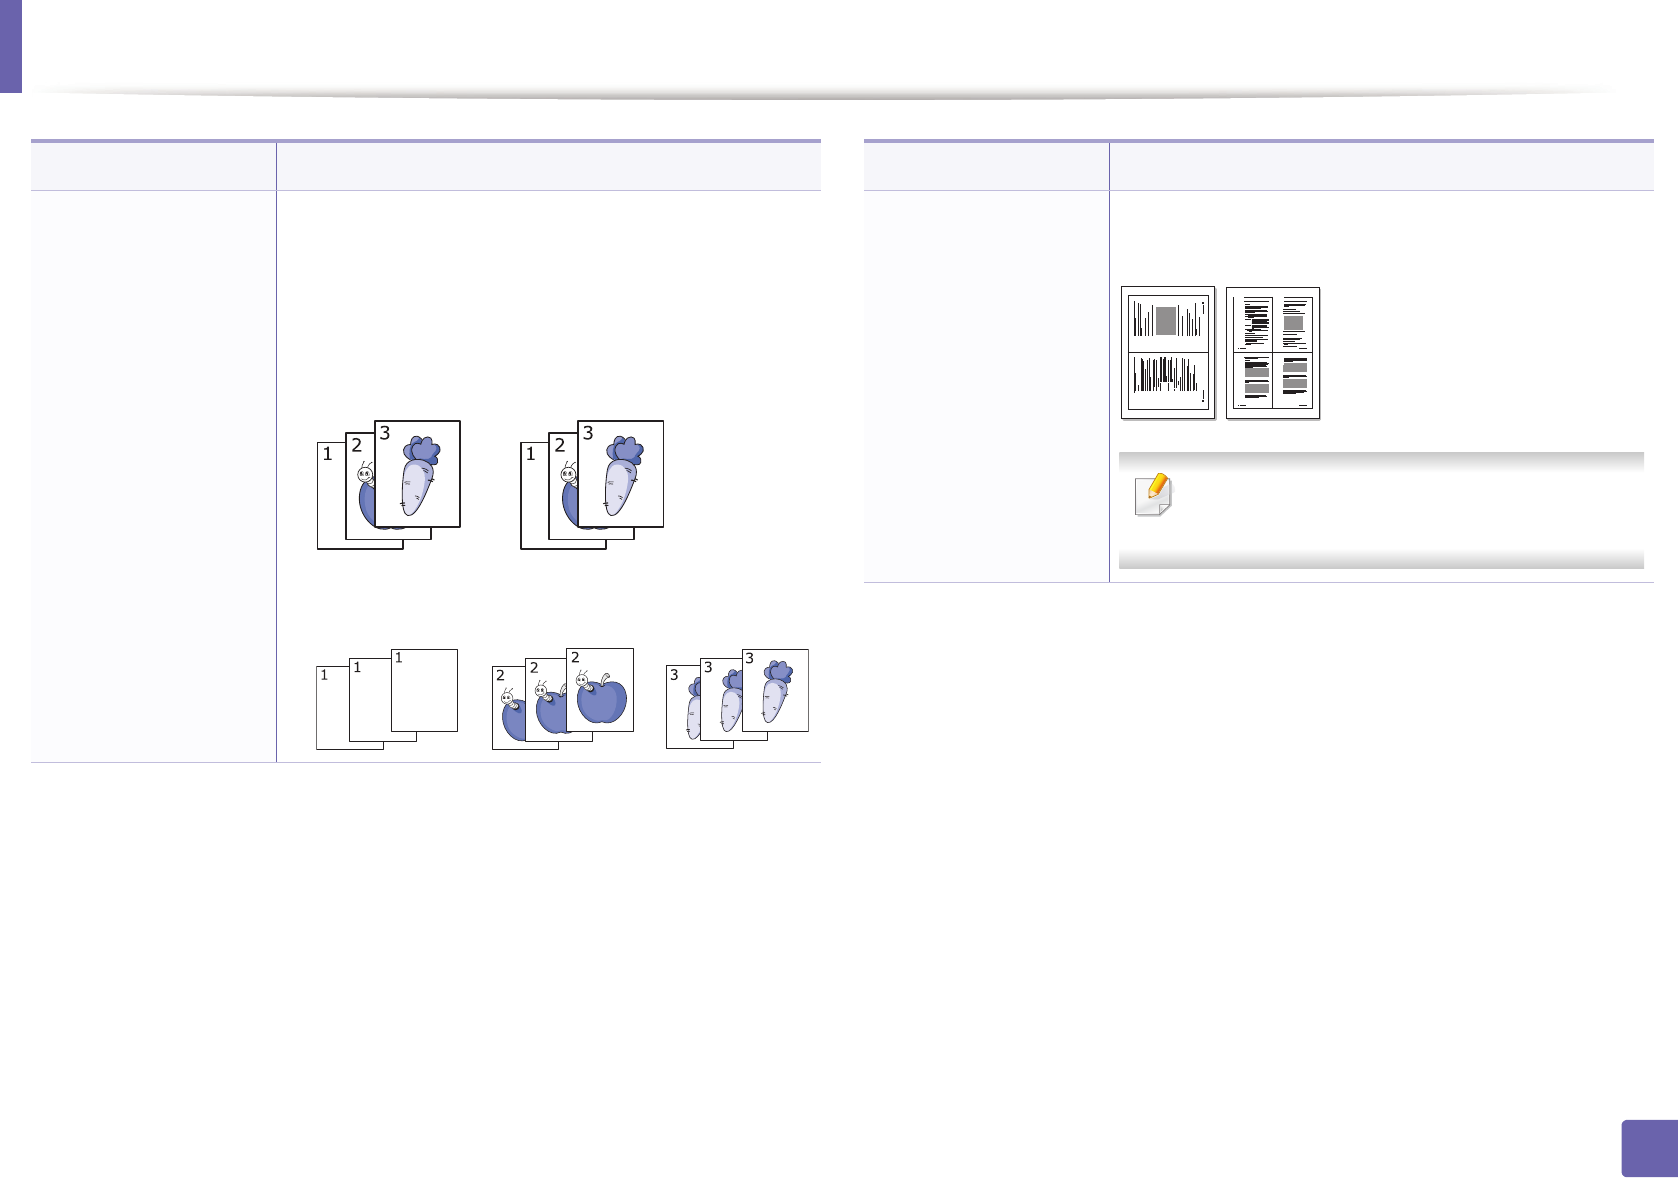
•Copy Collation
•Collate Copy
Set the machine to sort the copy job. For example, if you
make 2 copies of a 3 page original, one complete 3 page
document will print followed by a second complete
document.
•On: Prints output in sets to match the sequence of
originals.
•Off: Prints output sorted into stacks of individual
pages.
Item Description
•2-up or 4-up
•N-up Copy
Reduces the size of the original images and prints 2 or 4
pages onto one sheet of paper.
This copy feature is available only when you
load originals into the document feeder.
Item Description
1 2
1 2
3 4
Copy menu
194
3. Useful Setting Menus
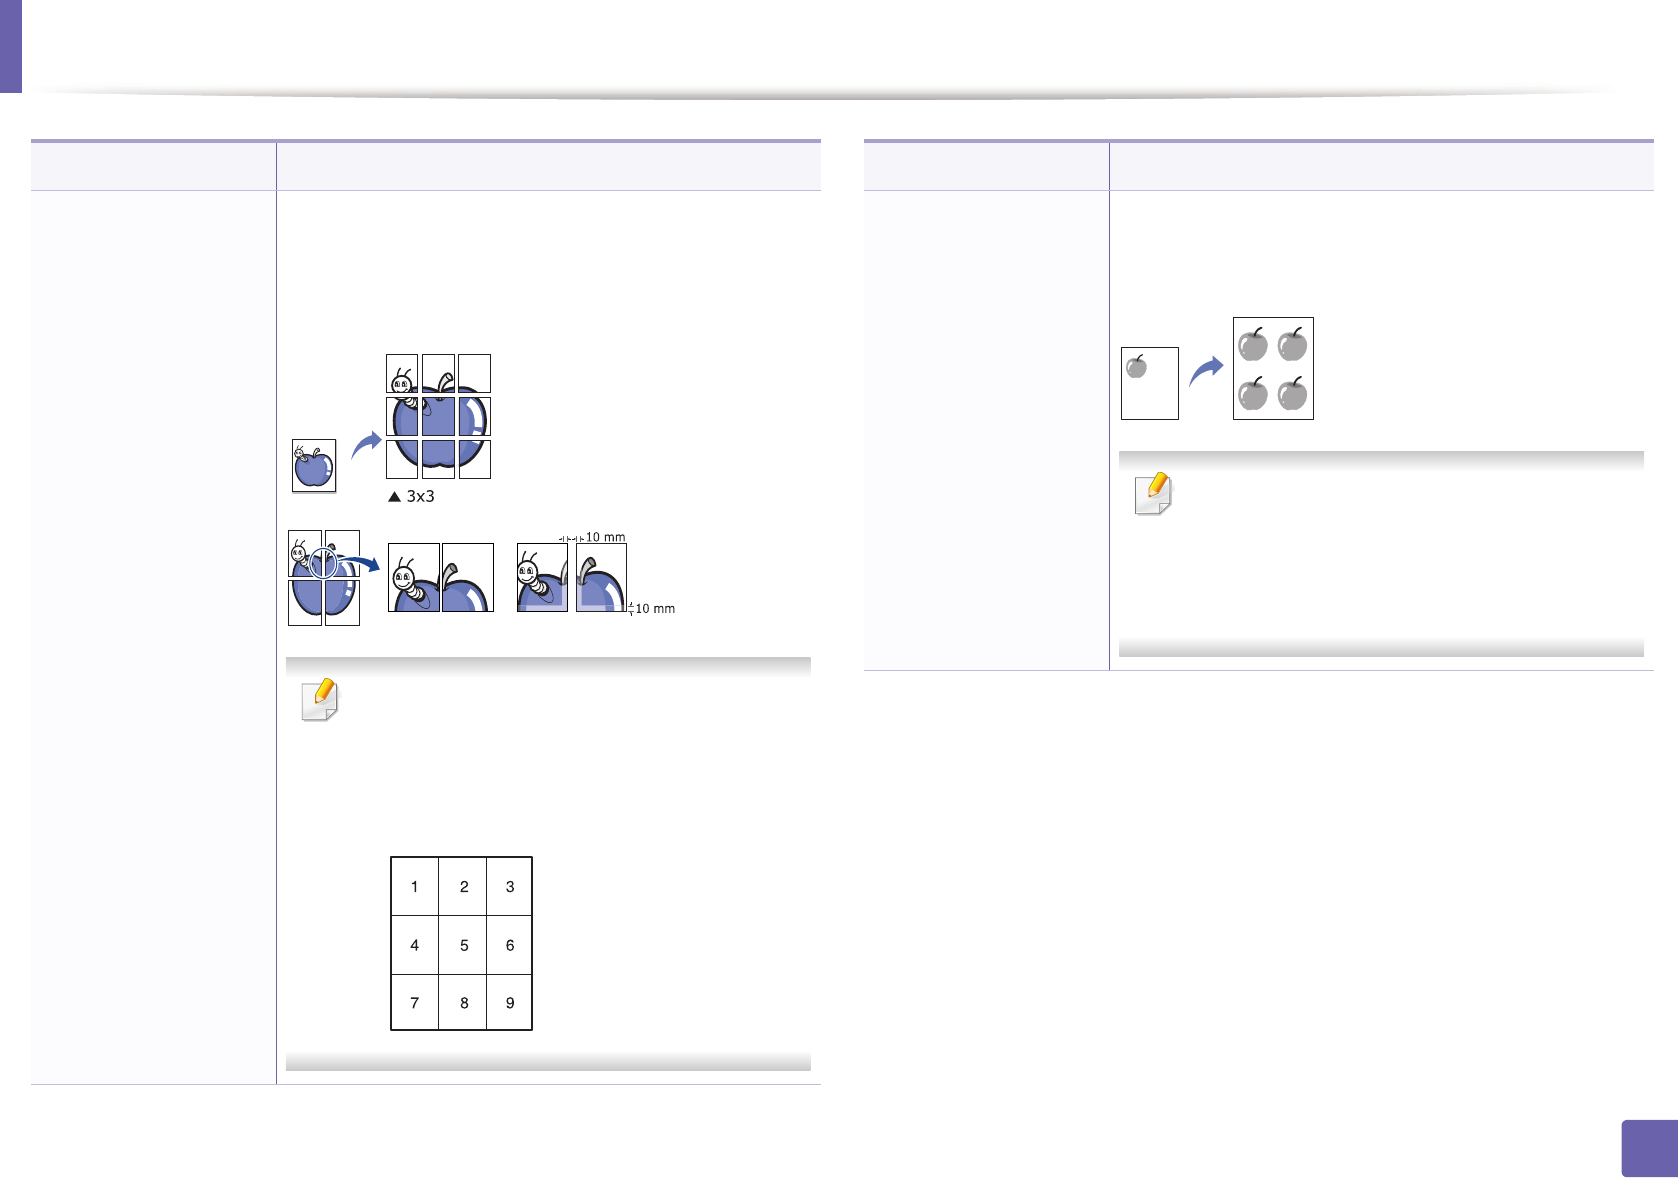
Poster Copy
Prints a single-page document onto 4 (Poster 2x2), 9
(Poster 3x3), or 16 (Poster 4x4) sheets of paper, for the
purpose of pasting the sheets together to form one
poster-size document.
• This copy feature is available only when you
place originals on the scanner glass.
• Your original is divided into 9 portions. Each
portion is scanned and printed one by one in
the following order:
Item Description
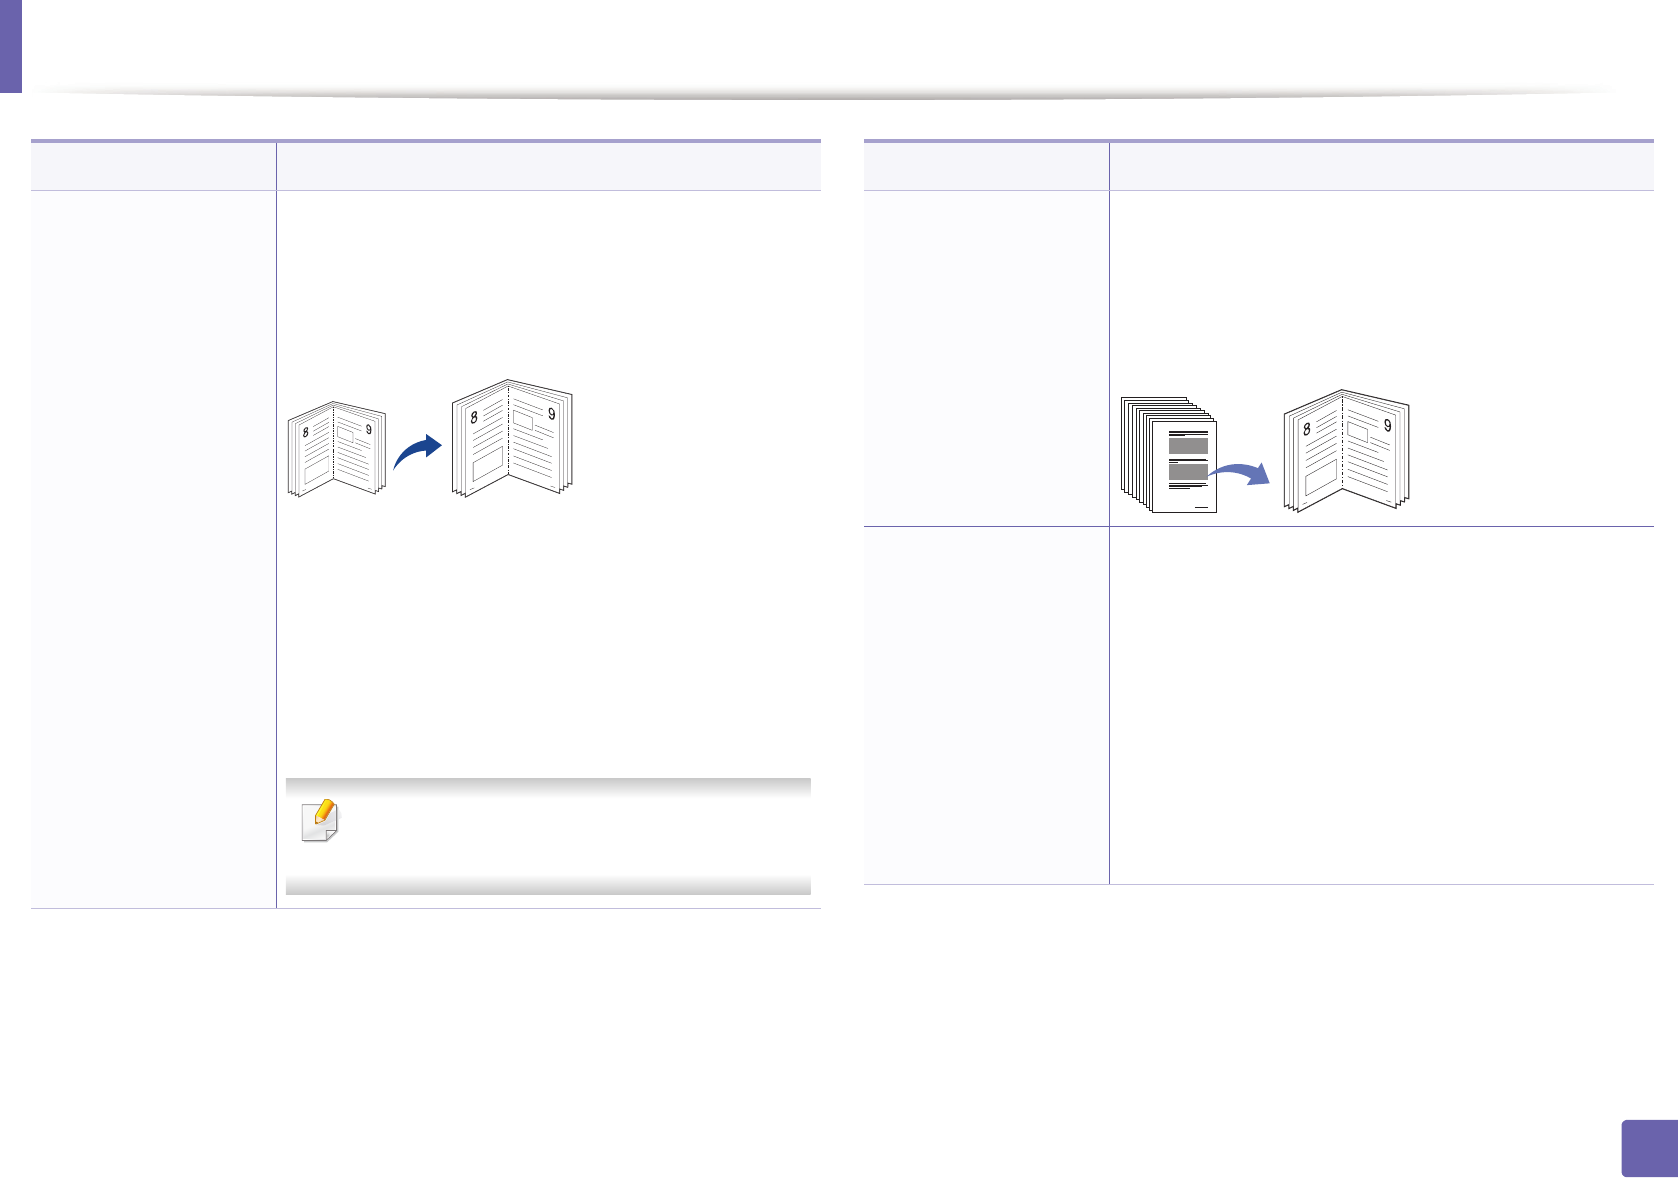
Clone Copy
Prints multiple original images on a single page. The
number of images is automatically determined by the
original image and the paper size.
• This copy feature is available only when you
place originals on the scanner glass.
• You cannot adjust the copy size using
Reduce/Enlarge for the Clone Copy
feature.
Item Description
Copy menu
195
3. Useful Setting Menus
Book Copy
The Book Copy feature allows you to copy an entire
book. If the book is too thick, lift the cover until its
hinges are caught by the stopper and then close the
cover. If the book or magazine is thicker than 30 mm,
start copying with the cover open.
•Off: Does not use this feature.
•Left Page: Use this option to print left page of the
book.
•Right Page: Use this option to print right page of the
book.
•Both Page: Use this option to print both pages of
the book.
This copy feature is available only when you
place originals on the scanner glass.
Item Description
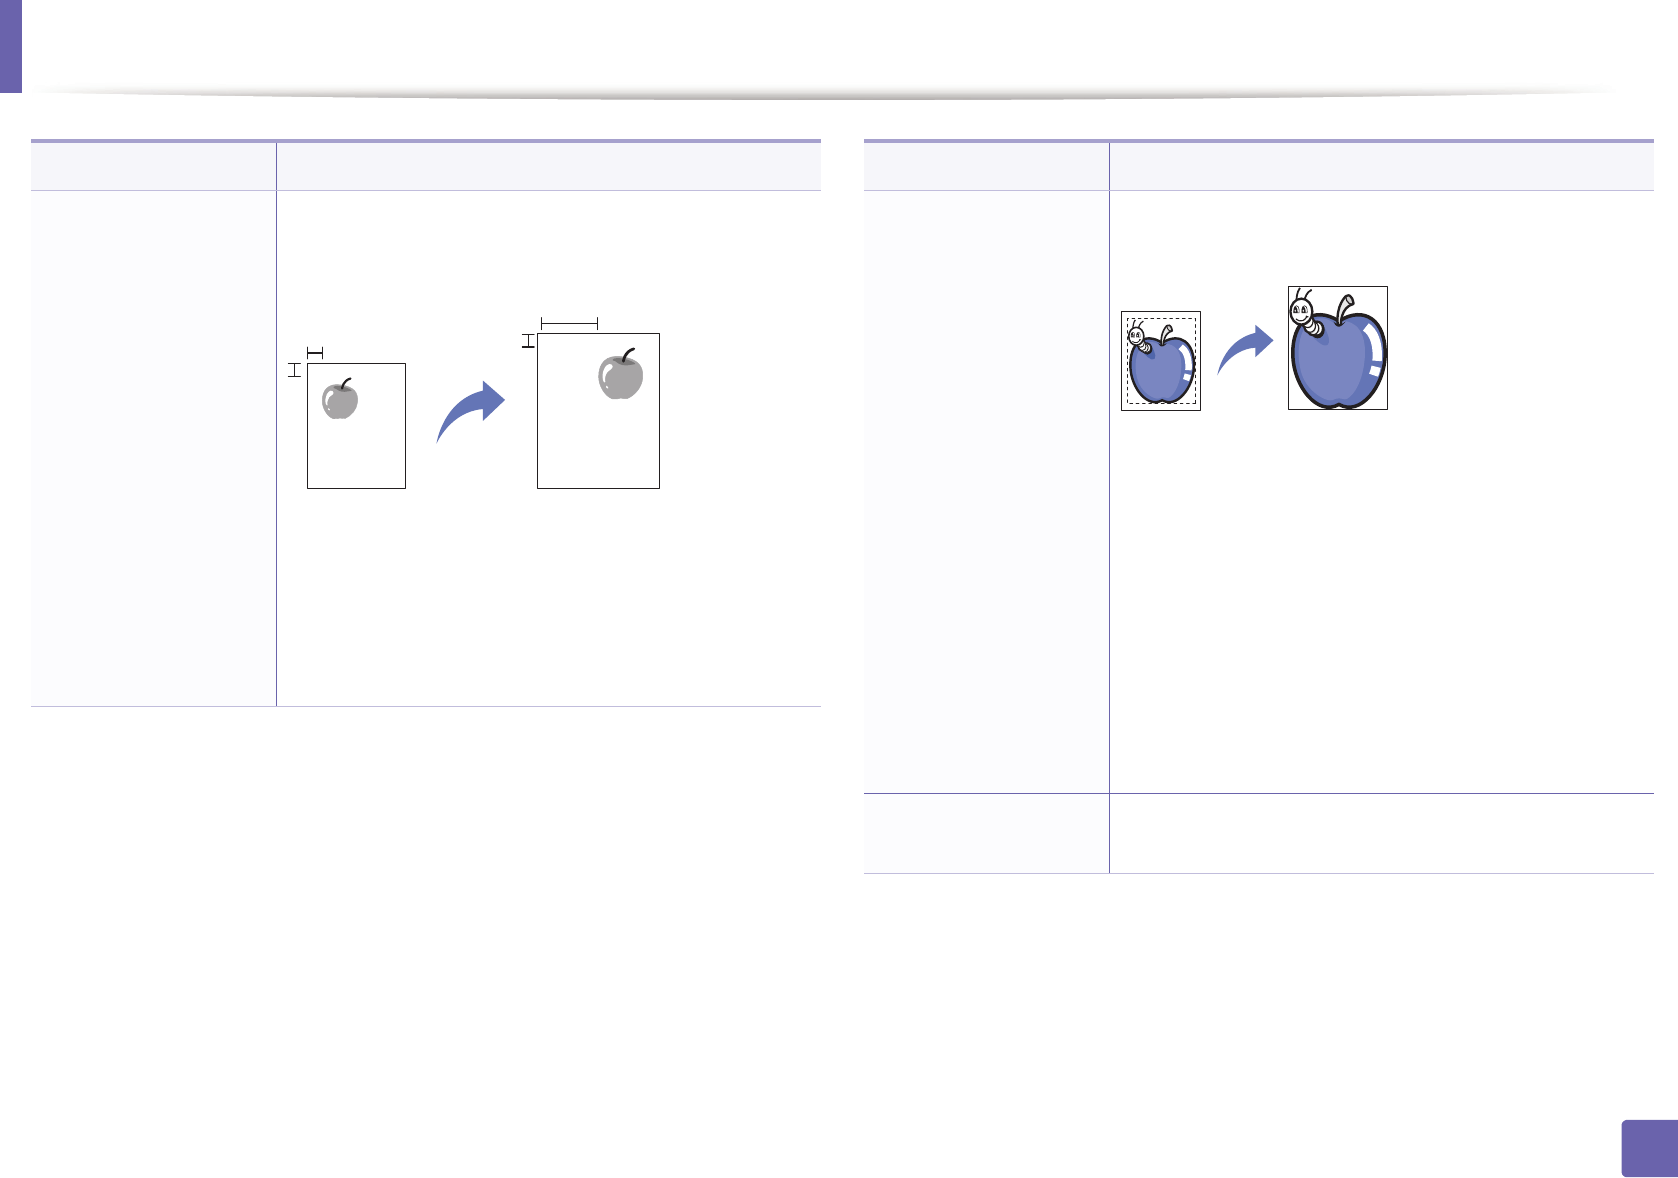
Booklet
The machine automatically prints on one or both sides
of the paper, which are then folded to produce a
booklet with all of the pages in the correct sequence.
The machine will reduce and correctly adjust the
position of each image to fit on the selected paper.
Adjust Bkgd
Prints an image without its background. This copy
feature removes the background color and can be
helpful when copying an original containing color in
the background, such as a newspaper or a catalog.
•Off: Does not use this feature.
•Auto: Optimizes the background.
•Enhance Lev.1~2: The higher the number is, the
more vivid the background is.
•Erase Lev.1~4: The higher the number is, the lighter
the background is.
Item Description
Copy menu
196
3. Useful Setting Menus
Margin Shift copying
Allows you to create a binding edge for the document.
The image can be adjusted up or down on the page
and/or shifted to the right or left.
•Off: Does not use this feature.
•Auto Center: Automatically copy in the center of the
paper. This feature is available only when you place
originals on the scanner glass.
•Custom Margin: Enter the left, right, top, bottom
margin using Number keypad.
Item Description
Edge Erase copying
Allows you to erase spots, drill holes, fold creases and
staple marks along any of the four edges of a document.
•Off: Does not use this feature.
•SmallOriginal: rases the edge of the original if it is
small. This feature is available only when you place
originals on the scanner glass.
•Hole Punch: Erases the marks of bookbinding holes.
•Book Center: Erases the middle part of the paper
which is black and horizontal, when you copy a
book. This feature is available only when you place
originals on the scanner glass.
•Border Erase: Enter the left, right, top, bottom
margin using Number keypad.
Gray Enhance
copying
When you make a copy in gray scale, use this feature to
get better quality of copy-output.
Item Description
Copy menu
197
3. Useful Setting Menus
Watermark copying
The watermark option allows you to print text over an
existing document. For example, you use it when you
want to have large gray letters reading “DRAFT” or
“CONFIDENTIAL” printed diagonally across the first
page or all pages of a document.
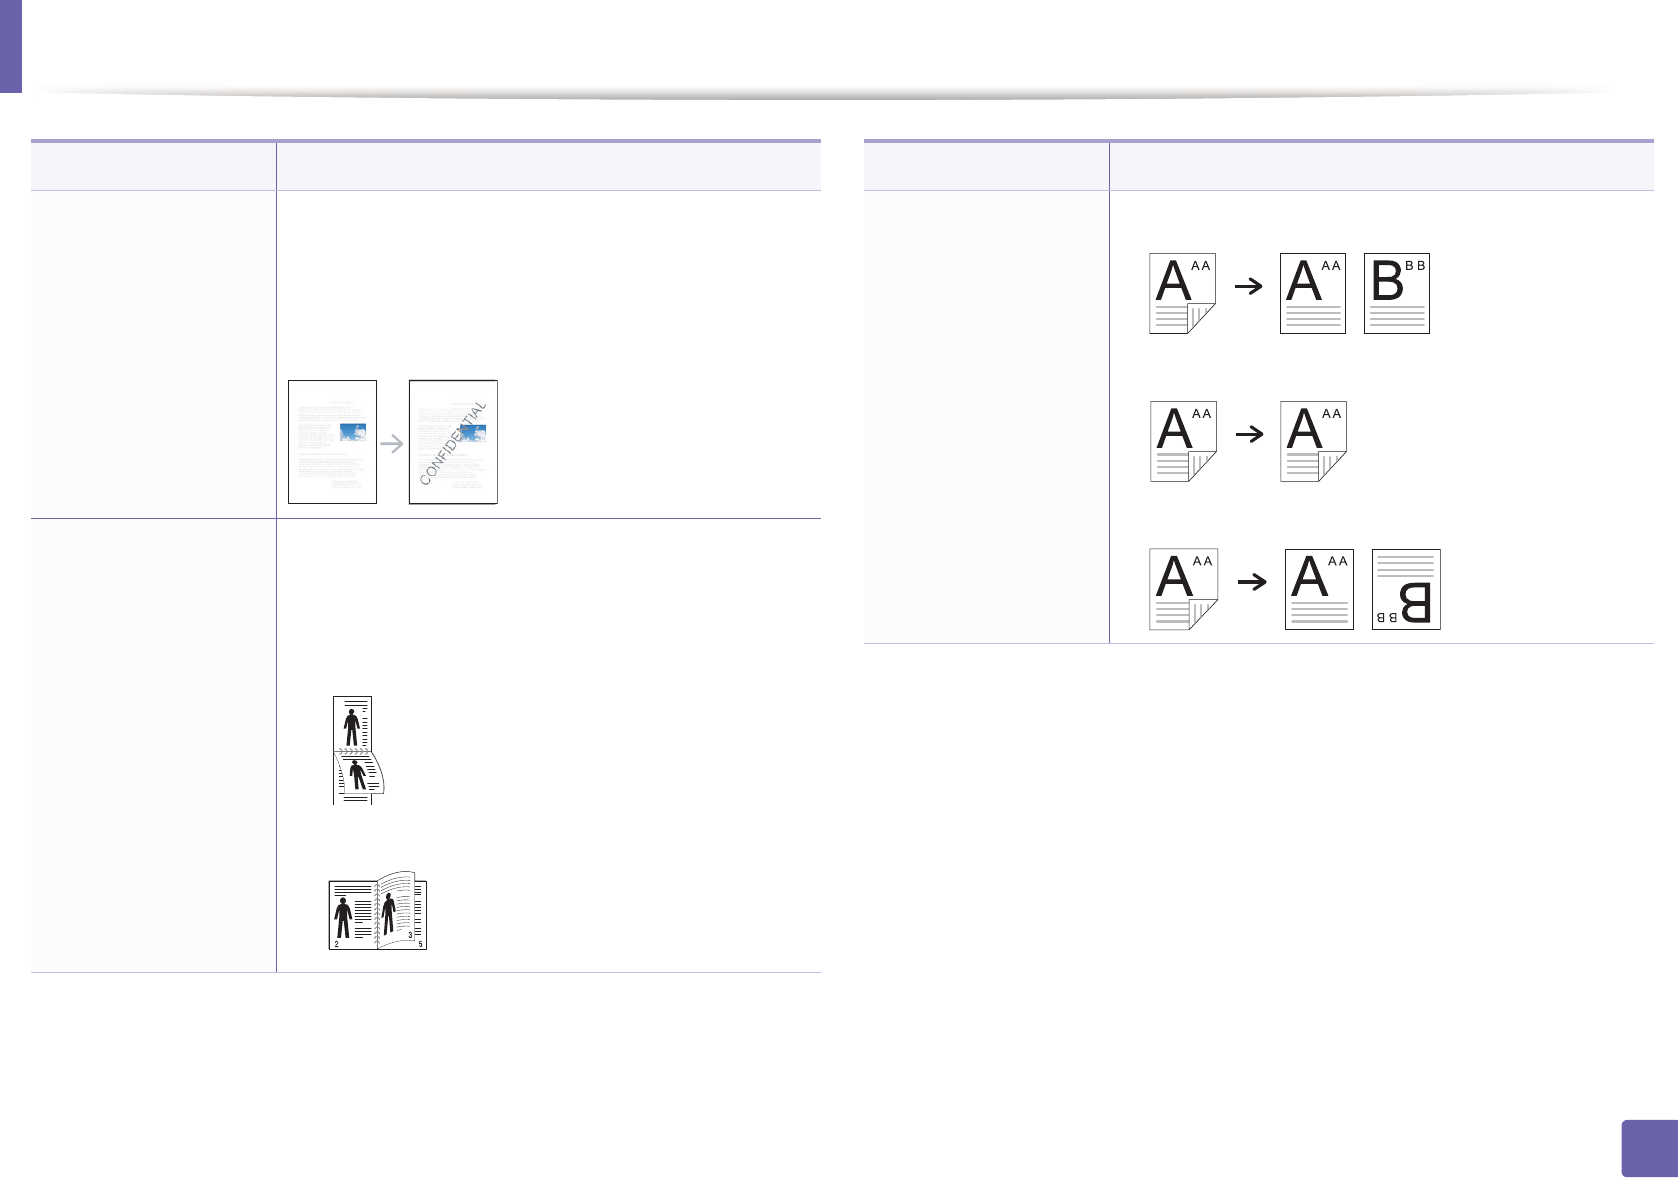
Duplex
You can set the machine to print copies on both sides of
paper.
•Off: Prints in normal mode.
•1->2Side Short
•1->2Side Long
Item Description
2
5
3
Duplex (continue)
•2->1Side
•2->2Side
•2->1Side ROT2
Item Description
Copy menu
198
3. Useful Setting Menus
2
Copy Setup
Some menus may not appear in the display depending on options or
models. If so, it is not applicable to your machine (see "Menu overview" on
page 34).
To change the menu options:
Press (copy) > (Menu) > Copy Setup on the control panel.
Item Description
Change Default Resets the value or setting to the printer’s out-of-box
state.
199
3. Useful Setting Menus
Fax menu
3
Fax Feature
Some menus may not appear in the display depending on options or
models. If so, it is not applicable to your machine (see "Menu overview" on
page 34).
To change the menu options:
• Press (fax) > (Menu)> Fax Feature on the control panel.
• Or press Setup > Machine Setup > Default Setting > Fax Default on the
touch screen.
• Or press Fax > select the menu item you want on the touch screen.
Item Description
•Scan Size
•Original Size
Sets the image size.
Contrast
Adjusts the contrast level to scan an original that is
easier to read, when the original contains too faint or
too dark contents.
Darkness
Adjusts the brightness level to scan an original that is
easier to read, when the original contains faint
markings and dark images (see "Darkness" on page 69).
Resolution
The default document settings procedure good results
when using typical text-based originals. However, if you
send originals that are of poor quality, or contain
photographs, you can adjust the resolution to produce
a higher quality fax (see "Resolution" on page 69).
Duplex prints the received fax on both sides of paper.
Multi Send
Sends a fax to multiple destinations (see "Sending a fax
to multiple destinations" on page 67).
You cannot send a color fax using this feature.
Delay Send
Sets your machine to send a fax at a later time when you
will not be present (see "Delaying a fax transmission" on
page 255).
You cannot send a color fax using this feature.
Priority Send
Scans the original into memory and immediately
transmits it when the current operation is finished.
Priority transmission will interrupt a sending to multiple
destinations between stations (example, when the
transmission to station A ends, before transmission to
station B begins) or between redial attempts (see
"Sending a priority fax" on page 257).
Item Description
Fax menu
200
3. Useful Setting Menus
4
Sending setup
Some menus may not appear in the display depending on options or
models. If so, it is not applicable to your machine (see "Menu overview" on
page 34).
To change the menu options:
• Press (fax) > (Menu) > Fax Setup > Sending on the control panel.
• Or press Setup > Machine Setup > Default Setting > Fax Default on the
touch screen.
Forward
Forwards the received or sent fax to other destination
by a fax or PC. If you are out of office but have to receive
the fax, this feature may be useful.
• See "Forwarding a sent fax to another destination"
on page 257.
• See "Forwarding a received fax" on page 258.
Secure Receive
Stores the received fax in memory without printing out.
To print received documents, you need to enter the
password. You can prevent your received faxes from
being accessed by unauthorized people (see "Receiving
in secure receiving mode" on page 262).
Add Page
Adds additional documents to a reserved delay fax job
(see "Adding documents to a reserved fax" on page
256).
Cancel Job Cancels the delayed fax job which is saved in memory
(see "Canceling a reserved fax job" on page 256).
Item Description
Item Description
Redial Times Sets the number of redial attempts. If you enter 0, the
machine will not redial.
Redial Term Sets the time interval before automatic redialling.
Prefix Dial
Sets a prefix of up to five digits. This number dials
before any automatic dial number is started. It is useful
for accessing a PABX exchange.
ECM Mode
Sends faxes using error correction mode (ECM) to
makes sure the faxes are sent smoothly without any
error. It may take more time.