Samsung Electronics Co SLM4025NX Mono Laser Printer User Manual MagpieN english
Samsung Electronics Co Ltd Mono Laser Printer MagpieN english
Contents
Users Manual 5
Regulatory information
123
5. Appendix
The FCC has set a general guideline of 20 cm (8 inches) separation between the
device and the body, for use of a wireless device near the body (this does not
include extremities). This device should be used more than 20 cm (8 inches)
from the body when wireless devices are on. The power output of the wireless
device (or devices), which may be embedded in your printer, is well below the
RF exposure limits as set by the FCC.
This transmitter must not be collocated or operation in conjunction with any
other antenna or transmitter.
Operation of this device is subject to the following two conditions: (1) This
device may not cause harmful interference, and (2) this device must accept any
interference received, including interference that may cause undesired
operation of the device.
Wireless devices are not user serviceable. Do not modify them in any way.
Modification to a wireless device will void the authorization to use it.
Contact manufacturer for service.
FCC Statement for Wireless LAN use:
While installing and operating this transmitter and antenna combination
the radio frequency exposure limit of 1m W/cm2 may be exceeded at
distances close to the antenna installed. Therefore, the user must maintain
a minimum distance of 20cm from the antenna at all times. This device
cannot be colocated with another transmitter and transmitting antenna.
14
Russia only
15
Germany only
Regulatory information
124
5. Appendix
16
Turkey only
17
Thailand only
18
Replacing the Fitted Plug (for UK Only)
Important
The mains lead for this machine is fitted with a standard (BS 1363) 13 amp plug
and has a 13 amp fuse. When you change or examine the fuse, you must re-fit
the correct 13 amp fuse. You then need to replace the fuse cover. If you have lost
the fuse cover, do not use the plug until you have another fuse cover.
Contact the people from you purchased the machine.
The 13 amp plug is the most widely used in the UK and should be suitable.
However, some buildings (mainly old ones) do not have normal 13 amp plug
sockets. You need to buy a suitable plug adaptor. Do not remove the moulded
plug.
If you cut off the moulded plug, get rid of it straight away.
You cannot rewire the plug and you may receive an electric shock if you
plug it into a socket.
Important warning:
If the wires in the mains lead do not match the colors marked in your plug, do
the following:
You must connect the green and yellow wire to the pin marked by the letter “E”
or by the safety ‘Earth symbol’ or colored green and yellow or green.
You must connect the blue wire to the pin which is marked with the letter “N” or
colored black.
You must earth this machine.
The wires in the mains lead have the following color code:
•Green and Yellow: Earth
•Blue: Neutral
•Brown: Live
Regulatory information
125
5. Appendix
You must connect the brown wire to the pin which is marked with the letter “L”
or colored red.
You must have a 13 amp fuse in the plug, adaptor, or at the distribution board.
19
Declaration of conformity (European countries)
Approvals and Certifications
January 1, 1995: Council Directive 2006/95/EC Approximation of the laws of
the member states related to low voltage equipment.
January 1, 1996: Council Directive 2004/108/EC, approximation of the laws of
the Member States related to electromagnetic compatibility.
March 9, 1999: Council Directive 1999/5/EC on radio equipment and
telecommunications terminal equipment and the mutual recognition of their
conformity. A full declaration, defining the relevant Directives and referenced
standards can be obtained from your Samsung Electronics Co., Ltd.
representative.
EC Certification
Certification to 1999/5/EC Radio Equipment & Telecommunications Terminal
Equipment Directive (FAX)
This Samsung product has been self-certified by Samsung for pan-European
single terminal connection to the analogue public switched telephone network
(PSTN) in accordance with Directive 1999/5/EC. The product has been designed
to work with the national PSTNs and compatible PBXs of the European
countries:
In the event of problems, you should contact the Euro QA Lab of Samsung
Electronics Co., Ltd. in the first instance.
The product has been tested against TBR21. To assist in the use and application
of terminal equipment which complies with this standard, the European
Telecommunication Standards Institute (ETSI) has issued an advisory document
(EG 201 121) which contains notes and additional requirements to ensure
network compatibility of TBR21 terminals. The product has been designed
against, and is fully compliant with, all of the relevant advisory notes contained
in this document.
Hereby, Samsung Electronics, declares that this [ProXpress M332xND,
ProXpress M382xD, ProXpress M382xND, ProXpress M402xND] is in
compliance with the essential requirements and other relevant
provisions of Low Voltage Directive (2006/95/EC), EMC Directive (2004/
108/EC).
Hereby, Samsung Electronics, declares that this [ProXpress M382xDW]
is in compliance with the essential requirements and other relevant
provisions of R&TTE Directive 1999/5/EC.
The declaration of conformity may be consulted at
www.samsung.com, go to Support > Download center and enter
your printer (MFP) name to browse the EuDoC.

Regulatory information
126
5. Appendix
European radio approval information (for products
fitted with EU-approved radio devices)
Low power, Radio LAN type devices (radio frequency (RF) wireless
communication devices), operating in the 2.4 GHz/5 GHz band, may be present
(embedded) in your printer system which is intended for home or office use. This
section is only applicable if these devices are present. Refer to the system label
to verify the presence of wireless devices.
The power output of the wireless device or devices that may be embedded in
you printer is well below the RF exposure limits as set by the European
Commission through the R&TTE directive.
European states qualified under wireless approvals:
EU countries
European states with restrictions on use:
EU
EEA/EFTA countries
No limitations at this time
20
Israel only
21
Regulatory compliance statements
Wireless guidance
Low power, Radio LAN devices (radio frequency (RF) wireless communication
devices), operating in the 2.4 GHz/5 GHz Band, may be present (embedded) in
your printer system. The following section is a general overview of
considerations while operating a wireless device.
Additional limitations, cautions, and concerns for specific countries are listed in
the specific country sections (or country group sections). The wireless devices in
your system are only qualified for use in the countries identified by the Radio
Approval Marks on the system rating label. If the country you will be using the
wireless device in, is not listed, contact your local Radio Approval agency for
requirements. Wireless devices are closely regulated and use may not be
allowed.
Wireless devices that may be in your system are only qualified for
use in the European Union or associated areas if a CE mark is on the
system label.
Regulatory information
127
5. Appendix
The power output of the wireless device or devices that may be embedded in
your printer is well below the RF exposure limits as known at this time. Because
the wireless devices (which may be embedded into your printer) emit less
energy than is allowed in radio frequency safety standards and
recommendations, manufacturer believes these devices are safe for use.
Regardless of the power levels, care should be taken to minimize human contact
during normal operation.
As a general guideline, a separation of 20 cm (8 inches) between the wireless
device and the body, for use of a wireless device near the body (this does not
include extremities) is typical. This device should be used more than 20 cm (8
inches) from the body when wireless devices are on and transmitting.
This transmitter must not be collocated or operation in conjunction with any
other antenna or transmitter.
Some circumstances require restrictions on wireless devices. Examples of
common restrictions are listed below:
Radio frequency wireless communication can interfere with
equipment on commercial aircraft. Current aviation regulations
require wireless devices to be turned off while traveling in an airplane.
IEEE 802.11 (also known as wireless Ethernet) and Bluetooth
communication devices are examples of devices that provide wireless
communication.
In environments where the risk of interference to other devices or
services is harmful or perceived as harmful, the option to use a wireless
device may be restricted or eliminated. Airports, Hospitals, and
Oxygen or flammable gas laden atmospheres are limited examples
where use of wireless devices may be restricted or eliminated. When in
environments where you are uncertain of the sanction to use wireless
devices, ask the applicable authority for authorization prior to use or
turning on the wireless device.
Every country has different restrictions on the use of wireless devices.
Since your system is equipped with a wireless device, when traveling
between countries with your system, check with the local Radio
Approval authorities prior to any move or trip for any restrictions on
the use of a wireless device in the destination country.
If your system came equipped with an internal embedded wireless
device, do not operate the wireless device unless all covers and shields
are in place and the system is fully assembled.
Wireless devices are not user serviceable. Do not modify them in any
way. Modification to a wireless device will void the authorization to
use it. Contact manufacturer for service.
Only use drivers approved for the country in which the device will be
used. See the manufacturer System Restoration Kit, or contact
manufacturer Technical Support for additional information.
Regulatory information
128
5. Appendix
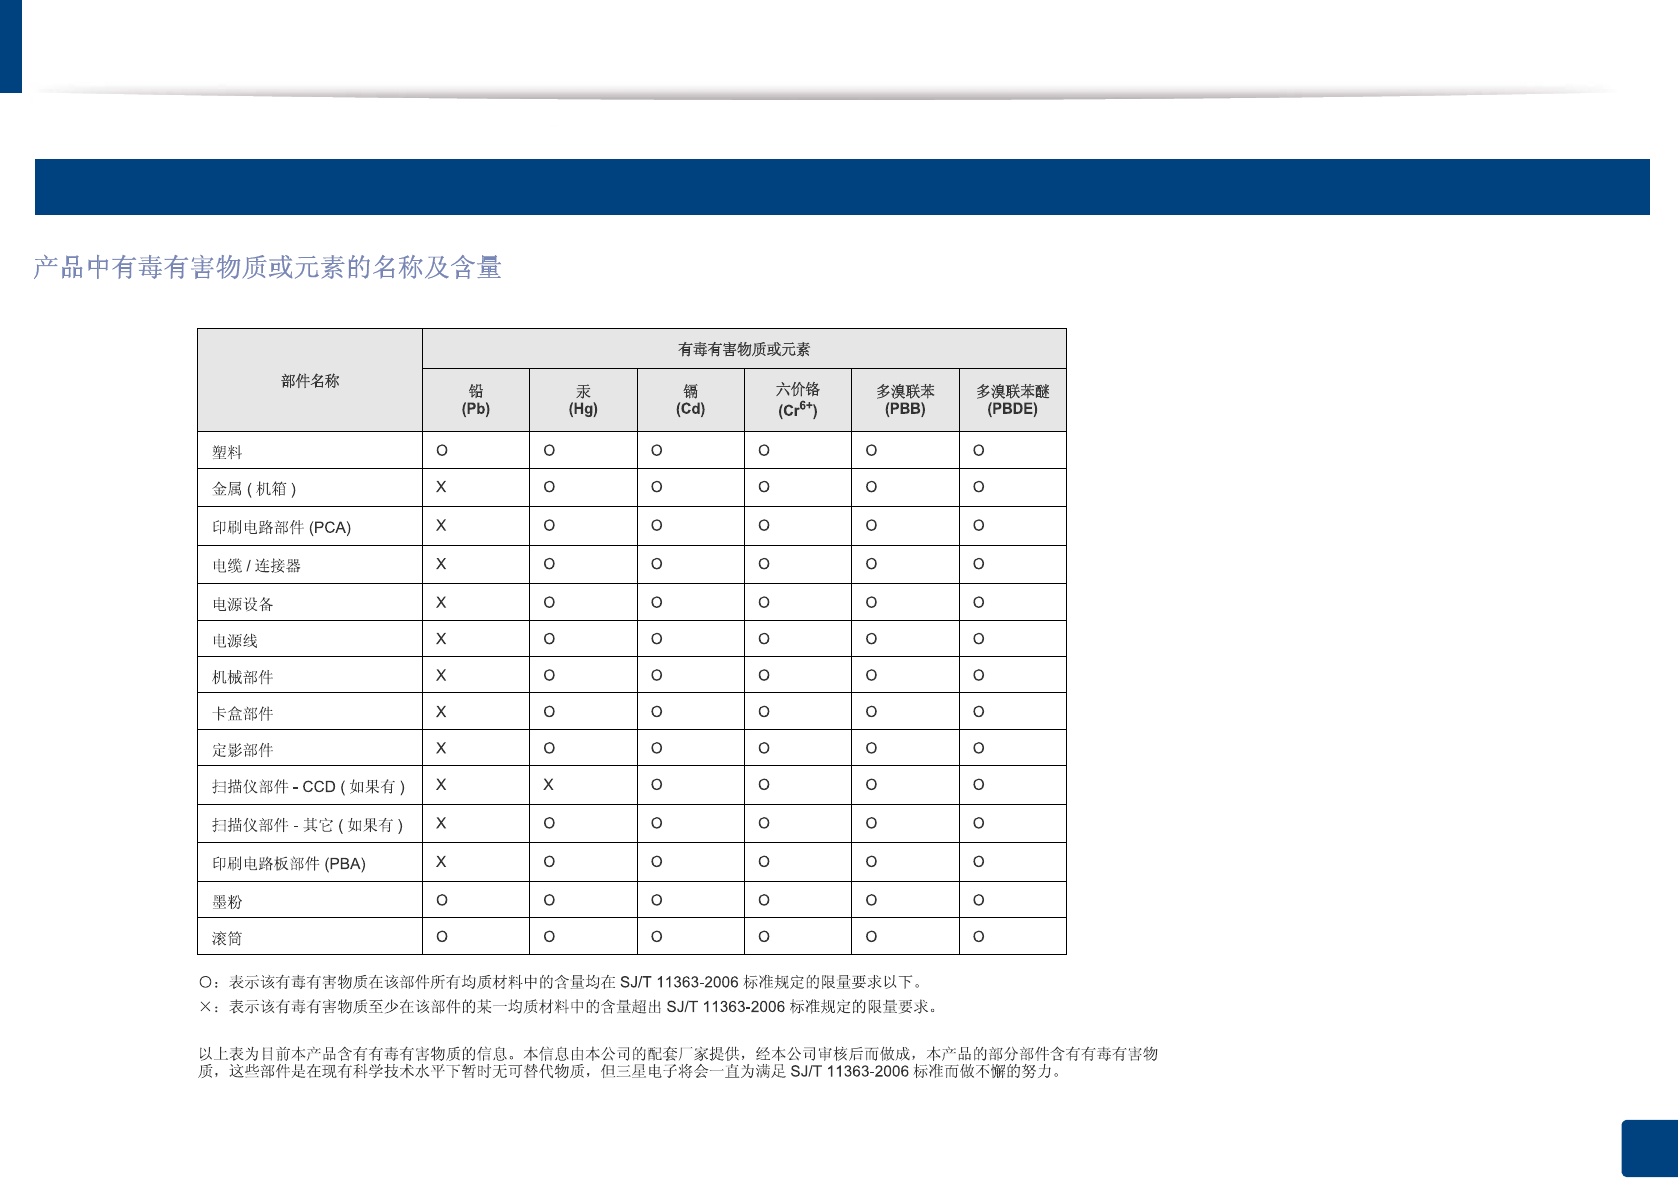
22
China only

129
5. Appendix
Copyright
© 2013 Samsung Electronics Co., Ltd. All rights reserved.
This user’s guide is provided for information purposes only. All information included herein is subject to change without notice.
Samsung Electronics is not responsible for any direct or indirect damages, arising from or related to use of this user’s guide.
• Samsung and the Samsung logo are trademarks of Samsung Electronics Co., Ltd.
• Microsoft, Windows, Windows Vista, Windows 7, Windows 8 and Windows Server 2008 R2 are either registered trademarks or trademarks of Microsoft
Corporation.
• Google, Picasa, Google Docs, Android and Gmail are either registered trademarks or trademarks of Google Inc.
• Google Cloud Print is a trademark of Google Inc.
• iPad, iPhone, iPod touch, Mac and Mac OS are trademarks of Apple Inc., registered in the U.S and other countries. AirPrint and the AirPrint logo are trademarks
of Apple Inc.
• All other brand or product names are trademarks of their respective companies or organizations.
Refer to the 'LICENSE.txt' file in the provided CD-ROM for the open source license information.
REV.2.00
ADVANCED
User’s Guide
ADVANCED
User’s Guide
This guide provides information about installation, advanced configuration,
operation and troubleshooting on various OS environments.
Some features may not be available depending on models or countries.
BASIC
This guide provides information concerning installation, basic operation and troubleshooting
on windows.

131
ADVANCED
1. Software Installation
Installation for Mac 134
Reinstallation for Mac 135
Installation for Linux 136
Reinstallation for Linux 137
2. Using a Network-Connected
Machine
Useful network programs 139
Wired network setup 140
Installing driver over the network 143
IPv6 configuration 152
Wireless network setup 156
Samsung Mobile Print 182
AirPrint 183
Google Cloud Print™ 185
3. Useful Setting Menus
Before you begin reading a chapter 189
Information 190
Layout 191
Paper 192
Graphic 193
System Setup 194
Emulation 197
Network 198
Job Management 200
Admin setup 201
Eco 202
Direct USB 203
Job Status 204
Counter 205
Help 206
Secure Release 207
4. Special Features
Altitude adjustment 209
Entering various characters 210
Printing features 213
Using optional device features 229

132
ADVANCED
5. Useful Management Tools
Accessing management tools 232
Easy Capture Manager 233
Samsung AnyWeb Print 234
Easy Eco Driver 235
Using SyncThru™ Web Service 236
Using Samsung Easy Printer Manager 240
Using Samsung Printer Status 243
Using Samsung Printer Experience 245
Using the Linux Unified Driver Configurator 251
6. Troubleshooting
Paper feeding problems 256
Power and cable connecting problems 257
Printing problems 258
Printing quality problems 262
Operating system problems 270
1. Software Installation
This chapter provides instructions for installing essential and helpful software for use in an environment where the
machine is connected via a cable. A locally connected machine is a machine directly attached to your computer using
the cable. If your machine is attached to a network, skip the following steps below and go on to installing a network
connected machine’s driver (see "Installing driver over the network" on page 143).
• Installation for Mac 134
• Reinstallation for Mac 135
• Installation for Linux 136
• Reinstallation for Linux 137
• If you are a Windows OS user, refer to the Basic Guide for installing the machine’s driver (see
"Installing the driver locally" on page 27).
• Only use a USB cable no longer then 3 meter (118 inches).

134
1. Software Installation
Installation for Mac
1Make sure that the machine is connected to your computer and
powered on.
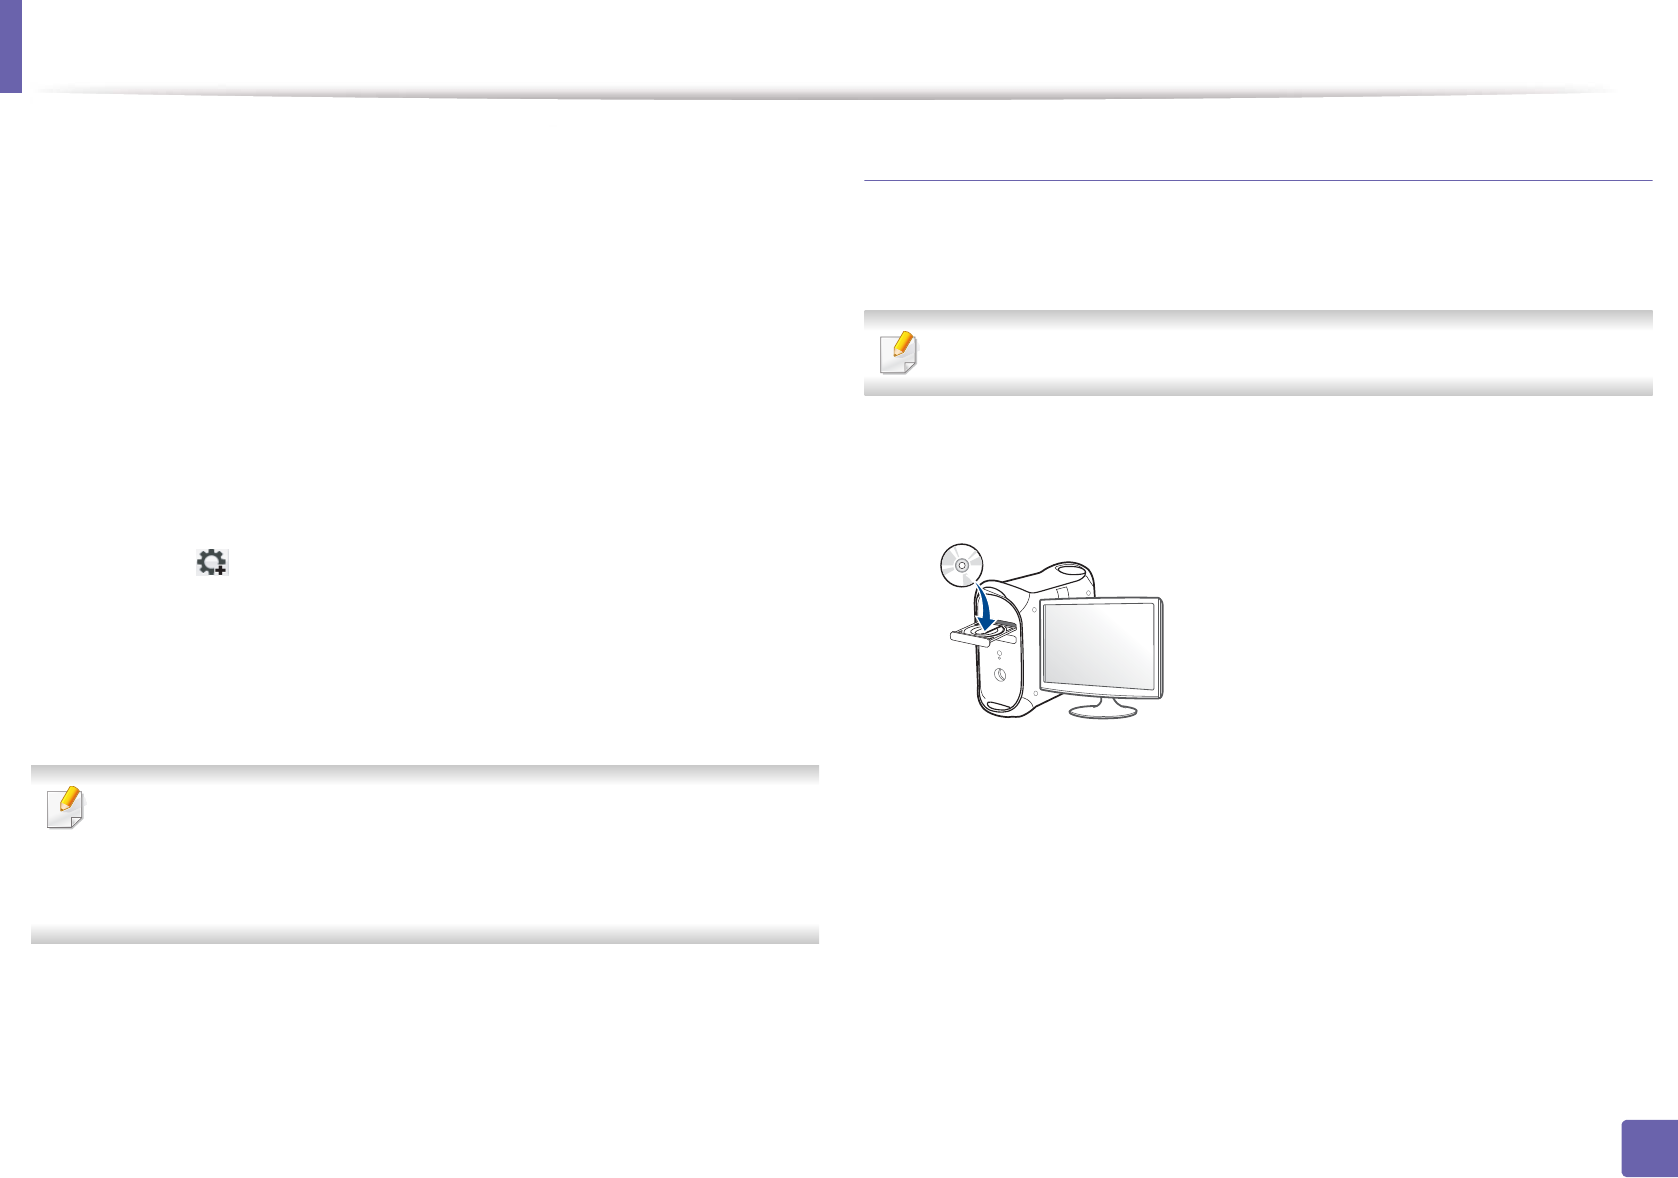
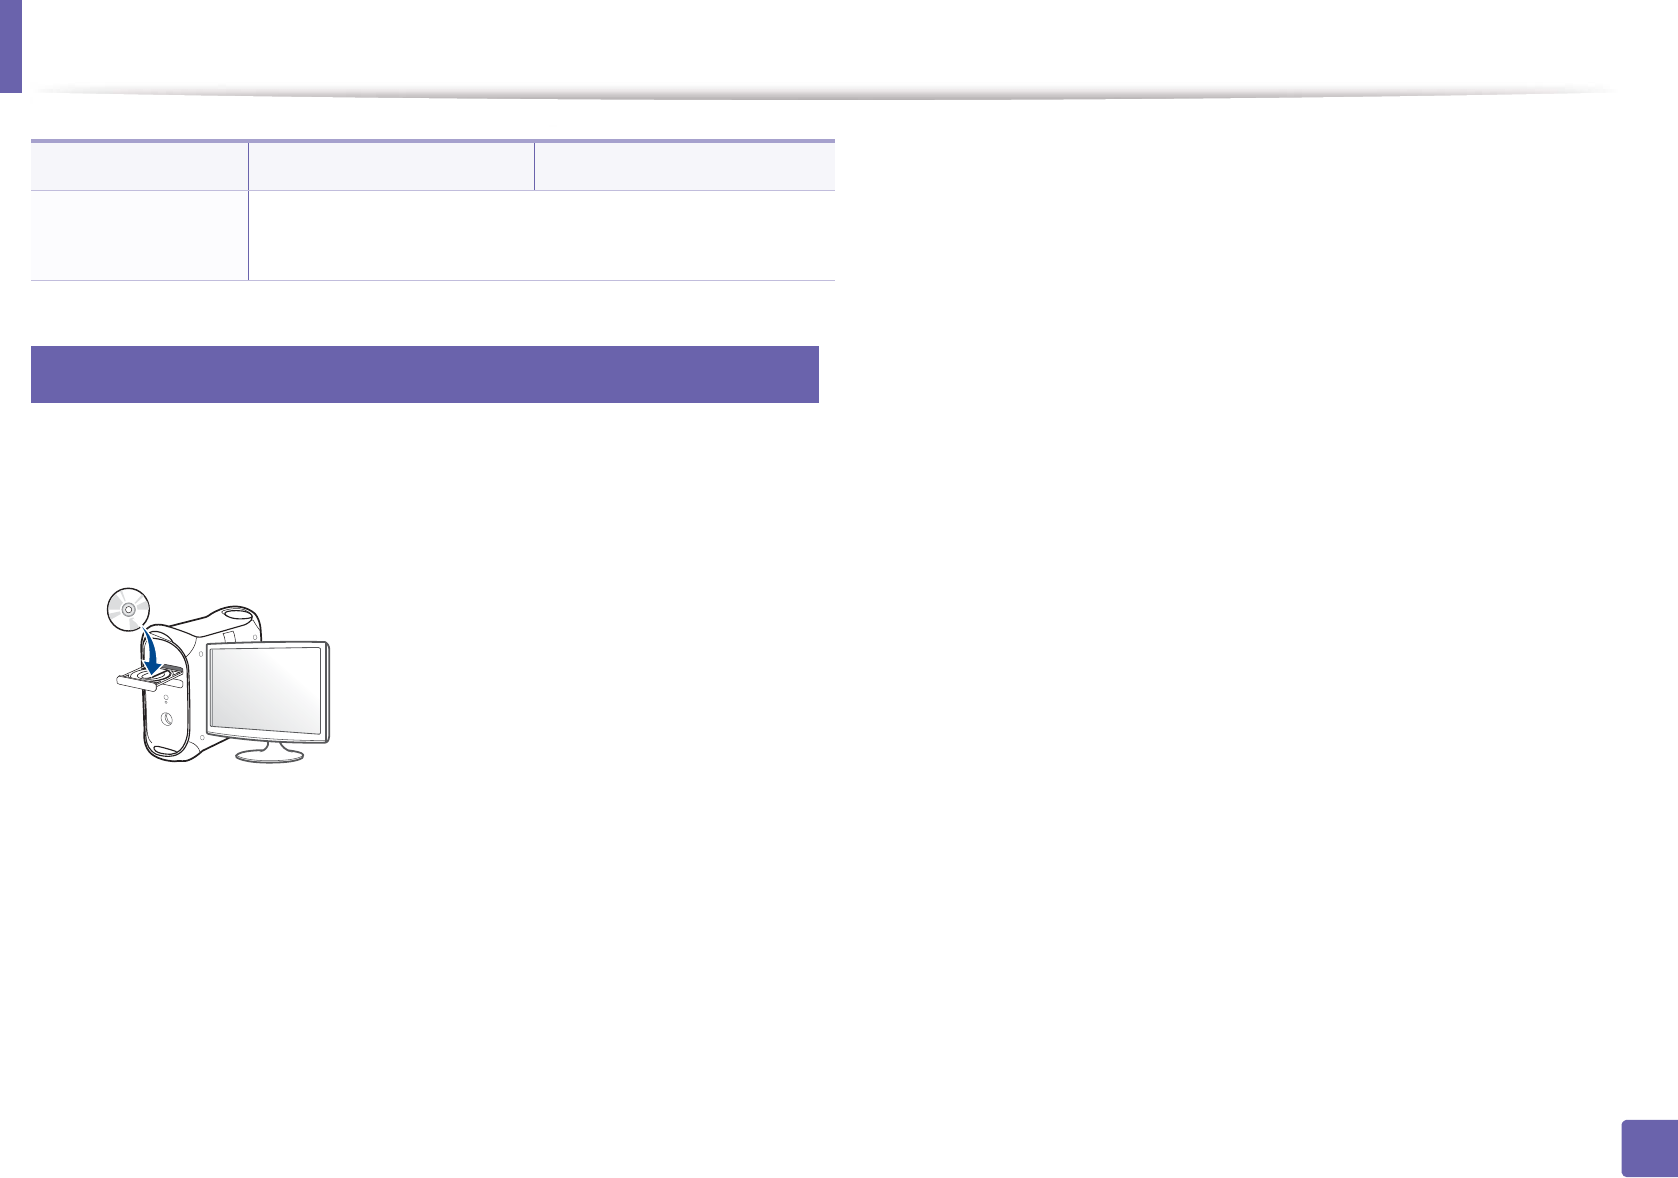
2 Insert the supplied software CD into your CD-ROM drive.
3 Double-click the CD-ROM icon that appears on your Mac desktop.
• For Mac OS X 10.8, double-click the CD-ROM that appears on Finder.
4 Double-click the MAC_Installer folder > Installer OS X icon.
5 Click Continue.
6 Read the license agreement and click Continue.
7 Click Agree to agree to the license agreement.
8 Click Install. All components necessary for machine operations will be
installed.
If you click Customize, you can choose individual components to install.
9 Enter the password and click OK.
10 Select Direct Connection using USB cable on the Printer Connection
Type and click Continue.
11 Click Add Printer button to select your printer and add it to your printer
list.
12 After the installation is finished, click Close.

135
1. Software Installation
Reinstallation for Mac
If the printer driver does not work properly, uninstall the driver and reinstall it.
1Open the Applications folder > Samsung > Printer Software
Uninstaller.
2 To uninstall printer software, click Continue.
3 Check the program you want to delete and click Uninstall.
4 Enter the password and click OK.
5 After the uninstallation is finished, click Close.
If a machine has already been added, delete it from the Print Setup Utility
or Print & Fax.

136
1. Software Installation
Installation for Linux
You need to download Linux software packages from the Samsung website to
install the printer software (http://www.samsung.com > find your product >
Support or Downloads).
1
Installing the Unified Linux Driver
1Make sure that the machine is connected to your computer and
powered on.
2 When the Administrator Login window appears, type “root” in the
Login field and enter the system password.
You must log in as a super user (root) to install the machine software. If you
are not a super user, ask your system administrator.
3 From the Samsung website, download the Unified Linux Driver package
to your computer.
4 Right-click the Unified Linux Driver package and extract the package.
5 Double click cdroot > autorun.
6 When the welcome screen appears, click Next.
7 When the installation is complete, click Finish.
The installation program added the Unified Driver Configurator desktop icon
and the Unified Driver group to the system menu for your convenience. If you
have any difficulties, consult the on-screen help that is available through your
system menu or from the driver package Windows applications, such as Unified
Driver Configurator or Image Manager.

137
1. Software Installation
Reinstallation for Linux
If the printer driver does not work properly, uninstall the driver and reinstall it.
1Make sure that the machine is connected to your computer and
powered on.
2 When the Administrator Login window appears, type “root” in the
Login field and enter the system password.
You must log in as a super user (root) to uninstall the printer driver. If you
are not a super user, ask your system administrator.
3 Open the Terminal program. When the Terminal screen appears, type in
the following.
[root@localhost root]#cd /opt/Samsung/mfp/uninstall/
[root@localhost uninstall]#./uninstall.sh
4 Click Next.
5 Click Finish.

2. Using a Network-
Connected Machine
This chapter gives you step-by-step instructions for setting up a network connected machine and software.
• Useful network programs 139
• Wired network setup 140
• Installing driver over the network 143
• IPv6 configuration 152
• Wireless network setup 156
• Samsung Mobile Print 182
• AirPrint 183
• Google Cloud Print™ 185
Supported optional devices and features may differ according to your model (see "Features by
models" on page 8).

139
2. Using a Network-Connected Machine
Useful network programs
There are several programs available to setup the network settings easily in a
network environment. For the network administrator especially, managing
several machines on the network is possible.
• Before using the programs below, set the IP address first.
• Some features and optional goods may not be available depending on
model or country (see "Features by models" on page 8).
1
SyncThru™ Web Service
The web server embedded on your network machine allows you to do the
following tasks (see "Using SyncThru™ Web Service" on page 236).
• Check the supplies information and status.
• Customize machine settings.
• Set the email notification option. When you set this option, the machine
status (toner cartridge shortage or machine error) will be sent to a certain
person's email automatically.
• Configure the network parameters necessary for the machine to connect to
various network environments.
2
SyncThru™ Web Admin Service
Web-based machine management solution for network administrators.
SyncThru™ Web Admin Service provides you with an efficient way of managing
network devices and lets you remotely monitor and troubleshoot network
machines from any site with corporate internet access.
• Download this program from http://solution.samsungprinter.com.
3
SetIP wired network setup
This utility program allows you to select a network interface and manually
configure the IP addresses for use with the TCP/IP protocol.
• See "IPv4 configuration using SetIP (Windows)" on page 140.
• See "IPv4 configuration using SetIP (Mac)" on page 141.
• See "IPv4 configuration using SetIP (Linux)" on page 142.
• The machine that does not support the network port, it will not be able
to use this feature (see "Rear view" on page 22).
• TCP/IPv6 is not supported by this program.
140
2. Using a Network-Connected Machine
Wired network setup
4
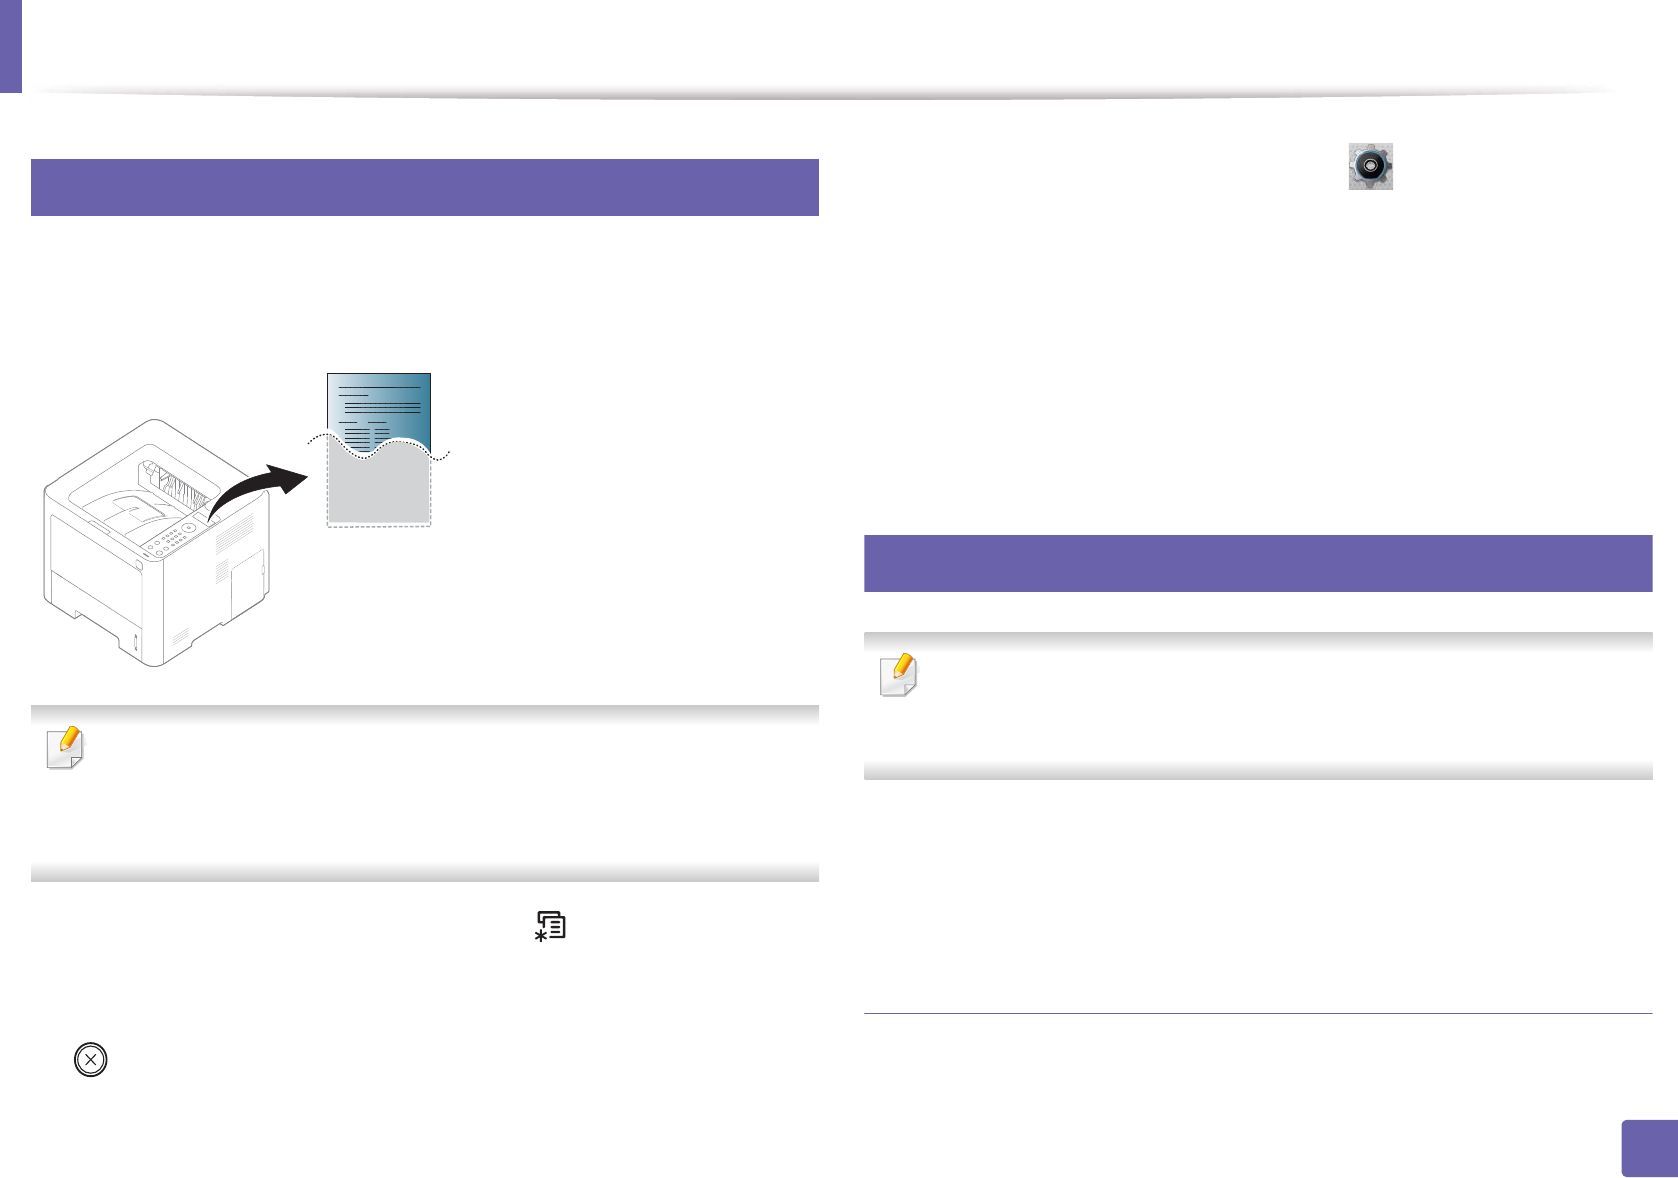
Printing a network configuration report
You can print Network Configuration Report from the machine’s control panel
that will show the current machine’s network settings. This will help you to set
up a network.
• Accessing menus may differ from model to model (see "M332xND/
M382xD/M382xND/M382xDW/M402xND" on page 31).
• It may be necessary to press OK to navigate to lower-level menus for
some models.
•The machine has a display screen: Press the (Menu) button on the
control panel and select Network > Network Conf.
•The machine does not have a display screen: Press the
(Cancel)button for more than five seconds on the control panel.
•The machine has a touch screen: Press the (Setup) on the touch
screen and select Network > Network Configuration.
Using this Network Configuration Report, you can find your machine’s MAC
address and IP address.
For example:
• MAC Address: 00:15:99:41:A2:78
• IP Address: 169.254.192.192
5
Setting IP address
• The machine that does not support the network interface, it will not be
able to use this feature (see "Rear view" on page 22).
• TCP/IPv6 is not supported by this program.
First, you have to set up an IP address for network printing and managements.
In most cases a new IP address will be automatically assigned by a DHCP
(Dynamic Host Configuration Protocol) server located on the network.
IPv4 configuration using SetIP (Windows)
Before using the SetIP program, disable the computer firewall from Control
Panel > Security Center > Windows Firewall.
Wired network setup
141
2. Using a Network-Connected Machine
1 Download the software from the Samsung website then unpack and
install it: (http://www.samsung.com > find your product > Support or
Downloads).
2 Follow the instructions in the installation window.
3 Connect your machine to the network with a network cable.
4 Turn on the machine.
5 From the Windows Start menu, select All Programs > Samsung
Printers > SetIP > SetIP.
6 Click the icon in the SetIP window to open the TCP/IP configuration
window.
7 Enter the machine’s new information into the configuration window. In
a corporate intranet, you may need to have this information assigned by
a network manager before proceeding.
Find the machine’s MAC address from the Network Configuration Report
(see "Printing a network configuration report" on page 140) and enter it
without the colons. For example, 00:15:99:29:51:A8 becomes
0015992951A8.
8 Click Apply, and then click OK. The machine will automatically print the
Network Configuration Report. Confirm that all the settings are
correct.
IPv4 configuration using SetIP (Mac)
Before using the SetIP program, disable the computer firewall from System
Preferences > Security > Firewall.
The following instructions may vary from your model.
1Connect your machine to the network with a network cable.
2 Insert the supplied software CD into your CD-ROM drive.
3 Double-click the CD-ROM icon that appears on your Mac desktop.
• For Mac OS X 10.8, Double-click the CD-ROM that appears on Finder.
4 Double-click the MAC_Installer folder > Installer OS X icon.
5 Click Continue.
6 Read the license agreement and click Continue.
7 Click Agree to agree to the license agreement.
Wired network setup
142
2. Using a Network-Connected Machine
8 Click Install. All components necessary for machine operations will be
installed.
If you click Customize, you can choose individual components to install.
9 Enter the password and click OK.
10 When the message that warns that all applications will close on your
computer appears, click Continue.
11 Select Network Connected Printer (Wired or Wireless) on the Printer
Connection Type and click Set IP Address button.
12 Click the icon in the SetIP window to open the TCP/IP configuration
window.
13 Enter the machine’s new information into the configuration window. In
a corporate intranet, you may need to have this information assigned by
a network manager before proceeding.
Find the machine’s MAC address from the Network Configuration Report
(see "Printing a network configuration report" on page 140) and enter it
without the colons. For example, 00:15:99:29:51:A8 becomes
0015992951A8.
14 Click Apply, and then click OK. The machine will automatically print the
Network Configuration Report. Confirm that all the settings are
correct.
IPv4 configuration using SetIP (Linux)
Before using the SetIP program, disable the computer firewall from System
Preferences or Administrator.
The following instructions may vary from your model or operating systems.
1Open /opt/Samsung/mfp/share/utils/.
2 Double-click the SetIPApplet.html file.
3 Click to open the TCP/IP configuration window.
4 Enter the machine’s new information into the configuration window. In
a corporate intranet, you may need to have this information assigned by
a network manager before proceeding.
Find the machine’s MAC address from the Network Configuration Report
(see "Printing a network configuration report" on page 140) and enter it
without the colons. For example, 00:15:99:29:51:A8 becomes
0015992951A8.
5 The machine will automatically print the Network Configuration
Report.

143
2. Using a Network-Connected Machine
Installing driver over the network
• Some features and optional goods may not be available depending on
model or country (see "Features by models" on page 8).
• The machine that does not support the network interface, it will not be
able to use this feature (see "Rear view" on page 22).
• You can install the printer driver and software when you insert the
software CD into your CD-ROM drive.
For Windows, select the printer driver and software in the Select
Software to Install window.
Installing driver over the network
144
2. Using a Network-Connected Machine
6
Windows
1Make sure that the machine is connected to the network and powered
on. Also, your machine’s IP address should have been set (see "Setting IP
address" on page 140).
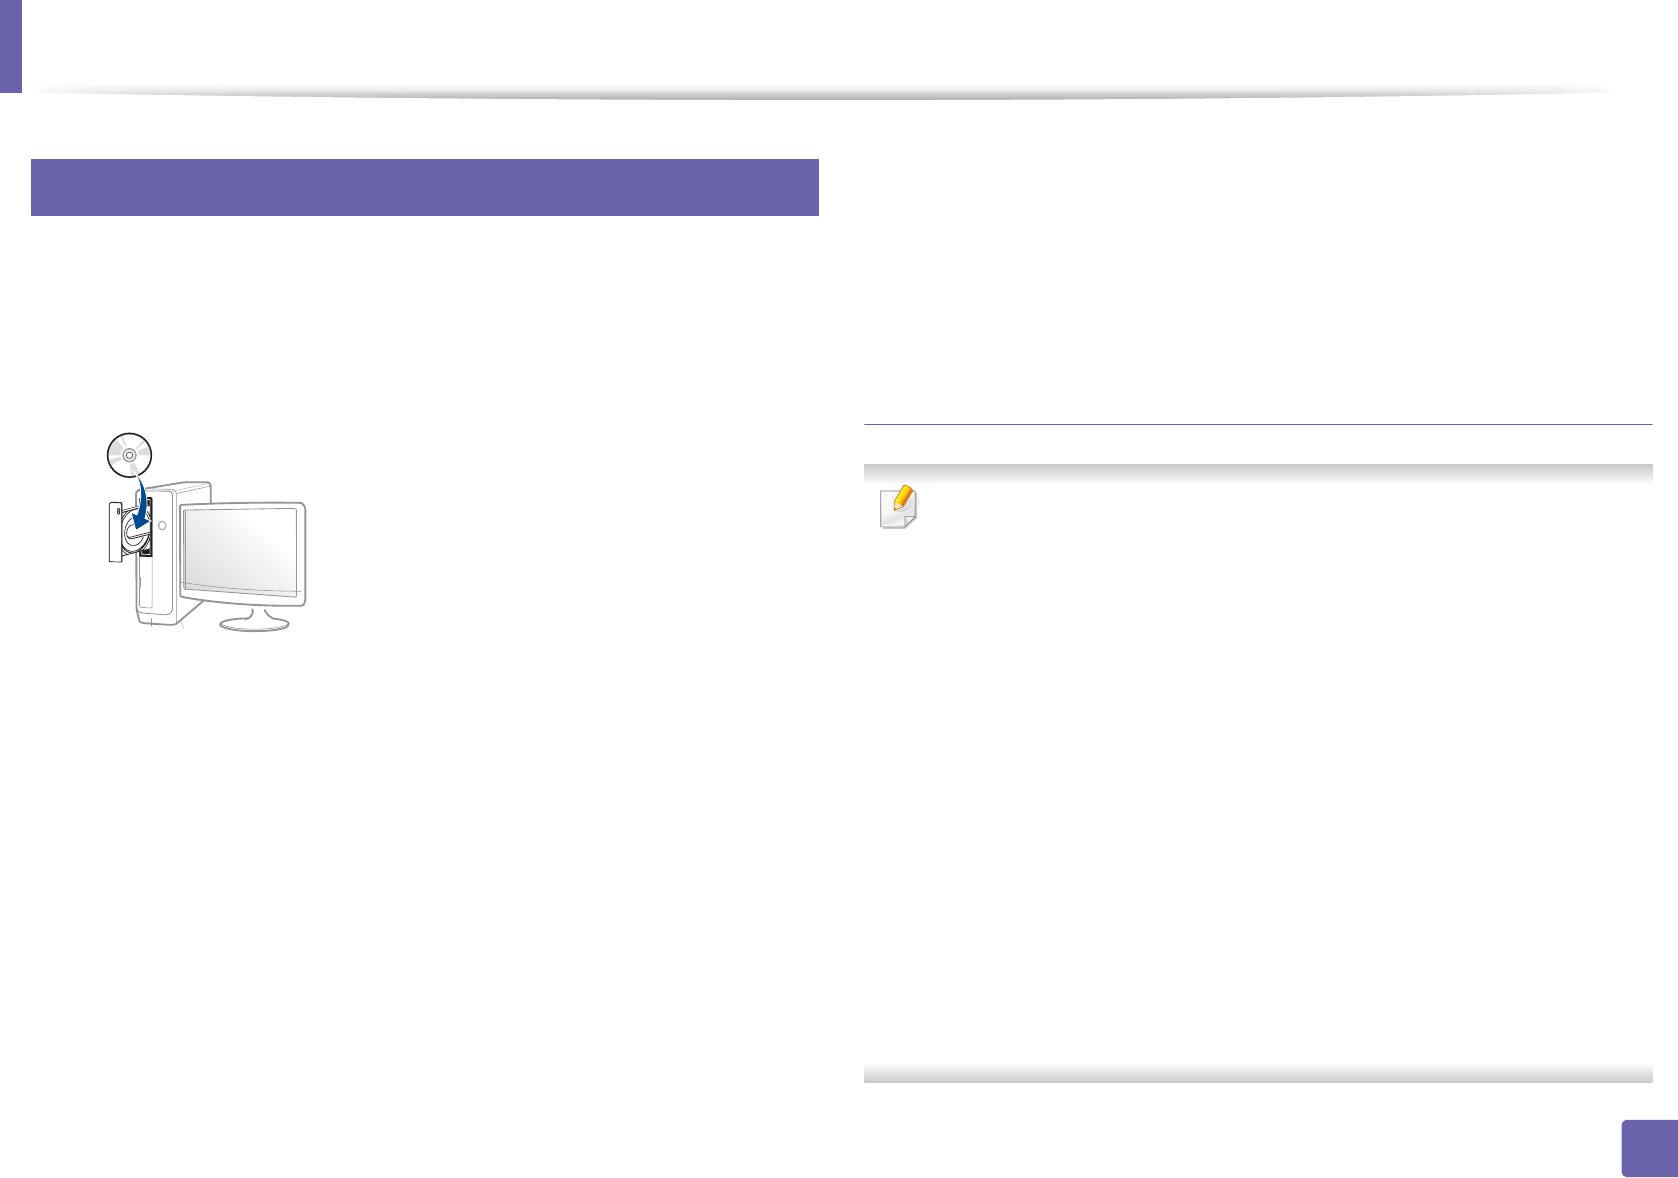
2 Insert the supplied software CD into your CD-ROM drive.
If the installation window does not appear, click Start > All programs >
Accessories > Run.
X:\Setup.exe replacing “X” with the letter, which represents your CD-
ROM drive and click OK.
• For Windows 8,
If the installation window does not appear, from Charms, select
Search > Apps and search for Run. Type in X:\Setup.exe, replacing
“X” with the letter that represents your CD-ROM drive and click OK.
If “Tap to choose what happens with this disc.” pop-up window
appears, click the window and select Run Setup.exe.
3 Review and accept the installation agreements in the installation
window. Then, click Next.
4 Select Network connection on the Printer Connection Type screen.
Then, click Next.
5 Follow the instructions in the installation window.
From the Windows 8 Start Screen
•Samsung Printer Experience app can only be used in the Start screen
when V4 driver is installed. The V4 driver is automatically downloaded
from the Windows Update if your computer is connected to the Internet.
If not, you can manually download the V4 driver from Samsung website,
www.samsung.com > find your product > Support or downloads.
• You can download Samsung Printer Experience app from the
Windows Store. You need have a Microsoft account to use the Windows
Store.
a From Charms, select Search.
b Click Store.
c Search and click Samsung Printer Experience.
d Click Install.
• If you install the driver using the supplied software CD, V4 driver is not
installed. If you want to use the V4 driver in the Desktop screen, you can
download from the Samsung website, www.samsung.com >find your
product > Support or downloads.
• If you want to install Samsung’s printer management tools, you need to
install them using the supplied software CD.
Installing driver over the network
145
2. Using a Network-Connected Machine
1Make sure that the machine is connected to the network and powered
on. Also, your machine’s IP address should have been set (see "Setting IP
address" on page 140).
2 From Charms, select Settings > Change PC settings > Devices.
3 Click Add a device.
Discovered machines will be shown on the screen.
4 Click the model name or host name you wish to use.
You can print a Network Configuration Report from the machine’s control
panel that will show the current machine’s host name (see "Printing a
network configuration report" on page 173).
5 The driver is automatically installed from the Windows Update.
Silent installation Mode
Silent installation mode is an installation method that does not require any user
intervention. Once you start the installation, the machine driver and software
are automatically installed on you computer. You can start the silent installation
by typing /s or /S in the command window.
Command-line Parameters
Following table shows commands that can be used in the command window.
Following command-line are effective and operated when command is
used with /s or /S. But /h, /H or /? are exceptional commands that can be
operated solely.
Command- line Definition Description
/s or
/S
Starts silent installation. Installs machine drivers
without prompting any UIs or
user intervention.
/p”<port name>” or
/P”<port name>”
Specifies printer port.
Network Port will be
created by use of
Standard TCP/IP
Port monitor. For
local port, this port
must exist on
system before
being specified by
command.
Printer port name can be
specified as IP address,
hostname, USB local port
name or IEEE1284 port name.
For example:
• /p”xxx.xxx.xxx.xxx” in
where, “xxx.xxx.xxx.xxx”
means IP address for
network printer. /
p”USB001”, /P”LPT1:”, /
p”hostname”

Installing driver over the network
146
2. Using a Network-Connected Machine
/a”<dest_path>” or
/A”<dest_path>”
Specifies destination path
for installation.
The destination
path should be a
fully qualified path.
Since machine drivers should
be installed on the OS specific
location, this command
applies to only application
software.
/n”<Printer name>”
or
/N”<Printer name>”
Specifies printer name.
Printer instance shall be
created as specified printer
name.
With this parameter, you can
add printer instances as your
wishes.
/nd or
/ND
Commands not to set the
installed driver as a default
machine driver.
It indicates installed machine
driver will not be the default
machine driver on your
system if there are one or
more printer drivers installed.
If there is no installed
machine driver on your
system, then this option
won’t be applied because
Windows OS will set installed
printer driver as a default
machine driver.
Command- line Definition Description
/x or
/X
Uses existing machine
driver files to create printer
instance if it is already
installed.
This command provides a
way to install a printer
instance that uses installed
printer driver files without
installing an additional driver.
/up”<printer
name>” or
/UP”<printer
name>”
Removes only specified
printer instance and not the
driver files.
This command provides a
way to remove only specified
printer instance from your
system without effecting
other printer drivers. It will
not remove printer driver files
from your system.
/d or
/D
Uninstalls all device drivers
and applications from your
system.
This command will remove all
installed device drivers and
application software from
your system.
/v”<share name>” or
/V”<share name>”
Shares installed machine
and add other available
platform drivers for Point &
Print.
It will install all supported
Windows OS platform’s
machine drivers to system
and share it with specified
<share name> for point and
print.
/o or
/O
Opens Printers and Faxes
folder after installation.
This command will open
Printers and Faxes folder
after the silent installation.
Command- line Definition Description
Installing driver over the network
147
2. Using a Network-Connected Machine
7
Mac
1Make sure that the machine is connected to your network and powered
on.
2 Insert the supplied software CD into your CD-ROM drive.
3 Double-click the CD-ROM icon that appears on your Mac desktop.
• For Mac OS X 10.8, double-click the CD-ROM that appears on Finder.
4 Double-click the MAC_Installer folder > Installer OS X icon.
5 Click Continue.
6 Read the license agreement and click Continue.
7 Click Agree to agree to the license agreement.
8 Click Install. All components necessary for machine operations will be
installed.
If you click Customize, you can choose individual components to install.
9 Enter the password and click OK.
10 Select Network Connected Printer(Wired or Wireless) on the Printer
Connection Type and click Continue.
11 Click Add Printer button to select your printer and add it to your printer
list.
12 Click IP and select HP Jetdirect - Socket in Protocol.
13 Enter the machine’s IP address in the Address input field.
14 Enter the queue name in the Queue input field. If you cannot determine
the queue name for your machine server, try using the default queue
first.
15 If Auto Select does not work properly, choose Select Printer Software
and your machine name in Print Using.
16 Click Add.
17 After the installation is finished, click Close.
/h, /H or /? Shows Command-line Usage.
Command- line Definition Description

Installing driver over the network
148
2. Using a Network-Connected Machine
8
Linux
You need to download Linux software packages from the Samsung website to
install the printer software (http://www.samsung.com > find your product >
Support or Downloads).
Install the Linux driver and add network printer
1Make sure that the machine is connected to your network and powered
on. Also, your machine’s IP address should have been set.
2 Download the Unified Linux Driver package from the Samsung website.
3 Extract the UnifiedLinuxDriver.tar.gz file and open the new directory.
4 Double-click the cdroot > autorun.
5 The Samsung installer window opens. Click Next.
6 The add printer wizard window opens. Click Next.
7 Select network printer and click Search button.
8 The machine’s IP address and model name appears on list field.
9 Select your machine and click Next.
10 Input the printer description and Next.
11 After the machine is added, click Finish.
12 When installation is done, click Finish.
Add a network printer
1Double-click the Unified Driver Configurator.
2 Click Add Printer.
3 The Add printer wizard window opens. Click Next.
4 Select Network printer and click the Search button.
5 The printer’s IP address and model name appears on list field.
6 Select your machine and click Next.
7 Enter the printer description and click Next.
8 After the machine is added, click Finish.

Installing driver over the network
149
2. Using a Network-Connected Machine
9
UNIX
• Make sure your machine supports the UNIX operating system before
installing the UNIX printer driver (see "Operating System" on page 8).
• The commands are marked with “”, when typing the commands, do not
type “”.
• Some features and optional goods may not be available depending on
model or country (see "Operating System" on page 8).
To use the UNIX printer driver, you have to install the UNIX printer driver
package first, then setup the printer. You can download the UNIX printer driver
package from the Samsung website (http://www.samsung.com > find your
product > Support or Downloads).
Installing the UNIX printer driver package
The installation procedure is common for all variants of UNIX OS mentioned.
1From the Samsung website, download and unpack the UNIX Printer
Driver package to your computer.
2 Acquire root privileges.
“su -”
3 Copy the appropriate driver archive to the target UNIX computer.
See administration guide of your UNIX OS for details.
4 Unpack the UNIX printer driver package.
For example, on IBM AIX, use the following commands.
“gzip -d < enter the package name | tar xf -”
5 Go to the unpacked directory.
6 Run the install script.
“./install –i”
install is the installer script file which is used to install or uninstall the
UNIX Printer Driver package.
Use “chmod 755 install” command to give the permission to the
installer script.
7 Execute the “. /install –c” command to verify installation results.
8 Run “installprinter” from the command line. This will bring up the Add
Printer Wizard window. Setup the printer in this window referring to
the following procedures.

Installing driver over the network
150
2. Using a Network-Connected Machine
On some UNIX OS, for example on Solaris 10, just added printers may not be
enabled and/or may not accept jobs. In this case run the following two
commands on the root terminal:
“accept <printer_name>”
“enable <printer_name>”
Uninstalling the printer driver package
The utility should be used to delete the printer installed in the system.
a Run “uninstallprinter” command from the terminal.
It will open the Uninstall Printer Wizard.
The installed printers are listed in the drop-down list.
b Select the printer to be deleted.
c Click Delete to delete the printer from the system.
d Execute the “. /install –d” command to uninstall the whole package.
e To verify removal results, execute the “. /install –c” command.
To re-install it, use the command “. /install –i” to reinstall the binaries.
Setting up the printer
To add the printer to your UNIX system, run ‘installprinter’ from the command
line. This will bring up the Add Printer Wizard window. Setup the printer in this
window according to the following steps:
1Type the name of the printer.
2 Select the appropriate printer model from the model list.
3 Enter any description corresponding to the type of the printer in the
Type field. This is optional.
4 Specify any printer description in the Description field. This is optional.
5 Specify the printer location in the Location field.
6 Type the IP address or DNS name of the printer in the Device textbox for
network-connected printers. On IBM AIX with jetdirect Queue type,
only the DNS name is possible-numeric IP address is not allowed.
7 Queue type shows the connection as lpd or jetdirect in the
corresponding list box. Additionally, usb type is available on Sun Solaris
OS.
8 Select Copies to set the number of copies.
9 Check the Collate option to receive copies already sorted.
10 Check the Reverse Order option to receive copies in the reverse order.

Installing driver over the network
151
2. Using a Network-Connected Machine
11 Check the Make Default option to set this printer as default.
12 Click OK to add the printer.
152
2. Using a Network-Connected Machine
IPv6 configuration
IPv6 is supported properly only in Windows Vista or higher.
• Some features and optional goods may not be available depending on
model or country (see "Features by models" on page 8 or "Menu
overview" on page 31).
• If the IPv6 network seems to not be working, set all the network setting
to the factory defaults and try again using Clear Setting.
The machine supports the following IPv6 addresses for network printing and
managements.
•Link-local Address: Self-configured local IPv6 address (Address starts with
FE80).
•Stateless Address: Automatically configured IPv6 address by a network
router.
•Stateful Address: IPv6 address configured by a DHCPv6 server.
•Manual Address: Manually configured IPv6 address by a user.
In the IPv6 network environment, follow the next procedure to use the IPv6
address.
10
From the control panel
Activating IPv6
• Accessing menus may differ from model to model (see "M332xND/
M382xD/M382xND/M382xDW/M402xND" on page 31).
• It may be necessary to press OK to navigate to lower-level menus for
some models.
1Select (Menu) > Network > TCP/IP (IPv6) > IPv6 Protocol on the
control panel.
OR
For the model with a touch screen, select (Setup) > Network > TCP/
IP (IPv6) > IPv6 Protocol on the touch screen.
2 Select On and press OK.
For the model with a touch screen, select On using the arrows on the
touch screen.
3 Turn the machine off and turn it on again.
IPv6 configuration
153
2. Using a Network-Connected Machine
When you install the printer driver, do not configure both IPv4 and IPv6. We
recommend to configure either IPv4 or IPv6.
DHCPv6 address configuration
If you have a DHCPv6 server on your network, you can set one of the following
options for default dynamic host configuration.
• Accessing menus may differ from model to model (see "M332xND/
M382xD/M382xND/M382xDW/M402xND" on page 31).
• It may be necessary to press OK to navigate to lower-level menus for
some models.
1Select (Menu) > Network > TCP/IP (IPv6) > DHCPv6 Config on the
control panel.
OR
For the model with a touch screen, select (Setup) > Network > TCP/
IP (IPv6) > DHCPv6 Config on the touch screen.
2 Press OK to select the required value you want.
For the model with a touch screen, select the option you want using the
arrows and press (back) to save the selection.
•Router: Use DHCPv6 only when requested by a router.
•Always Use: Always use DHCPv6 regardless of router request.
•Never Use: Never use DHCPv6 regardless of router request.
IPv6 configuration
154
2. Using a Network-Connected Machine
11
From the SyncThru™ Web Service
Activating IPv6
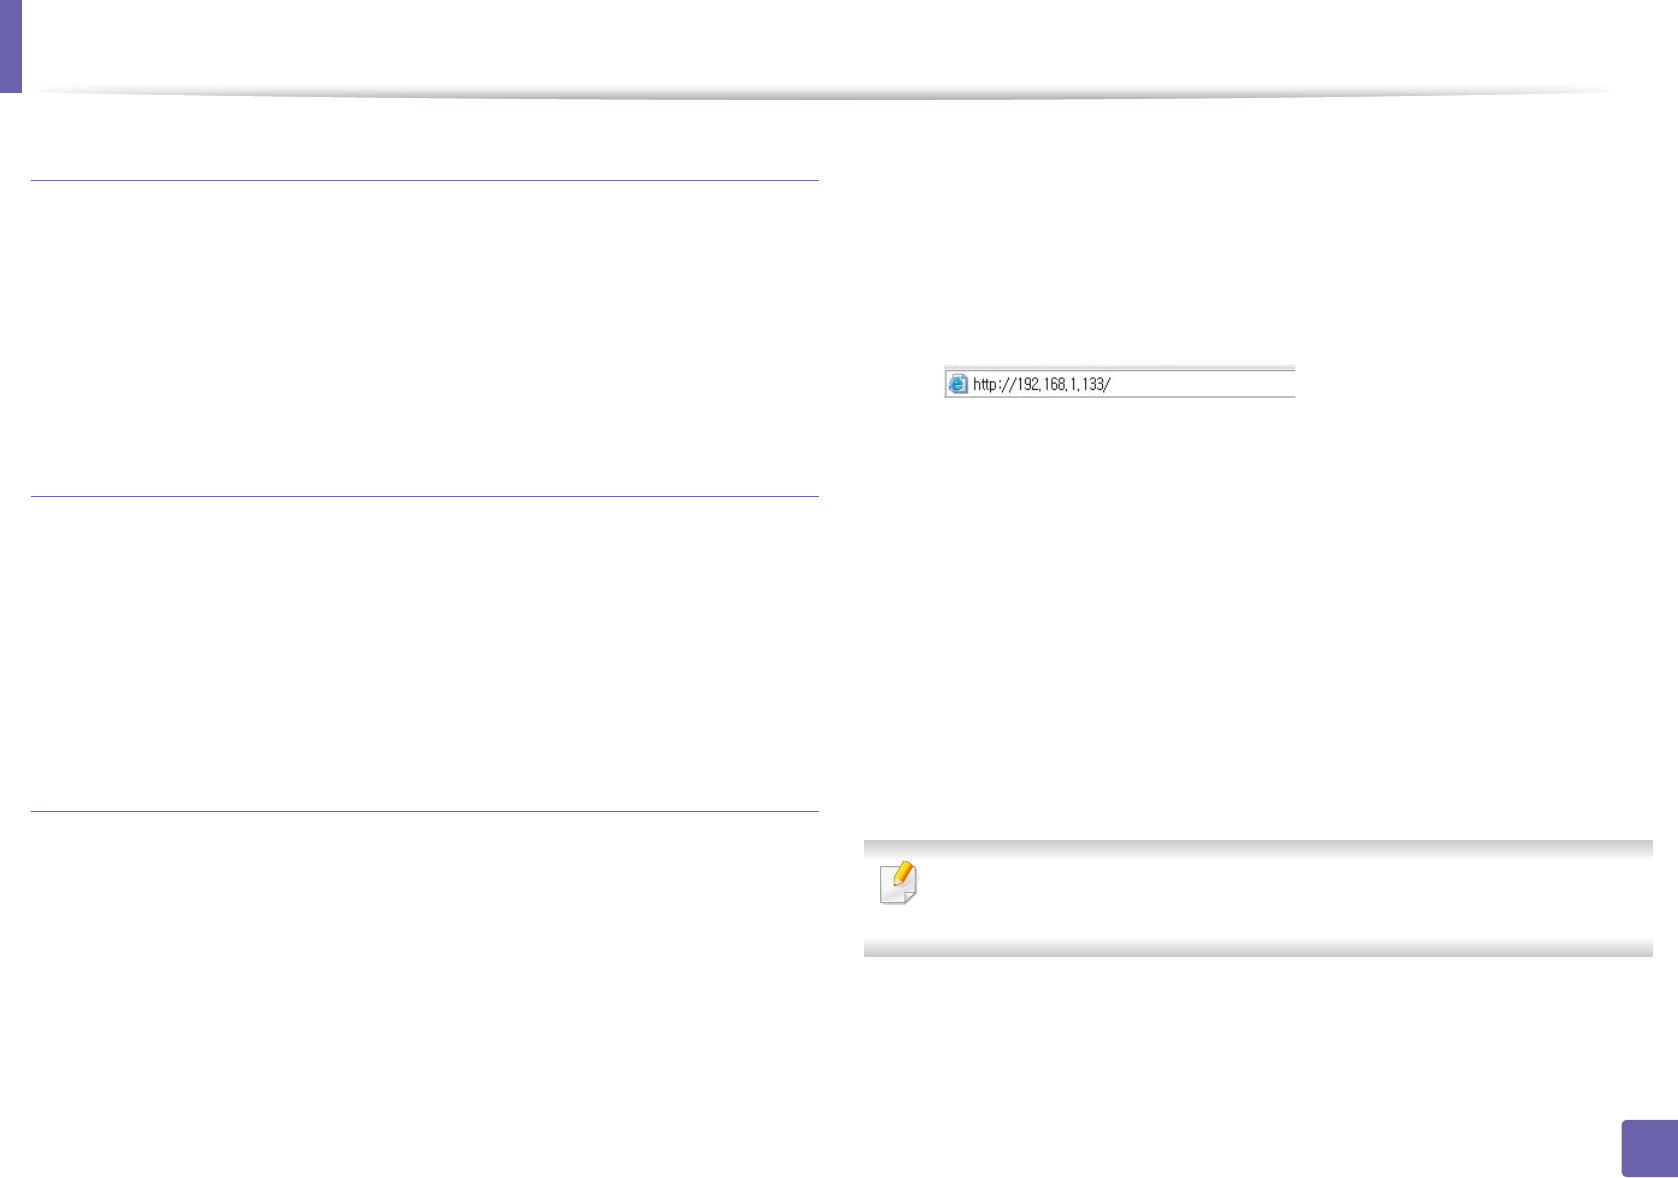
1Access a web browser, such as Internet Explorer, from Windows. Enter
the machine IP address (http://xxx.xxx.xxx.xxx) in the address field and
press the Enter key or click Go.
2 If it’s your first time logging into SyncThru™ Web Service you need to
log-in as an administrator. Type in the below default ID and password.
We recommend you to change the default password for security
reasons.
•ID: admin
•Password: sec00000
3 When the SyncThru™ Web Service window opens, move the mouse
cursor over the Settings of the top menu bar and then click Network
Settings.
4 Click TCP/IPv6 on the left pane of the website.
5 Check the IPv6 Protocol check box to activate IPv6.
6 Click the Apply button.
7 Turn the machine off and turn it on again.
• You can also set the DHCPv6.
• To manually set the IPv6 address:
Check the Manual Address check box. Then, the Address/Prefix text
box is activated. Enter the rest of the address
(e.g.,:3FFE:10:88:194::AAAA. “A” is the hexadecimal 0 through 9, A
through F).
IPv6 address configuration
1Start a web browser, such as Internet Explorer, that supports IPv6
addressing as a URL.
2 Select one of the IPv6 addresses (Link-local Address, Stateless
Address, Stateful Address, Manual Address) from Network
Configuration Report (see "Printing a network configuration report" on
page 140).
•Link-local Address: Self-configured local IPv6 address (Address
starts with FE80).
•Stateless Address: Automatically configured IPv6 address by a
network router.
•Stateful Address: IPv6 address configured by a DHCPv6 server.
•Manual Address: Manually configured IPv6 address by a user.
3 Enter the IPv6 addresses (e.g.,: http://[FE80::215:99FF:FE66:7701]).

IPv6 configuration
155
2. Using a Network-Connected Machine
Address must be enclosed in '[ ]' brackets.
156
2. Using a Network-Connected Machine
Wireless network setup
• Make sure your machine supports wireless networking. Wireless
networking may not be available depending on the model (see "Features
by models" on page 8).
• If the IPv6 network seems to not be working, set all the network settings
to the factory defaults and try again using Clear Setting.
12
Getting started
Understanding your network type
Typically, you can only have one connection between your computer and the
machine at a time.
Wireless network name and network password
Wireless networks require higher security, so when an access point is first set up,
a network name (SSID), the type of security used, and a Network Password are
created for the network. Ask your network administrator about this information
before proceeding with the machine installation.
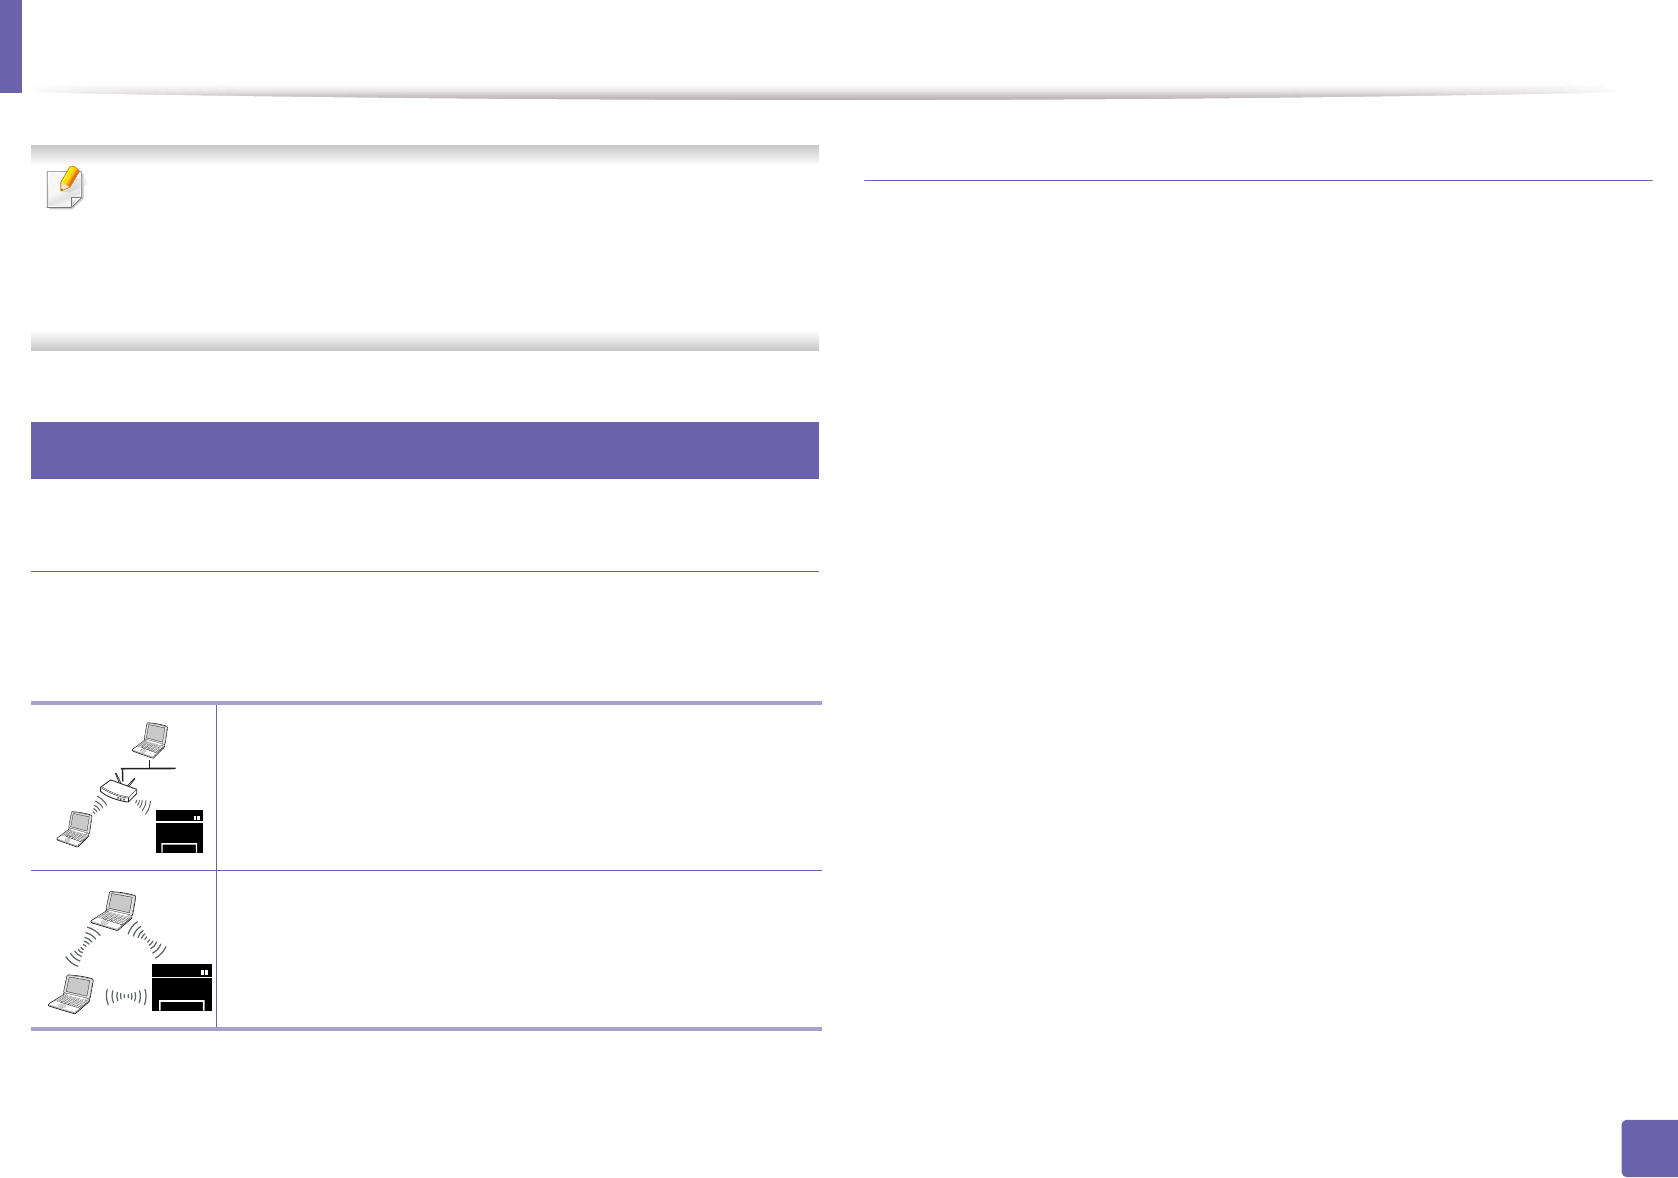
Infrastructure mode
This is an environment generally used for homes and SOHOs
(Small Office/ Home Office). This mode uses an access point to
communicate with the wireless machine.
Ad hoc mode
This mode does not use an access point. The wireless
computer and wireless machine communicate directly.
Wireless network setup
157
2. Using a Network-Connected Machine
13
Introducing wireless set up methods
You can set wireless settings either from the machine or the computer. Choose the setting method from the below table.
Some wireless network installation types may not be available depending on the model or country.
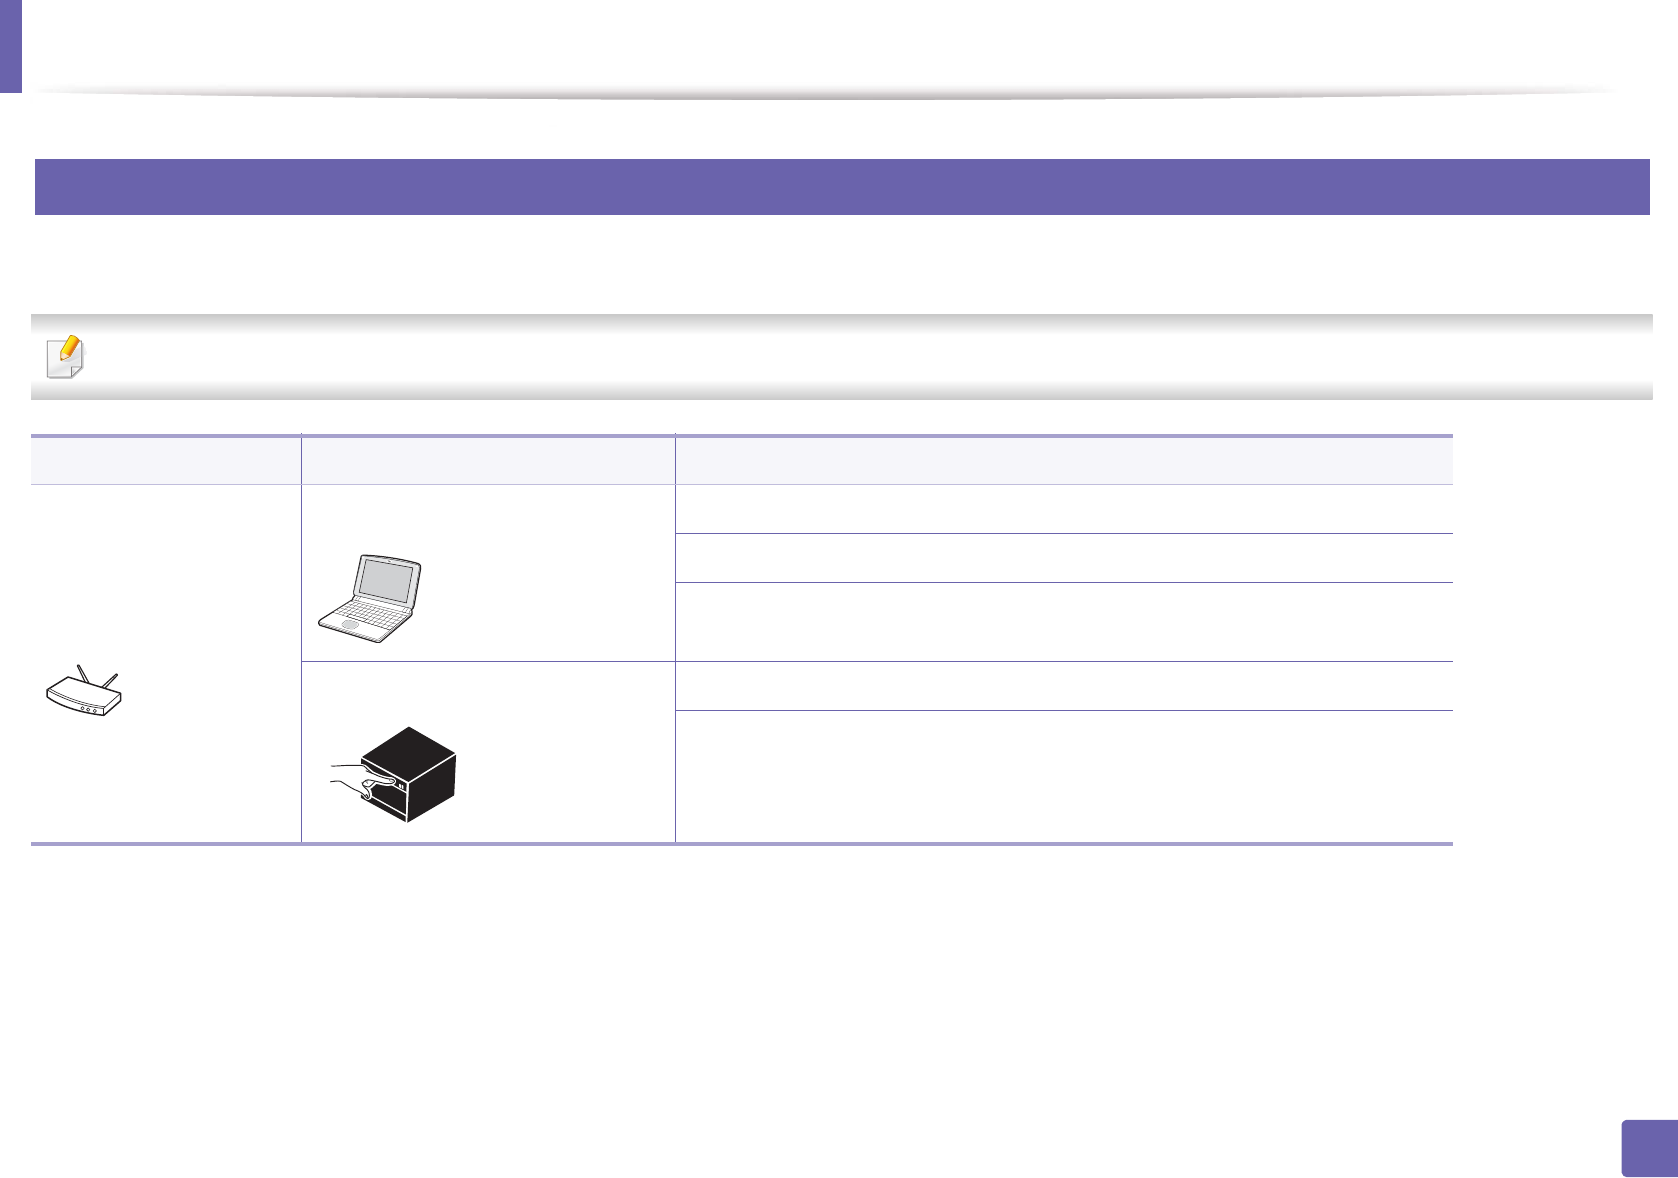
Set up method Connecting method Description & Reference
With Access Point
From the computer Windows user, see "Access point via USB cable (recommended)" on page 163.
Mac user, see "Access point via USB cable (recommended)" on page 168.
See "Using a network cable" on page 173.
From the machine’s control panel See "Machines with a display screen" on page 160.
See "Using the menu button" on page 162.
Wireless network setup
158
2. Using a Network-Connected Machine
• If problems occur during wireless set up or driver installation, refer to the troubleshooting chapter (see "Troubleshooting for wireless network" on page 178).
• It is strongly recommended that you set the password on Access Points. If you do not set the password on Acess Points, they might be exposed to illegal access
from unknown machine including PCs, smart phones and printers. Refer to the Access Point user guide for password settings.
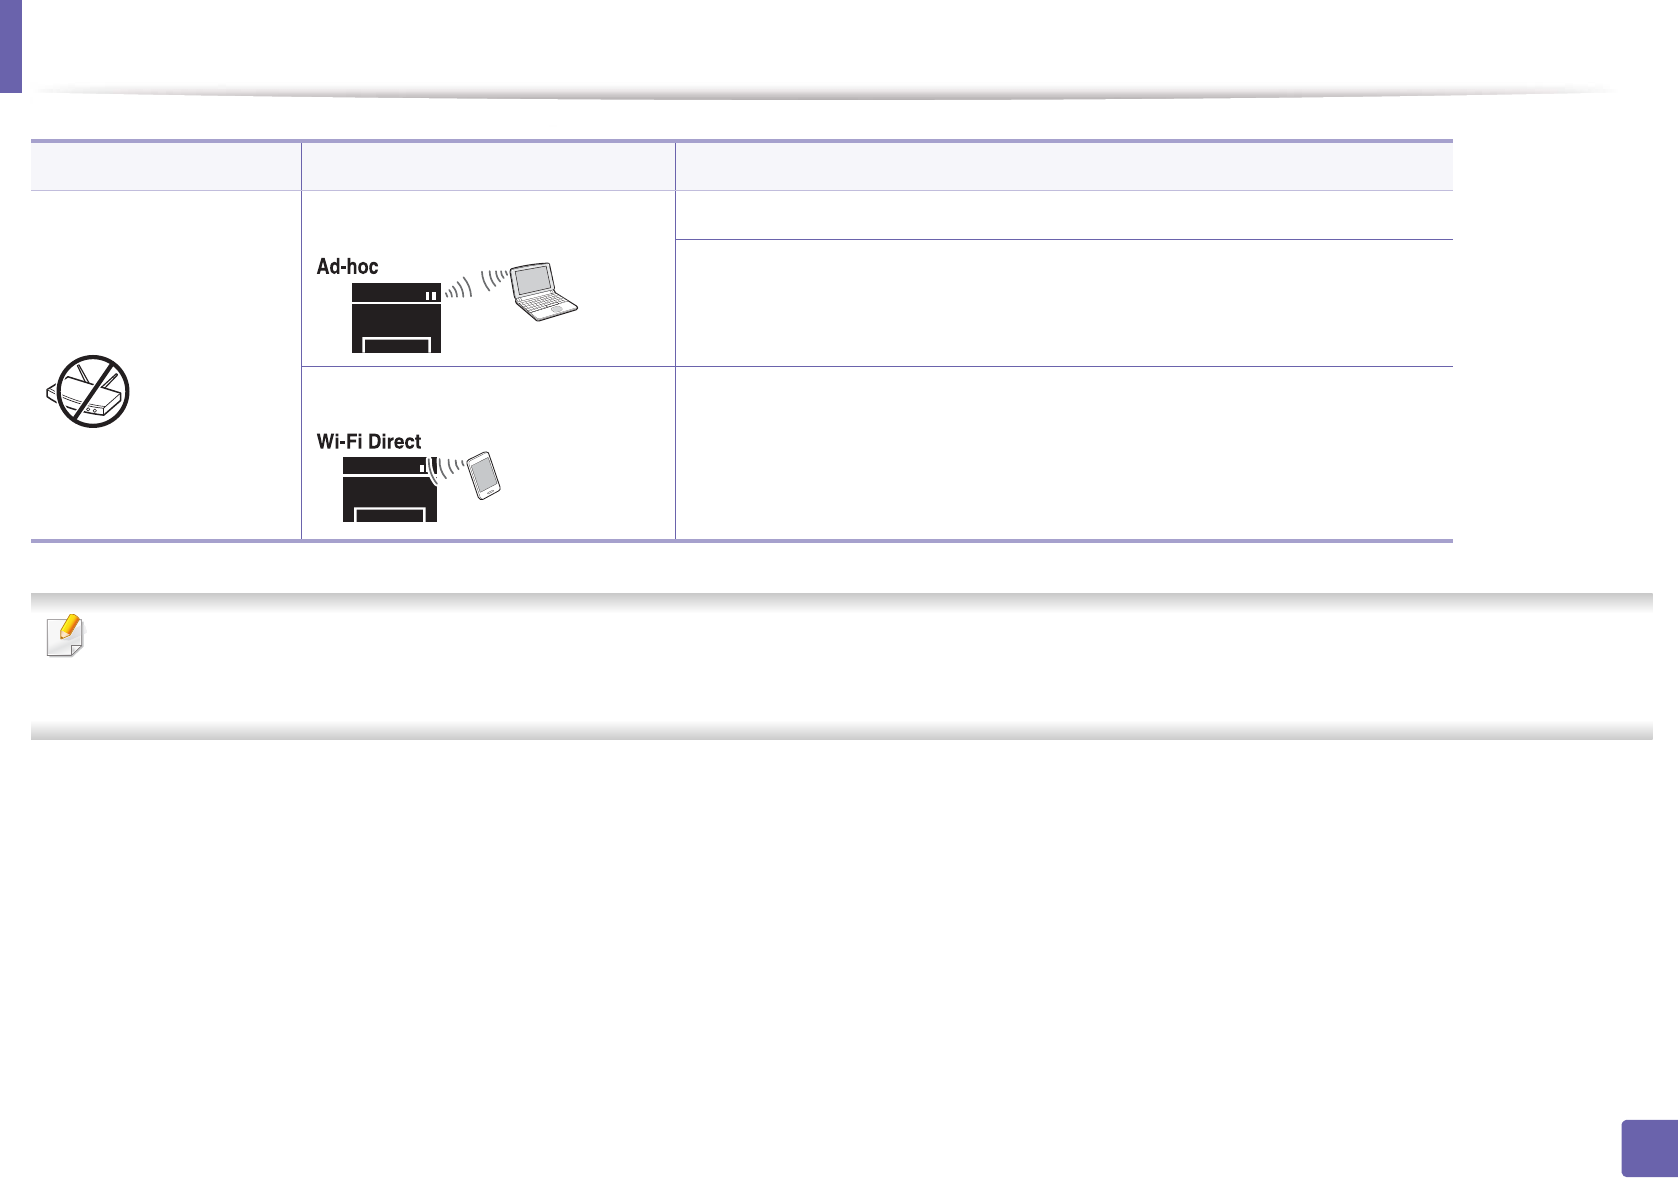
Without Access Point
From the computer Windows user, see "Ad hoc via USB cable" on page 166.
Mac user, see "Ad hoc via USB cable" on page 170.
Wi-Fi Direct setup See "Setting the Wi-Fi Direct for mobile printing" on page 176.
Set up method Connecting method Description & Reference
Wireless network setup
159
2. Using a Network-Connected Machine
14
Using the WPS button
If your machine and an access point (or wireless router) support Wi-Fi Protected
Setup™ (WPS), you can easily configure the wireless network settings by
pressing the (WPS) button on the control panel without a computer.
• If you want to use the wireless network using the infrastructure mode,
make sure that the network cable is disconnected from the machine.
Using the WPS (PBC) button or entering the PIN from the computer to
connect to the access point (or wireless router) varies depending on the
access point (or wireless router) you are using. Refer to the user's guide
of the access point (or wireless router) you are using.
• When using the WPS button to set the wireless network, security settings
may change. To prevent this, lock the WPS option for the current wireless
security settings. The option name may differ depending on the access
point (or wireless router) you are using.
Items to prepare
• Check if the access point (or wireless router) supports Wi-Fi Protected
Setup™ (WPS).
• Check if your machine supports Wi-Fi Protected Setup™ (WPS).
• Networked computer (PIN mode only)
Choosing your type
There are two methods available to connect your machine to a wireless network
using the (WPS) button on the control panel.
The Push Button Configuration (PBC) method allows you to connect your
machine to a wireless network by pressing both the (WPS) button on the
control panel of your machine and the WPS (PBC) button on a Wi-Fi Protected
Setup™ WPS-enabled access point (or wireless router) respectively.
The Personal Identification Number (PIN) method helps you connect your
machine to a wireless network by entering the supplied PIN information on a Wi-
Fi Protected Setup™ WPS-enabled access point (or wireless router).
Factory default in your machine is PBC mode, which is recommended for a
typical wireless network environment.
You can change the WPS mode from the control panel (Menu) >
Network > Wi-Fi > WPS).
Wireless network setup
160
2. Using a Network-Connected Machine
Machines with a display screen
Connecting in PBC mode
1Select (Menu) > Network > Wi-Fi > WPS > ConnectViaPBC on the
control panel.
Or press and hold the (WPS) button on the control panel for more
than 2 seconds.
The machine starts waiting for up to two minutes until you press the WPS
(PBC) button on the access point (or wireless router).
2 Press the WPS (PBC) button on the access point (or wireless router).
The messages are displayed on the display screen in the order below:
a Connecting: The machine is connecting to the access point (or
wireless router).
b Connected: When the machine is successfully connected to the
wireless network, the WPS LED light stays on.
c AP SSID: After completing the wireless network connection process,
the AP’s SSID information appears on the display.
3 Insert the supplied software CD into your CD-ROM drive, and follow the
instructions in the window to set up the wireless network.
Connecting in PIN mode
1Select (Menu) > Network > Wi-Fi > WPS > ConnectViaPIN on the
control panel.
Or press and hold the (WPS) button on the control panel for more
than 2 seconds.
2 The eight-digit PIN appears on the display.
You need to enter the eight-digit PIN within two minutes on the
computer that is connected to the access point (or wireless router).
The messages are displayed on the display screen in the order below:
a Connecting: The machine is connecting to the wireless network.
b Connected: When the machine is successfully connected to the
wireless network, the WPS LED light stays on.
c SSID Type: After completing the wireless network connection
process, the AP’s SSID information is displayed on the LCD display.
3 Insert the supplied software CD into your CD-ROM drive, and follow the
instructions in the window to set up the wireless network.

Wireless network setup
161
2. Using a Network-Connected Machine
Machines without a display screen
Connecting in PBC mode
1Press and hold the (WPS) button on the control panel for about 2 - 4
seconds until the status LED blinks quickly.
The machine starts connecting to the wireless network. The LED blinks
slowly for up to two minutes until you press the PBC button on the
access point (or wireless router).
2 Press the WPS (PBC) button on the access point (or wireless router).
a The light blinks fast on the WPS LED. The machine is connecting to
the access point (or wireless router).
b When the machine is successfully connected to the wireless
network, the WPS LED light stays on.
3 Insert the supplied software CD into your CD-ROM drive, and follow the
instructions in the window to set up the wireless network.
Connecting in PIN mode
1The network configuration report, including PIN, must be printed (see
"Printing a network configuration report" on page 140).
In ready mode, press and hold the (Stop/Clear)button on the
control panel for about 5 seconds. You can find your machine’s PIN.
2 Press and hold the (WPS) button on the control panel for more than
4 seconds until the status LED stays on.
The machine starts connecting to the access point (or wireless router).
3 You need to enter the eight-digit PIN within two minutes on the
computer that is connected to the access point (or wireless router).
The LED blinks slowly for up to two minutes until you enter the eight-
digit PIN.
The WPS LED blinks in the order below:
a The light blinks fast on the WPS LED. The machine is connecting to
the access point (or wireless router).
b When the machine is successfully connected to the wireless
network, the WPS LED light stays on.
4 Insert the supplied software CD into your CD-ROM drive, and follow the
instructions in the window to set up the wireless network.
Wireless network setup
162
2. Using a Network-Connected Machine
Re-connecting to a network
When the wireless function is off, the machine automatically tries to re-connect
to the access point (or wireless router) with the previously used wireless
connection settings and address.
In the following cases, the machine automatically re-connects to the
wireless network:
• The machine is turned off and on again.
• The access point (or wireless router) is turned off and on again.
Canceling the connection process
To cancel the wireless network connection when the machine is connecting to
the wireless network, press and release the (Stop/Clear) on the control
panel. You need to wait 2 minutes to re-connect to the wireless network.
Disconnecting from a network
To disconnect the wireless network connection, press the (WPS) button on
the control panel for more than two seconds.
•When the Wi-Fi network is in idle mode: The machine is immediately
disconnected from the wireless network and the WPS LED turns off.
•When the Wi-Fi network is being used: While the machine waits until the
current job is finished, the light blinks fast on the WPS LED. Then, the
wireless network connection is automatically disconnected and the WPS
LED turns off.
15
Using the menu button
Some menus may not appear in the display depending on options or
models. If so, it is not applicable to your machine (see "Features by models"
on page 8).
Before starting, you will need to know the network name (SSID) of your wireless
network and the network key if it is encrypted. This information was set when
the access point (or wireless router) was installed. If you do not know about your
wireless environment, please ask the person who set up your network.

Wireless network setup
163
2. Using a Network-Connected Machine
After completing the wireless network connection, you need to install a
machine driver to print from an application (see "Installing driver over the
network" on page 143).
1Select (Menu) > Network > Wi-Fi > Wi-Fi Settings on the control
panel.
2 Press the OK to select the setup method you want.
•Search List (recommended): In this mode, the setup is automatic.
The machine will display a list of available networks from which to
choose. After a network is chosen then printer will prompt for the
corresponding security key.
•Custom: In this mode, users can give or edit manually their own
SSID, or choose the security option in detail.
16
Setup using Windows
Shortcut to the Samsung Easy Wireless Setup program without the CD: If
you have installed the printer driver once, you can access the Samsung
Easy Wireless Setup program without the CD (see "Accessing
management tools" on page 232).
Access point via USB cable (recommended)
Items to prepare
• Access point
• Network-connected computer
• Software CD that was provided with your machine
• A machine installed with a wireless network interface
• USB cable
Creating the infrastructure network
1Check whether the USB cable is connected to the machine.
2 Turn on your computer, access point, and machine.

Wireless network setup
164
2. Using a Network-Connected Machine
3 Insert the supplied software CD into your CD-ROM drive.
If the installation window does not appear, click Start > All programs >
Accessories > Run.
X:\Setup.exe replacing “X” with the letter, which represents your CD-
ROM drive and click OK.
• For Windows 8,
If the installation window does not appear, from Charms, select
Search > Apps and search for Run. Type in X:\Setup.exe, replacing
“X” with the letter that represents your CD-ROM drive and click OK.
If “Tap to choose what happens with this disc.” pop-up window
appears, click the window and select Run Setup.exe.
4 Review and accept the installation agreements in the installation
window. Then, click Next.
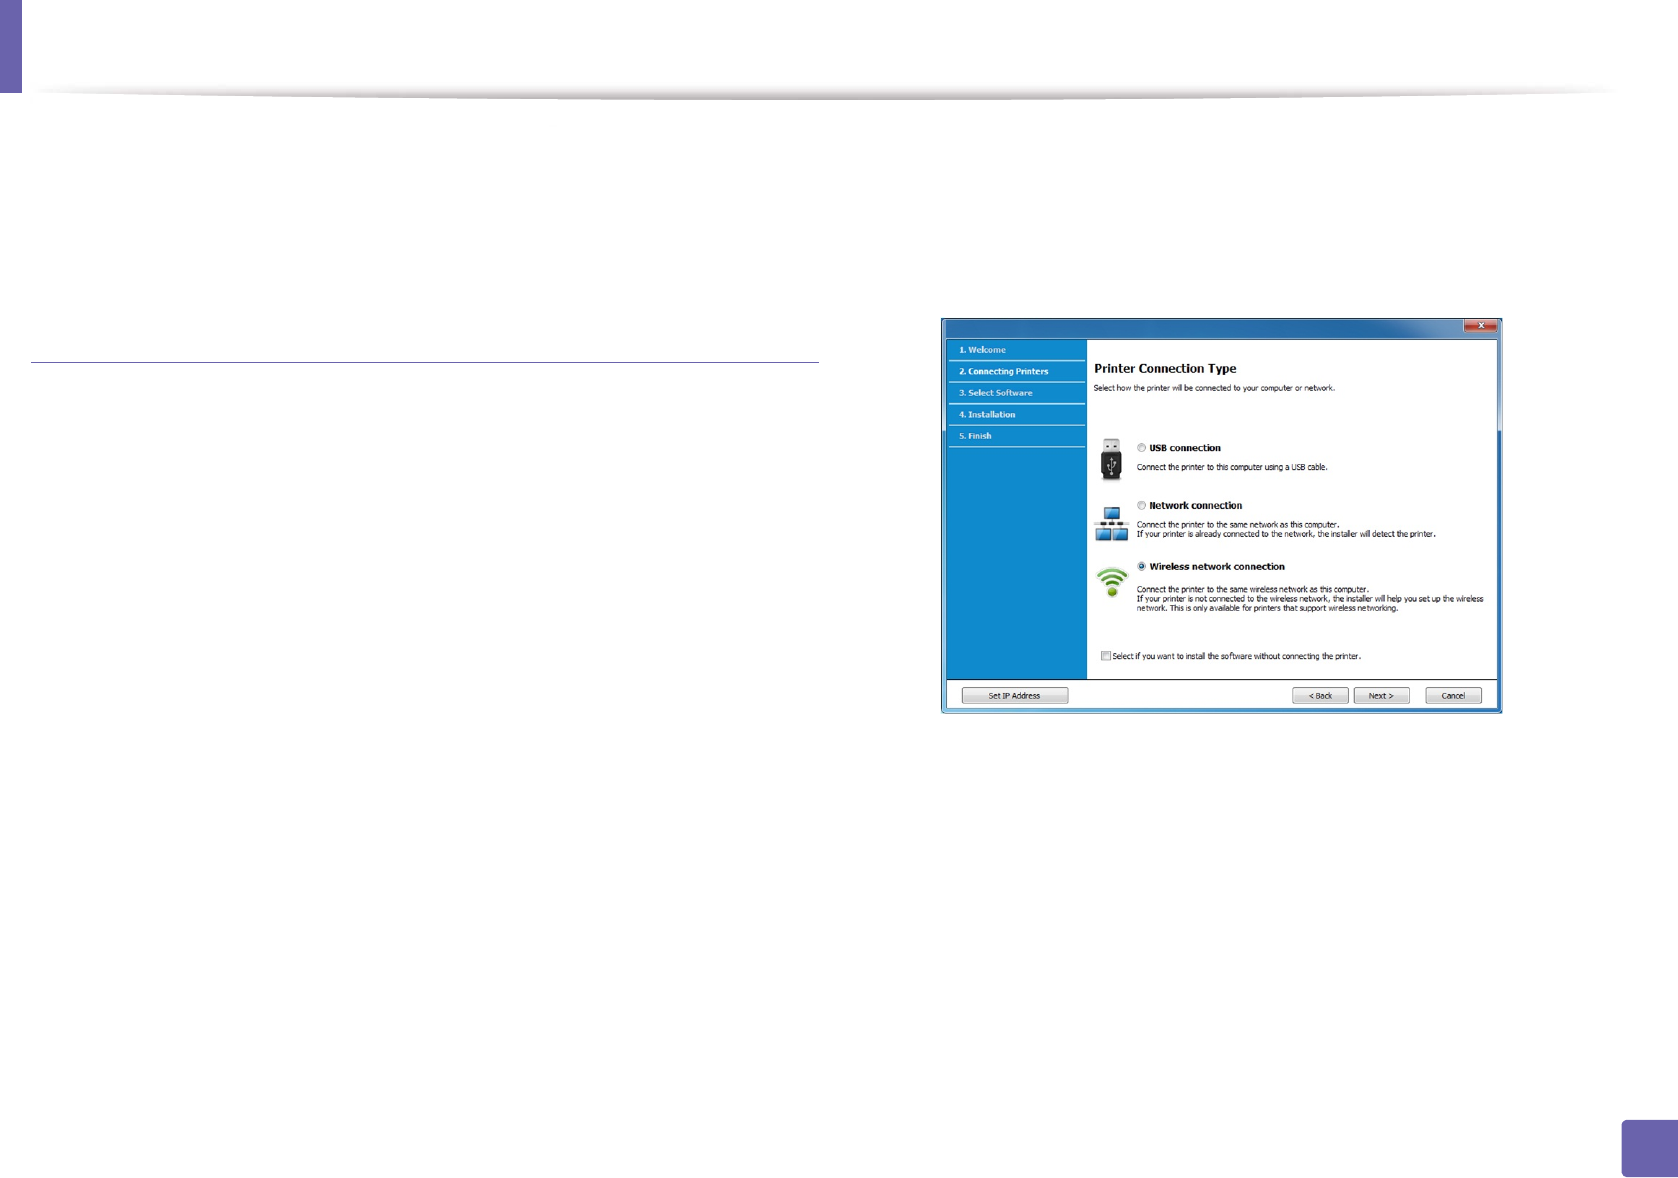
5 Select Wireless network connection on the Printer Connection Type
screen. Then, click Next.
6 On the Are you setting up your printer for the first time? screen, select
Yes, I will set up my printer's wireless network. Then, click Next.
If your printer is already connected on the network, select No, my
printer is already connected to my network.
7 After searching, the window shows the wireless network devices. Select
the name (SSID) of the access point you want to use and click Next.
Wireless network setup
165
2. Using a Network-Connected Machine
If you cannot find the network name you want to choose, or if you want to
set the wireless configuration manually, click Advanced Setting.
•Enter the wireless Network Name: Enter the SSID of the access point
(SSID is case-sensitive).
•Operation Mode: Select Infrastructure.
•Authentication: Select an authentication type.
Open System: Authentication is not used, and encryption may or may
not be used, depending on the need for data security.
Shared Key: Authentication is used. A device that has a proper WEP key
can access the network.
WPA Personal or WPA2 Personal: Select this option to authenticate the
print server based on a WPA Pre-Shared Key. This uses a shared secret key
(generally called Pre Shared Key pass phrase), which is manually
configured on the access point and each of its clients.
•Encryption: Select the encryption (None, WEP64, WEP128, TKIP, AES,
TKIP AES).
•Network Password: Enter the encryption network password value.
•Confirm Network Password: Confirm the encryption network
password value.
•WEP Key Index: If you are using WEP Encryption, select the appropriate
WEP Key Index.
The wireless network security window appears when the access point has
security settings.
Enter the Network Password of the access point (or router).
8 When the network connection window appears, disconnect the network
cable. Then, click Next. The network cable connection can interfere with
searching for wireless devices.
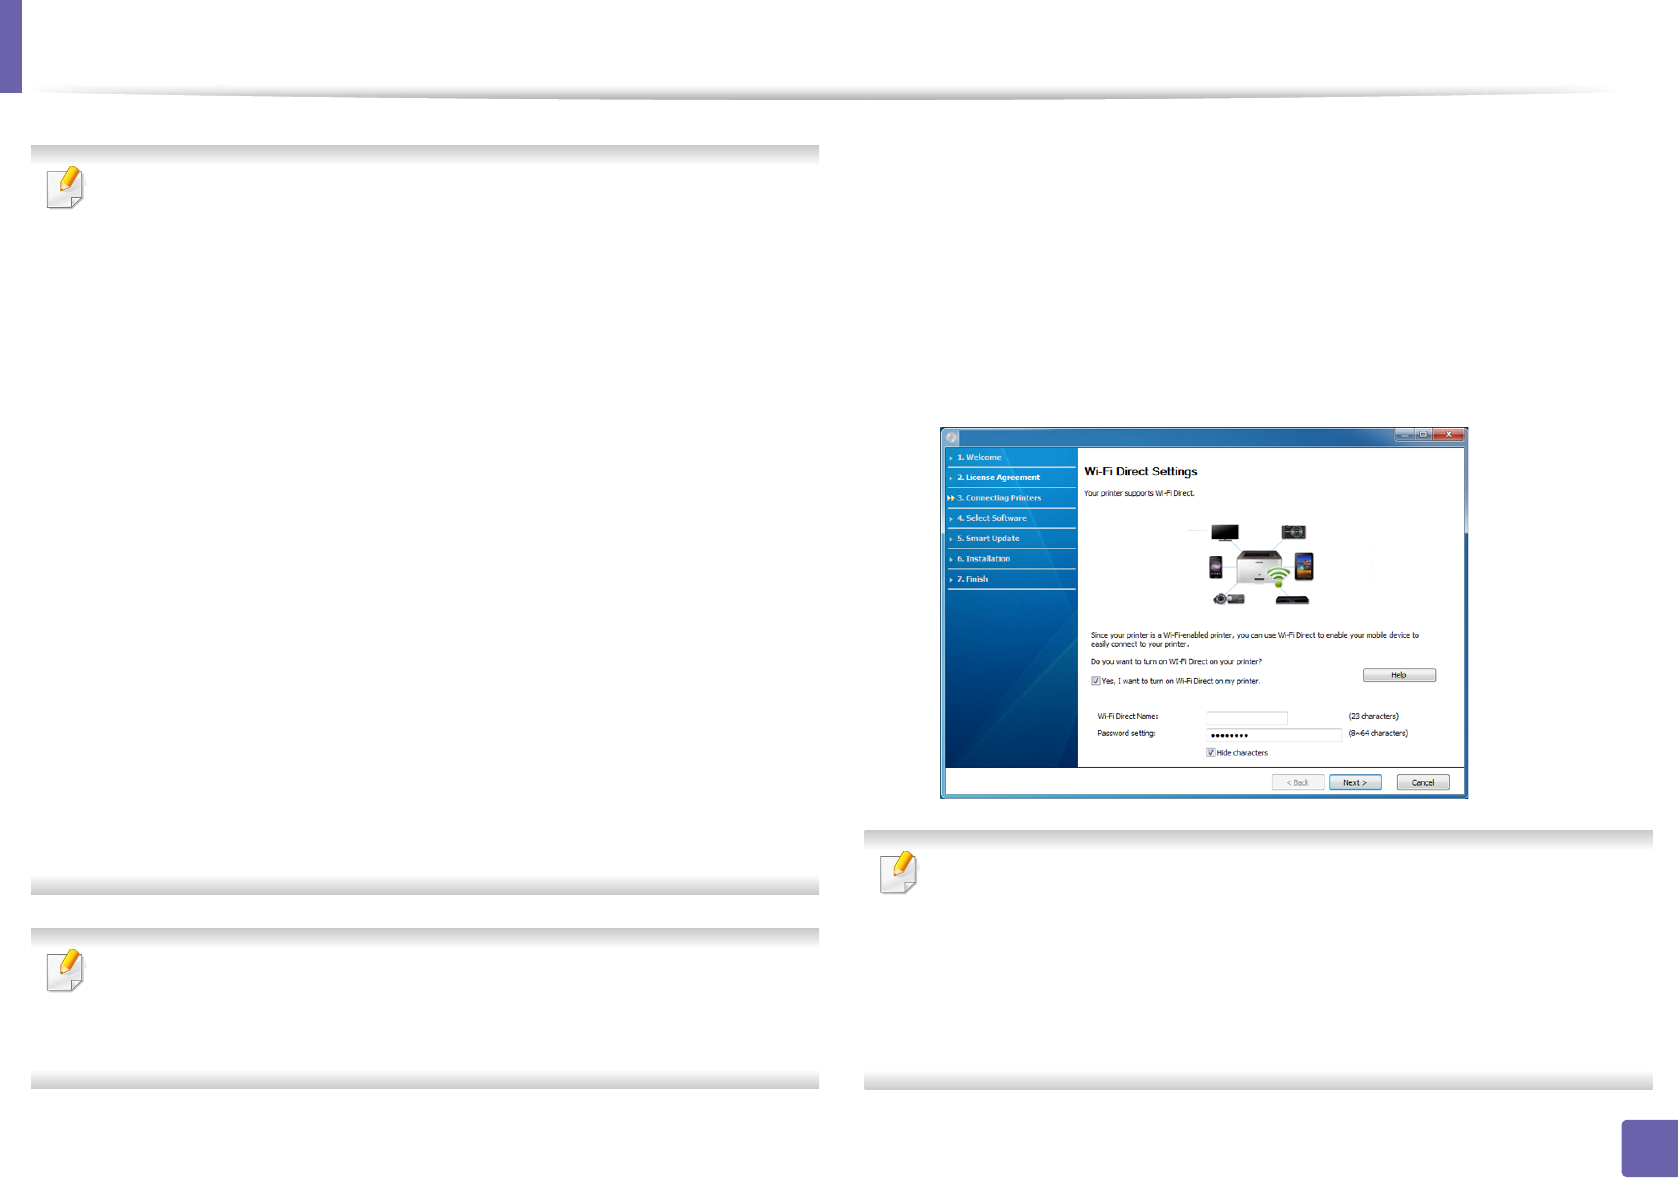
9 If your printer supports Wi-Fi Direct and this function is disabled, its
corresponding screen will appears.
If you want to enable Wi-Fi Direct, check the checkbox, and click Next. If
not, click just Next.
• Can start to build Wi-Fi Direct by using Samsung Easy Printer Manager
(see "Setting up Wi-Fi Direct" on page 176).
•Wi-Fi Direct Name: The default Wi-Fi Direct Name is the model name
and the maximum length is 22 characters.
•Password setting is the numeric string, and the size is 8 ~ 64 characters.
Wireless network setup
166
2. Using a Network-Connected Machine
10 When the wireless network set up is completed, disconnect the USB
cable between the computer and machine. Click Next.
11 Follow the instructions in the installation window.
Ad hoc via USB cable
If you do not have an access point (AP), you may still connect the machine
wirelessly to your computer by setting up an ad-hoc wireless network by
following the simple steps below.
Items to prepare
• Network-connected computer
• Software CD that was provided with your machine
• A machine installed with a wireless network interface
• USB cable
Creating the ad hoc network in Windows
1Check wheter the USB cable is connected to the machine.
2 Turn on your computer and the wireless network machine.
3 Insert the supplied software CD into your CD-ROM drive.
4 Review and accept the installation agreements in the installation
window. Then, click Next.
5 Select Wireless network connection on the Printer Connection Type
screen. Then, click Next.
6 On the Are you setting up your printer for the first time? screen, select
Yes, I will set up my printer's wireless network. Then, click Next.
If your printer is already connected on the network, select No, my
printer is already connected to my network.
7 After searching the wireless networks, a list of wireless networks your
machine has searched appears. Click Advanced Setting.
Wireless network setup
167
2. Using a Network-Connected Machine
•Enter the wireless Network Name: Enter the SSID name you want (SSID
is case-sensitive).
•Operation Mode: Select ad hoc.
•Channel: Select the channel. (Auto Setting or 2412 MHz to 2467 MHz).
•Authentication: Select an authentication type.
Open System: Authentication is not used, and encryption may or may
not be used, depending on the need for data security.
Shared Key: Authentication is used. A device that has a proper WEP key
can access the network.
•Encryption: Select the encryption (None, WEP64, WEP128).
•Network Password: Enter the encryption network password value.
•Confirm Network Password: Confirm the encryption network
password value.
•WEP Key Index: If you are using WEP Encryption, select the appropriate
WEP Key Index.
The wireless network security window appears when the ad hoc network
has security enabled.
Select Open System or Shared Key for the authentication and click Next.
• WEP (Wired Equivalent Privacy) is a security protocol preventing
unauthorized access to your wireless network. WEP encrypts the data
portion of each packet exchanged on a wireless network using a 64-bit
or 128-bit WEP encryption key.
8 The window showing the wireless network setting appears. Check the
settings and click Next.
Before entering the IP address for the machine, you must know the
computer’s network configuration information. If the computer’s network
configuration is set to DHCP, the wireless network setting should also be
DHCP. Likewise, if the computer’s network configuration is set to Static, the
wireless network setting should also be Static.
If your computer is set to DHCP and you want to use the Static wireless
network setting, you must contact the network administrator to get the
static IP address.
•For the DHCP method
If the IP address assignment method is DHCP, check if DHCP is shown in
the Wireless Network Setting Confirm window. If it shows Static, click
Change TCP/IP to change the assignment method to Receive IP
address automatically (DHCP).
•For the Static method
If the IP address assignment method is Static, check if Static is shown in
the Wireless Network Setting Confirm window. If it shows DHCP, click
Change TCP/IP to enter the IP address and other network configuration
values for the machine.
For example,
If the computer’s network information is as shown follows:
- IP address: 169.254.133.42
- Subnet Mask: 255.255.0.0
Then, the machine’s network information should be as below:
- IP address: 169.254.133.43
- Subnet Mask: 255.255.0.0 (Use the computer’s subnet mask.)
- Gateway: 169.254.133.1
Wireless network setup
168
2. Using a Network-Connected Machine
9 The Wireless Network Setting Complete window appears. Click Next.
10 When the wireless network settings are completed, disconnect the USB
cable between the computer and machine. Click Next.
11 Follow the instructions in the installation window.
17
Setup using Mac
Items to prepare
• Access point
• Network-connected computer
• Software CD that was provided with your machine
• A machine installed with a wireless network interface
• USB cable
Access point via USB cable (recommended)
1Make sure that the machine is connected to your computer and
powered on.
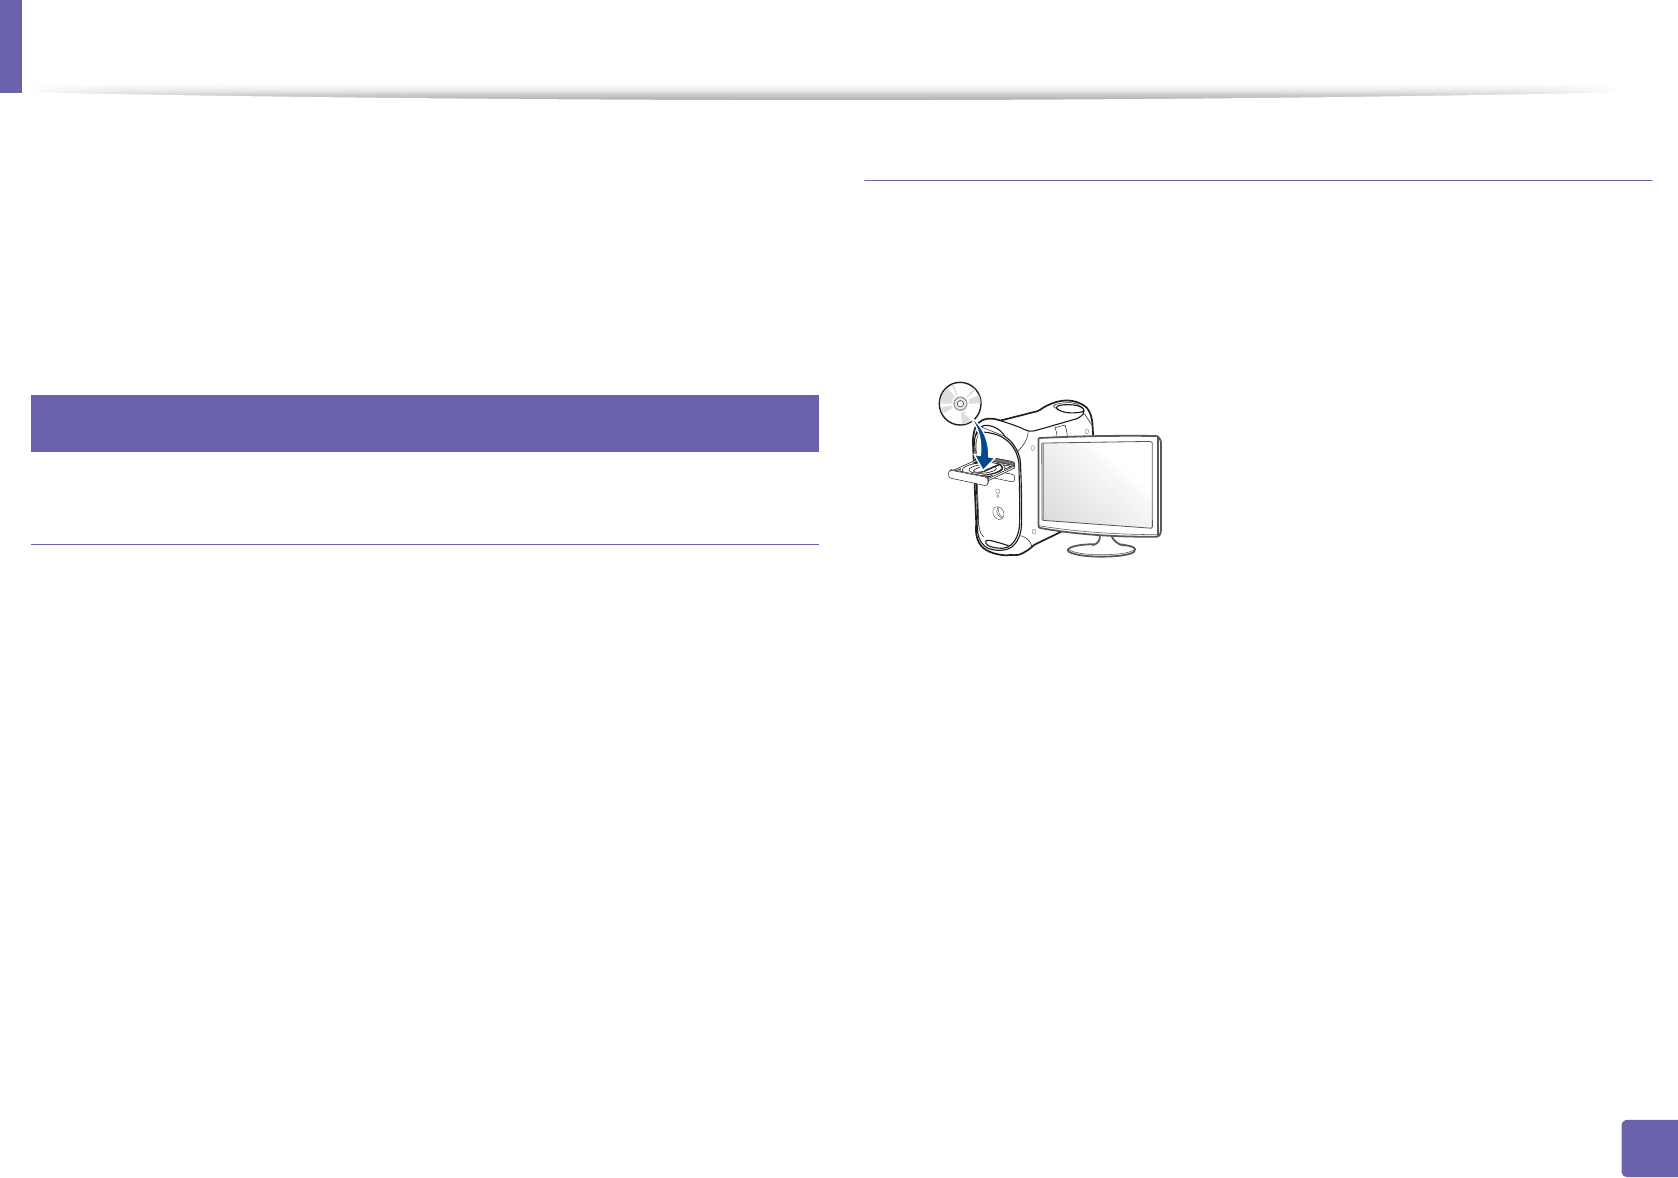
2 Insert the supplied software CD into your CD-ROM drive.
3 Double-click the CD-ROM icon that appears on your Mac desktop.
• For Mac OS X 10.8, double-click the CD-ROM that appears on Finder.
4 Double-click the MAC_Installer folder > Installer OS X icon.
5 Click Continue.
6 Read the license agreement and click Continue.
7 Click Agree to agree to the license agreement.
8 Click Install. All components necessary for machine operations will be
installed.
If you click Customize, you can choose individual components to install.
Wireless network setup
169
2. Using a Network-Connected Machine
9 Enter the password and click OK.
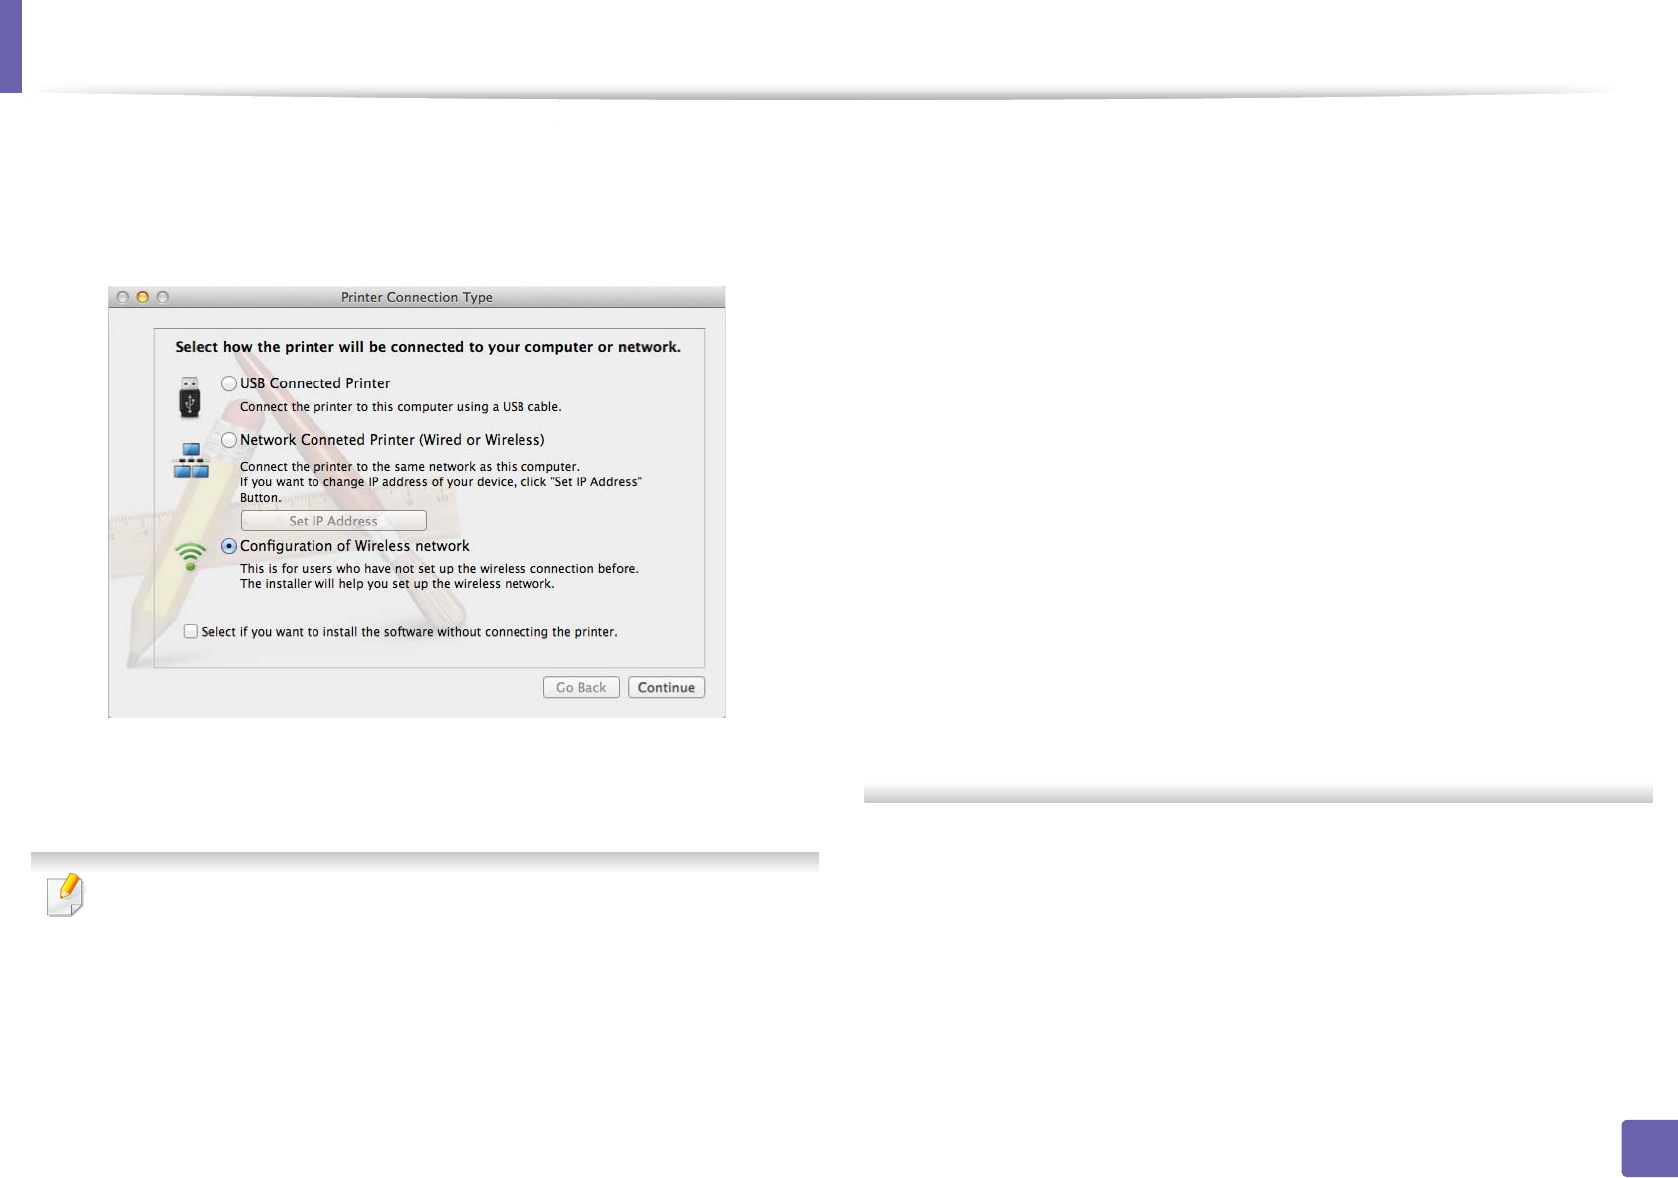
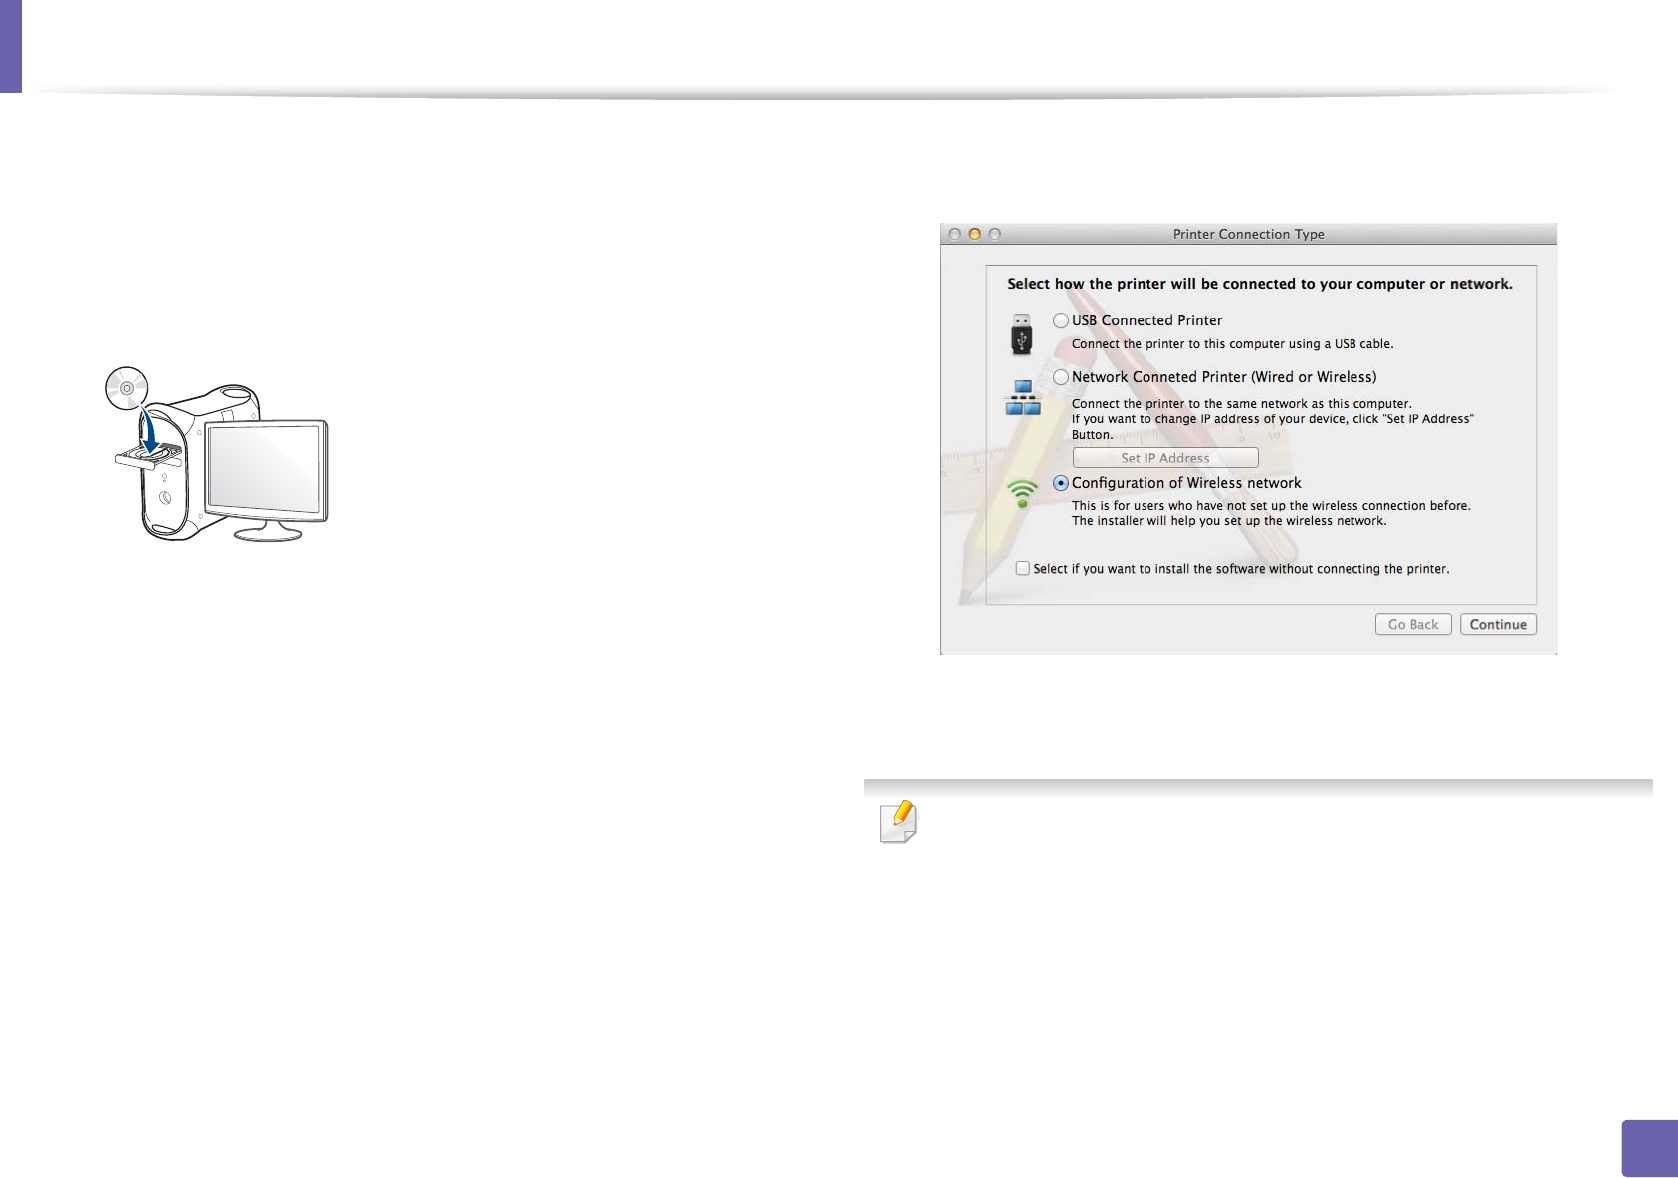
10 Select Configuration of Wireless network on the Printer Connection
Type and click Continue.
11 After searching, the window shows the wireless network devices. Select
the name (SSID) of the access point you want to use and click Next.
When you set the wireless configuration manually, click Advanced Setting.
•Enter the wireless Network Name: Enter the SSID of the access point
(SSID is case-sensitive).
•Operation Mode: Select Infrastructure.
•Authentication: Select an authentication type.
Open System: Authentication is not used, and encryption may or may
not be used, depending on the need for data security.
Shared Key: Authentication is used. A device that has a proper WEP key
can access the network.
WPA Personal or WPA2 Personal: Select this option to authenticate the
print server based on the WPA Pre-Shared Key. This uses a shared secret
key (generally called Pre Shared Key pass phrase) that is manually
configured on the access point and each of its clients.
•Encryption: Select the encryption. (None, WEP64, WEP128, TKIP, AES,
TKIP, AES)
•Network Password: Enter the encryption network password value.
•Confirm Network Password: Confirm the encryption network
password value.
•WEP Key Index: If you are using WEP Encryption, select the appropriate
WEP Key Index.
The wireless network security window appears when the access point has
security enabled.
Enter the Network Password of the access point (or router).
Wireless network setup
170
2. Using a Network-Connected Machine
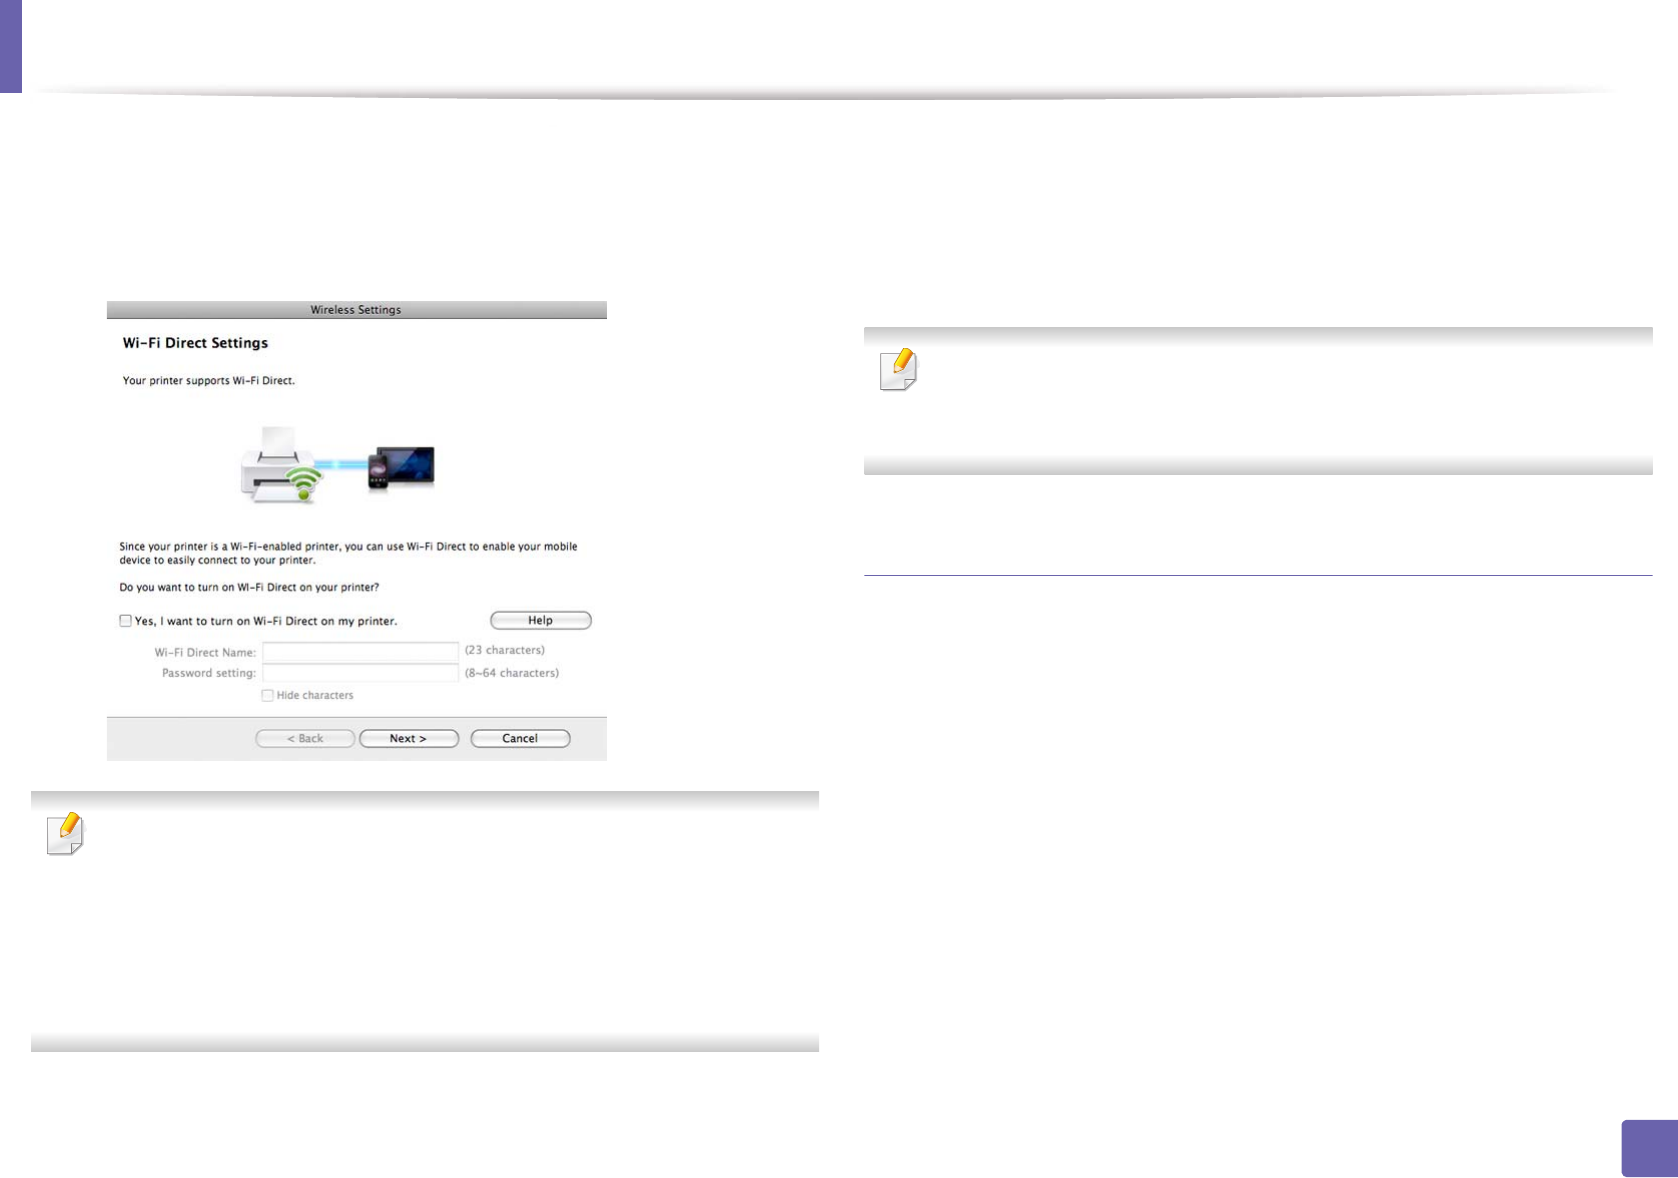
12 If your printer supports Wi-Fi Direct and this function is disabled, its
corresponding screen will appears.
If you want to enable Wi-Fi Direct, check the checkbox, and click Next. If
not, click just Next.
• Can start to build Wi-Fi Direct by using Samsung Easy Printer Manager
(see "Setting up Wi-Fi Direct" on page 176).
•Wi-Fi Direct Name: The default Wi-Fi Direct Name is the model name
and the maximum length is 22 characters.
•Password setting is the numeric string, and the size is 8 ~ 64 characters.
13 When the wireless network settings are completed, disconnect the USB
cable between the computer and machine.
14 Wireless network set up is completed. After the installation is finished,
click Quit.
After completing the wireless network connection, you need to install a
machine driver to print from an application (see "Installation for Mac" on
page 134).
Ad hoc via USB cable
If you do not have an access point (AP), you may still connect the machine
wirelessly to your computer by setting up an ad hoc wireless network by
following these simple directions.
Items to prepare
• Network-connected computer
• Software CD that was provided with your machine
• A machine installed with a wireless network interface
• USB cable
Wireless network setup
171
2. Using a Network-Connected Machine
Creating the ad hoc network in Mac
1Make sure that the machine is connected to your computer and
powered on.
2 Insert the supplied software CD into your CD-ROM drive.
3 Double-click the CD-ROM icon that appears on your Mac desktop.
• For Mac OS X 10.8, double-click the CD-ROM that appears on Finder.
4 Double-click the MAC_Installer folder > Installer OS X icon.
5 Click Continue.
6 Read the license agreement and click Continue.
7 Click Agree to agree to the license agreement.
8 Click Install. All components necessary for machine operations will be
installed.
If you click Customize, you can choose individual components to install.
9 Enter the password and click OK.
10 Select Configuration of Wireless network on the Printer Connection
Type and click Continue.
11 After searching the wireless networks, a list of wireless networks your
machine has searched appears. Click Advanced Setting.
•Enter the wireless Network Name: Enter the SSID name (SSID is case-
sensitive).
•Operation Mode: Select ad hoc.
•Channel: Select the channel (Auto Setting or 2412 MHz to 2467 MHz).
•Authentication: Select an authentication type.
Open System: Authentication is not used, and encryption may or may
not be used, depending on the need for data security.
Shared Key: Authentication is used. A device that has a proper WEP key
can access the network.
Wireless network setup
172
2. Using a Network-Connected Machine
•Encryption: Select the encryption (None, WEP64, WEP128).
•Network Password: Enter the encryption network password value.
•Confirm Network Password: Confirm the encryption network
password value.
•WEP Key Index: If you are using WEP Encryption, select the appropriate
WEP Key Index.
The wireless network security window appears when the ad hoc network
has security setting.
Select Open System or Shared Key for the authentication and click Next.
• WEP (Wired Equivalent Privacy) is a security protocol preventing
unauthorized access to your wireless network. WEP encrypts the data
portion of each packet exchanged on a wireless network using a 64-bit
or 128-bit WEP encryption key.
12 The window showing the wireless network settings appears. Check the
settings and click Next.
Before entering the IP address for the machine, you must know the
computer’s network configuration information. If the computer’s network
configuration is set to DHCP, the wireless network setting should also be
DHCP. Likewise, if the computer’s network configuration is set to Static, the
wireless network setting should also be Static.
If your computer is set to DHCP and you want to use Static wireless network
setting, you must contact the network administrator to get the static IP
address.
•For the DHCP method
If the IP address assignment method is DHCP, check if DHCP is shown in
the Wireless Network Setting Confirm window. If it shows Static, click
Change TCP/IP to change the assignment method to Receive IP
address automatically (DHCP).
•For the Static method
If the IP address assignment method is Static, check if Static is shown in
the Wireless Network Setting Confirm window. If it shows DHCP, click
Change TCP/IP to enter the IP address and other network configuration
values for the machine.
For example,
If the computer’s network information is shown as follows:
- IP address: 169.254.133.42
- Subnet Mask: 255.255.0.0
Then, the machine’s network information should be as shown below:
- IP address: 169.254.133.43
- Subnet Mask: 255.255.0.0 (Use the computer’s subnet mask.)
- Gateway: 169.254.133.1
Wireless network setup
173
2. Using a Network-Connected Machine
13 When the window that tells you that the network cable connection is
confirmed appears, disconnect the network cable and click Next.
If the network cable is connected, it may have trouble finding the
machine when configuring the wireless network.
14 The wireless network connects according to the network configuration.
15 Wireless network set up is completed. After installation is finished, click
Quit.
After completing the wireless network connection, you need to install a
machine driver to print from an application (see "Installation for Mac" on
page 134).
18
Using a network cable
Machines that do not support the network port will not be able to use this
feature (see "Rear view" on page 22).
Your machine is a network compatible machine. To enable your machine to
work with your network, you will need to perform some configuration
procedures.
• After completing the wireless network connection, you need to install a
machine driver to print from an application (see "Installing driver over
the network" on page 143).
• See your network administrator, or the person that set up your wireless
network, for information about your network configuration.
Items to prepare
• Access point
• Network-connected computer
• Software CD that was provided with your machine
• A machine installed with a wireless network interface
• Network cable
Printing a network configuration report
You can identify the network settings of your machine by printing a network
configuration report.
See "Printing a network configuration report" on page 140.
Wireless network setup
174
2. Using a Network-Connected Machine
IP setting using SetIP Program (Windows)
This program is used to manually set the network IP address of your machine
using its MAC address to communicate with the machine. The MAC address is
the hardware serial number of the network interface and can be found in the
Network Configuration Report.
See "Setting IP address" on page 140.
Configuring the machine’s wireless network
Before starting you will need to know the network name (SSID) of your wireless
network and the network key if it is encrypted. This information was set when
the access point (or wireless router) was installed. If you do not know about your
wireless environment, please ask the person who set up your network.
To configure wireless parameters, you can use SyncThru™ Web Service.
Using SyncThru™ Web Service
Before starting wireless parameter configuration, check the cable connection
status.
1Check whether or not the network cable is connected to the machine. If
not, connect the machine with a standard network cable.
2 Start a web browser such as Internet Explorer, Safari, or Firefox and enter
your machine’s new IP address in the browser window.
For example,
3 Click Login on the upper right of the SyncThru™ Web Service website.
4 Type in the ID and Password then click Login. We recommend you to
change the default password for security reasons.
•ID: admin
•Password: sec00000
5 When the SyncThru™ Web Service window opens, click Network
Settings.
6 Click Wireless > Wizard.
Wizard will help you setup the wireless network configuration. However, if
you want to set the wireless network directly, select Custom.
Wireless network setup
175
2. Using a Network-Connected Machine
7 Select the one Network Name(SSID) in the list.
•SSID: SSID (Service Set Identifier) is a name that identifies a wireless
network, access points, and wireless devices attempting to connect
to a specific wireless network must use the same SSID. The SSID is
case sensitive.
•Operation Mode: Operation Mode refers to the type of wireless
connections (see "Wireless network name and network password"
on page 156).
-Ad-hoc: Allows wireless devices to communicate directly with
each other in a peer-to-peer environment.
-Infrastructure: Allows wireless devices to communicate with
each other through an access point.
If your network’s Operation Mode is Infrastructure, select the SSID of the
access point. If the Operation Mode is Ad-hoc, select the machine’s SSID.
8 Click Next.
If the wireless security setting window appears, enter the registered
password (network password) and click Next.
9 The confirmation window appears, please check your wireless setup. If
the setup is right, click Apply.
Disconnect the network cable (standard or network). Your machine should
then start communicating wirelessly with the network. In case of Ad-hoc
mode, you can use a wireless LAN and wired LAN simultaneously.
10 Insert the supplied software CD into your CD-ROM drive, and follow the
instructions in the window to set up the wireless network.
19
Turning the Wi-Fi network on/off
If your machine has a display, you can also turn on/off the Wi-Fi from the
machine’s control panel using the Network menu.
1Check whether the network cable is connected to the machine. If not,
connect the machine with a standard network cable.
2 Start a web browser such as Internet Explorer, Safari, or Firefox and enter
your machine’s new IP address in the browser window.
For example,
3 Click Login on the upper right of the SyncThru™ Web Service website.

Wireless network setup
176
2. Using a Network-Connected Machine
4 Type in the ID and Password, then click Login. We recommend you to
change the default password for security reasons.
•ID: admin
•Password: sec00000
5 When the SyncThru™ Web Service window opens, click Network
Settings.
6 Click Wireless > Custom.
You can also turn the Wi-Fi network on/off.
20
Setting the Wi-Fi Direct for mobile printing
Wi-Fi Direct is an easy-to-setup peer-to-peer connection method between the
Wi-Fi Direct certified printer and a mobile device that provides a secure
connection and better throughput than ad hoc mode.
With Wi-Fi Direct, you can connect your printer to a Wi-Fi Direct network while
concurrently connecting to an access point. You can also use a wired network
and a Wi-Fi Direct network simultaneously so multiple users can access and print
documents both from Wi-Fi Direct and from a wired network.
• You cannot connect your mobile device to the internet through the
printer’s Wi-Fi Direct.
• The supported protocol list may differ from your model, Wi-Fi Direct
networks do NOT support IPv6, network filtering, IPSec, WINS, and SLP
services.
• The maximum number of devices that can be connected via Wi-Fi Direct
is 3.
Setting up Wi-Fi Direct
You can enable Wi-Fi Direct feature by one of the following methods.
From the USB cable-connected computer(recommended)
After the driver installation is complete, Samsung Easy Printer Manager can be
used to change Wi-Fi Direct settings.
Samsung Easy Printer Manager is Available for Windows
and Mac OS users only.
- From the Start menu, select Programs or All Programs > Samsung
Printers > Samsung Easy Printer Manager > Device Settings >
Network.
▪Wi-Fi Direct On/Off: Select On to enable.
Wireless network setup
177
2. Using a Network-Connected Machine
▪Device Name: Enter the printer’s name for searching for your
printer on a wireless network. By default, the device name is the
model name.
▪IP Address: Enter the IP address of the printer. This IP address is
used only for the local network and not for the infrastructure wired
or wireless network. We recommend using the default local IP
address (the default local IP address of the printer for Wi-Fi Direct is
192.168.3.1 )
▪Group Owner: Activate this option to assign the printer the Wi-Fi
Direct group’s owner. The Group Owner acts similar to a wireless
access point. We recommend activating this option.
▪Network Password: If your printer is a Group Owner, a Network
Password is required for other mobile devices to connect to your
printer. You can configure a network password yourself, or can
remember the given Network Password that is randomly generated
by default.
From the machine (Machines with a display screen)
Accessing menus may differ from model to model (see "M332xND/M382xD/
M382xND/M382xDW/M402xND" on page 31 ).
• Select (Menu) > Network > Wi-Fi > Wi-Fi Direct on the control panel.
• Enable Wi-Fi Direct.
From the network-connected computer
If your printer is using a network cable or a wireless access point, you can enable
and configure Wi-Fi Direct from SyncThru™ Web Service.
• Access SyncThru™ Web Service, select Settings > Network Settings >
Wireless > Wi-Fi Direct.
• Enable or disable Wi-Fi Direct and set other options.
•For Linux OS users,
- Print an IP network configuration report to check the output (see
"Printing a network configuration report" on page 140).
- Access SyncThru Web Service, select Settings > Network Settings
> Wireless > Wi-Fi Direct.
- Enable or disable Wi-Fi Direct.
Setting up the mobile device
• After setting up Wi-Fi Direct from the printer, refer to the user manual of the
mobile device you are using to set its Wi-Fi Direct.
• After setting up Wi-Fi Direct, you need to download the mobile printing
application (For example: Samsung Mobile printer) to print from your
smartphone.

Wireless network setup
178
2. Using a Network-Connected Machine
• When you have found the printer you want to connect to from your
mobile device, select the printer and the printer's LED will blink. Press the
WPS button on the printer and it will be connected to your mobile
device.
• If your mobile device does not support Wi-Fi Direct, you need to enter
the "Network Key" of a printer instead of pushing the WPS button.
21
Troubleshooting for wireless network
Problems during setup or driver installation
Printers Not Found
• Your machine may not be turned on. Turn on your computer and the
machine.
• USB cable is not connected between your computer and machine. Connect
the machine to your computer using the USB cable.
• The machine does not support wireless networking (see "Features by
models" on page 8).
Connecting Failure - SSID Not Found
• The machine is unable to find the network name (SSID) you have selected or
entered. Check the network name (SSID) on your access point and try
connecting again.
• Your access point is not turned on. Turn on your access point.

Wireless network setup
179
2. Using a Network-Connected Machine
Connecting Failure - Invalid Security
• Security is not configured correctly. Check the configured security on your
access point and machine.
Connecting Failure - General Connection Error
• Your computer is not receiving a signal from your machine. Check the USB
cable and your machine’s power.
Connecting Failure - Connected Wired Network
• Your machine is connected with a wired network cable. Remove the wired
network cable from your machine.
Connecting Failure - Assigning the IP address
• Cycle the power for the access point (or wireless router) and machine.
PC Connection Error
• The configured network address is unable to connect between your
computer and machine.
- For a DHCP network environment
The machine receives the IP address automatically (DHCP) when
computer is configured to DHCP.
If the printing job is not working in DHCP mode, the problem may be caused
by the automatically changed IP address. Compare the IP address between
the product's IP address and the printer port's IP address.
How to compare:
1 Print the network information report of your printer, and then check the
IP address (see "Printing a network configuration report" on page 140).
2 Check the printer port's IP address from your computer.
a Click the Windows Start menu.
• For Windows 8, from Charms, select Search > Settings.
b For Windows XP/Server 2003, select Printer and Faxes.
• For Windows Server 2008/Vista, select Control Panel > Hardware
and Sound > Printers.
• For Windows 7/8, select Control Panel > Devices and Printers.
• For Windows Server 2008 R2, select Control Panel > Hardware >
Devices and Printers.
c Right-click your machine.
d For Windows XP/2003/2008/Vista, press Properties.
For Windows 7/8 and Windows Server 2008 R2, from context menus,
select the Printer properties.
If Printer properties item has ► mark, you can select other printer
drivers connected with selected printer.
e Click Port tab.
f Click Configure Port... button.
g Check if Printer Name or IP Address: is the IP address on the network
configuration Sheet.
3 Change the printer port's IP address if it is different from the network
information report's.
If you want to use the software installation CD to change the port IP,
Connect to a network printer. Then reconnect the IP address.