Samsung Electronics Co SLM4025NX Mono Laser Printer User Manual MagpieN english
Samsung Electronics Co Ltd Mono Laser Printer MagpieN english
Contents
Users Manual 6
Wireless network setup
180
2. Using a Network-Connected Machine
- For a Static network environment
The machine uses the static address when the computer is configured
to static address.
For example,
If the computer’s network information is as shown below:
▪IP address: 169.254.133.42
▪Subnet Mask: 255.255.0.0
Then the machine’s network information should be as below:
▪IP address: 169.254.133.43
▪Subnet Mask: 255.255.0.0 (Use the computer’s subnet mask.)
▪Gateway: 169.254.133.1
Other problems
If problems occur while using the machine on a network, check the following:
For information on the access point (or wireless router), refer to its own
user's guide.
• You cannot enable wired and wireless networks at the same time.
• Your computer, access point (or wireless router), or machine may not be
turned on.
• Check the wireless reception around the machine. If the router is far from
the machine or there is an obstacle, you might have difficulty receiving the
signal.
• Cycle the power for the access point (or wireless router), machine, and
computer. Sometimes cycling the power can recover network
communication.
• Check whether firewall software (V3 or Norton) is blocking the
communication.
If the computer and the machine are connected on the same network and it
cannot be found when searching, firewall software might be blocking the
communication. Refer to the user's guide for the software to turn it off and
try searching for the machine again.
• Check whether the machine's IP address is allocated correctly. You can
check the IP address by printing the network configuration report.
• Check whether the access point (or wireless router) has a configured
security (password). If it has a password, refer to the access point (or wireless
router) administrator.
• Check the machine's IP address. Reinstall the machine driver and change the
settings to connect to the machine on the network. Due to the
characteristics of DHCP, the allocated IP address could change if the
machine is not used for a long time or if the access point has been reset.
Register the product's MAC address when you configure the DHCP server on
the access point (or wireless router). Then you can always use the IP address
that is set with the MAC address. You can identify the MAC address of your
machine by printing a network configuration report (see "Printing a network
configuration report" on page 140).

Wireless network setup
181
2. Using a Network-Connected Machine
• Check the wireless environment. You might not be able to connect to the
network in the infrastructure environment where you need to type in a
user's information before connecting to the access point (or wireless router).
• This machine only supports IEEE 802.11 b/g/n and Wi-Fi. Other wireless
communication types (e.g., Bluetooth) are not supported.
• When using the ad hoc mode, in operating systems such as Windows Vista,
you might need to set the wireless connection setting every time you use
the wireless machine.
• You cannot use infrastructure mode and ad hoc mode at the same time for
Samsung wireless network machines.
• The machine is within the range of the wireless network.
• The machine is located away from obstacles that could block the wireless
signal.
Remove any large metal objects between the access point (or wireless
router) and the machine.
Make sure the machine and wireless access point (or wireless router) are not
separated by poles, walls, or support columns containing metal or concrete.
• The machine is located away from other electronic devices that may
interfere with the wireless signal.
Many devices can interfere with the wireless signal, including a microwave
oven and some Bluetooth devices.
• Whenever the configuration of your access point (or wireless router)
changes, you must do the device’s wireless network setup again.
• The maximum number of device that can be connected via Wi-Fi Direct is 3.
• If Wi-Fi Direct is ON, this machine only supports IEEE 802.11 b/g.
• If the access point is set to work with the 802.11n standard only, it may not
connect to your machine.

182
2. Using a Network-Connected Machine
Samsung Mobile Print
22
What is Samsung Mobile Print?
Samsung Mobile Print is a free application that enables users to print photos,
documents, and web pages directly from your smartphone or tablet. Samsung
Mobile Print is not only compatible with your Android and iOS smart phones
but also with your iPod Touch and tablet PC. It connects your mobile device to a
network connected Samsung printer or to a wireless printer through a Wi-Fi
access point. Installing a new driver or configuring network settings isn’t
necessary – just simply install the Samsung Mobile Print application, and it will
automatically detect compatible Samsung printers. Besides printing photos,
web pages, and PDFs, scanning is also supported. If you have a Samsung
multifunction printer, scan any document into a JPG, PDF, or PNG format for
quick and easy viewing on your mobile device.
23
Downloading Samsung Mobile Print
To download Samsung Mobile Print, go to the application store (Samsung
Apps, Play Store, App Store) on your mobile device, and just search for
“Samsung Mobile Print.” You can also visit iTunes for Apple devices on your
computer.
24
Supported Mobile OS
• Android OS 2.1 or higher
• iOS 4.0 or higher
25
Supported devices
•iOS 4.0 or higher: iPod Touch, iPhone, iPad
•Android 2.1 or higher: Galaxy series, and Android mobile device
183
2. Using a Network-Connected Machine
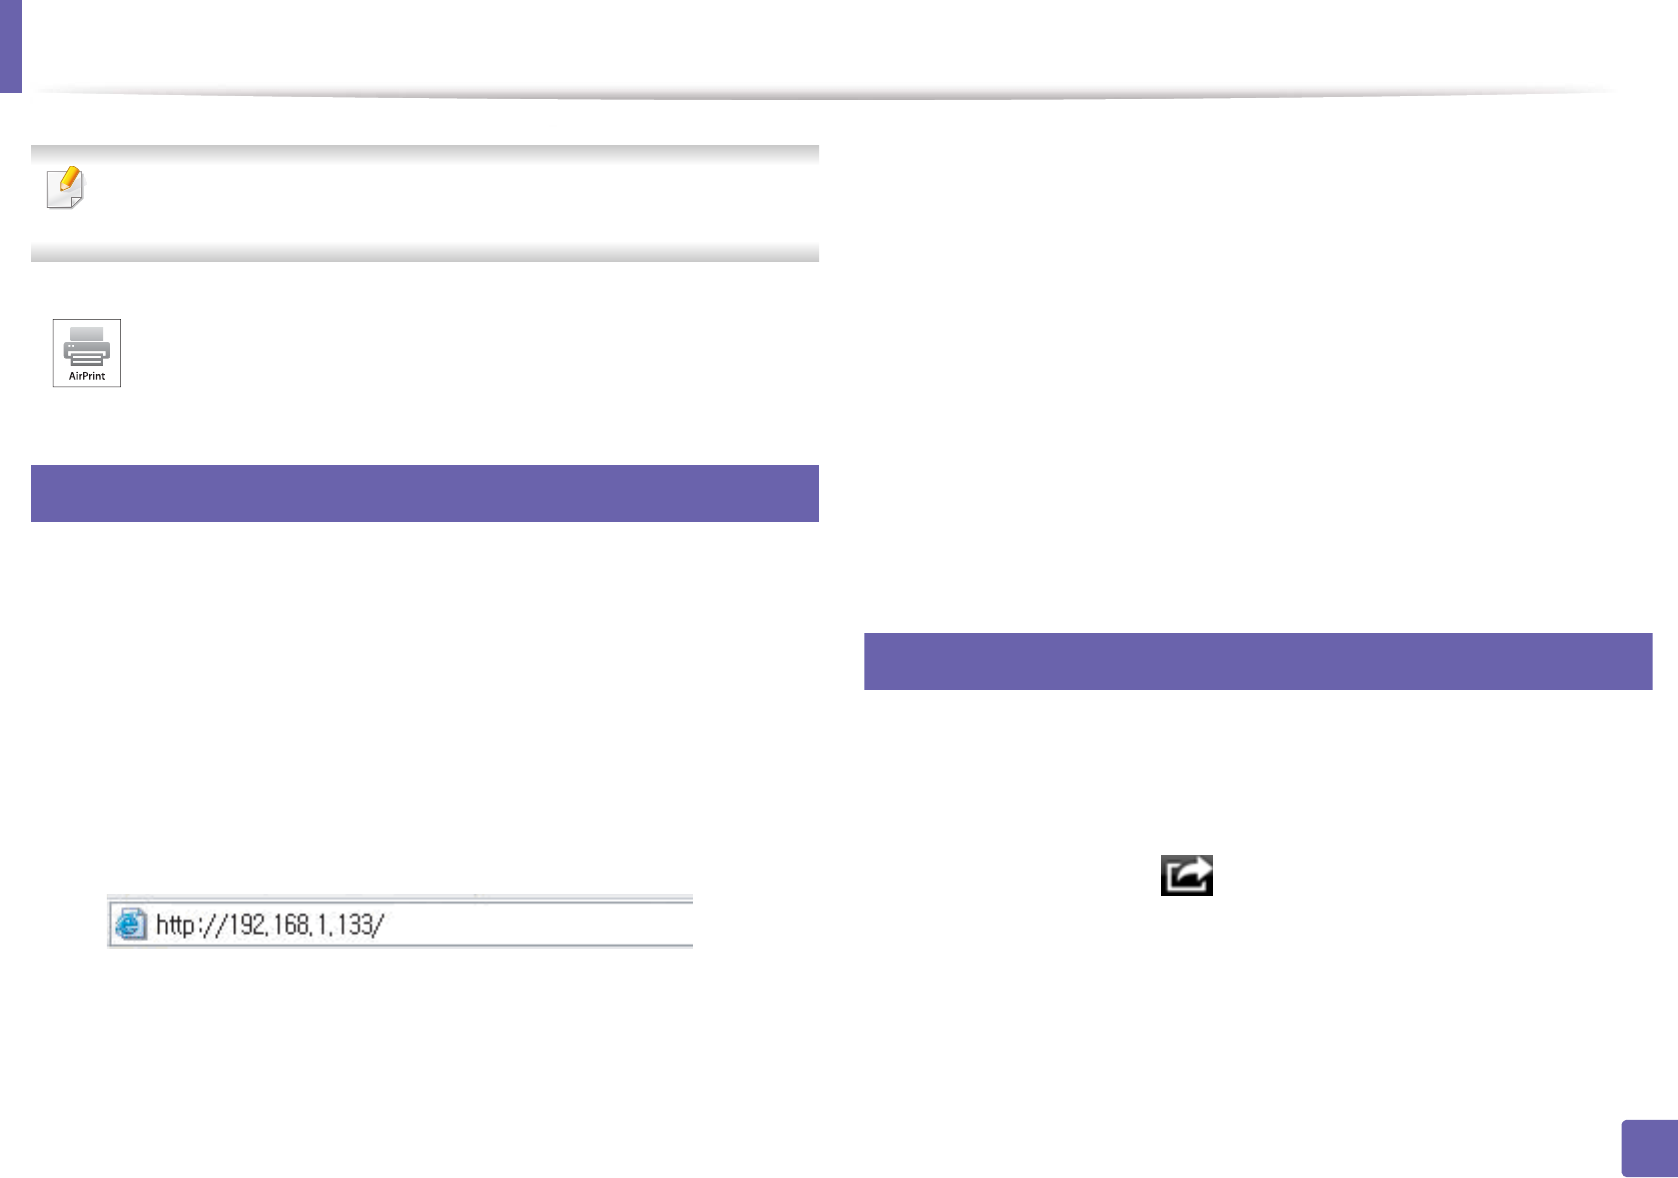
AirPrint
Only AirPrint certified machines can use the AirPrint feature. Check the box
your machine came in for the AirPrint certified mark.
26
Setting up AirPrint
Bonjour(mDNS) and IPP protocols are required on your machine to use the
AirPrint feature. You can enable the AirPrint feature by one of the following
methods.
1Check whether the machine is connected to the network.
2 Start a web browser such as Internet Explorer, Safari, or Firefox and enter
your machine’s new IP address in the browser window.
For example,
3 Click Login in the upper right of the SyncThru™ Web Service website.
4 Type in the ID and Password, then click Login. If it’s your first time
logging into SyncThru™ Web Service, type in the below default ID and
password. We recommend you to change the default password for
security reasons.
•ID: admin
•Password: sec00000
5 When the SyncThru™ Web Service window opens, click Settings >
Network Settings.
6 Click AirPrint .
You can enable the AirPrint.
27
Printing via AirPrint
For example, the iPad manual provides these instructions:
1Open your email, photo, web page, or document you want to print.
2 Touch the action icon( ).
3 Select your printer driver name and option menu to set up.
4 Touch Print button. Print it out.
AirPrint allows you to wirelessly print directly from an iPhone, iPad,
and iPod touch running the latest version of iOS.
AirPrint
184
2. Using a Network-Connected Machine
Cancelling print job: To cancel the printing job or view the print summary,
click the print center icon ( ) in multitasking area. You can click cancel in
the print center.
185
2. Using a Network-Connected Machine
Google Cloud Print™
Google Cloud Print™ is a service that allows you to print to a printer using your
smart phone, tablet, or any other web-connected devices. Just register your
Google account with the printer, and you are ready to use the Google Cloud
Print™ service. You can print your document or email with Chrome OS, Chrome
browser, or a Gmail™/ Google Docs™ application on your mobile device, so you
don’t need to install the printer driver on the mobile device. Refer to the Google
website (http://www.google.com/cloudprint/learn/ or http://
support.google.com/cloudprint) for more information about Google Cloud
Print™.
28
Registering your Google account to the printer
• Make sure the printer machine is turned on and connected to a wired or
wireless network that has access to the Internet.
•You should create your Google account in the advance.
1Open the Chrome browser.
2 Visit www.google.com.
3 Sign in to the Google website with your Gmail™ address.
4 Enter your printer’s IP address in the address field and press the Enter key
or click Go.
5 Click Login in the upper right corner of the SyncThru™ Web Service
website.
6 If it’s your first time logging into SyncThru™ Web Service you need to
log-in as an administrator. Type in the below default ID and Password.
We recommend you to change the default password for security
reasons.
•ID: admin
•Password: sec00000
If the network environment is using a proxy server, you need to configure
the proxy’s IP and port number from Settings > Network Settings >
Google Cloud Print > Proxy Setting. Contact your network service
provider or network administrator for more information.
7 When the SyncThru™ Web Service window opens, click Settings >
Network Settings > Google Cloud Print.
8 Enter your printer’s name and description.
9 Click Register.
The confirmation pop-up window appears.
If you set the browser to block pop-ups, the confirmation window will not
appear. Allow the site to show pop-ups.
Google Cloud Print™
186
2. Using a Network-Connected Machine
10 Click Finish printer registration.
11 Click Manage your printers.
Now your printer is registered with Google Cloud Print™ service.
Google Cloud Print™-ready devices will appear in the list.
29
Printing with Google Cloud Print™
The printing procedure varies depending on the application or the device you
are using. You can see the application list that supports Google Cloud Print™
service.
Make sure the printer is turned on and connected to a wired or wireless
network that has access to the Internet.
Printing from an application on mobile device
The following steps are an example of using the Google Docs™ app from
Android mobile phone.
1Install the Cloud Print application on your mobile device.
If you do not have the application, download it from the application store
such as Android Market or App Store.
2 Access the Google Docs™ application from your mobile device.
3 Tap the option button of the document that you want to print.
4 Tap the send button.
5 Tap the Cloud Print button.
6 Set the printing options if you want.
7 Tap Click here to Print.
Printing from the Chrome browser
The following steps are an example of using the Chrome browser.
1Run Chrome.
2 Open the document or email that you want to print.
3 Click the wrench icon in the browser’s top right corner.
4 Click Print. A new tab for printing appears.

Google Cloud Print™
187
2. Using a Network-Connected Machine
5 Select Print with Google Cloud Print.
6 Click the Print button.

3. Useful Setting Menus
This chapter explains how to browse the current status of your machine, and the method of setting for advanced
machine setup.
• Before you begin reading a chapter 189
• Information 190
• Layout 191
• Paper 192
• Graphic 193
• System Setup 194
• Emulation 197
• Network 198
• Job Management 200
• Admin setup 201
• Eco 202
• Direct USB 203
• Job Status 204
• Counter 205
• Help 206

189
3. Useful Setting Menus
Before you begin reading a chapter
This chapter explains all the features available for this series' models to help users easily understand the features.
You can check the features available for each model in the Basic Guide (see "Menu overview" on page 31).
The following are tips for using this chapter
• The control panel provides access to various menus to set up the machine or use the machine’s functions. These menus can be accessed by pressing (Menu)
or from the touch screen.
• Some menus may not appear on the display depending on options or models. If so, it is not applicable to your machine.
• For models that do not have the (Menu) or the touch screen on the control panel, this feature is not applicable (see "Control panel overview" on page 23).
• Some menu names may differ from your machine depending on its options or the models.
190
3. Useful Setting Menus
Information
Some menus may not appear in the display depending on options or
models. If so, it is not applicable to your machine (see "Menu overview" on
page 31).
To change the menu options:
• Press (Menu) > Information on the control panel.
OR
For the model with a touch screen, select (Information) on the touch
screen.
Item Description
•Menu Map
•Help List
Prints the menu map which shows the layout and
current settings of this machine.
Configuration Prints a report on the machine's overall configuration.
Network
Configuration
Prints a report on the machine's current network
configuration.
Demo Page Prints the demo page to check whether your machine is
printing properly or not.
•Supplies Info.
•Supplies
Information
Prints supplies’ information page.
Usage Counter Prints a usage page. The usage page contains the total
number of pages printed.
Account
Prints a report of printout counts for each user. This is
only available when Job Accounting is enabled from
the SyncThru™ Web Admin Service.
Font List Prints the font list the machine supports.
PCL Font Prints the PCL font list.
PS Font Prints the PS font list.
EPSON Font Prints the EPSON font list.
KSC5843 FontaPrints the KSC5843 font list.
KSC5895 FontaPrints the KSC5895 font list.
KSSM FontaPrints the KSSM font list.
a. This option may not be available depending on your country.
Item Description
191
3. Useful Setting Menus
Layout
Some menus may not appear in the display depending on options or
models. If so, it is not applicable to your machine (see "Menu overview" on
page 31).
To change the menu options:
• Press (Menu) > Layout on the control panel.
•For the model with a touch screen, select (Setup) > Layout on the
touch screen.
Item Description
Orientation
Selects the direction in which information is printed on a
page.
•Portrait
•Landscape
Margin
•Common Margin: Sets the margin for each side of
paper.
•MP Tray: Sets the paper margins in multi-purpose tray.
•Tray X: Sets the paper margins for the paper trays.
•Emulation Mar./Emulation Margin: Sets the paper
margins for emulation print page.
Duplex
To print on both sides of the paper, choose the binding
edge.
•Off: Disables this option.
•Long Edge
•Short Edge
Item Description
192
3. Useful Setting Menus
Paper
Some menus may not appear in the display depending on options or
models. If so, it is not applicable to your machine (see "Menu overview" on
page 31).
To change the menu options:
• Press (Menu) > Paper on the control panel.
•For the model with a touch screen, select (Setup) > Paper on the touch
screen.
Item Description
Copies Selects the number of copies.
MP Tray/ [Tray <x>]
•Paper Size: Selects the default paper size.
•Paper Type: Selects the paper type currently loaded
in the tray.
Paper Source
Sets the default paper tray to use.
Auto: You can set the machine to automatically
change to the tray with the same sized paper
when the tray in use is empty.
Tray Confirmation Activates the tray confirmation message. If you open and
close a tray, a window asking you whether to set the
paper size and type for the tray just opened appears.
Item Description
193
3. Useful Setting Menus
Graphic
Some menus may not appear in the display depending on options or
models. If so, it is not applicable to your machine (see "Menu overview" on
page 31).
To change the menu options:
• Press (Menu) > Graphic on the control panel.
•For the model with a touch screen, select (Setup) > Graphic on the
touch screen.
Item Description
Resolution
Specifies the number of dots printed per inch (dpi). The
higher the setting, the sharper printed characters and
graphics.
Clear Text Prints text darker than on a normal document.
Auto CR Allows you to append the required carriage return to
each line feed, which is useful for Unix or DOS users.
Edge Enhance Allows user to enhance sharpness of text and graphics for
improving readability.
194
3. Useful Setting Menus
System Setup
Some menus may not appear in the display depending on options or
models. If so, it is not applicable to your machine (see "Menu overview" on
page 31).
To change the menu options:
• Press (Menu) > System Setup on the control panel.
•For the model with a touch screen, select (Setup) > System/ Tray
Behaviour on the touch screen.
Item Description
Date & TimeaSets the date and time.
Clock ModeaSelects the format for displaying time between 12
hours and 24 hours.
Language Sets the language of the text that appears on the
control panel display.
•Default Paper
•Default Paper Size
You can set the default paper size to use.
Power Save
Sets how long the machine waits before going to
power save mode.
When the machine does not receive data for an
extended period of time, power consumption is
automatically lowered.
Wakeup Event
When this option is On, you can wake up the machine
from the power saving mode with the following
actions:
• Loading paper in a tray.
• Opening or closing the front cover.
• Pulling a tray out or pushing a tray in.
Job Timeout
When there is no input for a certain period of time, the
machine cancels the current job. You can set the
amount of time the machine will wait before canceling
the job.
•Altitude Adj.
•Altitude
Adjustment
Optimize print quality according to the machine’s
altitude ("Altitude adjustment" on page 209).
Auto Continue
Determine whether or not the machine continues
printing when it detects the paper does not match the
paper settings.
•0 Sec: This option allows you to continue printing
when the paper size you have set is mismatched
with the paper in the tray.
•30 Sec: If a paper mismatch occurs, an error message
will display. The machine waits for about 30 second,
then automatically clear the message and continue
printing.
•Off: If a paper mismatch occurs, the machine waits
until you insert the correct paper.
Item Description
System Setup
195
3. Useful Setting Menus
•Auto Tray Swi.
•Auto Tray Switch
Determine whether or not the machine continues
printing when it detects the paper does not match. For
example, if both tray 1 and tray 2 are filled with the
same size paper, the machine automatically prints from
tray 2 after the tray 1 runs out of paper.
This option does not appear if you selected
Auto for Paper Source from printer driver.
•Paper Substit.
•Paper Substitution
Automatically substitutes the printer driver’s paper size
to prevent the paper mismatch between Letter and A4.
For example, if you have A4 paper in the tray but you
set the paper size to Letter in the printer driver, the
machine prints on A4 paper and vice versa.
•Tray Protect.
•Tray Protection
Decides to use or not use the Auto Tray Swi. /Auto
Tray Switch feature for a certain tray. If you set tray 1 to
on, for example, then tray 1 is excluded during tray
switching.
SkipBlankPage
The printer detects the printing data from computer
whether a page is empty or not. You can set to print or
skip the blank page.
Item Description
Maintenance
•CLR Empty Msg.: This option appears only when
toner cartridge is empty.
•Supplies Life: Allows you to check how many pages
are printed and how much toner is left in the
cartridge.
•Image Mgr.: Allows you to adjust the density.
•TonerLow Alert: If toner in the cartridge has run
out, a message informing the user to change the
toner cartridge appears. You can set the option for
this message to appear or not.
•ImgU. Low Alertb: Allows you to set the alarm for
when the imaging unit is low.
M3325/M3825/M4025 series only.
•RAM Disk: Enables/disables RAM disk to manage
jobs.
Toner Save
Activating this mode extends the life of your toner
cartridge and reduces your cost per page beyond what
one would experience in the normal mode, but it
reduces print quality.
Item Description
System Setup
196
3. Useful Setting Menus
Eco Settings
Allows you to save print resources and enables eco-
friendly printing (see "Eco printing" on page 53).
•Default Mode: Select whether to turn the Eco mode
on or off.
On Force: Sets the Eco mode on. If a user wants
to turn the Eco mode off, the user needs to
enter the password.
•Select Temp.: Selects the eco template set from the
SyncThru™ Web Service.
Auto Power Off Turns power off automatically when the machine has
been in power save mode for the length of time set in
Auto Power Off > On > Timeout.
• To turn the machine on again, press the
(Power) button on the control panel (make
sure the main power switch is on).
• If you run the printer driver or Samsung Easy
Printer Manager, the time automatically
extends.
• While the machine is connected to the
network or working on a print job, Auto
Power Off feature doesn't work.
Item Description
Held Job Timeout You can set the time to hold the temprarily stopped job.
File Policy
If the memory already has the same name when you
entered a new file name, you can rename or overwrite
it.
Job Timeout Sets the length of time the printer waits before printing
the last page of a print job that does not end with a
command to print the page.
a. M382xDW only
b. M3325/M3825/M4025 series only.
Item Description

197
3. Useful Setting Menus
Emulation
Some menus may not appear in the display depending on options or
models. If so, it is not applicable to your machine (see "Menu overview" on
page 31).
To change the menu options:
• Press (Menu) > Emulation on the control panel.
•For the model with a touch screen, select (Setup) > Emulation on the
touch screen.
Item Description
Emulation Type The machine language defines how the computer
communicates with the machine.
Setup Sets the detailed settings for the selected emulation type.
198
3. Useful Setting Menus
Network
Some menus may not appear in the display depending on options or
models. If so, it is not applicable to your machine (see "Menu overview" on
page 31).
To change the menu options:
• Press (Menu) > Network on the control panel.
•For the model with a touch screen, select (Setup) > Network on the
touch screen.
You can also use this feature from the SyncThru™ Web Service. Open the
Web browser from your networked computer and type the IP address of
your machine. When SyncThru™ Web Service opens, click Settings >
Network Settings (see "Using SyncThru™ Web Service" on page 236).
Option Description
TCP/IP (IPv4)
Selects the appropriate protocol and configure
parameters to use the network environment (see "Setting
IP address" on page 140).
There are lots of parameters to be set. If you are
not sure, leave as is, or consult the network
administrator.
TCP/IP (IPv6) Selects this option to use the network environment
through IPv6 (see "IPv6 configuration" on page 152).
Ethernet
Configure the ethernet port and network transmission
speed.
Turn the power off and on after you change this
option.
802.1x
You can select the user authentication for network
communication. For detailed information consult the
network administrator.
Wi-Fi Select this option to use the wireless network (see
"Wireless network setup" on page 156).
Network
199
3. Useful Setting Menus
• Protocol Mgr.
•Protocol
Management
You can activate or deactivate the following protocols.
•HTTP: You can sets whether to use SyncThru™ Web
Service or not.
•WINS: You can configure the WINS server.
WINS(Windows Internet Name Service) is used in the
Windows operating system.
•SNMP V1/V2: You have to enable this option to use
SNMP V1/V2 protocol. Administrator’s can use SNMP
to monitor and manage machines on the network.
•SNTP: You can set SNTP (Simple Network Time
Protocol) settings. SNTP synchronizes the clocks of the
computer systems through the Internet (NTP) so there
would not be a time difference when exchanging
data.
•UPnP(SSDP): You have to enable this option to use
UPnP(SSDP) protocol.
•MDNS: You have to enable this option to use MDNS
(Multicast Domain Name System) protocol.
•SetIP: You have to enable this option to use SetIP
protocol.
•SLP: You can configure SLP (Service Location
Protocol) settings. This protocol allows host
applications to find services in a local area network
without prior configuration.
Turn the power off and on after you change this
option.
Option Description
•Network Conf.
•Network
Configuration
This list shows information on your machine’s network
connection and configuration (see "Printing a network
configuration report" on page 140).
Clear Setting
Reverts the network settings to the default values.
Turn the power off and on.
Option Description
200
3. Useful Setting Menus
Job Management
• This feature is not supported for M382xD.
• Some menus may not appear in the display depending on options or
models. If so, it is not applicable to your machine (see "Menu overview"
on page 31).
To change the menu options:
• Press (Menu) > Job Management on the control panel.
•For the model with a touch screen, select (Setup) > System on the
touch screen.
Item Description
Active Job Shows the print job lists that are waiting to be printed.
Secured Job Shows the print job lists that are secured on the disk.
Stored Job Shows the print job lists that are stored on the disk.
•Filing Policy
•File Policy
If the memory already has the same name when you
entered a new file name, you can rename or overwrite it.
201
3. Useful Setting Menus
Admin setup
Some menus may not appear in the display depending on options or
models. If so, it is not applicable to your machine (see "Menu overview" on
page 31).
To change the menu options:
•For the model with a touch screen, select (Setup) > Admin Setup on
the touch screen.
Item Description
User Access
Control
You can control user access to a machine. You can assign
different levels of permissions to use the machine to each
user.
You can also use this feature from the SyncThru™
Web Service. Open the Web browser from your
networked computer and type the IP address of
your machine. When SyncThru™ Web Service
opens, click the Security tab > User Access
Control.
Stamp
You can apply the stamp feature.
•Item: You can select the items to print on the printout
such as time, date, and etc.
•Opacity: You can select the stamp transparency.
•Position: Sets the stamp position.
Secure Release
You can set secure release settings.
•Max Job Count per User: You can set the number of
job allowed for each user.
•Smart Release:
•Release Mode:
Change Admin.
Password
Changes the machine’s password for accessing the Admin
Setup.
Firmware Upgrade To upgrade the latest firmware, turn this option "On" and
then download the firmware file.
Image Overwrite
You can set the machine to overwrite data stored in the
memory. The machine overwrites the data with different
patterns eliminating the possibilities of recovery.
Application
You can install or uninstall applications.
•Application Management: You can uninstall or
enable/disable installed applications.
•Install New Application: You can install a new
application either from a USB or by manually entering a
URL.
Item Description
202
3. Useful Setting Menus
Eco
Some menus may not appear in the display depending on options or
models. If so, it is not applicable to your machine (see "Menu overview" on
page 31).
To change the menu options:
•For the model with a touch screen, select (Eco) on the touch screen.
Item Description
Eco-On/Eco-Off View current eco mode and change on/off option.
Settings
Sets eco-related settings and change default settings.
•Default Mode: Select this to turn on or off the default
mode.
•Feature Configuration: Select the Default mode or
Custom mode. If you select the Custom mode, you can
set the settings to apply for the Eco mode.
203
3. Useful Setting Menus
Direct USB
Some menus may not appear in the display depending on options or
models. If so, it is not applicable to your machine (see "Menu overview" on
page 31).
To change the menu options:
•For the model with a touch screen, select ( Direct USB) > on the touch
screen.
Item Description
Print From Select a file to print.
File Manage Select a file to delete. You can format the USB device.
Show Space Shows the remaining space.
204
3. Useful Setting Menus
Job Status
Some menus may not appear in the display depending on options or
models. If so, it is not applicable to your machine (see "Menu overview" on
page 31).
To change the menu options:
•For the model with a touch screen, select ( Job Status) > on the touch
screen.
Item Description
Current Job Displays the list of jobs in progress and pending.
Secure Job Displays the list of jobs that are secured on the disk
Stored Job Displays the list of jobs that are stored on the disk.
Completed Job Displays the list of completed jobs.
205
3. Useful Setting Menus
Counter
Some menus may not appear in the display depending on options or
models. If so, it is not applicable to your machine (see "Menu overview" on
page 31).
To change the menu options:
•For the model with a touch screen, select (Counter) > on the touch
screen.
Item Description
Total Printed Displays the number of pages printed.
206
3. Useful Setting Menus
Help
Some menus may not appear in the display depending on options or
models. If so, it is not applicable to your machine (see "Menu overview" on
page 31).
To change the menu options:
•For the model with a touch screen, select (Help) > on the touch screen.
Item Description
Basic Taskflow Displays basic method to start your job.
Troubleshooting Displays troubleshooting information.
207
3. Useful Setting Menus
Secure Release
Some menus may not appear in the display depending on options or
models. If so, it is not applicable to your machine (see "Menu overview" on
page 31).
To change the menu options:
•For the model with a touch screen, select (Secure Release) > on the
touch screen.
Item Description
Options •Card:
•ID/PW:
•PIN:
Stored Job •ID/PW:
•PIN:
4. Special Features
This chapter explains special printing features.
• Altitude adjustment 209
• Entering various characters 210
• Printing features 213
• Using optional device features 229
• The procedures in this chapter are mainly based on Windows 7.
• It may be necessary to press OK to navigate to lower-level menus for some models.
209
4. Special Features
Altitude adjustment
Print quality is affected by atmospheric pressure, which is determined by the
height of the machine above sea level. The following information will guide you
on how to set your machine for the best print quality.
Before you set the altitude value, determine the altitude where you are.
1High 4
2High 3
3High 2
4High 1
5Normal
You can set the altitude value from Device Settings in Samsung Easy Printer
Manager program.
• For Windows and Mac users, you set from Samsung Easy Printer Manager
> (Switch to advanced mode) > Device Settings, see "Device
Settings" on page 242.
• If your machine is connected to the network, you can set the altitude via
SyncThru™ Web Service (see "Using SyncThru™ Web Service" on page
236).
• You can also set the altitude in System Setup option on the machine’s
display (see "Machine’s basic settings" on page 37).
0
4,000 m
(13,123 ft)
3,000 m
(9,842 ft)
2,000 m
(6,561 ft)
1,000 m
(3,280 ft)
4
3
2
1
5,000 m
(16,404 ft)
5
210
4. Special Features
Entering various characters
M382xND/M382xDW/M402xND only.
As you perform various tasks, you may need to enter names and numbers.
1
Entering alphanumeric characters
Press the button until the correct letter appears on the display. For example, to
enter the letter O, press 6, labeled with MNO. Each time you press 6, the display
shows a different letter, M, N, O, m, n, o and finally 6. To find the letter that you
want to enter, see "Keypad letters and numbers" on page 210.
• You can enter a space by pressing 1 twice.
• To delete the last digit or character, press the arrow button.
2
Keypad letters and numbers
• Special character sets may differ from your machine depending on its
options or the models.
• Some of the follow key values may not appear depending on the job you
are doing.
Key Assigned numbers, letters, or characters
1@ / . ’ 1
2A B C a b c 2
3D E F d e f 3
4 G H I g h i 4
5J K L j k l 5
6M N O m n o 6
7P Q R S p q r s 7
8T U V t u v 8
9W X Y Z w x y z 9
0& + - , 0
* * % ^ _ ~ ! # $ ( ) [ ]
(These symbols are available when you type for network authentication.)
# # = | ? " : { } < > ;
(These symbols are available when you type for network authentication.)
Entering various characters
211
4. Special Features
3
Understanding the pop-up keyboard
• This feature is only available for models with a touch screen.
• Some of the follow key values may not appear depending on the job you
are doing.
You can enter alphabet characters, numbers, diacritical marks, or special
symbols using the keyboard on the home screen. This keyboard is specially
arranged like a normal keyboard for better usability to the user.
Entering various characters
212
4. Special Features
Touch the input area where you need to enter alphabet characters, numbers,
diacritical marks, or special symbols and the keyboard pops up on the screen.
•: Returns to the upper menu.
: Deletes all characters in the input area.
: Deletes character in the input area.
: Moves the cursor between characters in the input area.
: Saves and closes input result.
: Enters a blank between characters. Also, you can insert a pause.
: Toggles between lowercase keys and uppercase keys.
: Switches from the alphanumeric keyboard to the numbers or special
symbols keyboard.
: Switches diacritical characters.

213
4. Special Features
Printing features
• For basic printing features, refer to the Basic Guide (see "Basic printing"
on page 50).
• This feature may not be available depending on model or optional goods
(see "Features by models" on page 8).
4
Changing the default print settings
1Click the Windows Start menu.
2 Select Control Panel > Devices and Printers.
3 Right-click on your machine.
4 Select Printing preferences.
If Printing preferences has a ▶, you can select other printer drivers
connected to the selected printer.
5 Change the settings on each tab.
6 Click OK.
If you want to change the settings for each print job, change it in Printing
Preferences.
5
Setting your machine as a default machine
1Click the Windows Start menu.
2 Select Control Panel > Devices and Printers.
3 Select your machine.
4 Right-click your machine and select Set as Default Printer.
If Printing preferences has a ▶, you can select other printer drivers
connected to the selected printer.
6
Using advanced print features
•XPS printer driver: used to print XPS file format.
- See "Features by models" on page 8.
Printing features
214
4. Special Features
- The XPS printer driver can be installed only on Windows Vista OS or
higher.
- For models that provide XPS driver from the Samsung website, http:/
/www.samsung.com > find your product> Support or downloads.
Printing to a file (PRN)
You will sometimes need to save the print data as a file.
1Check the Print to file box in the Print window.
2 Click Print.
3 Type in the destination path and the file name, and then click OK.
For example, c:\Temp\file name.
If you type in only the file name, the file is automatically saved in My
Documents, Documents and Settings, or Users. The saved folder may
differ, depending on your operating system or the application you are
using.
Printing features
215
4. Special Features
Understanding special printer features
You can use advanced printing features when using your machine.
To take advantage of the printer features provided by your printer driver, click Properties or Preferences in the application’s Print window to change the print
settings. The machine name, that appears in the printer properties window may differ depending on the machine in use.
• Some menus may not appear on the display depending on options or models. If so, it is not applicable to your machine.
• Select the Help menu or press F1 on your keyboard and click on any option you want to know about (see "Using help" on page 52).
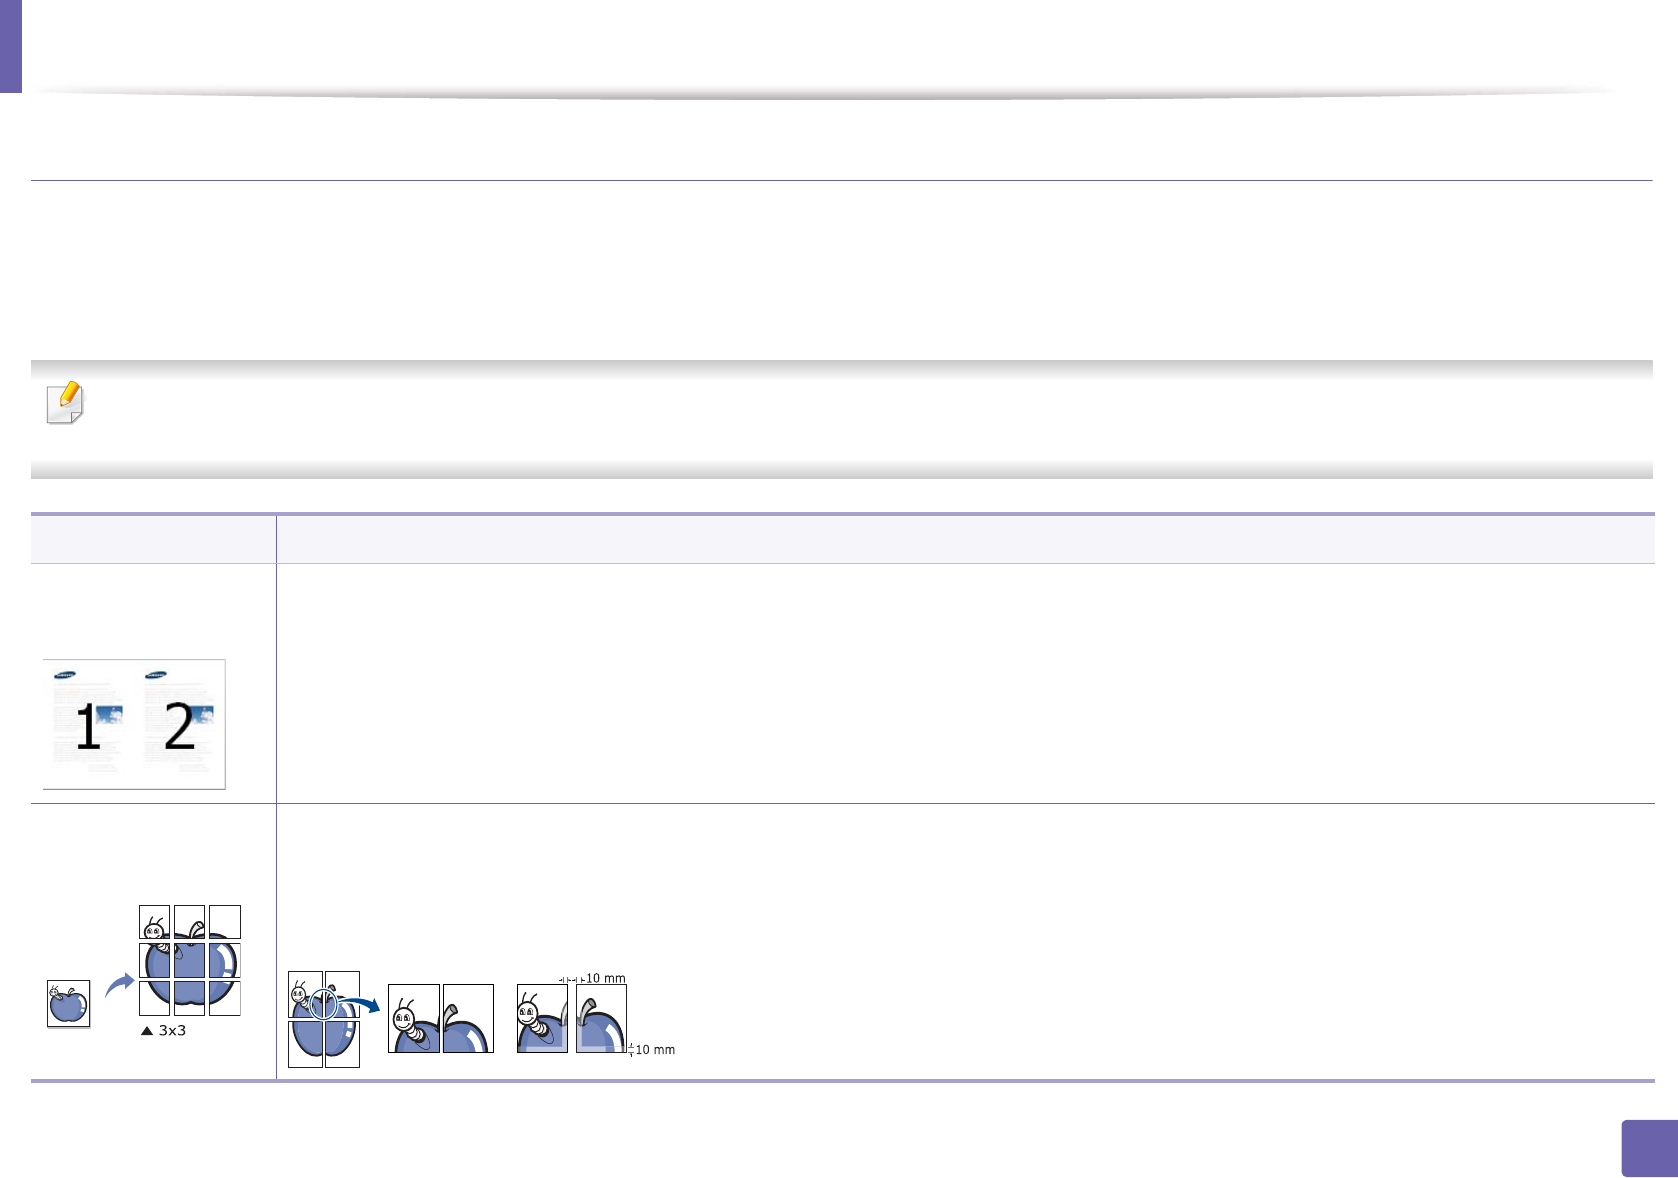
Item Description
Multiple Pages per
Side
Selects the number of pages to print on a single sheet of paper. To print more than one page per sheet, the pages will be reduced in size and
arranged in the order you specify. You can print up to 16 pages on one sheet.
Poster Printing
Prints a single-page document onto 4 (Poster 2x2), 9 (Poster 3x3), or 16 (Poster 4x4) sheets of paper, for the purpose of pasting the sheets
together to form one poster-size document.
Select the Poster Overlap value. Specify Poster Overlap in millimeters or inches by selecting the radio button on the upper right of Basic tab
to make it easier to paste the sheets together.
Printing features
216
4. Special Features
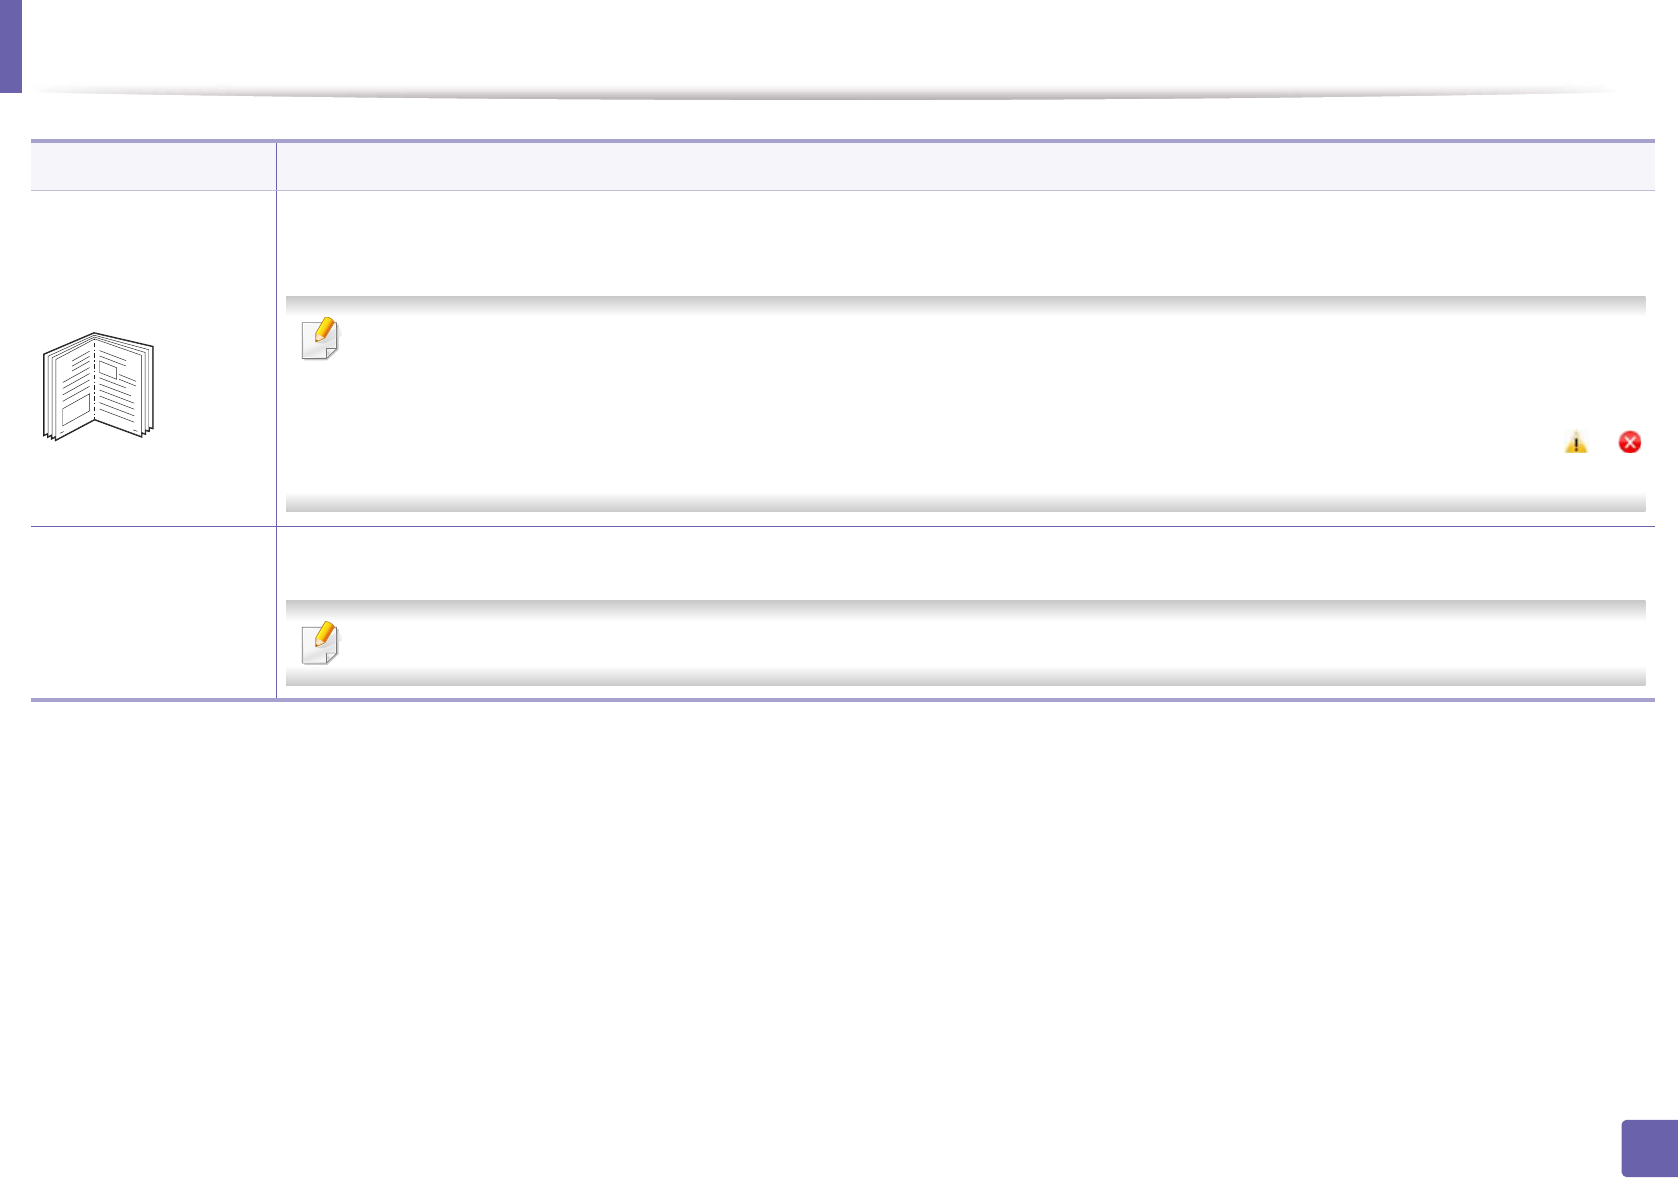
Booklet Printinga
Prints your document on both sides of a sheet of paper and arranges the pages so that the paper can be folded in half after printing to produce
a booklet.
• If you want to make a booklet, you need to print on Letter, Legal, A4, US Folio, or Oficio sized print media.
• The Booklet Printing option is not available for all paper sizes. Select the available paper Size option under the Paper tab to see what
paper sizes are available.
• If you select an unavailable paper size, this option can be automatically canceled. Select only available paper (paper without or
mark).
Double-sided
Printing
Print on both sides of a sheet of paper (duplex). Before printing, decide how you want your document oriented.
You can use this feature with Letter, Legal, A4, US Folio or Oficio sized paper
Item Description
8
9
Printing features
217
4. Special Features
Double-sided
Printing
•Printer Default: If you select this option, this feature is determined by the settings you have selected on the control panel of the machine.
•None: Disables this feature.
•Long Edge: This option is the conventional layout used in bookbinding.
•Short Edge: This option is the conventional layout used in calendars.
•Reverse Double-Sided Printing: Check this option to reverse the print order when duplex printing.
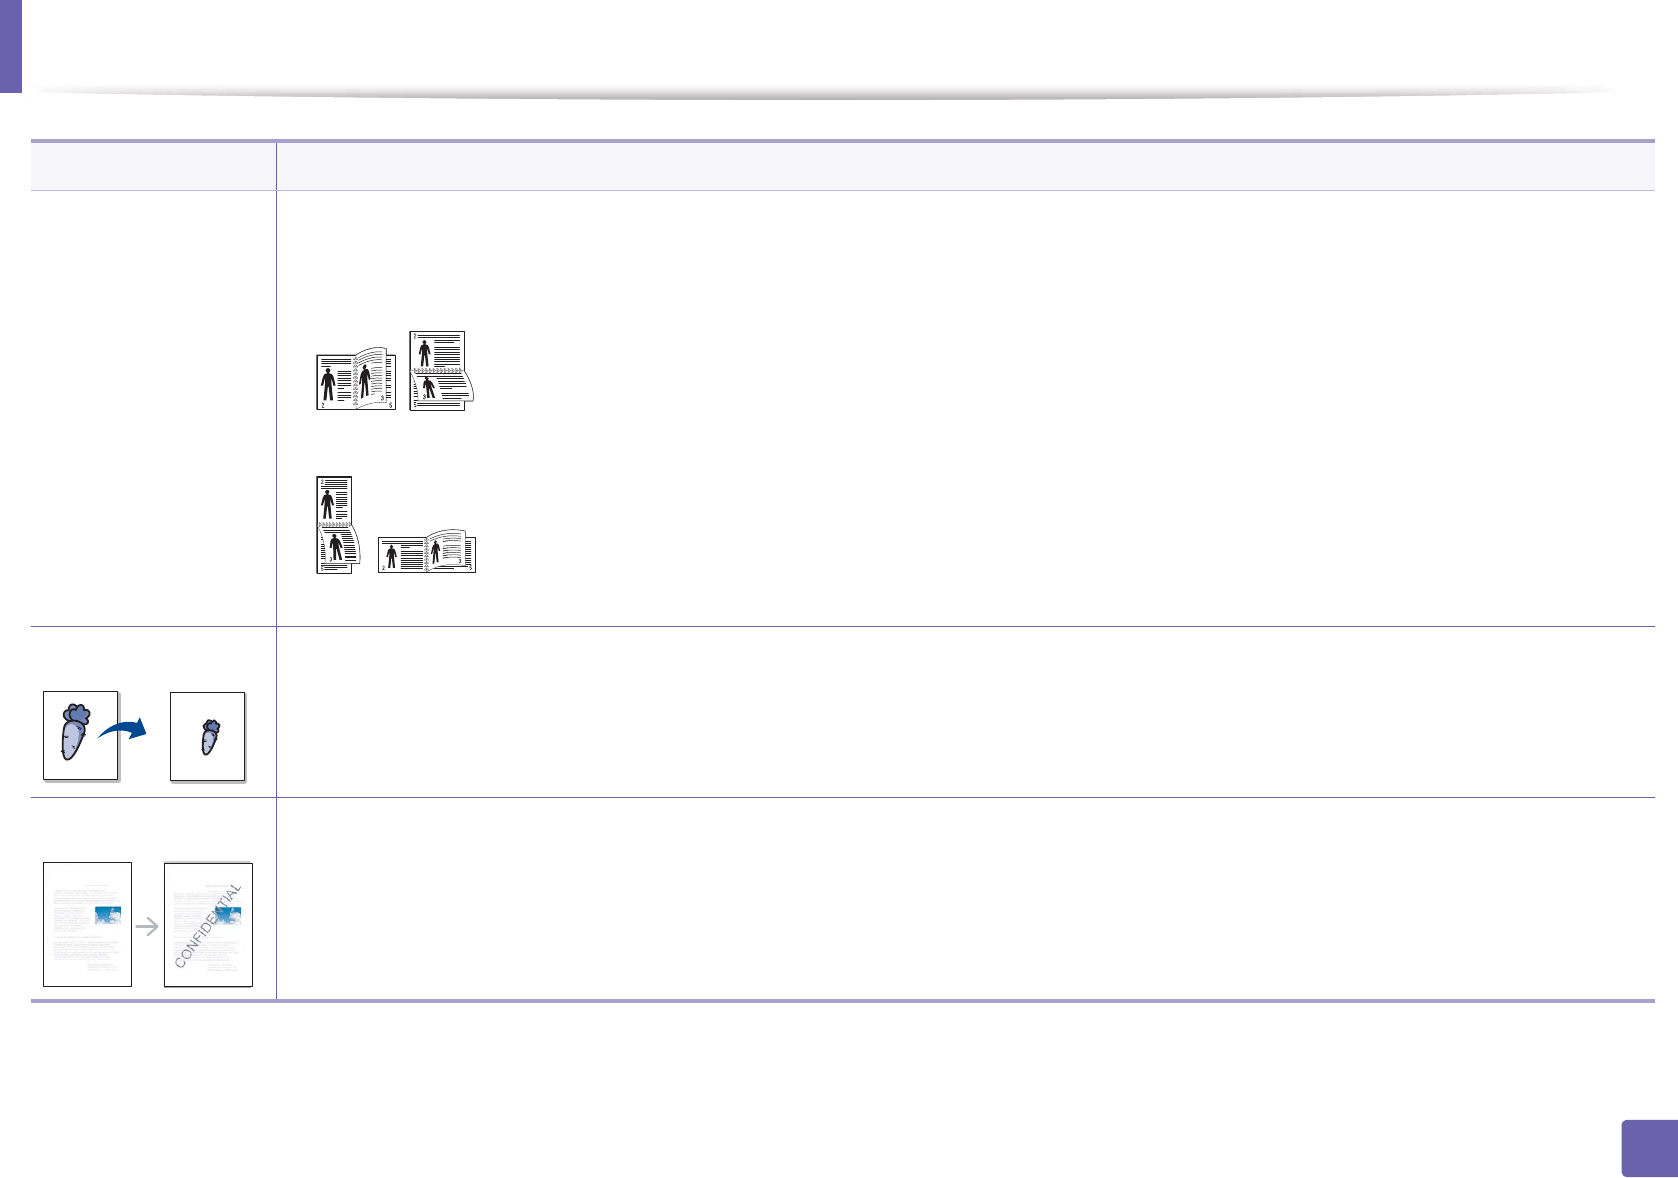
Paper Options Changes the size of a document to appear larger or smaller on the printed page by entering in a percentage by which to enlarge or decrease the
document.
Watermark The watermark option allows you to print text over an existing document. For example, you use it when you want to have large gray letters
reading “DRAFT” or “CONFIDENTIAL” printed diagonally across the first page or all pages of a document.
Item Description
Printing features
218
4. Special Features
Watermark
(Creating a
watermark)
a To change the print settings from your software application, access Printing Preferences.
b Click the Advanced tab, select Edit from the Watermark drop-down list. The Edit Watermarks window appears.
c Enter a text message in the Watermark Message box.
You can enter up to 256 characters. The message displays in the preview window.
Watermark
(Editing a watermark)
a To change the print settings from your software application, access Printing Preferences.
b Click the Advanced tab, select Edit from the Watermark drop-down list. The Edit Watermarks window appears.
c Select the watermark you want to edit from the Current Watermarks list and change the watermark message and options.
d Click Update to save the changes.
e Click OK or Print until you exit the Print window.
Watermark
(Deleting a
watermark)
a To change the print settings from your software application, access Printing Preferences.
b Click the Advanced tab, select Edit from the Watermark drop-down list. The Edit Watermarks window appears.
c Select the watermark you want to delete from the Current Watermarks list and click Delete.
d Click OK or Print until you exit the Print window.
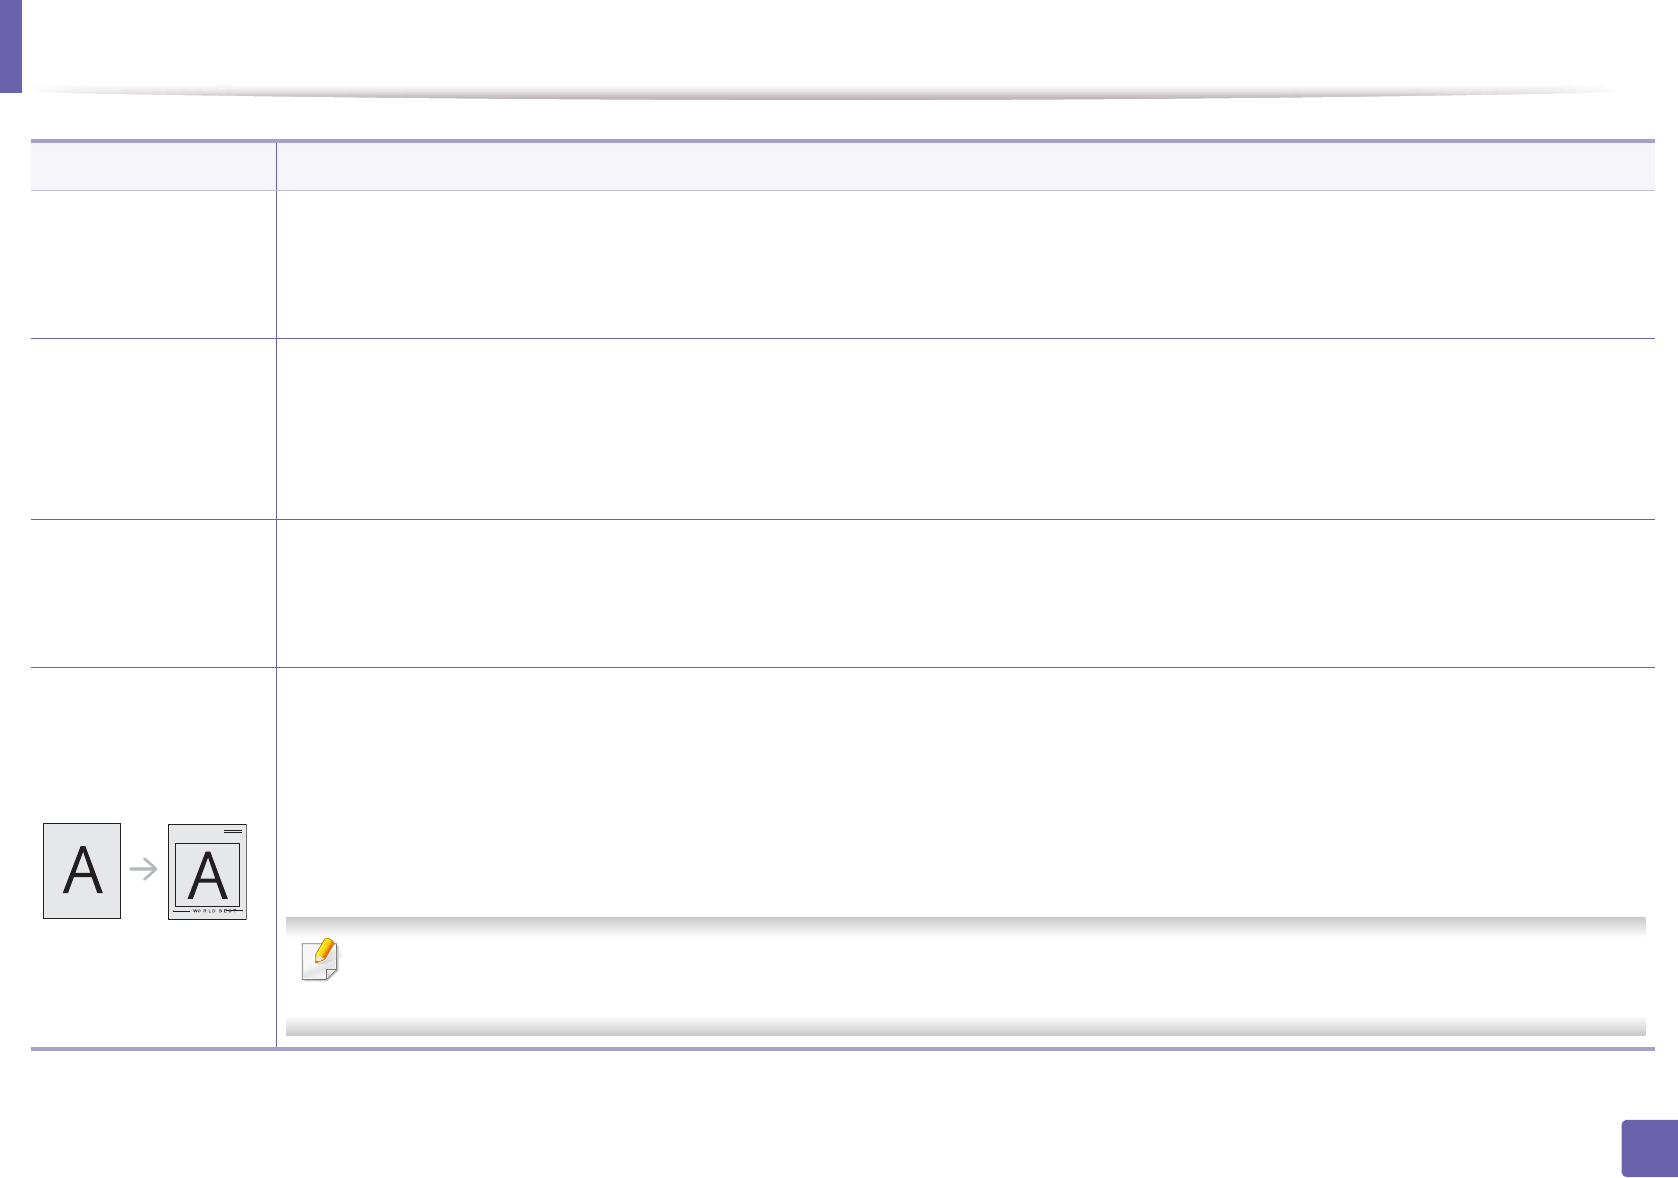
Overlaya
This option is available only when you use the PCL/SPL printer driver (see "Software" on page 9).
An overlay is text and/or images stored in the computer hard disk drive (HDD) as a special file format that can be printed on any document.
Overlays are often used to take the place of letterhead paper. Rather than using preprinted letterhead, you can create an overlay containing
exactly the same information that is currently on your letterhead. To print a letter with your company’s letterhead, you do not need to load
preprinted letterhead paper in the machine: just print the letterhead overlay on your document.
To use a page overlay, you must create a new page overlay containing your logo or image.
• The overlay document size must be the same as the document you print with the overlay. Do not create an overlay with a watermark.
• The resolution of the overlay document must be the same as that of the document you will print with the overlay.
Item Description
Printing features
219
4. Special Features
Overlaya
(Creating a new page
overlay)
a To save the document as an overlay, access Printing Preferences.
b Click the Advanced tab, and select Edit from the Text drop-down list. Edit Overlay window appears.
c In the Edit Overlay window, click Create.
d In the Save As window, type a name up to eight characters in the File name box. Select the destination path, if necessary (The default is
C:\Formover).
e Click Save. The name appears on the Overlay List.
f Click OK or Print until you exit the Print window.
The file is not printed. Instead, it is stored on your computer hard disk drive.
Overlaya
(Using a page overlay)
a Click the Advanced tab.
b Select the desired overlay from the Text drop-down list.
c If the overlay file you want does not appear in the Text drop-down list, select Edit... from the list and click Load. Select the overlay file you
want to use.
If you have stored the overlay file you want to use in an external source, you can also load the file when you access the Open window.
After you select the file, click Open. The file appears in the Overlay List box and is available for printing. Select the overlay from the Overlay
List box.
d If necessary, check Confirm Page Overlay When Printing box. If this box is checked, a message window appears each time you submit a
document for printing, asking you to confirm printing an overlay on your document.
If this box is not checked and an overlay has been selected, the overlay automatically prints with your document.
e Click OK or Print until you exit the Print window.
Overlaya
(Deleting a page
overlay)
a In the Printing Preferences window, click the Advanced tab.
b Select Edit in the Text drop down list.
c Select the overlay you want to delete from the Overlay List box.
d Click Delete.
e When a confirming message window appears, click Yes.
f Click OK or Print until you exit the Print window. You can delete page overlays that you no longer use.
Item Description
Printing features
220
4. Special Features
Print Modeb
• This feature is available only if you have installed the optional memory or mass storage device (HDD) (see "Variety feature" on page
10).
• Some menus may not appear on the display depending on options or models. If so, it is not applicable to your machine.
• To enable this feature, check Storage Options (see "Setting Device Options" on page 76).
• Without installing the optional memory or mass storage device (HDD) in the machine, the RAM disk feature provides only 3 options:
Normal, Proof, and Confidential.
•Print Mode: The default Print Mode is Normal, which is for printing without saving the printing file in the memory.
-Normal: This mode prints without storing your document in the optional memory.
-Proof: This mode is useful when you print more than one copy. You can print one copy first to check, then print the rest of the copies later.
-Confidential: This mode is used for printing confidential documents. You need to enter a password to print.
-Store: Select this setting to save a document in the optional memory or mass storage device (HDD) without printing.
-Store and Print: This mode is used when printing and storing document at the same time.
-Spool: This option can be useful when handling large amounts of data. If you select this setting, the printer spools the document into the
optional memory or mass storage device (HDD) and then prints it from the optional memory or mass storage device (HDD) queue,
decreasing the computer’s work load.
-Print Schedule: Select this setting to print the document at a specified time.
•Job Name: This option is used when you need to find a stored file using the control panel.
•User ID: This option is used when you need to find a stored file using the control panel. The user name automatically appears as the
user name that you use to log on Windows.
•Enter Password: If the Property of the document you selected is secured, you have to enter the password for the document. This
option is used for loading a stored file using the control panel.
•Confirm Password: Re-enter the password to confirm it.
Item Description
Printing features
221
4. Special Features
Job Accountingb
This option allows you to print with the given permission.
•User permission: If you check this option, only users with user permission can start a print job.
•Group permission: If you check this option, only groups with group permission can start a print job.
• Select the Help menu or press F1 on your keyboard and click on any option you want to know about (see "Using help" on page 52).
• Administrators can enable job accounting and configure permissions in the control panel or SyncThru™ Web Admin Service.
a. This option is not available when you use XPS driver.
b. Not supported for M382xD.
Item Description

Printing features
222
4. Special Features
7
Using Direct Printing Utility
• This feature is not supported for M382xD.
• Direct Printing Utility may not be available depending on model or
optional goods (see "Software" on page 9).
• Available for Windows OS users only.
What is Direct Printing Utility?
Direct Printing Utility is a program that sends the PDF files directly to your
machine to print without having to opening the file.
To install this program:
Download the software from the Samsung website then unpack and install it:
(http://www.samsung.com > find your product > Support or Downloads).
• You cannot print PDF files that are restricted. Deactivate the printing
restriction feature and retry printing.
• You cannot print PDF files that are restricted by a password. Deactivate
the password feature, and retry printing.
• Whether or not a PDF file can be printed using the Direct Printing Utility
program depends on how the PDF file was created.
• The Direct Printing Utility program supports PDF version 1.7 and below.
For higher versions, you must open the file to print it.
Printing
There are several ways you can print using the Direct Printing Utility.
1From the Start menu select Programs or All Programs .
• For Windows 8, from Charms, select Search > Apps.
2 Find Samsung Printers > Direct Printing Utility.
3 Select your machine from the Select Printer drop-down list and click
Browse.
4 Select the file you wish to print and click Open.
The file is added in the Select Files section.
5 Customize the machine settings for your needs.
6 Click Print. The selected PDF file is sent to the machine.
Printing features
223
4. Special Features
Using the right-click menu
1Right-click on the PDF file to print and select Direct Printing.
The Direct Printing Utility window appears with the PDF file is added.
2 Select the machine to use.
3 Customize the machine settings.
4 Click Print. The selected PDF file is sent to the machine.
8
Mac printing
Some features may not be available depending on models or options. It
means that the features are not supported.
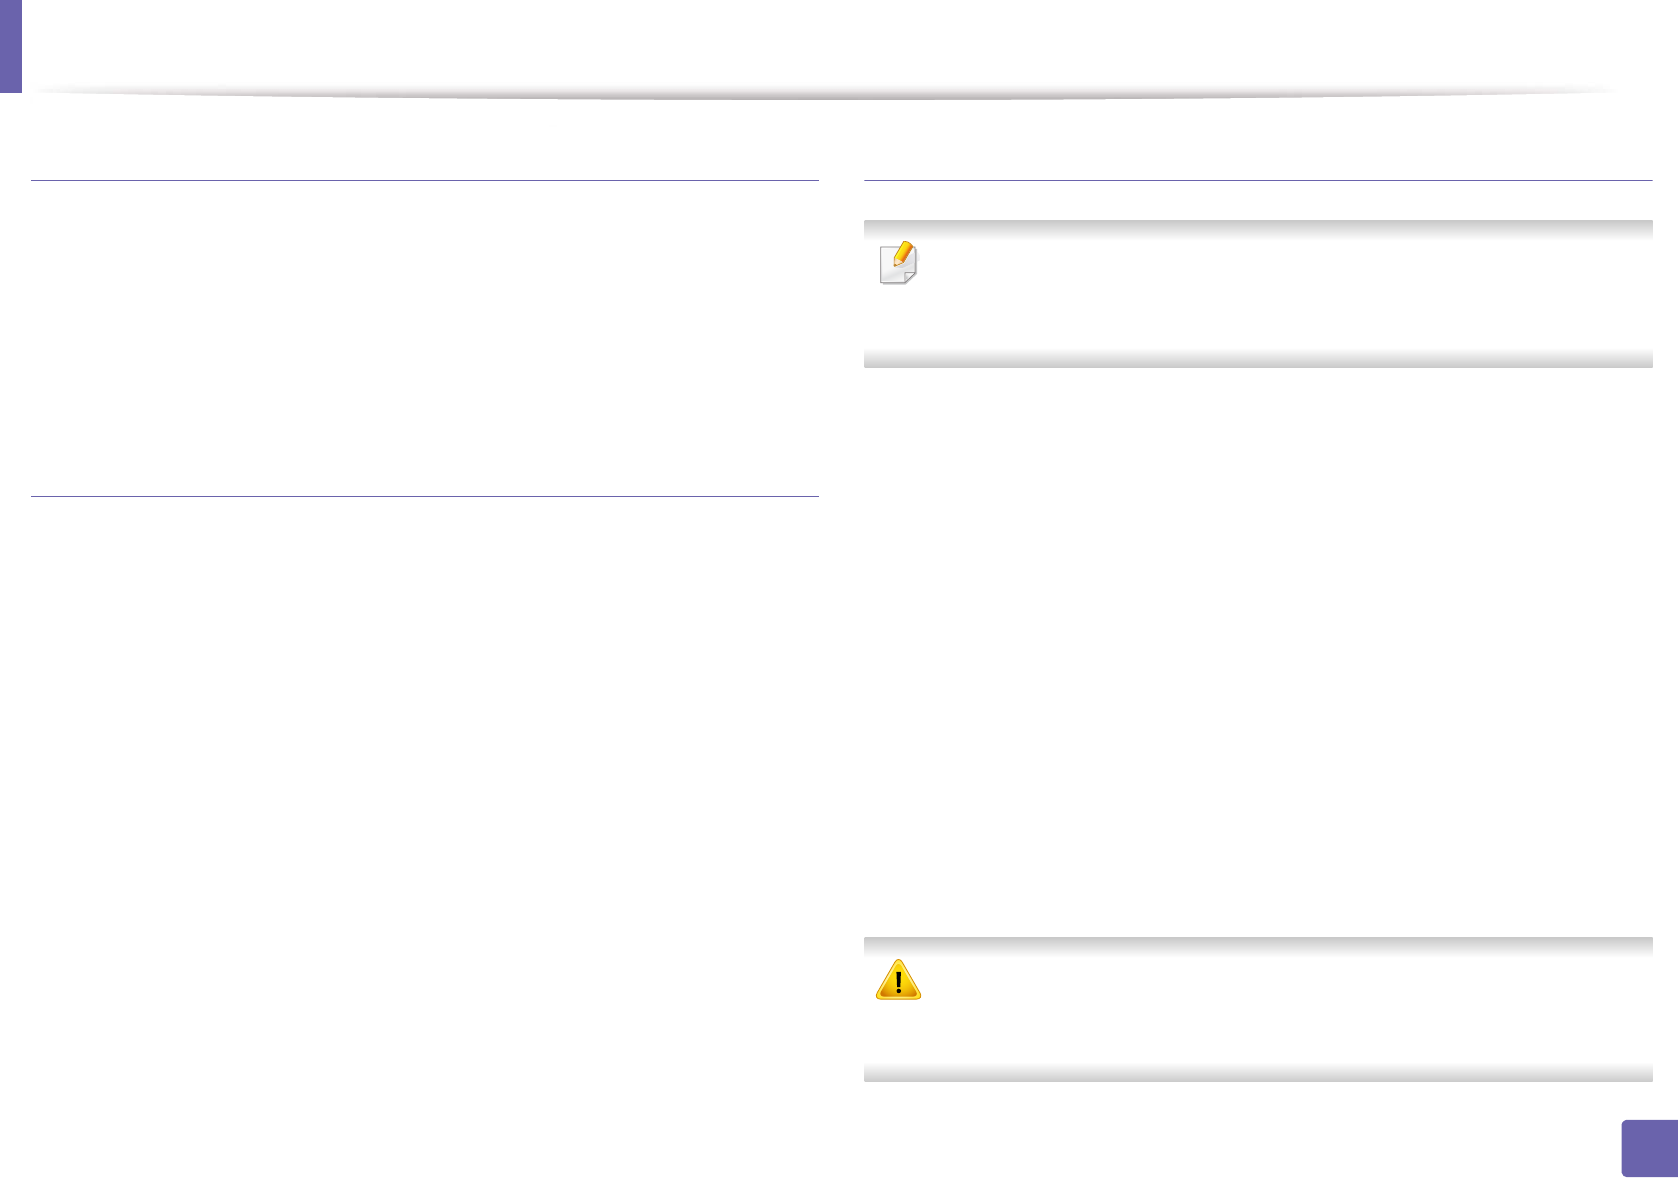
Printing a document
When you print with a Mac, you need to check the printer driver settings in each
application you use. Follow the steps below to print from a Mac:
1Open the document to print.
2 Open the File menu and click Page Setup (Document Setup in some
applications).
3 Choose your paper size, orientation, scaling, other options, and make
sure that your machine is selected. Click OK.
4 Open the File menu and click Print.
5 Choose the number of copies and indicate which pages to print.
6 Click Print.
Printing features
224
4. Special Features
Changing printer settings
You can use advanced printing features when using your machine.
Open an application and select Print from the File menu. The machine name,
which appears in the printer properties window, may differ depending on the
machine in use. Except for the name, the composition of the printer properties
window is similar to the following.
Printing multiple pages on one sheet
You can print more than one page on a single sheet of paper. This feature
provides a cost-effective way to print draft copies.
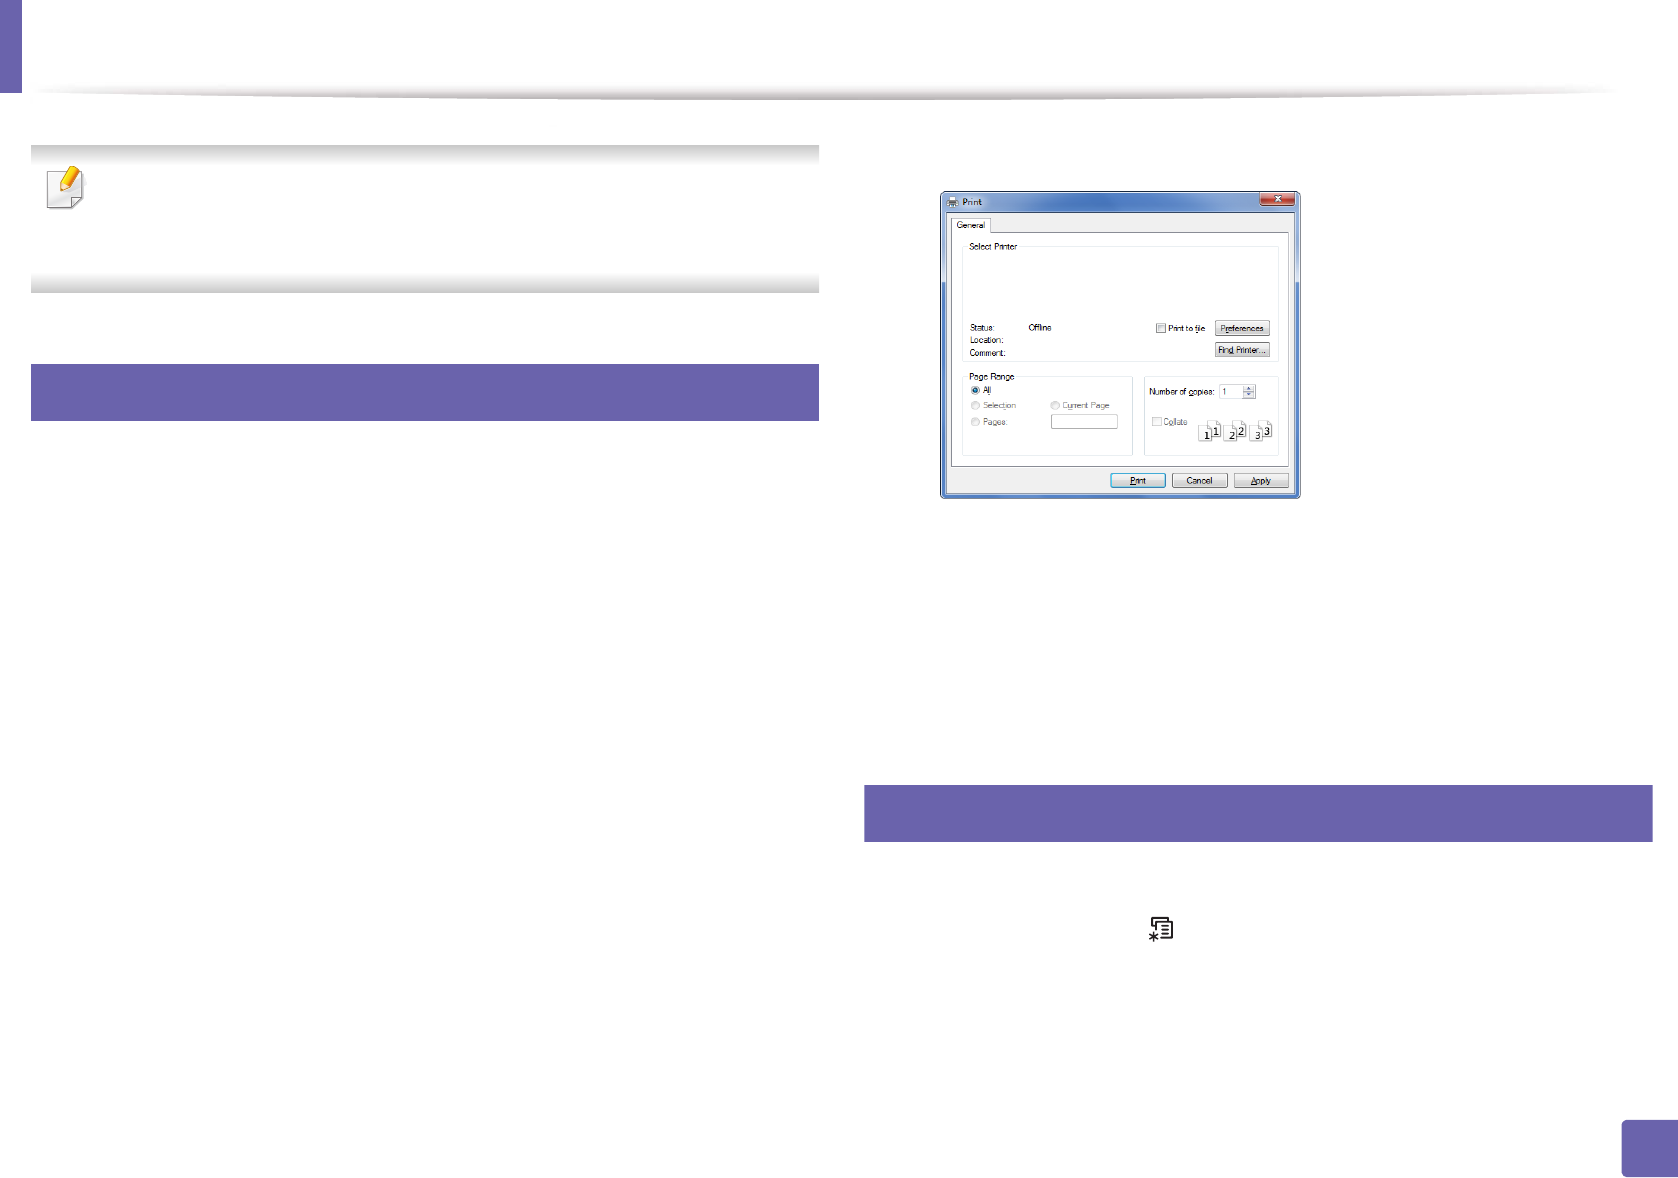
1Open an application, and select Print from the File menu.
2 Select Layout from the drop-down list under Orientation. In the Pages
per Sheet drop-down list, select the number of pages you want to print
on one sheet of paper.
3 Select the other options to use.
4 Click Print.
The machine prints the selected number of pages to print on one sheet
of paper.
Printing on both sides of the paper
Some features may not be available depending on models or options. It
means that the features are not supported (see "Variety feature" on page
10).
Before printing in the duplex mode, decide on which edge you will be binding
your finished document. The binding options are, as follows:
•Long-Edge Binding: This option is the conventional layout used in book
binding.
•Short-Edge Binding: This option is the type often used with calendars.
1From your Mac application, select Print from the File menu.
2 Select Layout from the drop-down list under Orientation.
3 Select a binding orientation from the Two-Sided option.
4 Select the other options to use.
5 Click Print and the machine prints on both sides of the paper.
If you print more than 2 copies, the first copy and the second copy might
print on the same sheet of paper. Avoid printing on both sides of paper
when you are printing more than 1 copy.
Printing features
225
4. Special Features
Using help
Click the question mark on the bottom-left corner of the window and click on
the topic you want to know about. A pop-up window appears with information
about that option's feature, which is provided from the driver.
9
Linux printing
Some features may not be available depending on models or options. It
means that the features are not supported.
Printing from applications
There are a lot of Linux applications that allow you to print using Common UNIX
Printing System (CUPS). You can print on your machine from any such
application.
1Open the document to print.
2 Open the File menu and click Page Setup (Print Setup for some
applications).
3 Choose your paper size, orientation, and make
sure that your machine is selected. Click Apply.
4 Open the File menu and click Print.
5 Select your machine to print.
6 Choose the number of copies and indicate which pages to print.
7 Change other printing options in each tab, if necessary.
8 Click Print.
Automatic duplex printing may not be available depending on models. You
can alternatively use the lpr printing system or other applications for odd-
even printing (see "Features by models" on page 8).

Printing features
226
4. Special Features
Printing files
You can print text, image, pdf files on your machine using the standard
CUPS directly from the command line interface. The CUPS lp or lpr utility allows
you to do that. You can print these files by using below command format.
"lp -d <printer name> -o <option> <file name>"
Please refer to lp or lpr man page on your system for more details.
Configuring Printer Properties
Using the Printer Properties window provided by the Printers configuration,
you can change the various properties for your machine as a printer.
1Open the Unified Driver Configurator.
If necessary, switch to Printers configuration.
2 Select your machine on the available printers list and click Properties.
3 The Printer Properties window appears.
The following five tabs display at the top of the window:
•General: Allows you to change the printer location and name. The
name entered in this tab displays on the printer list in Printers
configuration.
•Connection: Allows you to view or select another port. If you change
the machine port from USB to parallel or vice versa while in use, you
must re-configure the machine port in this tab.
•Driver: Allows you to view or select another machine driver. By
clicking Options, you can set the default device options.
•Jobs: Shows the list of print jobs. Click Cancel job to cancel the
selected job and select the Show completed jobs check box to see
previous jobs on the job list.
•Classes: Shows the class that your machine is in. Click Add to Class
to add your machine to a specific class or click Remove from Class
to remove the machine from the selected class.
4 Click OK to apply the changes and close the Printer Properties window.
Printing features
227
4. Special Features
10
Unix printing
Some features may not be available depending on models or options. It
means that the features are not supported (see "Features by models" on
page 8).
Proceeding the print job
After installing the printer, choose any of the image, text, or PS files to print.
1Execute “printui <file_name_to_print>” command.
For example, if you are printing “document1”
printui document1
This will open the UNIX Printer Driver Print Job Manager in which the
user can select various print options.
2 Select a printer that has been already added.
3 Select the printing options from the window such as Page Selection.
4 Select how many copies are needed in Number of Copies.
To take advantage of the printer features provided by your printer driver,
press Properties.
5 Press OK to start the print job.
Changing the machine settings
The UNIX printer driver Print Job Manager in which the user can select various
print options in printer Properties.
The following hot keys may also be used: “H” for Help, “O” for OK, “A” for Apply,
and “C” for Cancel.
General tab
•Paper Size: Set the paper size as A4, Letter, or other paper sizes, according
to your requirements.
•Paper Type: Choose the type of the paper. Options available in the list box
are Printer Default, Plain, and Thick.
•Paper Source: Select from which tray the paper is used. By default, it is Auto
Selection.
•Orientation: Select the direction in which information is printed on a page.
•Duplex: Print on both sides of paper to save paper.

Printing features
228
4. Special Features
Automatic duplex printing may not be available depending on models. You
can alternatively use the lpr printing system or other applications for odd-
even printing.
•Multiple pages: Print several pages on one side of the paper.
•Page Border: Choose any of the border styles (e.g., Single-line hairline,
Double-line hairline)
Image tab
In this tab, you can change the brightness, resolution, or image position of your
document.
Text tab
Set the character margin, line space, or the columns of the actual print output.
Margins tab
•Use Margins: Set the margins for the document. By default, margins are not
enabled. The user can change the margin settings by changing the values in
the respective fields. Set by default, these values depend on the page size
selected.
•Unit: Change the units to points, inches, or centimeters.
Printer-Specific Settings tab
Select various options in the JCL and General frames to customize various
settings. These options are specific to the printer and depend on the PPD file.
229
4. Special Features
Using optional device features
• This feature is not supported for M382xD.
• Some features may not be available depending depending on model or
optional goods (see "Variety feature" on page 10).
11
From the printer driver
If you install the optional device, you can use advanced printing features, such
as proofing a job and printing a private job in the Print window. Check the mass
storage (HDD) or RAM disk option in Device Options, then you can select the
various features from Print Mode (see "Setting Device Options" on page 76).
1Open the document you want to print.
2 Select Print from the File menu. The Print window appears.
3 Select your printer driver from the Select Printer list.
4 Click Properties or Preferences .
5 Click the each tab then select Print Mode.
6 Select the option you want (see "Understanding special printer features"
on page 215).
12
From the control panel
If your machine has optional mass storage device (HDD) or RAM disk, you can
use these features from the (Menu) button> System Setup > Job
Management.
OR