Samsung Electronics Co SLM4025NX Mono Laser Printer User Manual MagpieN english
Samsung Electronics Co Ltd Mono Laser Printer MagpieN english
UserManual.wiki
>
Samsung Electronics Co
>
SLM4025NX User Manual
>
Users Manual 6
Contents
1.
Users Manual 1
2.
Users Manaul 2
3.
Users Manual 3
4.
Users Manual 4
5.
Users Manual 5
6.
Users Manual 6
7.
Users Manual 7
Users Manual 6
Navigation menu
Upload a User Manual
Namespaces
Wiki Guide
HTML
PDF
Info
Views
User Manual
Discussion / Help
Navigation
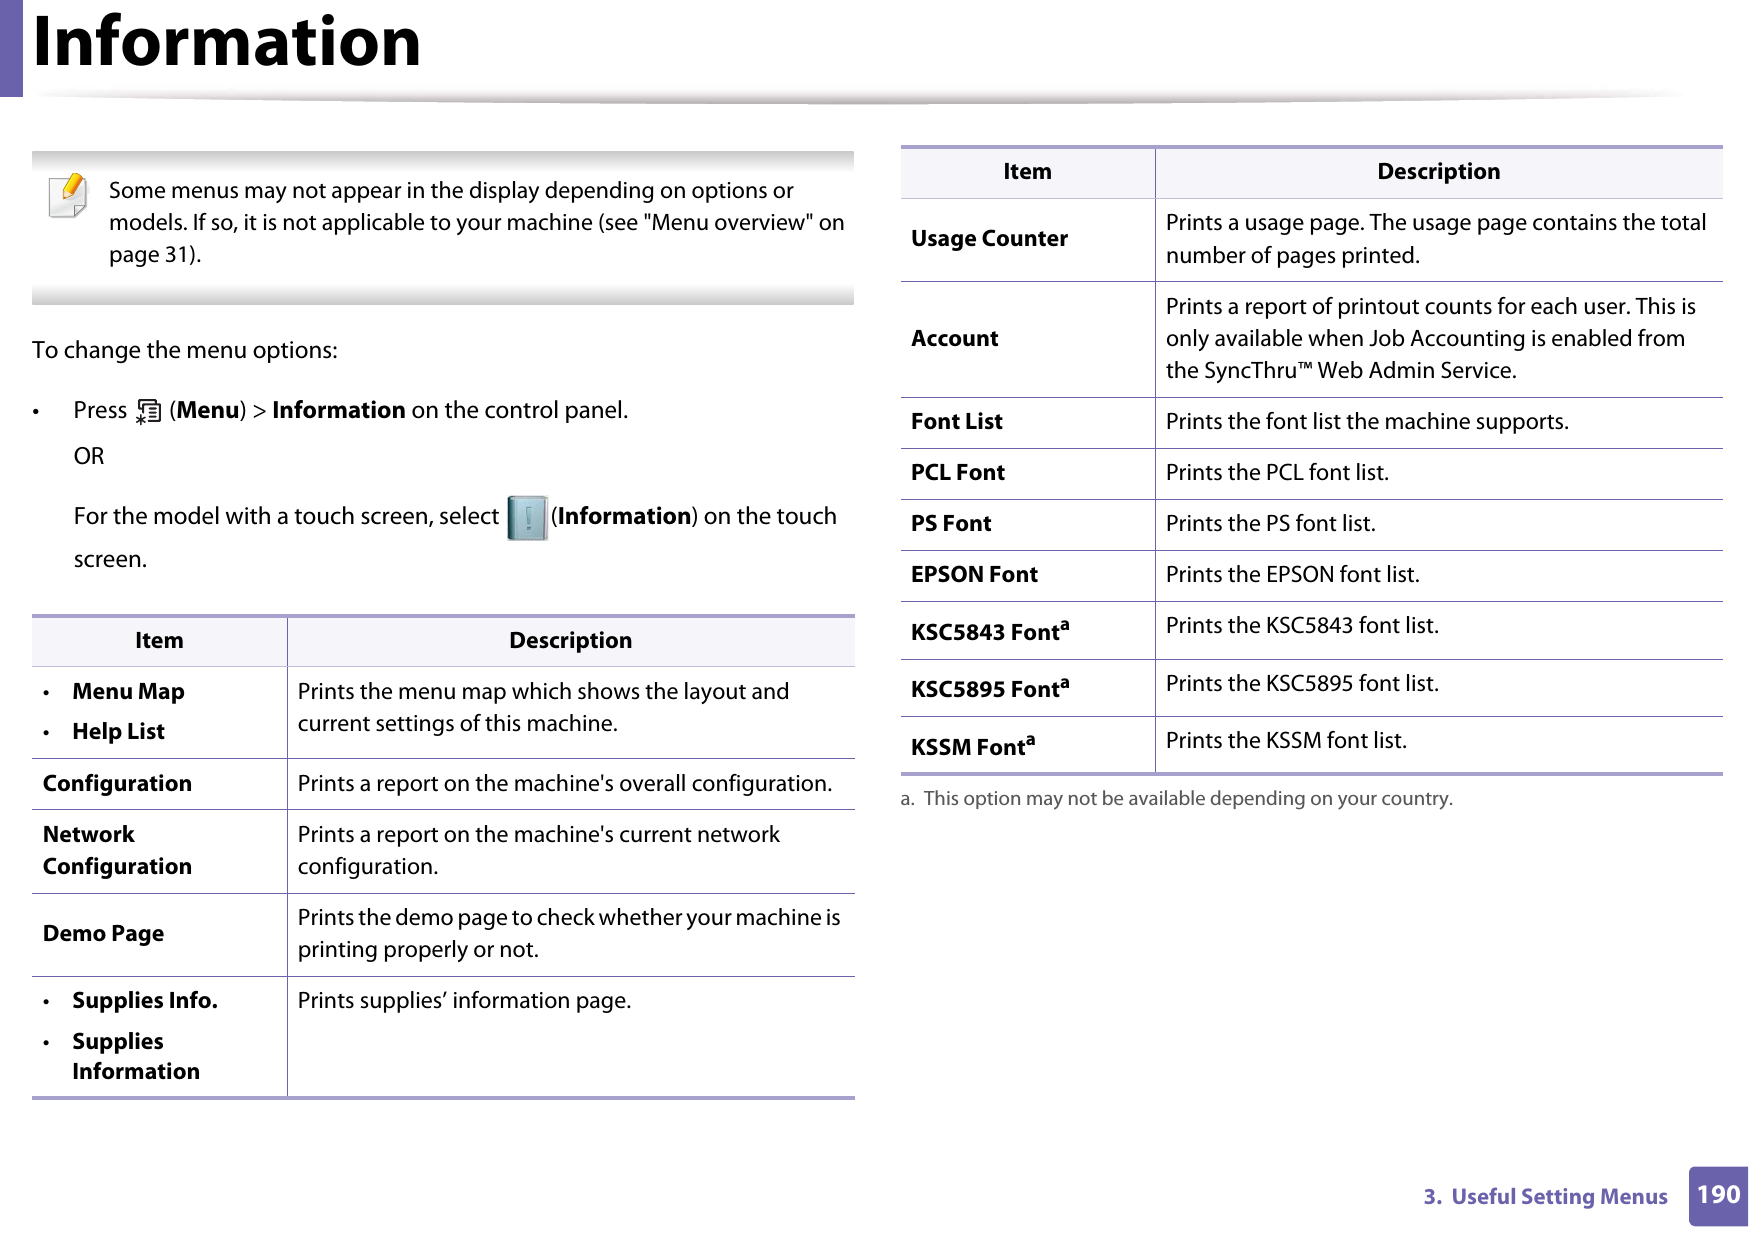
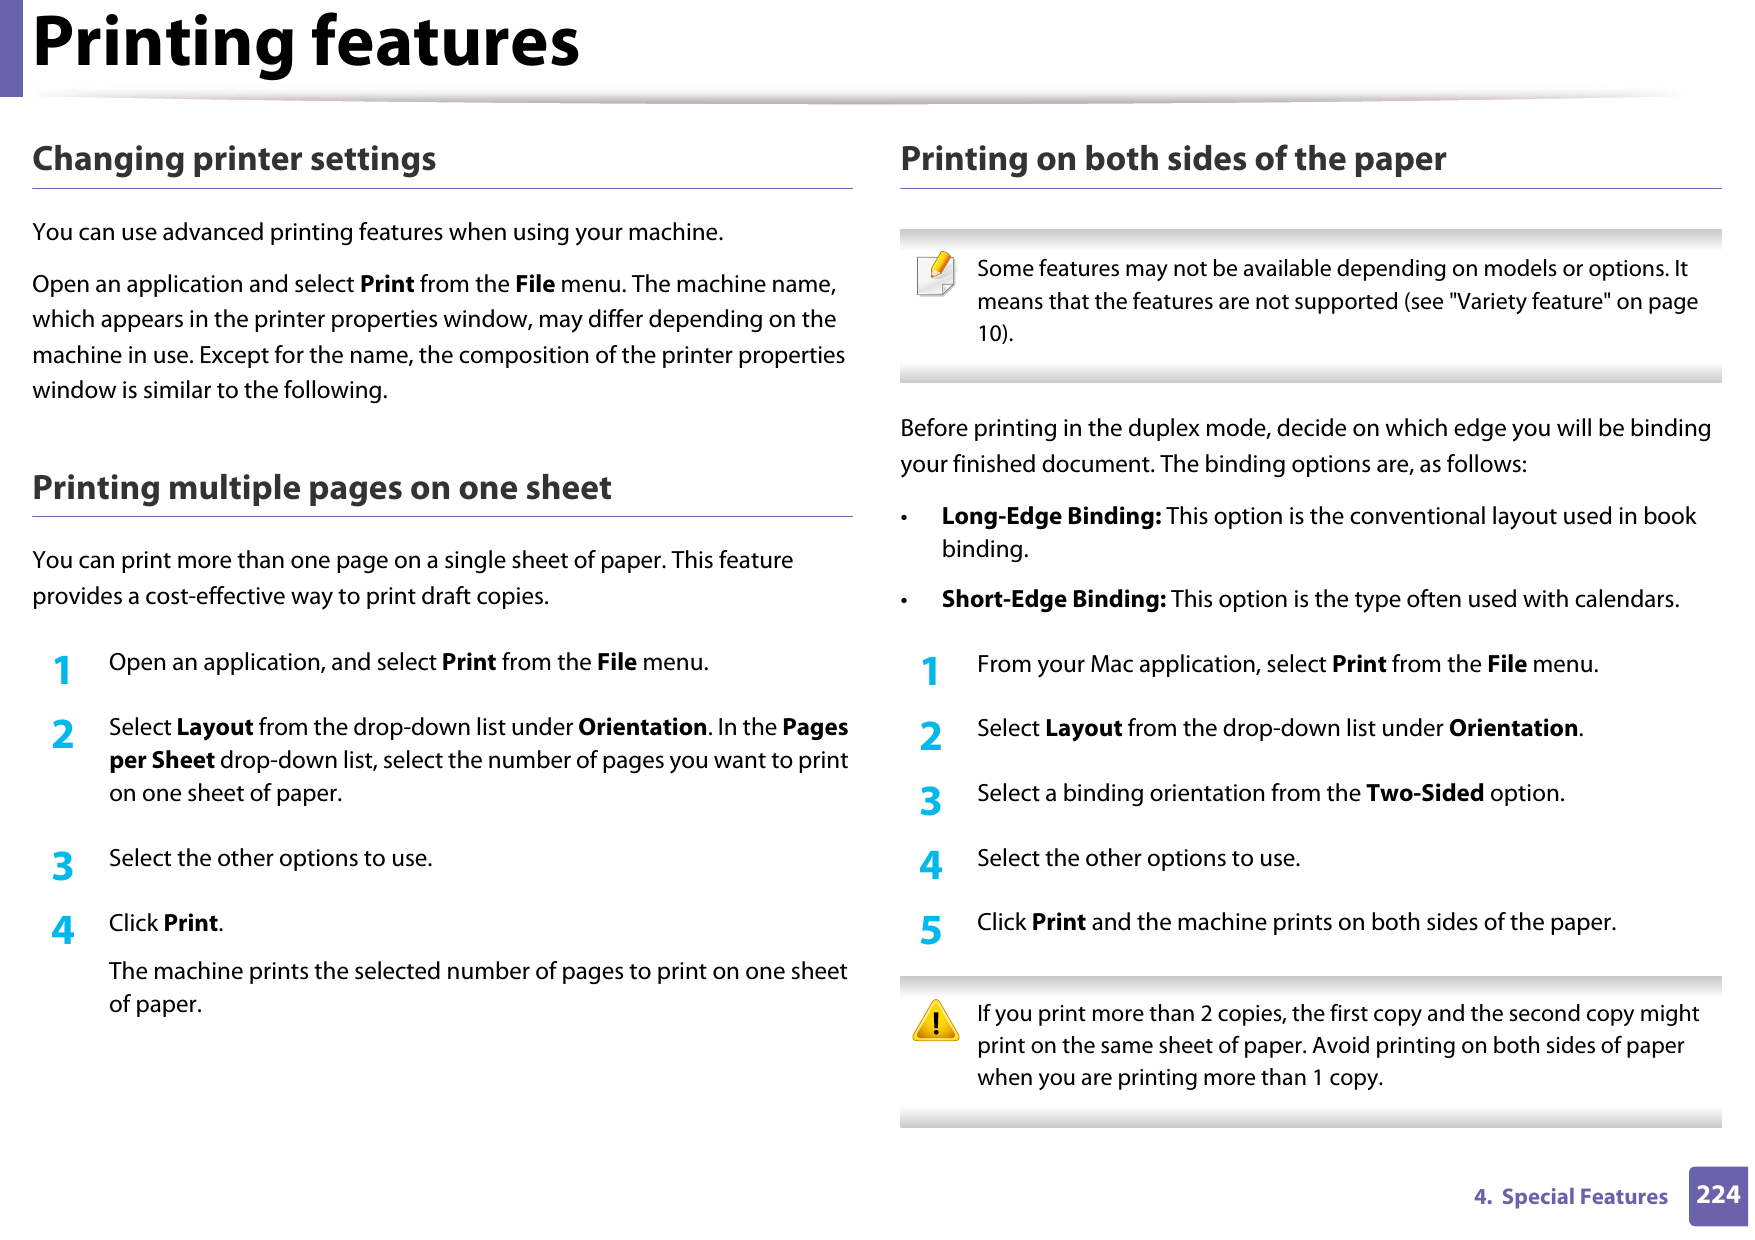
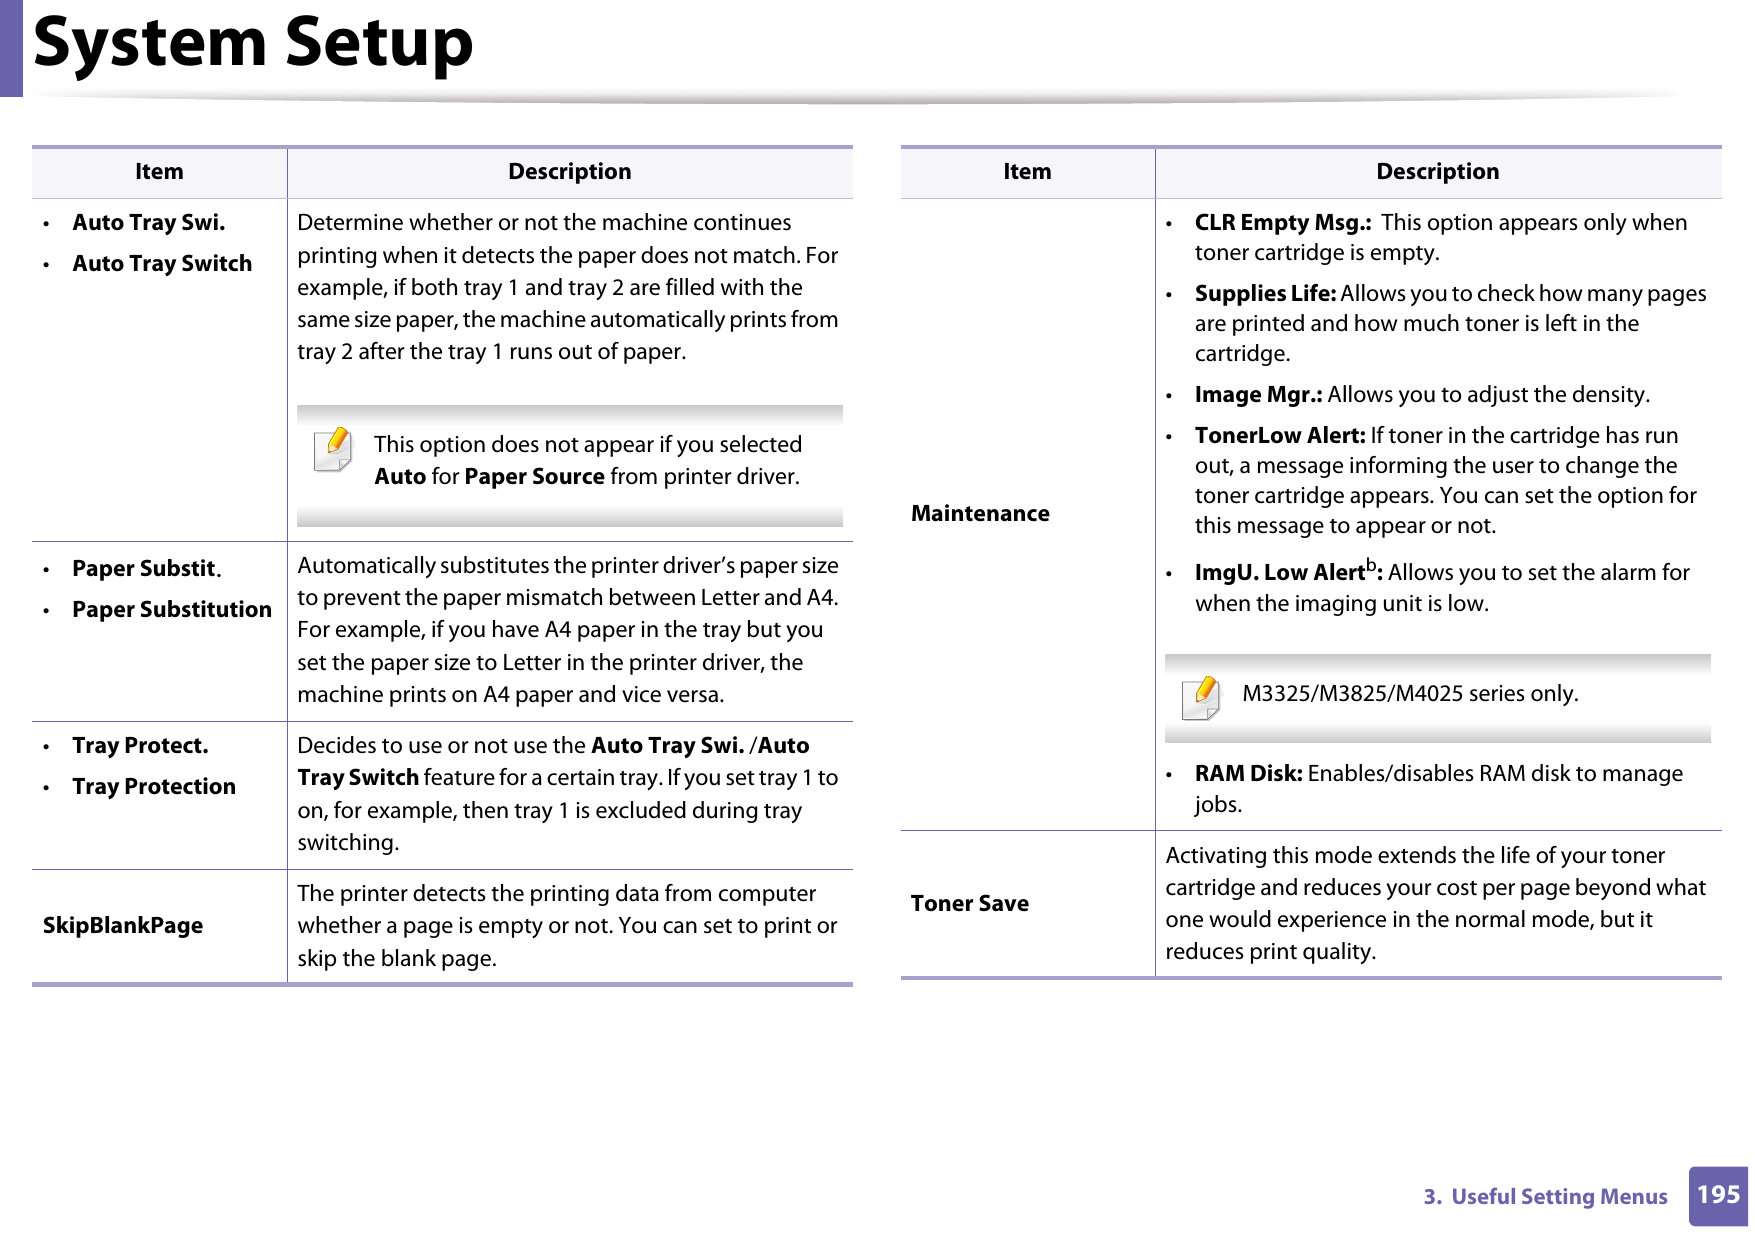
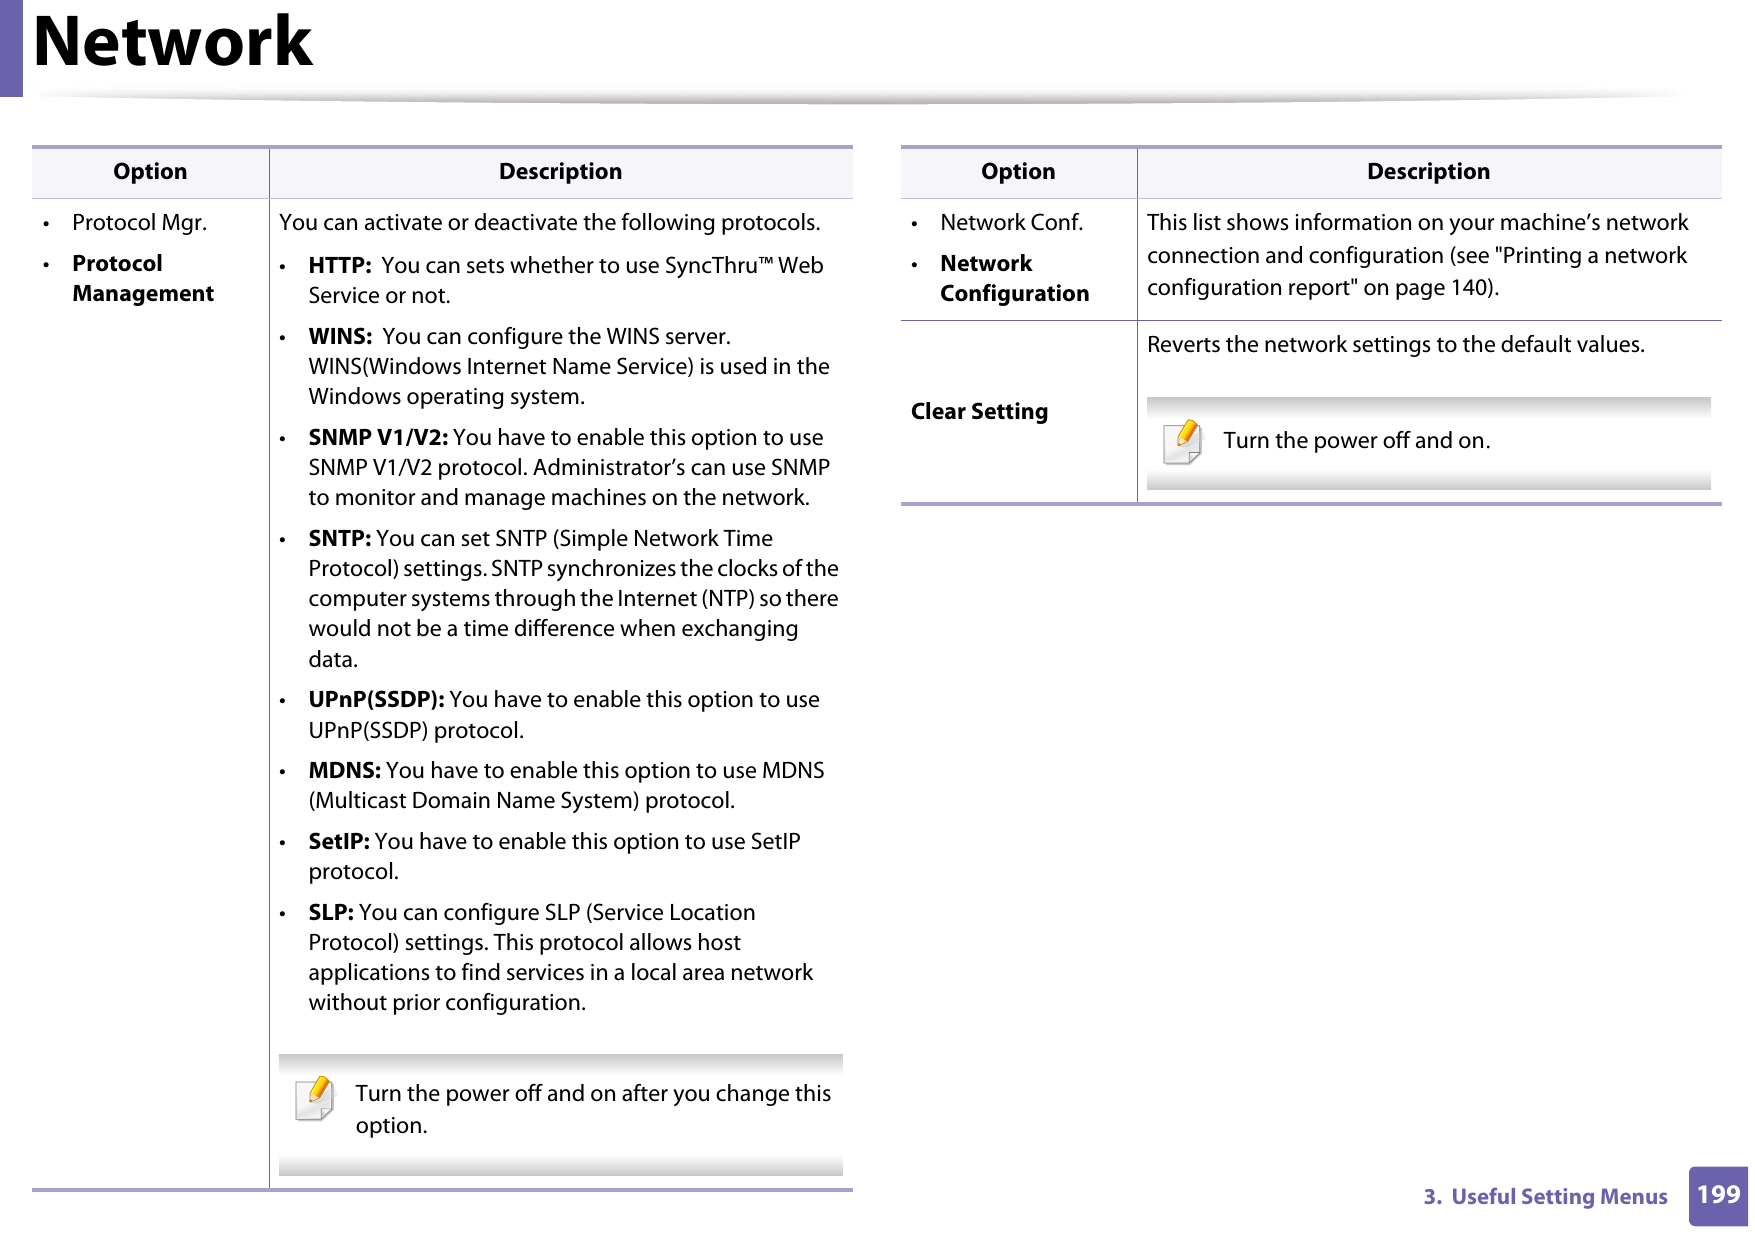
![1923. Useful Setting MenusPaper Some menus may not appear in the display depending on options or models. If so, it is not applicable to your machine (see "Menu overview" on page 31). To change the menu options:• Press (Menu) > Paper on the control panel.•For the model with a touch screen, select (Setup) > Paper on the touch screen.Item DescriptionCopies Selects the number of copies.MP Tray/ [Tray <x>]•Paper Size: Selects the default paper size.•Paper Type: Selects the paper type currently loaded in the tray.Paper SourceSets the default paper tray to use. Auto: You can set the machine to automatically change to the tray with the same sized paper when the tray in use is empty. Tray Confirmation Activates the tray confirmation message. If you open and close a tray, a window asking you whether to set the paper size and type for the tray just opened appears.Item Description](https://usermanual.wiki/Samsung-Electronics-Co/SLM4025NX.Users-Manual-6/User-Guide-2020639-Page-13.png)
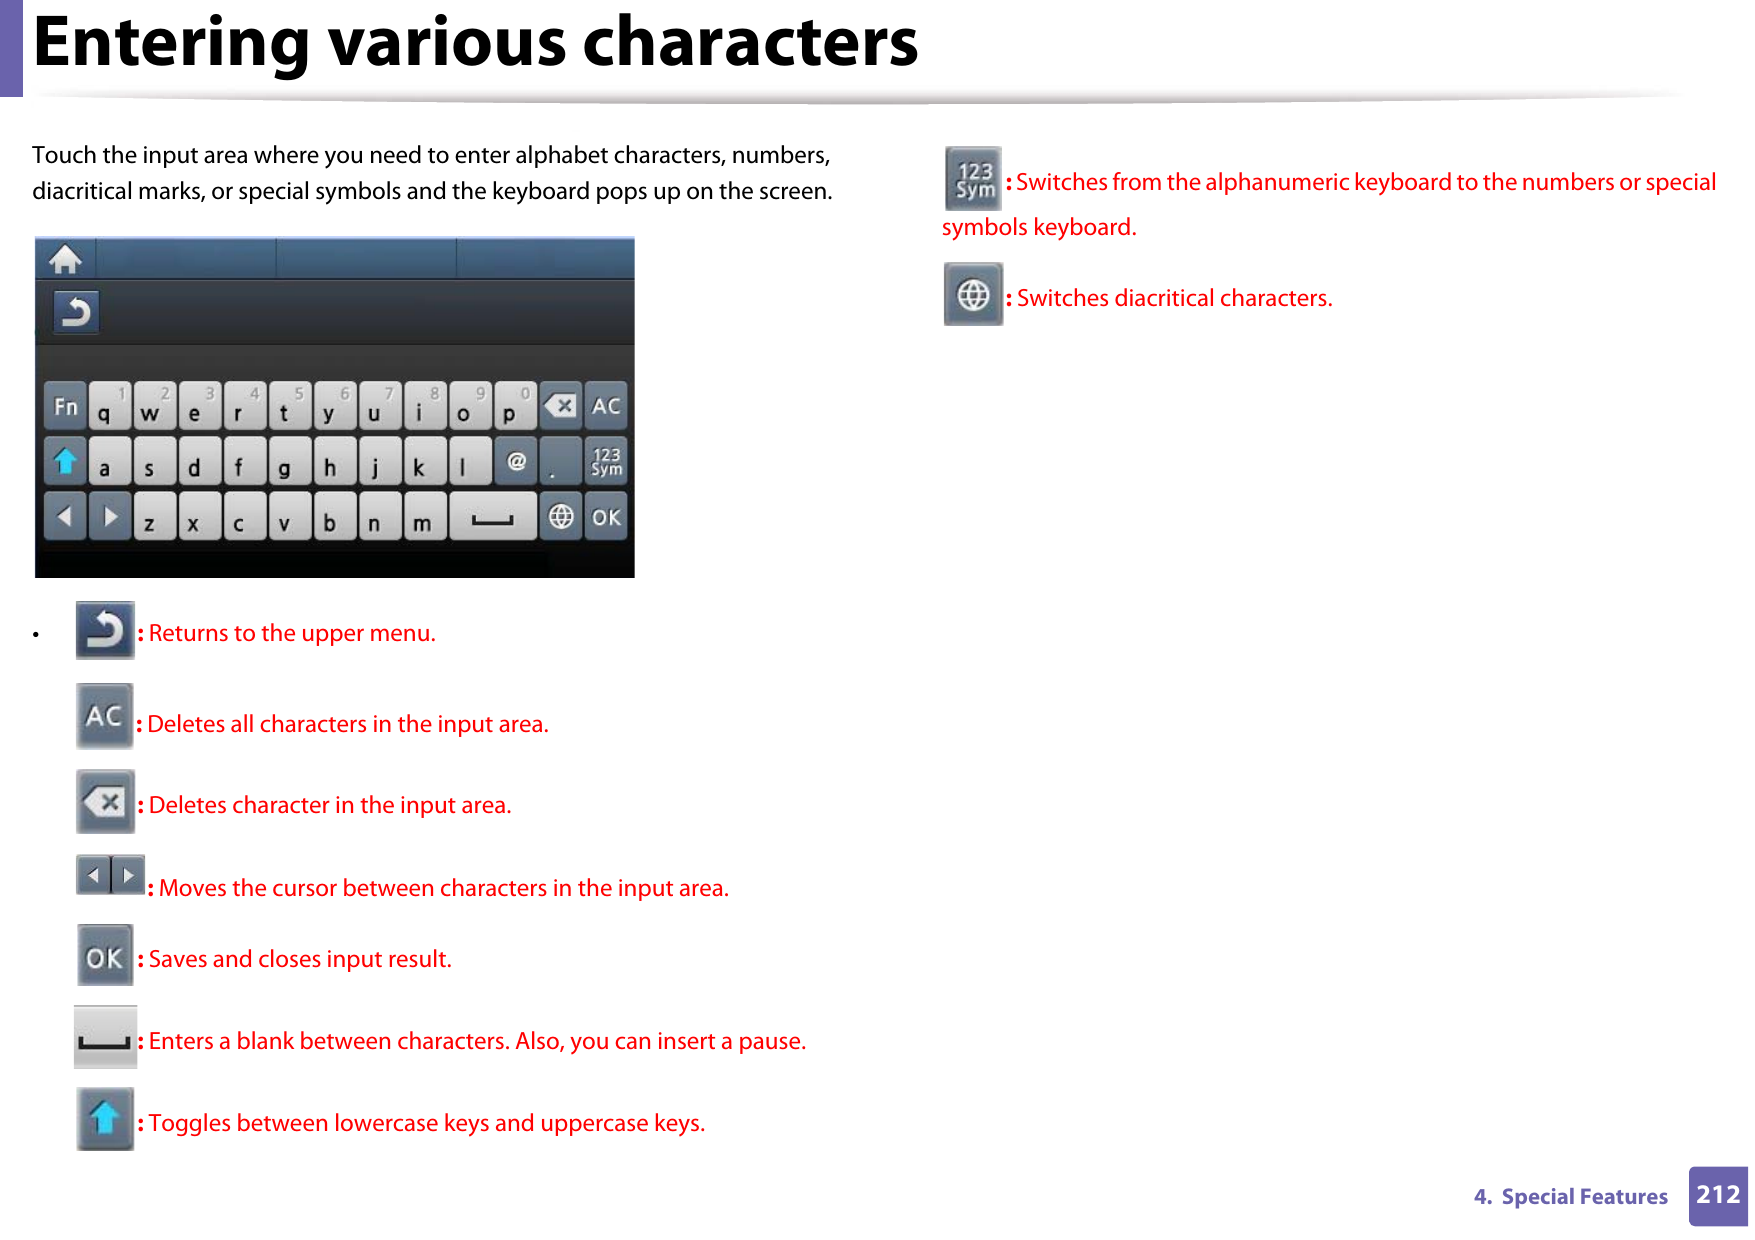
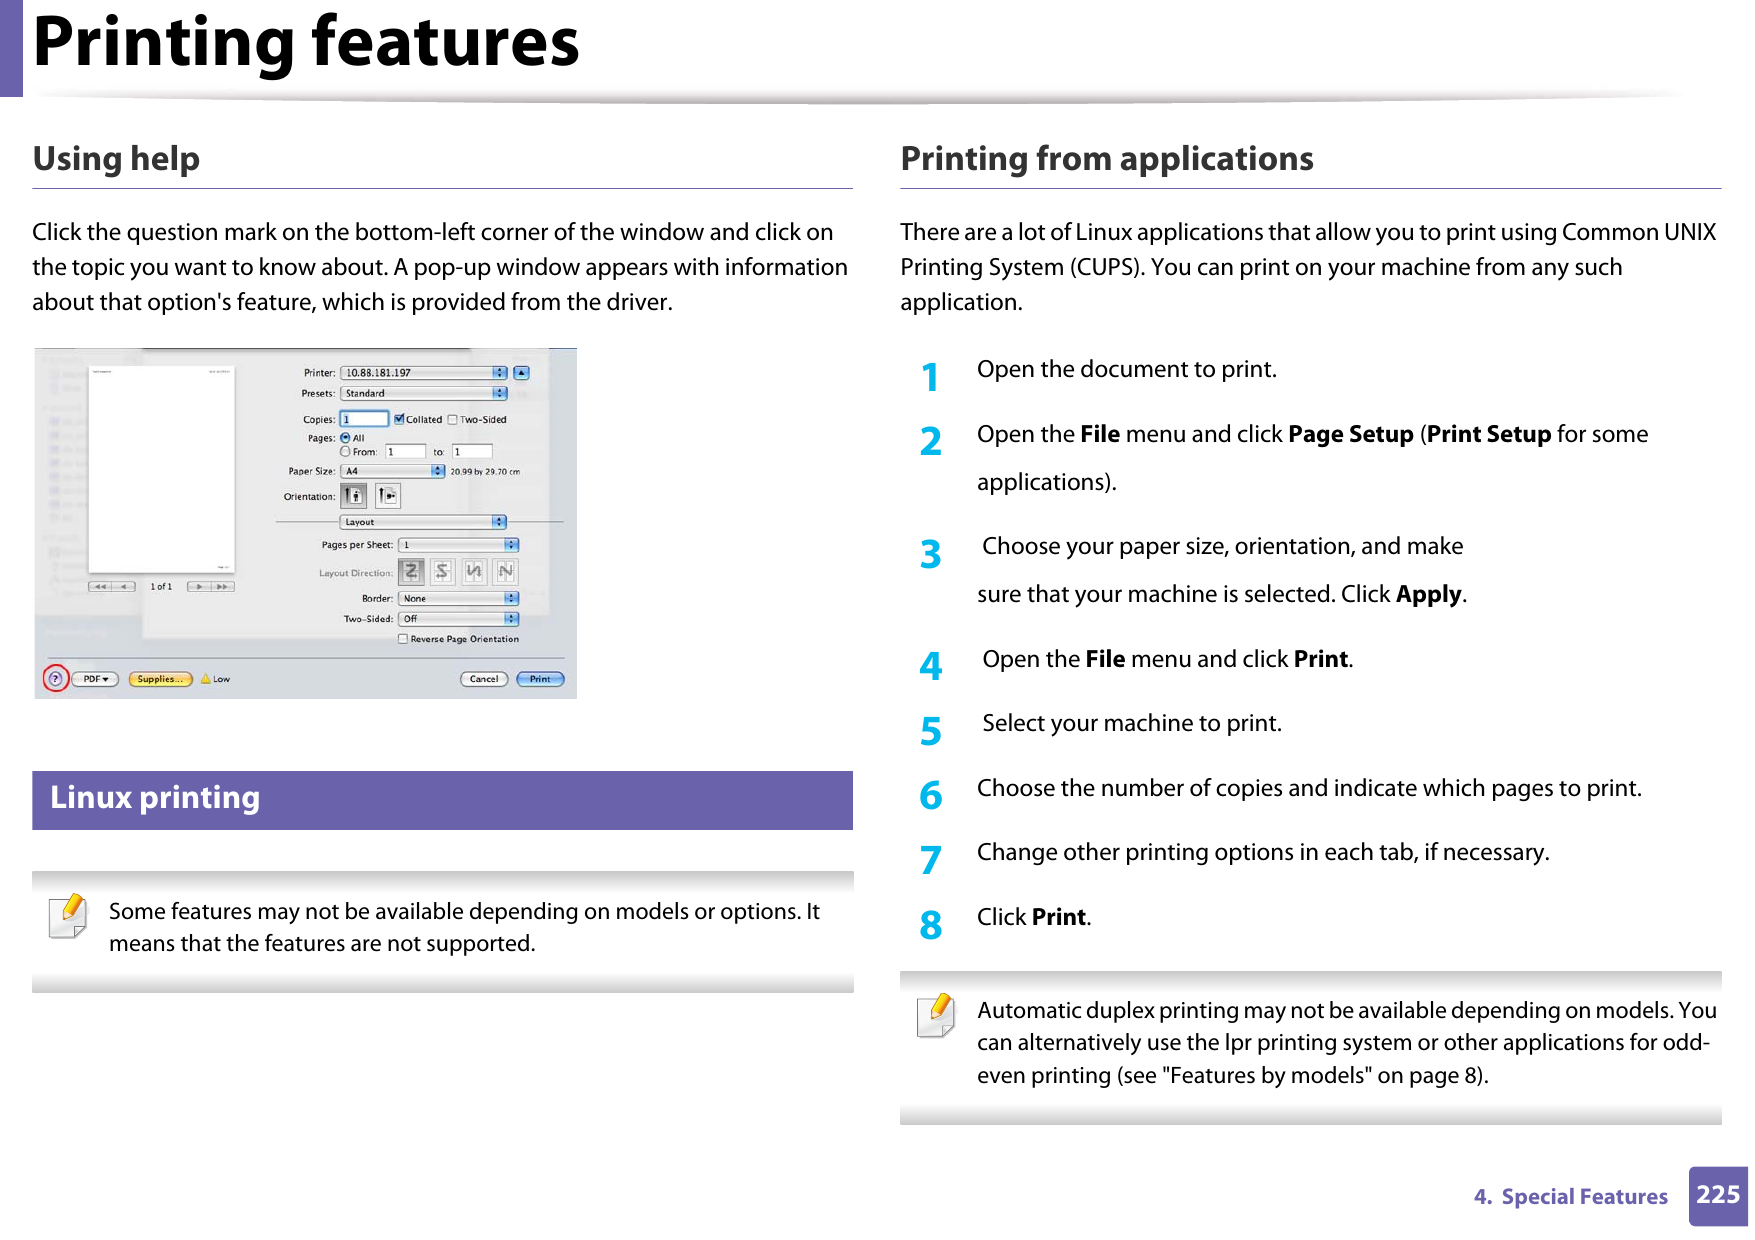
# # = | ? " : { } < > ;(These symbols are available when you type for network authentication.)](https://usermanual.wiki/Samsung-Electronics-Co/SLM4025NX.Users-Manual-6/User-Guide-2020639-Page-31.png)