Sharp HRO00024 Cordless Telephone System User Manual 2
Sharp Corporation Cordless Telephone System Users Manual 2
Sharp >
Contents
Users Manual 2
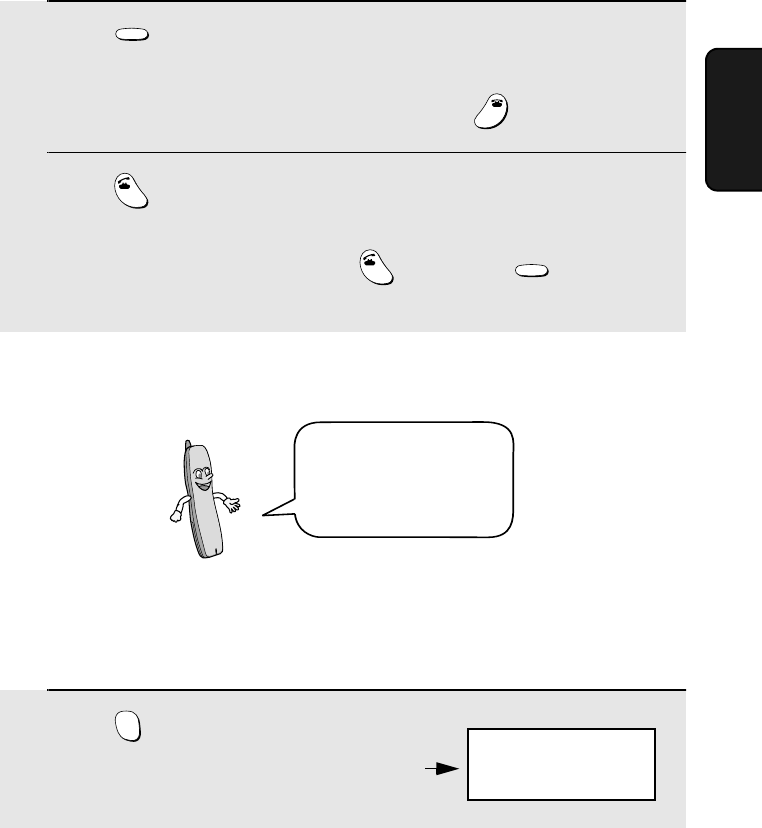
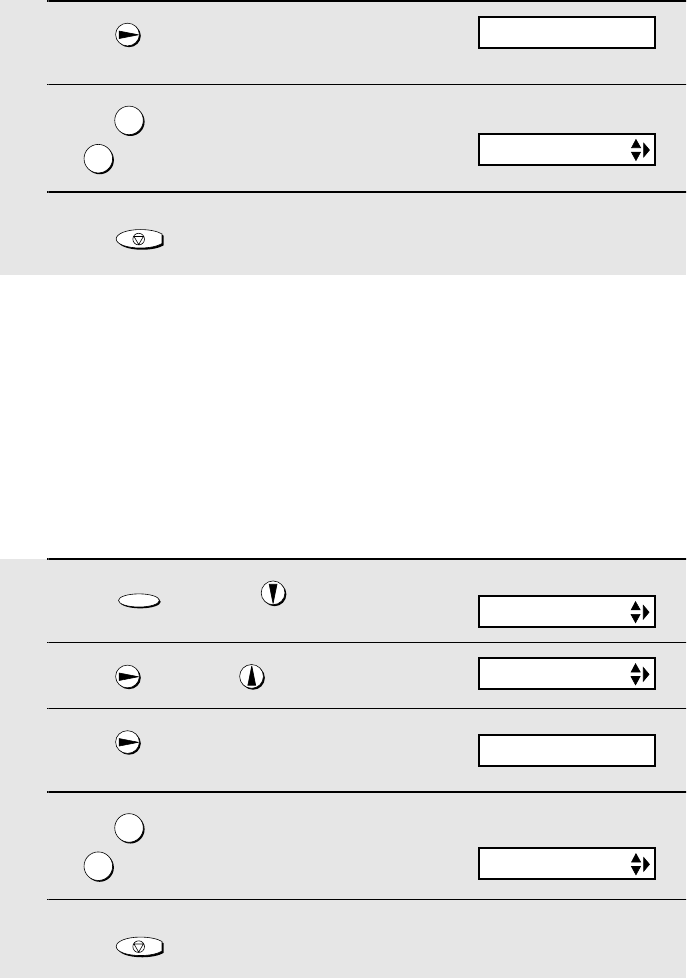
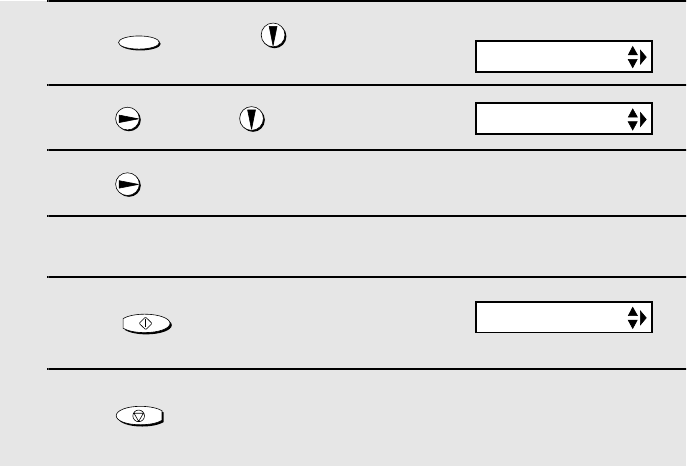
Storing and Using Auto-Dial Numbers
47
3. Cordless
Handset
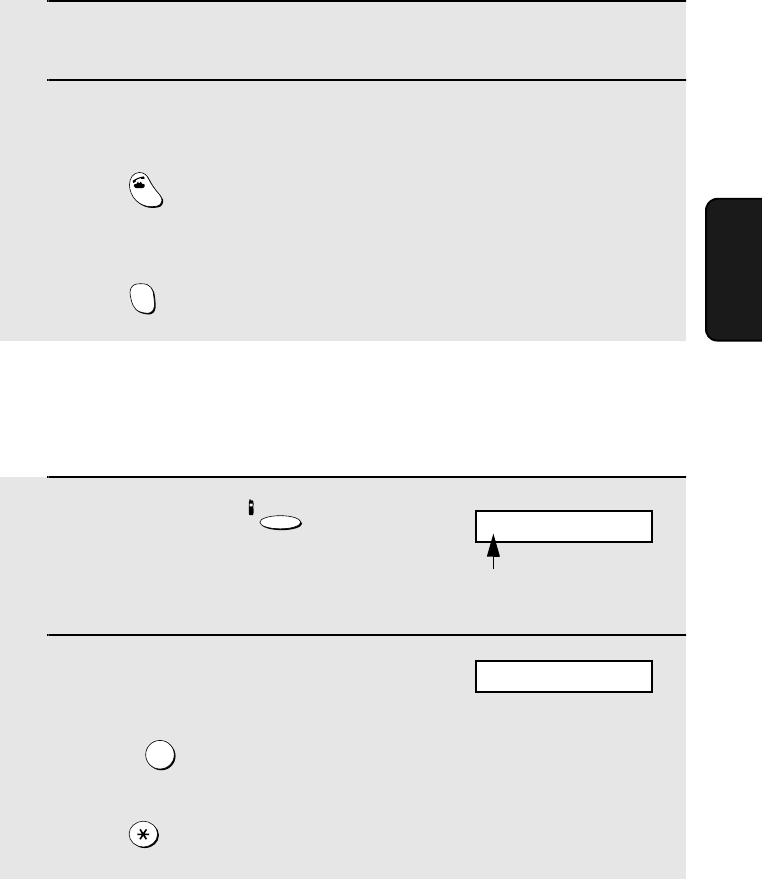
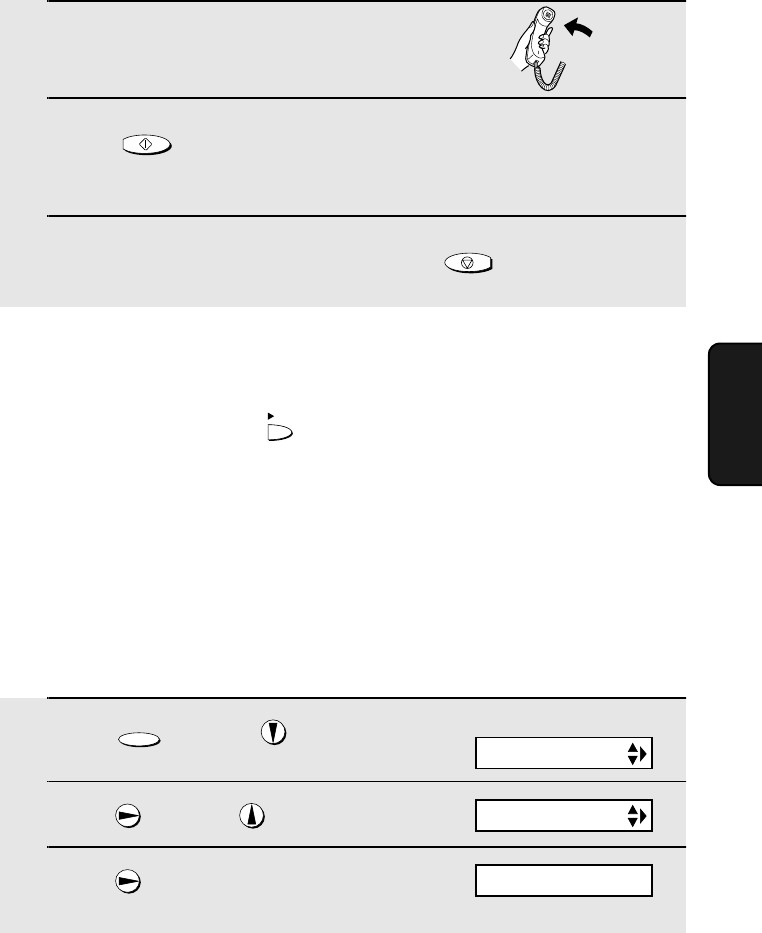
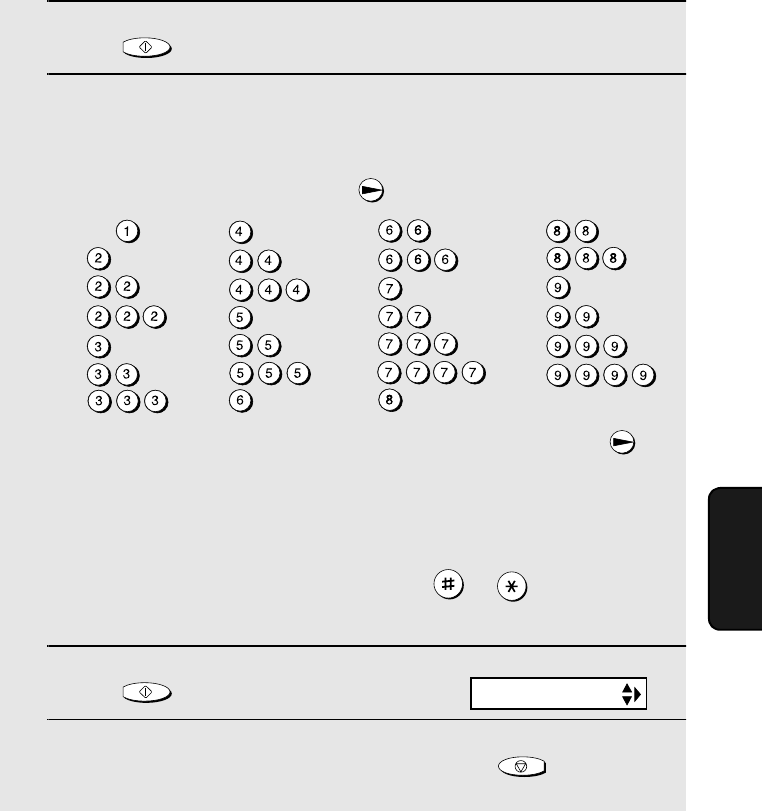
3Press .
4 Enter the number by pressing the number keys.
(Note: A space cannot be entered.)
•To clear a mistake, press .
•If a pause is required between any of the digits to access a special service
or an outside line, press . The pause appears as a hyphen (two
seconds per pause). Several pauses can be entered in a row.
5Press .
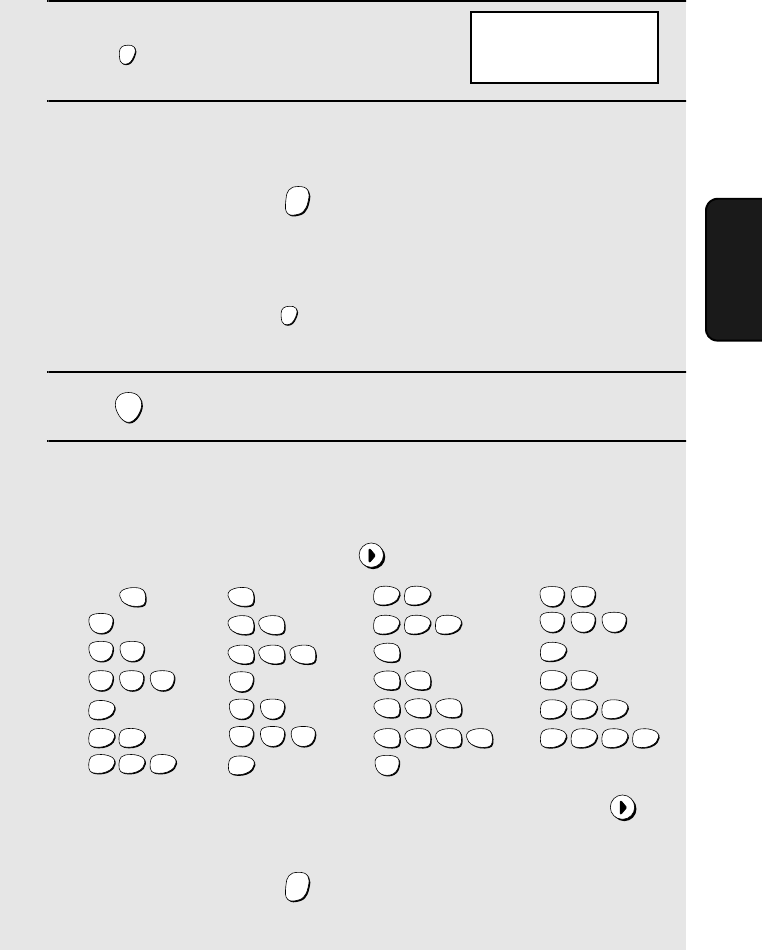
6Enter a name by pressing number keys for each letter as shown in the
chart below. Up to 15 characters can be entered. (If you do not wish to
enter a name, go directly to Step 7.)
Example: SHARP = 7777 44 2 777 7
♦To enter two letters in succession that require the same key, press
after entering the first letter.
♦To clear a mistake, press .
FUNCTION
/PAUSE
ERASE
HOLD
FUNCTION
/PAUSE
START
ERASE
HOLD
A =
B =
C =
D =
E =
F =
G =
H =
I =
J =
K =
L =
M =
N =
O =
P =
Q =
R =
S =
T =
U =
V =
W =
X =
Y =
Z =
SPACE =
WXYZ
9
WXYZ
9
WXYZ
9
WXYZ
9
WXYZ
9
WXYZ
9
WXYZ
9
WXYZ
9
WXYZ
9
WXYZ
9
TUV
8
TUV
8
TUV
8
TUV
8
TUV
8
TUV
8
PQRS
7
PQRS
7
PQRS
7
PQRS
7
PQRS
7
PQRS
7
PQRS
7
PQRS
7
PQRS
7
PQRS
7
MNO
6
MNO
6
MNO
6
MNO
6
MNO
6
JKL
5
JKL
5
JKL
5
MNO
6
JKL
5
JKL
5
JKL
5
GHI
4
GHI
4
GHI
4
GHI
4
GHI
4
GHI
4
DEF
3
DEF
3
DEF
3
DEF
3
DEF
3
DEF
3
ABC
2
ABC
2
ABC
2
ABC
2
ABC
2
ABC
2
1
ENTER TEL #
all.bookPage47Friday,April5,20023:57PM
Storing and Using Auto-Dial Numbers
48
♦To enter a lower case letter, continue pressing the key for the letter until the
lower case letter appears.
♦To enter one of the following symbols, press or repeatedly:
. / ! " # $ % & ’ ( ) + + , - : ; < = > ? @ [ ¥ ] ^ _ ' { | } ) (
7Press .
8Return to Step 2 to store another number, or press to exit.
START
OFF
OFF
Dialing an auto-dial number
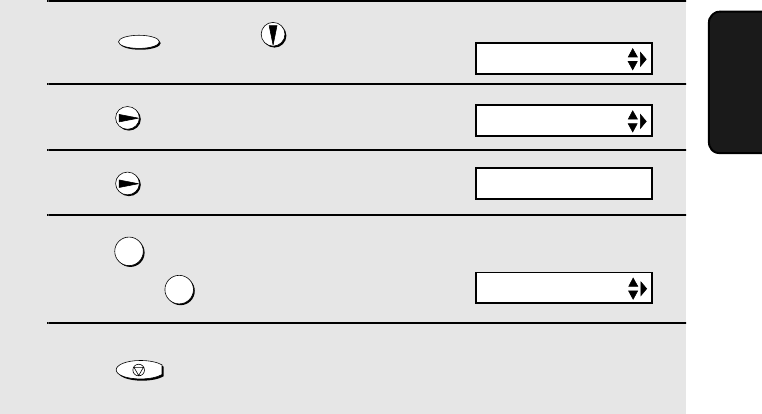
1Press once.
2Press to select the Common book,
or to select the Private book.
3Press or until the number you wish to dial appears in the
display.
4Press .
•The number is automatically dialed.
SEARCH
TALK
COMMON DIAL
▲▼: SEARCH
FUNCTION: ENTRY
Example: Common book selected
SELECT SEARCH
▲: COMMON
▼: PRIVATE
Cordless handset display:
SELECT SEARCH
▲: COMMON
▼: PRIVATE
all.bookPage48Friday,April5,20023:57PM
Storing and Using Auto-Dial Numbers
49
3. Cordless
Handset
Editing an auto-dial number
If you need to make changes to a previously stored auto-dial number, follow
these steps:
1Press once.
2Press to select the Common book,
or to select the Private book.
3Press or until the number you wish to edit appears in the
display.
4Press once.
5Press the number keys to enter the new number.
•To clear a mistake, press . If a pause is required between any of the
digits to access a special service or an outside line, press ..
•If you do not wish to change the number, go directly to Step 6.
6Press .
7Press the number keys to enter the new name (see Step 6 on page 47).
•If you do not wish to change the name, go directly to Step 8.
8Press .
SEARCH
FUNCTION
/PAUSE
ERASE
HOLD
FUNCTION
/PAUSE
START
START
COMMON DIAL
▲▼: SEARCH
FUNCTION: ENTRY
Example: Common book selected
Cordless handset display:
SELECT SEARCH
▲: COMMON
▼: PRIVATE
SELECT SEARCH
▲: COMMON
▼: PRIVATE
all.bookPage49Friday,April5,20023:57PM
Storing and Using Auto-Dial Numbers
50
Clearing an auto-dial number
If you need to clear an auto-dial number, follow these steps:
1Press once.
2Press to select the Common book,
or to select the Private book.
3Press or until the number you wish to clear appears in the
display.
4Press .
5Press .
6Press to exit.
SEARCH
ERASE
HOLD
START
OFF
OFF
COMMON DIAL
▲▼: SEARCH
FUNCTION: ENTRY
Example: Common book selected
ERASE?
PRESS START KEY
9Press to exit.
OFF
OFF
SELECT SEARCH
▲: COMMON
▼: PRIVATE
Cordless handset display:
SELECT SEARCH
▲: COMMON
▼: PRIVATE
all.bookPage50Friday,April5,20023:57PM
Redial
51
3. Cordless
Handset
Redial
You can automatically redial the last number dialed on the cordless handset.
Note: The fax machine and cordless handsets each retain their own separate
redial numbers.
1Press .
•Check the display to make sure the number that appears is the number you
wish to dial. (If the wrong number appears, press to clear it.)
2Press . The number is automatically dialed.
Note: You can also redial by pressing first and then . Note that this
method does not allow you to check the number before dialing begins.
REDIAL
OFF
OFF
TALK
TALK
REDIAL
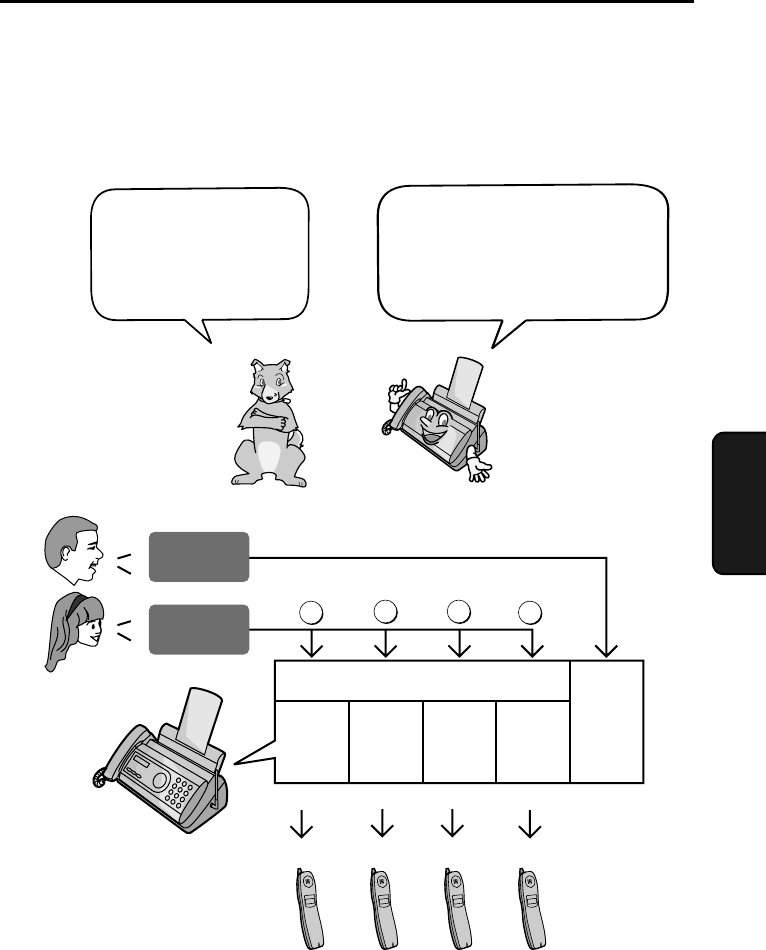
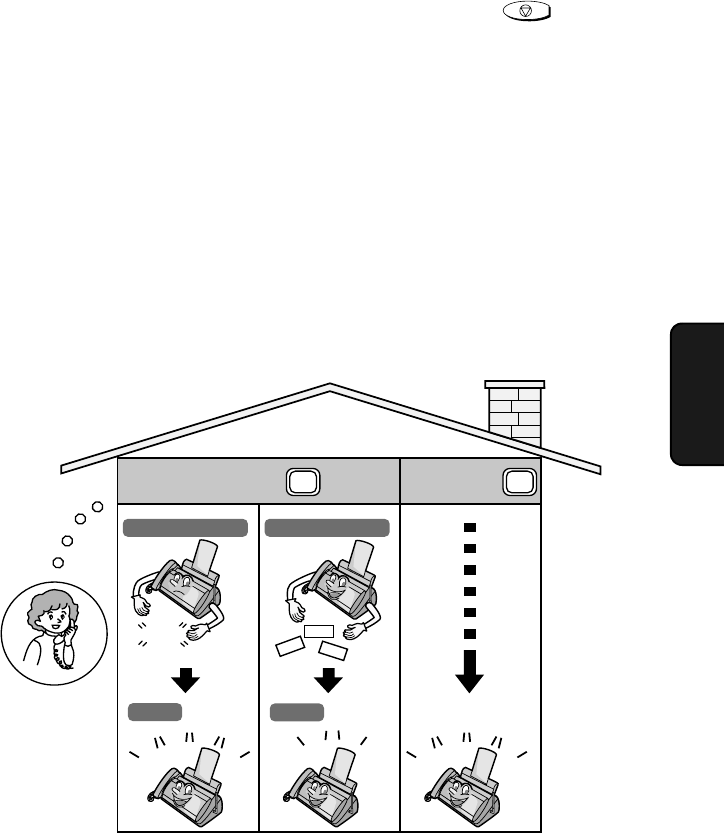
Using the Intercom Feature
Note: When using the Intercom feature, you will not hear your voice through
the handset receiver when you speak.
Paging the fax machine from a cordless handset
You can use the fax
machine and cordless
handsets as an
intercom system.
1Press on the cordless handset.
INTER
COM
2: BILL
3: SUE
4:
Cordless handset display:
The numbers and names of the other cordless
handsets appear (only the number appears if a
handset is not registered)
all.bookPage51Friday,April5,20023:57PM
Using the Intercom Feature
52
2Press on the cordless handset to
select the fax machine.
3The fax machine makes a special
ringing sound.
4The other person picks up the fax machine handset to answer.
5Talk with the other person. When you are ready to end the conversation,
press .
0
OFF
OFF
INTERCOM
0: BASE STATION
Cordless handset display:
Fax machine display:
INTERCOM
1: BOB
Number and name
of calling handset
Paging a cordless handset from another cordless handset
1Press on the cordless handset.
2Enter the number of the cordless
handset you wish to page.
Example:
•To page all the cordless handsets and
the fax machine, press .
3The selected cordless handset makes
a special ringing sound.
INTER
COM
ABC
2
2: BILL
3: SUE
4:
Cordless handset display:
The numbers and names of the other cordless
handsets appear (only the number appears if a
handset is not registered)
INTERCOM
2: BILL
INTERCOM
1: BOB
Display of paged handset:
Number and name
of calling handset
all.bookPage52Friday,April5,20023:57PM
Using the Intercom Feature
53
3. Cordless
Handset
Paging a cordless handset from the fax machine (cordless
handset locator)
You can use this procedure to page a cordless handset, or locate a handset in
the event that you misplace it.
1Pick up the fax machine handset.
2Press on the fax machine, and
enter the number of the cordless
handset you wish to page.
Example:
•To page all the cordless handsets,
press .
3The selected cordless handset makes
a special ringing sound.
•This allows you to locate the cordless
handset if you have misplaced it.
4The other person presses any key (except ) on the cordless
handset to answer.
INTERCOM
3
OFF
OFF
4The other person presses any key (except ) on the cordless
handset to answer.
5Talk with the other person. When you
are ready to end the conversation,
press .
OFF
OFF
OFF
OFF
INTERCOM
0: BASE STATION
Fax machine display:
INTERCOM
3: SUE
Display of selected
cordless handset:
all.bookPage53Friday,April5,20023:57PM
Transferring Calls
54
Transferring Calls
You can transfer a call to the fax machine or to a cordless handset.
Transferring a call from a cordless handset to the fax
machine or to another cordless handset
1During the call, press on the
cordless handset.
•The call is placed on hold.
2To transfer the call to the fax machine,
press .
To transfer the call to a cordless
handset, enter the number of the
handset.
•To page the fax machine and all
cordless handsets, press
INTER
COM
0
If a call comes in while the Intercom feature is being used
If an outside call comes in while you are using the Intercom feature, the
person who wishes to take the call should first stop the Intercom call (press
on the cordless handset or replace the fax machine handset), and then
answer the outside call (press any key except on the cordless handset
or pick up the fax machine handset).
OFF
OFF
OFF
OFF
5Talk with the other person. When you are ready to end the conversation,
replace the handset.
2: BILL
3: SUE
4:
Cordless handset display:
The numbers and names of the other cordless
handsets appear (only the number appears if a
handset is not registered)
CALL
TRANSFER
The fax machine and cordless
handsets all show the above
message, regardless of which
is selected
CALL
TRANSFER
all.bookPage54Friday,April5,20023:57PM
Transferring Calls
55
3. Cordless
Handset
3The selected cordless handset or fax machine makes a special ringing
sound.
4The other person answers on the cordless handset or fax machine.
•To answer on a cordless handset other than the selected cordless handset,
press on that cordless handset. To answer on the fax machine when
not selected, pick up the fax machine handset.
•If no one answers when you page the cordless handset or fax machine,
press once again to return to the initial caller.
TALK
INTER
COM
Transferring a call from the fax machine to a cordless
handset
1During the call, press on the
fax machine.
•The call is placed on hold.
2Enter the number of the cordless
handset to which you wish to transfer
the call.
Example: .
•To page all the cordless handsets,
press .
INTERCOM
3
Fax machine display:
REPLACE HANDSET
HOLD
“HOLD” alternates with the
numbers and names of the
cordless handsets
all.bookPage55Friday,April5,20023:57PM
Transferring Calls
56
3Replace the fax machine handset. The
selected cordless handset makes a
special ringing sound.
4The other person presses any key (except ) on the cordless
handset to answer.
•To answer on a cordless handset other than the selected cordless handset,
press on the other cordless handset.
•If no one answers when you page the cordless handset, pick up the fax
machine handset once again to return to the initial caller.
OFF
OFF
TALK
CALL
TRANSFER
Displays of all
cordless handsets
Fax machine display:
CALL
TRANSFER
Changing the reception mode on the fax machine
1Press .
2Press until the desired reception
mode appears in the display.
3Press or to exit REMOTE MODE.
REMOTE
/FLASH
JKL
5
RECEPTION
REMOTE
/FLASH
OFF
OFF
RECEPTION
FAX
Example: FAX mode
REMOTE MODE
0: GENERAL
Cordless handset display:
all.bookPage56Friday,April5,20023:57PM
57
4. Answering
Machine
4. Using the Answering System
The answering system allows you to receive both voice messages and faxes
while you are out.
The answering system
has one general box
and four personal
boxes for callers to
leave messages.
To use the answering system,
you must record a greeting for
the general box, and a
greeting for each personal box
you wish to use.
Each cordless handset can be used to listen to
the messages in its corresponding personal box
(the personal box with the same number as the
cordless handset)
1234
General
Box
Personal Box
1234
Press
General
Message
Personal
Message
12 3 4
all.bookPage57Friday,April5,20023:57PM
Recording an Outgoing Message
58
Recording an Outgoing Message
The outgoing message (OGM) is the greeting that the system plays after
answering a call to inform callers that they can leave a message or send a fax.
Follow the steps below to record an outgoing message for the general box,
and an outgoing message for each personal box that you wish to use.
Example of general outgoing message:
“Hello. You've reached ______ . No one is available to take your call right now.
If you would like to leave a general message, please speak after the beep. If
you would like to leave a personal message, press 1 for Susan, 2 for Bob, 3
for George, or 4 for Ann now. To send a fax, please press your facsimile Start
key now. Thank you for calling.”
Example of personal outgoing message:
“This is Susan’s pesonal box. Please leave a mesage after the beep.”
Note: Do not lift the handset until Step 3 below.
1Press .
2Press until the message you wish
to record appears in the display.
3Press once.
•(If you have already recorded a
message and wish to check it,
press .)
REC/
MEMO
PLAY
Display:
MEMO RECORDING
MEMO RECORDING
OGM (GENERAL)
OGM (BOX 1)
OGM (BOX 4)
OGM (TRANSFER)
Note: MEMO RECORDING is for recording a
memo (page 63), and OGM (TRANSFER) is
for the Transfer function (page 69).
LIFT HANDSET OR
PLAY: PLAYBACK
all.bookPage58Friday,April5,20023:57PM
Setting a Passcode for a Personal Box
59
4. Answering
Machine
4Lift the handset.
5Press and speak into the handset to record the message.
•While recording, the display will show the time left to record.
5When finished, replace the handset or press .
START/MEMORY
STOP
To listen to an outgoing message
To listen to an outgoing message, follow Steps 1 and 2 of the above
procedure and then press . Note that the general outgoing message
cannot be erased. If you need to change it, simply repeat the recording
procedure.
Setting a Passcode for a Personal Box
You can set a 3-digit passcode for each personal box. When this is done, the
passcode must be entered to listen to messages in the personal box.
(Note: When listening to the messages in a personal box from its
corresponding cordless handset, is not necessary to enter the passcode. )
PLAY
1Press once and once.
2Press once and once.
3Press .
FUNCTION
BOX PASSCODE#
Display:
T.A.D. SETTING
1=SET, 2=CLEAR
all.bookPage59Friday,April5,20023:57PM
Operating the Answering System
60
4Press to set a passcode.
(To clear a previously set passcode,
press .)
5Enter the number of the personal box
for which you wish to set a passcode.
Example: for Box 1
(If you are clearing a passcode, enter
the number of the box and go to Step
7.)
6Enter a 3-digit number for the passcode. The first digit of the number
must be 0, 5, 6, 7, 8, or 9.
7Press .
8Return to Step 5 to set another passcode, or press to return to
the date and time display.
1
2
1
START/MEMORY
STOP
ENTER PASSCODE
Note: If you wish to change a passcode, clear the passcode and then enter a
new passcode. If you forget a passcode, clear it and enter a new passcode.
ENTER BOX # (1-4)
Operating the Answering System
Activating the answering system
To turn on the answering system so that callers can leave messages, press
until the arrow in the display points to TAD. (TAD stands for
“Telephone Answering Device”.)
RESOLUTION/
RECEPTION MODE
RESOLUTION/
RECEPTION MODE
FAX
TEL
TAD
ENTER BOX # (1-4)
all.bookPage60Friday,April5,20023:57PM
Operating the Answering System
61
4. Answering
Machine
♦Each outgoing message will play (to stop playback, press ).
♦It will not be possible to set the reception mode to TAD if a general outgoing
message has not been recorded.
Note: In TAD mode, the machine will automatically switch to fax reception if it
detects 6 seconds of silence after answering a call. For this reason, if a caller
pauses for this length of time while leaving a message, they will be cut off.
Number of rings in TAD mode (Toll Saver function)
The number of rings on which the machine answers incoming calls in TAD
mode depends on whether the Toll Saver function is turned on, and if it is on,
whether you have messages.
♦The Toll Saver function is initially turned on.
STOP
To adjust the
NUMBER OF RINGS
setting, see page 93.
To turn off the Toll Saver
function, see page 73.
ON
OFF
No received messages
4 Rings
Received messages
2 Rings
Toll Saver Toll Saver
NOTHING Hello!
Hi!
Hi!
Ring
Ring
Ring
Ring
Ring
Ring
Ring
Ring
Ring
Ring
(Answer according to
NUMBER OF RINGS setting)
all.bookPage61Friday,April5,20023:57PM

Operating the Answering System
62
Listening to received messages from the fax machine
When you return, the display will show the number of messages recorded in
each box. Follow the steps below to listen to your messages.
1Press .
•If you only want to listen to new messages (messages not previously
listened to), continue to hold down for at least two seconds.
2If you wish to listen to the messages in a personal box, press the
number of the box.
Example: for Box 1
3Enter the passcode of the personal box.
Example:
4The messages will play.
•As each message plays, the date and time of recording will appear briefly in
the display. If no messages were received, NO MESSAGES will appear.
•Repeat: To listen to a message a second time, press before
playback of that message ends. To move back to the previous message,
press within 3 seconds of the beginning of the current message.
•Skip: To skip forward to the next message, press .
PLAY
PLAY
1
5 5 1
REPEAT
REPEAT
SKIP
0
Note: Playback will stop if you receive a call, lift the handset, or press .
♦You can print out a list of your received messages that shows the date and
time that each was received. See page 109.
STOP
all.bookPage62Friday,April5,20023:57PM
Operating the Answering System
63
4. Answering
Machine
Erasing received messages
It is important to erase received messages after you listen to them to ensure
that the memory does not become full.
♦Erasing all messages in the general box: To erase all messages in the
general box, press , , and then .
♦Erasing all messages in a personal box: To erase all messages in a
personal box, press , , enter the number of the box, enter the
passcode, and then press .
♦Erasing a single message: To erase a single message, press
while the message is being played.
FUNCTION
DELETE
START/MEMORY
FUNCTION
DELETE
START/MEMORY
DELETE
Recording memos
You can record memos for yourself and other users of the machine. These
are recorded in the general box, and will be played back together with
incoming messages when the key is pressed.
PLAY
1Press once and once.
2Pick up the handset, press , and speak into the handset.
3When you have finished speaking, replace the handset or press .
REC/
MEMO
START/MEMORY
STOP
all.bookPage63Friday,April5,20023:57PM
Operating the Answering System
64
Recording phone conversations
To record a phone conversation, hold down the key during the
conversation you want to record. When you are finished, release the key. The
conversation is recorded in the general box, and will be played back when the
key is pressed.
REC/
MEMO
PLAY
Listening to messages from a cordless handset
You can use your cordless handset to listen to messages received in your
personal box (the personal box with the same number as your cordless
handset), or messages received in the general box.
♦When you have received new messages in your personal box, NEW
MESSAGES appears in your cordless handset display.
1Press .
2To listen to messages in the general box, press .
(To listen to messages in your personal box, go directly to Step 3.)
3Press to listen to all messages in the box, or to listen to only
new messages.
4While listening to your messages, you can do any of the following:
•Repeat: To repeat a message, press .
•Skip: To skip forward, press .
•Delete: To delete the message you are currently listening to, press .
REMOTE
/FLASH
0
PQRS
7
PLAY
TUV
8
PLAY NEW
REPEAT
0
SKIP
DELETE
REMOTE MODE
0: GENERAL
Cordless handset display:
all.bookPage64Friday,April5,20023:57PM
Operating the Answering System
65
4. Answering
Machine
•Stop: To stop playback, press .
5To return to the STAND-BY display, press or .
•If a call comes in while you are listening to your messages, playback will
stop automatically. Press any key to answer.
•If you take no action for 60 seconds in REMOTE MODE, the cordless
handset will automatically return to the STAND-BY display.
STOP
WXYZ
9
OFF
OFF
REMOTE
/FLASH
Deleting all messages from a cordless handset
You can use your cordless handset to delete all messages in your personal
box, or all messages in the general box.
1Press .
(Note: This step is not necessary if you
are already in REMOTE mode.)
2To delete all messages in the general box, press .
(To delete all messages your personal box, go directly to Step 3.)
3Press .
4Press to delete the messages, and then or to return to
the STAND-BY display.
•To cancel, press , , or .
REMOTE
/FLASH
0
DELETE
START
OFF
OFF
REMOTE
/FLASH
STOP
WXYZ
9
OFF
OFF
REMOTE
/FLASH
REMOTE MODE
0: GENERAL
Cordless handset display:
REMOTE MODE
DELETE ALL?
PRESS START KEY
all.bookPage65Friday,April5,20023:57PM
Optional Answering System Settings
66
1Press once and once.
2Press once and once.
3Press .
4Press a number from 1 to 4 to select the desired ICM recording time.
5Press to return to the date and time display.
15 seconds 60 seconds
30 seconds 4 minutes
FUNCTION
STOP
Optional Answering System Settings
Setting ICM time
Incoming messages (ICMs) are the messages which callers leave for you in
the answering system. The answering system is set at the factory to allow
each caller a maximum of 4 minutes to leave a message. If desired, you can
change this setting to 15, 30, or 60 seconds.
Display:
T.A.D. SETTING
RECORDING TIME
1
2
3
4
The display briefly shows
your selection, then:
REMOTE CODE
Fax reception on TAD failure
If the memory for recording incoming messages becomes full while you are
out, the answering system will no longer be able to record messages. The ON
TAD FAILURE setting is used to choose the response of the machine to
incoming calls when this happens:
♦ Automatic fax reception NO: The machine will answer after 20 rings, after
which it will wait to receive a remote command. Most callers will hang up
before it answers; however, when you call the machine from a remote
location, you can wait until it answers, listen to your messages, and then
erase them (see Remote Operations on page 72).
all.bookPage66Friday,April5,20023:57PM
Optional Answering System Settings
67
4. Answering
Machine
1Press once and once.
2Press once and twice.
3Press .
4Press to turn on automatic fax
reception, or to turn it off.
5Press to return to the date and time display.
FUNCTION
1
2
STOP
ON TAD FAILURE
♦Automatic fax reception YES: The reception mode will switch to FAX mode,
allowing the machine to continue to receive faxes automatically. With this
setting, you can still use the remote commands to listen to your messages
and then erase them (see Remote Operations on page 72).
Automatic fax reception is set to NO at the factory before shipping. If you want
to set it to YES, press the panel keys as follows:
Display:
T.A.D. SETTING
1=YES, 2=NO
The display briefly shows
your selection, then:
OGM ONLY MODE
OGM only mode
If needed, you can turn off recording of incoming messages. In this case, your
outgoing message will play, but callers will not be able to leave a message
(this applies to all boxes). The machine will still receive faxes sent by
automatic dialing.
1Press once and once.
2Press once and 3 times.
FUNCTION
OGM ONLY MODE
Display:
T.A.D. SETTING
all.bookPage67Friday,April5,20023:57PM
Optional Answering System Settings
68
3Press .
4Press to turn on OGM only mode,
or to turn it off.
5Press to return to the date and time display.
1
2
STOP
The display briefly shows
your selection, then:
CPC DETECTION
CPC Detection
When a caller hangs up, the central telephone exchange issues a CPC
(Calling Party Control) signal. When the answering system detects this signal,
it stops recording so that periods of silence are not recorded.
However, if you subscribe to special services such as Call Waiting or Call
Forwarding, signals used by these services may be mistaken for a CPC
signal, causing the answering system to hang up during a call. If you
experience this problem, follow these steps to turn off CPC Detection.
1Press once and once.
2Press once and twice.
3Press .
4Press to turn on CPC Detection,
or to turn it off.
5Press to return to the date and time display.
FUNCTION
1
2
STOP
CPC DETECTION
Display:
T.A.D. SETTING
1=YES, 2=NO
The display briefly shows
your selection, then:
BOX PASSCODE#
1=YES, 2=NO
all.bookPage68Friday,April5,20023:57PM
Transfer Function
69
4. Answering
Machine
Transfer Function
The Transfer function is used to have the machine automatically call you at a
specified number every time it receives an incoming message in a specified
box. This lets you hear your messages immediately after they come in, even
when you are at a remote location.
To use the Transfer function, you must first program the number that you wish
the machine to call (the transfer number), and record the transfer message
that plays when you answer the phone at the remote location.
When you go out and wish to use the transfer function, turn it on. When you
return and no longer wish to use the transfer function, turn it off.
Programming the transfer number
To use the Transfer function, you must first give the machine the number to
call (the transfer number).
1Press once and once.
2Press once and 3 times.
3Press .
4Press the number keys to enter the transfer number.
•To insert a pause between any two digits of the number, press .
5Press .
6Press to return to the date and time display.
FUNCTION
FUNCTION
START/MEMORY
STOP
TRANSFER TEL #
Display:
T.A.D. SETTING
ENTER TEL #
all.bookPage69Friday,April5,20023:57PM
Transfer Function
70
Recording the transfer message
The transfer message plays when you answer the telephone, and informs you
that the call is a transfer call. The following is an example:
“Hello. This is a transfer call for (YOUR NAME). Enter your remote code
number now.”
Note: Do not lift the handset until Step 3 below.
1Press once and once.
2Press once.
•If you have already recorded a message, you can press to listen to the
message, or press to delete the message.
3Lift the handset.
4Press and speak into the handset to record the message.
•The transfer message can be up to 15 seconds long. While recording, the
display will show the time left to record.
5When finished, replace the handset or press .
REC/
MEMO
PLAY
DELETE
START/MEMORY
STOP
Display:
OGM (TRANSFER)
Checking or erasing the transfer message
To check or erase the transfer message, follow Steps 1 and 2 of the above
procedure, and then press to check the message, or to erase the
message.
PLAY
DELETE
all.bookPage70Friday,April5,20023:57PM
Transfer Function
71
4. Answering
Machine
Turning the Transfer function on and off
When you go out and wish to use the Transfer function, turn it on as follows:
1Press once and once.
2Press once and 4 times.
3Press .
4Press to turn on the Transfer
function.
(Press to turn the function off.)
5Press the number of the box for which you want the Transfer function to
operate (for the general box, press ).
6Press to return to the date and time display.
7Each time the machine receives an incoming message, it will call your
programmed transfer number. When you answer, you will hear your
recorded message telling you that the call is a transfer call. On the dial
pad of your phone, enter , your remote code number (see page 72) if
the general box was selected in Step 5, or the box passcode number if a
personal box was selected, and then . Your messages will play.
•You can also perform any of the remote operations described in Remote
Operations later in this chapter (see page 72).
Note: When you hang up after a transfer call, the machine will not
immediately resume normal operation. If you want the machine to accept calls
immediately after a transfer call, enter twice before hanging up (if
hanging up during message playback, first enter and to stop
playback, then enter twice).
FUNCTION
1
2
0
STOP
0
TRANSFER FUNC
Display:
T.A.D. SETTING
1=YES, 2=NO
The display briefly shows
your selection, then:
ON TAD FAILURE
all.bookPage71Friday,April5,20023:57PM
Remote Operations
72
1Press once and once.
2Press once and twice.
3Press .
4Press the number keys to enter a 3-digit remote code number.
5Press to store the remote
number.
6Press to return to the date and time display.
FUNCTION
START/MEMORY
STOP
Remote Operations
When you are out, you can call the machine from any touch-tone telephone
and play back your messages using the remote commands. You can also use
these commands to change the reception mode and other settings.
Remote code number
After calling the machine, you must enter your remote code number to listen
to the messages in the general box. The remote code number has been set to
"001" at the factory. To change the number, follow the steps below.
Note: The remote code is only for the general box. Personal boxes are
accessed by entering the passcode for the box (see page 59).
Display:
T.A.D. SETTING
REMOTE CODE
TRANSFER TEL #
all.bookPage72Friday,April5,20023:57PM
Remote Operations
73
4. Answering
Machine
Toll Saver
When you call the machine to listen to your messages, it will answer after two
rings if it has received at least one message in any of the boxes, or after four
rings if it has not received any messages.
This allows you to save money on telephone charges, particularly if you are
calling long distance. If the machine does not answer after the second ring,
you can simply hang up before it answers, saving yourself the cost of that call.
If you do not want to use the Toll Saver function, you can turn it off by
following the steps below. In this case, the machine will answer after the
number of rings set with the NUMBER OF RINGS setting (see Changing the
number of rings on page 93).
1Press once and once.
2Press once.
3Press once.
4Press to turn on the Toll Saver
function, or to turn it off.
5Press to return to the date and time display.
FUNCTION
1
2
STOP
TOLL SAVER
Display:
T.A.D. SETTING
1=YES, 2=NO
The display briefly shows
your selection, then:
RECORDING TIME
all.bookPage73Friday,April5,20023:57PM
Remote Operations
74
Retrieving your messages
Note: You can only access one box per call. If you wish to access more than
one box, you must make a separate call for each box.
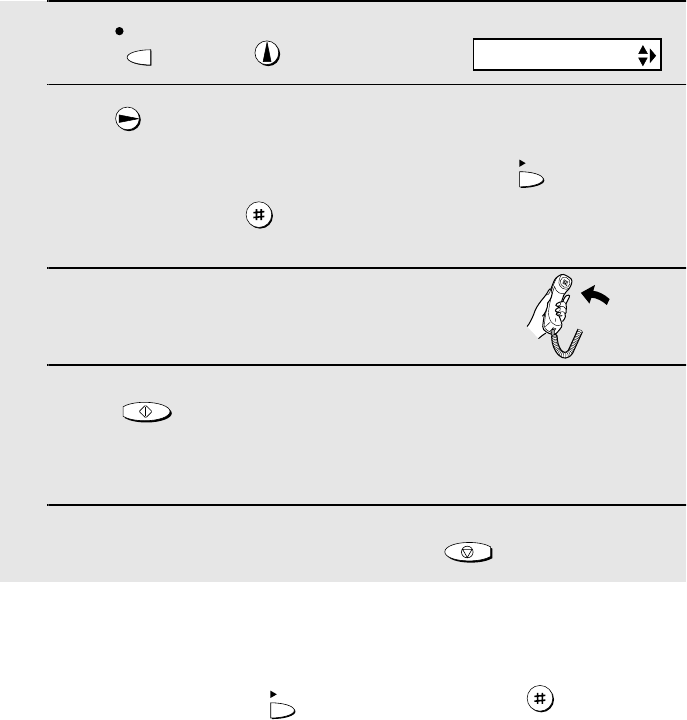
1Call the machine from a touch-tone telephone. When the general
outgoing message begins, press on the telephone.
•You will hear a short beep, and the outgoing message will stop.
2If you wish to listen to the messages in a personal box, enter the
number of that box (otherwise, go directly to Step 3).
Example: for Box 1
3If you are accessing the general box, enter your remote code.
If you are accessing a personal box, enter the passcode of the box.
When finished, press .
•You will hear a series of beeps equal to the number of messages recorded
in the box, or one long beep if four or more messages have been received.
The machine will then play back the messages, beeping once at the end of
each message. When all messages have been played back, you will hear a
long beep.
•If no messages have been received, you will hear a short beep. You can
either hang up, or perform any of the operations described in the following
section, Other remote operations.
1
all.bookPage74Friday,April5,20023:57PM
Remote Operations
75
4. Answering
Machine
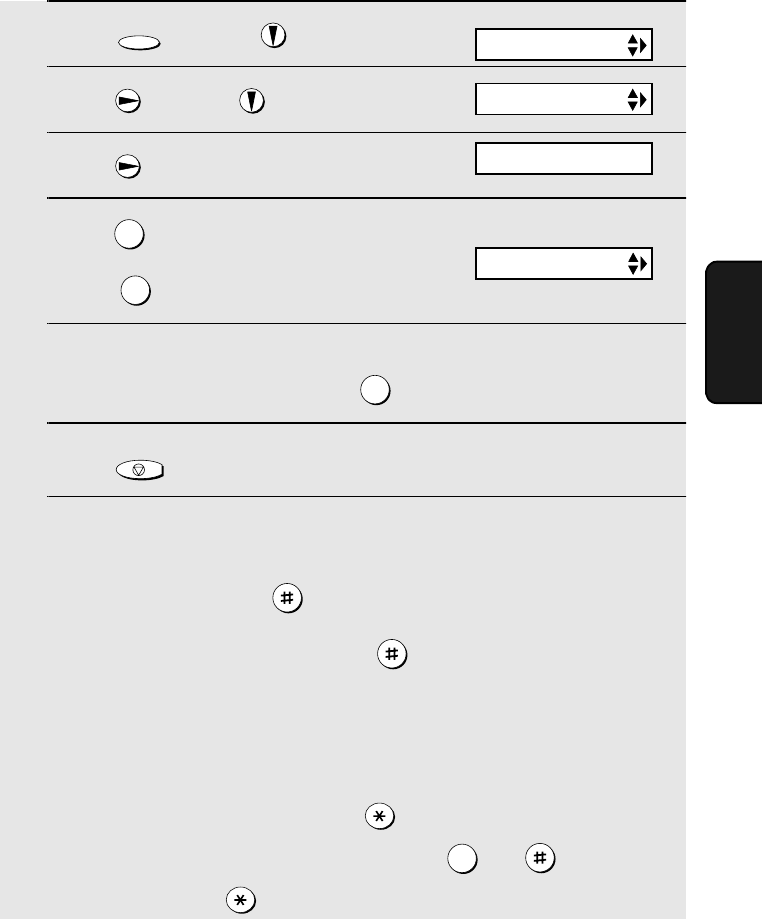
4While the messages are playing, you can do any of the following:
•Repeat: To listen to a message a second time, press and on the
telephone before that message ends. To move back to the previous
message, press and during the first 3 seconds of the current
message.
•Skip forward: To skip forward to the next message, press and
on the telephone.
•Stop: To stop playback, press and on the telephone. After this,
you can enter any of the commands described in the following section,
Other remote operations.
•Play new messages: To listen to only your new messages, first stop
playback by pressing and , and then press and .
•Erase a message: To erase the message you are currently listening to,
press and before it ends.
5 When you have finished listening to your messages, you can do any of
the following:
•Erase all messages: Press , , and .
•Repeat playback: Press and .
•Perform other operations: You can enter any of the commands described
in the following section, Other remote operations.
•Hang up: If you do not erase your messages first, they will be saved and
any new messages will be recorded after them. If you want the machine to
resume normal operation immediately, press twice before hanging up
(in some cases, particularly when the Transfer function is used, the
machine may not accept new calls for one or two minutes after you hang up
unless you press twice).
2
2
5
0
0 6
3
3 3
7
all.bookPage75Friday,April5,20023:57PM

Remote Operations
76
Note: You can also call the machine and perform remote operations when the
reception mode is set to FAX. In this case, when you call the machine, press
immediately after it answers (before you hear the fax tone), and then
continue from Step 2 above.
Comments:
♦When a remote command is accepted by the machine, you will hear one
beep. If an incorrect command is entered, you will hear four beeps. In the
latter case, re-enter the correct command.
♦When entering a command, do not pause longer than 10 seconds between
each digit. If you do, you will hear a 4-beep error signal and the digits
entered up to that point will be cleared. In this case, re-enter the command
from the beginning.
♦If you pause for longer than 10 seconds before entering a command, or
make two errors while entering your remote code number, the line will be
disconnected. (This prevents unauthorized people from attempting to
guess your remote code number.)
Other remote operations
After listening to your messages, you can perform any of the following
operations by pressing the appropriate keys on the telephone.
Note: The following commands cannot be entered while messages are being
played back. If you do not want to wait until playback ends to enter a
command, first stop playback by pressing and , and then enter the
command.
Changing the fax reception mode
Select a new reception mode by pressing the keys as follows:
0
♦TAD mode: , , and .
♦FAX mode: , , and .
♦TEL mode: , , and .
8 1
82
8 3
Caution: If you select TEL mode,
you will not be able to change the
reception mode again.
all.bookPage76Friday,April5,20023:57PM
Remote Operations
77
4. Answering
Machine
Recording a new outgoing message
Note: You can only record a new outgoing message for the box you accessed
at the beginning of the call.
1Press and on the telephone.
2When you hear a short beep, speak into the telephone to record the new
message.
•The message can be up to 15 seconds long. After 15 seconds (or earlier if
the machine detects silence after you finish speaking), you will hear a
beep, and the new message will be played back.
4
Turning the Transfer function on or off
To turn Transfer on: Press , , and on the telephone, followed
by the number of the box for which you want the Transfer function to operate
(press for the general box) and .
To turn Transfer off: Press , , and on the telephone.
9 1
0
92
Changing the transfer telephone number
1Press , , and on the telephone.
2After you hear a short beep, enter the new telephone number. When
finished, press .
•To insert a pause between any two digits of the number, press .
9 0
all.bookPage77Friday,April5,20023:57PM
Remote Operations
78
Recording a memo
You can record a memo for yourself or other users of the machine. The memo
will be recorded in the general box.
1Press and on the telephone.
2When you hear a short beep, speak into the telephone to record the
memo.
3When you are finished, press and on the telephone.
•If the machine detects silence, it will stop recording automatically.
0
Recording a new transfer message
1Press , , and on the telephone.
2When you hear a short beep, speak into the telephone to record the new
message.
•The time for the transfer message is fixed at 15 seconds. After 15 seconds
(or earlier if the machine detects silence after you finish speaking), you will
hear a beep, and the new message will be played back automatically.
9 3
OGM only mode
To turn on OGM only mode: Press , , and on the telephone.
(Outgoing messages will play, but callers will not be able to record a
message. Faxes sent by automatic dialling will be received)
To turn off OGM only mode: Press , , and on the telephone.
1 1
12
all.bookPage78Friday,April5,20023:57PM
79
5. Sending
Faxes
5. Sending Faxes
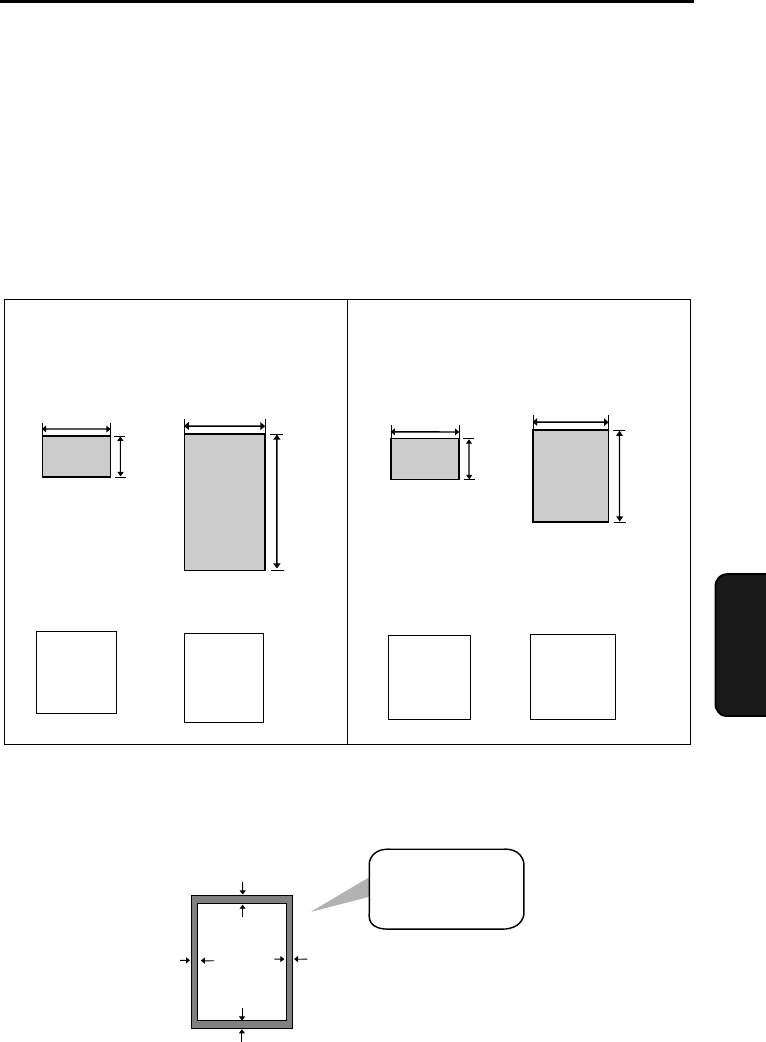
Transmittable Documents
Size and weight
The size and weight of documents that you can load in the document feeder
depend on whether you load one page at a time or several pages at once.
Note: Letters or graphics on the edges of a document will not be scanned.
0.16"(4 mm) 0.16"(4 mm)
0.2"(5 mm)
0.2"(5 mm)
Letters in the
shaded area will
not be scanned.
8.5"
(216 mm)
23.6"
(600 mm)
14 lbs.
(52 g/m²)
42 lbs.
(157 g/m²)
11"
(279 mm)
8.5"
(216 mm)
21.5 lbs.
(80 g/m²)
Loading one page at a time:
Minimum size Maximum size
Minimum weight Maximum weight
Minimum size Maximum size
Minimum weight Maximum weight
14 lbs.
(52 g/m²)
Loading up to 10 pages at once:
5.5"
(140 mm)
5.8"
(148 mm)
5.5"
(140 mm)
5.8"
(148 mm)
The illustration shows the
scanning margins for letter-
size documents. The scanning
width is 8.3” (210 mm). The
horizontal margins decrease
for smaller-width documents.
all.bookPage79Friday,April5,20023:57PM
Loading the Document
80
Other restrictions
♦The scanner cannot recognize yellow, greenish yellow, or light blue ink.
♦Ink, glue, and correcting fluid on documents must be dry before they pass
through the document feeder.
♦All clips, staples, and pins must be removed from documents before loading
in the feeder. If these are not removed, they may damage the machine.
♦Documents which are patched, taped, torn, smaller than the minimum size,
carbon backed, easily smudged, or have a slick coated surface should be
photocopied, and the copy loaded in the feeder.
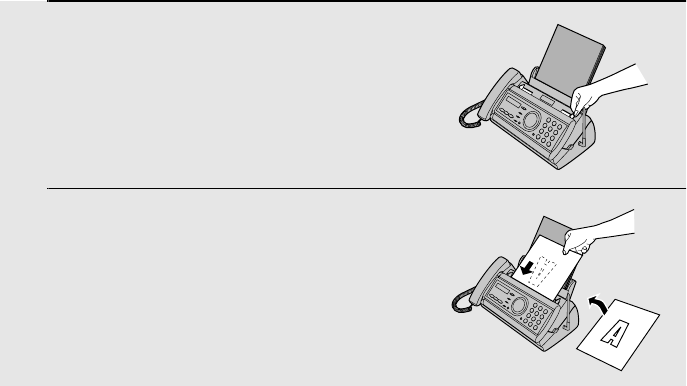
Loading the Document
Up to 10 pages can be placed in the feeder at one time. The pages will
automatically feed into the machine starting from the bottom page.
♦If you need to send or copy more than 10 pages, place the additional pages
gently and carefully in the feeder just before the last page is scanned. Do
not try to force them in, as this may cause double-feeding or jamming.
♦If your document consists of several large or thick pages which must be
loaded one at a time, insert each page into the feeder as the previous page
is being scanned. Insert gently to prevent double-feeding.
1Adjust the document guides to the
width of your document.
2Insert the document face down in the
document feeder. The top edge of the
document should enter the feeder first.
•READY TO SEND will appear in the
display.
all.bookPage80Friday,April5,20023:57PM
Adjusting the Resolution and Contrast
81
5. Sending
Faxes
Adjusting the Resolution and Contrast
If desired, you can adjust the resolution and contrast before sending a
document.
Note: The resolution and contrast settings are only effective for sending a
document. They are not effective for receiving a document.
Resolution settings
STANDARD Use STANDARD for ordinary documents. This
setting gives you the fastest and most
economical transmission.
FINE Use FINE for documents containing small letters
or fine drawings.
SUPER FINE Use SUPER FINE for documents containing
very small letters or very fine drawings.
HALF TONE Use HALF TONE for photographs and
illustrations. The original will be reproduced in
64 shades of gray.
You must adjust the
settings each time
you don’t want to use
the default settings.
The default resolution
setting is STANDARD
and the default contrast
setting is AUTO.
3Adjust the resolution and/or contrast settings as explained in
Resolution and Contrast below, then dial the receiving machine as
explained on page 82.
all.bookPage81Friday,April5,20023:57PM
Adjusting the Resolution and Contrast
82
Note: In order to transmit in SUPER FINE resolution, the receiving fax machine
must also have that resolution. If it doesn’t, your machine will automatically step
down to the next best available setting.
1Load the document(s).
•The document must be loaded before
the resolution and contrast can be
adjusted.
2Press one or more times until
the desired resolution and contrast
settings appear in the display.
•The first time you move through the list
of resolution settings, the contrast
setting AUTO will appear next to each
resolution setting. The second time you
move through the list, the contrast
setting DARK will appear.
RESOLUTION/
RECEPTION MODE
Display:
STANDARD :AUTO
FINE :AUTO
SUPER FINE :AUTO
HALF TONE :AUTO
STANDARD :DARK
HALF TONE :DARK
Contrast settings
AUTO Use AUTO for normal documents.
DARK Use DARK for faint documents.
all.bookPage82Friday,April5,20023:57PM
Sending a Fax by Normal Dialing
83
5. Sending
Faxes
1Load the document(s).
•If desired, press to set the
resolution and/or contrast.
2Pick up the handset or press .
Listen for the dial tone.
3Dial the number of the receiving
machine by pressing the number keys.
4Wait for the connection. Depending on the setting of the receiving
machine, you will either hear a fax tone or the other person will answer.
•If the other party answers, ask them to press their Start key (if you pressed
, pick up the handset to speak with them). This causes the receiving
machine to issue a fax tone.
RESOLUTION/
RECEPTION MODE
SPEAKER
SPEAKER
or
Sending a Fax by Normal Dialing
With Normal Dialing, you pick up the handset (or press ) and dial by
pressing the number keys.
♦If a person answers, you can talk with them through the handset before
sending the fax. (If you pressed , you must pick up the handset to
talk.)
♦Normal Dialing allows you to listen to the line and make sure the other fax
machine is responding.
SPEAKER
SPEAKER
JKL
ABC
1
DEF
WXYZ
9
GHI
45
MNO
6
PQRS
7
TUV
8
0
2 3
DELETE
REPEAT SKIP
READY TO SEND
SPEAKER
all.bookPage83Friday,April5,20023:57PM
Sending a Fax by Automatic Dialing
84
Sending a Fax by Automatic Dialing
You can store your most frequently dialed fax or phone numbers in the
machine for automatic dialing.
♦Auto-dial numbers can be stored using either the fax machine or the
cordless handset (to store a number using the cordless handset, see page
46).
♦Numbers stored using the fax machine are stored in the Common book. A
total of 30 numbers can be stored.
Storing fax and phone numbers for automatic dialing
1Press once and once.
2Press once.
3Enter the fax or voice number by pressing the number keys.
(Note: A space cannot be entered.)
•To clear a mistake, press .
•If a pause is required between any of the digits to access a special service
or an outside line, press . The pause appears as a hyphen (two
seconds per pause). Several pauses can be entered in a row.
FUNCTION
SPEAKER
FUNCTION
5When you hear the fax tone, press . Replace the handset.
•If the transmission is completed successfully, the fax will beep once.
•If an error occurs, the fax will beep three times and print a Transaction
Report to inform you of the problem (see page 111).
START/MEMORY
Display:
ENTER FAX #
<NEW NUMBER>
Note: If the transmission is unsuccessful and DOCUMENT JAMMED appears
in the display, remove the document as explained on page 129. (This may
occur if the other fax machine doesn’t respond properly when you attempt to
send the document.)
all.bookPage84Friday,April5,20023:57PM
Sending a Fax by Automatic Dialing
85
5. Sending
Faxes
4Press .
5Enter a name by pressing number keys for each letter as shown in the
chart below. Up to 15 characters can be entered. (If you do not wish to
enter a name, go directly to Step 6.)
Example: SHARP = 7777 44 2 777 7
♦To enter two letters in succession that require the same key, press
after entering the first letter.
♦To enter a lower case letter, continue pressing the key for the letter until the
lower case letter appears.
♦To enter one of the following symbols, press or repeatedly:
. / ! " # $ % & ’ ( ) + + , - : ; < = > ? @ [ ¥ ] ^ _ ' { | } ) (
6Press .
7Return to Step 2 to store another number, or press to return to
the date and time display.
START/MEMORY
START/MEMORY
STOP
A =
B =
C =
D =
E =
F =
G =
H =
I =
J =
K =
L =
M =
N =
O =
P =
Q =
R =
S =
T =
U =
V =
W =
X =
Y =
Z =
SPACE =
Display:
Note: The fax machine uses a lithium battery to keep automatic dialing numbers
and other programmed information in memory when the power is turned off.
Battery power is consumed primarily when the power is off. With the power kept
continuously off, the life of the battery is about 5 years. If the battery dies, have
your dealer or retailer replace it. Do not try to replace it yourself.
<NEW NUMBER>
all.bookPage85Friday,April5,20023:57PM
Sending a Fax by Automatic Dialing
86
Editing and clearing auto-dial numbers
If you need to make changes to a previously stored auto-dial number, or clear
a number, follow these steps:
1Press once and once.
2Press or until the number you wish to edit or clear appears in
the display.
3Press .
4Press for EDIT or for CLEAR.
•If you selected CLEAR, go to Step 8.
5If you selected EDIT, make the desired changes to the number.
•Press or to move the cursor to the digit or digits you wish to
change, and then enter the new digit. The new digit will replace the old
digit.
•If you do not wish to change the number, go directly to Step 6.
6Press .
7Make the desired changes to the name.
•Press or to move the cursor to the letter or letters you wish to
change, and then press the appropriate number key repeatedly until the
desired letter appears (see Step 5 on page 85). The new letter will replace
the old letter.
•If you do not wish to change the name, go directly to Step 8.
FUNCTION
12
START/MEMORY
Display:
1=EDIT, 2=CLEAR
<NEW NUMBER>
all.bookPage86Friday,April5,20023:57PM
Sending a Fax by Automatic Dialing
87
5. Sending
Faxes
8Press .
9Return to Step 2 to edit or clear another number, or press to
return to the date and time display.
START/MEMORY
STOP
Using an auto-dial number
Once you have stored a fax or phone number, you can use it to send a fax or
make a phone call.
1If you are sending a fax, load the
document(s).
•If desired, press to set the
resolution and/or contrast.
2Press (or ) until the name of the other party appears in the
display (if no name was stored, the number will appear).
3If you are sending a fax, press . Dialing and transmission
begins.
•If the transmission is completed successfully, the fax will beep once.
•If an error occurs, the fax will beep three times and print a Transaction
Report to inform you of the problem (see page 111).
If you are making a phone call, lift the handset. Dialing begins.
RESOLUTION/
RECEPTION MODE
START/MEMORY
READY TO SEND
all.bookPage87Friday,April5,20023:57PM
Sending a Fax by Automatic Dialing
88
Sending a fax by Direct Keypad Dialing
You can also enter a full number with the number keys and then press the
key to begin dialing. You can use this method to dial a full number
when you don't need to speak to the other party before faxing.
START/MEMORY
1Load the document(s).
•If desired, press to set the
resolution and/or contrast.
2Enter the number of the receiving machine by pressing the number
keys.
•If a pause is required between any of the digits to access a special service
or an outside line, press . The pause will appear as a hyphen (two
seconds per pause). Several pauses can be entered in a row.
3Check the display. If the number of the receiving machine shown is
correct, press .
•If the number is not correct, press to backspace and clear one digit
at a time, and then re-enter the correct digit(s).
RESOLUTION/
RECEPTION MODE
FUNCTION
START/MEMORY
STOP
READY TO SEND
all.bookPage88Friday,April5,20023:57PM
Sending a Fax by Automatic Dialing
89
5. Sending
Faxes
1If you are sending a fax, load the
document(s).
•If desired, press to set the
resolution and/or contrast.
2Press once. <REDIAL> appears in the display, followed by the last
number dialed. Make sure the number that appears is the number you
wish to dial.
3If you are sending a fax, press . Dialing begins.
If you are making a phone call, lift the handset. Dialing begins.
RESOLUTION/
RECEPTION MODE
START/MEMORY
Redial
You can automatically redial the last number dialed on the fax machine. This
procedure can be used to send a fax or make a phone call.
Note: The fax machine and the cordless handset each retain their own
separate redial numbers.
Automatic redialing
If you use automatic dialing (including Direct Keypad Dialing) to send a fax
and the line is busy, the fax machine will automatically redial the number. The
fax machine will make three redial attempts at intervals of five minutes. During
this time, RECALLING will appear in the display, followed by a two-digit
number assigned to the fax job. You will not be able to dial any other locations
while the message appears.
Note: If a fax transmission is unsuccessful and DOCUMENT JAMMED
appears in the display, remove the document as explained on page 129. (This
may occur if the other fax machine doesn’t respond properly when you
attempt to send the document.)
all.bookPage89Friday,April5,20023:57PM
Sending a Fax by Automatic Dialing
90
Error Correction Mode
The fax machine is set to automatically correct any distortions in a
transmission due to noise on the telephone line before printing at the
receiving end. This function is called Error Correction Mode (ECM). ECM is
effective for both transmissions and receptions, and is only effective when the
other fax machine has ECM as well.
If desired, you can turn ECM off. This will increase slightly the amount of
memory available for memory transmission and reception.
1Press once and twice.
2Press once and 6 times.
3Press once.
4Press to select YES, or to
select NO.
5Press to return to the date and
time display.
FUNCTION
12
STOP
OPTION SETTING
ECM MODE
1=YES, 2=NO
The display briefly shows
your selection, then:
DAY LIGHT SAVE
♦You can press to clear the message and stop automatic redialing.
♦Under certain conditions (for example if a person answers the call on a
telephone), automatic redialing may stop before three redialing attempts
are made.
STOP
all.bookPage90Friday,April5,20023:57PM
Sending a Fax From Memory
91
5. Sending
Faxes
Sending a Fax From Memory
You can scan a document into the fax’s memory and send the document from
memory. This increases transmission speed and allows you to send a fax to
multiple destinations in a single operation. After transmission, the document is
automatically cleared from memory.
Note: If a power failure occurs while sending a fax from memory, you will need
to repeat the operation.
Broadcasting (sending a fax to multiple destinations)
This function allows you to send the same fax to as many as 20 different
destinations in just one operation.
♦When sending to multiple destinations, only auto-dial numbers can be used
to dial the numbers of the receiving machines.
1Load the document(s).
•If desired, press to set the
resolution and/or contrast.
2Press .
3Press (or ) until the name of the destination appears in the
display (if no name was stored, the number will appear).
4Press to select the destination.
5Repeat Steps 3 and 4 for each of the other destinations to which you
wish to send the fax (maximum of 20).
•To check your selected destinations, press to scroll through them. To
delete a destination, scroll to the destination and then press .
RESOLUTION/
RECEPTION MODE
START/MEMORY
STOP
all.bookPage91Friday,April5,20023:57PM
Sending a Fax From Memory
92
Memory transmission
You can also send a fax through memory when sending to a single
destination. This is convenient when sending to destinations where the line is
often busy, as it saves you from waiting to pick up the original document and
frees the feeder for other operations.
6When you are ready to begin transmission, press .
•A Transaction Report is automatically printed out after Broadcasting is
completed. Check the "Note" column of the report to see if any of the
destinations are marked "Busy" or have a communication error code. If so,
send the document to those destinations again.
START/MEMORY
To send a fax through memory, load the document, press , and then
dial using one of the following methods:
♦Press the number keys to enter the fax number and then press .
♦Press repeatedly to select an auto-dial number and press .
♦Press once to select the last number dialed and press .
START/MEMORY
START/MEMORY
START/MEMORY
START/MEMORY
If the memory becomes full...
If the memory becomes full while the document is being scanned, MEMORY
IS FULL and SEE MANUAL will alternately appear in the display.
♦Press if you want to transmit the pages which have been stored up
to that point in memory. The remaining pages will be ejected from the
feeder. After transmission, the memory will be cleared and you can transmit
the remaining pages. You will also need to transmit the page which was
being scanned when the memory filled up.
♦Press if you want to cancel the entire transmission.
START/MEMORY
STOP
all.bookPage92Friday,April5,20023:57PM
93
6. Receiving
Faxes
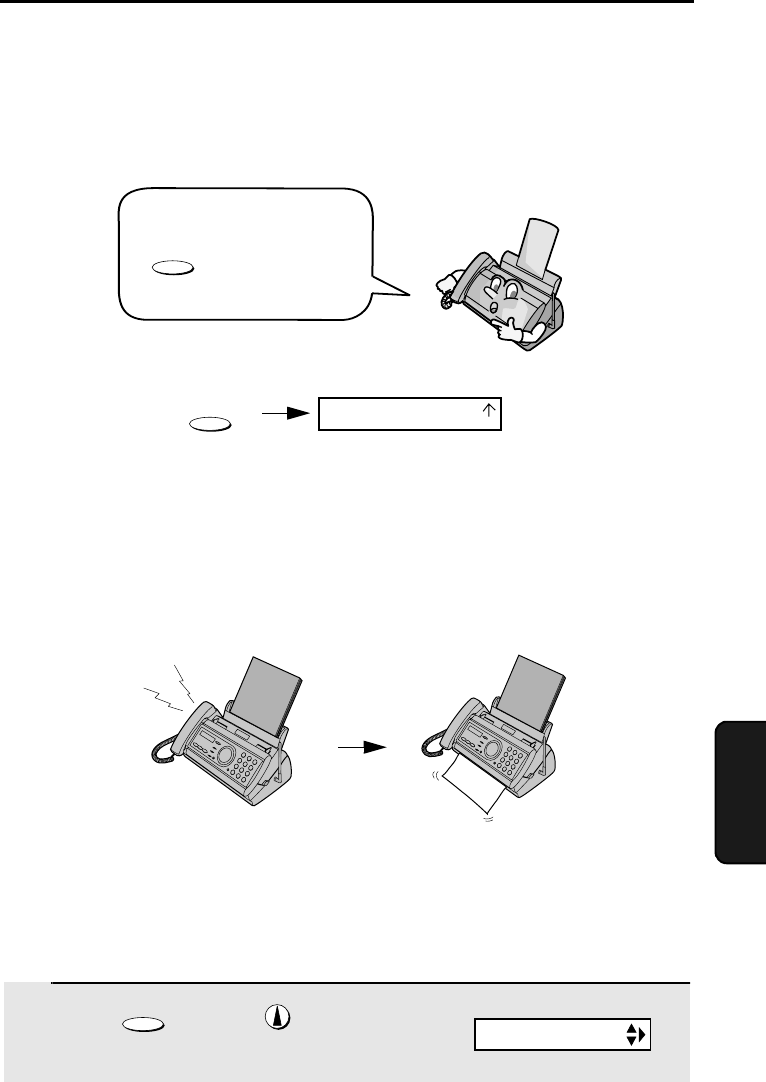
When the reception mode is set to FAX, the fax machine will automatically
answer all calls on four rings and receive incoming faxes.
♦If you pick up the handset before the machine answers, you can talk to the
other party and/or receive a fax as explained in Using TEL Mode on page
94.
4 rings Fax reception
6. Receiving Faxes
Using FAX Mode
RESOLUTION/
RECEPTION MODE
Changing the number of rings
If desired, you can change the number of rings on which the fax machine
answers incoming calls in FAX mode. Any number from 2 to 5 can be
selected.
1Press once and twice.
FUNCTION
Display:
FAX
TEL
TAD
OPTION SETTING
To select FAX mode, press
until the arrow in
the display points to FAX.
RESOLUTION/
RECEPTION MODE
all.bookPage93Friday,April5,20023:57PM

Using TEL Mode
94
2Press once.
3Press once.
4Enter the desired number of rings (any
number from 2 to 5).
Example: 3 rings
5Press to return to the date and time display.
Note: If you are using Distinctive Ring, the fax machine will answer calls after two
rings regardless of the above setting.
3
STOP
Using TEL Mode
The display briefly shows
your selection, then:
To select TEL mode, press
until the arrow in
the display points to TEL.
RESOLUTION/
RECEPTION MODE
When the reception mode is set to TEL, you must answer all calls by picking
up the fax machine’s handset or an extension phone connected to the same
line.
RESOLUTION/
RECEPTION MODE
FAX
TAD
TEL
NUMBER OF RING
TRANSACTION
ENTER (2-5) (4)
all.bookPage94Friday,April5,20023:57PM