Silex Technology SX10WAG SX-10WAG User Manual
Silex Technology, Inc. SX-10WAG
Contents
Manual 9
152
Mode / Choose Profile
Menu Guide
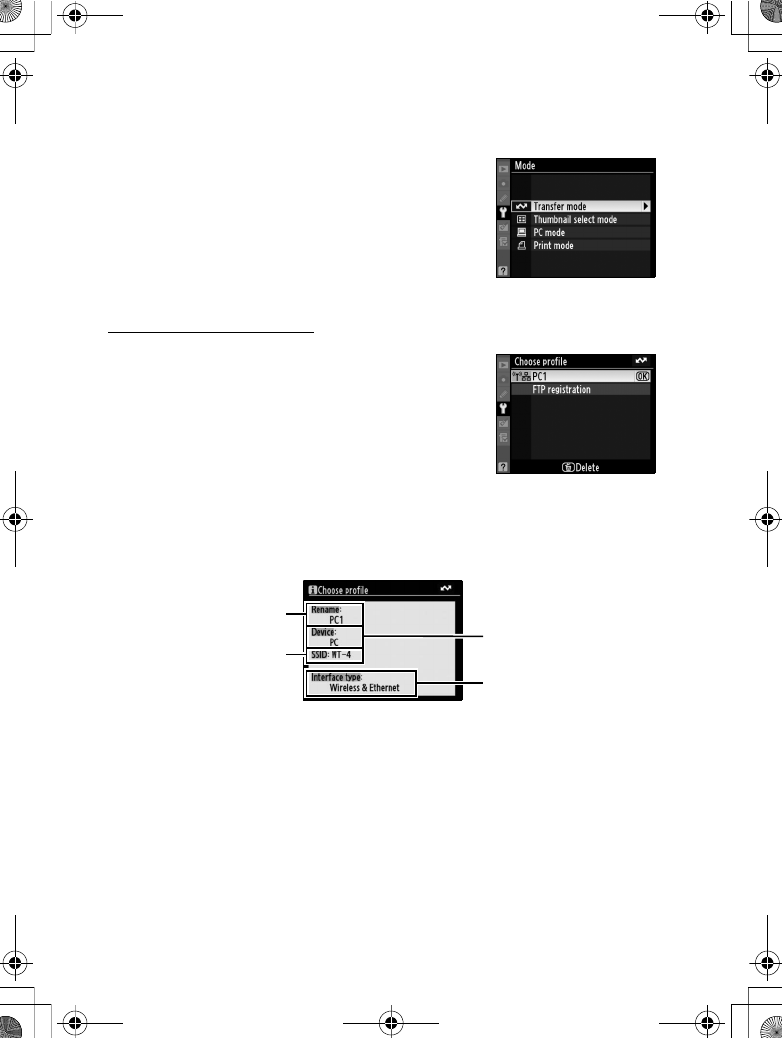
Mode
Choose from [Transfer mode] (pg.70),
[Thumbnail select mode] (pg.79), [PC mode]
(pg.90), and [Print mode] (pg.97). Selecting
any of these options displays a profile list
showing the connections available in the
selected mode.
Choose Profile
Selecting an option from the [Mode] menu
displays a profile list showing the
connections available in the selected mode.
The WT-4 can store a total of up to nine host,
server, and printer profiles. To delete a
profile, highlight it in the profile list and press
the O button. To edit an ftp server profile,
highlight the profile and press the N button (pg.153).
To view profile information, highlight the desired profile and press
the L (?) button. The following information will be displayed.
DUsing the Menus
If the shutter-release button on the camera is pressed while menus are
displayed, the monitor will turn off and any changes to the current profile
will be lost. Select [Monitor off delay] in [Custom menu] and configure a
longer power off timing.
Device (PC, ftp server,
or printer)
Interface type
(pg.51, pg.62, pg.121,
pg.131, pg.177)
Profile name
(pg.51, pg.62, pg.121,
pg.131, pg.176)
SSID
(pg.54, pg.65, pg.123,
pg.134, pg.177)
$00_WT-4_En.book Page 152 Friday, August 10, 2007 2:02 PM
153
Mode / FTP Registration (for Connection to ftp Servers Only)
Menu Guide
FTP Registration (for Connection to ftp
Servers Only)
In transfer mode, ftp profiles can be created without using the
WT-4 Setup Utility. See the Appendix for more information
(pg.175). This option is only available when the WT-4 and computer
are connected with a USB cable and the WT-4 is on.
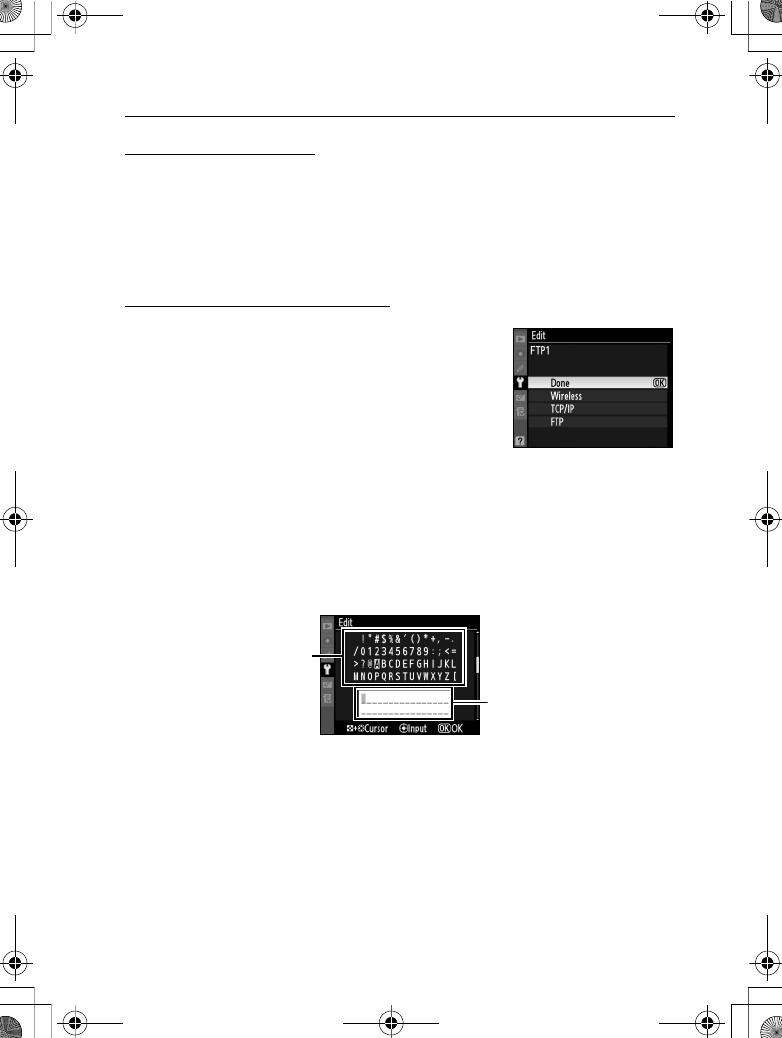
Editing ftp Profiles
To edit an ftp server profile, highlight it in the
profile list in transfer mode and press the N
button. Choose the settings to be edited
from [Wireless], [TCP/IP], and [FTP], or select
[Done] to save changes and return to the
profile list. Only ftp server profiles can be
edited in this fashion; to edit other profiles,
use the WT-4 Setup Utility. This option is only available when the
WT-4 and computer are connected with a USB cable and the WT-4
is on.
AText Entry
The following dialog is displayed when text entry is required.
Use the multi selector to highlight the desired character in the keyboard
area and press the center of the multi selector to insert the highlighted
character at the current cursor position (note that if a character is entered
when the field is full, the last character in the field will be deleted). To
delete the character under the cursor, press the O button. To move the
cursor to a new position, press the N button while using the multi
selector.
To complete entry and return to the previous menu, press the G button.
To exit to the previous menu without completing text entry, press G.
Keyboard area: Use multi
selector to highlight
letters, press center to
select.
Text display area: Text
appears in this area. To
move cursor, press N
while using up, down,
left, and right buttons
on multi selector.
$00_WT-4_En.book Page 153 Friday, August 10, 2007 2:02 PM
Mode / Editing ftp Profiles / Wireless
Menu Guide154
❏Wireless
This option contains settings for connection
to a wireless network and is only displayed if
the interface type for the selected profile is
[Wireless & Ethernet]. The wireless menu has
two pages of options; to scroll between
pages, press the multi selector up or down.
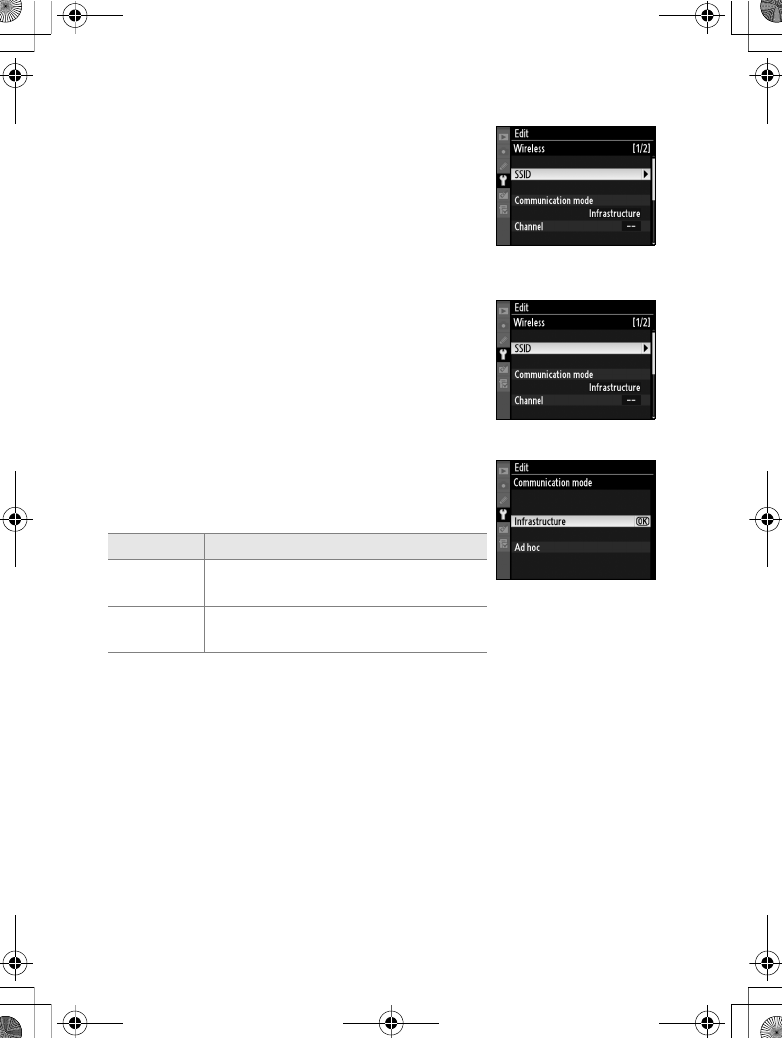
Wireless Menu, Page 1/2
SSID: A BSS- or ESS-ID is required for
connection to a wireless LAN adapter or
access point. To change the BSS- or ESS-ID,
highlight the current ID, press the multi
selector to the right, and enter a new ID as
described in the note on the previous page.
Press J to return to the wireless menu (1/2).
Communication mode: Choose a mode
according to how the wireless network is set
up.
AEthernet networks
When utilizing an ethernet cable connection, it is not necessary to
configure wireless settings.
Option Description
Infrastructure
(default)
Connection to wireless network is
via access point.
Ad-hoc Direct peer-to-peer wireless
connection to host.
$00_WT-4_En.book Page 154 Friday, August 10, 2007 2:02 PM

Mode / Editing ftp Profiles / Wireless
Menu Guide 155
Channel *
1Choose channel.
2Return to wireless menu (1/2).
* Not required if [Infrastructure] is selected for [Communication mode].
Authentication: Choose the type of
authentication used by the computer or
access point. The camera supports WPA-PSK,
WPA2-PSK, open system, and shared key
authentication. WPA-PSK and WPA2-PSK are
available only in infrastructure mode.
$00_WT-4_En.book Page 155 Friday, August 10, 2007 2:02 PM
Mode / Editing ftp Profiles / Wireless
Menu Guide156
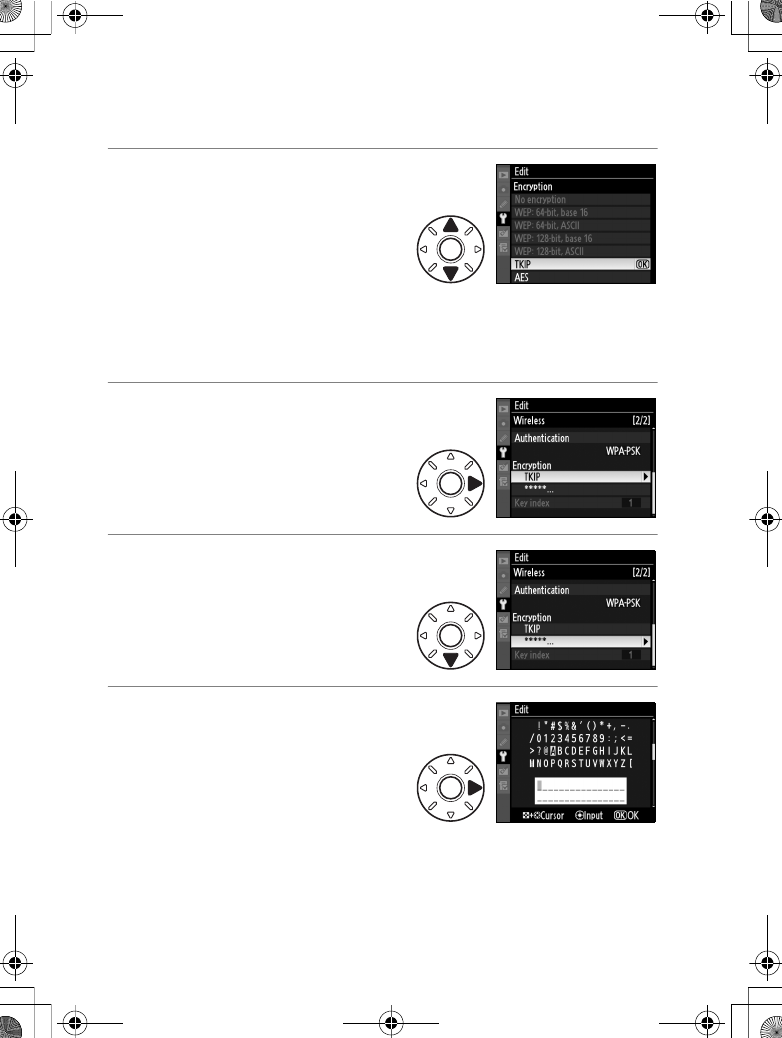
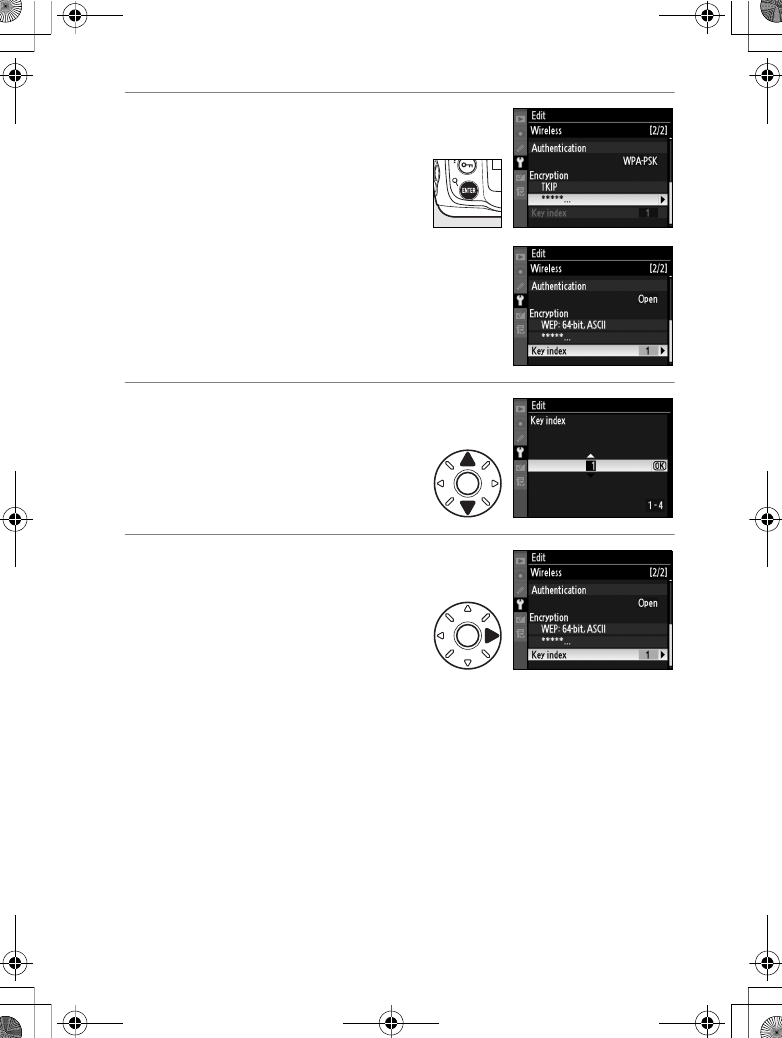
Wireless Menu, Page 2/2
Encryption
1Highlight encryption method.
AEncryption
The type of encryption available
depends on the option selected
for [Authentication] (pp.54, 65):
•Open: none, WEP
•Shared: WEP
•WPA-PSK: TKIP, AES
•WPA2-PSK: AES
2Return to wireless menu (2/2).
3Highlight encryption key. Skip
Steps 3–5 if [No encryption]
was selected in Steps 1–2.
4Edit encryption key:
•Base 16: Press multi selector
left or right to select
character, up or down to
change. 64-bit keys require
10 digits, 128-bit keys 26
digits, TKIP and AES keys 64 digits.
•ASCII: Enter key as described on page 26. 64-bit keys are 5
characters long, 128-bit keys 13 characters long, TKIP and
AES keys 8 to 63 characters long.
$00_WT-4_En.book Page 156 Friday, August 10, 2007 2:02 PM
Mode / Editing ftp Profiles / Wireless
Menu Guide 157
5Return to wireless menu (2/2).
Key index: In infrastructure networks that use
WEP encryption, choose the key index used
by the host or access point.
1Choose index.
2Return to wireless menu (1/2).
$00_WT-4_En.book Page 157 Friday, August 10, 2007 2:02 PM
Mode / Editing ftp Profiles / TCP/IP
Menu Guide158
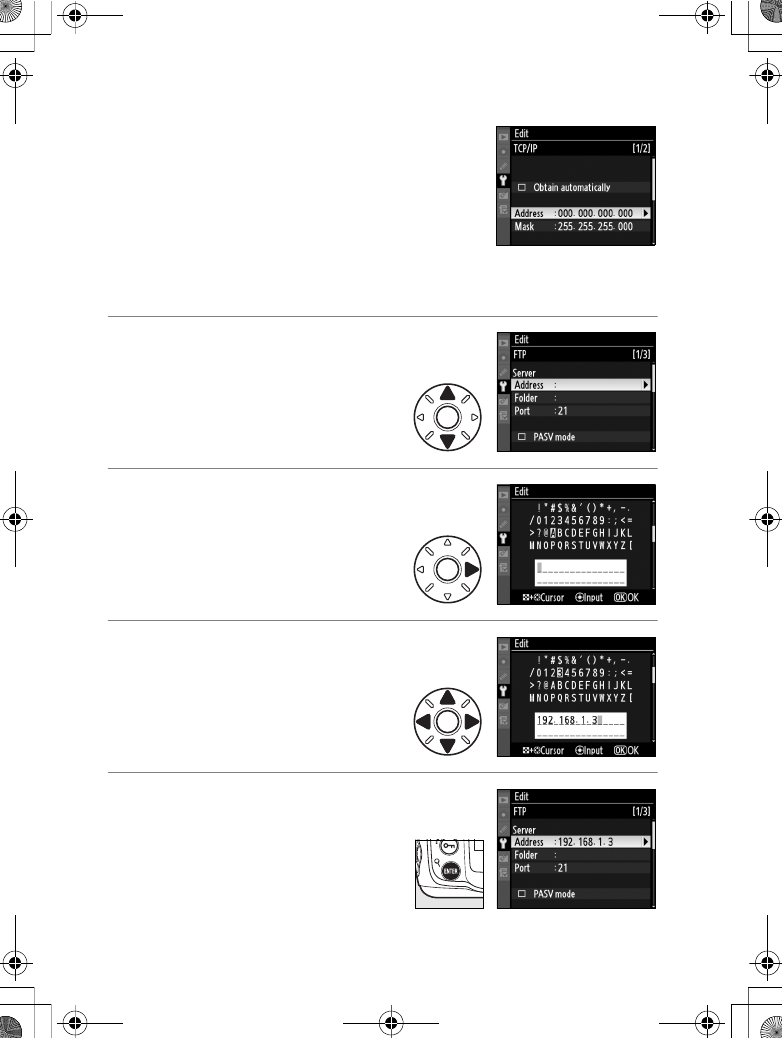
❏TCP/IP
Adjust TCP/IP settings as described on the
following pages. The TCP/IP menu has two
pages of options; to scroll between pages,
press the multi selector up or down.
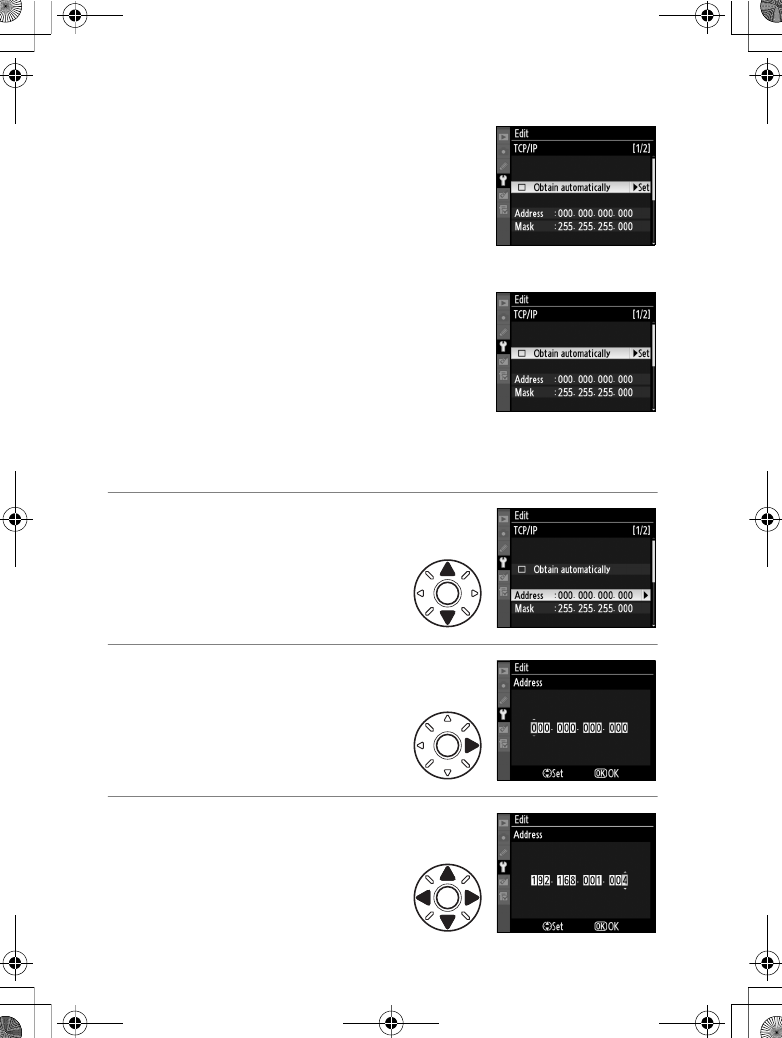
TCP/IP Menu, Page 1/2
Obtain automatically: Highlight this option and
press the multi selector right to toggle it on
(M) or off. Turn this option on if the wireless
network is configured to supply an IP
address automatically by DHCP server or
Auto IP (pg.180). Otherwise turn it off and
enter the address and sub-net mask supplied
by the network administrator as described
below.
1Highlight [Address].
2Enter edit mode.
3Press multi selector left or right
to select, up or down to
change.
$00_WT-4_En.book Page 158 Friday, August 10, 2007 2:02 PM
Mode / Editing ftp Profiles / TCP/IP
Menu Guide 159
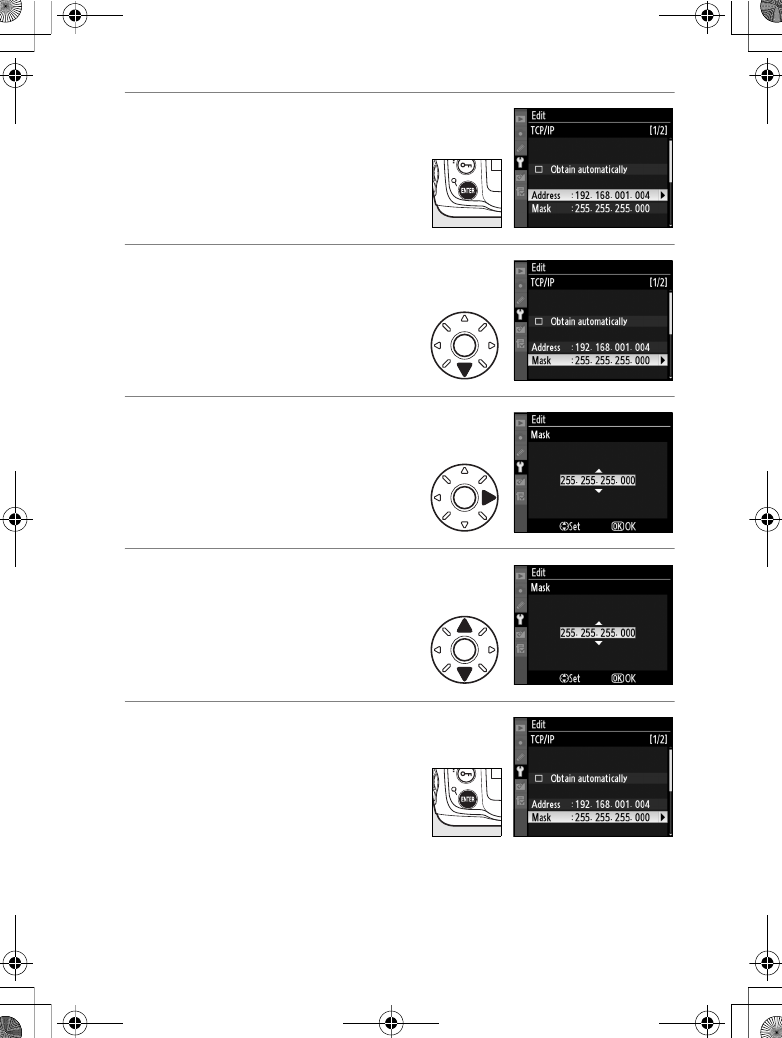
4Exit to TCP/IP menu (1/2). If
sub-net mask is required,
proceed to Step 5.
5Highlight [Mask].
6Enter edit mode.
7Choose sub-net mask.
8Exit to TCP/IP menu (1/2).
$00_WT-4_En.book Page 159 Friday, August 10, 2007 2:02 PM
Mode / Editing ftp Profiles / TCP/IP
Menu Guide160
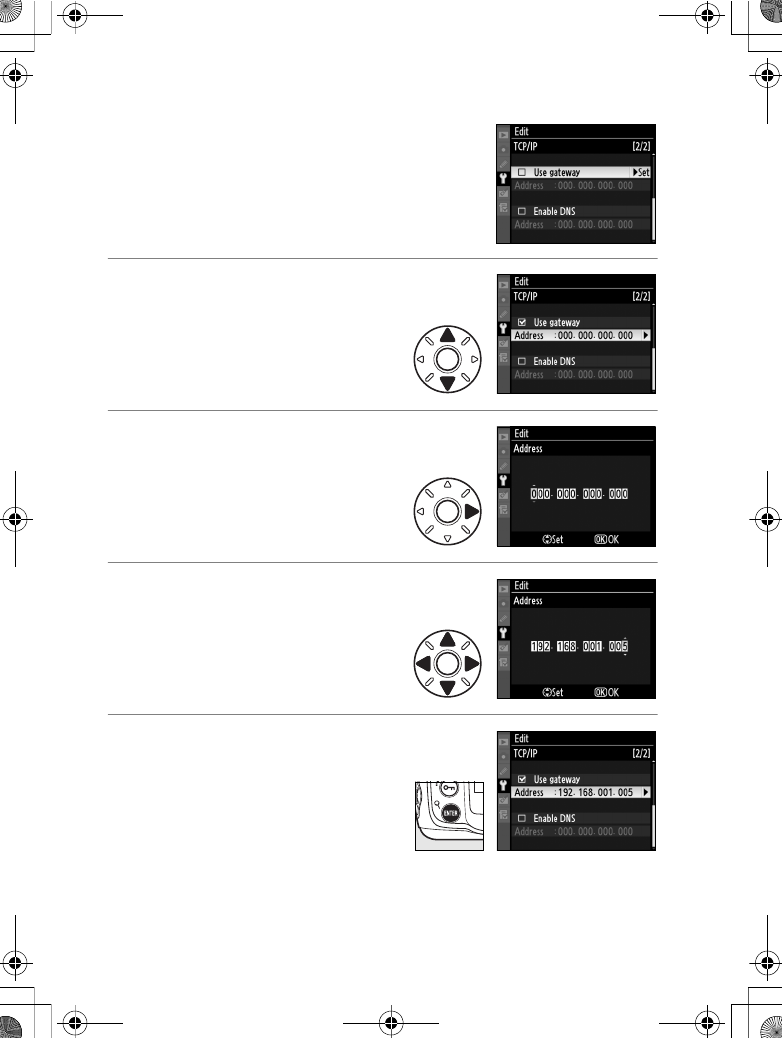
TCP/IP Menu, Page 2/2
Use gateway: Highlight this option and press
the multi selector right to toggle it on (M) or
off. If the network requires a gateway
address, turn this option on and enter the
address supplied by the network
administrator as described below.
1Highlight [Address].
2Enter edit mode.
3Press multi selector left or right
to select, up or down to
change.
4Return to TCP/IP menu (2/2).
$00_WT-4_En.book Page 160 Friday, August 10, 2007 2:02 PM

Mode / Editing ftp Profiles / TCP/IP
Menu Guide 161
Enable DNS: Highlight this option and press the
multi selector right to toggle it on (M) or off.
If a Domain Name Server (DNS) exists on the
network, turn this option on and enter the
address supplied by the network
administrator as described below.
1Highlight [Address].
2Enter edit mode.
3Press multi selector left or right
to select, up or down to
change.
4Return to TCP/IP menu (2/2).
$00_WT-4_En.book Page 161 Friday, August 10, 2007 2:02 PM
Mode / Editing ftp Profiles / FTP
Menu Guide162
❏FTP
Adjust ftp settings as described on the
following pages. The ftp menu has three
pages of options; to scroll between pages,
press the multi selector up or down.
FTP Menu, Page 1/3
Server
1Highlight [Address].
2Display text entry dialog.
3Enter server address (required;
pg.153).
4Return to ftp menu (1/3).
$00_WT-4_En.book Page 162 Friday, August 10, 2007 2:02 PM
Mode / Editing ftp Profiles / FTP
Menu Guide 163
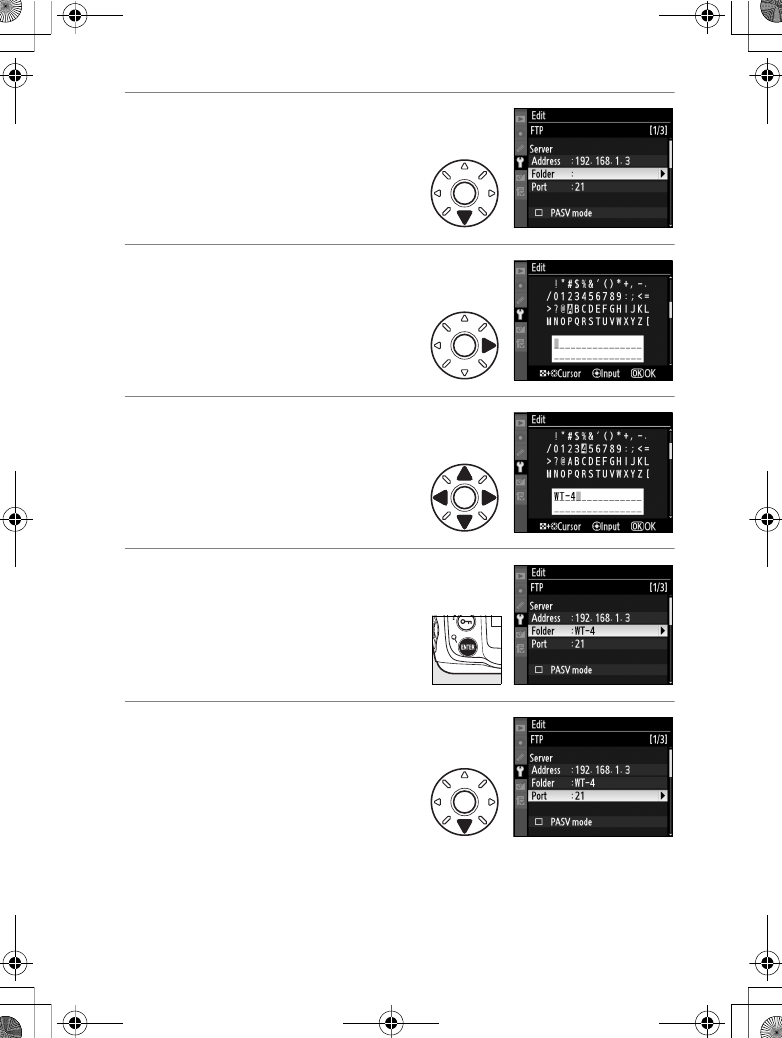
5Highlight [Folder].
6Display text entry dialog.
7Enter destination folder name
(pg.153).
8Return to ftp menu (1/3).
9Highlight [Port].
$00_WT-4_En.book Page 163 Friday, August 10, 2007 2:02 PM
Mode / Editing ftp Profiles / FTP
Menu Guide164
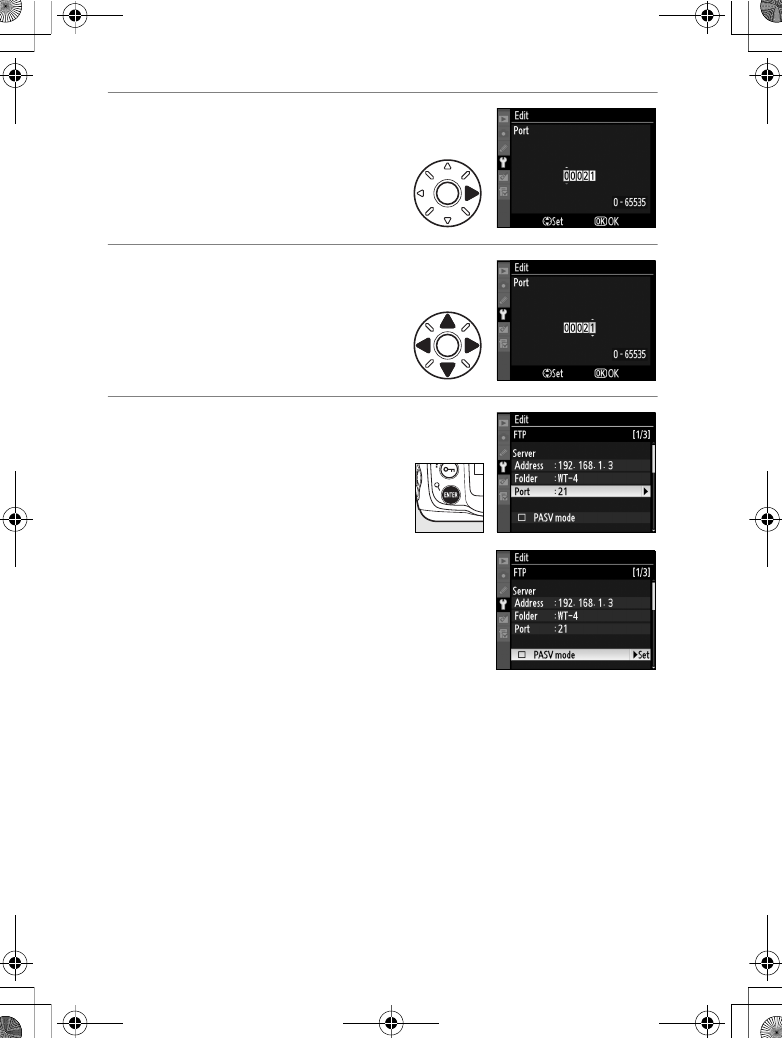
10
Enter edit mode.
11
Press multi selector left or right
to select, up or down to
change.
12
Return to ftp menu (1/3).
PASV mode: Highlight this option and press the
multi selector right to toggle PASV mode on
(M) or off. Turn this option off to use normal
(PORT) mode. Be sure the server supports
PASV mode before turning this option on.
$00_WT-4_En.book Page 164 Friday, August 10, 2007 2:02 PM