TransCore 76007 FHSS TRANSCEIVER MODULE User Manual 2
TransCore FHSS TRANSCEIVER MODULE 2
UserManual.wiki
>
TransCore
>
76007 User Manual
>
User Manual 2
Contents
1.
Users Manual
2.
User Manual 1
3.
User Manual 2
4.
User Manual 3
5.
User Manual 4
User Manual 2
Navigation menu
Upload a User Manual
Namespaces
Wiki Guide
HTML
PDF
Info
Views
User Manual
Discussion / Help
Navigation
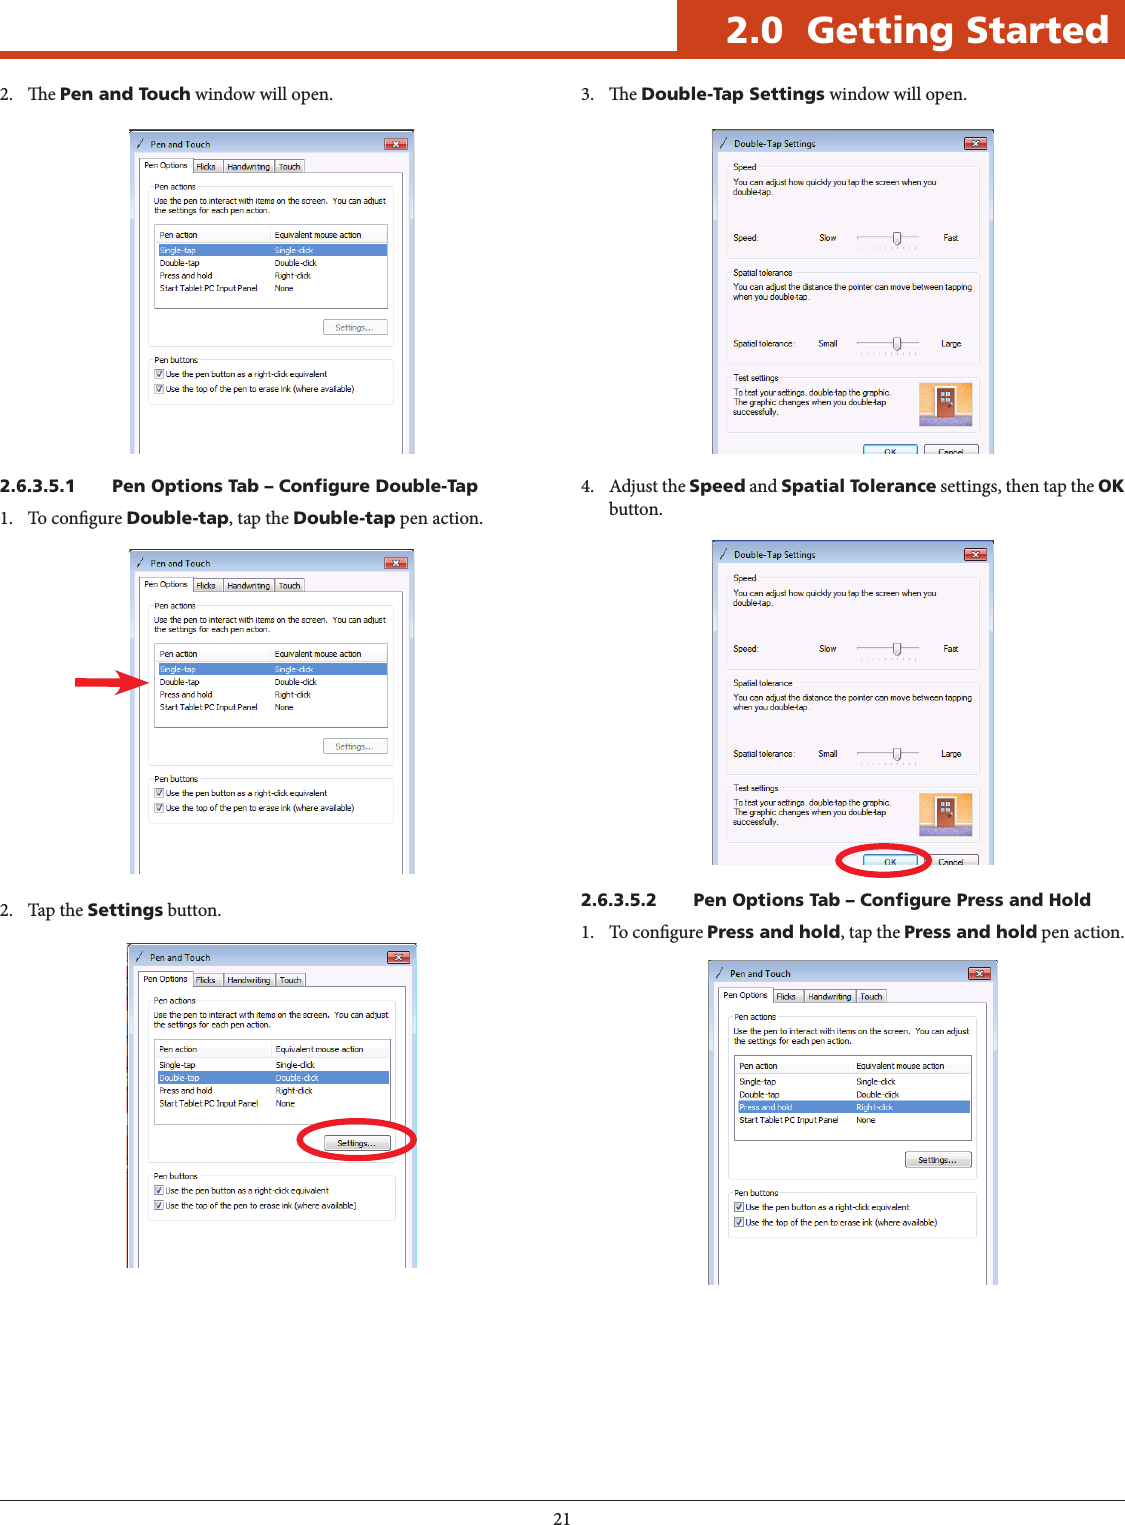
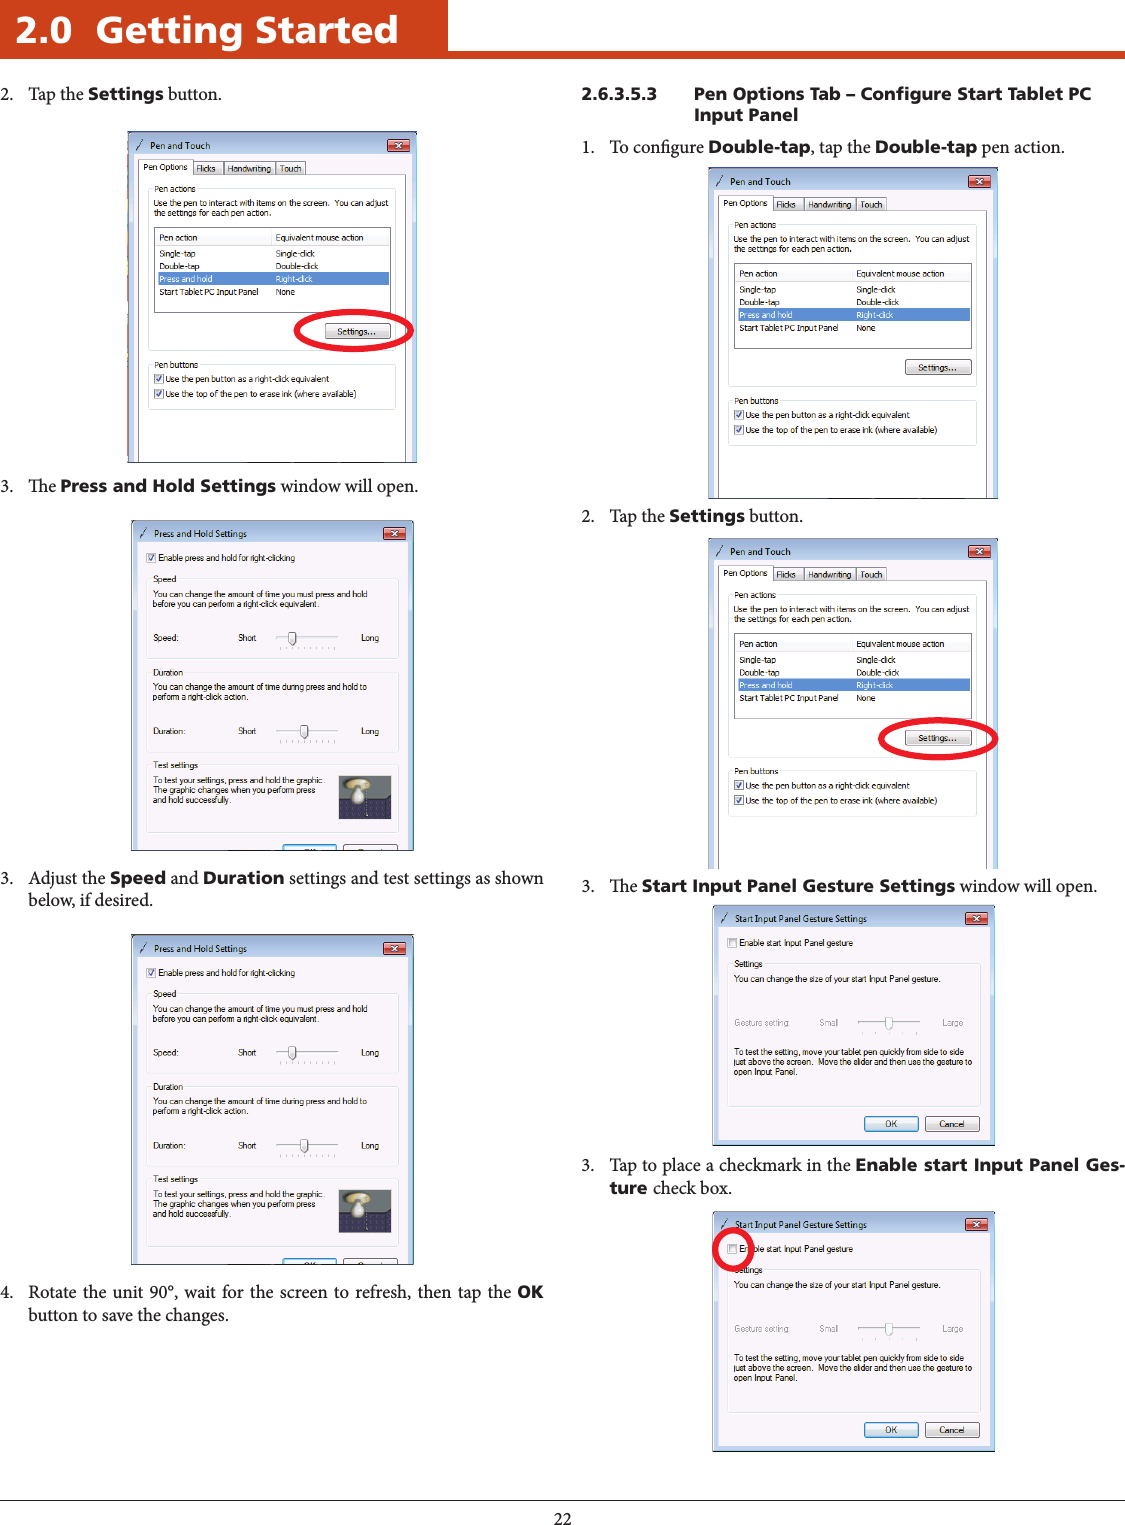
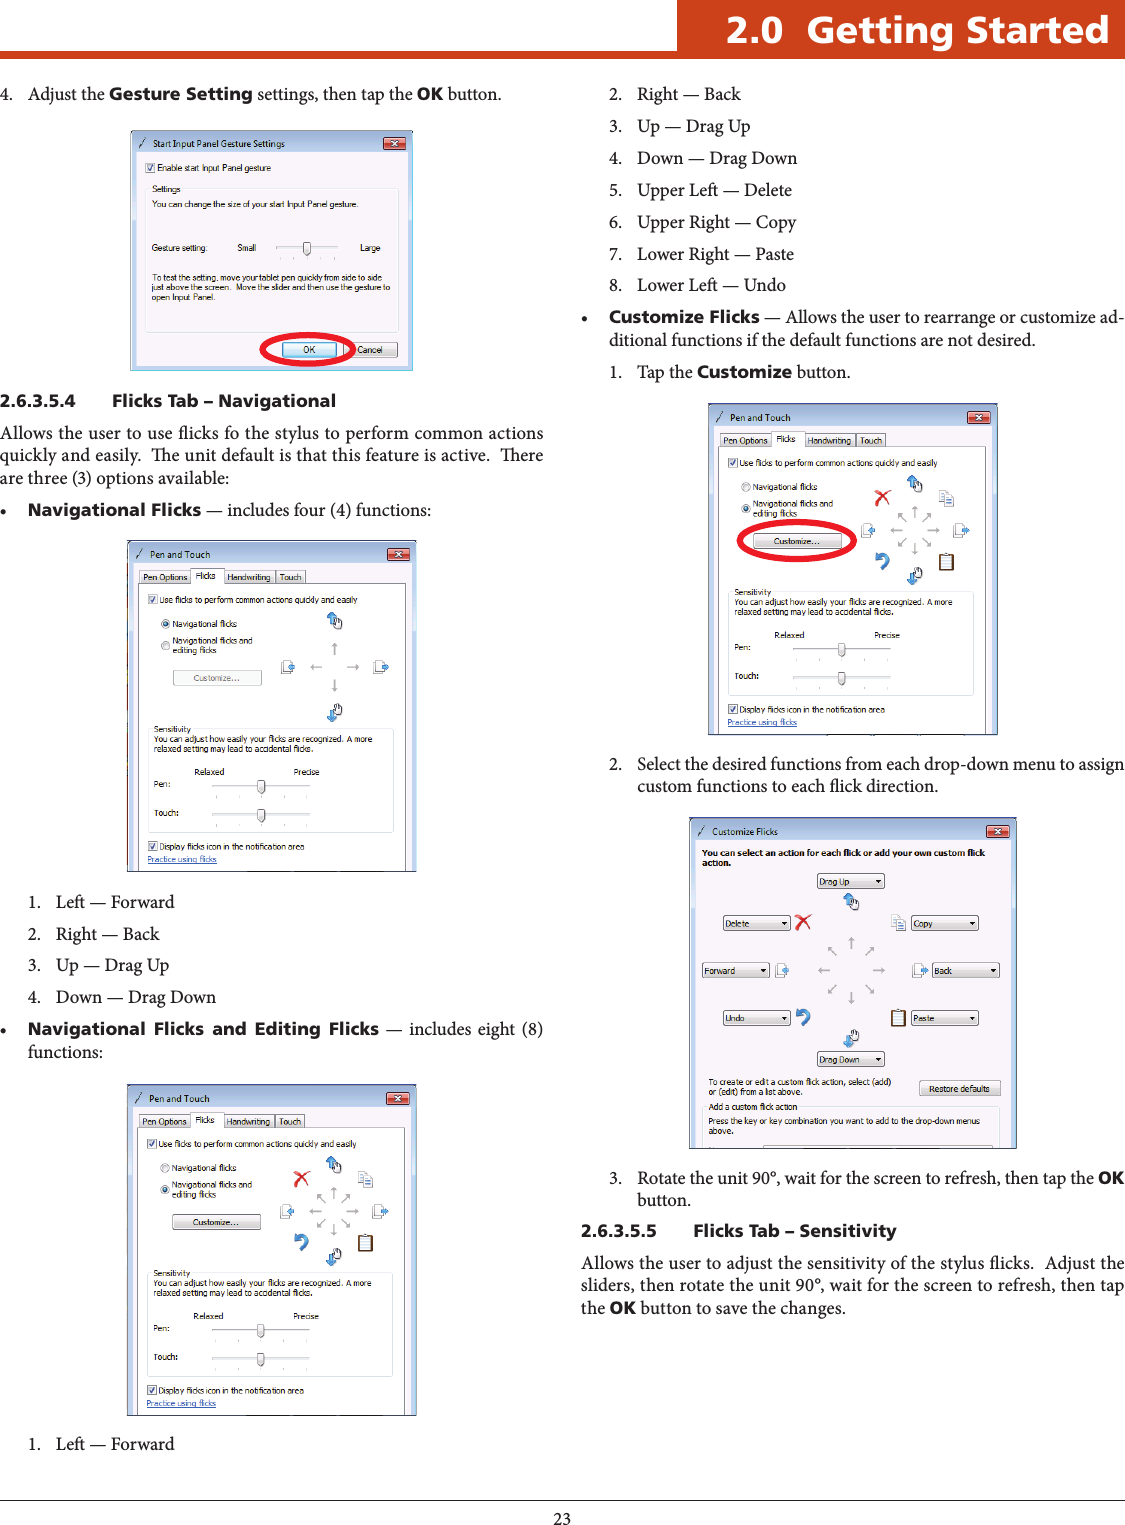
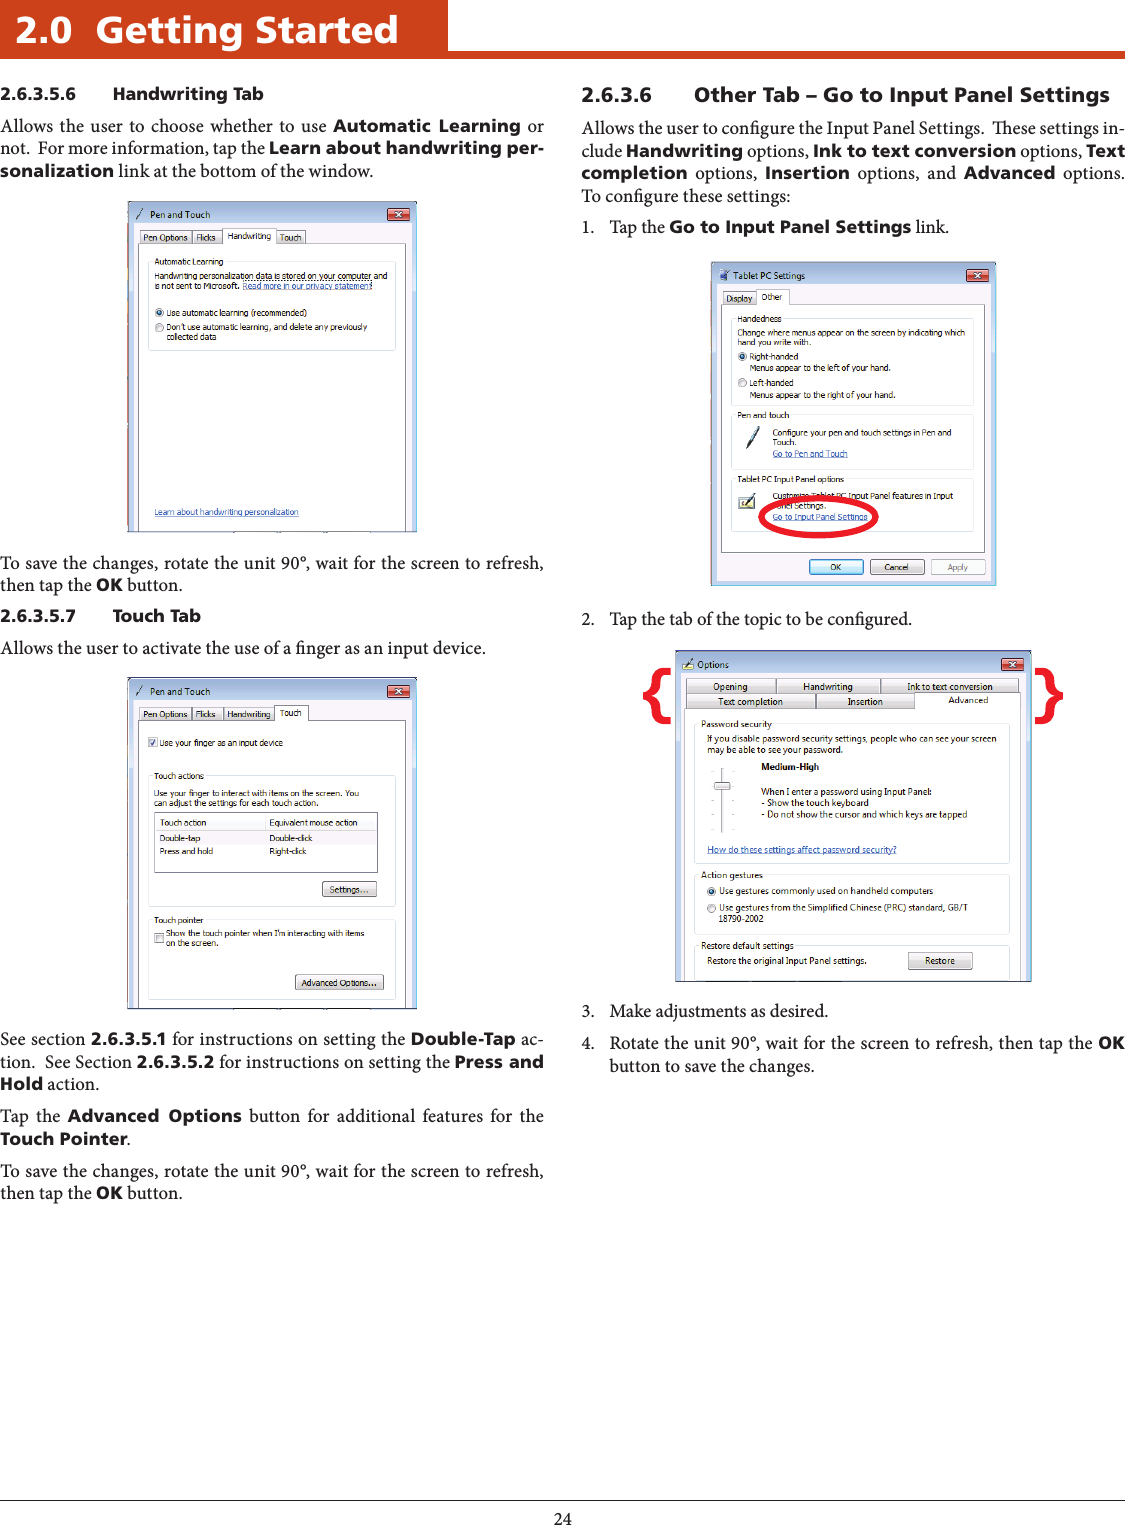
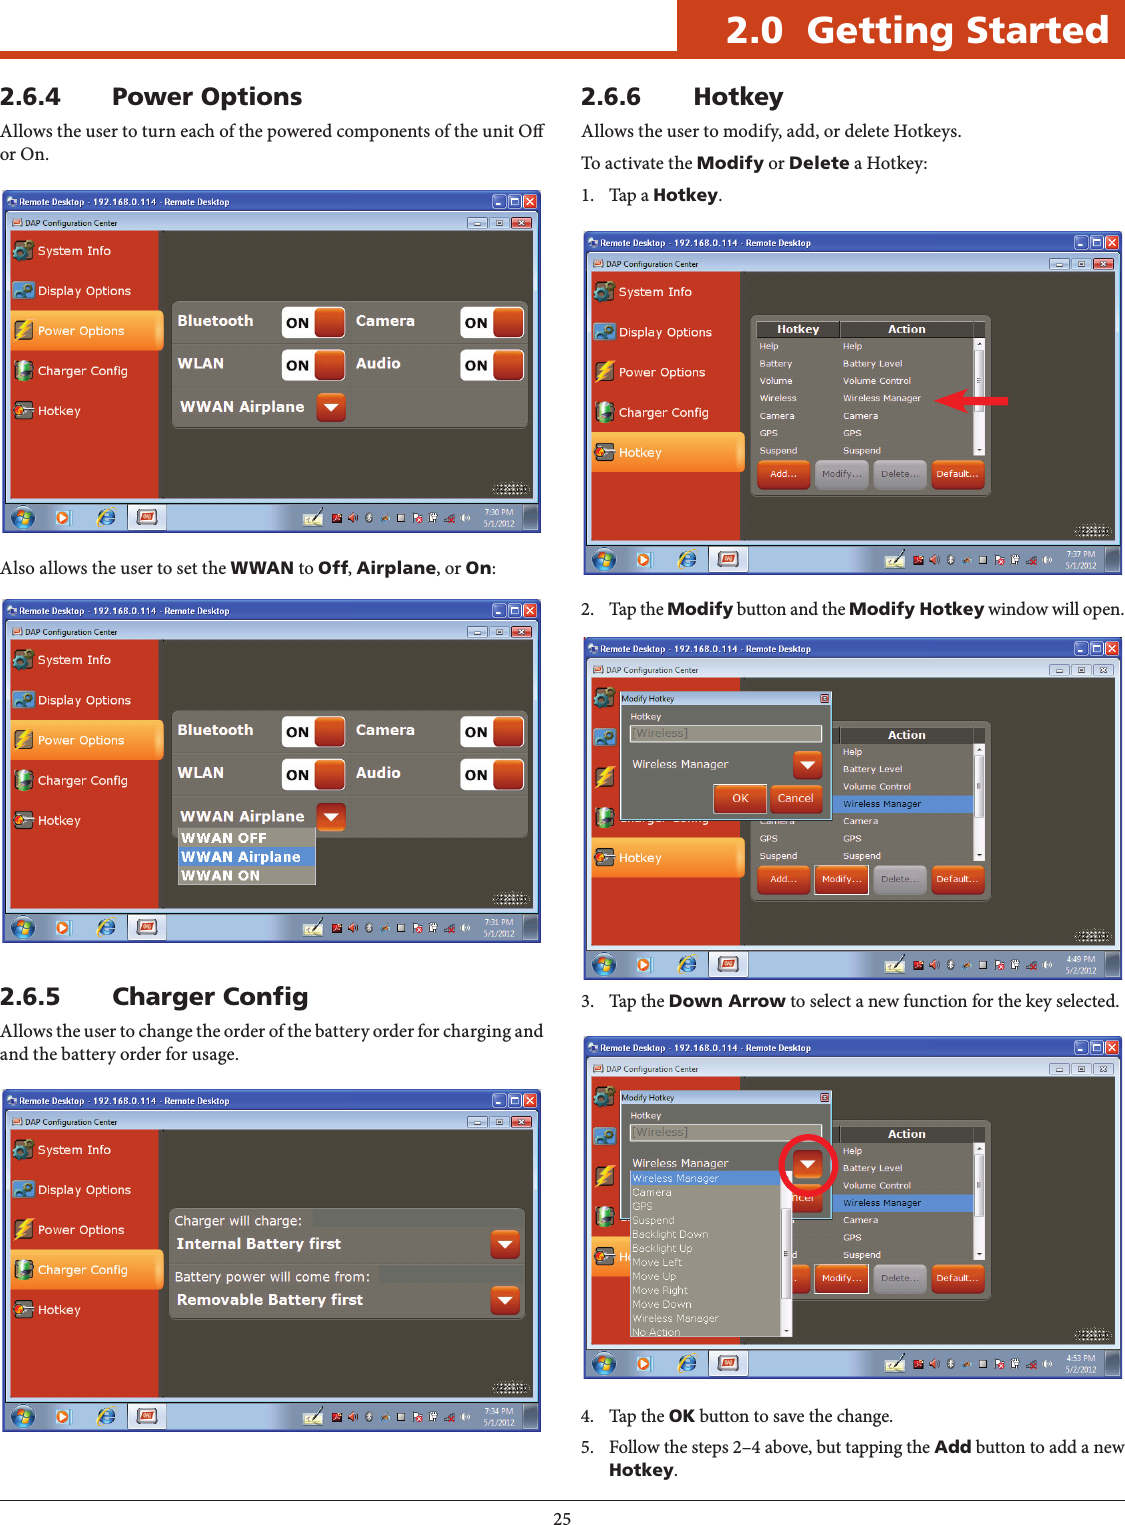
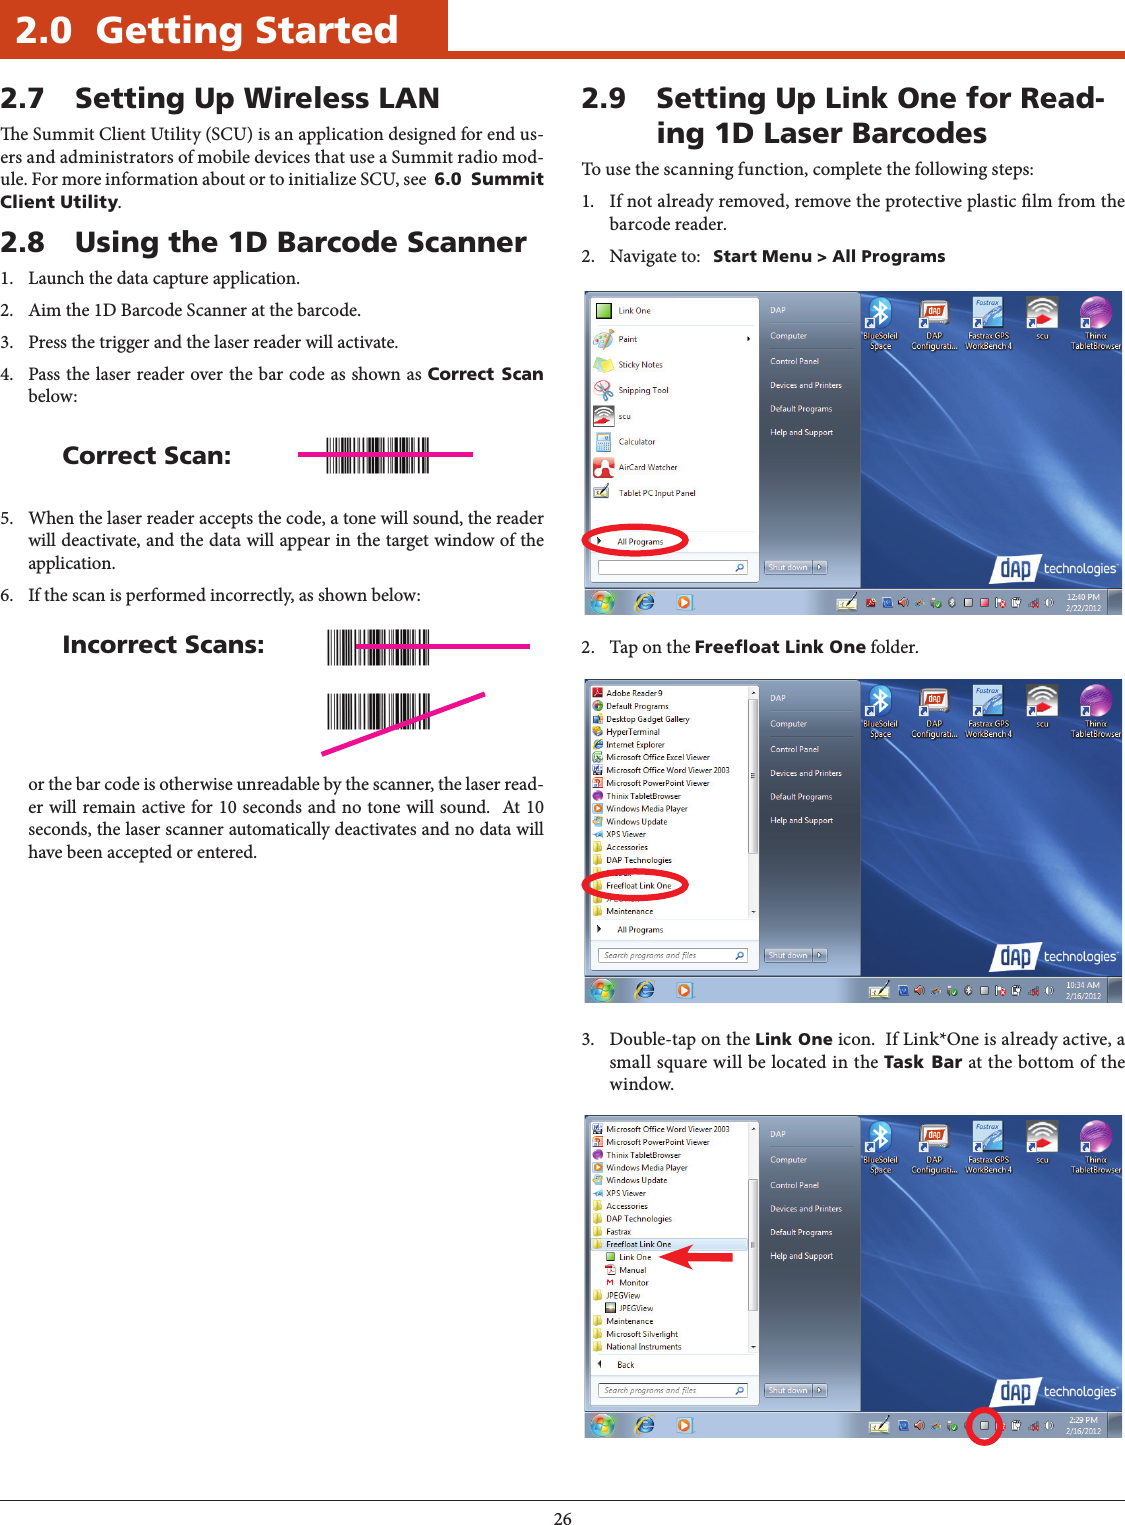
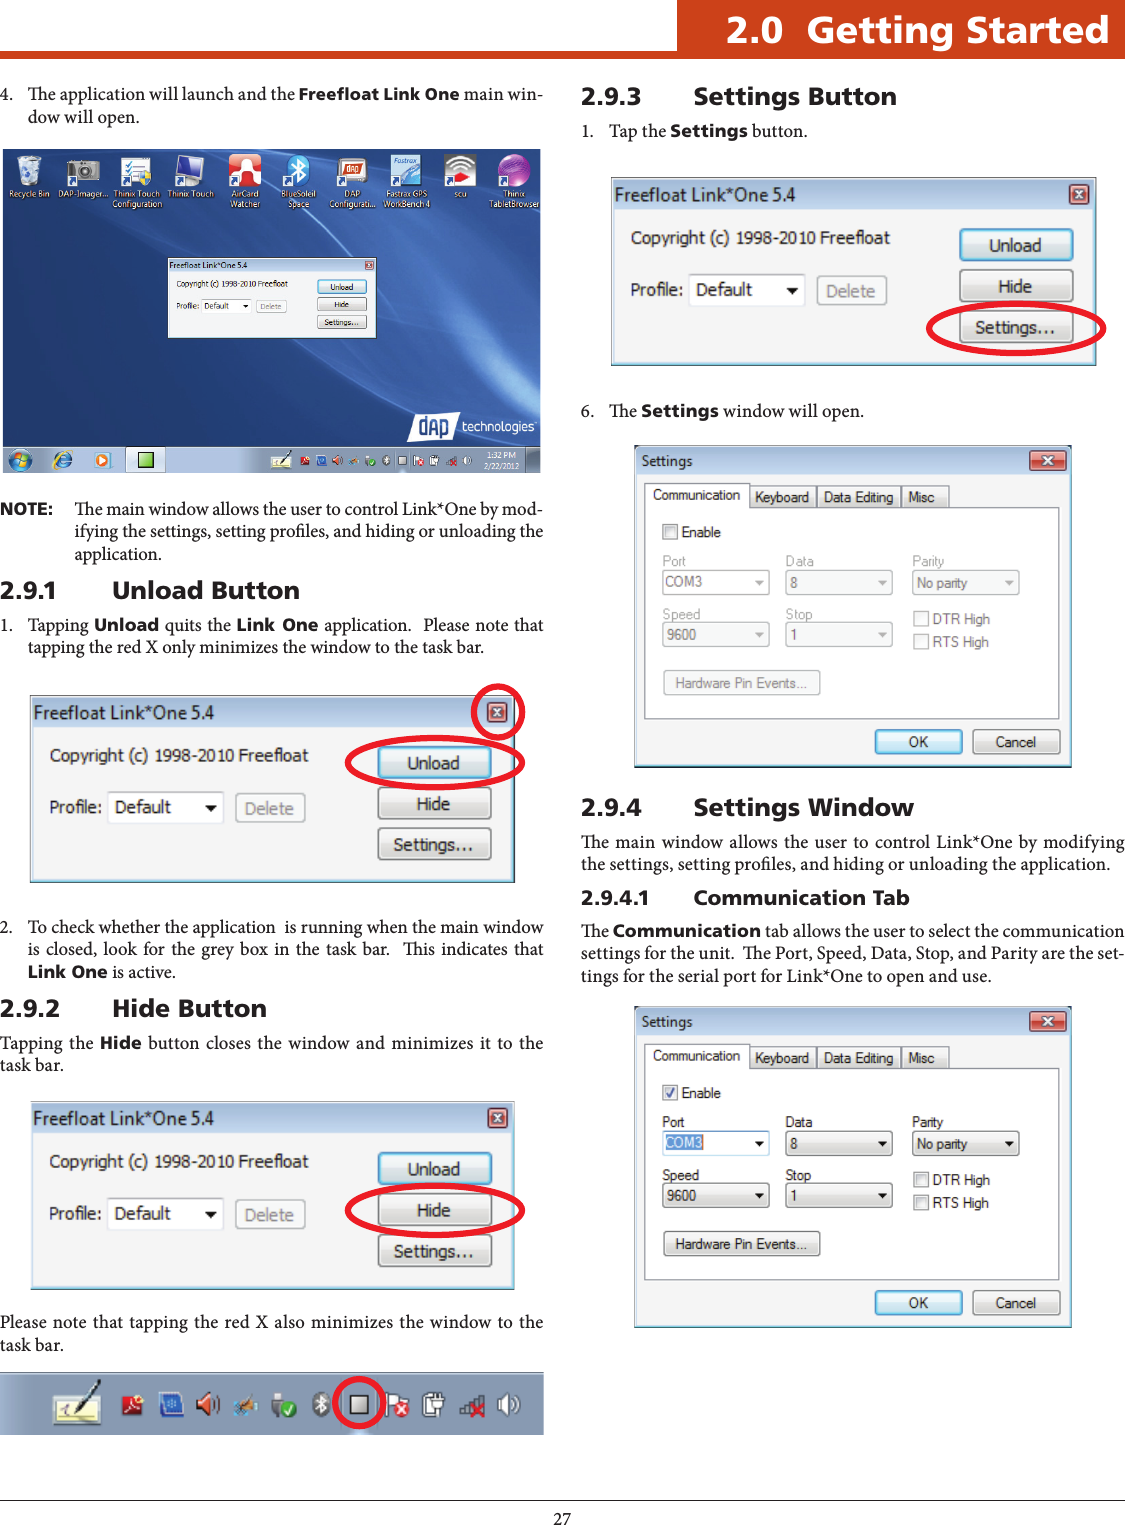
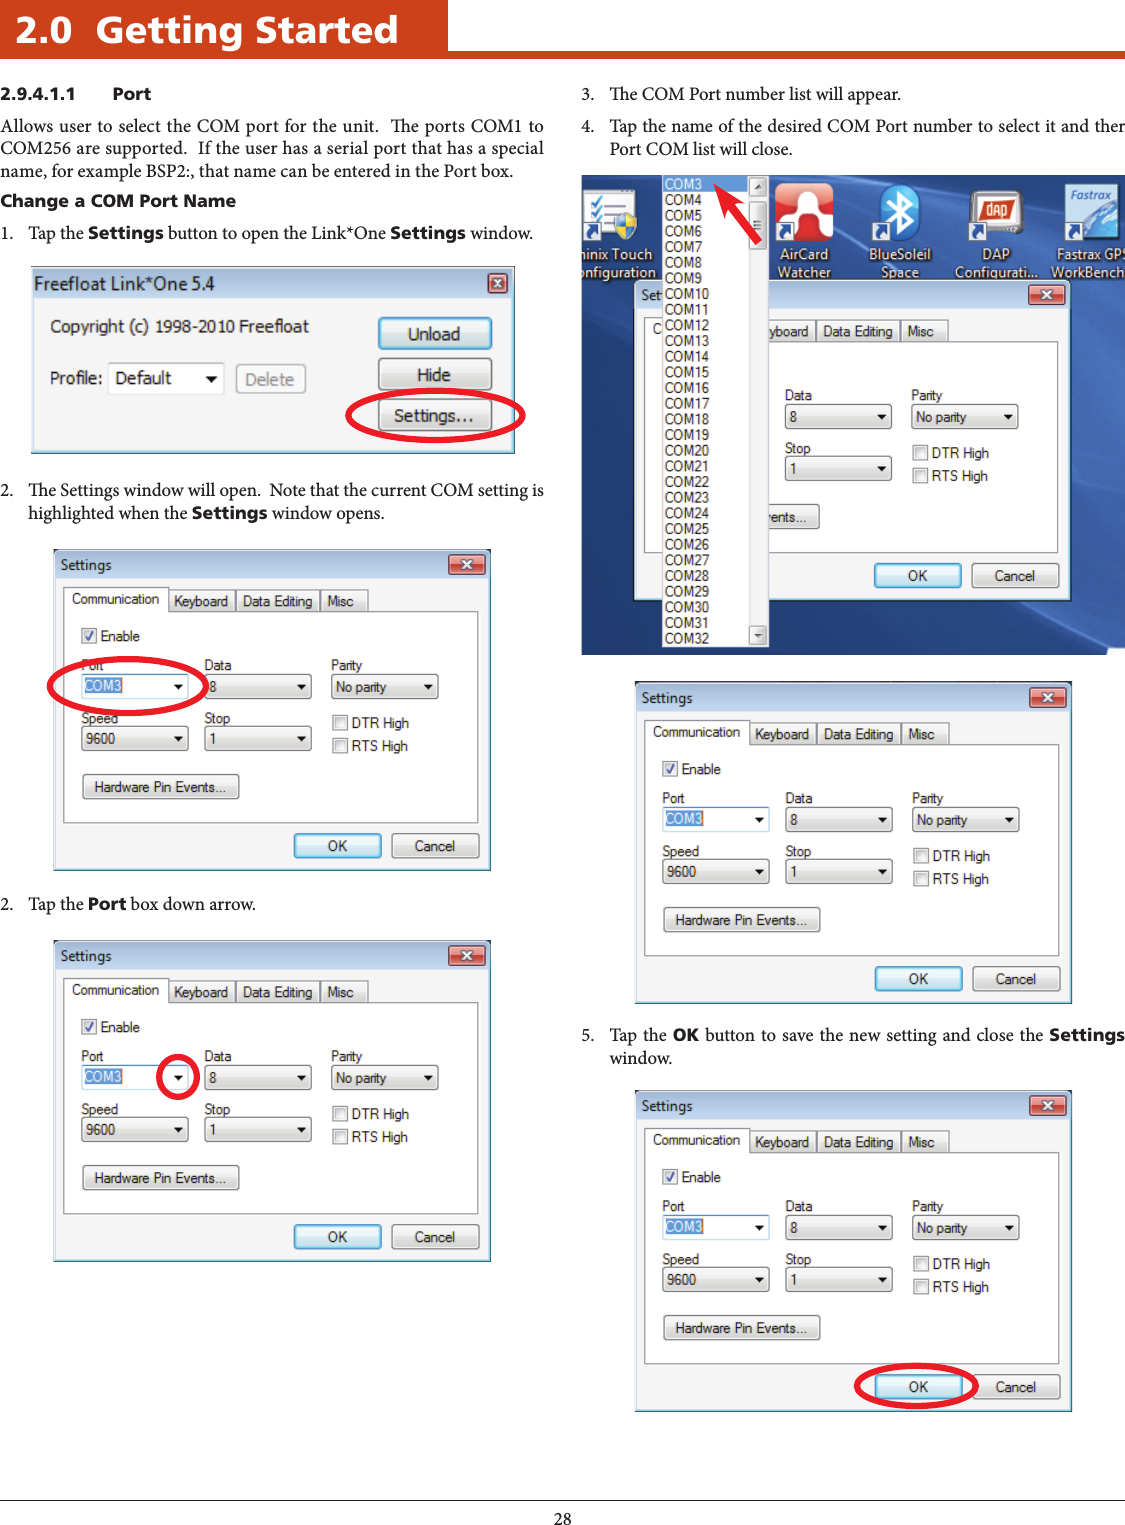
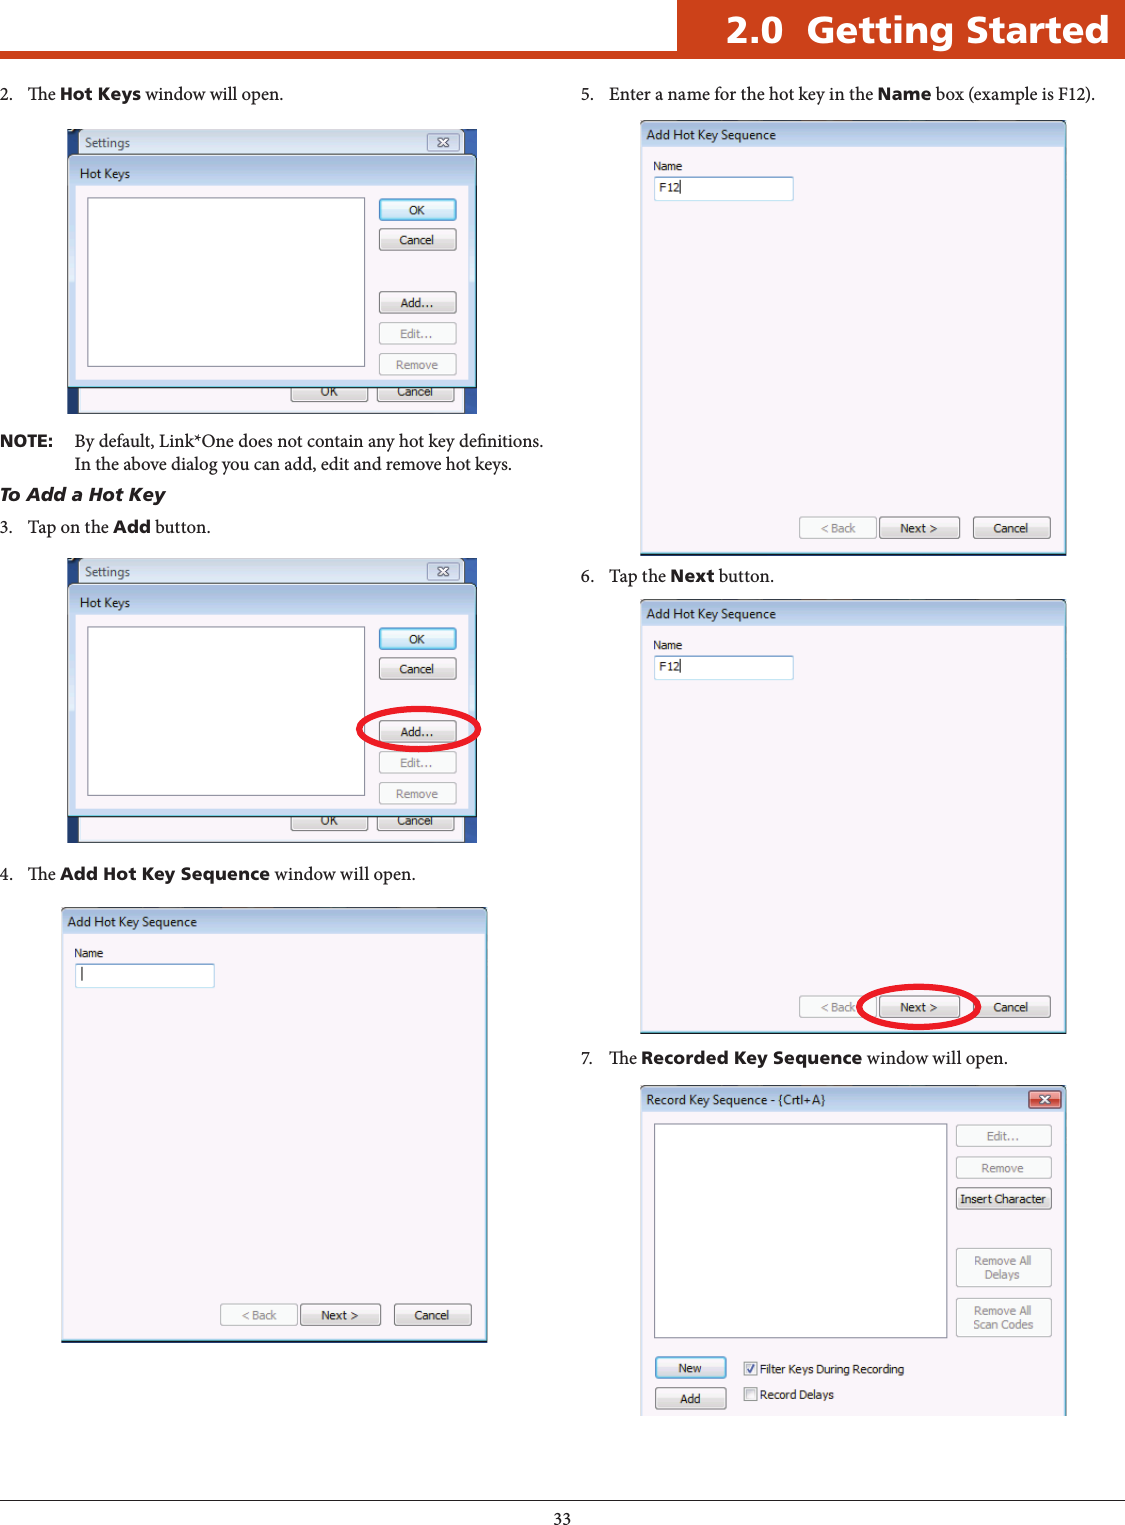
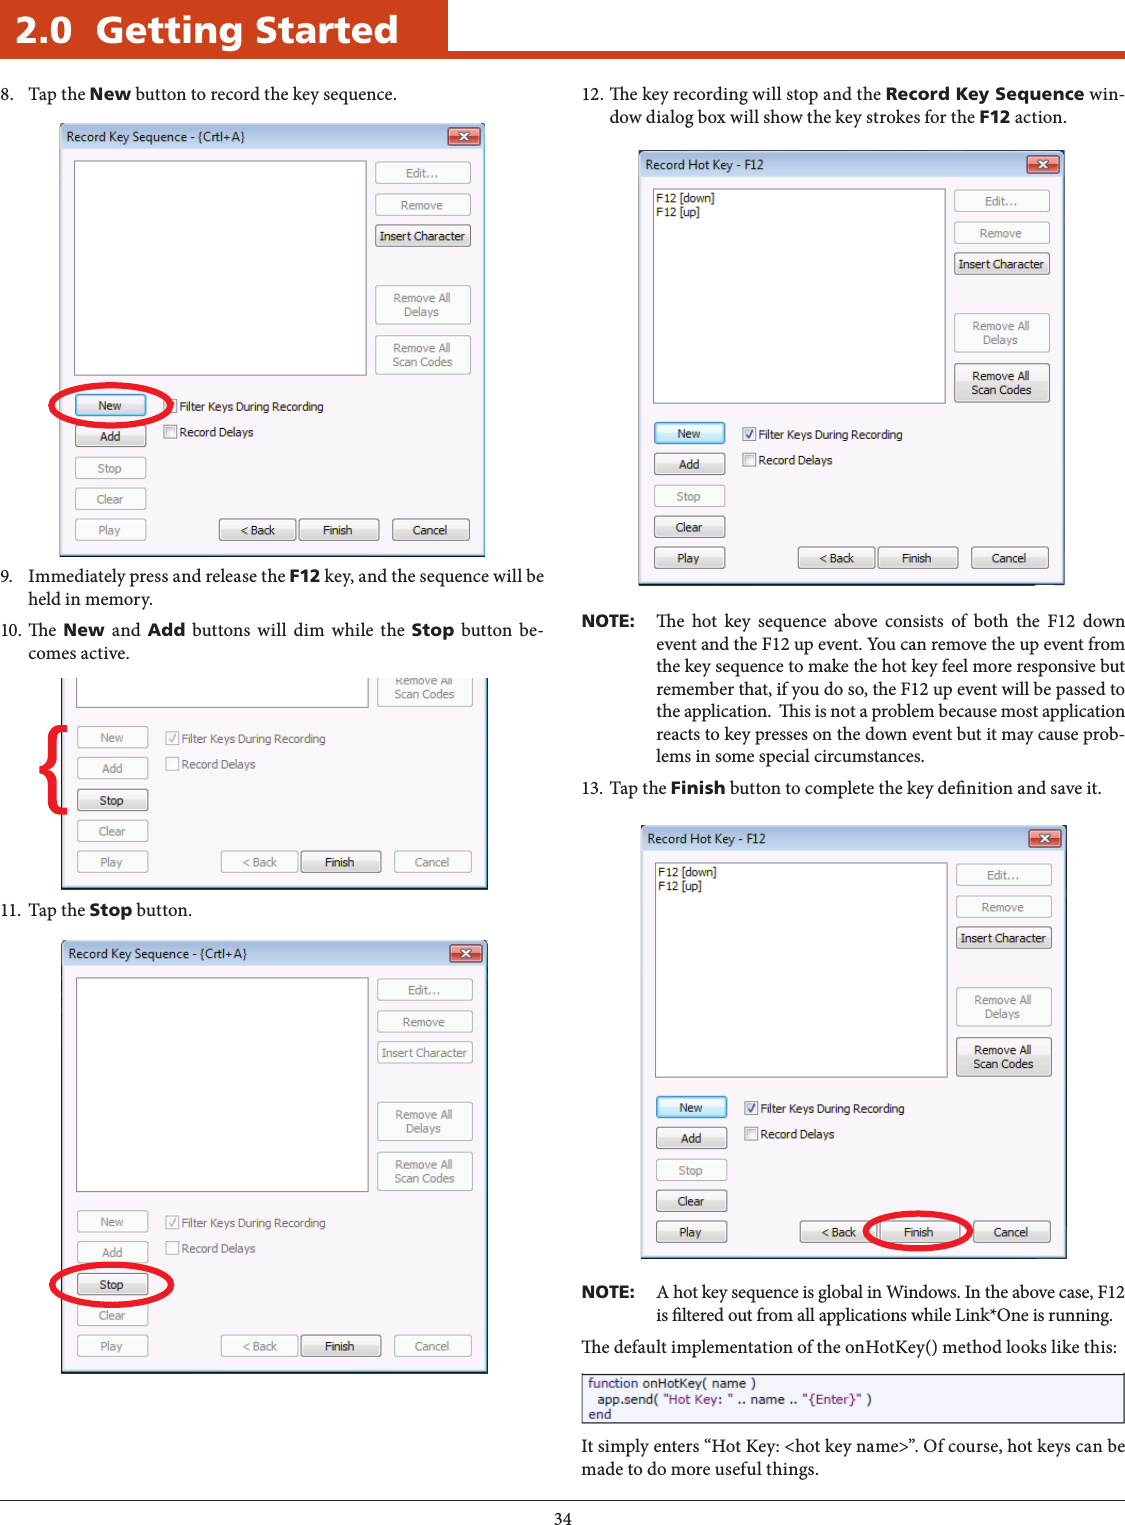
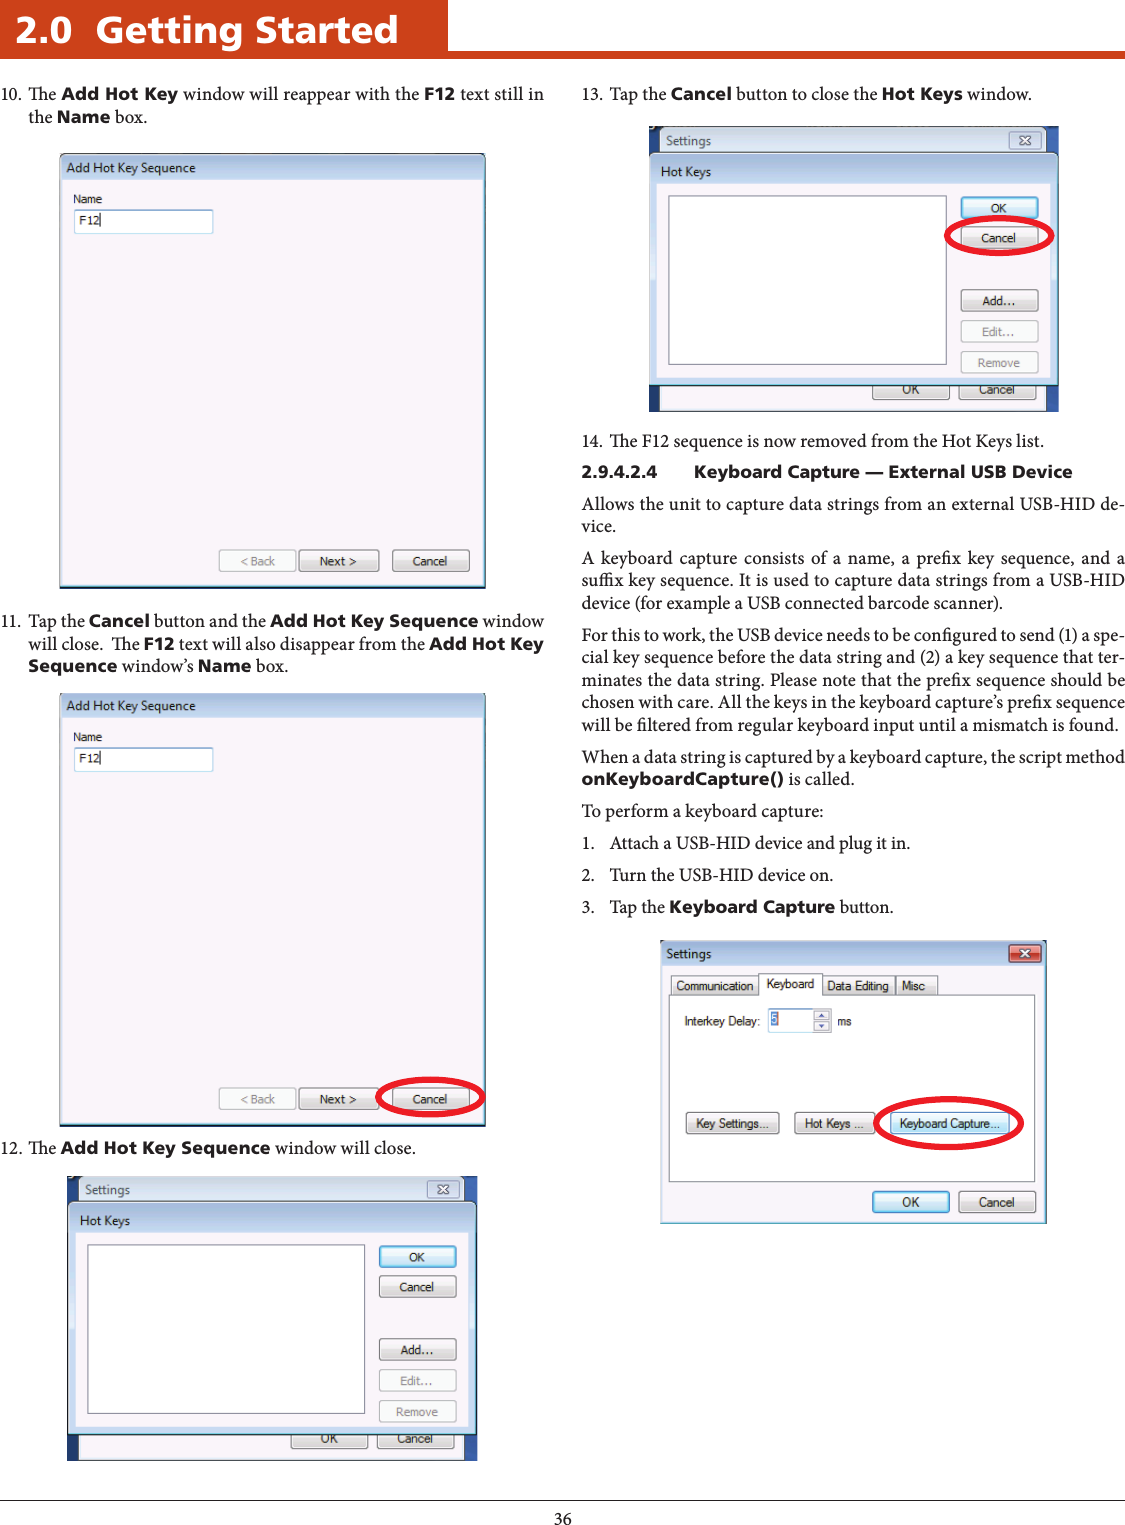
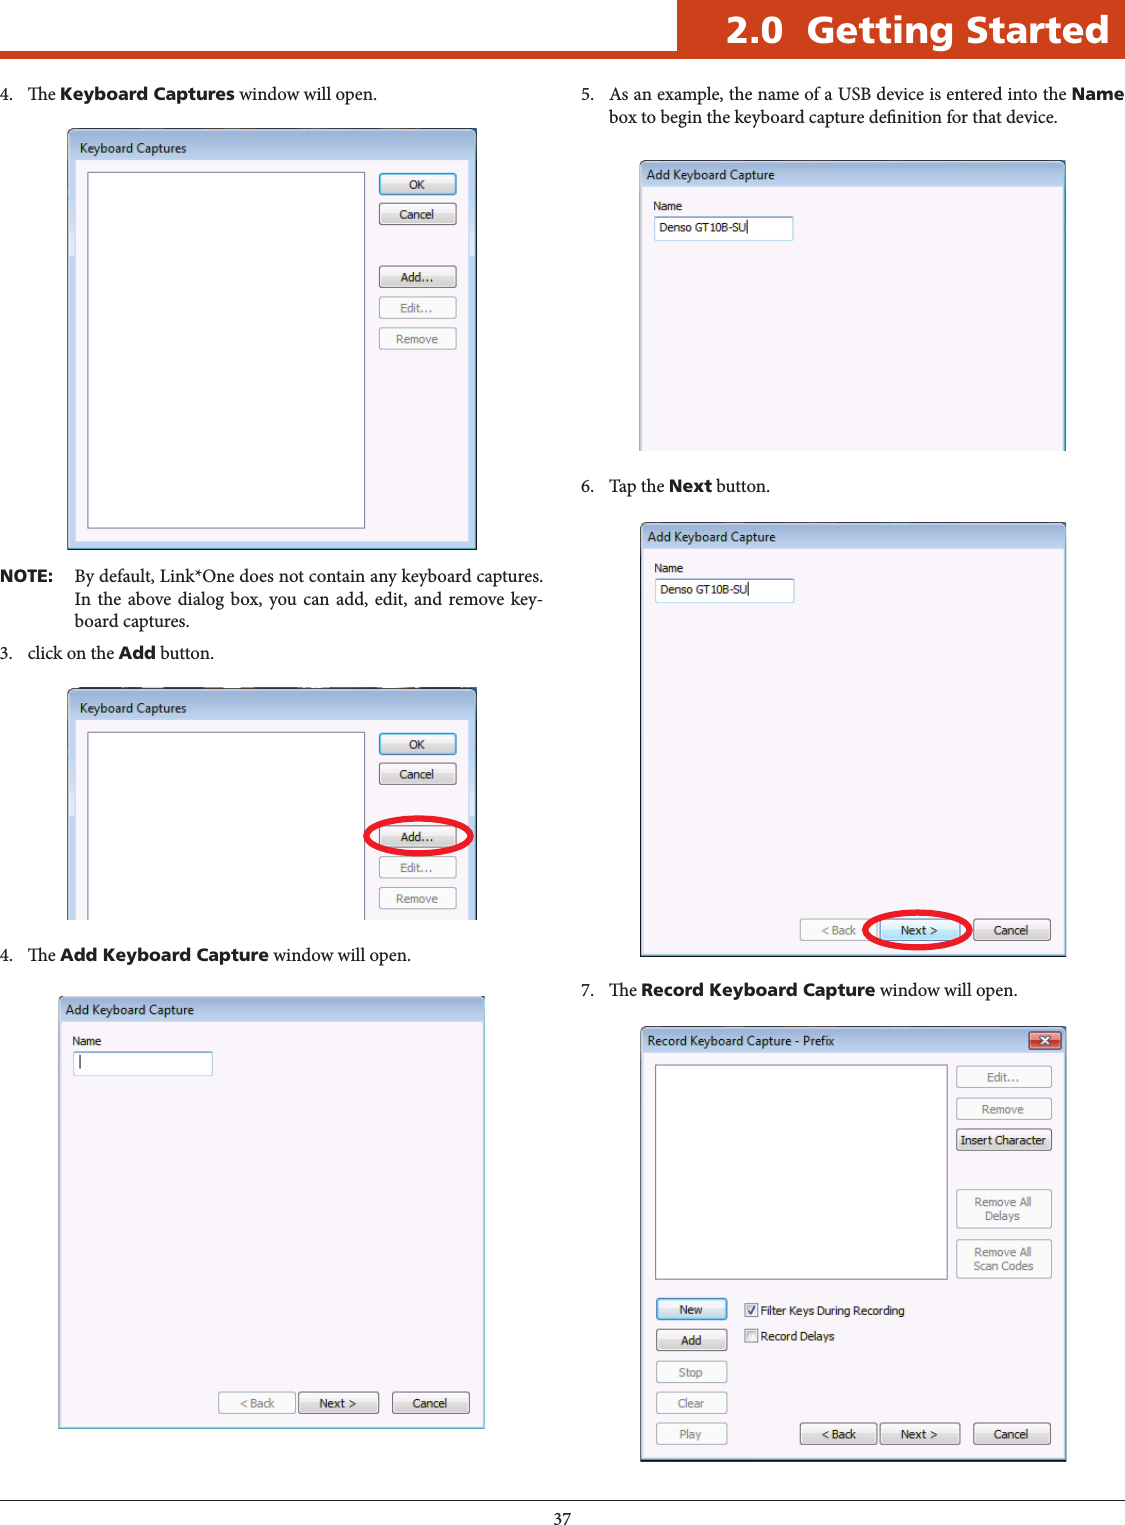
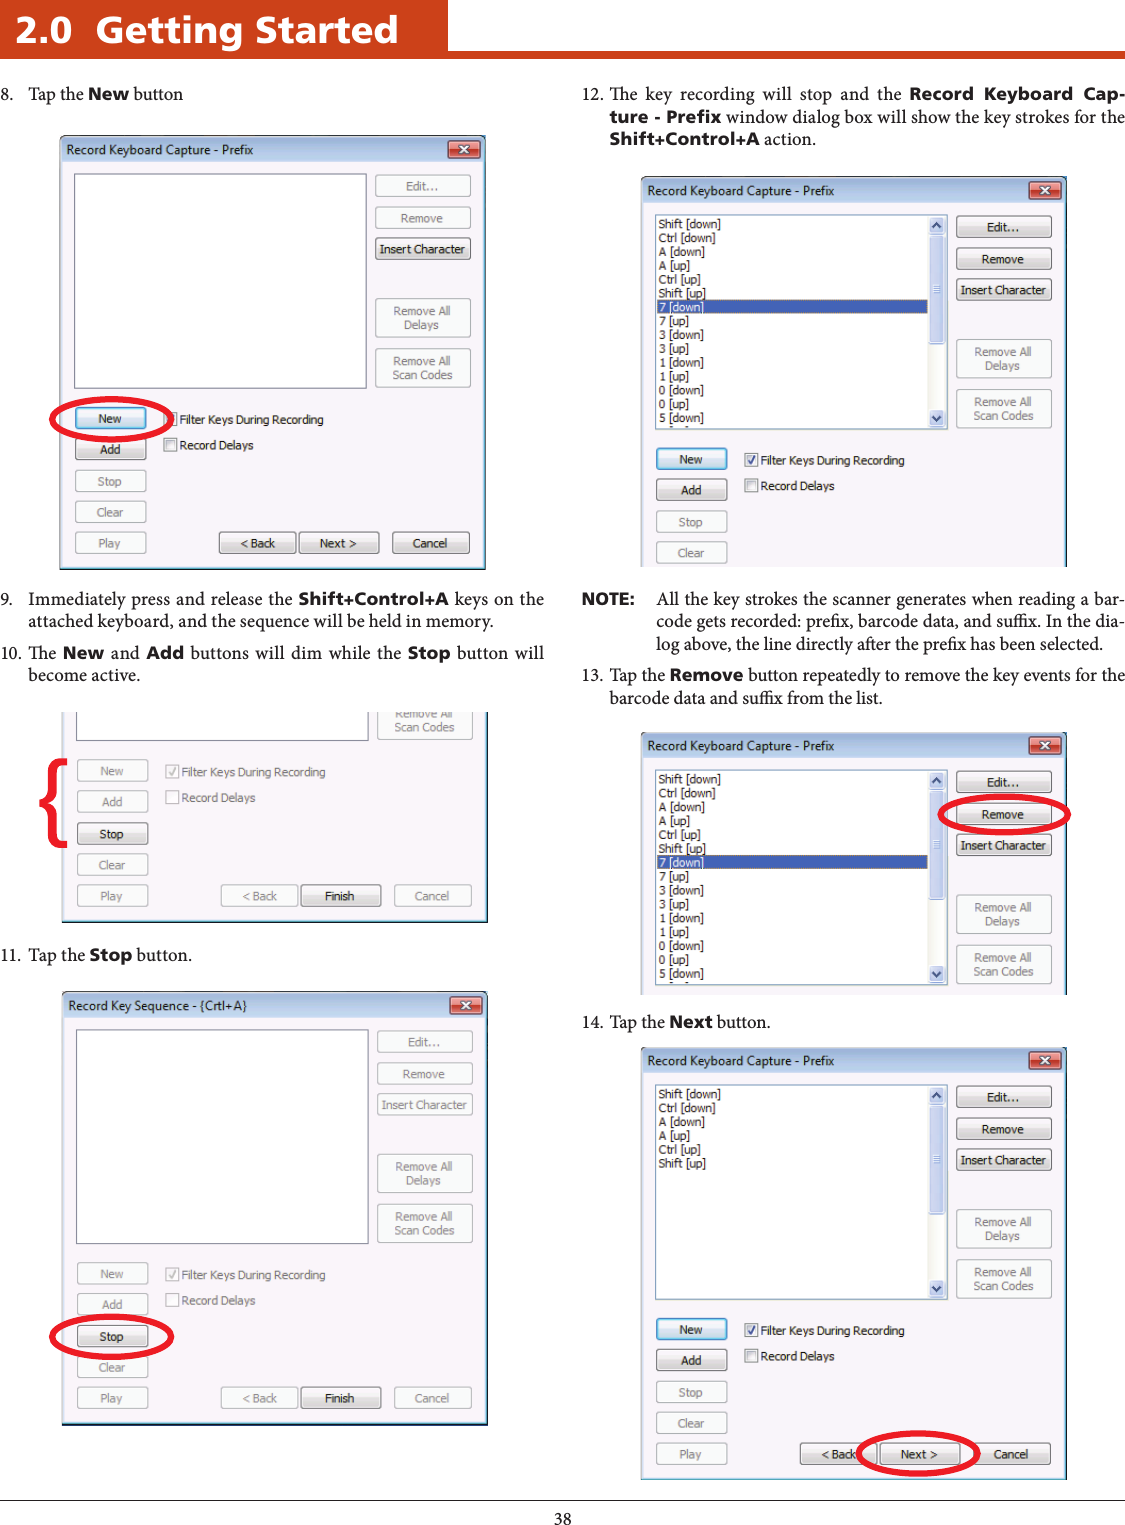
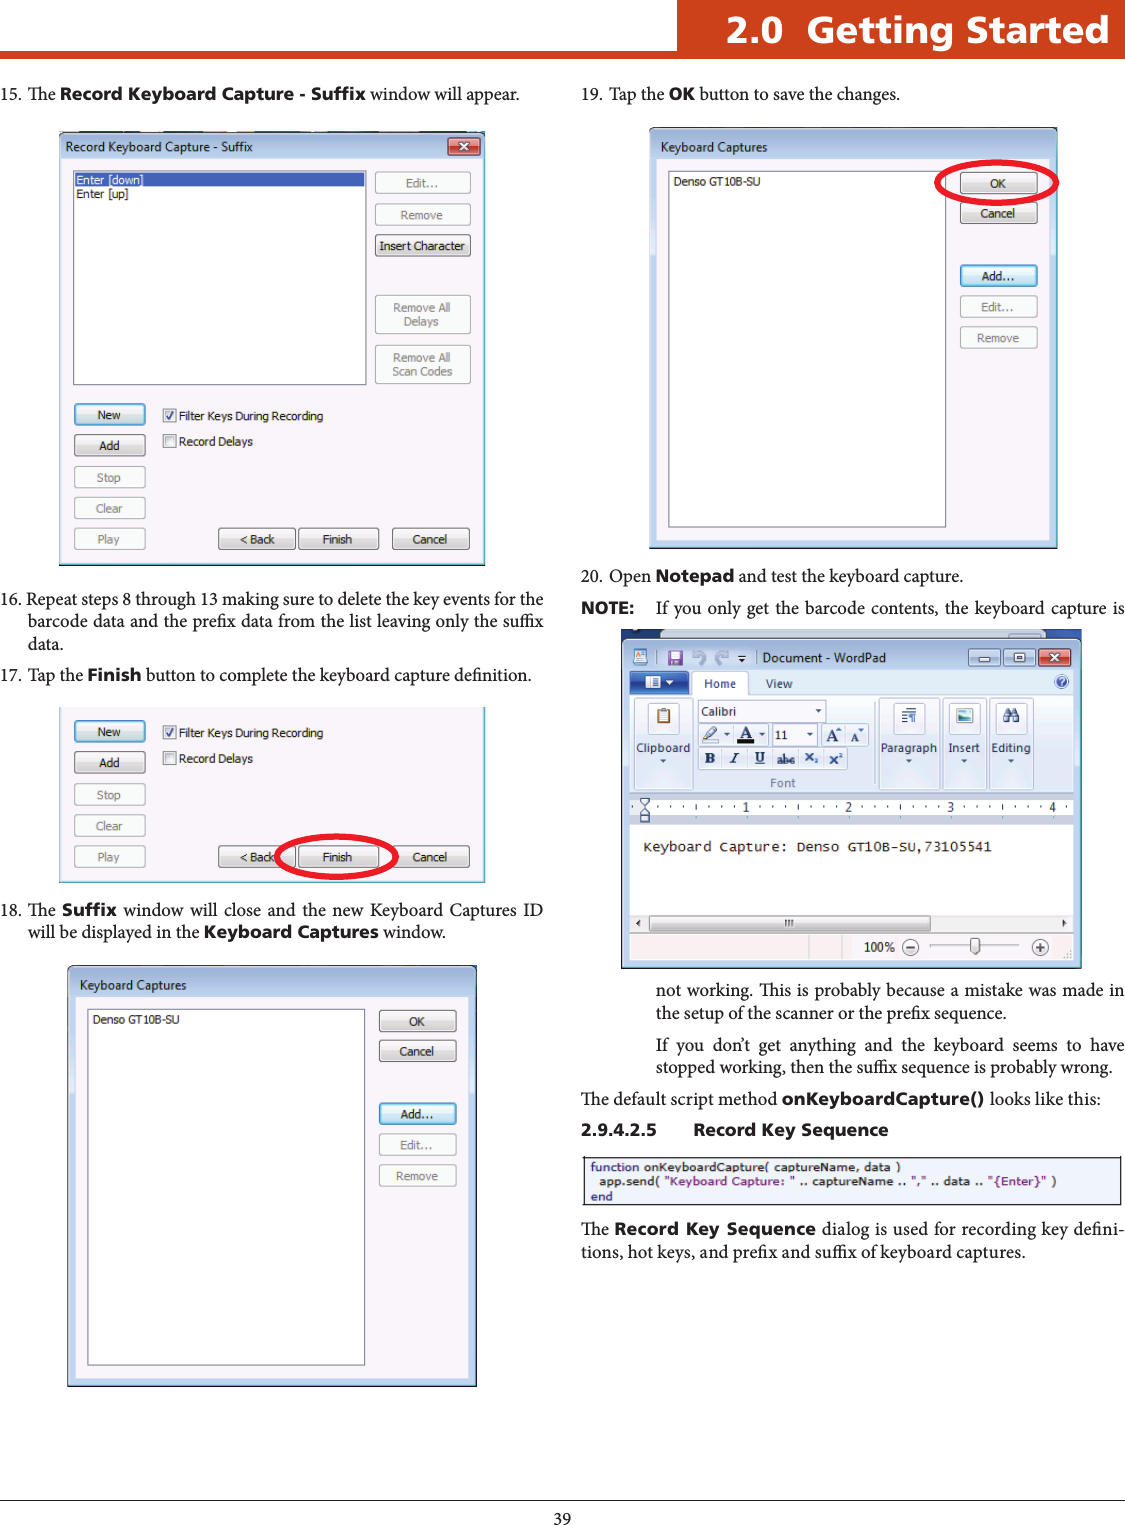
![352.0 Getting StartedTo Delete a Hot Key1. Tap on a Hot Key sequence component to be deleted. In this ex-ample, tap on F12[down] to highlight it.2. Tap the Remove button.3. F12[down] is removed.4. Tap on F12[up] to highlight it.5. Tap the Remove button.6. e Record Hot Key window dialog box shall be empty.7. Tap the Finish button to complete the Hot Key deletion.8. e following warning will appear:9. Tap OK and the warning will disappear.](https://usermanual.wiki/TransCore/76007.User-Manual-2/User-Guide-2266872-Page-18.png)