Fujitsu FOMA-F906I Part 15 Low Power Communication Device Transmitter User Manual F906i
Fujitsu Limited Part 15 Low Power Communication Device Transmitter F906i
Fujitsu >
Contents
manual 4
83
Phonebook
F906i_E1kou
Phonebook new entry
Adding to phonebook
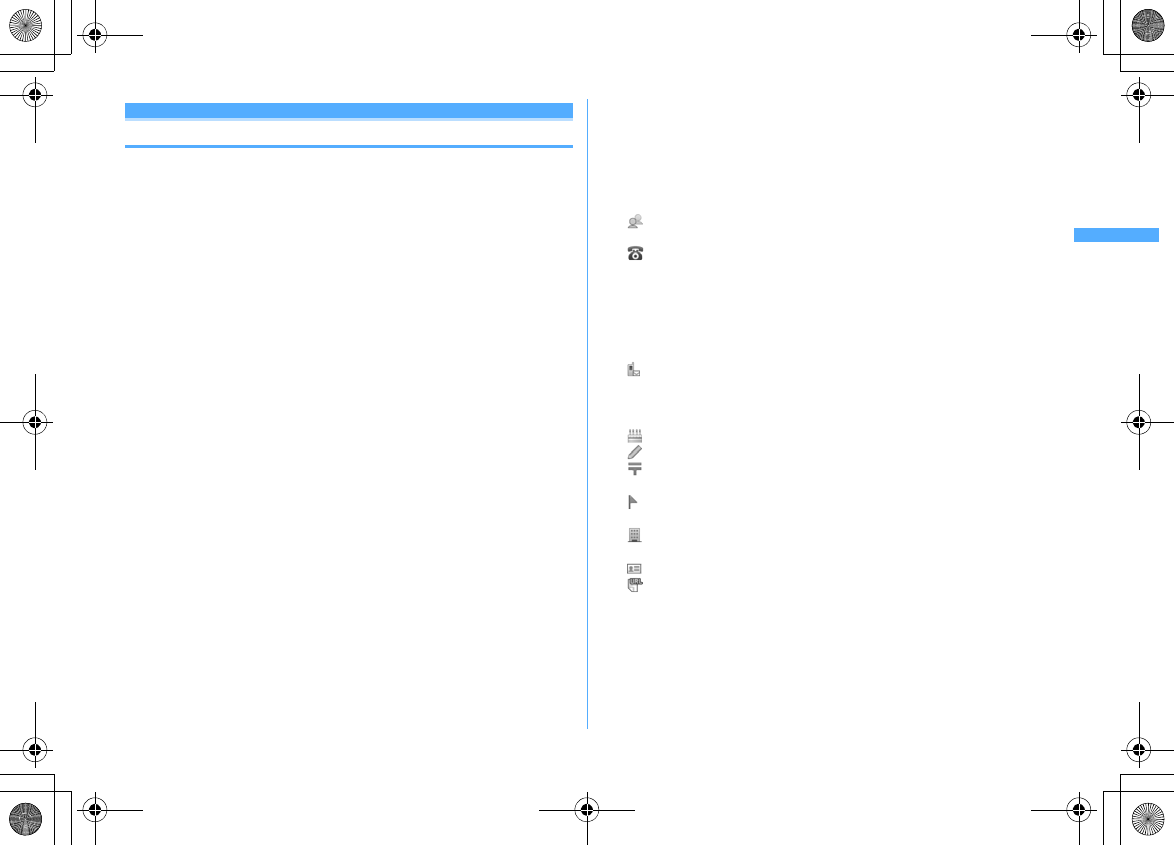
You can add to FOMA terminal phonebook or UIM phonebook.
・
Note that, when changing the models at a sales outlet such as DoCoMo shop,
data saved in FOMA terminal may not be copied to a new model terminal due
to its specifications.
・
Priority of incoming/outgoing operation
→
P104
・
Savable number
→
P82
1
d
(1 sec. or more)
・
When operating from the phonebook list, press
m2
.
Adding to UIM phonebook :
m
[Phonebook & Logs]
4
2
Enter a name
3
Set the required items
eC
Phonebook number (No.000-999) :
The lowest available phonebook number
is assigned.
・
When a phonebook number that is already saved is specified, a
confirmation screen for overwriting appears when adding. When not
overwriting, select "New entry" and specify another phonebook number.
・
Zeroes before single- or double-digit phonebook numbers can be
omitted.
Reading :
Reading of the entered name is entered.
・
Even if you correct the name, the reading does not reflect the change.
Select/Shoot image :
Set an image or movie/i-motion that is displayed when
receiving/making a call or checking the phonebook data. This item is
displayed when the saved person calls with the caller ID.
Setting image :
1e
Select a folder
e
Select an image
Reading folders and lists of images
→
P294
・
If a still image that vertical to horizontal size (or vice versa) is larger than
864
×
480 dots is selected, the image shrinking confirmation screen
appears.
・
Created animation does not operate.
Setting still image by shooting with camera :
2e
Shoot still
image
eg
・
The size of a still image to be shot is fixed to Ph.Book (96
×
72).
Setting movie/i-motion :
3e
Select a folder
e
Select a movie/i-motion
Reading folders and lists of movies/i-motion
→
P299
・
Movie/i-motion of only image can be set.
→
P302
・
This function is not available when dialing.
Setting movie by recording with camera :
4e
Record video
eg
・
Sounds are not recorded.
→
P145
Returning to the initial screen :
5
Group :
"
グループなし
(No group)" is set by default.
・
For FOMA terminal phonebook, press
a
to add a group.
→
P84
Phone number :
Up to 26 digits can be entered.
→
P43
・
For FOMA terminal phonebook, icon can be selected, and saving the first
item displays items to be added.
・
Pause ("P"), Timed pause ("T"), "+", "#" and sub-address delimiter ("
*
")
can be saved. Timed pause ("T") cannot be saved in UIM phonebook.
・
If a phone number prefixed with "186" or "184" is added in phonebook,
SMS cannot be sent even when the number is selected as the address.
Mail address :
Up to 50 one-byte characters can be entered.
・
For FOMA terminal phonebook, icon can be selected, and saving the first
item displays items to be added.
Secret code
→
P89
Birthday :
Set Set birthday to "ON" and enter the birthday.
Note :
Up to 100 two-byte (200 one-byte) characters can be entered.
PostalCode/Address :
Up to 7 digits for a postal code and up to 100 two-
byte (200 one-byte) characters for an address can be entered.
Location info :
Add location information according to the current location
and/or location history.
→
P253
Company name :
Up to 50 two-byte (100 one-byte) characters can be
entered.
Job title :
Up to 50 two-byte (100 one-byte) characters can be entered.
URL :
Up to 256 one-byte characters can be entered.
F906i.book Page 83 Monday, April 21, 2008 10:59 PM
84 Phonebook
F906i_E1kou
Alert by contact
Setting receiving actions for each phonebook
entry
Operations such as ring alert and light alert of voice calls, videophone calls or mail
can be set for each phonebook entry saved in FOMA terminal phonebook.
・
Priority of incoming operation
→
P96, 97, 113
1
de
Search the phonebook
e
Place the cursor on a phonebook
entry to set and
m32e
Set the required items
eC
h
: Switching Call and Mail screens.
・
Setting to "
グループなし
(No group)" set all to "Terminal setting". If Group
is set, Substitute image is set to "Terminal setting" and other items to
"Group setting".
/
Ring alert :
When set to "Terminal setting", the operation depends on
Call ring alert, V.phone ring alert or Mail ring alert.
・
Only when setting Ring alert of the detail information to "Available",
movies/i-motion and Music can be set as ring alert.
Setting Music
→
P95
/
Vibrate alert :
When set to "Terminal setting", the operation depends
on Vibrate alert/effect.
/
Light alert :
When set to "Terminal setting", the operation depends on
Light alert.
・
If setting Light pattern to "Light pattern 1", "Light pattern 2" or "Sync
melody", the light blinks in multiple colors. Light color cannot be set.
/
Light color :
When set to "Terminal setting", the operation depends on
Light alert.
Substitute image (Call alert only) :
When set to "Terminal setting", the
operation depends on Image setting/Videophone image.
✔
INFORMATION
・
Operation from FOMA terminal phonebook details screen :
m
→
"Edit/Settings"
→
"Alert by contact"
Group setting
Making group settings
・
For "
グループなし
(No group)", renaming group name or setting/deleting
incoming/outgoing operation is unavailable.
・
For UIM phonebook, only renaming group name is available.
<Example> Adding groups
1
m
[Phonebook & Logs]
12
2
m2
Deleting a group : Place the cursor on the group and
m3e
Authenticate
e
"Yes"
The group and the phonebook entries in it are deleted. The phonebook entries
in PushTalk phonebook are also deleted.
・
Even in Privacy mode (when Call & Logs is "Hide set contact"), the
phonebook entries with secrecy are deleted.
・
For "
グループなし
(No group)", only the phonebook entry in the group is
deleted.
Changing a group name : Place the cursor on the group and
m4
・
For UIM phonebook, press
C
, place the cursor on the group and press
m2
.
Setting the incoming/outgoing operation of the group : Place the cursor on
the group and
m5e
Set the required items
eC
Setting Call image
→
P83 Step 3 in "Adding to phonebook"
Setting other items
→
P84 "Setting receiving actions for each phonebook
entry"
Changing the order of the groups : Place the cursor on the group and
me6
or
7
3
Enter a group name (up to 10 two-byte (20 one-byte)
characters)
eC
・
For UIM phonebook, 10 two-byte (21 one-byte) characters can be entered.
Up to 10 characters can be entered when one- and two-byte characters are
both used or one-byte katakana is included.
F906i.book Page 84 Monday, April 21, 2008 10:59 PM
85
Phonebook
F906i_E1kou
Phonebook search
Making calls using phonebook
Call up the phonebook entry from FOMA terminal phonebook or UIM phonebook
for the party to call.
・
In Privacy mode (when Call & Logs is "Hide set contact"), the phonebook entries
or groups with secrecy cannot be searched. The same applies to Quick dial,
Quick mail, Headset quick-dial and Search message.
1
de
Search the phonebook
The previously used phonebook (FOMA terminal phonebook or UIM
phonebook) is displayed.
・
The phonebook list of Show all names is displayed by default. The setting
can be changed to display the search method frequently used.
→
P86
a
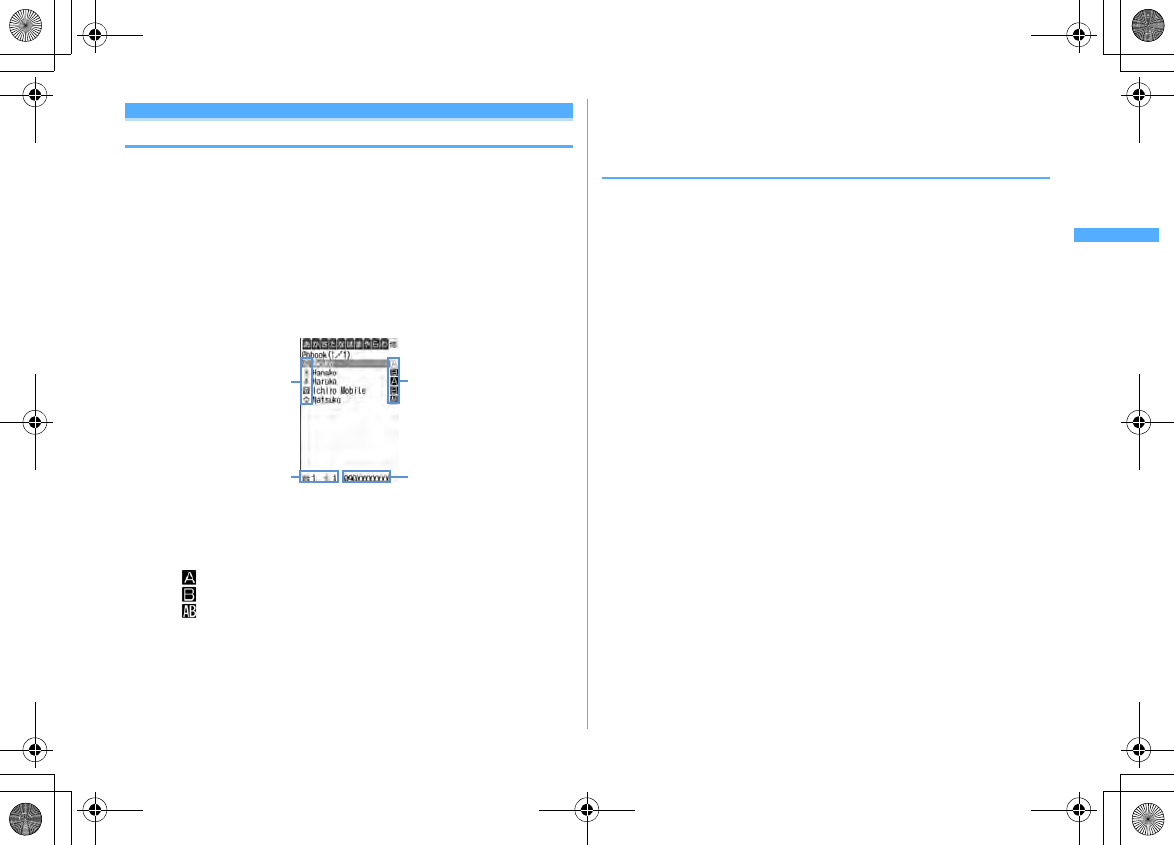
Icon set for first entry
b
Number of phone numbers and mail addresses saved in entry at the
cursor position
c
Icons set in Ph.book 2in1 setting (with 2in1 ON in Dual mode)
: Phonebook entries in A mode
: Phonebook entries in B mode
: Phonebook entries in both A and B modes
d
The first phone number of the party at the cursor position
2
Place the cursor on the party and
n
or
I
・
When operating from the details screen, display a phone number and press
n
or
I
. Pressing
g
also makes a call.
・
To make a call specifying conditions by pressing
m11
.
→
P59
・
With 2in1 ON in Dual mode, Number A is used to make a call to a party set
to "A" or "Common" in Ph.book 2in1 setting and Number B is used for a
party set to "B".
❖
Using phonebook entries
Creating an i-mode mail : Place the cursor on the party to send a mail to and
a
・
When operating from the details screen, display a mail address and press
a
or
g
.
Creating and sending methods of i-mode mail
→
P180
Creating SMS : Place the cursor on the party and
a
(1 sec. or more)
・
For the party that only the phone number is saved, pressing
a
can also create
SMS.
・
When operating from the details screen, display a phone number and press
a
.
Creating and sending SMS
→
P218
Displaying sites : Place the cursor on the party and
m15e
"Yes"
・
When operating from the details screen, display URL and press
g
and select
"Yes".
・
Press
I
on the site connection confirmation screen to display using Full
Browser.
Using Location info : Place the cursor on the party and
m0
・
When operating from the details screen, display the location information and
press
g
.
The next procedure
→
P253 "
■
Use location info menu"
Attaching phonebook data to mail : Place the cursor on the party and
m13
Creating and sending methods of i-mode mail
→
P180
Searching a sent/received mail : Place the cursor on the party and
m16e1
or
2
・
For UIM phonebook, place the cursor on the party and press
m15
, and
press
1
or
2
.
Phonebook list (Show all names)
ac
bd
F906i.book Page 85 Monday, April 21, 2008 10:59 PM
86 Phonebook
F906i_E1kou
◆
Searching by specifying the search method
・
In search method available for UIM phonebook, pressing
C
on a phonebook
list switches FOMA terminal phonebook list and UIM phonebook list.
・
is displayed on the left of each entry name in the UIM phonebook list.
・
When a phonebook list extends to multiple pages, you can switch pages using
side keys [
▲▼
]. In a search method except Show all names,
h
may also be
used to switch pages.
1
m
[Phonebook & Logs]
1
・
When operating from the phonebook list, press
m5
.
2
Specify the search method
Showing all names (Japanese syllabary) :
1e
Select the line to display by
h
・
Displayed in the order of the Japanese syllabary (
あ
(a) line
→か
(ka) line
→
…
→わ
(wa) line)
→他
(alphabets, numbers, reading starting with a blank
space, symbols, no reading).
・
Each time you enter 1 character in reading, the phone number with the
closest reading is searched (Name search).
Searching by group :
2e
Select a group
・
The entries in the specified group are displayed in the order of the reading
below.
Japanese syllabary order
→
Alphabetical order
→
Numbers
→
Reading
starting with blanks
→
Symbols
→
No reading
・
If one of the keypads of
0
-
9
,
#
,
*
is pressed, the line to which
the keypad is assigned is displayed.
1
:
あ
(a) line
2
:
か
(ka) line
3
:
さ
(sa) line
4
:
た
(ta) line
5
:
な
(na) line
6
:
は
(ha) line
7
:
ま
(ma) line
8
:
や
(ya) line
9
:
ら
(ra) line
0
:
わ
(wa) line
*
/
#
: alphabets, numbers,
symbols
Searching by frequency
*
:
3e1
or
2
Displayed in the order of number of calls or number of mails.
・
Counted up to 9,999 items.
・
PushTalk communications are not counted.
・
When resetting total number of calls and mails, place the cursor on the
party, press
m93
and select "Yes".
Searching by phonebook number
*
:
4e
Enter phonebook number
eC
・
Zeroes before single- or double-digit phonebook numbers can be omitted.
・
You can display the phonebook list in phonebook number order by
pressing
C
with no entry.
Searching by phone number :
5e
Enter part of a phone number
eC
Search the phone numbers containing the entered numbers, and phonebook
data list of FOMA terminal phonebook is displayed in the order of the
phonebook number, and the phonebook data list of UIM phonebook is
displayed in the order of reading.
・
You can display the phonebook data list in the order of phonebook number
or reading by pressing
C
with no entry.
Searching by secret attribute
*
:
6
The phonebook entries with secret attribute are displayed in the order of
phonebook number.
*
Unavailable for UIM phonebook.
❖
Searching by Rocket search
Search phonebook entry by the characters assigned to keypads
0
-
9
.
<Example> Searching for "
携帯花子
"(Keitai Hanako)
1
2
(
か
(ka) line)
ed
The phonebook list of the Show all names is displayed.
◆
Setting preferred search method <Default search
setting>
Set the search method displayed when pressing
d
on the stand-by display.
1
m
[Phonebook & Logs]
1e
Place the cursor on the search
method and
m
・
Check mark appears after the specified search method.
✔
INFORMATION
・
Even with Search by freq or Ph book No. search set by priority, pressing
d
on the
stand-by display causes the UIM phonebook list for Show all names to be displayed
if UIM phonebook was searched previously.
F906i.book Page 86 Monday, April 21, 2008 10:59 PM
87
Phonebook
F906i_E1kou
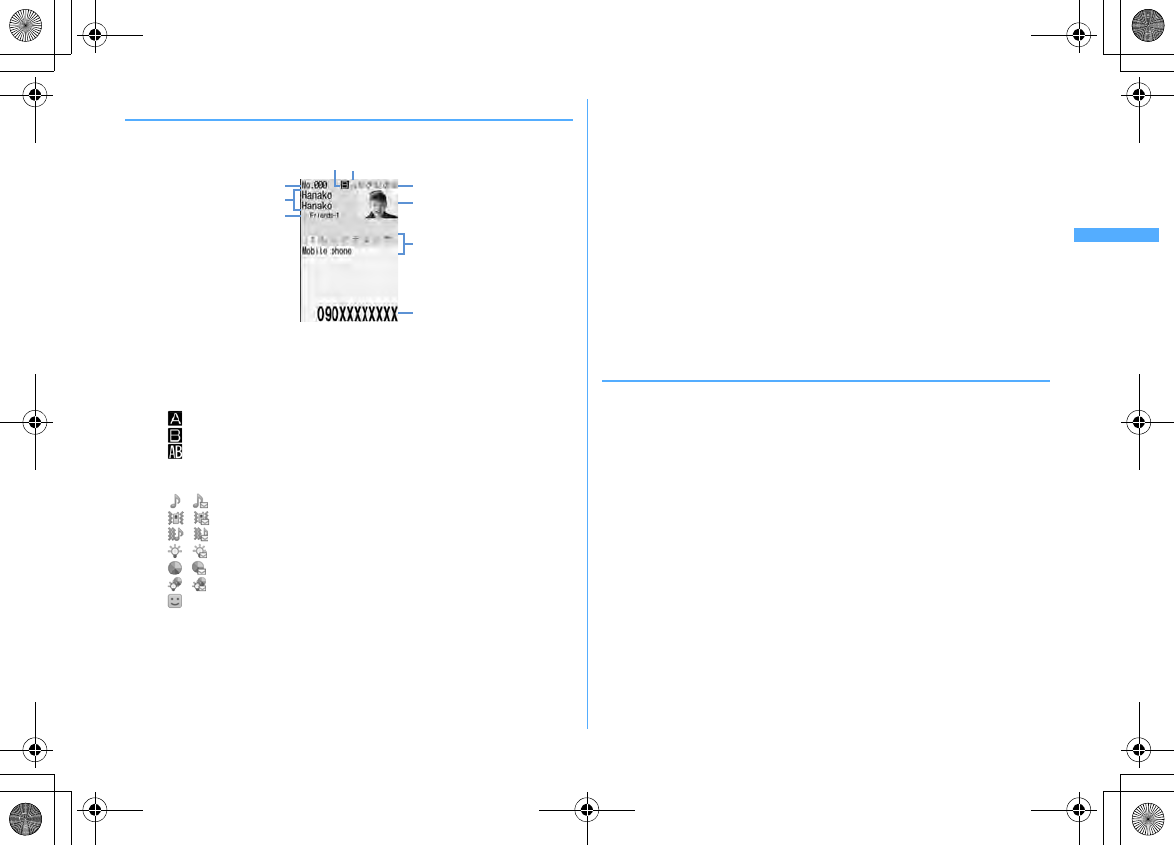
◆
Checking phonebook details
1
de
Search the phonebook
e
Select a phonebook entry
a
Phonebook No.
b
Name and reading
c
Group icon, Group name
d
Icons set in Ph.book 2in1 setting (with 2in1 ON in Dual mode)
: Phonebook entries in A mode
: Phonebook entries in B mode
: Phonebook entries in both A and B modes
e
Set any of Accept/Reject call, Caller ID settings or secret code
f
Icons indicating settings such as ring alert (call/mail)
*1
/ : Ring alert
/ : Vibrate alert
/ : Ring alert and Vibrate alert
/ : Light alert
/ : Light color
/ : Light alert and Light color
: Substitute image (call only)
g
Image
*2
h
Saved icon, Icon type
i
Saved items
*1
Settings from Alert by contact are indicated with colored icons.
*2
The display follows the settings of View preference.
j
: Display details screen of the previous/next phonebook entry.
h
: Display the set items.
・
Even when multiple phone numbers and/or mail addresses are saved,
the items can be displayed by pressing
h
.
Viewing history information : On the phone number or mail address details
screen,
C
.
The cumulative number and the date and time of last call appear.
・
If you press
C
on the history information screen, cumulation of calls and
mails can be reset collectively.
Check User information :
m91
Name, reading, phone number and mail address of the first entry appear. The
name and reading are fully displayed without omission.
◆
Switching details screen display <View preference>
・
"Show saved image" is set by default.
・
View preference of phonebook, Redial, Received calls, Mail logs and User
information are reflected to each of them.
1
de
Search the phonebook
e
Select a phonebook
entry
em94e1
-
3
・
When operating from UIM phonebook, press
m93
and
1
-
3
.
Show with image :
An image appears.
Show only name :
No image appears.
Show saved image :
Settings in "Show with image" are used when there is a
saved image, and settings in "Show only name" are used when not.
FOMA terminal phonebook details screen (Phone number)
a
i
h
f
g
c
b
d e
F906i.book Page 87 Monday, April 21, 2008 10:59 PM
88 Phonebook
F906i_E1kou
Edit phonebook
Editing phonebook entries
・
The identical phonebook entries in PushTalk phonebook are also edited.
◆
Editing saved data
1
de
Search the phonebook
e
Place the cursor on a phonebook
entry and
m31e
Edit a phonebook entry
Set the required items
→
P83 Step 2-3 in "Adding to phonebook"
2
C
The selection confirmation screen of saving method appears. If overwritten,
the phonebook entry already saved is discarded.
・
When a phone number saved in PushTalk phonebook is deleted, if
overwritten, it is also deleted from the PushTalk phonebook.
✔
INFORMATION
・
Operation from FOMA terminal phonebook details screen :
m
→
"Edit/Settings"
→
"Edit"
・
Operation from UIM phonebook :
m
→
"Edit"
・
For UIM phonebook, the phone number may not be overwritten when it contains "
*
".
・
When multiple phone numbers or mail addresses are saved and the phone number
or mail address in the first entry is deleted, the second or subsequent entry moves
forward.
◆
Copying saved data
Copied item can be pasted into screen entry fields such as in the mail creation
screen or the phonebook data entry screen.
・
The last copied item is recorded until the power is turned OFF, and it can be
pasted to anywhere any number of times.
1
de
Search the phonebook
e
Place the cursor on a phonebook
entry to copy and
m6e1
-
8
The data of appropriate items are recorded temporarily. The first saved phone
number and mail address are copied.
・
When operating from UIM phonebook, press
m6
and
1
-
3
.
・
When copying the second or subsequent phone number or mail address,
display the phone number or mail address to be copied on the details
screen, press
m6
and press
2
or
3
.
2
Display the character entry screen to paste
e
Paste the characters
Pasting method of characters
→
P383
◆
Switching order of phone numbers and mail addresses
When multiple phone numbers or mail addresses are saved in FOMA terminal
phonebook entry, the order of the phone numbers or mail addresses are switched.
<Example> Switching the order of the phone numbers saved
1
de
Search the phonebook
e
Place the cursor on a phonebook
entry and
m341
・
Press
m342
to switch the mail addresses.
2
Select a phone number to set as the first phone number
The positions of the selected phone number and first phone number are
switched.
✔
INFORMATION
・
Operation from FOMA terminal phonebook details screen :
m
→
"Edit/Settings"
→
"Switch order"
→
"Phone numbers" or "Mail addresses"
◆
Switching phonebook numbers
1
de
Search the phonebook
e
Place the cursor on a phonebook
entry and
m343e
Select the destination phonebook
entry
✔
INFORMATION
・
Operation from FOMA terminal phonebook details screen :
m
→
"Edit/Settings"
→
"Switch order"
→
"Phonebook Nos."
F906i.book Page 88 Monday, April 21, 2008 10:59 PM
89
Phonebook
F906i_E1kou
Copying phonebook entries
Entries in FOMA terminal phonebook are copied to UIM phonebook and from UIM
phonebook to FOMA terminal phonebook.
・
FOMA terminal phonebook also can be copied into microSD card.
→
P310
・
If there is a group of the same name in the copy destination, copied to the group.
・
When copying from FOMA terminal phonebook to UIM phonebook, the saved
timer ("T") as phone number is deleted.
・
The icons of phone number are all replaced with , and those of mail
addresses are replaced with .
・
If the number of characters exceeds the limit that can be saved in UIM
phonebook, the exceeding part is deleted.
→
P82
<Example> Copying from FOMA terminal phonebook to UIM phonebook
1
de
Search the phonebook
em71e
Select a
phonebook entry
eC
・
When copying from UIM phonebook to FOMA terminal phonebook, press
m7
to select a phonebook entry, and press
C
.
Delete phonebook
Deleting phonebook entries
・
When deleting all, all of the created groups are deleted.
・
The identical phonebook entries in PushTalk phonebook are also deleted.
・
For entries in UIM phonebook, "All contacts" cannot be performed.
<Example> Deleting a phonebook entry in FOMA terminal phonebook
1
de
Search the phonebook
2
Place the cursor on a phonebook entry and
m4e1
or
2e
"Yes"
・
When "All contacts" is selected, perform authentication.
Deleting from UIM phonebook : Place the cursor on a phonebook entry and
m4e
"Yes"
✔
INFORMATION
・
Operation from the phonebook details screen :
m
→
"Delete"
Setting functions for phonebook entries
・
These functions cannot be set for the phonebook entry in UIM phonebook.
◆
Setting Show/Hide caller ID to each phone number
<Caller ID settings>
・
This item is set to "No setting" by default.
・
Priority of the method to notify a caller ID
→
P50
1
de
Search the phonebook
e
Place the cursor on a phonebook
entry and
m352e
Authenticate
e
Select a phone
number
e1
-
3
・
When "No setting" is set, the settings in Caller ID notification are used.
✔
INFORMATION
・
Operation from FOMA terminal phonebook details screen : Display a phone number
and
m
→
"Edit/Settings"
→
"Advanced settings"
→
"Caller ID settings"
◆
Setting secret code to mail address <Secret code>
When the other party registers a secret code for its mail address (mobile phone
number@docomo.ne.jp) and you set that secret code for the mail address in your
phonebook, the secret code is automatically added to i-mode mail created by
searching the phonebook for that phone number.
1
de
Search the phonebook
e
Place the cursor on a phonebook
entry
m354e
Authenticate
e
Select the mail address
2
Enter the secret code of 4 digits
Canceling : Delete the secret code
eg
✔
INFORMATION
・
Operation from FOMA terminal phonebook details screen : Display a mail address and
m
→
"Edit/Settings"
→
"Advanced settings"
→
"Secret code"
・
The set secret code does not appear on the phonebook entry details screen or in the
address for creating i-mode mail. It can be checked by the same operations as secret
code settings.
F906i.book Page 89 Monday, April 21, 2008 10:59 PM
90 Phonebook
F906i_E1kou
・
If a mail address is saved as "mobile phone number + secret code@docomo.ne.jp",
sending mail to the party is unavailable.
Secret attribute
Making phonebook entries secret
You can set secrecy to phonebook entries or groups. In Privacy mode (when Call
& Logs is "Hide set contact"), the phonebook entries or groups with secrecy are
not displayed.
・
It is also reflected to PushTalk phonebook.
・
Setting for UIM phonebook is unavailable.
・
If you change secrecy, a confirmation screen appears for performing Apply
secret attribute when ending the phonebook and returning to the stand-by
display.
・
Operation setting of Privacy mode
→
P124
◆
Setting secret attribute for phonebook entries
1
de
Search the phonebook
e
Place the cursor on a phonebook
entry and
m351
Canceling :
de
Search the phonebook
e
Place the cursor on a phonebook
entry and
m351
✔
INFORMATION
・
Operation from FOMA terminal phonebook details screen :
m
→
"Edit/Settings"
→
"Advanced settings"
→
"Secrecy ON"
◆
Setting secret attribute for group
・
Secret attribute is not set for phonebook entries in a group.
・
Secret attribute cannot be set for "
グループなし
(No group)".
1
m
[Phonebook & Logs]
12e
Place the cursor on the
group and
m8
・
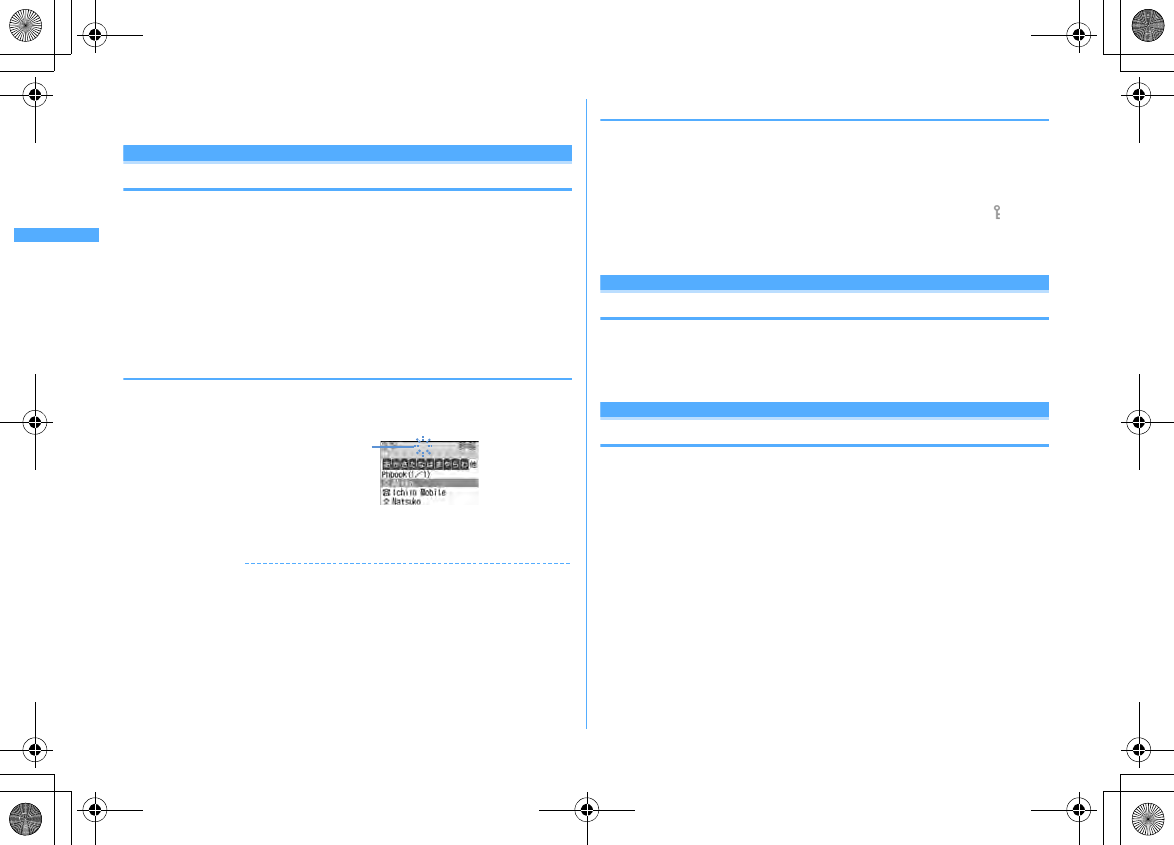
When secret attribute is set for the group at the cursor position, blinks.
Canceling :
m
[Phonebook & Logs]
12e
Place the cursor on the
group and
m8
No. of items
Checking number of phonebook entries
・
In Privacy mode (when Call & Logs is "Hide set contact"), the number of
phonebook entries in FOMA terminal phonebook with secrecy is not displayed.
1
de
Search the phonebook
em92
Quick dial
Using simple dial to make calls
You can make calls or PushTalk calls by a simple operation to parties with
phonebook numbers 0-99 in FOMA terminal's phonebook.
・
When there are multiple phone numbers saved, a call is made to the first phone
number.
<Example> Making a voice call to the phone number saved as phonebook
number 2
1
Enter phonebook number (
2
)
en
or
C
・
When making a PushTalk call, press
P
.
Blinking when secret attribute is set for the
phonebook entry at the cursor position
F906i.book Page 90 Monday, April 21, 2008 10:59 PM
91
Phonebook
F906i_E1kou
Data Security Service
Storing (restoring or updating) phonebook in
Data Center
This service saves entries of FOMA terminal phonebook to Data Center. Stored
phonebook entries can be restored/updated to FOMA terminal by connecting to
Data Center.
・
A charged service requiring subscription. When having not subscribed to this
service, attempting to connect to Data Center displays the screen indicating that.
・
You can restore the phonebook, set auto-update, etc. on Data Security Service
site of i-mode.
iMenu
→
English
→
My Menu
→電話帳お預かり
(Data Security Service)
・
For details of auto-update, restoration, etc., refer to "Mobile Phone User's Guide
[i-mode] FOMA version".
・
Entries saved in UIM phonebook cannot be saved in Data Center.
◆
Saving/Updating phonebook
1
m
[LifeKit]
61e
"Yes"
e
Authenticate
・g
: Cancel saving
Operating from FOMA terminal phonebook :
de
Search the
phonebook
em74e
"Yes"
e
Authenticate
2
Check the communication result
・
The communication result display disappears after about 5 seconds.
✔
INFORMATION
・
If automatic update is performed after deleting entries of FOMA terminal phonebook,
the entries of phonebook saved in Data Center are also deleted.
・
If you deleted entries of FOMA terminal phonebook, you can download the
phonebook from Data Security Service site of i-mode.
iMenu
→
English
→
My Menu
→電話帳お預かり
(Data Security Service)
→お預かりセン
ター
(Data Center)
→
Enter i-mode password
→電話帳・ケータイへダウンロード
(Download to phonebook/mobile phone)
→
OK
→
Return to stand-by display
・
When any other functions are running at the specified time of phonebook automatic
update, automatic update is executed after returning to stand-by display. Automatic
update is not executed when FOMA terminal is turned OFF or out of i-mode service
area or when UIM is not installed.
・
When the automatic update of the phonebook failed, no icon etc. appears on the
stand-by display. You can check by Synchronization log.
・
The saved order of phonebook groups may not be reverted by restoration.
◆
Viewing logs that used Data Center <Synchronization
log>
・
Up to 30 synchronization logs are to be recorded. When exceeding the limit,
record is overwritten chronologically.
1
m
[LifeKit]
62e
Select logs
◆
Setting if you send the image saved in phonebook
<Sync setting>
1
m
[LifeKit]
63e
Select the Contact image sending
field
e1
or
2eC
F906i.book Page 91 Monday, April 21, 2008 10:59 PM
F906i.book Page 92 Monday, April 21, 2008 10:59 PM
93
F906i_E1kou
Sound/Screen/Light Settings
Setting operations for incoming calls and mail/messages ....................... 94
Sounds settings
Changing ring alert for calls, mail/messages, etc.
..............................................................
Call ring alert/Mail/Msg ring alert 95
Setting Stereo/3D sound or Surround ..................... Stereo sound effect 96
Setting alarm sound for Alarm clock and Schedule reminder
....................................................................................................
Alarm sound 96
Setting volume of various sounds such as ring alert and alarm sound
.................................................................................................
Adjust volume 96
Using vibrator to signal incoming calls and alarms
.........................................................................................
Vibrate alert/effect 97
Changing the ring tone of the phone ..................................... Melody Call 98
Setting sound for GPS positioning ............................................ GPS alert 98
Setting Keypad sound ......................................................... Keypad sound 98
Setting Open/Close sound ........................................... Open/Close sound 98
Setting sound to be emitted when turning display
.........................................................................................
Display turn sound 98
Setting shutter sound .................... Shutter sound/Movie camera sound 98
Setting alert sound for charging ............................................ Charge alert 99
Setting on-hold tone ............................................................. On-hold tone 99
Alarm announcing that call is about to be interrupted ..... Quality alarm 99
Setting alarm for reconnecting interrupted call ........... Reconnect alarm 99
Setting Low Battery alert .............................................. Low Battery alert 99
Making FOMA terminal silent ................................................. Silent mode 99
Displays/Lights settings
Switching stand-by display, Silent mode, etc. by lifestyles
...................................................................................................
Timed theme 101
Changing stand-by display ............................................. Stand-by display 101
Changing images for outgoing voice/videophone calls
......................................................................................
Outgoing call image 104
Changing images for incoming voice/videophone calls
......................................................................................
Incoming call image 104
Decorating titles to display for incoming/outgoing calls or while talking
.........................................................................................
Identification mark 105
Setting Contact image display from phonebook at incoming/outgoing call
................................................................................................
Contact image 106
Changing displays for incoming/outgoing messages and retrieving
......................................................
Sent/Received/Retrieving mail image 106
Setting sub-display .................................................................. Sub-display 106
Setting display and key lighting ................................ Display & Key light 106
Changing display colors ....................................................... Color scheme 107
Changing startup menu ............................................ Select startup menu 107
Using Kisekae Tool ........................................................................................ 107
Customizing the menu .................................................................................. 110
Customizing FOMA terminal screen ...................................... Style theme 111
Changing battery/signal level icon .......... Battery icon/Signal level icon 112
Indicating newly arrived information such as missed calls and unread mails with
lighting .............................................................................. Indicator light 112
Setting the lighting patterns and colors used for an incoming call/mail or while
talking ...................................................................................... Light alert 112
Changing font style ..................................................................... Font style 113
Changing font size ........................................................................ Font size 113
Setting clock display ................................................ Clock display format 114
F906i.book Page 93 Monday, April 21, 2008 10:59 PM
94 Sound/Screen/Light Settings
F906i_E1kou
Setting operations for incoming calls and mail/
messages
・
This setting is reflected to Call ring alert, Mail/Msg ring alert, Incoming call/
Videophone receiving of Call image, Vibrate alert/effect or Light alert.
◆
Changing operations for incoming call <Call alert/
Videophone alert>
<Example> Setting operations for incoming calls
1
m
[Settings & NW services]
512e
Set the required
items
eC
Changing operations for incoming videophone calls :
m
[Settings & NW
services]
612e
Set the required items
eC
Ring alert :
Set the ring alert.
・
When selecting any of "Melody", "Movie ringtone" or "Music", select the
ring alert. When setting a movie/i-motion with sound and image for
"Movie ringtone", Show image is "Sync ring alert".
Setting Music
→
P95
Show image :
Set an image to display.
・
When "Select image" is selected, select the List images field and select
an image.
・
When "i-motion" is selected, select a movie/i-motion from the movie list.
Vibrate alert :
Set the operation pattern of vibrator.
Light alert :
Set a lighting pattern and color of the light.
・
If setting Light alert to "Light pattern 1", "Light pattern 2" or "Sync
melody", the light blinks in multiple colors. Light color cannot be set.
◆
Changing operations for incoming PushTalk call
<PushTalk alert>
1
m
[Settings & NW services]
621e
Set the required
items
eC
Ring alert :
Set the ring alert.
・
When selecting any of "Melody", "Movie ringtone" or "Music", select the
ring alert. For "Movie ringtone", movie/i-motion containing only sound
(i-motion without image such as the one containing only voice of a
singer) can be set.
Setting Music
→
P95
Vibrate alert/Light alert :
Setting items
→
P94 "Changing operations for
incoming call"
◆
Changing operations for incoming MessageR/F
<MessageR/F alert>
1
a#1e2
or
3e
Set the required items
eC
Ring alert :
Set the ring alert.
・
When selecting any of "Melody", "Movie ringtone" or "Music", select the
ring alert.
Setting Music
→
P95
Light alert/Vibrate alert :
Setting items
→
P94 "Changing operations for
incoming call"
Ring time (sec) :
Set the duration of sounding of ring alert or operation of
vibrator within the range of 1-30 seconds.
◆
Changing operations for incoming mail <Mail alert>
1
a#11e
Set the required items
eC
Setting items
→
P94 "Changing operations for incoming MessageR/F"
◆
Changing operations for incoming chat mail <Chat
mail alert>
1
a#14e
Set the required items
eC
Alert setting :
Set if you set operations for incoming mail or follow the
incoming operation.
・
Setting "Customize" allows setting the items below.
Ring alert/Light alert/Vibrate alert/Ring time (sec) :
Setting items
→
P94 "Changing operations for incoming MessageR/F"
F906i.book Page 94 Monday, April 21, 2008 10:59 PM
95
Sound/Screen/Light Settings
F906i_E1kou
✔
INFORMATION
・
Setting created animation for Select image of Show image in Call alert (Incoming call)
or Videophone alert (Videophone receiving) displays the first image.
・
When music or movie/i-motion containing only sound (i-motion without image such
as the one containing only voice of a singer) is set as the ring alert in Call alert or
Videophone alert, if you set Show image to movie/i-motion containing only images
or Flash graphics, the ring alert is reset to the default. The melody can be changed.
・
Some movies/i-motion may not be set for Show image of Call alert (Incoming call) or
Videophone alert (Videophone receiving). Also, movies/i-motion with sound cannot
be set.
・
Even when setting Vibrate alert or Light alert to "Sync melody", the vibrator/light may
not be synchronized depending on the melody.
Sounds settings
Call ring alert/Mail/Msg ring alert
Changing ring alert for calls, mail/messages, etc.
・
When a movie/i-motion is set as a ring tone, a movie and/or sound is played for
incoming phone call or mail (Movie ringtone).
・
This setting is reflected to ring alert in Call alert, Videophone alert, PushTalk
alert, Mail alert, MessageR alert, MessageF alert and Chat mail alert.
・
Melodies for ring alert stored by default
→
P429
<Example> Setting ring alert for incoming mail
1
m
[Settings & NW services]
11
2
21
Setting ring alert for incoming voice/videophone/PushTalk call :
1e1
-
3
Setting ring alert and Ring time (sec) for incoming chat mail or MessageR/F :
2e2
-
4
3
Set the required items
eC
Mail
*1
:
Select a ring alert.
・
When selecting any of "Melody", "Movie ringtone" or "Music", select the
ring alert.
Setting Music
→
P95
・
For Chat M ring alert, "Sync msg alert" can be selected. If you select "Sync
msg alert", the ring alert operates according to Mail alert. Ring time cannot
be set.
Ring time (sec)
*2
:
Set time in range of 1-30 seconds.
*1
Function names selected in Step 2 are displayed.
*2
Voice call, videophone call or PushTalk call are not displayed.
❖
Setting Music
Music (Chaku-uta full
®
) can be set as a ring alert in two ways : Full song ring tone
for setting whole music and Point ring tone for setting a section previously
selected.
<Example> Setting Full song ring tone
1
Select "Music" at each setting
e
Select a folder
2
Select a music to set
・
When music in microSD card is selected, a confirmation screen appears.
Select "Yes" to move the music to the terminal and set to a ring alert.
Setting Point ring tone : Place the cursor on the data to set and
ae
Select
the item
・
When Chaku-uta full
®
in microSD card available to nonmember is selected,
a confirmation screen for cutting out the part to set as the ring alert and
saving it in the i-motion folder appears. Select "Yes", enter a display name
and press
C
. The cut out music is saved to "i-mode" folder of i-motion as
i-motion compatible with contents transfer.
When exceeding the savable number/area
→
P322
✔
INFORMATION
・
The data below cannot be set as the ring alert.
- Movie/i-motion containing only image
- Movie/i-motion for which Ring alert in detail information (
→
P319) is "Unavailable"
- Music for which Full song ring tone or Point ring tone of detail information (
→
P348) is
"Unavailable"
・
In the cases below, the image for incoming call is used as the standard image in the
settings of Call ring alert and V.phone ring alert. The image can be changed in Call
alert (Incoming call) or Videophone alert (Videophone receiving).
- When the ring alert is changed from a movie/i-motion containing images to music or movie/i-
motion containing only sound (i-motion without image such as the one containing only voice of a
singer) or melody
- When a movie/i-motion containing only images or Flash graphics is set as the incoming image and
a movie/i-motion containing only sound (i-motion without image such as the one containing only
voice of a singer) is set as the ring alert
F906i.book Page 95 Monday, April 21, 2008 10:59 PM
96 Sound/Screen/Light Settings
F906i_E1kou
❖
Ring alert priority
When setting ring alerts for multiple functions, they sound in order of the priority
below.
a
Alert by contact of FOMA terminal phonebook
b
Alert/image by group of FOMA terminal phonebook
c
Call ring alert/V.phone ring alert/Mail ring alert/Call alert (Incoming call)/
Videophone alert (Videophone receiving)/Mail alert/Incoming calls melody
setting for Multi number/Ring alert for No. B
・
When the other party does not notify the caller ID, the ring alert for voice call
depends on Anonymous caller. A ring alert for videophone call depends on the
settings of V.phone ring alert/Videophone alert/Ring alert for No. B.
Stereo sound effect
Setting Stereo/3D sound or Surround
・
This setting is also reflected to Surround of Settings for movie/i-motion and
Music player, and Stereo/3D sound of Settings for Melody.
1
m
[Settings & NW services]
16e1
-
3e1
or
2
✔
INFORMATION
・
The 3D sound function creates sound that is 3-dimensional or moves around in space
using stereo speakers (or stereo earphone set). Using the 3D sound function, realistic
i-
α
ppli games, ring tone and i-motion can be enjoyed. The most realistic 3D sound can
be enjoyed when FOMA terminal is held approximately 20-30 cm away from the
listener's face. The effect fades when FOMA terminal is positioned off the center
rightward or leftward or too close or too far.
・
There are differences in how the 3D sound effect is felt among individuals.
Alarm sound
Setting alarm sound for Alarm clock and
Schedule reminder
<Example> Setting Alarm clock sound
1
m
[Settings & NW services]
114
2
1e
Select the Alarm clock field
e1
-
4
・
When selecting any of "Melody", "i-motion" or "Music", set the alert sound.
When movie/i-motion containing sound and image is set for "i-motion", the
image of the movie/i-motion is displayed.
Setting Music
→
P95
Setting sound for Schedule reminder :
2e
Select the Alarm on time field
or Alarm in advance field
e1
-
3
3
C
Adjust volume
Setting volume of various sounds such as ring
alert and alarm sound
1
m
[Settings & NW services]
12e1
-
9
・
When Alarm volume is selected, select
1
or
2
.
Call alert volume :
Set call alert volume for voice, videophone and PushTalk
calls. It is also reflected to alarm volume of Call cost limit.
Mail/Msg alert vol. :
Set volume of a ring alert for mail, chat mail and
MessageR/F.
GPS alert volume :
Set volume of GPS alert sound (Position location, Location
request, Notify location).
Listen volume :
Set earpiece volume of voice call, videophone call and
PushTalk call. Reflected to the volume of play sound of Answer machine or
Voice memos and sound effect of pasting stamp or text to an image.
Alarm clock sound :
Set volume of sound to be emitted when Volume is set to
"Phone setting" from the Set sound screen of Alarm clock. Also reflected to
the volume of Countdown timer.
Schedule reminder :
Set sound volume of alarm for watching reservation of
1Seg, alarm on time or alarm in advance for the schedule.
i-
α
ppli effect sound :
Set volume of the sound emitted from i-
α
ppli.
ToruCa receive alert :
Set the volume of the alert activated when receiving
ToruCa has completed. Also reflected to Receive alert volume of ToruCa
alert.
F906i.book Page 96 Monday, April 21, 2008 10:59 PM
97
Sound/Screen/Light Settings
F906i_E1kou
Operation sound :
Set the volume of Keypad sound, Open/Close sound and
Display turn sound.
・
If setting to "Silent", the confirmation sound is not emitted when the code
is read.
Melody effect sound :
Set the volume for playing melody (including melody
attached to mail or MessageR/F). Also reflected to the volume of Settings
of Melody.
・
"Silent" and "Steptone" cannot be set for Listen volume. "Steptone" cannot
be set for i-
α
ppli effect sound, ToruCa receive alert, Operation sound or
Melody effect sound.
2
Side keys [
▲▼
] or
keg
・
If setting Call alert volume to "Silent", appears on the stand-by display.
appears when a vibrate for Call vibrate alert is set simultaneously.
Vibrate alert/effect
Using vibrator to signal incoming calls and
alarms
・
The operation of vibrator for receiving 64K data communication depends on the
setting of incoming voice call.
・
This setting is also reflected to settings for Vibrate alert or Vibrate effect in Call
alert, Videophone alert, PushTalk alert, Mail alert, MessageR alert, MessageF
alert, Chat mail alert, Positioning alert and i-
α
ppli settings.
・
If FOMA terminal is on the desk etc. when the vibrator operates, it may fall off
because of the vibration.
<Example> Setting the vibrator for incoming voice, videophone and PushTalk
calls
1
m
[Settings & NW services]
13
2
1e1
-
3
Setting the vibrator for incoming mail, chat mail and MessageR/F :
2e1
-
4
・
When Alert setting of Chat mail alert is set to "Same:Mail setting", a screen
appears indicating that setting is unavailable.
Setting the vibrator for GPS positioning :
3e1
-
4
Setting the vibrator used with Alarm clock or Schedule reminder sounding :
4e1
or
2
Setting the vibrator used for i-
α
ppli effect : Press
5
3
1
-
5
Vibrator is set and FOMA terminal vibrates on the incoming call/message and
alarm notification.
・
If you place the cursor on "Pattern A", "Pattern B" or "Pattern C", it vibrates
in the pattern at the cursor position.
・
When setting to "Sync melody", the vibrator operates along with the
melody set for ring alert etc. Note that it may not synchronize depending
on the melody.
・
When setting the vibrator for i-
α
ppli effect, select "ON" or "OFF".
・
If the vibrator for incoming calls is set, appears on the stand-by display
if the Call alert volume is more then "Level 1". appears when Call alert
volume is set to "Silent".
❖
Vibrate alert priority
When setting vibrator in multiple functions, it operates in order of the priority
below.
a
Alert by contact of FOMA terminal phonebook
b
Alert/image by group of FOMA terminal phonebook
c
Vibrate alert/effect/Call alert/Videophone alert/Mail alert
✔
INFORMATION
・
Vibrator does not operate when another call is received during a call.
・
Even with "OFF", the vibrator may operate when Flash graphics operate.
F906i.book Page 97 Monday, April 21, 2008 10:59 PM
98 Sound/Screen/Light Settings
F906i_E1kou
Melody Call
Changing the ring tone of the phone
This is a service to change the sound like "prr" that you hear when making a call
to a mobile phone to a melody.
・
A communication fee is not required for connecting to the setting site. Note that
you are charged packet communication fees for connecting to IP site, i-mode
menu site or Free Melody Corner.
1
m
[Settings & NW services]
118e
"YES"
The melody call site is connected.
・
For details, refer to "Mobile Phone User's Guide [Network Services]".
✔
INFORMATION
・
Melody Call is valid only when a voice call is received.
GPS alert
Setting sound for GPS positioning
・
This setting is also reflected to Position settings, Notification setting and
Positioning alert for Request setting.
1
m
[Settings & NW services]
113e1
-
4e
Select the Ring alert field
e1
or
2
・
When "Melody" is selected, select ring alert.
2
C
Keypad sound
Setting Keypad sound
You can change the sound to be emitted when pressing keys (except side keys [
▲▼
],
M
or
P
) or when operating pointing device. Emission of the sound can also
be inhibited.
・
When the sound of Battery level and End alert of Data exchange settings are set
to "ON", sounds are emitted according to these settings.
・
If setting to "OFF", the sound is not emitted when reading a code.
1
m
[Settings & NW services]
1151e1
-
5
✔
INFORMATION
・
Keypad sound is not emitted in the cases below even if it is set to ON.
- When i-
α
ppli is activated (except
s
)
- When Full Browser is activated, or when the pointer is moved by sliding the pointing device
・
If setting keypad sound to "Sol-fa", "Key sound 2" is emitted by sliding the pointing
device and the dedicated sound is emitted by double-tapping.
Open/Close sound
Setting Open/Close sound
You can change the sound to be emitted when opening/closing FOMA terminal.
1
m
[Settings & NW services]
1152e1
-
4
Display turn sound
Setting sound to be emitted when turning
display
1
m
[Settings & NW services]
1153e
Select the
Turn sound field
e1
or
2
・
When "Melody" is selected, select turn sound.
2
C
Shutter sound/Movie camera sound
Setting shutter sound
You can set a shutter sound to be emitted when shooting an image with Still
camera or recording a movie with Movie camera (including recording sound with
Sound recorder).
・
This setting is also reflected to Shutter sound of Image settings and Recording
settings.
1
m
[Settings & NW services]
115e4
or
5e1
-
5
F906i.book Page 98 Monday, April 21, 2008 10:59 PM
99
Sound/Screen/Light Settings
F906i_E1kou
Charge alert
Setting alert sound for charging
You can set if you activate the battery charged sound at the start and end of
charging.
1
m
[Settings & NW services]
116e1
or
2
✔
INFORMATION
・
The alert sound for charging is not emitted in the situations below even when this
function is set to "ON".
- In Silent mode, Public mode (Drive mode), during a voice/videophone call, PushTalk session, 64K
data communication, i-mode communication, packet communication
On-hold tone
Setting on-hold tone
1
m
[Settings & NW services]
1172e1
-
3
Quality alarm
Alarm announcing that call is about to be
interrupted
You can set if you sound an alarm before the voice call is disconnected when
signal quality deteriorates.
・
If the signal quality deteriorates rapidly, the call may be disconnected without
sounding the alarm.
1
m
[Settings & NW services]
1173e1
-
3
✔
INFORMATION
・
To make settings during a voice call, press
m
and select "Quality alarm".
Reconnect alarm
Setting alarm for reconnecting interrupted call
・
While the call is interrupted, the distant party hears no sound.
・
The time required to make a reconnection depends on the call conditions, radio
wave conditions, etc. It normally takes about 10 seconds to reconnect.
・
You are charged for the time used to make a reconnection (up to 10 seconds).
・
The call may be terminated without sounding the alarm depending on the call
conditions, signal quality, etc.
1
m
[Settings & NW services]
1174e1
-
3
✔
INFORMATION
・
To make settings during a voice or PushTalk session, press
m
and select "Reconnect
alarm".
Low Battery alert
Setting Low Battery alert
You can set if you activate the alert when the battery is low.
1
m
[Settings & NW services]
1175e1
or
2
✔
INFORMATION
・
When the battery becomes low during a call, the alert is emitted from the earpiece
even with "OFF" set.
Silent mode
Making FOMA terminal silent
Sounds from FOMA terminal can be disabled in order to prevent disturbance to
the people around you by enabling the vibrator for incoming calls or muting the
keypad sound.
◆
Starting Silent mode
1
#
(1 sec. or more)
After Silent mode specified in Silent mode is activated, (in General silent
mode) or (in Personalized silent mode) is displayed on the stand-by
display.
・
By default, you can also start/cancel Silent mode by pressing side key [
▲
]
for 1 second or more with FOMA terminal folded.
F906i.book Page 99 Monday, April 21, 2008 10:59 PM
100 Sound/Screen/Light Settings
F906i_E1kou
・
When FOMA terminal is folded, Silent mode can be started/canceled by
using a menu on the sub-display.
→
P35
Canceling :
#
(1 sec. or more)
❖
When General silent mode is activated
An incoming call is notified with vibration, muting all sounds emitted from FOMA
terminal such as ring tone, Keypad sound, Open/Close sound, Display turn sound,
alarm, buzzer or the sound for reading a code. And, microphone is sensitized, and
a call can be made in a small voice.
・
In the cases below, the operation of vibrate alert is "Pattern A".
- When receiving voice call, videophone call, PushTalk call, mail or during 64K data
communication
- Positioning when melody is set in GPS alert
- When the time specified in Countdown timer elapses
- When the date and time specified in schedule come
・
The vibrator operation for receiving Area Mail of emergency earthquake flash
report is "Sync melody".
・
When the time specified in Alarm clock comes, vibrate operates according to the
setting of Alarm clock.
・
Melody is not played automatically even when sent/received mail or MessageR/
F is displayed with "Auto play" set for Attachment auto-play.
・
When playing a movie/i-motion with sound, program recorded from 1Seg, a
confirmation screen for sound playing appears. Select "No" to play movie only.
・
When activating 1Seg, a sound emission confirmation screen appears. If you
select "Yes", you can adjust the volume. Select "No" to inhibit sound output.
When 1Seg is activated with Use as alarm in watching reservation set to "Yes",
you can adjust the volume.
・
When playing Music or Melody or Music&Video Channel program in Silent
mode, the playing confirmation screen appears. Select "Yes" to play.
✔
INFORMATION
・
Shutter sound is emitted even in Silent mode.
・
The alarm sound of Call cost limit is not usually emitted in Silent mode. In
Personalized silent mode, alarm volume of Call cost limit depends on the setting of
"Call alert volume" of the Personalized silent mode.
◆
Setting Personalized silent mode <Silent mode>
1
m
[Settings & NW services]
14
2
2
Setting General silent mode :
1
3
Set the required items
eC
Vibrate alert :
Set the vibrate alert while incoming or receiving.
・
When setting to "ON", it operates according to Vibrate alert/effect. Note
that, when Vibrate alert/effect is set to "OFF", it vibrates in "Pattern A".
・
When setting to "Contact setting", it operates according to Vibrate alert/
effect.
・
Regardless of this setting, when receiving Area Mail of emergency
earthquake flash report, the vibrator operates in "Sync melody".
Keypad sound :
Set keypad sound.
Open/Close sound :
Set Open/Close sound.
Display turn sound :
Set if you emit a sound when rotating the display.
Call alert volume :
Set call alert volume for voice, videophone and PushTalk
calls.
Mail alert volume :
Set mail alert volume.
・
Even if "Silent" is set, if any other setting item is set to emit sound, the
buzzer sounds when receiving Area Mail of emergency earthquake flash
report.
Melody volume :
Set the volume for playing melody (including melody
attached to mail or MessageR/F).
ToruCa alert volume :
Set the volume of a confirmation sound for obtaining
ToruCa from IC card reader.
GPS alert volume :
Set volume of GPS alert sound (Position location, Notify
location, Location request).
Low battery alert :
Set if you activate the alarm when the battery becomes
low.
Alarm sound, Schedule reminder, i-
α
ppli sound :
When setting to "ON", the
sound is emitted according to respective setting.
・
When setting Alarm sound to "ON", the Countdown timer sound is also
emitted.
Fake call alert :
Set if you emit fake call sound.
Sensitize microphone :
Set if you increase the microphone sensitivity.
F906i.book Page 100 Monday, April 21, 2008 10:59 PM
101
Sound/Screen/Light Settings
F906i_E1kou
Answer machine :
Operates according to this setting regardless of the setting
of Answer machine.
Displays/Light s settings
Timed theme
Switching stand-by display, Silent mode, etc. by
lifestyles
This function allows you to change the stand-by display or activate Silent or
Privacy mode at the specified time. You can select the alarm to sound once only,
repeat everyday or sound on the same day every week.
・
Up to 18 items can be added.
1
m
[Settings & NW services]
33e
Select the title
is displayed at the left of the title for Timed theme set to ON.
Setting/Canceling the timed theme : Place the cursor on the title and
m
2
Set the required items
eC
Time :
Enter the time to switch the theme in the 24-hour format.
Repeat :
Set action of repeat switching.
・
When "Day of week" is selected, select "Day/Week", select a day of week
and press
C
.
Title :
Up to 10 two-byte (20 one-byte) characters can be entered.
Style theme :
Set if you change style theme.
・
When "Change" is selected, select a style theme.
Silent mode :
Set if you start Silent mode.
・
When "ON" is set, Silent mode set from Silent mode starts.
Privacy mode :
Set if you start Privacy mode.
・
When "ON" is set, Privacy mode set from Privacy mode setting starts.
✔
INFORMATION
・
With Style theme set to "Change", the image, movie/i-motion, Chara-den and Set
random image settings on the stand-by display are canceled at the time specified in
this function. However, Show ticker of i-Channel is not canceled.
・
When i-
α
ppli stand-by display is set, this function is unavailable.
・
If multiple items are set and the operating time for them are the same, the item on the
top of the list of Timed theme operates.
・
When Timed theme and alarm are set to start at the same time, Timed theme starts
after the alarm operates.
・
This function does not operate if FOMA terminal is turned OFF, All lock or Omakase
Lock is ON or other function is operating when the specified time comes. If you turn
FOMA terminal ON, cancel the lock or display the stand-by display, Timed theme that
passed the set time operates in order.
Stand-by display
Changing stand-by display
・
Stand-by display for some of images, movies/i-motion, Chara-den or i-
α
ppli are
unavailable if you do not install the same UIM as used in downloading the data
(UIM operation restriction).
・
If a data in "Preinstalled" folder is set, the set stand-by display is displayed even
in Personal data lock.
◆
Setting image/movie/i-motion/Chara-den as stand-by
display
Image, movie/i-motion or Chara-den downloaded from an i-mode site or still
image or movie shot with FOMA terminal can be set as the stand-by display. GIF
Animation, created animation or Flash graphics can also be set.
・
Still image, GIF animation, created animation or Flash graphics can be set on
Horizontal display.
・
Images and movies/i-motion saved in microSD card cannot be selected.
・
Movie/i-motion that can be set for stand-by display
→
P302
1
m
[Settings & NW services]
211
2
1
Setting horizontal display stand-by display :
2
3
Select any of
1
,
3
,
4
,
6
Selecting horizontal display :
1
or
2
F906i.book Page 101 Monday, April 21, 2008 10:59 PM
102 Sound/Screen/Light Settings
F906i_E1kou
4
Select a folder
e
Select an image, movie/i-motion or Chara-den
Setting action of Chara-den : Place the cursor on the Chara-den to set and
me
On the Stand-by settings screen, set the required items
eC
Setting items
→
P305 Step
a
in "Setting to the stand-by display"
5
"Yes"
・
When setting movie/i-motion as the stand-by display, the first image is
displayed.
・
If the selected image, movie/i-motion or Chara-den can be zoomed, a
confirmation screen appears asking if you display at the same
magnification or zoom. Select "Yes (Same size)" to maintain the image size
or select "Yes (Large size)" to enlarge the image to the screen size to display
on the stand-by display.
・
If i-
α
ppli stand-by display has been set, a confirmation screen appears
asking if you terminate the i-
α
ppli stand-by display. When selecting "Yes",
the i-
α
ppli stand-by display is terminated.
・
When Show ticker of i-Channel ticker is set to "Yes" and movie/i-motion or
Chara-den is selected, the ticker display is canceled.
・
When the movie/i-motion or Chara-den is canceled with no i-
α
ppli stand-by
display set, Show ticker of i-Channel ticker is set to "Yes".
❖
To play movie/i-motion, animation or Chara-den set as the
stand-by display
・
The operations below are available for movie/i-motion.
f
/Opening FOMA terminal : Play
c
/
f
: Stop
Side keys [
▲▼
] : Adjust volume
・
The operations below are available for GIF animation, created animation or
Flash graphics.
Opening FOMA terminal/Turning the display/Returning to the stand-by display/
Turning power on : Play
f
: Pause/Play
・
The operations below are available for Chara-den.
c
/Opening FOMA terminal : Play
c
/
f
: Stop
✔
INFORMATION
・
When the stand-by display is displayed, Flash graphics and/or GIF animation plays for
a predetermined period of time and stops.
・
If zoom display is set for GIF animation, the display may be distorted.
・
If setting Flash graphics in "Preinstalled" folder of My Picture, the images change as
shown below.
- When setting
ホワイト
1
/
2 (White 1/2), if Pedometer setting is "Use", the number of steps is
displayed, and the images change according to the number of steps. When tilting FOMA terminal,
human-shaped icon moves. For the case of "Not use", the images change according to the battery
level.
- When setting
ミラーブラック
1
/
2 (Mirror Black 1/2), the images change according to the
season or time. And, when Pedometer settings is "Use", the number of steps is displayed, and the
images change according to the number of steps. For the case of "Not use", the time is displayed.
- When setting
ミラーレッド
1
/
2 (Mirror red 1/2), if Pedometer settings is "Use", the number of
steps is displayed.
- When setting
ゴールド
1
/
2 (Gold 1/2), if tilting or shaking FOMA terminal, the movement of the
butterflies changes. And, when Pedometer settings is "Use", the number of steps is displayed.
- When setting
アドバンストモード
1
/
2 (Advanced mode 1/2), the images change according to
the season or time.
- When setting
ウォーキング
×
フラワー
(walking
×
flower), images change according to the
season and time. And, when Pedometer settings is "Use", the number of steps is displayed, and the
images change according to the number of steps.
◆
Displaying images at random <Set random image>
You can display multiple still images saved in folders in My Picture on the stand-
by display (Vertical display) switching at random at the specified timings.
・
Only JPEG/GIF format images (except for GIF animation) can be displayed.
1
m
[Settings & NW services]
21112e
Set the
required items
Folder :
Select the folder containing the images.
Change image :
Set the timing for changing images.
・
When "Every 30 mins" is selected, the image is changed at minutes 00
and 30 every hour, and when "Every 60 mins" is selected, the image is
changed at minutes 00 every hour.
F906i.book Page 102 Monday, April 21, 2008 10:59 PM
103
Sound/Screen/Light Settings
F906i_E1kou
2
Ce
"Yes"
・
If i-
α
ppli stand-by display has been set, a confirmation screen appears
asking if you terminate the i-
α
ppli stand-by display. When selecting "Yes",
the i-
α
ppli stand-by display is terminated.
✔
INFORMATION
・
When no still image can be displayed because some specified folders are deleted or
still images saved in the folder have been moved/deleted or Create animation is
made, the image set by default appears on the stand-by display and random image
setting returns to the default. However, when the still image displayed on the stand-
by display is moved or used for Create animation, the image is temporarily displayed
until next time the image is changed.
◆
Setting i-
α
ppli stand-by display
・
Only i-
α
ppli compatible with the i-
α
ppli stand-by display can be set.
・
The i-
α
ppli stand-by display takes precedence over other stand-by display
settings.
・
Canceling operation, setting and stand-by display of i-
α
ppli
→
P238
1
m
[Settings & NW services]
21115
A list of i-
α
ppli compatible with the i-
α
ppli stand-by display is displayed.
2
Select i-
α
ppli
e
"Yes"
or is displayed when the i-
α
ppli stand-by display is set.
・
When Show ticker of i-Channel ticker is "Yes", Show ticker is canceled.
・
With no movie/i-motion or Chara-den set on the stand-by display, if i-
α
ppli
stand-by display is canceled, Show ticker of i-Channel ticker is set to "Yes".
◆
Customizing stand-by display <Info/calendar layout>
You can divide the stand-by display to several and make settings to display newly
arrived information such as unread mail or missed call, schedule, calendar, list of
notes or contents of a note in individual areas.
・
When the stand-by display has an image set, the set information is displayed
overlaid on the image. It is not displayed if movie/i-motion, Chara-den or i-
α
ppli
stand-by display is set on the stand-by display.
1
m
[Settings & NW services]
215
2
1
Canceling :
2
3
h
to switch patterns
e
Select an area
e1
-
6
・
Press
m
and select "Yes" to cancel all area settings.
Setting newly arrived information :
2e
Select information
eC
・
"When selecting " Unread messages", reception date/time and titles of
unread mails appear.
・
When selecting " MessageR"/" MessageF", reception date/time and
titles of MessageR/F appear.
・
When selecting " Missed call", reception date/time and the phone
number of the caller (or name if saved in phonebook) appear.
・
When selecting " Recorded messages", recording date/time and the
phone number of the caller (or name if saved in phonebook) appear.
Setting Calendar :
4e1
-
4
・
The number of months that calendar can be displayed varies by the area
size.
Setting Note content :
6e
Select a note
4
Ce
"Yes"
❖
Checking information on the stand-by display
1
g
The area is surrounded with a red cursor frame.
・
When no information is shown, press
f
repeatedly and display it before
pressing
g
.
2
Move the cursor with
keg
✔
INFORMATION
・
Pressing
f
switches hide and display of the information.
・
If you set a GIF animation, created animation or Flash graphics in Set image of Image/
i-
α
ppli, the information is displayed by pressing
f
after the playing is stopped or
paused.
F906i.book Page 103 Monday, April 21, 2008 10:59 PM
104 Sound/Screen/Light Settings
F906i_E1kou
❖
Displayed contents of various information
Each information set in Info/calendar layout appears as follows.
・
Since the numbers of information entries and lines displayed differ by the area
size, some part of the information may not be displayed.
・
For each information entry, the time is displayed for the current day and the date
is displayed for others.
■
New arrival
The information is displayed from the latest one. Select an area to check the top
information.
: Unread mail / : MessageR/MessageF
: Missed call : Recorded message
■
Schedule
Icon, Start time, contents/program name appear in the order of the date and time
of schedule or watching reservation/recording reservation of 1Seg that start date/
time have not come yet. If an area is selected, the schedule or watching
reservation/recording reservation of the first item can be checked.
・
When the date of Start time and End time are not the same, the icon to be
displayed is .
・
If the schedule with All day set to ON is the current day, "AllDay" is displayed.
■
Calendar
The calendar for 1 month/2 months/4 months/6 months are displayed. Select an
area to display the Calendar of Scheduler.
・
The current day is displayed in yellow, days off and holidays in red and
Saturdays in blue. The color changes by Days off, Day off of week and Holiday
settings of Scheduler.
・
When a schedule or 1Seg watching reservation/recording reservation is set, a
red mark appears on the upper-right side of the date.
■
List of notes
The list of notes saved in Notepad is displayed. Select an area to display the list of
notes.
■
Note
The beginning of a note set in Notepad is displayed. Select an area to display the
details of a note.
✔
INFORMATION
・
In Personal data lock, only the setting of Missed calls for New arrival can be changed.
Also, Schedule, List of notes or Note cannot be selected.
Outgoing call image
Changing images for outgoing voice/videophone
calls
<Example> For voice call
1
m
[Settings & NW services]
2321e
Select
Display image field
e1
-
3
Changing image displayed when making a videophone call :
m
[Settings &
NW services]
2323e
Select the Display image field
e1
-
3
・
When "Select image" is selected, select Image list field and select an image.
2
C
✔
INFORMATION
・
Setting created animation for "Select image" displays the first image.
❖
Outgoing call image priority
When setting outgoing images in multiple functions, they are displayed in order of
the priority below.
a
Image saved in FOMA terminal phonebook
*
b
Alert/image by group of FOMA terminal phonebook
c
Outgoing call/Videophone dialing (V.phone dialing img.)
*
Effective when Contact image is set to "ON".
Incoming call image
Changing images for incoming voice/
videophone calls
・
This setting is also reflected to Call alert of Call & Answer or Videophone alert
of Videophone.
F906i.book Page 104 Monday, April 21, 2008 10:59 PM
105
Sound/Screen/Light Settings
F906i_E1kou
<Example> For voice call
1
m
[Settings & NW services]
2322e
Select Show
image field
e1
-
5
Changing image displayed when receiving a videophone call :
m
[Settings
& NW services]
2324e
Select Show image field
e1
-
5
・
When "Select image" is selected, select the Image list field and select an
image.
・
When "i-motion" is selected, select a movie/i-motion from the movie list.
・
When movie/i-motion containing sound and images is set for Call ring alert
or V.phone ring alert, "Sync ring alert" is set.
2
C
✔
INFORMATION
・
Setting created animation for "Select image" displays the first image.
・
When movie/i-motion containing only sound (i-motion without image such as voice
of a singer) is set as the ring alert, if you reset Show image to movie/i-motion
containing only images or Flash graphics, "
着信音
1 (Tone1)" (voice call) or "
ハープ
(Harp)" (videophone call) is set as the ring alert. The melody can be changed.
・
Some movies/i-motion may not be set to Show image. Also, movies/i-motion with
sound cannot be set.
❖
Incoming call image priority
When setting incoming images in multiple functions, they are displayed in order
of the priority below.
a
Image saved in FOMA terminal phonebook
*1
b
Alert/image by group of FOMA terminal phonebook
c
Call ring alert
*2
/V.phone ring alert
*2
/Call alert (Incoming call)/Videophone alert
(Videophone receiving)/Incoming calls melody setting for Multi number/Ring
alert for No. B
*2
*1
Effective when Contact image is set to "ON".
*2
If setting to "Movie ringtone", effective when movie/i-motion containing sound and image
is set.
・
When the other party does not notify the caller ID, the incoming image for voice
call depends on Anonymous caller. An incoming image for videophone call
depends on the settings of Videophone alert.
・
When setting movie/i-motion (including the case of setting to "Terminal setting"
and setting movie/i-motion for Incoming call) for the ring alert of Alert by
contact of FOMA terminal phonebook, the image or movie/i-motion set in
phonebook does not appear, and the movie/i-motion set for the ring alert
appears. Note that, when setting movie/i-motion containing only sound (i-
motion without image such as voice of a singer) in Call alert etc., it operates as
below.
- When setting a still image to phonebook, the still image is displayed.
- When Flash graphics or movie/i-motion is set to phonebook, the image of the phonebook
does not appear, but the image set for Alert/Image by group or Call alert appears.
・
When setting ring alert to "Terminal setting" in Alert/image by group of
phonebook and setting movie/i-motion in Call alert etc., the image or movie/i-
motion set in phonebook by group does not appear, and the movie/i-motion set
for Ring alert appears. Note that, when setting movie/i-motion containing only
sound (i-motion without image such as voice of a singer) in Call alert etc., it
operates as below.
- When a still image is set for Alert/Image by group, the still image appears.
- When Flash graphics or movie/i-motion is set for Alert/Image by group, the image set for
Call alert etc. appears.
Identification mark
Decorating titles to display for incoming/
outgoing calls or while talking
・
This setting is reflected to Number A of Identification mark of 2in1.
1
m
[Settings & NW services]
513e
Set the required
items
eC
・
When setting Identify No. to "ON", Mark can be set.
✔
INFORMATION
・
The mark does not appear in the cases below.
- When receiving while using Multi number
- When calling by specifying Multi number from submenu
F906i.book Page 105 Monday, April 21, 2008 10:59 PM
106 Sound/Screen/Light Settings
F906i_E1kou
Contact image
Setting Contact image display from phonebook
at incoming/outgoing call
You can set if you display the image saved in FOMA terminal phonebook for
incoming/outgoing voice calls/videophone calls.
・
The image saved in phonebook is displayed when the recorded person calls
with the caller ID.
1
m
[Settings & NW services]
2325e1
or
2
Sent/Received/Retrieving mail image
Changing displays for incoming/outgoing
messages and retrieving
You can set images to appear when sending mails, receiving mails (including
MessageR/F) or received mails, or checking new messages.
1
m
[Settings & NW services]
233e1
-
4
2
Select the Display image field
e1
-
3
・
When "Select image" is selected, select Image list field and select an image.
Setting Image message alert : Select the Display image field
e1
-
5
・
When "i-motion" is selected, select a movie/i-motion from the movie list.
・
When movie/i-motion containing sound and images is set for Mail ring
alert, "Sync ring alert" is set.
3
C
Sub-display
Setting sub-display
◆
Setting an image to display on sub-display <Clock &
alert image>
An image is set on the sub-display for incoming calls or incoming mail. Display of
the clock can be set.
1
m
[Settings & NW services]
281e
Set the required
items
eC
Clock style :
Set display of the clock.
Alert image :
Set the image to display on the sub-display for incoming voice
and videophone calls.
Incoming mail img :
Set the image to display in the sub-display at the time of
mail arrival.
◆
Setting the light of sub-display <Sub-display light>
You can set the sub-display light to turn on when there is an incoming call or mail,
switching display of sub-display, operating camera/movie camera/sound recorder,
folding FOMA terminal, etc.
1
m
[Settings & NW services]
282e1
-
7
Display & Key light
Setting display and key lighting
◆
Setting lighting time <Display light time>
You can set the lighting time of display. When the light is ON, the display becomes
brighter and Keypad light turns on.
・
In addition to Normal use, lighting time can be set also for AC adapter connected
(including DC adapter), i-mode session, Camera session, Movie camera session,
i-motion and i-
α
ppli.
・
This setting is also reflected to Display light of i-mode settings, Still image
settings, Recording settings, Settings for i-motion and Display light of i-
α
ppli
settings, respectively. And, i-motion settings are also reflected to the light
settings of Music&Video Channel.
<Example> Setting lighting time for Normal use
1
m
[Settings & NW services]
241
F906i.book Page 106 Monday, April 21, 2008 10:59 PM
107
Sound/Screen/Light Settings
F906i_E1kou
2
1e1
-
7
・
When set to "Always", the light always turns on with brightness set in
Brightness and power saving does not operate.
Setting lighting time for AC adapter connected, i-mode session, Camera
session, Movie camera session, i-motion or i-
α
ppli :
2
-
7e1
or
2
・
When setting to "Terminal setting", the light is lit according to the lighting
time set in Normal use.
・
When setting to "Always on", the light always turns on with brightness set
in Brightness and Power saved mode does not operate. However, while an
AC adapter is connected, the light is lit in "Brightness 5" regardless of the
settings in Brightness.
・
When setting to "Software" for i-
α
ppli, the light is lit according to the i-
α
ppli
settings. Power saved mode does not operate for i-
α
ppli that holds lighting
always ON.
◆
Setting brightness of light <Brightness>
1
m
[Settings & NW services]
242e1
-
6
・
When setting to "Auto adjust", the brightness of the display lights is
automatically adjusted according to the ambient light. In a well-lighted
area, Keypad light does not turn on.
◆
Setting key lighting <Keypad light>
1
m
[Settings & NW services]
243e
Set the required
items
eC
Keypad light :
When setting to "ON", Keypad light turns on when opening
FOMA terminal or rotating the display.
・
When setting to "OFF", Keypad light does not turn on regardless of the
settings of Display light time or Brightness.
Light color :
When setting to "Rainbow (Key press)", the light color changes
each time you press a key. When setting to "Rainbow (Open/Close)", the
light color changes each time FOMA terminal is opened.
Call/Mail light alert :
When setting to "ON", Keypad light for an incoming call
operates according to Light alert. When setting to "OFF", Keypad light for
an incoming call operates according to the setting of Keypad light color.
・
When Light pattern of Light alert is "Light pattern 1", it operates in "Kiwi",
and when "Light pattern 2", it operates in Rainbow (Key press). When
setting to "OFF", Keypad light does not operate.
・
When Light color of Light alert is "Rainbow", Light color of Keypad light
operates in "Rainbow (Key press)".
Color scheme
Changing display colors
1
m
[Settings & NW services]
231e
Select the color
scheme
Select startup menu
Changing startup menu
Set the menu displayed when pressing
m
on the stand-by display.
1
m
[Settings & NW services]
221e1
-
3
Using Kisekae Tool
Use of Kisekae Tool allows to collectively set stand-by display image, menu icons,
incoming/outgoing call images, ring alerts, etc.
・
Kisekae Tool set by default is saved in "Preinstalled" folder.
・
Kisekae Tool in "Preinstalled" folder cannot be moved or deleted. And, the file
name cannot be changed.
F906i.book Page 107 Monday, April 21, 2008 10:59 PM
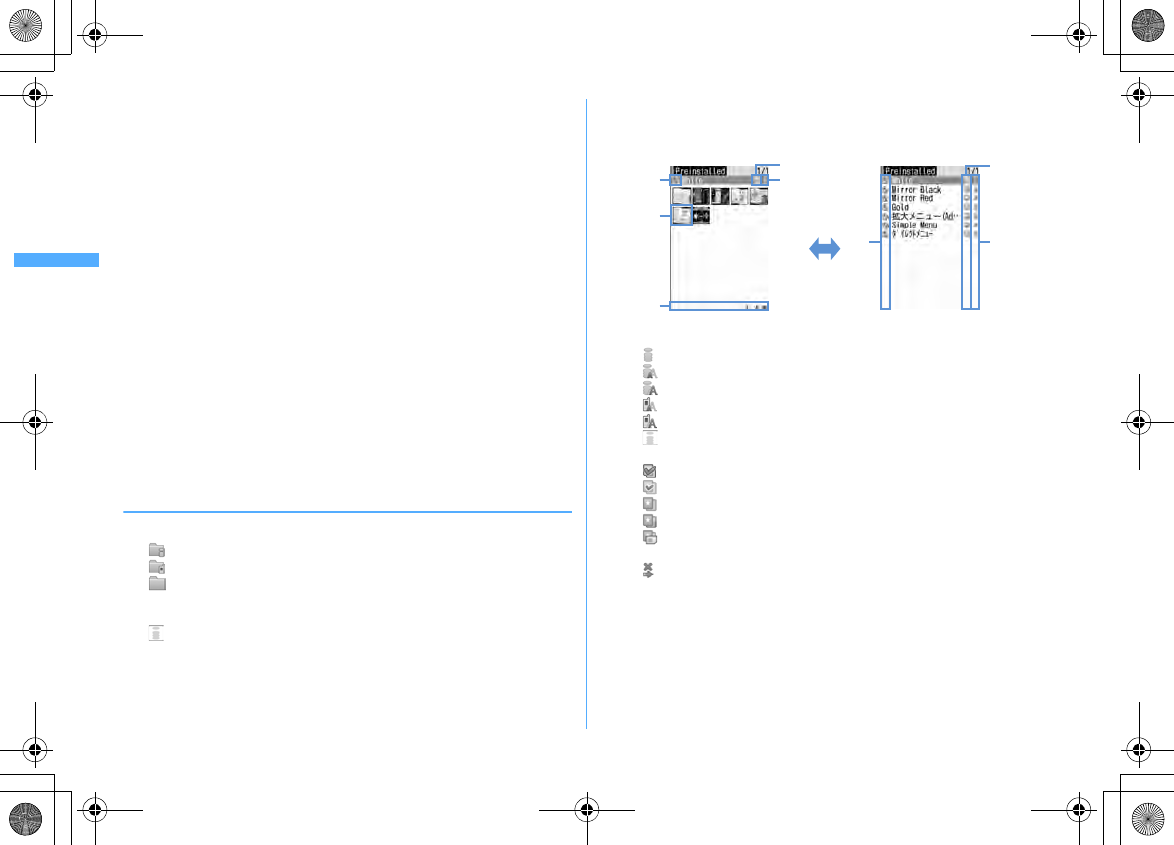
108 Sound/Screen/Light Settings
F906i_E1kou
・
Using Kisekae Tool, the items below can be set (combinations of items that can
be set vary by Kisekae Tool).
- Stand-by display, Stand-by(Horizontal), Kisekae menu
*1
, Basic menu, Basic menu
(Background), Battery icon, Antenna icon, Outgoing call image, Call alert image,
Videophone call image, Videophone alert image, Outgoing message image, Mail alert
image, Image message alert, Message retrieving
*2
, Call ring alert, Videophone ring alert,
PushTalk ring alert, Mail ring alert, Chat mail ring alert, MessageR ring alert, MessageF ring
alert, Alarm clock sound, Screen theme
*3
, Clock format
*4
, Sub-display
*5
*1
Some Kisekae Tools are not compatible with horizontal or English display when setting
Select language to "English". Also, there are some cases that operation by pressing
d
or
a
on the stand-by display may cause different actions from ordinary ones or short-
cut operations may be unavailable.
*2
Set the image to display when setting Check new message/SMS.
*3
Set color theme (Color scheme), font, brightness and keypad light color.
*4
Set Style, Time format, Day and Layout.
*5
Set Clock style, Calling image, incoming mail img and Sub-display light.
・
Some types of Kisekae menu change the menu structure according to usage
frequency. Also, the number assigned to menu item (item number) may not be
applicable to some menu items. In such a case, as operations cannot be
performed as described in this manual, switch to Basic menu.
→
P36 "To switch
the menu screen temporarily"
・
When setting 2in1 to ON, no Kisekae Tool items are set on the stand-by display
in Dual and B modes, and for Call/V.phone/Mail ring alert of Number B.
◆
Changing Kisekae Tool
1
m
[Data Box]
7
i-mode :
Kisekae Tool downloaded from sites
Preinstalled :
Preinstalled Kisekae Tool
My folder :
Kisekae Tool moved from other folders
・
Appear if a folder is created.
→
P317
・
Folders can be deleted or folder names can be changed.
→
P317
Search by i-mode :
Kisekae Tool can be downloaded by connecting to the
site.
→
P298
2
Select a folder
e
Place the cursor on Kisekae Tool
The display name of the file at the cursor position and an icon indicating
details are shown.
a
Originated
: i-mode
: i-mode (compatible with Standard font)
: i-mode (compatible with Large font)
: Preinstalled (compatible with Standard font)
: Preinstalled (compatible with Large font)
: Search by i-mode (only "i-mode" folder is displayed)
→
P298
b
File types
: The last setting
: The current setting
(the back card is gray) : Not set
(Upper half is gray) : Partially saved
: i-
α
ppli unavailable due to UIM operation restriction.
c
File restriction
: File restricted
Thumbnails screen List screen
d
a
e
c
c
b
a
b
I
F906i.book Page 108 Monday, April 21, 2008 10:59 PM
109
Sound/Screen/Light Settings
F906i_E1kou
d
Thumbnail image
When there is no preview image, displayed as below.
(the back card is pink) : No preview image
: i-
α
ppli unavailable due to UIM operation restriction.
(Upper half is gray) : Partially downloaded
: Search by i-mode (appears only in "i-mode" folder)
→
P298
e
File size (Size)
Resetting :
m6e
Authenticate
e
"Reset all" or "Reset menu"
・
Selecting "Reset all" resets Kisekae Tool settings to the default state.
・
Selecting "Reset menu" resets settings of "Kisekae menu", "Basic menu"
and "Basic menu (Background)" to the default state.
Setting list screen operations : Select a folder
em7e1
or
2
・
Set to "Yes" for thumbnail display or "No" for list display.
・
When operating from the folder list screen, press
m
and select "Setting".
Checking memory :
m4e
Place the cursor on a data type
Checking memory
→
P321
3
Ce
"Yes"
Data of Kisekae Tool is collectively set.
・
When a large font setting is included in Kisekae Tool, a confirmation screen
for changing the font of mail, phonebook, call logs, etc. appears. And, when
changing to a Kisekae Tool not containing large font while setting in a large
font, a confirmation screen for changing the font of mail, phonebook, call
logs, etc. appears. Follow the instruction of this screen and set.
・
When placing the cursor on Kisekae Tool partially downloaded and
pressing one of
g
,
C
or
a
, a downloading confirmation screen of the
remaining data appears. Select "Yes" to start downloading.
Viewing/Changing detail information :
m2e1
or
2
Detail information
→
P319
Canceling the setting :
m3e1
-
3
・
When "Selected items" is selected, select the Kisekae Tools to cancel and
press
C
, and select "Yes".
・
When "One item" or "All items" is selected, select "Yes".
Moving/Restoring data :
m4e1
or
2e1
-
3
Moving/Restoring
→
P318
Deleting data :
m5e1
-
3
Deleting
→
P321
Sorting data :
m6e
Set the required items
eC
Sorting
→
P321
❖
Setting to Special mode
If you set to Special mode, "
カロリー
(Calorie)" is added to "Preinstalled" folder,
and automatically set to Kisekae Tool.
1
meCem13e
Enter "
カロリー
(Calorie)" in the
group name field
eC
・
The items below are set.
- Stand-by display, Stand-by(Horizontal), Kisekae menu, Battery icon, Antenna icon,
Outgoing call image, Call alert image, Videophone call image, Videophone alert
image, Outgoing message image, Mail alert image, Image message alert, Message
retrieving, Screen theme, Clock format, Sub-display
・
If you perform the same operations as the setting procedure, "
カロリー
(Calorie)" is deleted from "Preinstalled" folder, and the set items are
restored to the default state.
・
For information on Special mode, refer to "
裏技紹介
(Tricks)" of "
@
F
ケータ
イ応援団
(@ F mobile phone supporters)" website.
"
@
F
ケータイ応援団
(@ F mobile phone supporters)" (as of April, 2008)
iMenu
→
メニューリスト
(Menu list)
→
ケータイ電話メーカー
(Mobile
phone manufacturer)
→
@
F
ケータイ応援団
(@ F mobile phone supporters)
*
The access method may be changed without previous notice.
QR code for
site access
F906i.book Page 109 Monday, April 21, 2008 10:59 PM
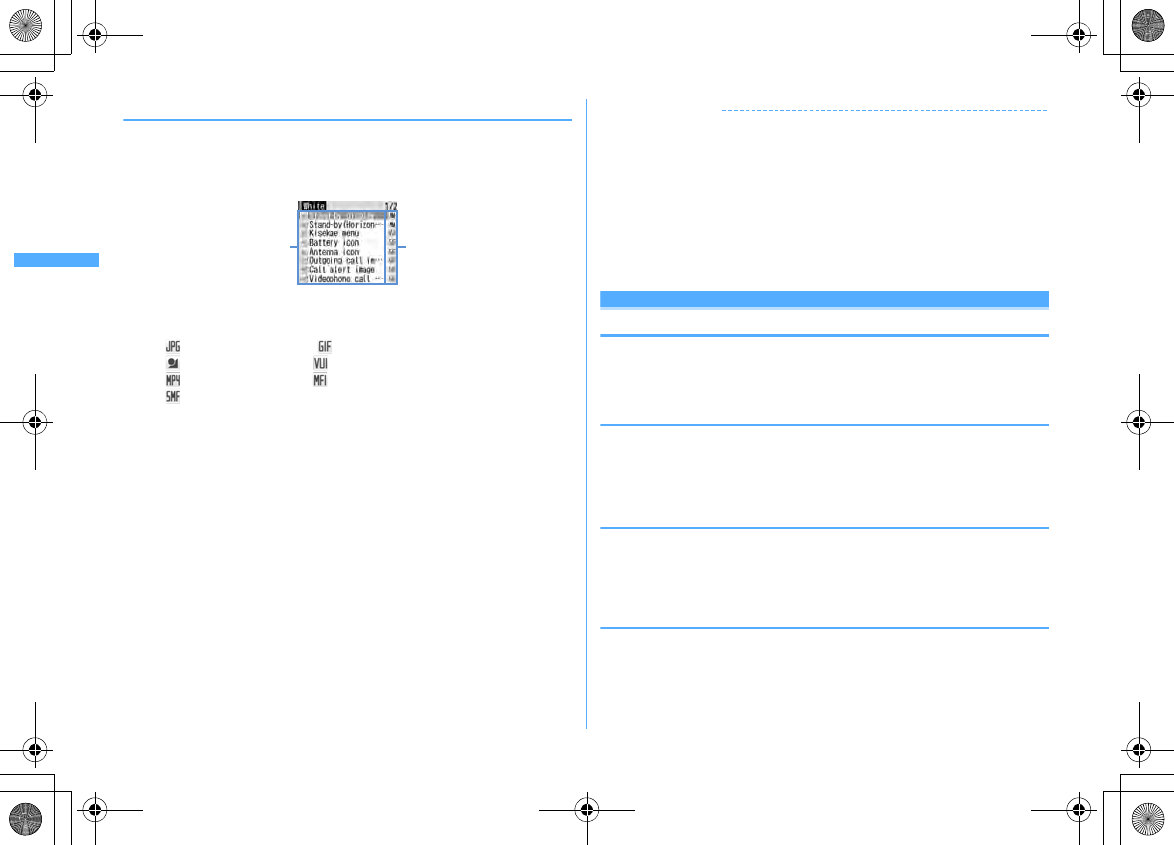
110 Sound/Screen/Light Settings
F906i_E1kou
◆
Viewing Kisekae Tool settings
1
m
[Data Box]
7e
Select a folder
2
Place the cursor on Kisekae Tool and
a
The list of the contents saved in Kisekae Tool is displayed.
a
Item : Icons and item names
Check mark (red) is added to the set icon.
b
File format
: Image in JPEG format : Image in GIF format
: SWF (Flash graphics) : Kisekae menu
: Movie in MP4 format : Melody in MFi format
: Melody in SMF format No icon : No file
・
Confirm the contents also by pressing
m
and selecting "Check info".
・
Press
C
to set Kisekae Tool.
Displaying the preview image of Kisekae Tool : Place the cursor on Kisekae
Tool and
g
.
・
You may also press
C
on the preview screen to set Kisekae Tool.
3
Select an item
The data or information of item is displayed or played.
・
When Screen theme is selected, a preview screen specified by "Color
theme" and "Font" is displayed.
✔
INFORMATION
・
When using "Simple Menu", there is no bilingual setting. Item number of "Simple
Menu"
→
P428
・
Functions changed with Kisekae Tool are automatically set to "Kisekae Tool". When
two or more Kisekae Tools are set with some overlapping items, data of the Kisekae
Tool item set last is used. When Kisekae Tool is set, if other than "Kisekae Tool" is
selected on any setting screen, a Kisekae Tool cancellation confirmation screen
appears. If you select "Yes", only corresponding items are canceled. To return to the
settings of Kisekae Tool, reset Kisekae Tool.
・
When Kisekae Tool contains data that cannot be displayed or played, only that data is
not set.
Customizing the menu
The menu items of Kisekae menu can be changed by yourself, or icons of Basic
menu can be changed.
・
The items that can be operated vary by the set contents.
◆
Customizing the menu items of Kisekae menu
・
Only when using a Kisekae Tool compatible with changing or replacing the
menu items or setting "
カロリー
(Calorie)" of Special mode (
→
P109), the menu
items of Kisekae menu can be customized. For "
カロリー
(Calorie)", press
h
on
the menu screen to display "
お気に入り
(your favorite)" menu.
❖
Changing menu items
1
me
Place the cursor on the menu item and
m2e
Select a
function to add
・
You can select till second level.
❖
Switching menu items
1
me
Place the cursor on the menu item and
m3e
Select the
menu item to be switched to
a b
F906i.book Page 110 Monday, April 21, 2008 10:59 PM
111
Sound/Screen/Light Settings
F906i_E1kou
◆
Resetting the operation logs of the menu
1
m
[Settings & NW services]
2231e
"Yes"
◆
Changing the icons and background of Basic menu
1
meI
・
When the display menu is Basic menu, you do not need to press
I
.
2
m2
3
Select a function
e
Select a folder
e
Select an image
Menu icons of other functions can be set successively in the same way.
Canceling 1 item : Place the cursor on an icon and
m1e
"Yes"
Canceling all items :
m2e
"Yes"
4
ae
Select a folder
e
Select an image
Background is set.
Canceling background :
m4e
"Yes"
5
Ce
"Yes"
・
When the display menu is Basic menu, the confirmation screen of changing
to the Basic menu does not appear.
✔
INFORMATION
・
Created animations, Flash graphics or images in "Item" folder cannot be selected. If a
GIF animation is selected, first image is displayed.
・
Depending on the image size to set, the icon is displayed by 192
×
192, and the
background image is enlarged/shrunk to 480
×
704.
・
In the cases below, the icon and the background of Basic menu cannot be changed.
- Using Kisekae Tool including "Basic menu", "Basic menu(Background)"
- Personal data lock ON
◆
Reset to default menu items and icons
・
Custom menu is also reset to default state.
1
m
[Settings & NW services]
2232e
Authenticate
e
"Yes"
Displays/Lights settings
Style theme
Customizing FOMA terminal screen
You can make 3 types of original coordinates by changing the screen designs such
as stand-by display, menu, Clock, battery icon, antenna icon or Sub-display
pattern.
・
If setting Style theme, Brightness of Display light, i-mode of Font size, Mail view,
Text input, Font style and Subtitle size of User setting of 1Seg are restored to
default settings. And, when Normal use of Display light time in Display & Key
light is set to "0 sec", the setting is restored to the value set prior to "0 sec".
1
m
[Settings & NW services]
32
2
1
-
3e
Set the required items
eC
Title :
Up to 10 two-byte (20 one-byte) characters can be entered.
Menu design :
Select a preinstalled Kisekae Tool.
Color scheme :
Select the display color scheme.
Stand-by image :
Select the image to display for stand-by display (vertical
display). Still images, GIF animation, Created animation or Flash graphics
can be selected.
Clock display format/Time format/Clock layout/Day :
Select if you display a
clock on the stand-by display, clock design to be displayed, time format,
clock layout, and display type of the day of the week.
Items of Clock display format
→
P114 Step 1 in "Setting clock display"
Battery icon :
Select the battery icon type.
Antenna icon :
Select the antenna icon type.
Sub display color :
Select light color of sub-display.
Sub-display Clock style :
Set clock style for sub-display.
Sub-display Incoming call image :
Select incoming call image for sub-display.
Sub-display Incoming msg. image :
Select an image pattern to appear for sub-
display when receiving mail.
Keypad light color :
Select the color of Keypad light.
F906i.book Page 111 Monday, April 21, 2008 10:59 PM
112 Sound/Screen/Light Settings
F906i_E1kou
Battery icon/Signal level icon
Changing battery/signal level icon
1
m
[Settings & NW services]
21e3
or
4e1
-
6
・
When setting Special mode, select from among
1
-
7
.
Indicator light
Indicating newly arrived information such as
missed calls and unread mails with lighting
You can set if you blink the light (including call light, mail light) for missed call or
unread information when FOMA terminal is folded.
1
m
[Settings & NW services]
262e1
or
2
・
When setting to "ON", if there is newly arrived information indicating an
incoming call or mail from a phone number or mail address saved in
phonebook, the light blinks at intervals of approximately 7 seconds
according to the setting of Light color of Alert by contact of FOMA terminal
phonebook.
✔
INFORMATION
・
If there are multiple newly arrived information, the light turns on in the priority below.
a
Missed call (voice call, videophone call, PushTalk, recorded message)
b
Unread information (Mail, MessageR/F, Chat mail, SMS)
・
When setting Indicator light to "ON", if about 6 hours elapsed since the last
information was received or you delete (the number indicates the
number of items) from the stand-by display, the light stops blinking even if you do not
check the information.
Light alert
Setting the lighting patterns and colors used for
an incoming call/mail or while talking
・
This setting is also reflected to Light alert in Call alert, Videophone alert,
PushTalk alert, Mail alert, MessageR alert, MessageF alert, Chat mail alert and
ToruCa alert.
◆
Setting the lighting patterns and colors for incoming
call/mail or ToruCa reception <Light alert>
1
m
[Settings & NW services]
251e
Set the required
items
eC
・
When setting Light pattern to "Light pattern 1", "Light pattern 2" or "Sync
melody", the light blinks in multiple colors. Light color cannot be set.
・
When setting Light pattern to "Sync melody" and Indicator light to "ON",
Light color when there is newly arrived information depends on Light color
set for Call or Mail.
・
When setting light for receiving ToruCa, set Light to "ON" and select the
Light color.
✔
INFORMATION
・
When setting Alert setting of Chat mail alert to "Same:Mail setting", Chat mail cannot
be set.
・
Even if setting Light pattern to "Sync melody", some melodies are not synchronized.
F906i.book Page 112 Monday, April 21, 2008 10:59 PM
113
Sound/Screen/Light Settings
F906i_E1kou
❖
Light alert priority
When setting Light pattern and Light color for Light alert of the light in multiple
functions, light turns on in order of the priority below.
a
Alert by contact of FOMA terminal phonebook
b
Alert/image by group of FOMA terminal phonebook
c
Light alert/Call alert/Videophone alert/Mail alert
◆
Setting lighting and lighting color during a call/IC card
transaction <Call session light/IC card light>
1
m
[Settings & NW services]
25e2
or
4e
Set the
required items
eC
・
When setting Light to "ON", Lighting color can be set.
◆
Setting lighting pattern and color during GPS <GPS
light alert>
1
m
[Settings & NW services]
253e
Set the required
items
eC
・
When setting Light pattern to "OFF", "Light pattern 1" or "Light pattern 2",
Light color cannot be set.
・
Lighting pattern cannot be set to "Sync melody". And, "Loc. request-accept
or Loc. request-verify cannot be set to "OFF".
◆
Setting lighting for opening, closing and turning
<Open/close/turn>
1
m
[Settings & NW services]
255e
Set the required
items
eC
・
When setting Light to "ON", Light color can be set.
✔
INFORMATION
・
When lights are ON, the phenomena below may occur. They are caused by
characteristics of LEDs used for lighting or FOMA terminal, not defects of FOMA
terminal.
- The lighting color or brightness differs by FOMA terminal.
- The actual lighting color may seem to discord from the lighting color name depending on painting
color of FOMA terminal.
Font style
Changing font style
The font of characters to display on the menu screen, i-mode site, Full Browser,
character entry screen, etc. can be changed.
・
In addition to "
プリティー桃
" stored by default, you can use other kana fonts
downloaded.
1
m
[Settings & NW services]
272e
Select the Kanji/
Alphameric field
e1
-
3
2
Select Hiragana/Katakana field
e
Select a font
Deleting downloaded fonts : Select Hiragana/Katakana field
e
Place the
cursor on the font and
me
"Yes"
・
Preinstalled fonts or fonts currently used cannot be deleted.
3
C
✔
INFORMATION
・
This setting is not reflected to some functions such as camera, i-
α
ppli or i-motion.
Font size
Changing font size
The size of font used for full-screen entry of notepad, message text, etc. or for
displaying screen memo, i-mode site, Full Browser or mail can be changed.
F906i.book Page 113 Monday, April 21, 2008 10:59 PM
114 Sound/Screen/Light Settings
F906i_E1kou
<Example> When setting with All listed
1
m
[Settings & NW services]
271
2
1e1
-
6
Setting i-mode view :
2e1
-
5
Setting Full Browser :
3e1
-
4
Setting Mail view :
4e1
-
5
Setting Text input :
5e1
-
6
Setting Phonebook/Logs :
6e1
or
2
✔
INFORMATION
・
When a font size that cannot be displayed for i-mode view, Full Browser, Mail view or
Phonebook/Logs is selected with All listed, the closest size is set.
・
By the font size selected with All listed, a confirmation screen of menu font size
appears when changing Kisekae Tool. When selecting "Yes", Kisekae Tool applicable
to the selected font size can be selected.
・
The font size can be changed also from the mail details screen. The settings are
reflected to Mail view of this setting.
→
P209
Clock display format
Setting clock display
Whether to display clock, the design, size or layout of clock display on the stand-
by display can be set. The language to use to display the day of the week or the
display format can also be set.
1
m
[Settings & NW services]
724e
Set the required
items
eC
Style :
Set if you display clock. Select the clock style from "Analogue", "Digital
1-4" and "World time clock" when setting it to "ON".
・
When setting to "World time clock", Japan time appears on the left side
and the time/name of the specified time zone appears on the right side,
respectively.
Time format :
Set the clock display format to either "24 hour" or "12 hour".
Clock layout :
Set the position to display the clock.
Day :
Set if you use Japanese or English to display the day of the week. When
Style is "World time clock", setting is unavailable.
・
When setting to "Terminal settings", the display depends on the bilingual
setting.
World time clock :
Set the time zone to be displayed or set if you enable
summer time when "World time clock" is selected in Style. And, set the
name of the time zone.
・
When Summer time is "ON", the displayed time is set forward one hour
from the time of the specified time zone.
✔
INFORMATION
・
On a screen other than the stand-by display, the clock appears in the upper-right
corner of the display. This display depends on Time format ("24 hour" or "12 hour").
・
In the cases below, clock is displayed in the upper right corner of the display
regardless of the settings of Style or Clock layout.
- When a movie/i-motion or Chara-den is set on the stand-by display
- When the i-
α
ppli stand-by display is displayed
・
In All lock or Omakase Lock, the clock is displayed at the "Top" regardless of this
setting.
・
Two time zone clocks are used when using FOMA terminal overseas.
→
P413
・
"Digital 1" and "World time clock" are 24 hour regardless of format setting.
F906i.book Page 114 Monday, April 21, 2008 10:59 PM
115
F906i_E1kou
Security Settings
Security code
Security code available with FOMA terminal ................................................................................................................... 116
Changing terminal security code ................................................................................. Terminal security code change 117
Setting PIN code .................................................................................................................................................................. 117
Unblocking PIN/PIN2 code ................................................................................................................................................. 118
Using fingerprint authentication ....................................................................................................................................... 118
Restricting mobile phone operations or functions
Preventing unauthorized use ............................................................................................................................... All lock 120
Using Omakase Lock ................................................................................................................................. Omakase Lock 121
Preventing making/receiving calls ................................................................................................................. Self mode 122
Disabling to use personal information ............................................................................................. Personal data lock 122
Prohibiting keypad dial .......................................................................................................................... Keypad dial lock 123
Setting operations for using or displaying personal information .......................................................... Privacy mode 124
Setting contents displayed when receiving call or mail .......................................................... Receive display option 129
Preventing inadvertent operation of side keys ........................................................................................ Side key hold 129
Locking key each time FOMA terminal is folded ...................................................................................... Lock on close 129
Restricting calls/mail/data transfer
Accepting/Rejecting calls from specified phone numbers .............................................................................................. 131
Setting operations for incoming calls not to notify caller ID .......................................................... Anonymous caller 132
Setting not to answer calls from the party not saved in phonebook ................................................ Ring alert delay 132
Rejecting calls from phone numbers not saved in phonebook ..................................................... Unregistered caller 133
Other "Security Settings"
Data Security Service .......................................................................................................................................................... 133
Other "Security Settings" ................................................................................................................................................... 134
F906i.book Page 115 Monday, April 21, 2008 10:59 PM
116 Security Settings
F906i_E1kou
Securit y code
Security code available with FOMA terminal
Some of the convenient FOMA terminal functions require entry of security code.
In addition to the terminal security code for using some terminal functions, there
are several types of security codes such as network security code for network
services and i-mode password. Use these codes appropriately for FOMA terminal.
・
The terminal security code, network security code or i-mode password entered
is masked with " ".
Precautions related to security codes
・
When setting a security code, do not use a number that can be easily known
to others, such as "birthday", "a part of a phone number", "street address or
room number", "1111" or "1234". Keep a separate note of the set security
code.
・
Be careful never to reveal your security code to others. If a security code is
known to and misused by others, DoCoMo assumes no responsibility for
damages resulted from it.
・
DoCoMo never asks you about your security code.
・
If you forgot your security codes, or fingerprint authentication for all of the
fingers registered is unavailable when Fingerprint access is "ON", you need
to bring a document (such as a driver's license) for identifying that you are
a subscriber, FOMA terminal and UIM to a DoCoMo Shop.
For details, contact the phone number for "General Inquiries" on the back
of this manual.
❖
Terminal security code
The default security code is "0000", which you can change by yourself.
→
P117
・
If a wrong terminal security code is entered 5 times consecutively, the power is
turned OFF.
・
For the setting using Verify fingerprint, the fingerprint authentication screen
appears instead of the terminal security code entry screen. Press
m
to switch
the terminal security code entry screen. The terminal security code cannot be
entered when Fingerprint access is "ON".
❖
Network security code
Network security code is a 4-digit number used when making various applications
for DoCoMo e-site and using various network services; you can set any number at
subscription and optionally change it later.
If you have "DoCoMo ID/Password" for "My DoCoMo" that is a total support site for
a PC, you can change your network security code from a PC.
From i-mode, you can change the code by yourself accessing "
各種手続き
(Procedures)" in DoCoMo e-site.
・
For "My DoCoMo" and "
ドコモ
e
サイト
(DoCoMo e-site)", see the back of this
manual.
❖
i-mode password
4-digit "i-mode password" is required to register/delete sites in My Menu or
subscribe/unsubscribe to Message Service or i-mode pay sites. The default
security code is "0000", which you can change by yourself.
→
P162
There may be passwords required by individual IPs (Information Providers).
❖
PIN code/PIN2 code
2 security codes which are the PIN code and PIN2 code can be set for UIM. Their
security codes are set to "0000" by default, which you can change by yourself.
→
P117
PIN code is a number (code) to be entered each time UIM is installed or FOMA
terminal is powered ON to confirm the user and to prevent unauthorized use of
FOMA terminal. Making/Receiving calls and terminal operations are enabled by
entering PIN code.
The PIN2 code is the security code to be used when requesting the issuance of a
user certificate, resetting Total calls cost or changing settings of Reset call cost.
・
When installing UIM that has been used with another FOMA terminal, the PIN
code and PIN2 code should be the same ones set previously. If no changes have
been made to PIN code and PIN2 code, your codes are "0000".
F906i.book Page 116 Monday, April 21, 2008 10:59 PM
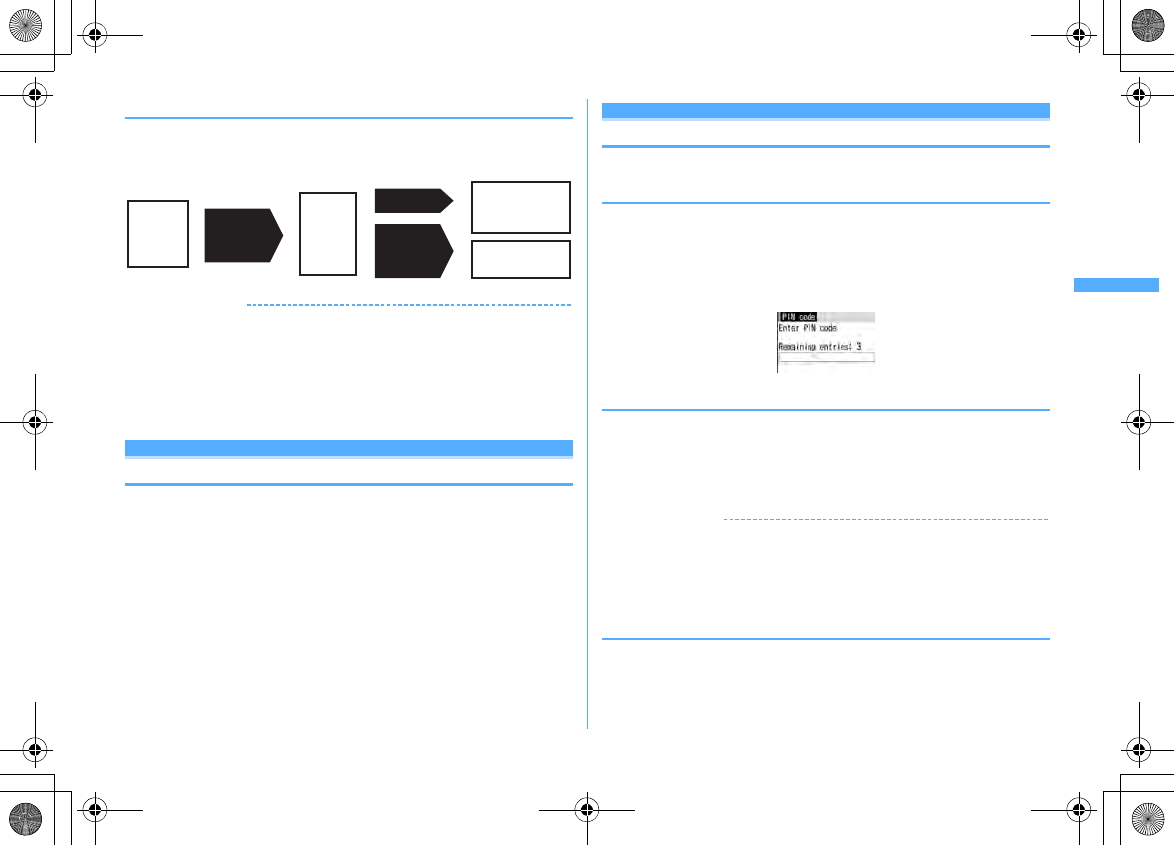
117
Security Settings
F906i_E1kou
❖
PUK (PIN Unblocking Key)
PUK is a number of 8-digit code used to unblock PIN or PIN2 lock. You cannot
change PUK by yourself.
・
If a wrong PUK is entered 10 times consecutively, UIM is locked.
✔
INFORMATION
・
When using Password manager with the fingerprint authentication and a terminal
security code access available, change the terminal security code. For the new
terminal security code, avoid use of an easily-guessed number such as the low-order
4 digits of the phone number and take care not to let others know the terminal security
code. Keep a separate note of the set security codes.
*
Note that DoCoMo is not liable for any damages caused through incorrect use of the data by a
third party.
Terminal security code change
Changing terminal security code
1
m
[Settings & NW services]
461e
Authenticate
e
Enter the new terminal security
code
2
Enter the new terminal security code in New security code-check
field
eC
Setting PIN code
◆
Setting whether to require entry of PIN code when
turning power ON <PIN1 code ON/OFF>
If a wrong PIN code is entered 3 times consecutively, the PIN code is locked. Press
g
and enter PUK.
・
The PIN code entry screen is displayed only when the current setting is changed.
1
m
[Settings & NW services]
453e1
or
2e
Enter PIN code
❖
When PIN1 code ON/OFF is set to "ON"
When FOMA terminal is powered on, the PIN code entry screen is displayed. The
stand-by display appears when correct PIN code is entered, but all operations are
unavailable when not.
・
You can make emergency calls (110, 119 and 118) even while PIN code entry
screen is being displayed.
✔
INFORMATION
・
When the date/time specified in Alarm clock or schedule has come with Alarm auto
power ON is "ON", the power is turned ON and the alarm starts sounding before the
PIN code entry screen is displayed. When
f
is pressed to stop the alarm, the PIN
code entry screen is displayed. Even if a downloaded melody, i-motion or music is set
as an alarm, operations are carried out as specified in the default settings.
◆
Changing PIN/PIN2 code
・
To change the PIN code, you need to set PIN1 code ON/OFF to "ON".
1
m
[Settings & NW services]
45e1
or
2e
Authenticate
Enter PIN
code/PIN2
code
Enter
PUK
Input error
3 times in
a row Contact a
DoCoMo shop
Input error
10 times in
a row
Setting a new
PIN code/PIN2
code is available
OK
F906i.book Page 117 Monday, April 21, 2008 10:59 PM
118 Security Settings
F906i_E1kou
2
Enter the current PIN/PIN2 code
e
Enter a new PIN/PIN2 code in
the New PIN/PIN2 code entry field
e
Enter the new PIN/PIN2 code
in the New PIN/PIN2 code - check field
eC
・
If the PIN/PIN2 code was not correctly entered, a screen indicating the
failure of authentication appears. Press
g
and enter the correct PIN/PIN2
code. If a wrong code is entered 3 times consecutively, the PIN code is
locked. Press
g
and enter the PUK.
✔
INFORMATION
・
Even if PIN2 code is locked by entering incorrect PIN2 code 3 times consecutively,
making/receiving calls, PushTalk calls or sending/receiving mail is available; if PIN
code is locked by entering incorrect PIN code 3 times consecutively, these operations
are unavailable.
Unblocking PIN/PIN2 code
If a wrong PIN/PIN2 code is entered 3 times consecutively on the PIN code entry
screen, lock is set. If this happens, unblock and enter a new PIN code.
・
You can make emergency calls (110, 119 and 118) in the entry field of PUK of
PIN1.
1
On the confirmation screen of the PUK, "OK"
e
Enter the PUK
2
Enter a new PIN/PIN2 code in the New PIN/PIN2 code entry
field
e
Enter the new PIN/PIN2 code in the New PIN/PIN2 code -
check field
eC
Using fingerprint authentication
Use of the fingerprint authentication allows you to skip the operation of entering
the terminal security code with keypads by sliding your fingertip on the
fingerprint sensor.
・
Even with fingerprint authentication set, pressing
m
on the fingerprint
authentication screen displays the terminal security code entry screen, allowing
you to enter terminal security code for authentication. The terminal security
code cannot be entered when Fingerprint access is "ON".
・
Simultaneous use of the fingerprint authentication and terminal security code
access
→
P117 INFORMATION in "Security code available with FOMA terminal"
◆
Precautions for using fingerprint authentication
・
This function is used to authenticate the information on the characteristics of
fingerprint image. For this reason, user with fingerprint that does not provide
enough characteristics information may not be able to use the fingerprint
authentication.
・
The 3 readings with the same finger are needed to register your fingerprint. Do
not register the different finger.
・
Authentication performance (the probability of successful fingerprint
authentication for correct sliding of the finger) depends on the condition of use.
The finger conditions below may make fingerprint registration difficult or
reduce the authentication performance. Taking measures according to the
condition of your finger including washing hands, wiping hands, using a
different finger for fingertip authentication and applying cream if the hand is
rough or dry may improve the authentication performance.
- Fingers are wrinkled, wet or sweaty after taking a bath, etc.
- Fingers are sweaty or oily enough to obscure ridges of fingertip, or fingers are soiled with
dirt or oil
- Rough or damaged (cut, inflamed, etc.)
- Extremely dry or having tendency to get dry
- Became fat or thin to cause the fingerprint to change
- Fingerprint unclear by wearing away
- Surface in a condition extremely different from that at the time of fingerprint registration
・
For registration/authentication of fingerprint, align the first joint of one of your
fingers to the center of the sensor, press your finger parallel to the sensor and
slide it downward until it passes the fingerprint sensor area. To prevent
authentication failure due to difference in finger positions at registration and
authentication, put your finger in the same direction as the terminal and slide it.
Fingerprint
sensor area
Figure A Figure B
F906i.book Page 118 Monday, April 21, 2008 10:59 PM
119
Security Settings
F906i_E1kou
・
If the sliding movement is too fast or too slow, the fingerprint may not be
correctly recognized.
・
Registration/Authentication of fingerprint may be difficult with your thumb as
the center of the whorl of the fingerprint may be displaced or distorted. Try as
much possible to slide your finger so that the center of the whorl of the
fingerprint passes the center of the fingerprint sensor.
・
If the fingerprint was not correctly read, a warning message appears. If the
fingerprint was not authenticated within a certain period of time, a confirmation
message appears and the screen returns to the previous screen.
・
If fingerprint registration or authentication is started with the finger put on the
fingerprint sensor, activation may be unavailable. Put the finger off from the
fingerprint sensor and retry the operation.
・
When connecting FOMA terminal using a USB cable to a device which requires
grounding such as a desktop PC, make sure that the device is grounded in
advance. If the connected device is not grounded, fingerprint authentication
may be unavailable. In such a case, perform fingerprint authentication while
touching a metallic part (frame, external connector, etc.) of the connected device
or after disconnecting FOMA terminal from the device.
・
Fingerprint authentication technology does not guarantee complete identity
authentication or verification. Note that DoCoMo assumes no responsibility for
any damage caused by use of this product or failure to use this product.
◆
Fingerprint sensor
・
The conditions below may cause failure or damage.
- Strike or give a hard shock
- Scratch or pick with a pointed object
- Rub hard with a fingernail or hard object (such as metal piece of strap) and scratch the
surface of the fingerprint sensor
- Scratch or stain the surface of the fingerprint sensor with soil etc.
- Cover with a sticker or paint with ink etc.
・
The conditions below may make fingerprint scanning difficult or reduce the
authentication performance. Clean the surface of the fingerprint sensor from
time to time.
- Dirt of dust, sebum, etc., attachment or condensation of moisture of sweat etc.
・
If any of the phenomena below occurs, clean the surface of the fingerprint
sensor. The phenomena may be improved.
- "Clean surface of sensor." appears
- Fingerprint registration or authentication fails often
・
To clean the fingerprint sensor, wipe its surface with a dry, soft and static-free
cloth. Long-term use may cause the fingerprint sensor to get dusty, but do not
try to remove the dust with a pointed object even in such a case.
・
Static electricity may cause malfunction. Before placing the finger on the
fingerprint sensor, eliminate static electricity by touching a metal object with the
hand etc. Take particular care in dry seasons such as winter.
◆
Registering fingerprint to be used for authentication
<Register fingerprint>
・
Up to 10 items can be registered.
1
m
[Settings & NW services]
462e
Authenticate
2
"OK"
e
Press the sensor with your finger and slide slowly
downwards by following the instruction message
・
Fingerprint registration is canceled when there is an incoming voice/
PushTalk call or a previously specified date/time for Alarm clock or
schedule has come during the fingerprint scan.
3
Enter the name to register (up to 10 two-byte (20 one-byte)
characters)
eC
・
appears with the finger print set for use.
◆
Setting whether to use only fingerprint authentication
for authentication <Fingerprint access>
・
When setting Fingerprint access to "ON", 2 or more registrations of different
fingers and use for authorize are required.
・
When setting Fingerprint access to "ON", authentication using terminal security
code is unavailable. If authentication is disabled for any registered fingers due
to FOMA terminal operating conditions, finger conditions, failure of the
fingerprint sensor or other reasons, you need to bring a document (such as a
driver's license) for identifying that you are a subscriber, FOMA terminal and
UIM to a DoCoMo Shop.
F906i.book Page 119 Monday, April 21, 2008 10:59 PM
120 Security Settings
F906i_E1kou
<Example> Setting to "ON"
1
m
[Settings & NW services]
464e
Authenticate
2
1
Canceling :
2
3
"OK"
ea
・
If 2 or more fingerprint items registration and Use for authorize are not
made, setting cannot be completed.
The next procedure
→
P119 Step 2 in "Registering fingerprint to be used for
authentication"
Setting authentication
→
P120 "Setting/Canceling use for authorize" in
"Managing fingerprint" Step 2
◆
Authenticating fingerprint
1
When the fingerprint authentication screen appears, slide your
fingertip on the fingerprint sensor
・
For fingerprint authentication, press the finger set for use against the
fingerprint sensor.
・
If the authentication is failed, remove the finger from the fingerprint sensor
and retry authentication. When authentication performance is low, retry the
fingerprint registration.
・
Pressing
m
or a keypad displays the terminal security code entry screen,
except when Fingerprint access is "ON".
✔
INFORMATION
・
If fingerprint authentication failed 5 times consecutively, the terminal security code
entry screen appears. If authentication failed 5 times consecutively when Fingerprint
access is "ON", the power is turned OFF. The cumulative number of authentication
failure is cleared by correct authentication or redisplaying of fingerprint
authentication screen.
◆
Managing fingerprint
You can display or delete fingerprint set for authentication, change the registered
name, etc.
・
If all fingerprints set for authentication are canceled or deleted, the fingerprint
authentication becomes unavailable.
・
When setting Fingerprint access to "ON", and there are 3 or more registered
fingerprints set for authentication, the fingerprints can be deleted after
canceling authorize. Note that if there are 2 or less fingerprints, they cannot be
canceled authorize or deleted.
<Example> Deleting fingerprint (1 item)
1
m
[Settings & NW services]
463e
Authenticate
2
Place the cursor on the fingerprint to delete and
m31e
"Yes"
・
To check the registered fingerprint, press
I
.
Setting/Canceling use for authorize: Select a fingerprint to set/cancel use for
authorize
appears with the finger print set for use.
Deleting selected items :
m32e
Select fingerprint
eCe
"Yes"
Deleting all items :
m33e
"Yes"
Renaming data :
m4e
Edit the name
eC
Changing the order : Place the cursor on the fingerprint and
me5
or
6
Restricting mo bile phone operations or fun ctions
All lock
Preventing unauthorized use
When All lock is activated, menu operations are disabled to prevent unauthorized
use by third parties.
To make an emergency call (110, 119 or 118) in All lock, enter the emergency
call number on the stand-by display and press
n
.
*
The emergency call number entered on the terminal security code entry screen is marked
with " ".
■
For Verify fingerprint
Press
m
on the stand-by display, enter the emergency call number on the
fingerprint authentication screen and press
n
.
■
When Fingerprint access is "ON"
Press
mn
on the stand-by display, enter the emergency call number and
press
n
.
F906i.book Page 120 Monday, April 21, 2008 10:59 PM
121
Security Settings
F906i_E1kou
・
To start both IC card lock and All lock, start IC card lock
→
All lock in sequence.
→
P249
・
The microSD card and UIM remain unlocked.
1
m
[Settings & NW services]
412e
Authenticate
"All locked." appears on the stand-by display.
Canceling : Enter the terminal security code
・
If fingerprint authentication is set, press
m
and perform authentication.
✔
INFORMATION
・
PushTalk calls received in All lock are rejected and the callers hear the busy tone. It
appears in Received calls when All lock is canceled.
・
A call is received regardless of the settings of Specified caller.
・
Even if a stand-by display is set, the image set by default is displayed.
・
All lock takes precedence over it even if Lock on close is "ON".
・
The alarm clock and schedule reminder do not operate even when the specified date
and time arrive. Activation by watching reservation or recording reservation of 1Seg
does not occur.
・
Even when the specified date/time comes, Timed theme is not switched. When
canceling All lock, Timed theme not in operation start in order.
・
The functions below are available.
- Receiving voice/videophone calls
*1
, making emergency call (110, 119, 118)
- Automatic update of Data Center
- Receiving i-mode mail, MessageR/F, SMS
*2
- Receiving Area Mail
- Starting Omakase Lock
- Obtaining ToruCa from IC card reader
- Operations for location request of GPS
*3
- Software update
- Auto-update of pattern definitions
*1
Only a phone number is displayed, but the other party's name or image saved in phonebook does
not. The incoming image, ring alert and other settings are reset to default settings, and the
default image is displayed as videophone substitute image. Chaku-moji can be received, but it
is not displayed on the incoming call screen. It is displayed in Received calls when All lock is
canceled.
*2
No receiving actions such as displaying the receiving or reception result screen, emitting ring
alert are taken.
*3
Even when the requestor ID of Location request matches a phonebook entry, the requestor name
is not displayed.
Omakase Lock
Using Omakase Lock
This is a service to lock FOMA terminal that the subscribed UIM is installed by
making a call to DoCoMo or by remote control from My DoCoMo in case FOMA
terminal is misplaced.
FOMA terminal can be unlocked upon your request, etc.
*
Omakase Lock is a charged service. However, if you subscribe at the same time as service
interruption or during interruption, no charges occur. Even in Omakase Lock, if Request
permit/deny is "Always permit", FOMA terminal responds to location request of GPS
function.
Setting/Canceling Omakase Lock
0120-524-360 Office hours : 24hours
*
Omakase Lock can be set/canceled from My DoCoMo site using a PC etc.
・
For details of Omakase Lock, refer to "Mobile Phone User's Guide [i-mode]
FOMA version".
❖
When Omakase Lock is activated
"Omakase Lock active." appears on the stand-by display.
・
Operations except turning power ON/OFF, receiving voice/videophone calls, or
reactions to Location request are unavailable and the IC card functions are also
unavailable. Note, however that the microSD card and UIM remain unlocked.
✔
INFORMATION
・
Voice calls or videophone calls are received, displaying the callers phone number
instead of the name or image saved in the phonebook. The incoming image, ring alert
and other settings are reset to default settings, and the default image is displayed as
videophone substitute image. The setting you made is restored when Omakase lock
is canceled.
・
PushTalk calls received are rejected and the callers hear the busy tone, but the calls
are recorded as missed calls.
・
Chaku-moji can be received, but it does not appear on the incoming call screen. The
Chaku-moji appears in Received calls after Omakase Lock is canceled.
・
Even when the requestor ID of Location request of GPS matches a phonebook entry,
the requestor name is not displayed.
F906i.book Page 121 Monday, April 21, 2008 10:59 PM
122 Security Settings
F906i_E1kou
・
The received mails are stored in i-mode Center.
・
When Omakase Lock is activated while other functions are active, those functions are
terminated (data being edited, if any, may not be saved before the termination).
・
Even with various lock functions set, Omakase Lock takes precedence over them.
・
Omakase Lock is unavailable when FOMA terminal is misplaced with its power OFF,
put out of service area or in Self mode.
・
You can turn ON/OFF the power, however, lock is not canceled even if you turn OFF
the power.
・
If you are a subscriber to Dual Network Service and using mova service, Omakase
Lock is unavailable.
・
Omakase Lock is a service that locks FOMA terminal on request from the subscriber
of UIM installed in it. FOMA terminal is locked on request from the subscriber even
when the holder of FOMA terminal is different from the subscriber.
・
Omakase Lock can be canceled only when UIM with the same phone number as the
one used when activating Omakase Lock is installed. If the lock cannot be canceled,
contact the phone number for "General Inquiries" on the back of this manual.
Self mode
Preventing making/receiving calls
This function disables all functions that require communications such as calls,
PushTalk, i-mode, mail, infrared communication.
1
c
(1 sec. or more)
e
"Yes"
appears at the top of the display.
Canceling :
c
(1 sec. or more)
e
"Yes"
✔
INFORMATION
・
The functions below are not available.
- Making/Receiving call or PushTalk call, making emergency call (110, 119, 118)
*
- i-mode, sending or receiving mail
- ToruCa obtained from IC card reader
- GPS (including registering, editing and deleting service clients in LCS clients list)
- FM radio waves sending
- Infrared communication/iC transmission or infrared remote control
- Packet communication or 64K data communication with a PC
*
After making call, self mode is canceled.
・
If you receive a call, a message is played for the caller that you are out of service area
or your terminal is turned OFF. The caller can use Voice Mail service and Call
forwarding service.
・
When a PushTalk call comes in, reception is rejected and the callers hear the busy
tone.
・
i-mode mail and MessageR/F are stored in i-mode Center and SMS in SMS Center
when they are received. To receive messages, perform i-mode/SMS inquiry after
canceling Self mode.
Personal data lock
Disabling to use personal information
You can temporarily restrict use of i-mode, mail, personal information, etc.
・
This function cannot be activated when Unregistered caller is "ON".
・
Calls made or received in Personal data lock are recorded. Making calls from
Redial or Received calls is available
1
m
[Settings & NW services]
413e
Authenticate
e1
or
2
When "ON" is set, appears on the stand-by display.
❖
When Personal data lock is ON
All or a part of the settings in the functions below are restricted. The microSD card
and UIM remain unlocked.
-Mail
*1
, Check new message, Chat mail
*1
, SMS
*1
, receiving Area Mail
- i-mode, MessageR/F
*1
, i-Channel, Full Browser
-i-
α
ppli
- Phonebook, PushTalk phonebook, Ans.Machine & Voice memo (Movie memo), Mail logs
*2
- Data Box (All functions)
- Bar code reader, Ir/iC/PC connection
*3
, microSD, Camera, Sound recorder, Data Center,
GPS
*4
, Pedometer
- Quick search
*5
, Scheduler
*6
, Notepad, Alarm clock, Alert&Time settings
- Call ring alert, Mail/Msg ring alert, GPS alert, Alarm sound, Display turn sound, Melody effect
sound, Image/i-
α
ppli, i-Channel ticker, Shortcut icons, resetting Menu preference, Call image
(excluding Contact image), Mail image, Kisekae/Themes, Sound & Image, Anonymous caller,
Headset key control (Headset quick-dial), Reject/Accept call, V.phone dialing img.,
Videophone alert, Image setting
*6
, PushTalk alert, Call cost limit, Reset, Delete all data, Tone/
Vibration message notification, Chaku-moji
*7
, 2in1 setting, Melody Call, Number Setting/
Incoming calls melody setting of Multi number
- Music player, Music&Video Channel
*9
F906i.book Page 122 Monday, April 21, 2008 10:59 PM
123
Security Settings
F906i_E1kou
- User information
- IC card content, DCMX, ToruCa, Search by i-mode
- 1Seg (except a part of User setting)
*1
Automatic reception is available, but none of receiving actions such as displaying the
receiving or reception result screen, emitting ring alert are not taken. Mail creation from
mail logs is also unavailable.
*2
Only a mail address is displayed, but the other party's name or image saved in phonebook
does not.
*3
Data transfer in infrared communication/iC transmission or using USB connection is
unavailable.
*4
Reactions to a Location request are available.
*5
Search by function with restriction is unavailable with Personal data lock ON.
*6
The information of the Scheduler is not displayed on the calendar set for stand-by display.
*7
The default image is displayed as videophone substitute image.
*8
Chaku-moji can be received, but it does not appear on an incoming call screen. It appears in
Received calls when Personal data lock is canceled.
*9
When program downloading starts, the program downloading screen appears, but the
downloading result screen does not appear.
✔
INFORMATION
・
When making/receiving a call to/from the party saved in the phonebook or PushTalk
phonebook, neither name nor image saved is displayed and only the phone number
is displayed.
・
does not appear on the stand-by display even when Answer machine is activated,
and an icon for a recorded message which has not been played is also not displayed.
・
When data to which Personal data lock applies is set as the stand-by display or ring
alert, the default setting becomes active in Personal data lock (when menu is a
Kisekae menu except the one set by default, Basic menu is displayed). The setting you
made is restored when canceled. When data saved in "Preinstalled" folder is set,
however, the setting does not change even in Personal data lock.
・
Even when the requestor ID of Location request of GPS matches a phonebook entry,
the requestor name is not displayed.
・
On Basic menu or Custom menu, icons of functions and parties with activation
restricted are changed to and person names appear as "
***
". For Kisekae
menu, the font color is displayed in gray or the reason is displayed why activation
cannot be performed.
Keypad dial lock
Prohibiting keypad dial
You can set so that calls or PushTalk calls cannot be made without using
phonebook.
1
m
[Settings & NW services]
415e
Authenticate
e1
or
2
When "ON" is set, appears on the stand-by display.
❖
When Keypad dial lock is ON
The operations below cannot be performed.
- Making call from Redial or Received calls
*1
, making emergency call (110, 119, 118)
- Editing, adding, deleting entries, setting group, adding group or adding phonebook group of
phonebook or PushTalk phonebook
- Editing and resetting recorded user information data
- Phone To (AV Phone To), SMS To and Mail To functions
- Phonebook data or user information transfer to/from external devices
- Sending Mail/Chat mail
*1
/SMS
*1
, Sending from mail logs
*1
- Reading template on the mail creation screen, creating mail from the mail template list screen
or the mail template details screen
*2
- Notify location of GPS
*3
- Using network services by the dial up operation
- Packet communication or 64K data communication with a PC
*1
Calls/Messages can be made or sent to parties saved in phonebook.
*2
A mail can be created from a template that a mail address saved in the phonebook is entered
as the destination.
*3
Though notification to notification destinations is available, adding, editing and deleting
notification destinations to LCS clients are unavailable.
F906i.book Page 123 Monday, April 21, 2008 10:59 PM