Fujitsu FOMA-F906I Part 15 Low Power Communication Device Transmitter User Manual F906i
Fujitsu Limited Part 15 Low Power Communication Device Transmitter F906i
Fujitsu >
Contents
manual 7
250 Osaifu-Keitai/ToruCa
F906i_E1kou
◆
Locking only a specified IC card function <Lock
preference>
You can set so that, when activating IC card lock, only the IC card function for
Osaifu-Keitai compatible i-
α
ppli previously specified is locked (Individual IC card
lock).
1
m
[Osaifu-Keitai]
42
2
2e
Select the Osaifu-Keitai compatible i-
α
ppli
eC
Locking all IC card functions :
1
✔
INFORMATION
・
For selected Osaifu-Keitai compatible i-
α
ppli, appears on IC card content.
→
P225
・
The selecting targets are Osaifu-Keitai compatible i-
α
ppli that the service is already
registered in the IC card and the service is available.
◆
Automatically activating IC card lock <Timed lock>
You can set to activate IC card lock automatically after the specified time has
elapsed.
1
m
[Osaifu-Keitai]
43e
Set the required items
eC
✔
INFORMATION
・
If the power is turned OFF manually or due to exhaustion of the battery while this
function is "ON", IC card lock is activated before the specified time.
・
When locking time comes while using Osaifu-Keitai compatible i-
α
ppli, IC card lock is
activated upon termination of Osaifu-Keitai compatible i-
α
ppli.
◆
Automatically deactivating IC card lock at specified
time <Programed activation>
You can set to make the IC card available only in the specified period of time in IC
card lock.
・
Up to 7 items can be registered.
・
This function operates only while the power is ON.
1
m
[Osaifu-Keitai]
44e
Authenticate
e1
-
7
Setting/Canceling : Place the cursor on the title and
m
・
appears at the left of the title for the Programed activation set to ON.
2
Set the required items
eC
Time :
Enter the start time and end time (it can be set to the following day over
24 o'clock) to deactivate IC card lock.
Repeat :
When "Day of week" is selected, select "Day/Week", select a day of
the week and press
C
.
Title :
Up to 9 two-byte (18 one-byte) characters can be entered.
✔
INFORMATION
・
When the end time for deactivating IC card lock comes while using Osaifu-Keitai
compatible i-
α
ppli, IC card lock is activated upon termination of Osaifu-Keitai
compatible i-
α
ppli.
・
IC card lock can be started in the period for which IC card lock is deactivated, but
cannot be automatically activated by Timed lock.
◆
Locking IC card functions when power is turned OFF
<IC lock(power-off)>
You can select if you continue the IC card lock state before turning the power OFF
or lock all IC card functions.
1
m
[Osaifu-Keitai]
45e
Authenticate
e1
or
2
F906i.book Page 250 Monday, April 21, 2008 10:59 PM
251
F906i_E1kou
GPS Function
Using GPS Function ............................................................................................................................................................ 252
Checking your current location ............................................................................................................ Position location 252
Using GPS compatible i-
α
ppli ............................................................................................................................................ 254
Providing your current location information when requested ......................................................... Location request 259
Notifying your current location information .......................................................................................... Notify location 263
Displaying histories of location information checked ................................................................................. Loc. history 264
Setting GPS .......................................................................................................................................................................... 265
F906i.book Page 251 Monday, April 21, 2008 10:59 PM
252 GPS Function
F906i_E1kou
Using GPS Function
・
This function is unavailable as a navigation device for aircraft, vehicles or
persons or as high-precision location surveying GPS. DoCoMo is not liable to
any purely economic damages including troubles, if any, caused by missing
opportunities of viewing positioning results or making communications due to
failures or malfunctions of FOMA terminal or external events such as power
interruption (including battery exhaustion) in using FOMA terminal for
purposes including but not limited to the above.
・
Because GPS is managed by U.S. Department of Defense, GPS wave conditions
may be controlled (accuracy degraded or wave stopped) for security reasons of
the U.S. And, wave conditions differ by satellite locations; therefore, positioning
operations in the same location under the same environmental conditions may
not yield the same result.
・
GPS uses waves transmitted from satellites and it may be disabled or become
hard to receive waves in the conditions below, causing to have an error of 300
m or more in location information.
- Under or inside forest, on street of large buildings or in an area packed with many houses
- Inside or beneath a building
- Underground, in a tunnel or underwater
- Near a high-voltage cable
- Inside an automobile, train, etc.
- Bad weather such as heavy rain or snow
- Covered with hand etc., or placed in a bag etc.
- FOMA terminal closed
- FOMA terminal surrounded by obstacles or persons
・
When using Location request and Notify location functions, check instructions
and precautions given in website of GPS service providers and DoCoMo. And,
you may be charged for using these functions.
・
The GPS function except Position location is not available in out of service area
or overseas.
Position location
Checking your current location
・
No packet communication fee applies for Position location. Note that a packet
communication fee is required separately with map displayed using location
information.
・
Positioning is unavailable while positioning with Location request or Notify
location.
・
Even out of service area or overseas, positioning may be enabled in a location
with a wide view, but it may function abnormally, e.g., taking long time or
positioning disabled under certain environmental conditions.
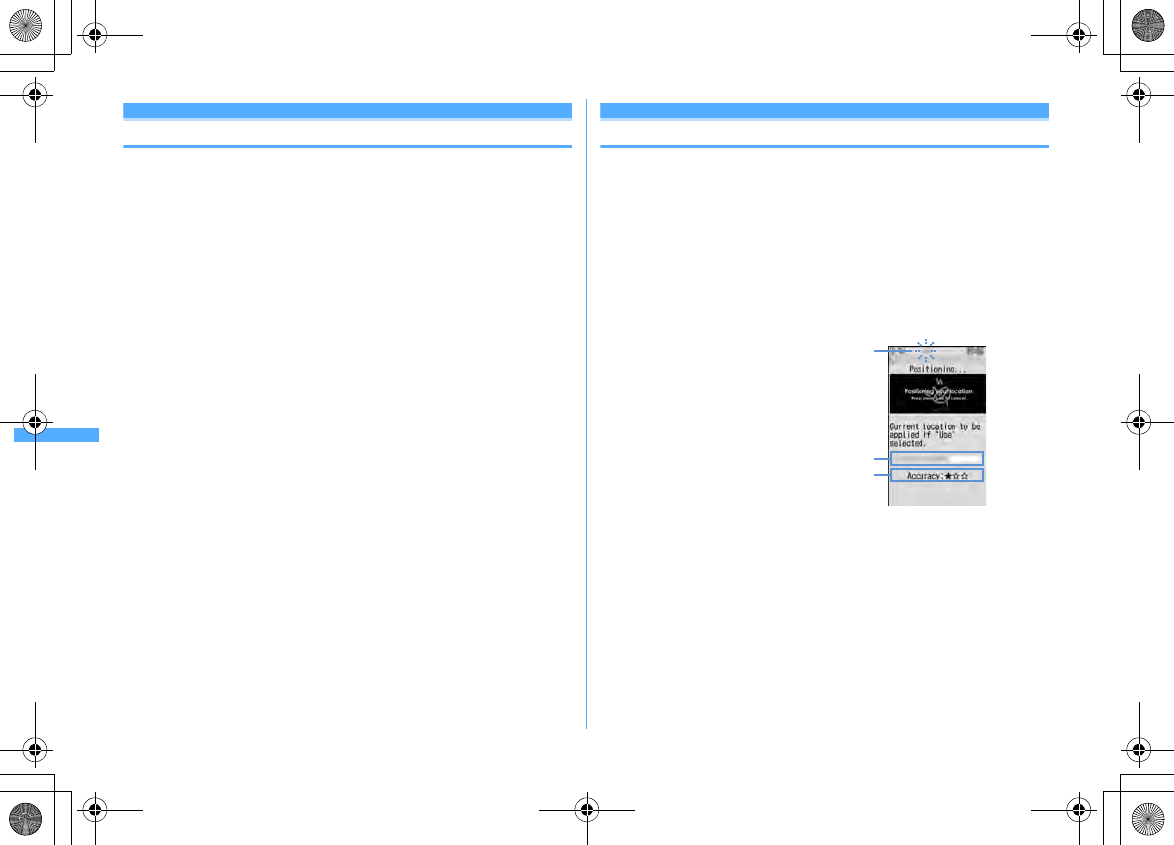
1
m
[LifeKit]
71
Positioning starts and the light turns on.
・
Accuracy icon definitions.
★★★
: Nearly accurate location information (with an error of less than 50
m)
★★☆
: Comparatively accurate location information (with an error of less
than 300 m)
★☆☆
: Approximate location information (with an error of 300 m or more)
Accuracy is merely approximate indication. Actual accuracy may vary by
the environmental wave and other conditions.
・
When positioning, press
c
or
f
to stop it.
・
To use the location information currently acquired, press
C
.
2
Select a function from Use location info menu after positioning
Operating Use location info menu
→
P253 "
■
Use location menu"
Blinking when positioning
Approximate time elapsed in positioning
Accuracy
F906i.book Page 252 Monday, April 21, 2008 10:59 PM
253
GPS Function
F906i_E1kou
✔
INFORMATION
・
A message may appear indicating that positioning takes time. Select "Yes" to
continue positioning which takes time. Select "Retry" to retry positioning in Quality
mode regardless of the setting of the positioning mode. "Retry" does not appear when
using overseas.
◆
Using location information
■
Use location menu
This menu appears after performing Position location, selecting "Use location"
from the submenu of Loc. history, selecting "Detail info"
→
"Use location" from the
submenu in displaying image or selecting the location information on the details
screen of phonebook or User information.
1
On the menu screen,
1
-
7
Read map :
1e
"OK"
Connect to a map site and display a map using Location information. After a
map appears, you can check periphery information using i-area. For details on
i-area, refer to the DoCoMo website.
Run i-
α
ppli :
2e
Select i-
α
ppli
i-
α
ppli starts.
Paste to a mail :
3
A mail creation screen with a Location information in the form of URL entered
in the mail message is displayed.
・
When mail creation screen is displayed from Position location or Loc.
history, "
位置メール
(Location mail)" is entered in the subject field.
・
This is unavailable when 2in1 is ON in B mode.
・
A Location information URL pasted to a mail can be displayed only on i-
mode compatible terminals.
Add to phonebook :
4
A new phonebook entry screen is displayed.
Update phonebook :
5e
Select phonebook entry to update
Location information is added to the selected phonebook entry and an entry
screen is displayed.
Adding to image :
6e
Select a folder
e
Select an image
e
"Yes"
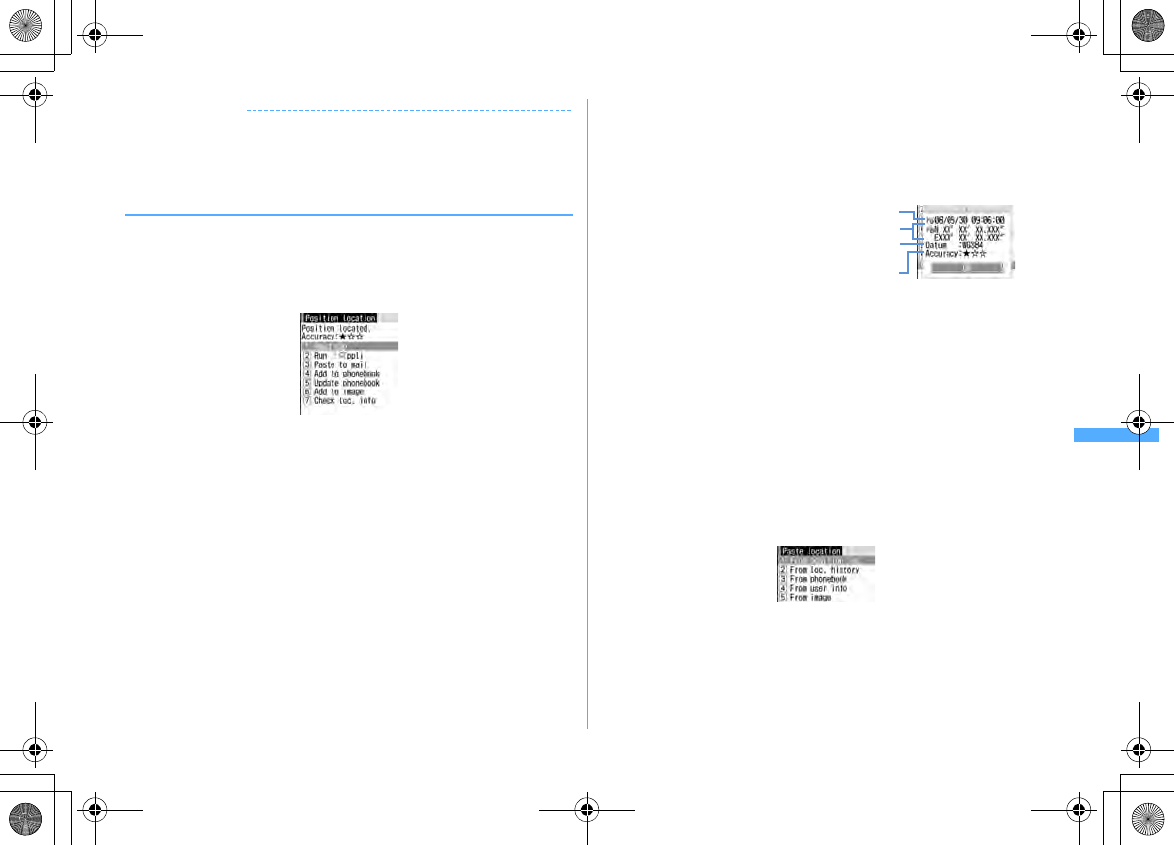
Checking location information :
7
Display the screen shown below.
*
The information is shown in degrees (
°
), minutes (
′
), and seconds (
″
). "N", "S", "E" and
"W" indicate a north latitude, south latitude, east longitude and west longitude,
respectively.
■
Paste/Attach/Send location menu
Displayed for pasting/attaching/sending Location information of individual items
in the cases below.
Paste location menu :
Selecting "Quote phrase/passw"
→
"Paste location" after
pressing
m
while entering message text or editing a signature
Attach location menu :
When Selecting "Location info" on the new data entry, data
edit or User information edit screen of FOMA terminal phonebook, when
pressing
m
while displaying image to select "Detail info"
→
"Attach location",
or when pressing
m
on the screen after shooting still image to select "Attach
location"
Send location info menu :
Selecting a link item for sending location information
from i-mode or ToruCa
1
From Paste/Attach/Send location menu,
1
-
5
Using Location information of Position location :
1e
"Yes" from
confirmation screen after activating Position location
Using Location information of Loc. history :
2e
Select Loc.
history
e
"Yes"
Date and time of positioning
Current location*
Indicate World Geodetic System (WGS84) or Tokyo
Datum (Tokyo), whichever used for positioning.
Accuracy
F906i.book Page 253 Monday, April 21, 2008 10:59 PM
254 GPS Function
F906i_E1kou
Using Location information of phonebook :
3e
Select a phonebook entry
from FOMA terminal phonebook list with Location information
entered
e
"Yes"
Using Location information of User information :
4e
Authenticate
e
"Yes"
Using Location information entered to an image :
5e
Select a
folder
e
Select an image
e
"Yes"
◆
Setting actions to be taken after Position location
<Post-Position task>
Set actions after Position location when pressing
8
for 1 second or more on
stand-by display (the setting of Shortcut menu in default state) or starting Position
location from Shortcut icons.
・
It is also applicable when Custom menu settings are changed and Position
location is assigned to another keypad (the first level).
1
m
[LifeKit]
741e1
-
6
Read map :
Connect to a map site and display a map based on the positioned
location information.
Run i-
α
ppli :
Display a list of GPS compatible i-
α
ppli.
Paste to mail :
A mail creation screen appears, with "
位置メール
(Location
mail)" entered in the subject field, and with a Location information in the
form of URL entered in the message text.
Add to phonebook :
Display a screen for selecting "Add to phonebook" or
"Update phonebook". You can add new phonebook entry with location
information set or update location information to an existing phonebook
entry.
Add to image :
Display image folder list. Positioned location information can
be added to an image.
Confirm each time :
Display accuracy and location information menu.
→
P253
Using GPS compatible i-
α
ppli
・
Using GPS compatible i-
α
ppli sends location information to the Information
Provider of the i-
α
ppli to be used.
・
When using the GPS function with GPS compatible i-
α
ppli, "Location usage
setting" of i-
α
ppli to be used must be set to "Yes".
・
"
地図アプリ
(Map application)" and "
モバイル
Google
マップ
(Mobile Google
map)" are stored by default as GPS compatible i-
α
ppli.
1
m
[LifeKit]
72e
Select GPS compatible i-
α
ppli to start
・
To exit GPS compatible i-
α
ppli, use the procedure specified for each i-
α
ppli.
◆
Using
地図アプリ
(Map application)
By the preinstalled "
地図アプリ
", using GPS function and map, you can look up
your current location or the map of specified place, search information around the
place, perform navigation to the destination by vehicle, on foot or by car.
・
A packet communication fee is required separately. It is recommended to use
Pake-Houdai or Pake-Houdai full for this software.
・
In case of deleting it, you can download it from "
iエリア−周辺情報−
(i-area -
Peripheral information -)" site.
・
It is unavailable with 2in1 ON in B mode.
・
DoCoMo gives no assurances of accuracy, immediacy, etc. of the map or routing
information. Please be forewarned.
・
Make sure that other than the driver operate this software while driving.
・
The display shown here is an example. Screens are given only for information
purposes and may differ from actual displays.
❖
Basic services and additional services
There are 2 services below for this software.
Basic service :
The services DoCoMo offers without charge.
Additional service :
The services ZENRIN DataCom offers with charge.
・
You can use all functions except traffic information free of charge till 90th days
from the first activation. To use the additional services on or after the 91st day,
you are required to subscribe (charged) to "
ゼンリン 地図+ナビ
" provided by
ZENRIN DataCom.
・
If you subscribe to this software after you start using it, you do not need to
download the software again. You can use this software without modification.
F906i.book Page 254 Monday, April 21, 2008 10:59 PM
255
GPS Function
F906i_E1kou
■
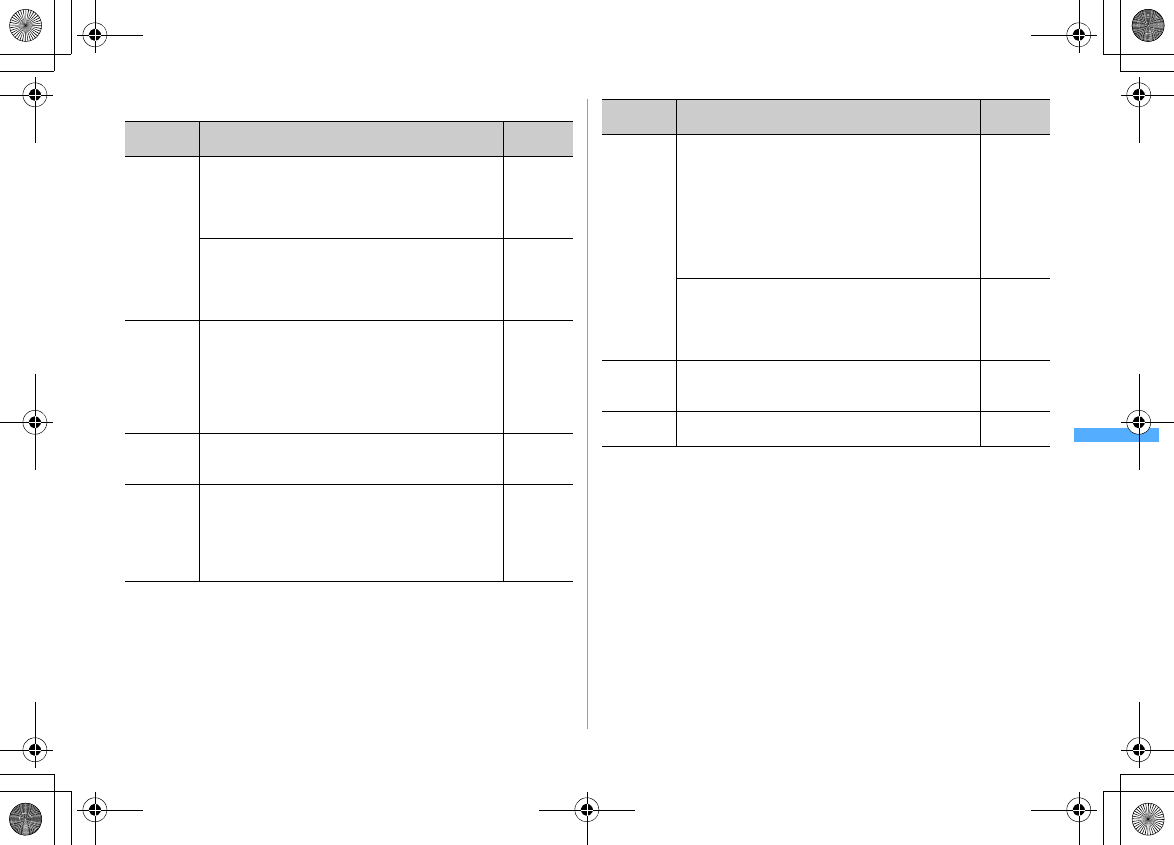
Service contents (Menu)
Menu Description On or after
the 91st day
Map
・
By using GPS function, read map by entering your
current location, free word, address phone number or
other information.
・
By entering address in a voice, you can see the map
easily.
Free
・
Check the map of the places you registered in this
software, server or phonebook, or places you searched
before.
・
If you save a place in the server, the saved place is
shared with PC.
Charged
Local Search
・
Search information of shops, facilities or iD-accepting
stores at your current location or around the specified
place, and obtain coupons from Gourmet information.
・
Confirm the parking availability information around the
place.
・
By entering in a voice, you can search the peripheral
information easily.
Free
Navigation
・
Perform the total navigation to the destination by
vehicle, on foot or by car altogether.
・
Perform navigation easily to your registered home.
Charged
Transfer
・
Check transfer information or timetable of the railway
system.
・
Check railway route on the map, and set the alarm
before departure.
・
By entering in a voice, you can get transfer information
easily.
Charged
Extra
・
Change the mode to not only a usual map, but also to
various types of maps such as a map moving by
declining FOMA terminal, a 3D map, a map
emphasizing railroads, etc.
・
Using GPS function, leave your footprint on the current
position, and view the trail of your movement.
・
Paint and display the map of the city/village you have
positioned before by GPS function on a prefectural
basis.
Free
・
Check
足あと
(footprints) also on a PC by sending "
足あ
と
" data saved in microSD card to the map application
server.
・
Back up the areas you have positioned before using
GPS function to the server.
Charged
Emergency
・
Search the facilities helpful in case of disaster.
・
A communication-free i-
α
ppli linked to map application
for disaster.
Charged
Setting/Help
・
Check settings or usage of map display or navigation
display.
Free
Menu Description On or after
the 91st day
F906i.book Page 255 Monday, April 21, 2008 10:59 PM
256 GPS Function
F906i_E1kou
❖
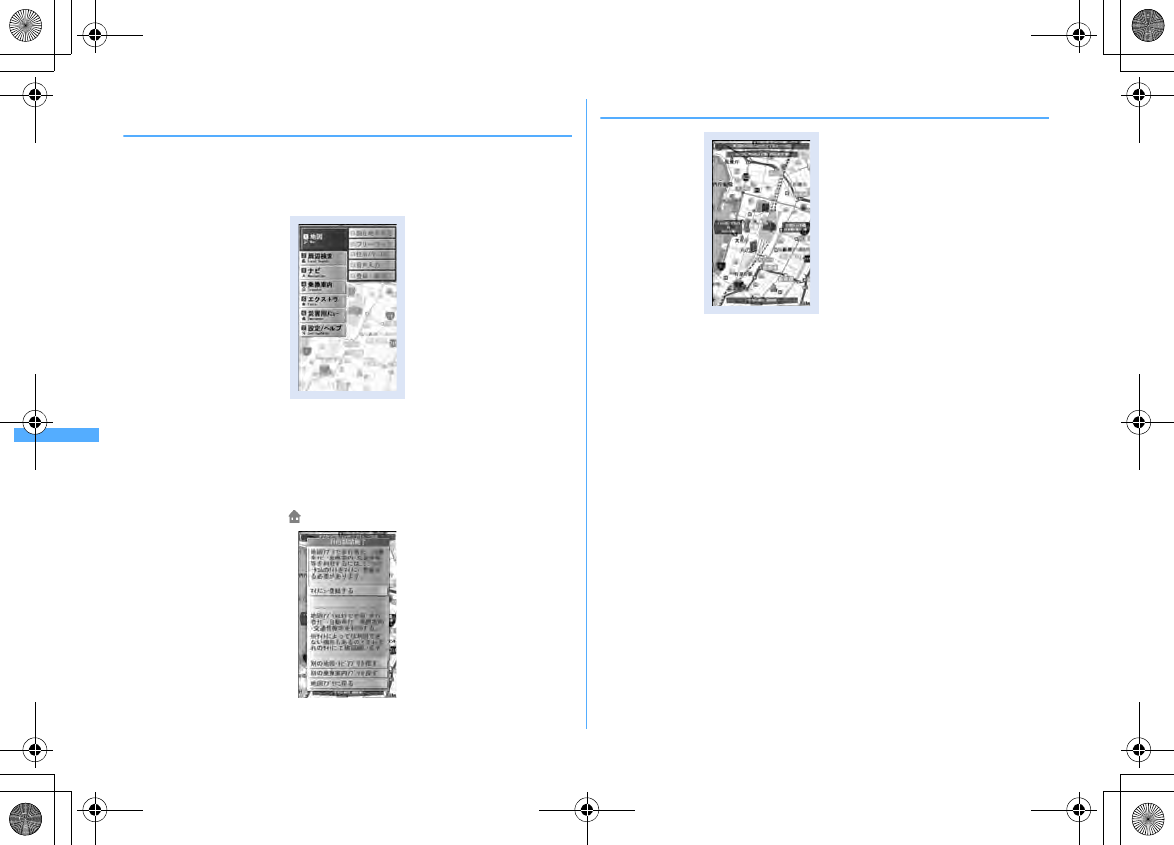
Menu and operation of "
地図アプリ
(Map application)" Top
screen
Menus appear on the TOP screen. If you close a menu by
c
, the map previously
displayed appears.
・
At the first time you use this application, the Terms of Service and the
instructions for use appear.
■
In case 91 days passed without subscription
When you use this application for the first time on or after the 91st day, a message
indicating that the usable functions are limited and the inquiry message for
subscription appear. Also, when you select an additional service menu, similar
messages appear.
・
Access the site of "
ゼンリン 地図+ナビ
" from this software when subscribing.
❖
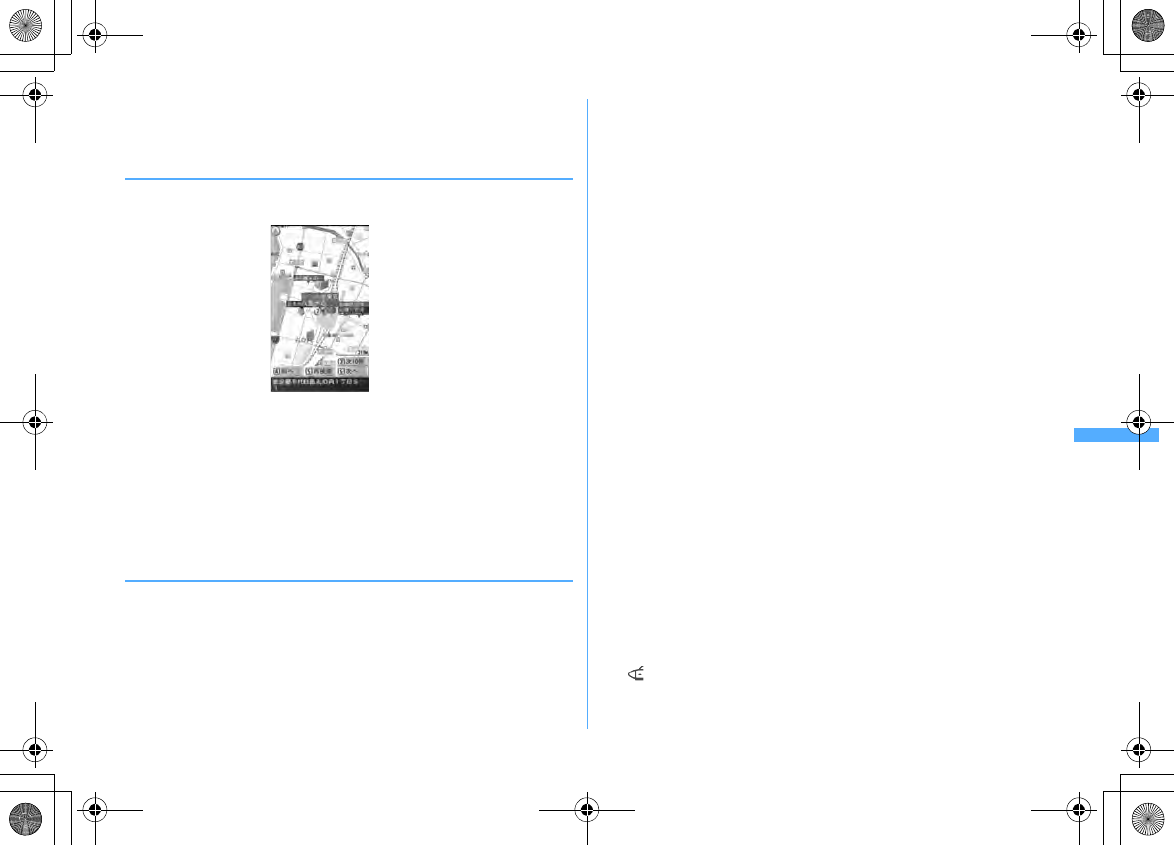
Map screen and operation
・
The operations below are available on the map display screen.
m
: Display of TOP screen
C
: Display of magnifying/shrinking bar (Wide display by
u
, and detail map
display by
d
)
g
: Display of the quick access menu
k
: Scroll the map on the left, right, up and down
c
: Close the menu Return to the first search result
*
: Rotate the map counterclockwise
0
: Display the map with the north upward
#
: Rotate the map clockwise
・
The operations below are available by the quick access menu.
u
: Search the peripheral information centering around the point on the
displayed map
d
: Search the route to the center of the displayed map by setting the starting
point.
l
: Send the URL of the displayed map by mail
r
: Register the location information of the center of the map to this software,
the server or phonebook (If registered in the server, you can share the
registered point with PC)
g
: Close the quick access menu
1
: Display the point you can view the 3D crossing or the panorama image
(3D crossing or panorama image is displayed by selecting a point)
TOP screen
Map display screen
©2008 ZENRIN DataCom
F906i.book Page 256 Monday, April 21, 2008 10:59 PM
257
GPS Function
F906i_E1kou
2
: Display of the buildings existing in the peripheral area (Check the
information by selecting the point)
❖
Screen and operation of the search result of the peripheral
information
・
These are the screen and operation for the case that the search result is
displayed by a map, not for the case they are selected on the list.
・
The operations below are available on the search result screen.
g
: Check the detail information of the search result (When search result is not
selected, display of the quick access menu)
5
: Search again centering around the displayed point
4
: Select the previous search result
6
: Select the next search result
m
/
C
/
k
/
*
/
0
/
#
: The same operations as the Map display screen
❖
Guide (navigation) to the destination by voice and display
by searching route
Search the route by setting the starting point and the destination. Display the route
on foot, by public transportation system and by car. After searching the route,
guide (navigation) to the destination by voice and display.
1
On the TOP screen, "
ナビ
(Navigation)"
e
"
ナビをする
(Navigate)"
2
Select
出発地
(Starting point) field
e
Set starting point from each
item
現在地
(Current position) (GPS) :
Position and set the current position
フリーワード検索
(Free word search) :
Search by keyword and set
地図上で指定
(Plot on the map) :
Set the starting point on the map
TEL
/〒検索
(Phone number/
〒
(Postal code) search) :
Search by phone
number or postal code and set
住所一覧から
(From address list) :
Select and set the address
ジャンルから
(From category) :
Select the category and set
履歴から
(From history) :
Set from the map displayed before
登録地点から
(From registered point) :
Set from the location information
saved in this software, the server or phonebook
自宅
(Home) :
Set the location information of your home
出発地の確認
(Check the starting point) :
Check the information of the starting
point
3
Select
目的地
(Destination) field
e
Set destination from each item
・
Set with the same operation as Step 2.
4
Select
時間指定
(Time specifying) field
e
Select from each item
現時刻で指定
(Specify by current time) :
Search the route by current time
出発時刻指定
(Specified departure time) :
Search the route by specifying the
departure time
到着時刻指定
(Specify arrival time) :
Search the route by specifying the arrival
time
終電を利用
(Use the last train) :
Search the route by using the latest train of
the day
5
Select
条件設定
(Condition setting) field
e
Set the required
items
e
"
上記で設定
(Set as above)"
e
"OK"
乗換条件
(Transfer condition) :
Select the priority criteria of transfer from "
早
い
(Early)" "
安い
(Cheap)" "
楽々
(Comfortable)"
徒歩ルート
(Walking route) :
Select the priority criteria from "
おまかせ
(Up to
you)" "
屋根多い
(Many roofs)" "
階段少ない
(Few stairs)"
特急利用
(Using express) :
Select if you use express even if the total
distance of the route is less than 100 km
通常利用車種
(Car type for ordinary use) :
Select the car type for use
Search result screen of peripheral information
©2008 ZENRIN DataCom
F906i.book Page 257 Monday, April 21, 2008 10:59 PM
258 GPS Function
F906i_E1kou
6
「
"
で検索
(Search by )"or "
のみで検索
(Search
only by )"
You can search the route only by "
で検索
(Search)" for total
navigation and "
のみで検索
(Search only)" for car only. The routes (up to 6
routes) are displayed as a result of the search. When a transfer route by a
different transportation system exists, the characteristics of the route is
displayed by icon.
早
(Early) :
Reguire less time
安
(Cheap) :
Fare is cheap
楽
(Comfortable) :
Few transfers
オススメ
(Recommended) :
Meeting all conditions of
楽
/
早
/
安
有料
(Charged) :
Using toll road
一般
(General) :
Using general road
7
ルートを選択
(Select the route)
e
"
ナビ・ルート確認
(Check the
navigation route)"
e
"
ナビ
(Navigation)" or "
ナビ
(
省電力
)
(Navigation (Power saving))"
e
"
はい
(Yes)"
Start the navigation to the destination.
Registering the route : "
ルートを登録
(Register the route)"
Checking the route : Select the route
e
"
ルート確認
(Check the route)"
e
"
はい
(Yes)"
❖
Screens and operations of Route (car)/Navigation (car)
display
・
The operations below are available on the navigation screen.
m
: End the navigation and display the top screen
5
: Stop/Resume navigation
2
: Switch to crossing mode
c
: Return to the current position
g
/
C
/
k
/
*
/
0
/
#
: The same operations as the map display screen
・
The operations below are available on the quick access menu.
u
: Search the parking areas around the destination
d
: Display the search result (time, fare, etc.) or set the navigation
l
: Search the route by adding up to 3 way-stops to the route to the destination
r
: Search again the route from the current position to the destination
1
: Delete the route currently displayed
2
: Switch to the crossing mode
❖
Using "
音声入力
(Voice entry)"
By
音声入力
(Voice entry) menu, by entering in a voice, you can easily check
peripheral information, get transfer information or see the map.
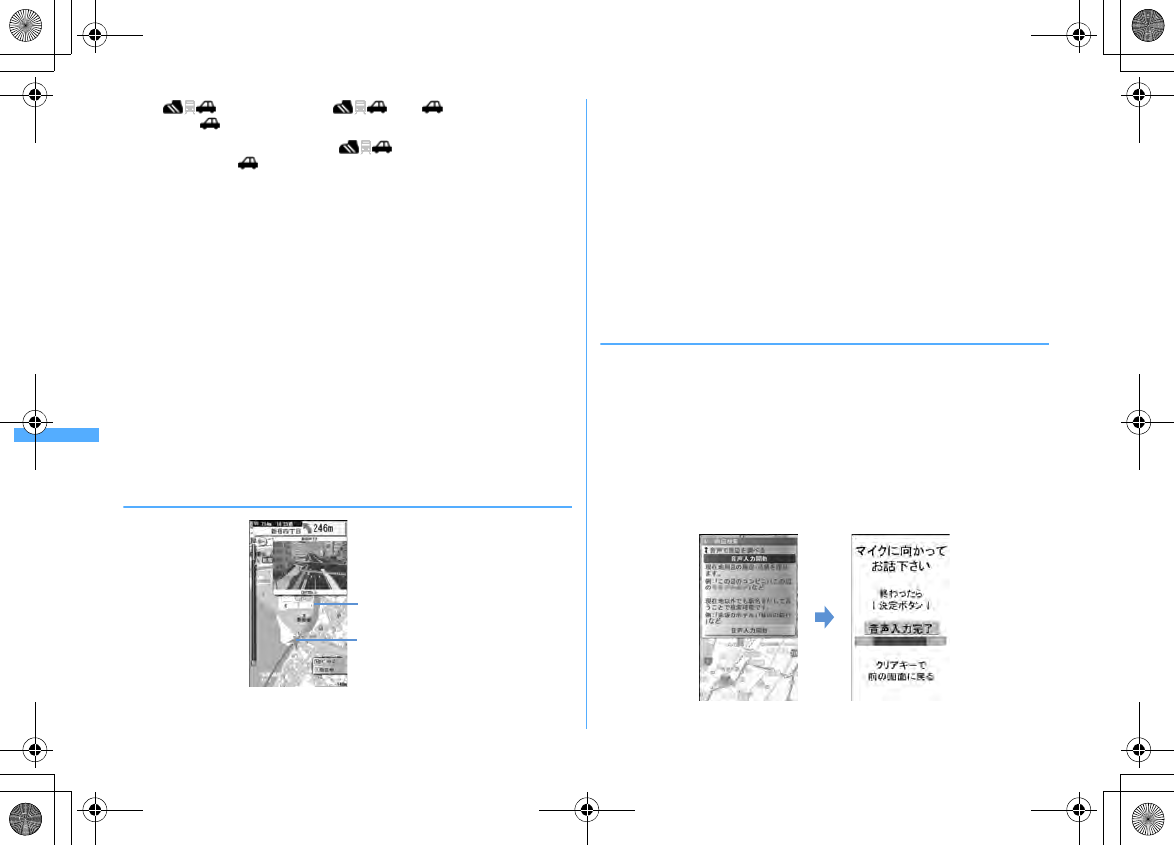
<Example> Using "
音声入力
(Voice entry)" of Local Search
1
While this software is active,
me
"Local Search"
e
"
音声入力
(Voice entry)"
The way of voice entry is displayed.
2
"
音声入力開始
(Start voice entry)"
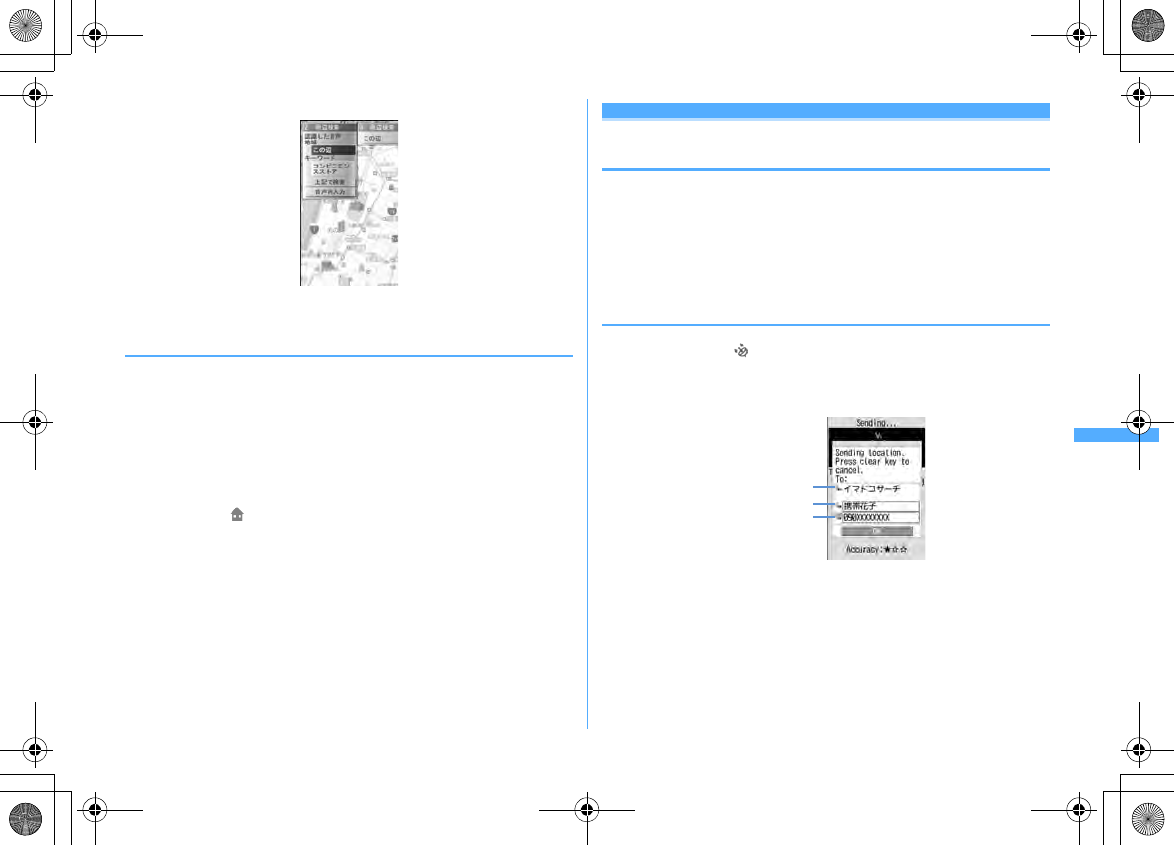
After the voice entry screen is displayed, enter the peripheral information to
search by voice.
By recognizing the voice, a confirmation screen appears.
Navigation (car) display screen
Route to destination
Current position
or the direction
©2008 ZENRIN DataCom
F906i.book Page 258 Monday, April 21, 2008 10:59 PM
259
GPS Function
F906i_E1kou
・
If the recognition is wrong, enter again.
❖
Using
設定/ヘルプ
(Set/Help)
1
While this software is active,
me
"
設定・ヘルプ
(Set/Help)"
・
The operations below are available.
各種設定
(Various settings) :
Basic setting of software, setting of navigation,
setting of home, setting of the nearest station from home, deleting all
logs, initializing the software
ヘルプ・規約
(Help/Terms) :
Check
使いかたの説明
(Explanation of usage),
よくある質問
(FAQ) or
利用規約
(Terms of service)
会員情報確認
(Check the subscription) :
Check the subscription to "
ゼンリン
(ZENRIN)
地図+ナビ
(Map + navigation)"
PC
確認方法
(Confirmation method on a PC) :
Display URL, Log-in ID or
password entry to view map application site for a PC
Location request
Providing your current location information
when requested
This is a service related to Location request; you can set so that location
information is provided upon request from other set parties.
・
To use a service related to Location request, a subscription to the service
provider may be required. You may be charged for using the service.
・
To use a service related to Location request, you must set Request permit/deny
to "Always permit" or "Permission period". And, you may be required to make
usage settings by services.
◆
When Location request is issued
<Example> When "
許可
(Permit)" is set for usage settings by services
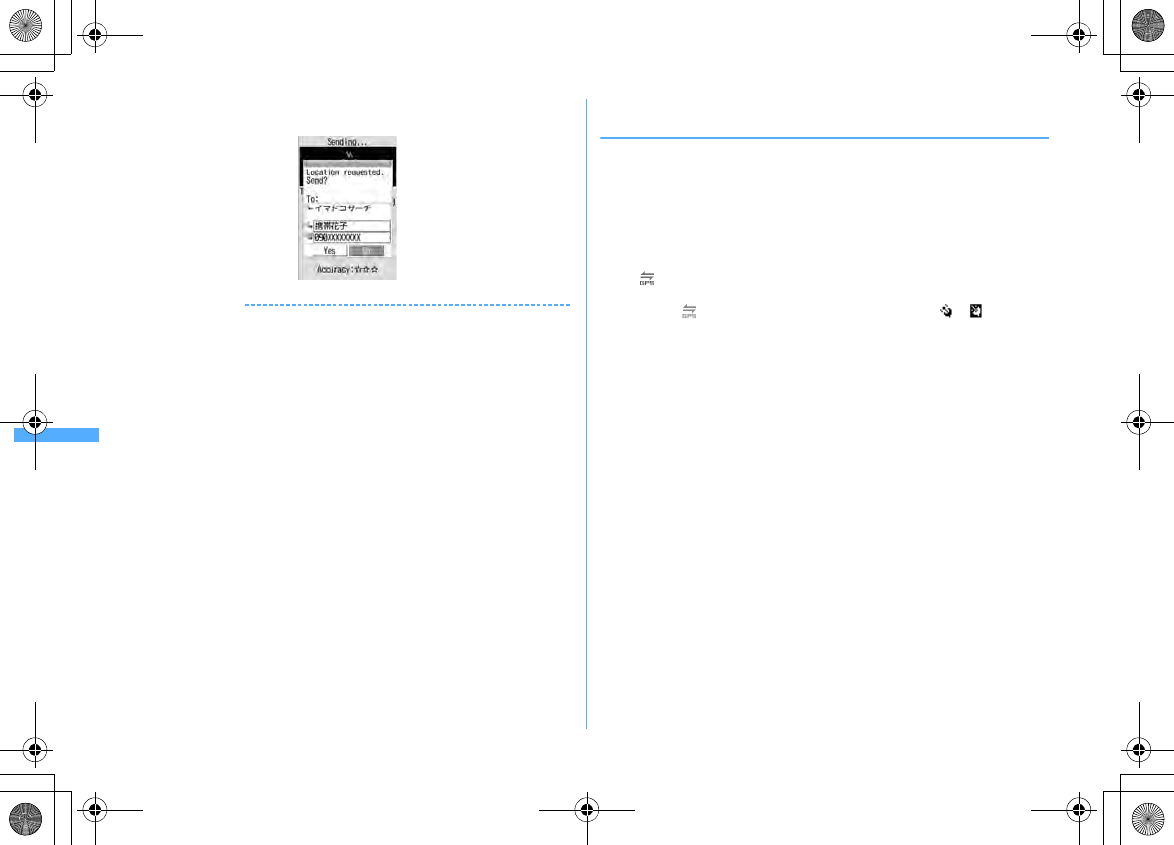
Location request starts. blinks, the GPS alert sound is emitted and the light
turns on or vibrator operates.
・
Press
c
or
f
to stop Location request. Location information is sent under
some timing.
・
When the requestor ID matches a phone entry, the requestor name saved in
phonebook appears.
・
Requestor ID may not be displayed.
When "
この辺のコンビニ
(Peripheral convenience
store)" are entered by voice entry
Receiver name
Requestor name
Requestor ID
F906i.book Page 259 Monday, April 21, 2008 10:59 PM
260 GPS Function
F906i_E1kou
・
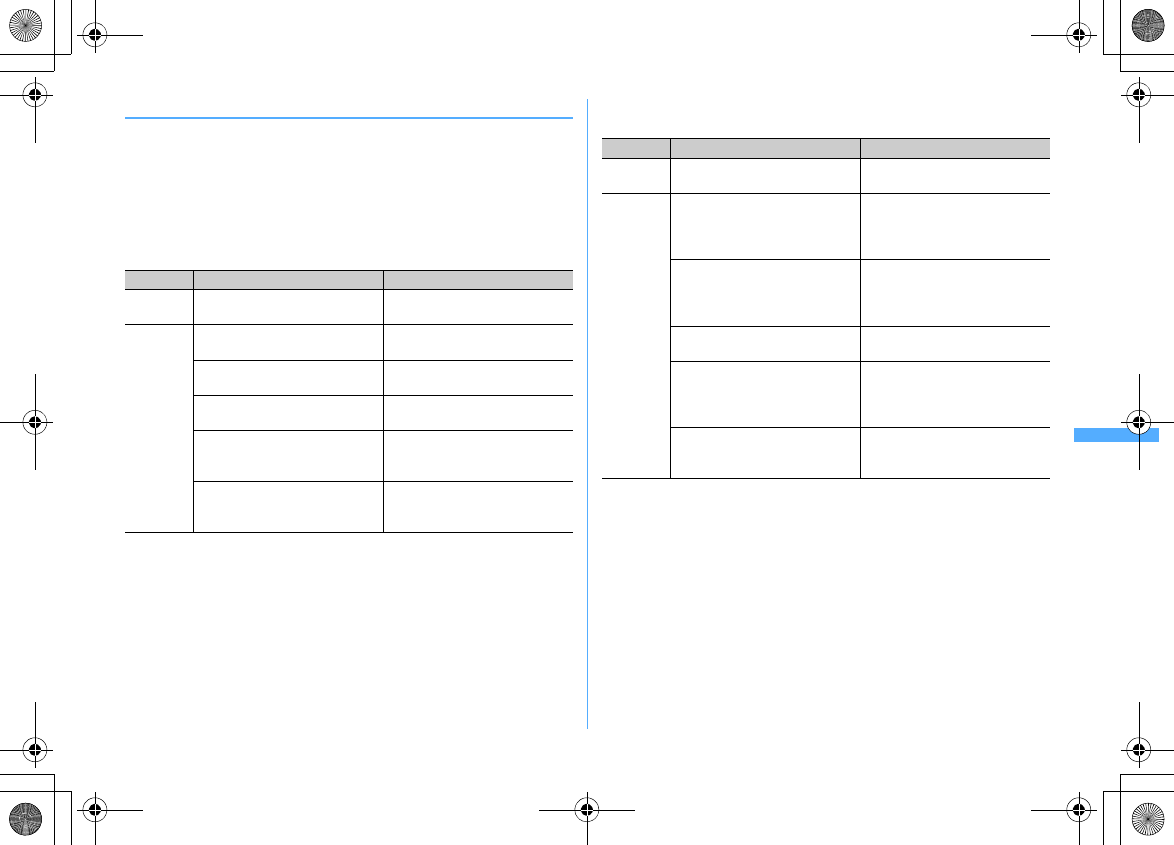
When "
毎回確認
(Check each time)" is set for usage settings by services, a screen
shown below appears. Select "Yes" to start Location request.
✔
INFORMATION
・
Sending Location information requires no charge.
・
Location request is unavailable while positioning with Position location or Notify
location, while FOMA terminal is out of service area or during Self mode, i-mode
communication with i-
α
ppli or infrared communication/iC transmission. If the battery
is exhausted or Omakase Lock is activated while positioning, it is stopped.
・
Information is not delivered by Location request to the requestor under some wave
conditions.
・
If "
毎回確認
(Check each time)" is set for usage settings by services when Location
request is issued during Public mode (Drive mode), location information is not sent.
If "
許可
(Permit)" is set, a screen appears and location information is sent, but the GPS
alert sound is not emitted, and the light or vibrator does not operate.
・
With 2in1 ON, Location request for Number A is available regardless of mode of 2in1.
・
When you are required to provide the location information by a party using
imadocokantan search, it operates as below.
- Every time you are required, a confirmation screen for location information appears. If you select
"Yes", a rough positioning result is immediately notified to the other party. After the positioning,
high-precision positioning results are notified to the other party.
- Even if the location request is interrupted after selecting "Yes" on the confirmation screen of
location request, a rough positioning result is notified to the other party. In this case, although it is
recorded in the Loc. history, the location information is not displayed.
◆
Setting whether to permit/deny Location request
<Request permit/deny>
You can set if you provide location information when there is a request from other
parties.
・
"Always permit" or "Always deny" in this setting can also be set in initial
settings.
→
P48
1
m
[LifeKit]
761e
Authenticate
e1
-
3
・
With "Always permit" set, location information may be sent and notified to
the searcher without operations.
・
(blue) appears on the stand-by display when "Always permit" or
"Permission period" is set. When permission period is outside a valid
period, (gray) appears. With FOMA terminal folded, or appears on
the sub-display.
Setting permission period :
3e
Set the required items
eC
Start :
Set time for "Always permit".
End :
Set time for "Always deny".
・
You can set the next day exceeding 24:00.
Repeat :
Set repetition of operation of the set time.
・
When "Day of week" is selected, select "Day/Week", select the day of the
week to perform Location request and press
C
.
Date :
Set a period of time to perform Location request. When "Specify start
date" or "Specify start/end" is set, the items below can be set.
Start :
Set day for "Always permit".
End :
Set day for "Always deny".
F906i.book Page 260 Monday, April 21, 2008 10:59 PM
261
GPS Function
F906i_E1kou
❖
Operations of Location request with Permission period set
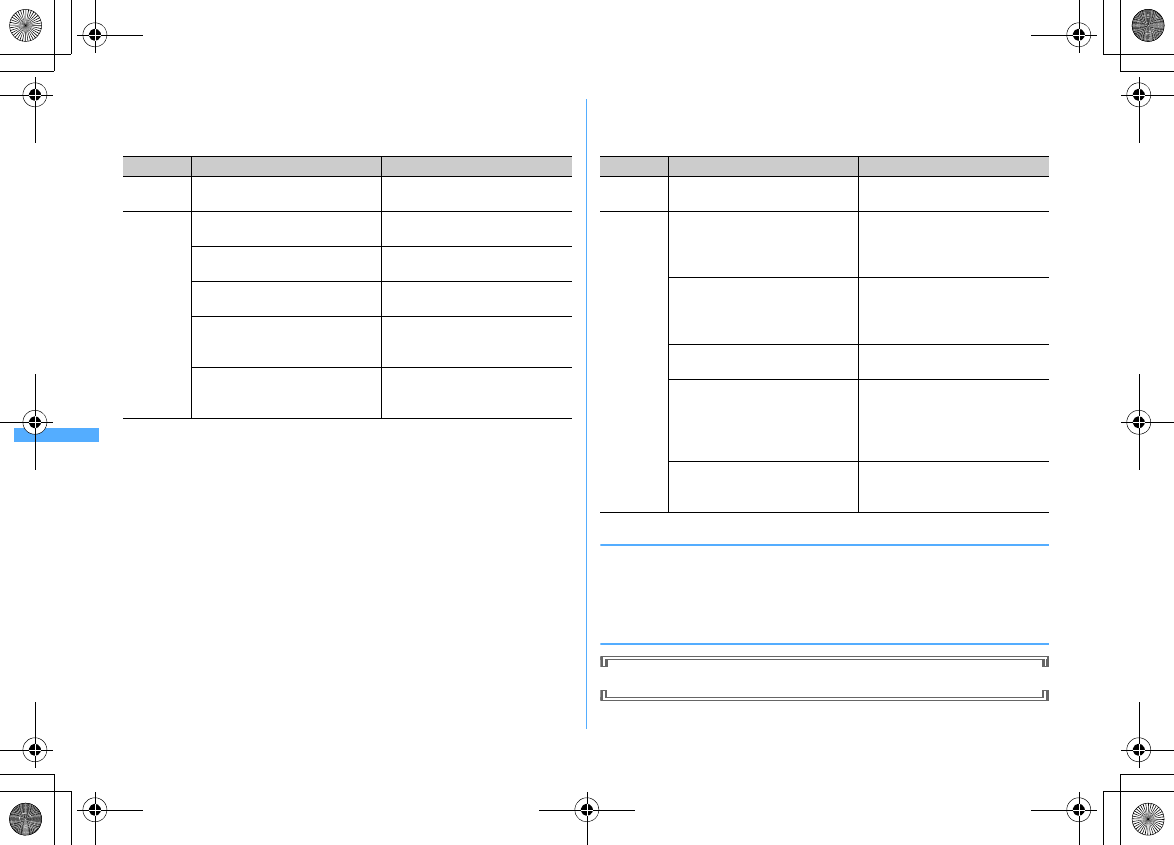
When Permission period is set from Request permit/deny, "Always permit" is
activated in periods listed below.
・
The column titled "Always permit" period shows periods with years omitted in
which "Always permit" is active if Permission period is set at 9:00, 2008/06/02.
・
If Repeat is set to "Day of week", the function is activated only on the specified
day of the week in the period specified in the field for "Always permit" period.
■
When time after the current time is set as Start
<Example> Start : "10:00", End : "18:00"
■
When time before the current time is set as Start
<Example> Start : "08:00", End : "18:00"
Repeat Date "Always permit" period
None
ー
06/02
10:00-18:00
Every Day/
Day of week
None 06/02 or later
10:00-18:00
Specify start date
Start : 2008/06/01
06/02 or later
10:00-18:00
Specify start date
Start : 2008/07/01
07/01 or later
10:00-18:00
Specify start/end
Start : 2008/06/01
End : 2008/06/30
06/02-06/30
10:00-18:00
Specify start/end
Start : 2008/07/01
End : 2008/07/31
07/01-07/31
10:00-18:00
Repeat Date "Always permit" period
None
ー
06/02
09:00-18:00
Every Day/
Day of week
None 06/02
09:00-18:00
06/03 or later
08:00-18:00
Specify start date
Start : 2008/06/01
06/02
09:00-18:00
06/03 or later
08:00-18:00
Specify start date
Start : 2008/07/01
07/01 or later
08:00-18:00
Specify start/end
Start : 2008/06/01
End : 2008/06/30
06/02
09:00-18:00
06/03-06/30
08:00-18:00
Specify start/end
Start : 2008/07/01
End : 2008/07/31
07/01-07/31
08:00-18:00
F906i.book Page 261 Monday, April 21, 2008 10:59 PM
262 GPS Function
F906i_E1kou
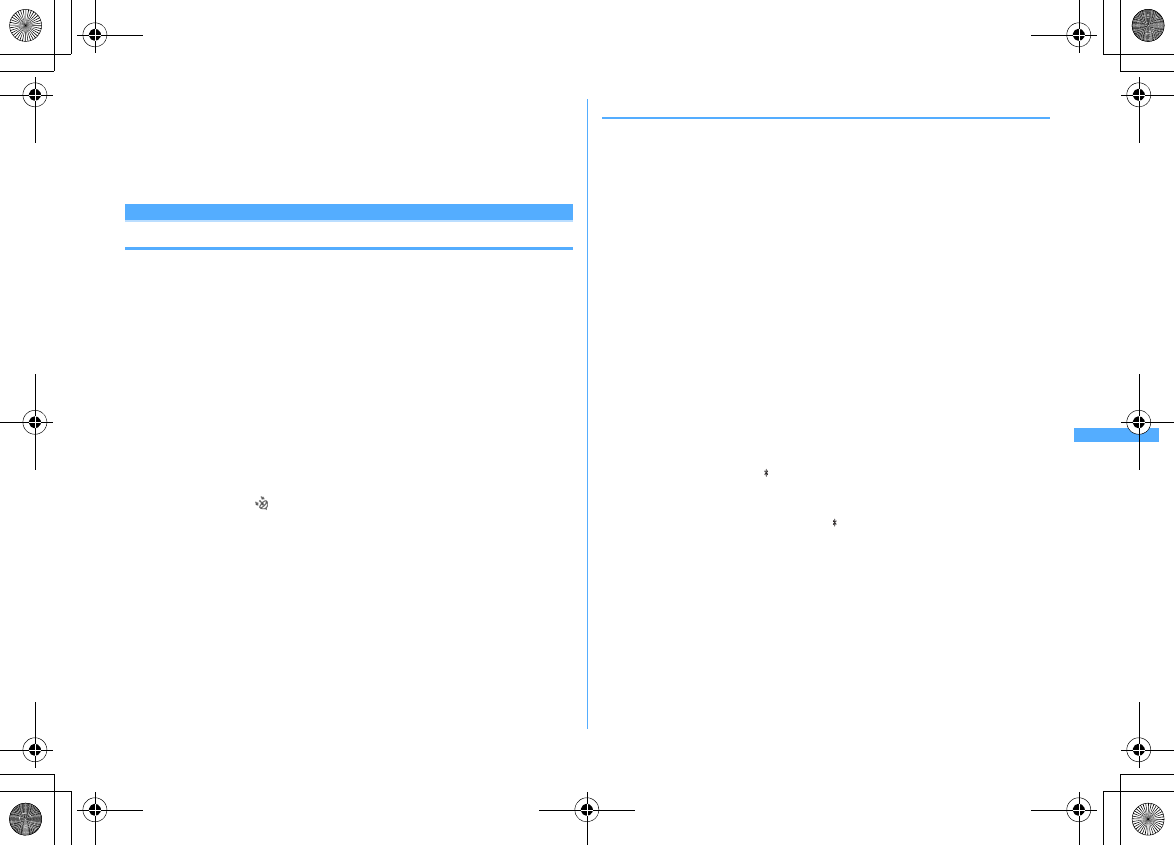
■
When time after the current time is set as Start and one on the next day
over 24 o'clock is set as End
<Example> Start : "10:00", End : "02:00"
■
When time before the current time is set as Start and one on the next day
over 24 o'clock is set as End
<Example> Start : "08:00", End : "02:00"
◆
Making settings for using service <Service settings>
1
m
[LifeKit]
763
・
For next procedure, contact a related service provider.
◆
Changing host of service usage setup site <Service
host URL>
Usually, you do not need to change this setting.
Repeat Date "Always permit" period
None
ー
06/02 10:00
-06/03 02:00
Every Day/
Day of week
None 06/02 or later
10:00-02:00 next day
Specify start date
Start : 2008/06/01
06/02 or later
10:00-02:00 next day
Specify start date
Start : 2008/07/01
07/01 or later
10:00-02:00 next day
Specify start/end
Start : 2008/06/01
End : 2008/06/30
06/02-06/30
10:00-02:00 next day (until 07/01
02:00)
Specify start/end
Start : 2008/07/01
End : 2008/07/31
07/01-07/31
10:00-02:00 next day (until 08/01
02:00)
Repeat Date "Always permit" period
None
ー
06/02 09:00
-06/03 02:00
Every Day/
Day of week
None 06/02 09:00
-06/03 02:00
06/03 or later
08:00-02:00 next day
Specify start date
Start : 2008/06/01
06/02 09:00
-06/03 02:00
06/03 or later
08:00-02:00 next day
Specify start date
Start : 2008/07/01
07/01 or later
08:00-02:00 next day
Specify start/end
Start : 2008/06/01
End : 2008/06/30
06/02 09:00
-06/03 02:00
06/03-06/30
08:00-02:00 next day (until 07/01
02:00)
Specify start/end
Start : 2008/07/01
End : 2008/07/31
07/01-07/31
08:00-02:00 next day (until 08/01
02:00)
F906i.book Page 262 Monday, April 21, 2008 10:59 PM
263
GPS Function
F906i_E1kou
1
m
[LifeKit]
764e
Set the required items
eC
Host :
Select a host.
・
When "User setting" is selected, the items below can be set.
User host :
Enter up to 99 one-byte characters for the host.
User host URL :
Enter up to 100 one-byte characters for URL.
Notify location
Notifying your current location information
You can notify current location information to others (service providers applicable
to Notify location function).
・
To use Notify location, a subscription to a service provider applicable to Notify
location function may be required. And, you may be charged for using the
service.
・
Notify location requires usage fee.
・
Notify location is unavailable while positioning with Position location or
Location request, when FOMA terminal is out of service area or in Self mode.
Notification by entering a service client is unavailable in Keypad dial lock.
<Example> Notifying by entering a service client
1
m
[LifeKit]
751
2
2e
Enter a service client ID in the service client ID field (up to
12 one-byte characters)
eg
When positioning, blinks and the light turns on. The GPS alert sound is
emitted and the vibrator operates on completion of positioning.
・
Positioning is stopped when
f
is pressed while a message is being
displayed indicating that a location and phone number are sent or
c
or
f
is pressed while positioning.
・
Even if positioning is interrupted, the location information is notified under
some timing.
Notifying to saved service client :
1e1
-
5eg
3
Check send result
eg
❖
Saving service client to LCS clients list
For Notify location, a service client can be selected from a list of those saved, if any.
You can also set so that your current location is notified to saved service client ID
of a specified party by making a voice/videophone call.
・
Up to 5 items can be saved.
・
No LCS client can be saved, edited or deleted with UIM not inserted.
1
m
[LifeKit]
7521e
"<New LCS client>"
・
When checking a service client already saved, select the service client to
check and press
C
to edit.
・
When deleting a service client already saved, press
m
and select "Delete".
Similarly, a service client can be saved to phonebook, sent by infrared
communication or iC transmission or copied/backed up to microSD card
from a submenu.
2
Set the required items
eC
・
While "Quote phonebook" is selected from the submenu, a service client
name and phone number can be quoted from a phonebook.
Service client name :
Enter the service client name in up to 16 two-byte (32
one-byte) characters.
Service client ID :
Enter a number specified by a service provider you
subscribed to in up to 12 one-byte characters.
・
Numerals, "#" and " " can be entered.
Phone number :
Enter a phone number of the other party in up to 26 one-byte
characters.
・
Numerals, "P", "T", "+", "#" and " " can be entered. You can set Notify
when calling when a phone number is entered.
Notify when calling :
Set if you notify your location to a saved service client
ID when making a voice/videophone call to that client.
・
Set to "ON" to notify the location when making a call.
・
Set to "Confirm each calling" to display a confirmation screen asking if
you notify the location when making a call.
F906i.book Page 263 Monday, April 21, 2008 10:59 PM
264 GPS Function
F906i_E1kou
✔
INFORMATION
・
Information is not delivered to the other party under some wave conditions.
・
Even with Notify location set in LCS clients list, location cannot be notified in the cases
below.
- When a call is made without notifying caller ID
- When call is not connected because the other party is busy or out of service area
・
With 2in1 ON, location information is notified as Number A regardless of mode of
2in1.
Loc. history
Displaying histories of location information
checked
You can display histories of positioning performed by Position location, Location
request or Notify location function. Using location information in the log, you can
save location information in phonebook or create a message containing location
information URL.
・
Up to 50 location histories are saved. When exceeding the limit, items are
overwritten chronologically.
1
m
[LifeKit]
73
・
Icon definitions.
: Position location / (gray) : Location request/positioning failure
/ (gray) : Notify location/positioning failure
2
Select a history to display
Using Location information : Place the cursor on the history to use and
m1
The next procedure
→
P253 "
■
Use location info menu"
Deleting 1 item : Place the cursor on the history and
m21e
"Yes"
Deleting selected items :
m22e
Select the histories
eCe
"Yes"
Deleting all items :
m23e
Authenticate
e
"Yes"
❖
Reading Loc. history log details screen
: Positioning date/time and function
: Receiver name for Location request/Service client name for Notify location
: Service client ID for Notify location : Location information : Requester's
name of Location request
: Requestor ID for Location request
・
From a submenu, you can display the Use location menu to use location
information or delete histories. When phone number or mail address
information of the requestor ID is contained in Location request history, the
information can be saved to phonebook.
✔
INFORMATION
・
When positioning with Position location is stopped or fails, it is not saved in history.
And, location information is unavailable from histories of failing positioning with
Location request or Notify location.
・
When failed in positioning in Location request or Notify location, the location
information is not displayed.
・
Location information, if any, saved in histories of Location request or Notify location
is not sent to a service provider under some wave conditions.
・
When the requester ID of a Location request matches a phone entry, the requester
name saved in phonebook appears.
・
The location information recorded in the Loc. history differs from the location
information that was sent to the provide of the location or LCS client by wave
conditions etc.
Page/Total pages
Loc. history log details screen for Position location
F906i.book Page 264 Monday, April 21, 2008 10:59 PM
265
GPS Function
F906i_E1kou
Setting GPS
◆
Setting positioning mode
・
In "Standard mode", positioning is performed in a short period of time.
・
"Quality mode" takes time for positioning. As a result, it may provide higher
accuracy than "Standard mode".
<Example> Setting positioning mode for Position location
1
m
[LifeKit]
742
Setting positioning mode for Notify location :
m
[LifeKit]
7522
Setting positioning mode for Location request :
m
[LifeKit]
762
2
1
or
2
◆
Setting actions in positioning <Positioning alert>
<Example> Setting actions for Position location
1
m
[LifeKit]
743
Setting operation for Notify location :
m
[LifeKit]
7523
Setting operation for Loc. request-accept :
m
[LifeKit]
7651
Setting operation for Loc. request-verify :
m
[LifeKit]
7652
2
Set the required items
eC
Ring alert :
Set if you sound melody.
・
When "Melody" is set, select a melody.
Vibrate alert :
Set a vibrator operation pattern.
Ring time (sec) :
Set time in range of 0-30 seconds.
・
Set time in range of 0-20 seconds for Loc. request-verify.
Light alert :
Set a lighting or blinking pattern and color of the light.
・
"Sync melody" cannot be selected. "OFF" cannot be selected for the case
of Loc. request-accept or Loc. request-verify.
・
When setting "Light pattern 1" or "Light pattern 2", light color cannot be
selected.
✔
INFORMATION
・
When positioning is made again or retried with Position location due to wave
conditions etc. only lighting/blinking of the light occurs.
F906i.book Page 265 Monday, April 21, 2008 10:59 PM
F906i.book Page 266 Monday, April 21, 2008 10:59 PM
267
F906i_E1kou
1Seg
1Seg ...................................................................................................................................................................................... 268
Before using 1Seg ............................................................................................................................................................... 269
Channel setting .................................................................................................................................................................... 270
Watching 1Seg ............................................................................................................................................ Activate 1Seg 272
Using Program guide i-
α
ppli .............................................................................................................................................. 275
Reserving 1Seg watching/recording .................................................... Watching reservation/Recording reservation 275
Using data broadcasting .................................................................................................................... Data broadcasting 278
Using TVlink ......................................................................................................................................................................... 279
Managing TVlink ................................................................................................................................................................. 279
Watching 1Seg with Multi window ................................................................................................................................... 280
Recording 1Seg being watched .............................................................................................................. 1Seg recording 281
Making various settings related to 1Seg watching ................................................................................... User setting 282
Using remote controller with microphone F01 ................................................. Remote controller with microphone 283
Listening to music of 1Seg with audio device or car stereo ................................................................ FM transmitter 283
F906i.book Page 267 Monday, April 21, 2008 10:59 PM
268 1Seg
F906i_E1kou
1Seg
1Seg is a terrestrial digital TV broadcasting service that allows mobile devices to
receive broadcasted data along with images and sounds. In addition, you can use
i-mode to acquire detailed program information, participate in quiz programs,
enjoy TV shopping, etc.
・
For details of "1Seg" service, refer to the website below.
The Association for Promotion of Digital Broadcasting
PC : http://www.dpa.or.jp/
i-mode : http://www.dpa.or.jp/1seg/k/
◆
Using 1Seg
・
1Seg is a service provided by TV broadcasting enterprises (stations), etc.
・
This is a free broadcasting service on airwave requiring no subscription to
receive video, sound and data broadcasting of 1Seg.
・
There are 2 types of information displayed in the data broadcasting area : "Data
broadcasting" and "Data broadcasting site". "Data broadcasting" is displayed
using airwave along with images and sounds; while "Data broadcasting site" is
displayed by connecting to a site provided by TV broadcasting enterprises
(stations), etc., using information of data broadcasting. Sometimes, you may
connect to "i-mode site" etc. You need to subscribe to i-mode to connect to the
site.
・
For viewing "Data broadcasting site", "i-mode site", etc., you are charged packet
communication fees. Some sites require information fees (i-mode pay sites).
◆
Radio waves
1Seg is one of the broadcast services and a different type of radio waves
(airwaves) from that of FOMA service is received. Therefore, regardless of whether
you are in or out of FOMA service area, it cannot be received where airwaves do
not reach or during broadcasting interruptions.
Also, even in FOMA service area, reception condition may be poor or reception
may be unavailable in such places as below.
- A place far from the tower that the airwaves are sent from
- Mountain-ringed regions or a place between buildings where airwaves are interrupted by
geography or buildings
- Tunnel, underground or far back from a building where airwaves are weak or do not reach
To make the reception condition better, stretch out the 1Seg antenna. Also, by
changing the direction of the antenna, moving FOMA terminal closer to or further
from your body or changing the place, the reception condition may be improved.
◆
Screen appearing when using 1Seg for the first time
When using 1Seg for the first time after purchasing, a confirmation screen for 1Seg
activation appears.
If you press "OK" after confirming each item, the confirmation screen does not
appear subsequently.
→
P272
◆
Storage area
Storage area is an area dedicated to 1Seg only in the terminal. Based on the
settings made by TV broadcasting enterprises (stations), the storage area saves
information entered by customers according to instructions of data broadcasting.
Saved information may contain personal information such as answers to quizzes,
membership number, gender, age, occupation, etc.
Saved information, without reentry, may be displayed when viewing data
broadcasting sites or sent to TV broadcasting enterprises (stations).
Deleting storage area
→
P282
If UIM is replaced, a confirmation screen for initializing the storage area appears.
Select "Yes" and initialize the storage area. When "No" is selected, services using
the storage area are unavailable.
F906i.book Page 268 Monday, April 21, 2008 10:59 PM
269
1Seg
F906i_E1kou
■
Screen appearing when reading storage area
When using information saved in the storage area while watching a program, "Use
saved information? It may include information used by the same affiliate."
appears. Select "Yes" to display no confirmation screens subsequently when
reading saved information while watching the same program. Select "Yes
(Always)" to display no confirmation screens subsequently also for different
programs.
❖
Other convenient functions
- Displaying and using data broadcasting
→
P278
- Using Program guide i-
α
ppli
→
P275
- Watching reservation, recording reservation
→
P275
- Using TVlink
→
P279
- Recording video and still image
→
P281
- One-key channel selection with remote controller number
→
P273
- Activating 1Seg by rotating display
→
P365
- Multi window (creating a mail etc. while watching 1Seg)
→
P280
Before using 1Seg
■
1Seg watching procedure
<Example> When watching 1Seg for the first time
Channel setting
→
P270
Save the channel list corresponding to the area where you watch 1Seg.
Activating 1Seg
→
P272
Stretch out the 1Seg antenna and activate 1Seg.
■
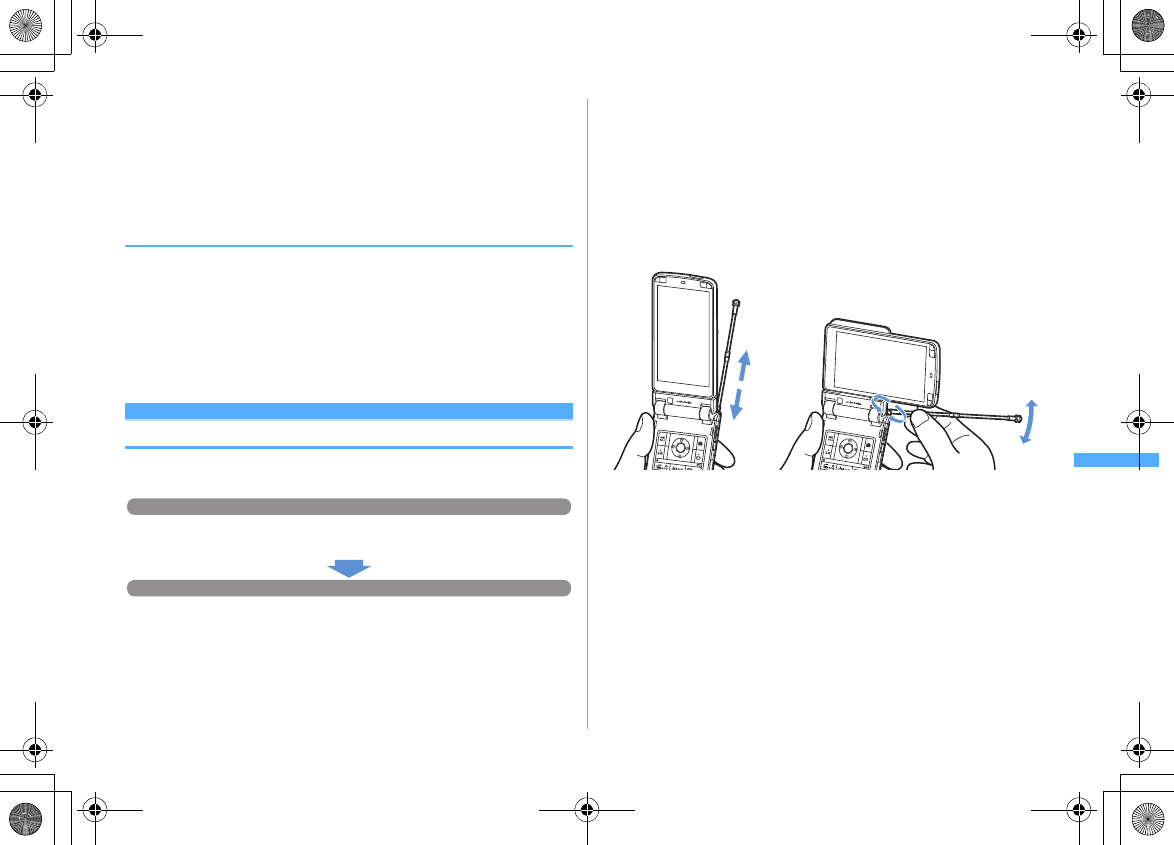
1Seg antenna
When watching 1Seg, the 1Seg antenna is used to receive 1Seg wave.
・
When changing the direction of the 1Seg antenna, do not give excessive force
to it.
・
When pulling out the 1Seg antenna, put your finger on the gut of the upper part
of 1Seg antenna and pull it.
・
When changing the direction of the 1Seg antenna, move it holding a part close
to the root of the 1Seg antenna.
・
When retracting 1Seg antenna, hold the root of the 1Seg antenna and retract
until it stops. Do not retract the 1Seg antenna with holding the head of it.
■
When there is an incoming call or alarm is activated while watching 1Seg
・
1Seg sound is interrupted in the cases below.
- i-mode mail with Display priority set to "Show message", SMS, MessageR/F reception (If
an image of movie/i-motion is played while receiving, 1Seg watching is interrupted)
- ToruCa downloaded from IC card reader
- Alarm (Alarm clock, schedule, Countdown timer) activated
・
If voice call, videophone call or PushTalk call is received, 1Seg watching is
interrupted.
・
For vertical display, the screen of the activated function appears and the sound
is emitted. End the function or press
T
to restart watching. For horizontal
display, 1Seg and activated function are displayed on two screens (
→
P280).
Ending the function returns to standard horizontal screen or horizontal full
screen of 1Seg watching.
Step 1
Step 2
F906i.book Page 269 Monday, April 21, 2008 10:59 PM
270 1Seg
F906i_E1kou
✔
INFORMATION
・
If UIM is not inserted, you unsubscribed to DoCoMo or made FOMA service inactive,
you cannot watch or record 1Seg.
・
If you repeat 1Seg watching and recording in communication disabled state, 1Seg
activation may be unavailable even with UIM inserted. In such a case, enable
communication e.g., by moving to FOMA service area, and retry 1Seg activation.
・
1Seg watching is interrupted when i-
α
ppli is activated. Every time you press
T
,
you can switch 1Seg watching and i-
α
ppli.
・
Note that DoCoMo assumes no responsibility whatsoever for any loss or modification
of saved contents resulting from malfunction, repair or other handling of FOMA
terminal.
When changing the model of or repairing FOMA terminal, information (TVlink,
information saved in the storage area, etc.) saved in the terminal cannot be
transferred; you are recommended to maintain a separate record of such information.
・
Watching 1Seg long time while charging may reduce the battery pack lifetime.
Channel setting
Broadcasting stations and channels that can be received vary by the area. To
watch 1Seg, you need to create a channel list that broadcasting stations and
channels are saved, and set it according to the area.
・
Savable number
→
P471
◆
Creating Channel list
Channel list should be created by either of the ways below.
Use preset
Broadcasting stations and channels that can be received are saved in advance by
area. Select from the area list and set.
Auto setting
Automatically search broadcasting stations and channels that can be received at
the place where you are and set. Perform by extending the 1Seg antenna in
terrestrial digital TV broadcasting service area.
・
The channels in the preset area cannot be watched in some places you watch.
In that case, make Auto setting. Other channels than the ones in the preset area
may be searched.
<Example> Set by "Use preset"
1
m
[1Seg]
7eC
・
When there is no Channel list, a confirmation screen for creating a list
appears.
2
"Use preset"
Creating by automatic search :
a
"Auto setting"
e
"Yes"
e
Select an area
Auto setting starts and, upon completion, a confirmation screen appears.
・
Select "No" to display an auto-scanning channel setting screen. At this
time, channel list is named after the date and time of setting.
・
A channel of the selected area is searched for by priority.
・
To interrupt the channel setting, press
g
and select "Yes".
b
"Yes"
Channel list is registered.
・
You do not need to perform Step 3.
3
Select an area
e
Select a prefecture
e
Select a local
municipality
e
"Yes"
Channel list containing broadcasting stations available in the selected area is
created.
・
In some cases, selection of a municipality is not required.
F906i.book Page 270 Monday, April 21, 2008 10:59 PM
271
1Seg
F906i_E1kou
✔
INFORMATION
・
Operation on the screen while watching or recording 1Seg :
m2
・
It takes approximately 60 seconds to search for channels in Auto setting. It may take
longer time depending on the number of broadcasting stations and airwave
conditions.
・
Auto setting performed near a noise source such as a PC or LCD TV may require a
time.
・
While Auto setting is set, system sound is not generated.
・
Auto setting is unavailable while recording.
◆
Setting/Operating Channel list
・
You cannot Set Channel list to use while recording.
1
m
[1Seg]
7
A list of Channel list appears.
・
appears before the channel list in use.
Displaying Channel list while watching 1Seg :
m2
on the 1Seg watching
screen.
2
Place the cursor on a channel list and
a
Channel list to use is set and TV station list appears.
・
If setting while watching 1Seg, 1Seg watching screen appears immediately.
✔
INFORMATION
・
When there is only one Channel list saved, it is automatically set as the one to be used.
❖
Operating Channel list
During Channel list display, the operations below are enabled.
Displaying TV station list : Place the cursor on a channel list and
g
・
You can watch by selecting the channel number.
Updating Channel list : Place the cursor on a channel list and
m4
Next procedure
→
P270 Step 2 in "Creating Channel list"
Deleting a channel list : Place the cursor on a channel list and
m51e
"Yes"
Deleting all channel lists :
m52e
Authenticate
e
"Yes"
Changing a channel list name : Place the cursor on a channel list and
m2e
Enter a channel list name (up to 10 two-byte (20 one-byte)
characters)
eC
Switching remote controller numbers : Select a channel list
e
Place the cursor on
a channel and
m1e
Select a channel to switch
Deleting a channel : Select a channel list
e
Place the cursor on a channel and
m2e
"Yes"
・
If only 1 channel is saved in a channel list, that channel cannot be deleted.
✔
INFORMATION
・
While watching or recording 1Seg, operations below are unavailable for a currently
active channel list.
- Deleting a channel list
- Updating a channel list
- Deleting a channel from a channel list
*
- Switching remote controller numbers
*
*
Operation is available if only recording 1Seg without watching.
F906i.book Page 271 Monday, April 21, 2008 10:59 PM
272 1Seg
F906i_E1kou
Activate 1Seg
Watching 1Seg
1
T
A confirmation screen for using 1Seg appears.
・
For the second and subsequent activation, the channel previously watched
is displayed.
・
When activating for the second time or after, if Channel list is not set, a
screen to perform channel setting appears. Press "OK" and create Channel
list
→
P270 Step 2 and the following steps in "Creating Channel list"
2
Check usage conditions
e
"OK"
A screen for confirming the storage area appears.
3
Check displayed contents
e
"OK"
1Seg watching starts.
・
If the channel list is not set, a screen for urging you to set the channel list
appears. Press "OK" and create Channel list
→
P270 Step 2 and the following
steps in "Creating Channel list"
✔
INFORMATION
・
You can also activate 1Seg watching in the ways below.
- Select a channel from TV station list screen of Channel list
- Select 1Seg watching information etc. displayed on Program guide i-
α
ppli, mail, MessageR/F, i-
Channel, site, Web site, etc. (Media To)
→
P169
- Watching reservation
→
P275
・
When using 1Seg watching for the first time, operate within FOMA service area.
・
A confirmation screen for 1Seg usage or storage area once appeared or a
confirmation screen for which "Yes (Always)" is selected during 1Seg operation does
not appear subsequently unless UIM is replaced or Reset permit status is done.
・
If you select "Yes (Always)" on a confirmation screen, subsequent updating of data
broadcasting or data broadcasting site information, etc. may be performed without
confirmation, requiring packet communication fees.
◆
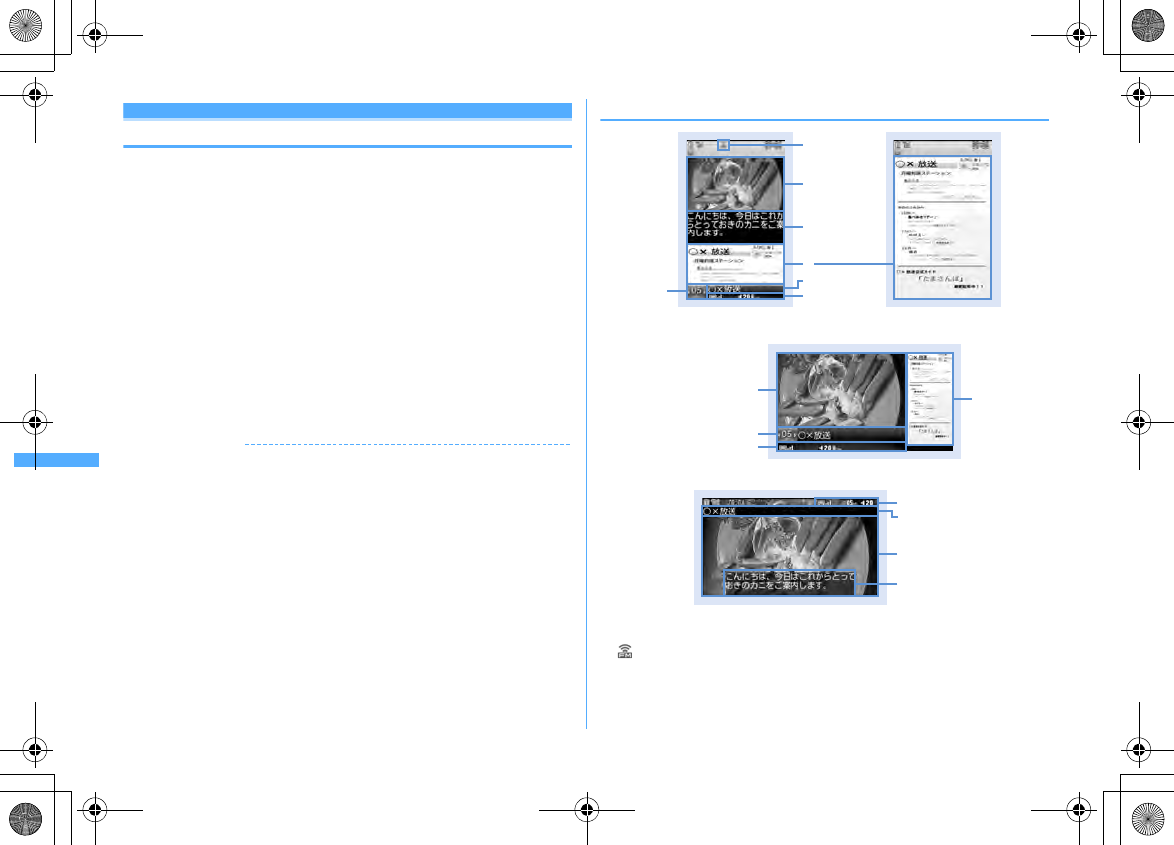
Reading and operating screen
a
FM transmission state
: During FM transmission
→
P283
b
Video
Data broadcasting full-screen1Seg watching screen (Standard screen)
i
b
c
d
ef
gh
a
jklm
nopq
1Seg watching screen (Horizontal standard screen)
d
efghi
jklmnopq
b
jknfem
i
c
b
1Seg watching screen (Horizontal full-screen)
F906i.book Page 272 Monday, April 21, 2008 10:59 PM
273
1Seg
F906i_E1kou
c
Subtitle
Appear when there is subtitle information in the program.
When displaying a subtitle on 1Seg watching screen (Horizontal standard
screen), the subtitle appears instead of
e
-
q
.
d
Data broadcasting
Display data broadcasting or data broadcasting site of the program.
e
Remote controller number
Indicate a remote controller number of the currently selected station.
While recording, appears next to the channel number indicating channel
selection is unavailable. is not displayed on horizontal display.
f
Broadcasting multiple programs
: Appear when multiple programs (service) are broadcasted on one channel.
You can switch and watch the program.
→
P274
g
Time shift play
: In time shift play : In time shift fast forward play
h
UP/DOWN selection
i
Broadcasting station name/program name
A broadcasting station name appears during channel selection and a program
name is displayed after selection.
When a program being watched is interrupted, "Unavailable channel" appears.
j
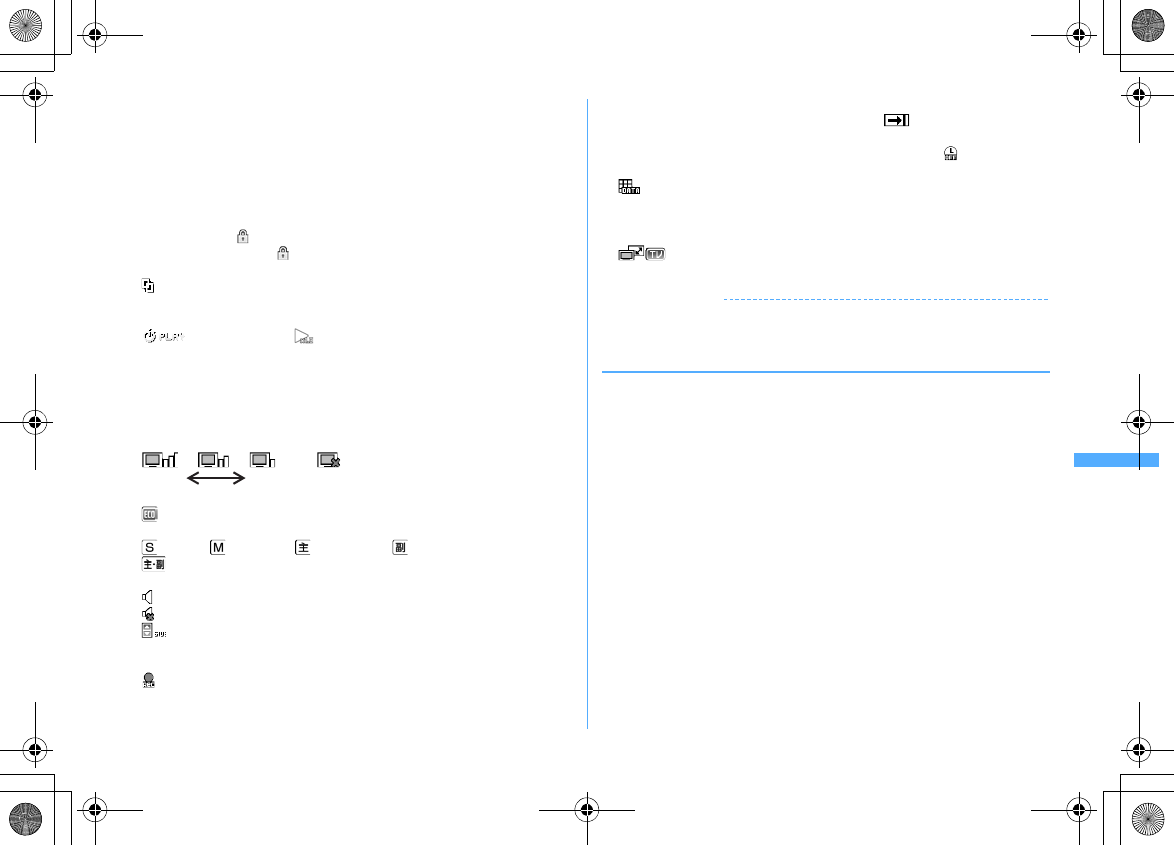
1Seg reception level
k
1Seg ECO mode
: Appear when 1Seg ECO mode is on.
l
Sound state
: Stereo : Monaural : Main sound : Sub sound
: Main sound+Sub sound
m
Volume
: Displayed when voice output is available.
: Appear when the sound is stopped regardless of the volume level.
: Indicate that side keys [
▲▼
] can be used to adjust the volume. It does
not appear on 1Seg watching screen (Horizontal full-screen).
n
Recording
: Appear while recording. If recording time is set, the remaining time is also
unavailable.
o
OFF timer
With OFF timer set, indicates remaining time or (until end time).
・
Remaining time is displayed if "End time" is set from Reserve program.
When the remaining time is more than 99 minutes, only appears.
p
Browser function state
: Appear when
1
-
9
,
*
,
0
,
#
can be used to select an item
in data broadcasting or data broadcasting site. At this time, one-key channel
selection is disabled.
q
Key guidance
: Indicate that, during concurrent execution of 1Seg watching and
another function,
T
can be used to switch the function.
✔
INFORMATION
・
When going outside broadcasting service area while selecting a channel, a black
screen is displayed for both video and data broadcasting.
❖
Operations enabled while watching TV
Side keys [
▲▼
] : Adjust volume
Side key [
▲
] (1 second or more) : Gradually raise the volume
Side key [
▼
] (1 second or more) : Silent
1
-
9
,
*
,
0
,
#
: One-key channel selection from TV station list
*1
I
(Vertical screen) : Switch standard screen/data broadcasting full-screen
I
(Horizontal screen) : Switch horizontal standard screen/horizontal full-screen
(with no icons)/horizontal full-screen (with icons)
C
: Activate Program guide i-
α
ppli
f
: End 1Seg watching
・
On an exit confirmation screen, select "Yes" to end.
Except for data broadcasting full-screen
h
: Select previous or next channel on TV station list
h
(1 second or more) : Search for previous or next frequency available
*2
a
: Switch display/hide of the subtitle
P
(1 second or more),
T
(1 second or more) : Start/Stop video recording
→
P281
P
: Save still image
→
P282
Data broadcasting full-screen
h
: Move to previous or next page
*3
Strong
: Outside broadcasting service area
Weak
F906i.book Page 273 Monday, April 21, 2008 10:59 PM
274 1Seg
F906i_E1kou
With data broadcasting display area
j
: Scroll data broadcasting
j
(1 second or more) : Fast scroll of data broadcasting
M
,
c
: Return to the top page
*4
Without data broadcasting display area
j
: Adjust volume
u
(1 second or more) : Gradually raise the volume
d
(1 second or more) : Silent
*1 *
for 10ch,
0
for 11ch,
#
for 12ch, 13ch and up can be selected from TV
station list.
*2
Making channel search, after moving etc., may allow you to receive wave from a
broadcasting station not saved. When reception is unavailable, the currently watching
channel reappears. The broadcasting station succeeded in wave reception can be saved to a
channel. Note that the channels may not be searched in the order of the remote controller
number because channel search is made in the order of frequency.
*3
Available when previous and next pages are stored in the cache.
*4
By the displayed contents, an operation such as returning to the previous page may be
performed.
・
Press
m01
to display Key function help.
Checking TV station list :
m1
・
You can switch to a channel by selecting it from TV station list.
Saving currently watching channel to Channel list :
m3e
Place the cursor on
the channel and
g
・
When a channel already saved is selected, a confirmation screen for overwriting
appears.
・
Up to 62 channels can be saved.
Setting/Canceling OFF timer :
m5e1
-
5
Checking program information :
m72
・
You can check Program info (start time - end time, program name), Program
description, TV station, Sound/Subtitle info (1st sound, 1st sound/2nd sound, No
sound, 1st language, 1st language/2nd language, No subtitle). Note that
information not set or read may not be displayed.
Creating mail :
m73
Display a mail creation screen with information for 1Seg watching about the
currently viewing program entered to message text.
Switching service :
m95e1
-
3
・
This is enabled when another program (service) is broadcasted in the same
channel.
Switching ON/OFF of 1Seg ECO mode :
m96
When setting 1Seg ECO mode to ON, brightness of the light is reduced a little to
reduce the power consumption by 1Seg watching.
・
In well-lighted area, power saving effect may not be enough.
❖
Time shift function
When there is an incoming voice, videophone or PushTalk call while viewing, you
can play the movie received during the call approximately 3 minutes.
Upon completion of the call, a confirmation screen for replaying the movie
received during the call appears.
Replay of the program continues even after the part received during the call ends.
・
Time shift function starts automatically.
・
Unavailable during Fake call.
・
Data broadcasting is not available.
・
For a long call duration, first images may be overwritten.
・
Time shift function does not operate when a call is received while selecting a
channel.
・
Operations during time shift operation are as shown below.
r
: Fast forward play
C
: Ordinary play (in fast forward play)
・
During fast forward play, voice may not be heard clearly.
・
To return to ordinary watching from time shift playing, press
c
and select
"Yes".
✔
INFORMATION
・
With Close setting set to "Continue", folding FOMA terminal during 1Seg watching
does not stop the sound.
・
Since airwave conditions are affected by geographic features etc., some channels
may be unavailable in certain locations. By updating Channel list and/or performing
Auto setting, you may receive other channels.
→
P270
・
By the conditions of the airwave, the events below may occur.
- Sound interruption
- Data broadcasting inoperative
- Video contains block noise or stops.
・
When activating 1Seg watching or a channel is switched, it takes a time before
watching is enabled.
F906i.book Page 274 Monday, April 21, 2008 10:59 PM
275
1Seg
F906i_E1kou
・
Sounds can be emitted from audio devices etc.
→
P283
・
When 1Seg ECO mode is ON, Light setting is disabled.
・
When OFF timer end time comes, a confirmation screen for ending the watching
appears. When 30 seconds elapse without doing any operations, 1Seg watching
stops.
・
If Activate 1Seg is started from information for 1Seg watching or Program guide
displayed on watching reservation, site or mail, which specifies an end date/time, OFF
timer is automatically set. After that, OFF timer can be reset while watching 1Seg.
・
When another channel is selected with OFF timer set to "Complete program", the end
date/time set in OFF timer changes to the end date/time of the program broadcasted
on the channel selected. Note that, the end date/time does not change unless there is
information.
・
The receiver of the mail containing information for 1Seg Watching, if applicable to
Media To function, can use the entered program information to watch the program.
・
If mail is created from a 1Seg watching screen, video display stops on vertical display.
On horizontal display, Multi window starts.
→
P280
・
During 1Seg watching, system sound is not emitted.
Using Program guide i-
α
ppli
You can use Program guide i-
α
ppli for selecting a program to start 1Seg watching
or watching reservation or recording reservation.
・
"G
ガイド番組表リモコン
(G-GUIDE TV Remote Controller)" is saved as Program
guide i-
α
ppli by default.
→
P232
1
m
[1Seg]
2
Program guide available in the area you live are displayed.
・
When operating from a 1Seg watching screen, press
C
.
・
Press
m
to watch a program being broadcasted from the selected
channel.
・
To exit Program guide i-
α
ppli, use the procedure specified for each i-
α
ppli.
・
For details, refer to "Mobile Phone User's Guide [i-mode] FOMA version".
✔
INFORMATION
・
When using Program guide i-
α
ppli for the first time, you must make initial settings.
・
You can use "Program guide key setting" in Software settings of i-
α
ppli to set up
Program guide i-
α
ppli. When Program guide i-
α
ppli is downloaded and Program
guide key setting are made, the downloaded Program guide i-
α
ppli is activated.
→
P227
Watching reservation/Recording reservation
Reserving 1Seg watching/recording
Watching reservation allows you to automatically activate 1Seg watching at the
reserved date and time or notify the program start with an alarm. Recording
reservation automatically starts recording at the reserved date and time.
・
Up to 100 watching and/or recording reservations can be saved in total, but the
savable number varies by the number of saved items in Scheduler.
→
P471
・
You can also use channel information shown in Program guide i-
α
ppli, site or
mail to save reservations. In that case, a reservation saving screen already
including a start date/time, end date/time, channel and program name may
appear.
◆
Saving watching reservation
1
m
[1Seg]
4eCe
Set the required items
Set Start time, End time, Channel, Program or Use as alarm.
・
End time or Program can be saved without setting.
・
Up to 100 two-byte (200 one-byte) characters can be entered for program
name.
・
When setting Use as alarm to "Yes", 1Seg is activated after activation
notification without displaying confirmation screen.
・
When setting watching time to 24 hours or more, is displayed in the
upper-right corner of the set date on the calendar screen of Scheduler. And,
is displayed below the individual watching reservation icons on the
schedule list of the calendar screen, the day view screen or booking list of
Booking list (Long-term schedule).
2
h
to switch to Notify start time screen
e
Set the required items
Set Notify start, Notify in advance, Alarm setting or Sync TV start.
・
When setting Notify start to "No", notification or activating 1Seg is not
performed even when Start time comes. Note that it is displayed in
Scheduler and Booking list.
・
Notify in advance sets the time to display Notify start.
・
When setting Alarm setting to "Yes", Notify start appears for one minute
and an alarm sound is emitted.
F906i.book Page 275 Monday, April 21, 2008 10:59 PM
276 1Seg
F906i_E1kou
・
Alarm sound can be selected. When "Melody" is selected, select an alarm
sound; when "Phone setting" is selected, Schedule reminder of Ring alerts
& Sounds is used.
・
Sync TV start sets whether 1Seg watching starts or not after activation
notification. When setting Use as alarm to "No", a confirmation screen
appears after activation notification.
3
h
to switch to Other settings screen
e
Set the required items
Repeat :
Set repetition of operation of watching reservation. When "Day of
week" is selected, select "Day/Week" and select a day of the week.
・
If Repeat is set, is displayed in the upper-right corner of the set date on
the calendar screen of Scheduler. And, is displayed below the individual
watching reservation icons on the schedule list of the calendar screen, the
day view screen or booking list of Booking list (Repeat schedule).
4
Ce
"Yes"
・
When watching reservation is set, appears on the stand-by display.
◆
Saving recording reservation
1
m
[1Seg]
4eae
Set the required items
Set Start time, End time, Channel or Program.
・
Program can be saved without setting.
・
Up to 100 two-byte (200 one-byte) characters can be entered for program
name.
・
When setting recording time to 24 hours or more, is displayed in the
upper-right corner of the set date on the calendar screen of Scheduler. And,
is displayed below the individual recording reservation icons on the
schedule list of the calendar screen, the day view screen or booking list of
Booking list (Long-term schedule).
2
h
to switch to Other settings screen
e
Set the required items
Set Repeat, Priority or Record to:.
・
When "Day of week" is selected by Repeat, select a day of the week by "Day/
Week".
・
If Repeat is set, is displayed in the upper-right corner of the set date on
the calendar screen of Scheduler. And, is displayed below the individual
recording reservation icons on the schedule list of the calendar screen, the
day view screen or booking list of Booking list (Repeat schedule).
・
By Priority, set whether to start recording automatically while using the
function that cannot be used at the same time with recording, and set
whether to display the confirmation screen for recording.
・
By Record to:, select the saving destination for the recorded movie from
FOMA terminal or microSD card.
3
Ce
"Yes"
・
When setting recording reservation, appears on the stand-by display.
・
If you make a recording reservation in default state, a confirmation screen
for the radio wave conditions at recording start and recording appears. If
you select "Yes (Confirm once)", a confirmation screen for recording
instead of radio wave conditions and recording appears from the next
recording reservation.
✔
INFORMATION
・
Watching reservation and recording reservation are also saved to a schedule of
Scheduler. Note that Scheduler cannot be used to view, edit or delete details of
reservation.
・
With Alarm setting set to "Yes", the alarm sounds for one minute after displaying
activation notification. 1Seg watching is not activated while the alarm sounds. If you
want to activate 1Seg watching exactly on the start time, set Notify in advance to "1
min before".
・
When Channel list is not set, no reservations can be made.
・
You cannot set the start date and time of recording reservation between the current
time and 2 minutes later.
・
Even if Priority is set to "Operation", when recording not during 1Seg watching, the
confirmation screen does not appear even if the date and time for recording
reservation come and it starts automatically.
F906i.book Page 276 Monday, April 21, 2008 10:59 PM
277
1Seg
F906i_E1kou
◆
When the reserved date and time come
❖
When the time set in watching reservation comes
The saved reserved contents appear on the display.
・
With Alarm setting set to "Yes", the volume, vibrator and light operations are the
same as those for schedule reminder.
・
Pressing
f
while the alarm is sounding stops the alarm and returns to the
previous screen.
・
When pressing
f
or any key except side key [
▼
] while the alarm sounds,
you can display activation confirmation screen or activate 1Seg watching.
・
When the time set in watching reservation comes while recording, a
confirmation screen for watching appears. If a channel to watch is different from
the one being recorded, confirmation screens for ending recording and starting
watching appear.
✔
INFORMATION
・
Display operations for the reserved contents are the same as those for the schedule
reminder.
・
When multiple watching reservation items or schedules are saved, the alarm of the
watching reservation or schedule saved the last becomes effective. 1Seg watching
may not be activated according to Sync TV start depending on the order of saving.
The Schedules or watching reservation not activated can be confirmed by pressing
h
after the alarm sound is stopped.
・
When the specified date and time come during a call or PushTalk session, a warning
sound instead of alarm sound is emitted and the activation notification screen
appears. At this time, even if Use as alarm or Sync TV start is "Yes", 1Seg watching is
not automatically activated. Pressing
g
on the activation notification screen can
display the activation confirmation screen or activate 1Seg watching. Note that 1Seg
watching cannot be activated unless a call or PushTalk session is finished.
・
During a fake call, when the specified time that Use as alarm is set to "Yes" and Alarm
setting is set to "No" comes, the activation notification screen appears with no sound.
・
When pressing
s
while the alarm sound is emitted or there is an incoming voice
call, 1Seg watching is not activated automatically. Pressing
g
can display the
activation confirmation screen or activate 1Seg watching.
❖
When the time set in recording reservation comes
Recording automatically starts and appears.
・
Recording reservation starts 1 minute before the start date and time to prepare
for recording. blinks.
・
To cancel recording, activate 1Seg watching and perform operations to cancel
recording.
Activating 1Seg watching
→
P272
Canceling recording
→
P281 Step 2 in "Recording video"
✔
INFORMATION
・
Preparations for recording are made under poor condition of airwave reception, and
recording is started when the wave reception condition becomes better.
・
When reserving times are overlapped, a reservation with earlier start time is
interrupted by the one with later start time. Note that, if the start times are the same,
the later reservation is given priority.
・
When making recording reservation without displaying the confirmation screen for
using 1Seg, recording is not performed even when the specified time comes.
→
P272
・
In case the saving destination is microSD card, recording may not be performed while
functions such as PDF data browsing with a heavy workload on FOMA terminal or
other functions using microSD card are operating.
・
When reserved recording starts during the operations of the functions below,
according to Priority (
→
P276), either the operation is interrupted and the recording is
started or a confirmation screen for interruption of operation and start of recording
appears. For the function that the operation is interrupted, the data currently edited
may be discarded.
- Camera, Sound recorder, Bar code reader
- Play of Music player, Download of music data
-Some i-
α
ppli (A confirmation screen appears regardless of Priority).
◆
When reserved recording ends
When reserved recording ends, an icon indicating the result of reserved recording
appears on stand-by display. You can select the icon to check Recording result.
・
Recording result icons are shown below.
: Completed recording reservation : Failed in recording reservation
・
When performing multiple reserved recordings, the icon of the last recording
result appears.
・
The saving destination, file name and conditions of programs that cannot be
recorded are the same as those for recording while watching.
→
P281
・
Recorded video can be played from completed Recording result.
F906i.book Page 277 Monday, April 21, 2008 10:59 PM
278 1Seg
F906i_E1kou
◆
Checking/Operating reservation
1
m
[1Seg]
4
The booking list appears.
Displaying reservation details screen : Select the reservation
Editing reservation : Place the cursor on the reservation and
m3e
Edit
the reservation
eCe
"Yes"
・
To edit from reservation details screen, press
C
.
Deleting reservation :
m4e1
-
3e
"Yes"
・
To delete 1 item, operate by placing the cursor on the reservation.
・
When "All past items" is selected, all reservations for the past date and time
are deleted.
・
When "All items" is selected, perform authentication.
・
To delete 1 item from reservation details screen, press
m4
.
Sorting reservation :
m5e1
or
2
・
"Air date(new
→
old)" sorts from the earlier reservation to later, and "Air
date(old
→
new)" sorts from the later reservation to earlier.
✔
INFORMATION
・
Reservations with the start date/time already passed appear after those not passed,
unless sorted.
◆
Checking result of reserved recording <Recording
result>
・
Up to 50 items can be saved. When exceeding the limit, items are overwritten
chronologically.
1
m
[1Seg]
5
Recording result list appears.
・
The list shows recording result icon, program name, broadcasting station
name and recording start date and time.
・
Recording result icons are given below.
: Completed recording reservation : Failed in recording reservation
2
Place the cursor on a history and
C
Details of Recording result appear.
・
Recording result, reason of failure (only for failure), broadcasting station
name, program name, recording start time and recording destination can
be checked.
Playing recorded program : Place the cursor on the completed history and
g
・
Playing is unavailable when recorded program is moved or deleted.
Deleting 1 history : Place the cursor on the history and
m1e
"Yes"
Deleting all histories :
m2e
Authenticate
e
"Yes"
✔
INFORMATION
・
Recording reservations canceled because they were duplicated with other
reservations or because FOMA terminal was not turned ON at the start time are not
recorded in Recording result.
Data broadcasting
Using data broadcasting
1Seg allows you to use data broadcasting as well as video and sound. Various
information containing still images and/or videos, such as a site linked with a
program, can be used.
1
On 1Seg watching screen (standard screen) or data broadcasting
full-screen,
je
Select the required items
Data broadcasting is shifted to data broadcasting site display.
Data broadcasting and data broadcasting site
→
P268"Before Using 1Seg"
Operations while displaying the screen
→
P273
・
Each time you press
I
, standard screen and data broadcasting full-
screen are switched.
・
Also during data broadcasting, 1Seg sound is emitted.
・
For some selected items, confirmation screen for connecting to site or
website, starting downloading , activating other functions, etc. appears.
Select "Yes" to use the function. If you select "Yes (Always)", the
confirmation screen does not appear for using the same function from the
next time, and the information of data broadcasting/data broadcasting site
may be updated automatically. Note that, packet communication fee may
be charged at this time.
・
You can make data broadcasting operations from a submenu.
m81
: Return to previous page
m82
: Go to next page
F906i.book Page 278 Monday, April 21, 2008 10:59 PM
279
1Seg
F906i_E1kou
m83
: Read the current page again
m84
: Display details of certificate
→
P172
m85
: Set images and sound effects for data broadcasting site
→
P172
m87
: Return from a data broadcasting site to data broadcasting
✔
INFORMATION
・
When empty space in the storage area is not enough, a confirmation screen for
overwriting appears. When overwriting, follow the instruction on the screen.
・
You can set the image for the data broadcasting site, a data broadcasting site or the
sound effect for the data broadcasting also by pressing
m
[1Seg]
832
on
the stand-by display.
・
With Close setting for data broadcasting and data broadcasting site set to "Continue"
or "Mute", information may be updated even when FOMA terminal is folded,
requiring packet communication fees.
TVlink
Using TVlink
For some data broadcasting and/or data broadcasting site, site and memo
information can be saved in TVlink. The site or memo information saved in TVlink
can be directly displayed.
・
Saved contents can only be used by operating from 1Seg. They cannot be used
from i-mode or Full Browser.
◆
Saving in TVlink
When selecting a savable item in TVlink, a confirmation screen for saving it in
TVlink appears.
・
Savable number
→
P471
1
Select a savable item in TVlink
e
"Yes"
e
Select a folder
・
When trying to save the same URL or memo information, a confirmation
screen for overwriting appears.
✔
INFORMATION
・
When empty space in the storage area is not enough or exceeding the savable
number, a confirmation screen for overwriting appears. When saving, follow the
instructions on the screen to overwrite TVlink.
◆
Displaying saved TVlink
1
m
[1Seg]
6e
Select a folder
e
Select a TVlink
・
Icon definitions :
: Folder : Empty folder : Link to data broadcasting site
: Link to site or website using i-mode or Full Browser : Text
information
・
When selecting memo information, a memo screen appears.
・
TVlink list can be displayed also in the ways below.
- Press
m86
on 1Seg watching screen
- Press
m2
when data broadcasting site is displayed from TVlink list
- From data broadcasting or data broadcasting site, select a link to display TVlink list
2
"Yes"
Displaying details screen :
C
✔
INFORMATION
・
For some data broadcasting or data broadcasting site, a confirmation screen for
automatically displaying TVlink list appears when displaying a site.
Managing TVlink
You can move or delete TVlink or arrange them using folders.
・
Up to 20 folders can be created.
1
m
[1Seg]
6
Deleting a TVlink : Select a folder
e
Place the cursor on a TVlink and
m21e
"Yes"
Deleting selected TVlinks : Select a folder
em22e
Select a
TVlink
eCe
"Yes"
Deleting all TVlinks in a folder : Select a
folder
em23e
Authenticate
e
"Yes"
Deleting all TVlinks :
m4e
Authenticate
e
"Yes"
Moving a TVlink : Select a folder
e
Place the cursor on a TVlink and
m31e
Select a folder to move to
Moving selected TVlinks : Select a folder
em32e
Select
TVlinks
eCe
Select a folder to move to
F906i.book Page 279 Monday, April 21, 2008 10:59 PM
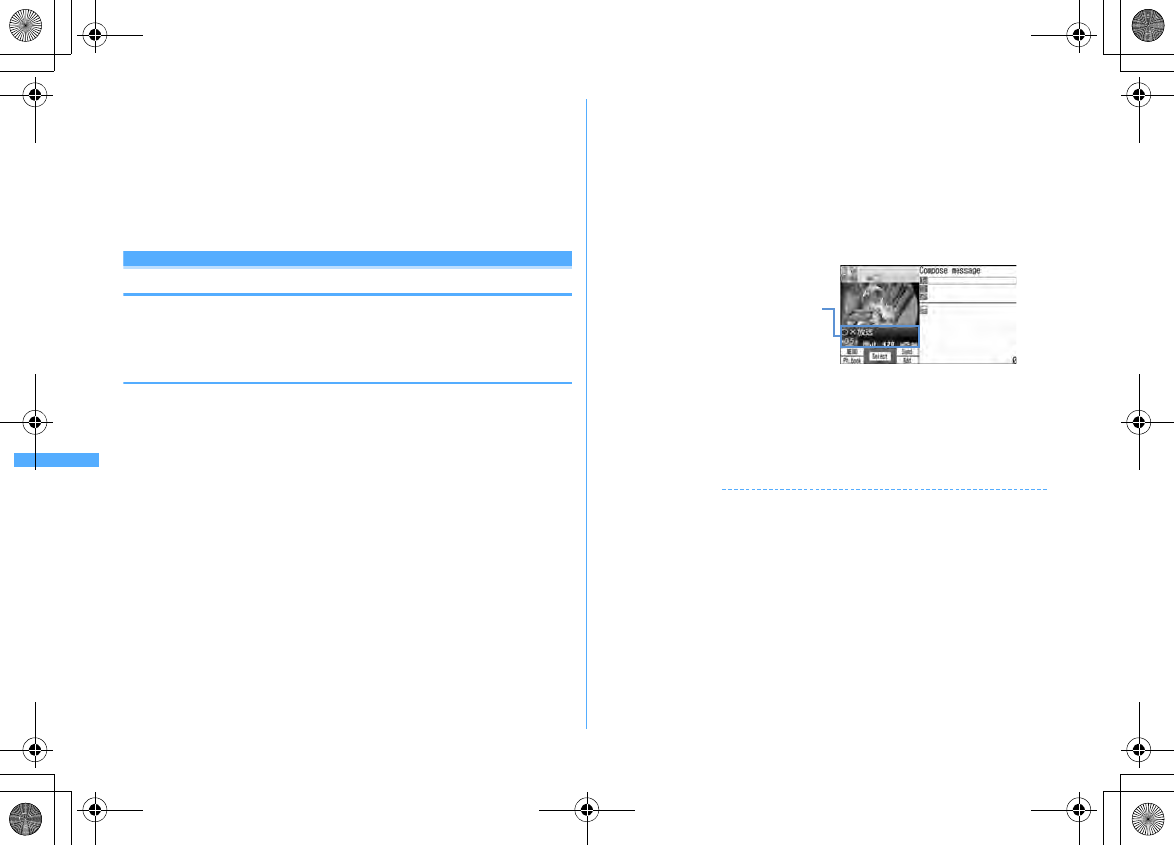
280 1Seg
F906i_E1kou
Creating a folder :
m1e
Enter a folder name (up to 8 two-byte (16 one-
byte) characters)
eC
Deleting a folder : Place the cursor on the folder and
m2e
Authenticate
e
"Yes"
・
When there is only 1 folder, it cannot be deleted.
Changing a folder name :
m3e
Enter a folder name (up to 8 two-byte
(16 one-byte) characters)
eC
Sorting folders : Place the cursor on a folder
me5
or
6
Watching 1Seg with Multi window
On the screen split to left and right, you can perform another function while
watching 1Seg.
・
It is available only on the horizontal display.
❖
Using another function while watching 1Seg
Multi Window appears when Activate 1Seg and one of the functions below are
used at the same time.
- Voice call
*1
, videophone call
*1
, PushTalk
*1
, Fake call
- Mail display
*2, 3
, mail creation, Chat mail, Check new message
- i-mode, Full Browser, i-Channel
-i-
α
ppli list, Display light of i-
α
ppli, Vibrate effect, Power saving
- Phonebook, PushTalk phonebook, Received calls, Redial, Answer machine, Voice memos,
Mail logs, User information
- Displaying of image list, list/detail information of movie/i-motion
*4
, list/detail information of
My Document, files of Word, Excel or PowerPoint
- Infrared communication/iC transmission, packet communication with a PC, microSD card
*5,
6
, Data Center
*5
, GPS
*7
, Pedometer, IC card content
- Scheduler, Notepad, Alarm clock, Calculator, Dictionaries, Countdown timer
- Call alert volume, mail/message alert volume, i-
α
ppli alert volume, pointing device setting
-Alarm
*8
of schedule, Alarm clock or Countdown timer
*1
1Seg watching is interrupted.
*2
Melody attached to mail and the sound effect of Flash graphics in Deco-mail or Decome-
Anime cannot be played.
*3
Detail display is not available for mail or SMS received from parties not saved in
Phonebook.
*4
Detail info from playing and playing screen of movie/i-motion cannot be displayed on the
Multi window.
*5
When saving mails in microSD card or those stored in Data Center with Data Security
Service to FOMA terminal, Multi Window is not available.
*6
Mail in microSD card cannot be displayed on Multi window.
*7
If you start positioning or communication by GPS, Multi window ends.
*8
Switched to Multi window only when Alarm is activated while watching 1Seg. When
Alarm sound is i-motion, "Pausing 1Seg..." appears on the 1Seg screen.
1
While watching 1Seg,
se
Select a function
・
To switch Multi window and 1Seg watching screen, press
T
. Note that,
when using 1Seg watching, Full Browser, Word, Excel or PowerPoint file at
the same time, the screen is switched in the order of Multi window
→
the
screen of the function used at the same time
→
1Seg watching screen each
time you press
T
.
✔
INFORMATION
・
While executing a function available on Multi window during 1Seg watching on
vertical display, turning the display activates Multi window. Note that, when setting
Turn-display option to "1Seg : at any mode", the 1Seg watching screen is displayed.
・
Even when Multi window is activated by selecting another function, no 1Seg image
may appear or 1Seg sound may remain sounding during display of other functions.
Creating mail during 1Seg watching
When used concurrently with i-mode
or Full Browser, data broadcasting is
displayed along with remote
controller number etc.
F906i.book Page 280 Monday, April 21, 2008 10:59 PM
281
1Seg
F906i_E1kou
❖
Receiving a voice call/videophone call/PushTalk call while
watching 1Seg
・
Displayed on Multi window, but 1Seg watching is not available.
<Example> When a voice call comes in
1
A voice call comes in
The ring alert sounds and switched to Multi windows screen. "Pausing
1Seg..." appears on the 1Seg screen and the image and sound of 1Seg is
interrupted.
2
n
Talking is enabled.
・
By default, you can talk also by rotating the display from horizontal to
vertical.
→
P365
・
When talking ends, you can watch a program received while talking.
→
P274
❖
Receiving mail, MessageR/F or SMS during 1Seg watching
・
With Display priority set to "Show message", the screen is automatically
switched to Multi window. When display of the reception result screen ends,
Multi window is closed and 1Seg watching screen reappears.
1Seg recording
Recording 1Seg being watched
You can record movies, sounds and data broadcasting (video recording) or save
movies being broadcasted as still images (still image recording).
・
Video is saved to "Video(Phone memory)" or "Video(microSD)" folder in "1Seg"
of Data Box according to the save destination setting, and still images are saved
to "Image(Phone memory)" folder.
・
The program name is assigned as a display name of video, and the saved date
and time are assigned as display names of still images.
・
Saved date and time are automatically set as the file name.
・
Programs whose recording is inhibited are not applicable to video/still image
recording. When airwave reception condition is not good, recording may be
unavailable.
・
Recorded data cannot be sent via mail attachment or infrared communication/
iC transmission. They cannot be set to the stand-by display etc.
・
Viewing recorded video or still images
→
P331
・
Savable number
→
P308, 471
・
Recordable time
→
P469
◆
Recording video
・
Recording is unavailable on data broadcasting full-screen.
1
On the 1Seg watching screen,
T
(1 sec. or more) or
P
(1 sec. or
more)
1Seg recording starts.
・
Even while recording, the same operations as those during ordinary 1Seg
watching can be performed except some functions.
→
P272
・
While recording, channel switching, Auto setting, using OFF timer and
service switching are unavailable.
2
T
(1 sec. or more) or
P
(1 sec. or more)
Recording stops and watching continues.
・
The saving destination and recording end time when not performing
ending operation depend on Record setting.
→
P283
Stopping only watching and continuing recording :
fe
"End reception"
Watching stops and recording continues. appears on the stand-by display.
・
To stop recording before specified recording end time, perform Activate
1Seg and operations for ending recording.
Stopping recording and watching :
fe
"Yes"
✔
INFORMATION
・
When the memory space is not enough or exceeding the savable number, you cannot
record.
・
Recording stops when storage area is exhausted while recording.
・
Recording at a time ends when the recorded data reaches 2 Gbytes. In terms of time,
it is approximately 11 hours. Recording time may be increased/decreased by the
broadcasted contents etc.
・
In case the saving destination is microSD card, recording may not be performed while
functions such as PDF data browsing with a heavy workload on FOMA terminal or
other functions using microSD card are operating.
・
In the cases below, movie and sound stops, but recording continues. After the related
functions end, 1Seg watching restarts.
- When a voice call, videophone call, PushTalk or 64K data communication is received
- When a voice call, videophone call or PushTalk call is made
F906i.book Page 281 Monday, April 21, 2008 10:59 PM
282 1Seg
F906i_E1kou
- When the date and time specified in Alarm clock or schedule
*1
come
- When mail, MessageR/F is received (with Display priority of mail set to "Show message")
- When a melody is played
- When i-motion is played/displayed
-When i-
α
ppli is activated from data broadcasting
*2
*1
For watching reservation schedule, if you select "Yes" on a confirmation screen for stop of
recording and activation of watching, recording is stopped if the channel is different from the
one being recorded. If the reserved channel is same as the one being recorded, recording
continues.
*2
A confirmation screen for watching and continuation of recording appears.
・
In the cases below, movie and sound are interrupted and recording stops. After the
related functions end, you can restart 1Seg watching.
-When i-
α
ppli that cannot be used concurrently with recording is started (A confirmation screen for
watching and continuation of recording appears)
・
When selecting a link to 1Seg watching information displayed on a site or mail while
recording, select "Yes" on a confirmation screen to stop recording and start watching
the channel specified in the information for 1Seg watching. If the channel specified by
the information for 1Seg watching is the same as the one being recorded, recording
continues.
・
When the time for recording reservation comes while recording, recording
reservation starts. When the channel currently recording and the channel for
recording reservation are different, a confirmation screens for changing the channel
and starting recording reservation appears if Record setting of recording reservation
is "Operation".
・
When recording data broadcasting for later viewing, record it at least 1 minute or
more under good wave reception conditions. If the recording time is too short, data
broadcasting may not be displayed.
・
If FOMA terminal goes outside broadcasting service area immediately after starting
recording and the recording is stopped without receiving the airwave, the recorded
data may not be saved.
・
For some programs, movie and/or sound may be recorded from a point a little before
recording operation is done.
・
While performing a function that cannot be activated at the same time as recording,
a confirmation screen for interruption of operation and start of recording appears.
◆
Recording still image
・
Recording is unavailable during video recording or on a data broadcasting full-
screen.
1
On 1Seg watching screen,
P
When exceeding the savable number/area
→
P322
✔
INFORMATION
・
When there is an incoming videophone or PushTalk call immediately after pressing
P
, still images may not be recorded.
・
Subtitles or data broadcasting are not saved.
User setting
Making various settings related to 1Seg
watching
◆
Setting screen or sound
1
m
[1Seg]
8
2
Set the required items
Setting screen :
1e
Set the required items
eC
Set Light setting, Display subtitle, Subtitle size, Subtitle language and
Incoming msg ticker.
・
If setting Display subtitle to "In silent mode", subtitle appears when "No"
is selected from a sound play confirmation screen appearing when
watching 1Seg in Silent mode.
・
For horizontal standard screen, the subtitle size remains unchanged.
・
By Incoming msg ticker , set if you display ticker according to Message
display setting of Receive display option or not display.
・
While watching 1Seg, setting can be made by
m91
Setting sound :
2e
Set the required items
eC
Set Switch sound and Main <> sub sound.
・
While watching 1Seg, setting can be made by
m92
✔
INFORMATION
・
Display light is not applied while 1Seg ECO mode is ON.
◆
Setting Data broadcasting <Data broadcasting>
・
If you reset permit status, a confirmation screen starts to be displayed when
displaying a site from data broadcasting.
1
m
[1Seg]
83
F906i.book Page 282 Monday, April 21, 2008 10:59 PM
283
1Seg
F906i_E1kou
2
Perform necessary operation
Setting connection timeout :
1e1
-
3
You can set a maximum waiting time for connection from data broadcasting
to a site.
・
These settings are reflected to i-mode Connection timeout.
Deleting information in the storage area :
3e
Place the cursor on affiliate
broadcasting station or individual enterprise and
me1
or
2e
"Yes"
・
When there are storage areas of individual enterprises, select an affiliate
broadcasting station.
・
When "Delete all items" is selected, perform authentication.
Resetting permit status :
4e
Authenticate
e
"Yes"
・
Set to display confirmation screens again for 1Seg watching, reserved
recording, etc.
◆
Setting actions when FOMA terminal is closed <Close
setting>
1
m
[1Seg]
84e1
-
3
・
When "Continue" is selected, 1Seg watching or recording continues.
・
When "Mute" is selected, 1Seg watching continues with the sound silent.
・
When "Recep:End/REC:Cont" is selected, only 1Seg watching ends and
recording continues.
・
While watching 1Seg, setting can be made by
m94
・
Close setting is applied also while playing the recorded video. Note that,
when "Mute" is selected, play is paused.
◆
Setting operations for recording 1Seg
1
m
[1Seg]
85e
Set the required items
eC
Set recording destination and Record time.
・
Set recording destination from FOMA terminal or microSD card.
・
Record time is the time from starting recording or changing the setting of
recording until recording ends.
・
It is unavailable for recording reservation.
・
While watching 1Seg, setting can be made by
m93
✔
INFORMATION
・
With Close setting for data broadcasting and data broadcasting site set to "Continue"
or "Mute", information may be updated even when FOMA terminal is folded,
requiring packet communication fees.
・
Recording destination of Record setting is applied from the recording performed after
the setting. Record time is applied from the time of setting.
Remote controller with microphone
Using remote controller with microphone F01
You can use the switch of the remote controller with microphone F01 (optional)
to operate 1Seg watching.
R
(In time shift fast forward play) : Time shift ordinary play
R
(1 second or more)
*1
: End 1Seg watching
+-
: Adjust volume
+
(1 second or more) (while watching)
*2
: Select next channel
+
(1 second or more) (In time shift play)
*2
: Time shift fast forward play
-
(1 second or more) (watching)
*2
: Select previous channel
W
(Slide in the direction of
▼
) : Disable
R
,
+
and
-
keys.
W
(Slide in the opposite direction of
▼
) : Enable unavailable keys
*1
During data broadcasting site display, the site also ends. During recording, only watching
stops.
*2
This is available while data broadcasting site display.
FM transmitter
Listening to music of 1Seg with audio device or
car stereo
You can transmit the sound of 1Seg over FM radio wave and listen to it with home
audio device or car stereo.
F906i.book Page 283 Monday, April 21, 2008 10:59 PM
284 1Seg
F906i_E1kou
◆
Setting FM transmitter frequency <FM transmit
frequency>
・
Set a frequency not to overlap with FM radio stations in the area you use FOMA
terminal.
・
This setting is shared with FM transmitter for Playing music.
1
m
[Settings & NW services]
18e1
-
9
◆
Transmitting sound of 1Seg over FM radio wave
1
On 1Seg watching screen or data broadcasting full-screen,
m6
・
On video play screen, press
m5
Stopping FM transmission : On 1Seg watching screen or data broadcasting
full-screen,
m6
・
On video play screen, press
m5
✔
INFORMATION
・
Because FM transmitter uses weak waves requiring no licenses for radio stations, the
sound may become noisy or interrupted by the installation conditions of the FM
transmitter and receiver devices, antenna positions and environmental conditions.
When there is such noise or interruption, change the direction of FOMA terminal for
the better sound. However, noise or interruption of sound may not be resolved by
changing FOMA terminal direction.
・
Obstacles, if any, between FM terminal and receiver device or metal pieces placed
near FOMA terminal may cause noise or interruption in sound.
・
FM transmission continues even when other functions are activated by Multitask.
Movies/i-motion or melodies, if any, played with other function use the speaker of
FOMA terminal, muting FM wave until the playing ends.
・
FM transmitter is also available out of service area. However, FOMA terminal must be
placed in FOMA service area at least once after turning ON.
・
When doing the things below during FM transmission, FM transmission is
interrupted.
- Connecting an earphone etc.
- Connecting an external device using USB cable
・
FM transmission is unavailable overseas.
F906i.book Page 284 Monday, April 21, 2008 10:59 PM
285
F906i_E1kou
Full Browser
Viewing websites for a PC ........................................................................................................................... Full Browser 286
Setting for Full Browser ...................................................................................................................................................... 291
F906i.book Page 285 Monday, April 21, 2008 10:59 PM
286 Full Browser
F906i_E1kou
Full Browser
Viewing websites for a PC
You can connect to Internet to view websites created for a PC.
Framed, CSS and SSL/TLS supporting websites can also be viewed.
・
Communications of large-size data such as viewing websites containing many
images and downloading require high charges. For details of packet
communication fees and charging plans, refer to "Mobile Phone User's Guide [i-
mode] FOMA version".
・
Full Browser supports the functions and technologies below.
Frame :
A frame for dividing a web page or a website configured with frames. A
website with some frame configurations may not be fully displayed.
Cookie :
A function that saves website-specified information such as the date
and time the website appears and the number of the times it is visited in
FOMA terminal. Based on such information, various functions on the website
can be easily used.
CSS :
A standard that defines the layout of web pages.
JavaScript :
A language for creating websites.
Referer :
URL information of a website from which a link is selected to move to
a website specified in it.
SSL/TLS :
A technology for securing safe data communications with
authentication/encryption. A website that supports SSL/TLS has URL
beginning with https://. In some cases, it is used in a part of a website.
<Example> Connecting to website at specified address (URL)
1
I9
2
31e
Enter a URL (up to 512 one-byte characters)
eC
・
When Access setting is set to "No" such as by default, the Access setting
screen appears.
→
P292
・
From the second time, the URL previously connected appears.
・
Press
c
or
m9
to stop connecting or
m8
to stop connecting
with multiple windows.
Connecting to Home :
1
Registering URL for Home connection
→
P291
Displaying from bookmark :
2e
Select a folder
e
Select a bookmark to
display
Create or delete the folder to register a bookmark.
→
P163 Step 2 in "Creating/
Deleting folders"
Register bookmark to Access shortcuts.
→
P164 Step 2 in "Registering
bookmarks in Access shortcuts"
Connecting from Entry URL log :
32e
Select a URL
Operation from Entry URL log
→
P162
Connecting to Browser history :
4e
Select a URL
Operation from Browser history
→
P159
3
After reading a website,
fe
"Yes"
✔
INFORMATION
・
The functions below are not supported.
-Plug-in
- Saving screen memos
- Phone To (AV Phone To), SMS To, Media To
・
Some websites may take extra time to be displayed or not be displayed correctly.
・
When displaying a site including an image, the icons below may appear instead of the
image.
: When Set image display is "Not display" in Image&Effect settings
: When the image data is invalid or the image cannot be found, or when the image
cannot be received because FOMA terminal goes out of service area during
reception
: When the image cannot be displayed for an incorrect URL etc.
・
Mail To and Web To functions can be used from mail addresses and URL,
respectively.
・
The volume while playing Flash graphics can be adjusted by
s84
.
・
If no operations are performed for more than 5 minutes, playing Flash graphics ends.
・
Flash animation of Flash graphics is applicable to up to 1 Mbyte per page, and
Flash
®
Video is applicable to up to 10 Mbytes per item.
・
Applicable to files of up to version equivaleut for Flash8. Note that, ever for relevant
file, playing may be unavailable for some sites.
F906i.book Page 286 Monday, April 21, 2008 10:59 PM
287
Full Browser
F906i_E1kou
◆
Viewing screen of Full Browser
a
Status display/Title or URL
(blue) : Obtaining : Displaying frame thumbnail
→
P289
: In frame enlarged display
→
P289
(dark blue) : Obtaining another frame during enlarged display of current
frame
: Downloading PDF data, Word, Excel or PowerPoint files
: Uploading image or movie/i-motion
b
/ : Display mode (PC mode (full scale)/Mobile mode)
→
P291
: In Window Open Guard
→
P291
c
Pointer
→
P288
d
Section map
The current position relative to the whole display appears temporarily at
connection or scrolling screen (except in thumbnail display). The size of section
map of PC mode may change while downloading the page or vary by websites.
❖
Operations on Full Browser screen
Scrolling :
k
,
2
,
4
,
6
,
8
・
Keys available for scrolling differ by the display mode.
→
P291
Displaying previous/next pages :
I
,
a
・
The operation is available only in PC mode with the pointer hidden.
Zooming in/out :
1
,
3
Switching pointer display/hide :
#
・
Pointer display/hide
→
P288
In the horizontal display, switching displays with/without the guide area :
*
・
When setting Screen view setting to "Full screen view", press
*
on the
vertical display to switch the guide area.
→
P292
Activating the selected link item with a new window :
C36
・
Operation is available also by pressing
7
.
Multi window
→
P289
Switching display mode :
C4
Display mode setting
→
P291
Switching display magnification by zooming :
C5e1
-
7
・
Operation is available also by pressing
5
. Settings of zooming remain after
exiting Full Browser.
Performing search in page :
C7
・
Operation is available also by pressing
0
.
Search in page
→
P289
Displaying key function help :
C8
Connecting to Home :
m1
Registering the displayed website in bookmark :
m21e
Select a folder
to register
Registering bookmark
→
P163
Displaying from bookmark :
m22e
Select a folder
・
Operation is available also by pressing
9
.
Displaying from bookmark
→
P163
Connecting by specifying URL :
m31e
Enter the URL
eC
Connecting from Entry URL log :
m32e
Select a URL
Connecting to Browser history :
m33e
Select a URL
Reloading information :
m4
Sending URL by mail :
m6
The mail creation screen with the URL of the displayed website pasted is
displayed.
Full Browser screen (Vertical display)
c
d
ab
F906i.book Page 287 Monday, April 21, 2008 10:59 PM
288 Full Browser
F906i_E1kou
Copying URL of a website :
m81
The next procedure
→
P169
Copying URL of link destination : Select link destination
em82em
Copying/Pasting method
→
P383
Displaying certificate of SSL/TLS compatible page : While SSL/TLS page is
displayed
m83
Certificate
→
P173
Performing Image&Effect settings :
m84
Image&Effect settings
→
P292
Switching character encode :
m851
・
Each time you press
m851
, character code is changed as SJIS
→
EUC
→
JIS
→
UTF8. Press
m852
to switch to "Auto switch".
Playing animation from the beginning by Retry :
m86
Making Window open guard valid/invalid :
m87e
"Yes"
Script setting
→
P291
Checking section map :
m88
Setting display or color of section map :
m89e1
-
4
✔
INFORMATION
・
When changing the display magnification by zooming while displaying multiple
websites with Multi window, the change applies only to the currently active window.
・
Operations for selecting link destinations displaying the pointer or items are the same
as those for i-mode.
→
P160
◆
Switching display of pointer
While displaying the pointer, you can move on a screen by operating the pointer
with
k
. Hold down to move quickly.
・
Settings of displaying/hiding the pointer remain after exiting Full Browser.
1
On the Full Browser screen,
#e
"Yes"
If selecting "Yes", the pointer is hidden. To display it, press
#
.
・
If hiding the pointer while playing Flash, the play stops.
a
Moving range
The pointer can be moved in this range. On some frames, the range the
pointer can move may be limited.
b
Pointer
Link destination or item can be selected. When moving near the end of the
window, the screen scrolls.
・
The display of the pointer is switched as shown below by operation.
: Pointer mode ON : Drag mode ON
: Obtaining data : Selecting link
: Selecting link while obtaining data : Selecting text box
c
Displayed when the item can be selected by the pointer
・
You can switch displaying/hiding the pointer each time you press
#
.
a
b
c
F906i.book Page 288 Monday, April 21, 2008 10:59 PM
289
Full Browser
F906i_E1kou
❖
Switching to drag mode for operation
You can switch to drag mode while pointer display to operate contents available
in drag mode.
・
Operations available in drag mode vary by contents.
1
Move pointer onto contents
eg
(1 sec. or more)
Pointer changes from to , and you can operate contents with
k
.
Canceling :
g
(1 sec. or more)
・
Pressing
g
also cancels.
◆
Displaying a framed website
When a framed website appears, thumbnail screen appears allowing to view the
entire configuration. Individual frames can be enlarged for viewing.
1
On the frame thumbnail screen, select a frame to enlarge
・
Use
k
to move the frame.
・
Press
c
to return to the frame thumbnail screen.
✔
INFORMATION
・
Frames requiring authentication appear with a yellow border and those with problem
elements detected by Scanning function appear with a red border.
・
While displaying frame thumbnail, the operations and settings below are
unavailable.
- Displaying pointer on the frame thumbnail screen
- Scrolling screen
- Search in page
- Save image, PDF data, Word, Excel or PowerPoint files
-Link display
- Section map check/setting
◆
Displaying multiple websites <Multi window>
You can view a website selected from up to 5 displayed websites.
<Example> Displaying a website link on a new window
1
On the Full Browser screen, place the cursor on the link and
C36
・
Press side keys [
▲▼
] to switch windows. A window to switch to can be
selected from a window list display by pressing side keys [
▲▼
] for 1
second or more or pressing
C1
.
・
To close the current window, press
C2
and select "Yes".
◆
Searching the character string on website
・
Search method is set to "Partial match", and Case-sensitive is set to "No" by
default.
1
On Full Browser screen,
0e
Enter characters in the search field
(up to 20 two-byte (40 one-byte) characters)
The set character string is searched for and character strings matching the
entered string are highlighted.
・
Press
I
to move to the previous option and
a
to move to the next
option (matched string).
・
Press
C
to end searching.
Setting search method : On Full Browser screen,
0eme
Set the
required items
eC
Search method :
Select "Partial match" or "Exact match" for Search method.
Case-sensitive :
Select if you make case-sensitive search.
✔
INFORMATION
・
Some websites may not be searched.
・
When the search result and search fields are overlapped, press
C
for viewing.
In thumbnail
displayIn frame enlarged
display
On stand-by
Displaying
F906i.book Page 289 Monday, April 21, 2008 10:59 PM
290 Full Browser
F906i_E1kou
◆
Uploading images or movie/i-motion
You can upload images in GIF or JPEG format or movie/i-motion in MP4 format
saved in FOMA terminal to a website.
・
The file size of an image or movie/i-motion that can be uploaded is up to 2,048
Kbytes, and when multiple images or character strings are included, it is up to
2,128 Kbytes.
1
On the Full Browser screen, "Browse"
The next procedure
→
P169 Step 2 and the following steps in "Uploading
image or movie/i-motion to sites"
・
"Browse" button appears when FOMA terminal can upload images or
movie/i-motion. It appears as a different mark when displaying the same
website on a PC etc.
✔
INFORMATION
・
Procedures for uploading vary by websites.
・
You cannot upload images, movie/i-motion inhibited to output from FOMA terminal
or data except character strings.
・
Movie/i-motion of ASF format or those partially obtained cannot be uploaded.
◆
Downloading images
You can save images in GIF, JPEG, PNG or BMP format displayed on websites.
・
An image file of up to 1 Mbytes is savable.
・
PNG and BMP format images can be saved in "Other" folder of microSD card,
but cannot be displayed.
・
Savable number
→
P471
1
On the Full Browser screen,
m5e
Select an image to save
The next procedure
→
P166 Step 2 and the following steps in "Downloading
images"
・
When placing the cursor on the image to save, the image is surrounded by
frame and the file name and the file size displayed.
✔
INFORMATION
・
Background images cannot be downloaded.
・
Images with horizontal and vertical (or vice versa) sizes larger than 864
×
480 in GIF
format or 1,728
×
2,304 in JPEG format cannot be saved in FOMA terminal. Some
images cannot be saved by the JPEG type.
・
Even a file of an allowable file type and size may not be saved from some websites.
・
When exceeding the savable number/area
→
P322
◆
Downloading PDF data, Word, Excel or PowerPoint
files
You can save PDF data, Word, Excel and PowerPoint files displayed on websites.
・
A data file of up to 1 Mbytes is savable.
・
Word, Excel or PowerPoint files can be downloaded only when microSD card is
installed.
・
File of Word 2007, Excel 2007 or PowerPoint 2007 cannot be saved in FOMA
terminal.
1
On the Full Browser screen, select data to download
・
You can stop downloading by pressing
c
or
m9
and selecting
"Yes". You can stop downloading all data with multiple windows by
pressing
m8
.
2
"Save"
Displaying : "Preview"
Canceling saving : "Back"
e
"No"
3
Enter the display name (up to 36 characters)
eC
・
When " " appears in the lower-left corner of the guide area, the save
destination can be switched by pressing
I
.
・
PDF data is saved in "i-mode" folder of My Document in FOMA terminal or
"My Document" folder in microSD card.
・
Word, Excel or PowerPoint files are saved in a folder of Other in FOMA
terminal or "Other" folder in microSD card. If Other in FOMA terminal has
multiple folders, a screen appears asking to select a saving folder. The files
are saved to a selected folder.
F906i.book Page 290 Monday, April 21, 2008 10:59 PM
291
Full Browser
F906i_E1kou
✔
INFORMATION
・
Downloading stops when the data size exceeds 1 Mbytes while downloading.
・
When exceeding the savable number/area
→
P322
Setting for Full Browser
You can set various functions for Full Browser.
◆
Registering URL for Home connection <Home URL>
・
The URL for Google website is entered by default.
1
I951e
Enter a URL (up to 512 one-byte
characters)
eC
✔
INFORMATION
・
Setting home URL while displaying a website :
m7
→
"Yes"
◆
Making Cookie settings <Cookie set/delete>
When setting Cookie to Valid, you can easily use functions of websites displayed
previously.
・
Some websites or contents services may not be correctly displayed or used
unless setting Cookie to Valid.
・
When setting Cookie to Valid, information such as date/time or number of times
of displaying the website is sent. DoCoMo assumes no responsibility if your
information is known to a third party by this. Please be forewarned.
1
I952
2
Select the Cookie field
e1
-
3
・
When "Valid(notify)" is selected, select the Notify field and then select the
timing to notify of sending/receiving information from "Sending",
"Receiving" or "Sending/receiving".
Deleting all Cookie data :
me
Authenticate
e
"Yes"
3
C
◆
Making Script settings <Script setting>
You can set if you validate operation of a website containing JavaScript.
・
Some websites may not be correctly displayed unless setting Script setting to
"Valid".
1
I953e
Select Script setting field
e1
or
2
・
When selecting "Valid", select the Window open guard field, and select
"Valid" or "Invalid".
If setting Window open guard to "Invalid", a message appears asking if you
open a new window as specified by JavaScript. If setting to "Valid", no new
windows open even if specified by JavaScript.
2
C
◆
Selecting display mode <Display mode setting>
You can set if you display a screen with the PC screen size (PC mode(full scale)) or
aligned with the lateral display size of FOMA terminal (Mobile mode).
1
I954e1
or
2
✔
INFORMATION
・
While displaying multiple websites with Multi window, the display mode is changed
for all websites.
・
When the pointer is hidden in Mobile mode, press
h
to display previous/next page.
❖
Scrolling screen
Scrolling in modes is as shown below.
・
Press any key except
k
to scroll the page by screen.
・
Hold down the key to scroll continuously.
PC mode
: Scroll to the direction of the key by
k
(up/down/left/right),
2
(up),
4
(left),
6
(right),
8
(down).
Mobile mode
: Scroll upward by
u
,
2
/Scroll down ward by
d
,
8
・
While the pointer is hidden, pressing
I
(up),
a
(down) also scrolls.
F906i.book Page 291 Monday, April 21, 2008 10:59 PM
292 Full Browser
F906i_E1kou
◆
Setting image display/sound effect <Image&Effect
setting>
You can set if you display an image or animation when displaying Full Browser
screen, and you can set sound effect of Flash graphics.
1
I955e
Set the required items
eC
Set image display :
Set if you display images.
・
When "Not display" is set, appears instead of the image or animation.
Animation :
Set if you display animation.
・
When "Not display" is set, the first image of the animation appears.
Use phone information :
Set if you use data saved in FOMA terminal for
displaying Flash graphics on Full Browser.
・
If setting to "No", websites using terminal data may not be used.
Sound effect setting :
Set if you play sound effects of Flash graphics on Full
Browser.
◆
Setting whether to use Full Browser <Access setting>
・
When setting to "Yes", be sure to read "For more information".
1
I956e
"Yes" or "No"
◆
Setting whether to send Referer <Referer setting>
・
DoCoMo assumes no responsibility if your information is known to third parties
by sending Referer.
1
I957e1
-
3
◆
Setting whether to display full screen <Screen view
setting>
Set whether to activate full-screen display in vertical display.
1
I958e1
or
2
◆
Setting whether to communicate automatically <Auto-
access setting>
You can set if you accept Auto-access setting request from the browsed page on
the Full Browser screen.
・
When setting to "No", Flash graphics may not be displayed correctly.
1
I959e1
-
3
・
Setting "Yes" performs communication without confirmation. When
selecting, select "Yes" on the confirmation screen.
・
If setting to "Confirm each time", the automatic communication starting
confirmation screen for asking if you start communication appears each
time there is a communication request.
・
If setting to "No", automatic communication is unavailable.
F906i.book Page 292 Monday, April 21, 2008 10:59 PM
293
F906i_E1kou
Data Display/Edit/Management
Making full use of image
Displaying image ........................................................................................... 294
Editing still images ........................................................................................ 296
Storing image in Data Center ................................. Data Security Service 298
Setting operating conditions of image ........................................ Settings 298
Searching by i-mode ...................................................................................... 298
Making full use of movie/i-motion
Playing movie/i-motion ................................................................................. 299
Editing movie/i-motion ................................................................................. 302
Setting operating conditions of movie/i-motion ........................ Settings 303
Moving i-motion to microSD card .... Compatible with contents transfer 304
Making full use of Chara-den
Displaying Chara-den .................................................................................... 304
Setting operating conditions of Chara-den ................................. Settings 305
Making full use of melody
Playing melodies ............................................................................................ 305
Setting operating conditions of melody ...................................... Settings 306
Making full use of microSD card
microSD card .................................................................................................. 307
Exchanging data between FOMA terminal and microSD card .................. 310
Displaying data in microSD card .................................................................. 313
Managing microSD card ................................................................................ 315
Operating data of microSD card in FOMA terminal from a PC
........................................................................................
USB mode settings 316
Managing various data
Using folder or album ................................................................................... 317
Viewing/Editing data detail information
...............................................
Detail information/Edit detail information 319
Deleting data .................................................................................................. 321
Sorting data .......................................................................................... Sort 321
Checking storage space of FOMA terminal ...................... Memory status 321
When exceeding the savable number/area ................................................ 322
Making full use of infrared communication/iC transmission
Infrared communication/iC transmission ................................................... 322
Sending data by infrared communication/iC transmission
..................................................................
Send Ir data or iC transmission 323
Receiving data by infrared communication/iC transmission
..............................................................
Receive Ir data or iC transmission 324
Using infrared remote control function ....................................................... 325
Setting operations for data exchange ............... Data exchange settings 326
Displaying PDF data
Displaying PDF data ............................................................ My Document 326
Setting operating condition of PDF data ..................................... Settings 329
Displaying other (Word, Excel, PowerPoint) files
Displaying Word, Excel and PowerPoint files .................................. Other 329
Setting operating conditions of Word, Excel and PowerPoint
............................................................................................................
Settings 331
Displaying recording data of 1Seg
Viewing recorded video or still images ....................................................... 331
Setting operating condition of recorded still image .................. Settings 332
F906i.book Page 293 Monday, April 21, 2008 10:59 PM
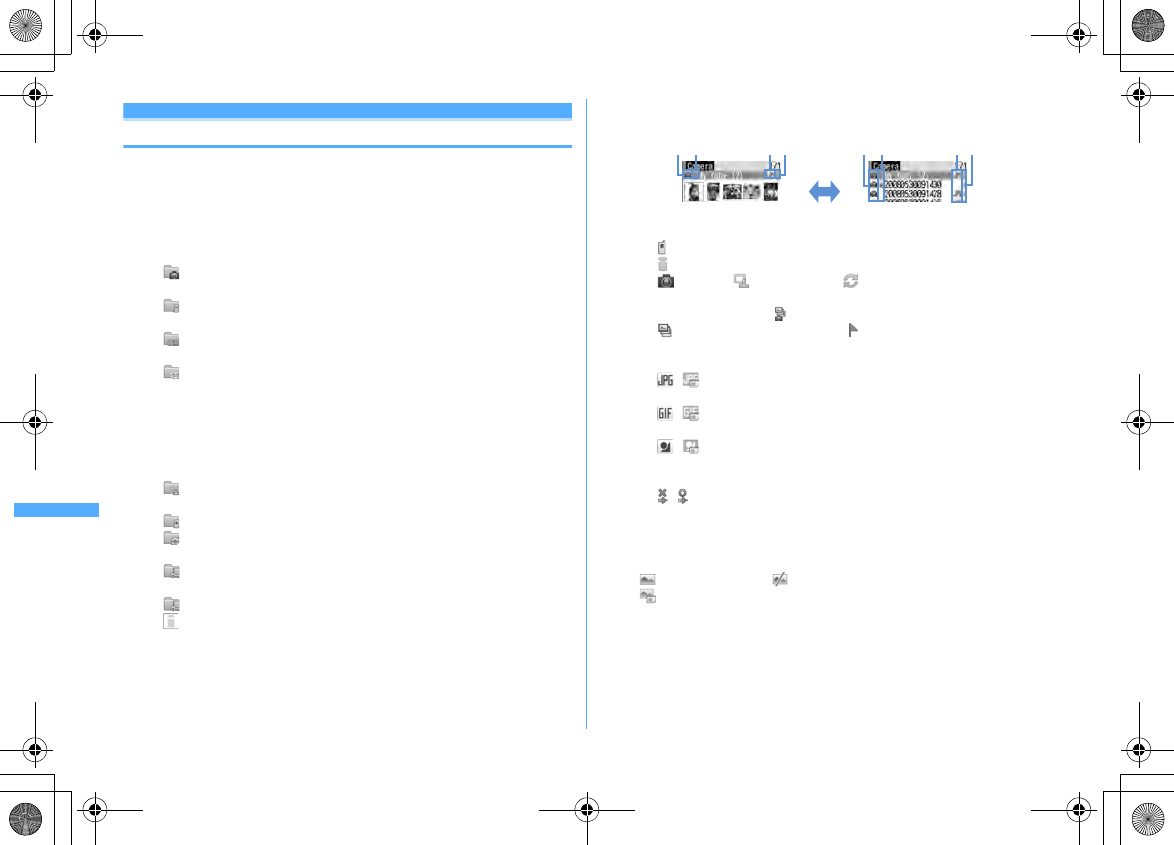
294 Data Display/Edit/Management
F906i_E1kou
Making full use of image
Displaying image
・
Images (JPEG or GIF format), animations (GIF animations or Flash graphics),
and created animations can be displayed. Note that, images with horizontal and
vertical (or vice versa) sizes larger than 864
×
480 in GIF format or larger than
1,728
×
2,304 in JPEG format cannot be displayed.
1
m
[Data Box]
1e
Select a folder
・
The folder contents are as given below.
Camera :
Images shot with Camera or cut out of movies/i-motion or PDF
data
i-mode :
Images downloaded from sites, websites, i-mode mail or i-
α
ppli
or saved by Music player
Deco-mail picture :
Images stored by default, downloaded from sites,
mail or i-
α
ppli, or read with Bar code reader
Deco-mail pictogram :
Images stored by default or Deco-mail pictogram
downloaded from the site
・
When obtaining an image conforming to the standard of Deco-mail
pictogram (image size is 20
×
20, the file size is up to 90 Kbytes, permitted
to attach to mail or output from FOMA terminal and JPEG or GIF format),
it is stored to this folder. Images not conforming to the standards cannot
be saved.
Item :
Frame images stored by default or frame or stamp images
downloaded from sites
Preinstalled :
Images stored by default
Data transfer :
Images read with Bar code reader or acquired from
microSD card or external devices
My album :
Images moved from another folder
・
Appears when album is added.
→
P317
My album (Secrecy: ON) :
My album with secret attribute ON
Search by i-mode
→
P298
Switching to microSD card list : On the folder list,
I
2
Place the cursor on an image
・
Icon definitions.
a
Originated
: Preinstalled
: i-mode, Full Browser, Mail, i-
α
ppli
: Camera : Frame, Stamp : Data transfer
b
Type of image
No icon : Still image : Created animation
: GIF animation/Flash graphics : Image with location information
c
File format
No icon : Created animation
/ : JPEG format image/Unavailable due to UIM operation
restriction
/ : GIF format image, GIF animation/Unavailable due to UIM
operation restriction
/ : SWF (Flash graphics)/Unavailable due to UIM operation
restriction
d
File restriction
/ : File restricted/unrestricted
・
For thumbnail display screen, the display name of the image at the cursor
position appears at the top of the display, and the image size and file size
appear at the bottom of the display. And, when thumbnail display is
unavailable, the icon is displayed as shown below.
: No preview image : Unavailable
: Unavailable due to UIM operation restriction
Search by i-mode
→
P298
I
a db c a db c
Thumbnail displayList display
F906i.book Page 294 Monday, April 21, 2008 10:59 PM
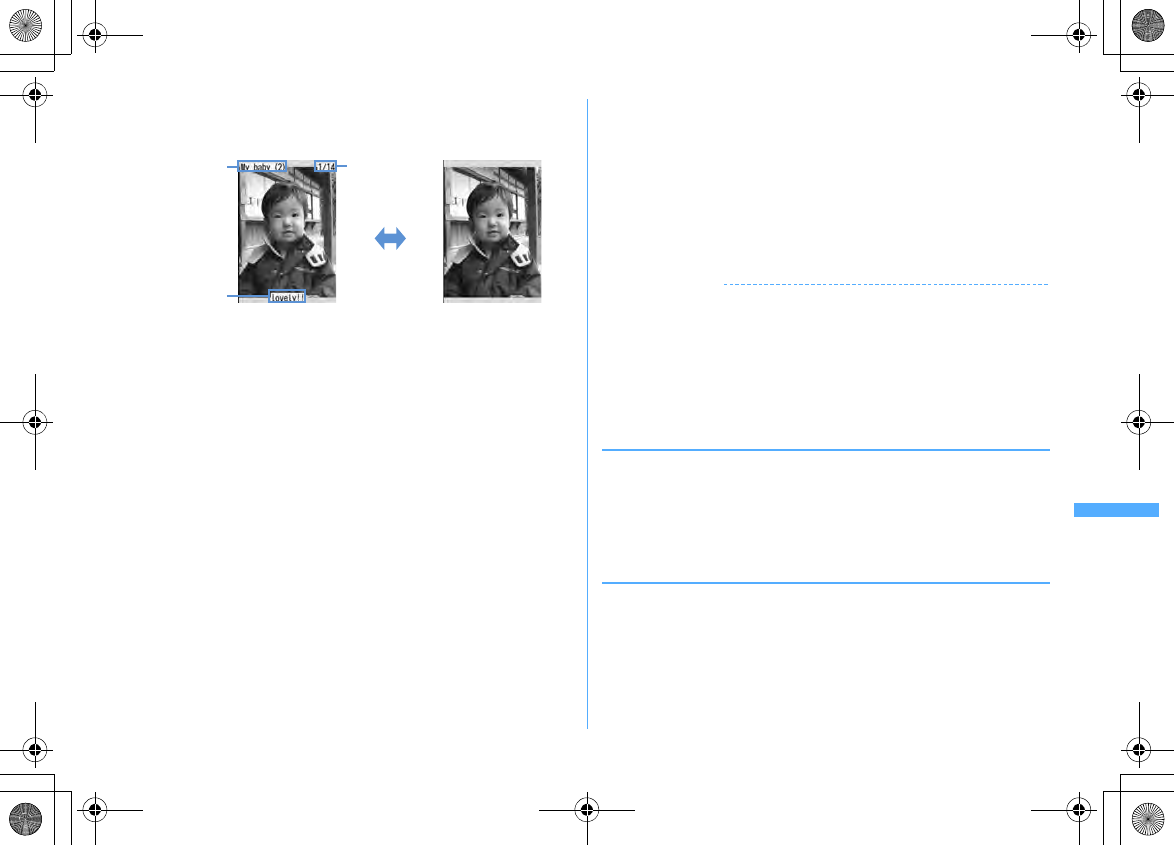
295
Data Display/Edit/Management
F906i_E1kou
3
g
The image display screen of the vertical display shows the display name and
comment.
*
For full-screen display, press any of
m
,
C
,
c
,
a
to return to the original
display.
・
If you press
j
, you can switch to previous/next image.
・
Image is always in the full-screen display with the horizontal display.
・
The operations below are available while playing GIF animation, created
animation or Flash graphics (except in full-screen display).
g
: Pause/Play
C
: Slow play (Only during pause of created animation)
m7
: Play from the beginning
・
An image with vertical and horizontal (or horizontal and vertical) size of less
than 240
×
432 dots is displayed with horizontal and vertical size doubled. If
the image becomes larger than the screen size when enlarged, the image
is displayed, adjusted to the screen size. Press
l
to display in the actual
size. Press
r
to restore the double-size display.
Attaching to mail :
a
・
When the file size is 90 Kbytes or less, a confirmation screen for pasting it
to the mail text appears.
・
For some image or file size, a confirmation screen appears for converting
to QVGA size.
・
For an image with location information, a confirmation screen for pasting
location URL to the message text appears. Select "No" to attach only the
image.
Using the location information attached to image :
m33
(
23
on image list of microSD card)
The next procedure
→
P253 "
■
Use location info menu"
Pasting location information to an image :
m34
(
24
on
image list of microSD card)
e
Paste the location information
e
Select an
image to attach the location information to
eCe
"Yes"
Pasting location information
→
P253 "
■
Paste/Attach/Send location menu"
Deleting the location information pasted to an image :
m35
(
25
on image list of microSD card)
e
Select an image
to delete location information from
eCe
"Yes"
✔
INFORMATION
・
Still images larger than the screen size are displayed, adjusted to the screen size. With
full-screen display, scrolling is performed automatically, and
g
can be used to
pause/restart and
*
can be used to switch display/hide scroll bar.
・
For a JPEG format image larger than the screen size, press the cursor on the image
list and press
m0
or press
g
in vertical display to use enlarged display that
enables zooming. During enlarged display, press
k
to scroll,
m
to zoom out by
20%,
C
to zoom in by 20%, and
*
to switch display/hide of the guide area and
g
to return to actual size display. Press
m
to restore to zoom from View actual size.
◆
Displaying slide show
Display images in a folder sequentially in a full-screen.
・
You can use Settings to change the rate, display order, etc.
→
P298
1
m
[Data Box]
1e
Place the cursor on a folder and
m6
・
When display of all images is complete or you press one of
c
,
m
,
I
,
C
,
a
, the folder list screen reappears.
◆
Setting images to the stand-by display or phonebook
<Example> Setting to the stand-by display
1
m
[Data Box]
1e
Select a folder
e
Place the cursor on an
image and
m2
Display name
Full-screen display
Comment
Image number
/Number of
images
I*
F906i.book Page 295 Monday, April 21, 2008 10:59 PM
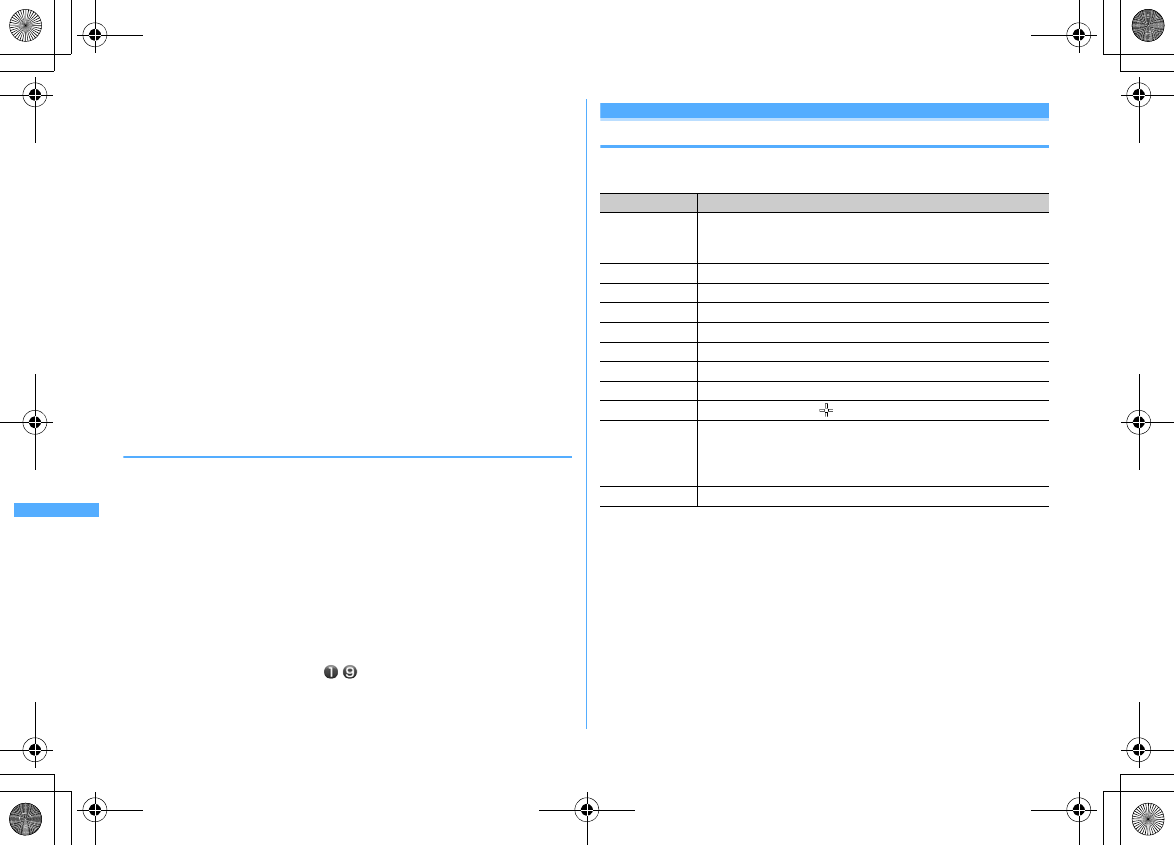
296 Data Display/Edit/Management
F906i_E1kou
2
1e
"Vertical view" or "Horizontal view"
e
"Yes"
・
For an image smaller than the screen size that can be enlarged, select "Yes
(Same size)" or "Yes (Large size)".
・
If i-
α
ppli stand-by display is set, a cancellation confirmation screen of the i-
α
ppli stand-by display appears.
Adding to phonebook :
2
Phonebook new entry
→
P83
Updating phonebook entry :
3e
Select phonebook entry
Setting as Calling image :
4e1
or
2
Setting as Video-phone image :
5e1
-
7
・
Images with size larger than 176
×
144 or images that cannot be output from
FOMA terminal can be set only for outgoing/incoming image.
Setting as Mail image :
6e1
-
4
・
The images set to Mail image also appear when MessageR/F or SMS is sent
or received.
Setting as Basic menu icon :
7e
Select a function or background
・
Flash graphics, images in "Item" folder or created animation cannot be set.
・
When Default MENU is except Basic menu, a screen appears for confirming
to switch to Basic menu.
◆
Creating animation
You can select up to 9 items from the same folder to create an animation.
・
You cannot save still images larger than 480
×
864.
・
Still images saved cannot be displayed or edited individually. In addition, unless
canceled, they cannot be saved to microSD card or external device or attached
to i-mode mail to send.
1
m
[Data Box]
1e
Select a folder
2
m41
Canceling created animation : Place the cursor on created animation and
m42
3
Select images to save to Create animation
Selected images are numbered - in the order of selections.
m
: Cancel all selections
4
Ce
Enter a display name (up to 36 characters)
eC
Editing still images
Edit a still image, and save it as a new still image. Editing contents are as shown
below.
*
Sound effect is emitted when pasting.
・
Image sizes that can be edited are as shown below.
Specify the size of Change size, attaching mail (Large) of Size limitation : 8
×
8-
1728
×
2304 dots
Specify cut out size : 16
×
16-1728
×
2304 dots
Specify cut out range : 16
×
16-1224
×
1632 dots
Other items than the above : 8
×
8-480
×
864 dots
・
The still images below cannot be edited.
- Still images in "Item" or "Preinstalled" folder
- Still images with mail attachment or output to terminals except FOMA terminals inhibited
(except still images with File restriction set to "File restricted" on the local terminal)
- Still images saved in microSD card
Editing item Overview
Change size
Specifying the size, or change the display size by zooming in/out
・
Up to 864
×
864 dots available for zooming in, and up to 8
×
8
dots available for zooming out
Clip
Specifying the size, or specifying the range and cut out the image
Brightness/Tone
Adjusting brightness, or setting the image to monotone or sepia
Effects
Softening, rotating or applying effect as if the image is sketched
Reverse/Rotate
Reversing or rotating
Frame
Adding frame
Paste stamp
*
Pasting stamps
Paste text
*
Pasting entered characters by specifying colors etc.
Cut
Specify the position by , and cut out the neighboring similar color
Size limitation
Changing the file size to "Msg attach:Small" (up to 90 Kbytes) or
"Msg attach:Large" (up to 2 Mbytes)
・
For images of 2 Mbytes or less, "Msg attach:Large" cannot be
selected.
Adjust
Adjusting brightness or color balance
F906i.book Page 296 Monday, April 21, 2008 10:59 PM
297
Data Display/Edit/Management
F906i_E1kou
1
m
[Data Box]
1e
Select a folder
e
Place the cursor on a still
image and
C
2
Perform necessary operation
Changing display size by specifying the size :
m1e1
-
9
・
If the aspect ratio is different from that of the original image, a blue frame
appears. Press
m
to change to the specified size without saving the aspect
ratio, and press
C
to save the aspect ratio and put the image within the
specified size. If moving the frame by
k
and pressing
9
, the image can
be cut out by the specified size.
Changing display size by zooming in/out :
m10e
Zoom out or in by
heg
・
Press
m
/
C
to zoom out/in by 20 %. By the display on the upper right of
the screen, the size after the change and the rate of zooming out/in can be
checked.
Cutting out by specifying the size :
m2e1
-
9e
Move the frame
by
keg
・
If pressing
I
, the frame size can be changed, and if pressing
C
, the
vertical and horizontal sides of the frame can be switched. By the display
on the upper right of the screen, the size after cutting out can be checked.
・
If pressing
m
, you can change to the screen for cutting out by specifying
the range.
Cutting out by specifying the range :
m20e
Specify the upper left
by
k
and
ge
Specify the lower right by
k
and
Ceg
Changing brightness :
m31e
Adjust the brightness by
heg
・
If pressing
m
/
C
, brightness can be adjusted to the highest/lowest.
Setting monotone/sepia :
m3e2
or
3
Applying effect :
m4e1
-
6
Applying sketch effect :
m4e7
or
8eg
・
Effect can be adjusted by one step by
h
or to the highest/lowest by
I
/
a
. And, if pressing
C
, the thickness of the line can be changed.
Reversing/Rotating :
m5e
Reversing by
k
or rotating by
m
/
Ceg
Adding frames :
m6e
Select a frame
eg
・
If pressing
m
with the frames added, the frames can be rotated by 180
degrees, and if pressing
j
, the frames can be changed.
Pasting stamps :
am7e
Select a stamp
e
Specify the position by
k
and
g
・
The same stamp can be pasted to multiple locations.
・
If pressing
m
, all the stamps can be erased.
bC
Pasting text :
am8e
Enter text in up to 20 two-byte (40 one-byte) characters
e
Set
the required items
eC
・
If setting Paste method to "By character", one character can be pasted
each time you press
g
.
b
Specify the position by
k
and
g
・
The same text can be pasted to multiple locations.
・
If pressing
m
, all the texts can be erased.
cC
Cutting out :
m9e
Place on the color to cut out by
k
and
geC
Changing the file size :
m0e1
or
2
・
You do not need to perform Step 3.
Adjusting :
aC
bme1
-
7
・
By the display on the upper right of the screen, the selected adjustment
type can be checked.
・
You can also change adjustment type by pressing
j
.
・
Effect can be adjusted by one step by
h
or to the highest/lowest by
I
/
a
.
cC
3
ge
"Save"
Saved as a new still image in the same folder as the original still image.
・
When the image size after editing is 20
×
20 and the file size is 90 Kbytes or
less, the image is saved to "Deco-mail pict" folder.
・
Select "As frame/stamp" to save the image for frame or stamp.
✔
INFORMATION
・
When the image size is larger than the display area as edited, the image is displayed
with reduced magnification. However, images are displayed with the same
magnification in Zoom in/out of Change size, Paste stamp or Paste text.
F906i.book Page 297 Monday, April 21, 2008 10:59 PM
298 Data Display/Edit/Management
F906i_E1kou
・
After editing, the file size may become larger or the quality may be deteriorated. And,
if displaying it on PC etc., the transparently displayed portion is displayed in white.
・
When selecting frame or stamp, some frame or stamp is not displayed because of the
size of the image to edit.
・
When exceeding the savable number/area
→
P322
Data Security Service
Storing image in Data Center
By using Data Security Service, images saved in My Picture of Data Box can be
stored in Data Center on the network.
・
Data Security Service
→
P133
・
This is a charged service requiring subscription. When having not subscribed to
this service, attempting to connect to Data Center displays the screen indicating
that.
・
Images that the size per file exceeds 100 Kbytes cannot be saved or restored.
・
Up to 10 items can be stored by one operation.
・
For details of restoration, refer to "Mobile Phone User's Guide [i-mode] FOMA
version".
・
Logs saved in Data Center can be checked.
→
P91
1
m
[Data Box]
1e
Select a folder
2
m56e
Select an image
eCe
"Yes"
e
Authenticate
g
: Cancel saving
3
Check the communication result
・
Display of the communication result disappears automatically in
approximately 5 seconds.
✔
INFORMATION
・
Data in "Item" folder or "Preinstalled" folder of My Picture cannot be selected.
Settings
Setting operating conditions of image
・
By default, Scale up image and Slide show random are set to "No", Slide show
speed to "Normal" and other items to "Yes".
1
m
[Data Box]
1em5e
Set the required items
eC
・
When setting to "Yes", operations are performed as shown below.
Display icons :
Thumbnail display on the image list.
Display title/Display number/Display comments :
On image display
screen, display name/image number and number of items/comment
Scale up image :
Zoom in an image to fully display on the display area
holding the image aspect ratio.
Scale down image :
Zoom out an image to display on the display area
holding the image aspect ratio.
Sound effect :
Play sound effects set to an image. (except slide show)
Auto scroll mode :
Automatically scroll a still image that does not fit to a
full-screen display.
Slide show random :
Display a slide show at random.
✔
INFORMATION
・
Operations from image list or image display screen :
m9
Searching by i-mode
When "Search by i-mode" ( ) is displayed on a folder or file list display screen,
you can easily connect to i-mode site and search for data given below.
- Image, music, i-motion, melody, Kisekae Tool
- Mail template
-i-
α
ppli
<Example> Searching for Deco-mail picture
1
m
[Data Box]
13e
"Search by i-mode"
e
"Yes"
You are connected to i-mode site.
・
"Search by i-mode" is displayed at the end of the list (for more than one
page, displayed at the last page).
2
Select Deco-mail picture
The selected data is saved to "Deco-mail picture" folder.
・
When a still image is searched from My Picture list or My Picture folders,
the still image of a certain type may be saved to a folder different from the
one used when selecting "Search by i-mode".
F906i.book Page 298 Monday, April 21, 2008 10:59 PM
299
Data Display/Edit/Management
F906i_E1kou
Making full us e of movie/i-mo tion
Playing movie/i-motion
・
In the formats below, movies/i-motion with image size of 48
×
48 - 640
×
480 can
be played.
1
m
[Data Box]
4e
Select a folder
・
The folder contents are as given below.
Playlist :
Playlist
→
P301
Camera :
Movies recorded with Camera, movies cut out of movie, Movie
memos and sound recorded with Sound recorder
i-mode :
i-motion downloaded from sites or mail, i-motion cut out of i-
motion or music data and i-motion compatible with contents transfer
moved from microSD card
Preinstalled :
Movies stored by default
Data transfer :
Movie/i-motion (except i-motion compatible with
contents transfer) acquired from microSD card or external device
My album :
Movies/i-motion moved from other folders
・
Appears when album is added.
→
P317
My album (Secrecy: ON) :
My album with secret attribute ON
Search by i-mode
→
P298
Switching to microSD card list : On the folder list,
I
2
Place the cursor on a movie/i-motion
・
Icon definitions.
a
Originated
: Preinstalled : i-mode, Mail, i-
α
ppli
: Camera : Data transfer : Videophone
b
Replay restriction
: No restriction
/ / : Restriction on the number of times/expiration/period
c
File type
(white)/ (yellow)/ / : MP4/MP4 with bookmark/Partially
saved MP4/Unavailable due to UIM operation restriction
(white)/ (yellow) : ASF/ASF with bookmark
d
File restriction
/ : File restricted/unrestricted
・
For thumbnail screen, the display name of the movie at the cursor position
appears at the top of the display, and the image size and file size appear at
the bottom of the display. And, when thumbnail display is unavailable, the
icon is displayed as shown below.
: Movie/i-motion containing only sound (i-motion without image such as
the one containing only voice of a singer), i-motion partially
downloaded, i-motion that cannot be played due to replay restriction,
sound recorded with Sound recorder
: Movie/i-motion with thumbnail images unavailable
: Unavailable due to UIM operation restriction
Searching by i-mode
→
P298
Attaching to mail :
a
File format
(Extension) Encoding format
MP4
(MP4, 3GP)
Movie MPEG4, H.263, H.264
Sound AMR, AAC, HE-AAC, Enhanced aacPlus
ASF
(ASF)
Movie MPEG4
Sound G.726
Thumbnail displayList display
I
a db c a db c
F906i.book Page 299 Monday, April 21, 2008 10:59 PM
300 Data Display/Edit/Management
F906i_E1kou
3
g
a
Play volume
b
Play time/Total time and the play position indicator
c
Play state
: In play : In stop : In pause
d
File type
: Sound : Movie
e
Zooming in/out display
: Zoomed in display : Zoomed out display
・
For the movie/i-motion with a bookmark set, the confirmation screen
appears for playing from the bookmark. Select "No" to play from the
beginning or play stopped position.
・
For the movie/i-motion containing image, it is played in the full-screen
display with the horizontal display.
・
While playing, the operations below are available.
j
, Side keys [
▲▼
] : Adjust volume
g
: Pause/Play/Play from the beginning (In stop)
h
: Reverse/Fast play
1
: Rewind for 10 seconds (Starting playing from the beginning if the
time from it is less than 10 seconds)
3
: Fast forward for 30 seconds (Starting playing from a point 1 second
before the end position if the time to the end position is less than 30
seconds)
C
: Stop
c
: Return to list screen
・
The operations below can be performed while playing a movie/i-motion
with chapter information.
4
/
6
: Play from the beginning of previous/next chapter
m2
: Playing by selecting a chapter
・
In pause, press
h
to display a tab for specifying position on the play
position indicator. Move by
h
and press
g
to play from the specified
position. Tab for specifying position moves by 1 minute each time you
press
h
, but movie/i-motion longer than approximately 20 minutes can be
moved by 5 minutes by pressing it for more than 2 seconds.
・
When playing is paused by pressing
c
or
f
or other functions, the
play stop position is saved to play from the position next time. Information
of play stop position for up to 5 items is saved to FOMA terminal or
microSD card. When newer information is saved, older information is
deleted. When playing while downloading data or in preview play, play
stop position cannot be saved.
Setting bookmark : During play,
Ie
"Yes"
・
Setting is unavailable to un saved movie/i-motion or i-motion with replay
restrictions set.
Canceling bookmark : In pause,
I
Switching screen display from horizontal display : Press
#
during play
・
Pressing
#
switches the full-screen display and normal play screen. For
movie/i-motion of 320
×
240 image size, the screen is switched in the order
of full-screen display
→
wide display
→
normal play screen.
・
Press
*
on the full-screen or wide display to switch displaying and
hiding the guide area.
✔
INFORMATION
・
For some i-motion on which "--:--:--" may appear as the full play duration on the play
screen, fast-forwarding/rewinding, playing operation from the bookmark or play stop
position, or playing using chapter information or tab for specifying position is
unavailable.
・
When i-motion with replay restriction set is selected, the replay restriction state
appears. When replay is unavailable due to the replay restriction, a message appears
for confirming deletion (except before the replay period). When replay period or
expiration is restricted, replaying is not available by changing the date and time of
FOMA terminal.
・
When i-motion failed or interrupted in downloading and partially downloaded is
selected, a confirmation screen for confirming to download the remaining data
appears. When it cannot be downloaded by retry, partially saved data is deleted. For
partially downloaded i-motion that the replay period or replay expiration expired, a
confirmation screen for deleting appears and redownloading is unavailable.
d
e
abc
F906i.book Page 300 Monday, April 21, 2008 10:59 PM
301
Data Display/Edit/Management
F906i_E1kou
◆
Creating/Playing playlists
Saving and managing the titles of movie/i-motion.
・
Recordable number
→
P471
・
100 titles can be saved in 1 playlist.
・
Movie/i-motion saved in microSD card, movie/i-motion partially saved, or
movie/i-motion title unavailable due to UIM operation restriction or replay
restriction cannot be registered.
❖
Creating/Deleting playlist
1
m
[Data Box]
4e
Select "Playlist" folder
2
m1
When no playlist is created : "Yes"
Changing name : Place the cursor on the playlist and
m2e
Enter the
name (up to 10 two-byte (20 one-byte) characters)
eC
Deleting 1 item : Place the cursor on the playlist and
m31e
"Yes"
Deleting selected items :
m32e
Select playlists and
Ce
"Yes"
Deleting all items :
m33e
Authenticate
e
"Yes"
3
Enter the playlist name (up to 10 two-byte (20 one-byte)
characters)
eC
・
"PlaylistYYYYMMDD (year, month and day of creation)" is preset.
4
Select a folder
e
Select a movie/i-motion
eCe
"Yes"
❖
Adding/Deleting titles of movies/i-motion to/from playlist
1
m
[Data Box]
4e
Select "Playlist" folder
e
Select a playlist
2
m31
Canceling 1 item : Place the cursor on the title and
m321e
"Yes"
Deleting selected items :
m322e
Select title and
Ce
"Yes"
Deleting all items :
m323e
Authenticate
e
"Yes"
3
1
-
3e
Select a folder
e
Select a movie/i-motion
eC
・
When "One item" is selected, go to Step 4 without pressing
C
.
・
When selecting "All items" and select a folder containing movie/i-motion
data, a title of movie/i-motion that can be saved in the folder is selected.
4
"Yes"
✔
INFORMATION
・
Removing a title of movie/i-motion in a playlist does not delete the data itself. When
movie/i-motion is deleted or moved to microSD card, they are removed from the
playlist.
❖
Playing playlist
You can continuously play movies/i-motion starting from the selected title.
・
Fast forwarding/Rewinding, operation of playing from the bookmark or play
stop position, playing using chapter information or tab for specifying position is
unavailable.
1
m
[Data Box]
4e
Select "Playlist" folder
e
Select a playlist
2
Selecting title to play first
・
On the screen for playing, the icons ( / ) indicating the settings of
Repeat play appear beside ones normally appear.
・
While playing, the operations below are available.
g
: Pause/Play
j
, Side keys [
▲▼
] : Adjust volume
I
, Side key [
▲
] (1 sec. or more) : Play from the beginning of data (Press
within 3 sec. from playing to play previous data)
C
: Stop
a
, Side key [
▼
] (1 sec. or more) : Play next data
Sorting play order :
m33e
Place the cursor on the title and
I
or
aeC
F906i.book Page 301 Monday, April 21, 2008 10:59 PM
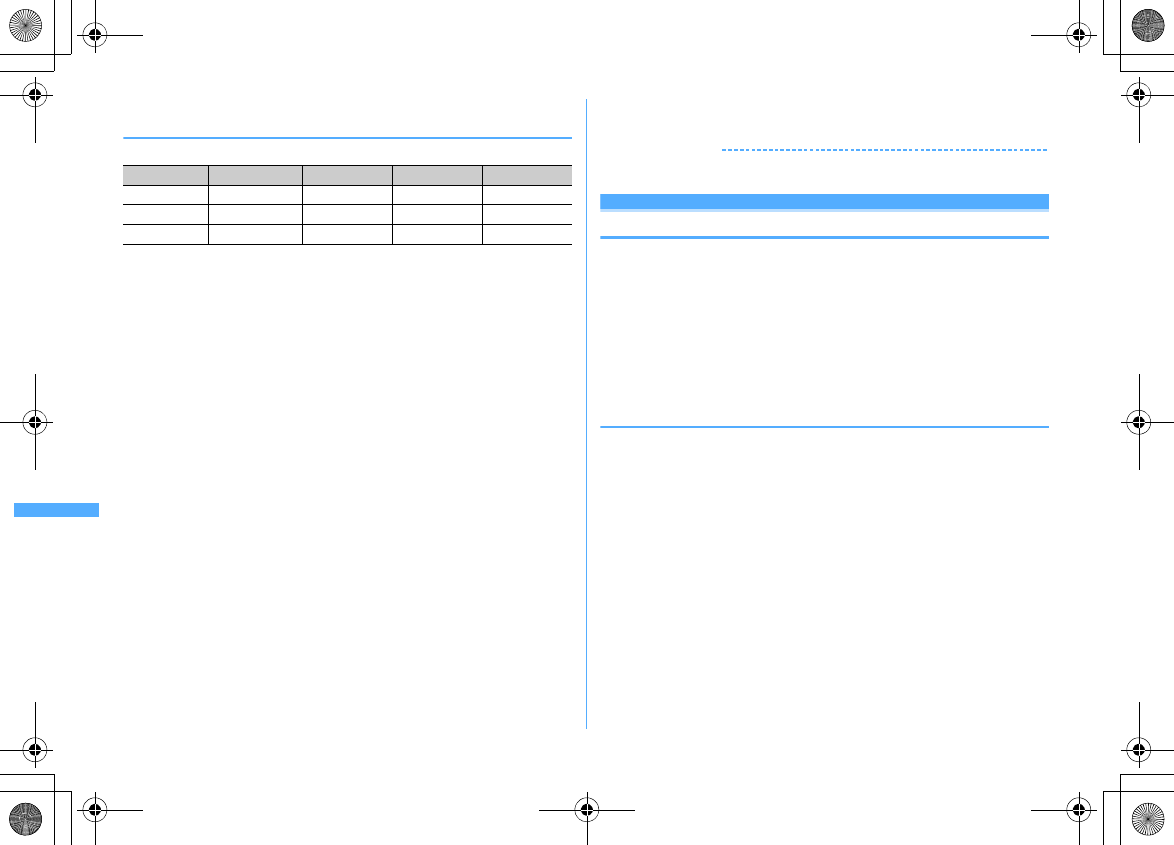
302 Data Display/Edit/Management
F906i_E1kou
◆
Setting movie/i-motion to stand-by display or the
phonebook
Some types of movie/i-motion can be used for the settings below.
*
Except PushTalk ring alert
・
Movie/i-motion that replay restriction is set, or movie/i-motion that the file size
is larger than 10 Mbytes are unavailable.
・
The movie/i-motion below are unavailable for phonebook, ring alert or
incoming call image.
- Other than the image size of 128
×
96, 176
×
144 or 320
×
240
- ASF format
- With ticker (text)
- Those transferred to external devices and then returned to FOMA terminal
- Those moved or copied from microSD card to FOMA terminal (including those moved or
copied from FOMA terminal to microSD card and then returned) except i-motion compatible
with contents transfer
・
Movie/i-motion for which Receive display of Detail information is "Unavailable"
is not applicable to phonebook or incoming call image. And, movie/i-motion
that Ring alert is "No" is not applicable to ring alert.
<Example> Setting to the stand-by display
1
m
[Data Box]
4e
Select a folder
e
Place the cursor on movie/
i-motion and
m2
2
1e
"Yes (Same size)" or "Yes (Large size)"
・
If i-
α
ppli stand-by display is set, a cancellation confirmation screen of the i-
α
ppli stand-by display appears.
Adding to phonebook :
2
Updating phonebook entry :
3e
Select a phonebook entry
Setting to ring alert :
4e1
-
9
・
When "Contact alert:Call" or "Contact alert:Mail" is selected, select a
phonebook entry
→
Press
C
Setting to Movie alert (voice/videophone call)/Received mail image :
5e1
-
3
✔
INFORMATION
・
Operation from title list of playlist :
m1
Editing movie/i-motion
・
The movie/i-motion below cannot be edited. Downloaded i-motion may not be
edited by encoding formats.
- Movie/i-motion with File restriction set to "File restricted" (except movie set to "File
restricted" on the local terminal)
- i-motion with replay restrictions
- Movie in ASF format
・
Edited movie/i-motion is saved as new data to the folder where the original data
is saved. The cut out data is saved in "Camera" folder of My Picture. It also
applies when movie/i-motion is attached to mail after editing.
◆
Cutting out still image (Capture)
Specify a range and cut out as a still image.
・
The size of the still image cut out is same as the display size when it is played.
1
m
[Data Box]
4e
Select a folder
e
Select a movie/i-motion
2
At the position to cut out,
m3eC
・
Pressing
g
resumes a play.
Attaching to mail : At the position to cut out,
m3ea
・
When the file size is 90 Kbytes or less, a confirmation screen for pasting it
to the mail text appears.
・
For some image or file size, a confirmation screen appears for converting
to QVGA size.
Type Stand-by display Phonebook Ring alert Alert image
Sound + Movie
○
×
○
*×
Movie only
○○
×
○
Sound only
××
○
×
F906i.book Page 302 Monday, April 21, 2008 10:59 PM
303
Data Display/Edit/Management
F906i_E1kou
◆
Cutting out movie/i-motion (Custom edit)
Cut out from the beginning to the specified location.
・
Movie/i-motion that the file size is 11–2,048 Kbytes can be edited.
1
m
[Data Box]
4e
Select a folder
e
Place the cursor on movie/
i-motion and
m41
appears below a replay time.
・
When data containing a ticker (text) track is cut out, the ticker (text) is
deleted.
2
geg
at the cutting position
c
: Retry
・
For a file larger than 500 Kbytes, press
m
and select "Msg attachment S"
to cut out a file of 500 Kbytes, press
m
and select "No settings to cut out
a file approximately 1,000 bytes smaller than the maximum size. For a file
of 2,048 Kbytes, press
m
and select "Msg attachment L" to cut out a file of
2,047 Kbytes.
・
When data is cut out up to the end without pressing
g
, the end point is set
at the position approximately 1,000 bytes smaller than the maximum file
size.
3
Enter the display name (up to 36 characters)
eC
Playing :
I
Attaching to mail :
a
◆
Specifying file size for cutting out movie/i-motion (Edit
by size)
Cut out a specified file size from the beginning.
・
Movie/i-motion that the file size is 11–2,048 Kbytes can be edited.
・
File size which you can specify is 10 K-2,047 Kbytes. The maximum file size
varies by the movie/i-motion to be cut out.
1
m
[Data Box]
4e
Select a folder
e
Place the cursor on movie/
i-motion and
m42
・
When data containing a ticker (text) track is cut out, the ticker (text) is
deleted.
2
Enter size to cut out
・
For a file larger than 500 Kbytes, press
m
and select "Msg attachment S"
to enter 500, or press
m
and select "Msg attachment L" to enter 2047.
3
Enter the display name (up to 36 characters)
eC
Playing :
I
Attaching to mail :
a
Settings
Setting operating conditions of movie/i-motion
・
By default, View thumbnails is set to "Yes", Size adjustment to "Zoom", Repeat
play to "ON", Backlight to "Always on", Volume to "Level 20", and Surround to
"OFF".
1
m
[Data Box]
4em5e
Set required items
eC
View thumbnails :
Set if you use thumbnail display on the image list.
Size adjustment :
Set if you zoom in/out an image to fully display on the
display area holding the image aspect ratio.
Repeat play :
Set if you repeat playing during playlist play.
Backlight :
Set lights operation during play. When setting to "Phone setting",
it depends on the setting of Display light time (Normal use) of Display &
Key light.
・
This setting is also reflected to Display light time (i-motion) of Display &
Key light and Display light of Music&Video Channel.
Volume :
Set the sound volume during play.
Surround :
Set if you enable the surround effects during play. This setting is
reflected to Movie (i-motion) in Stereo sound effect.
Current file size/
Maximum file size
F906i.book Page 303 Monday, April 21, 2008 10:59 PM
304 Data Display/Edit/Management
F906i_E1kou
✔
INFORMATION
・
Operations from movie/i-motion list, title list of Playlist :
m
→
"Settings"
Compatible with contents transfer
Moving i-motion to microSD card
Of copyrighted i-motion items downloaded from a site, you can move those
compatible with contents transfer to microSD card. It cannot be copied.
・
i-motion compatible with contents transfer can be moved only when "Moved to
microSD" in detail information is set to "Yes" or "Yes (Same model only)".
1
m
[Data Box]
4e
Select "i-mode" folder
e
Place the cursor on
i-motion and
m54
2
1
-
3
Moving selected i-motion :
2e
Select i-motion
eC
3
Place the cursor on a destination folder and
Ce
"Yes"
・
For Selected items or All items, the move confirmation screen appears right
after that.
・
When saving to a subfolder, select a folder
→
place the cursor on the
subfolder to move to and press
C
. When selecting a folder with no
subfolder, a confirmation screen for creating a subfolder appears.
・
On the selection screen of the destination folder, press
a
to move to
Home folder.
✔
INFORMATION
・
If data is moved to a created folder, it may not be checked from other FOMA terminals.
・
While moving data, do not remove microSD card or turn the power OFF. It may make
all data compatible with contents transfer in microSD card unavailable.
・
For moving selected or all items, i-motion incompatible with contents transfer is
saved in "Movie" or "Other movie" folder of microSD card.
❖
Moving to folder in FOMA terminal or others
Moving i-motion compatible with contents transfer saved in microSD card
・
Moving is available only when installing the same UIM as when obtaining from
the site or moving to microSD card (the model also must be the same for some
i-motion).
1
m
[LifeKit]
315e
Select a folder
e
Place the cursor on
i-motion and
m3e1
or
2
2
1
-
3
Moving selected i-motion :
2e
Select i-motion
eC
3
"Yes"
Selected items are saved to "i-mode" folder of i-motion.
Moving all data to phone memory : Authenticate
e
"Yes"
Moving to folder : Place the cursor on a folder and
Ce
"Yes"
・
On the selection screen of the destination folder, press
a
to move to
Home folder.
Making full use of Chara-den
Displaying Chara-den
Display the character to use instead of camera image during a videophone call.
Also, a Chara-den can be set on the stand-by display to take specific actions when
a missed call etc. exists.
・
Using Chara-den during videophone call
→
P69
1
m
[Data Box]
8e
Select a folder
・
The folder contents are as given below.
i-mode :
Chara-den downloaded from sites
Preinstalled :
Chara-den stored by default
My folder :
Chara-den moved from other folders
・
Appears if a folder is added.
→
P317
F906i.book Page 304 Monday, April 21, 2008 10:59 PM
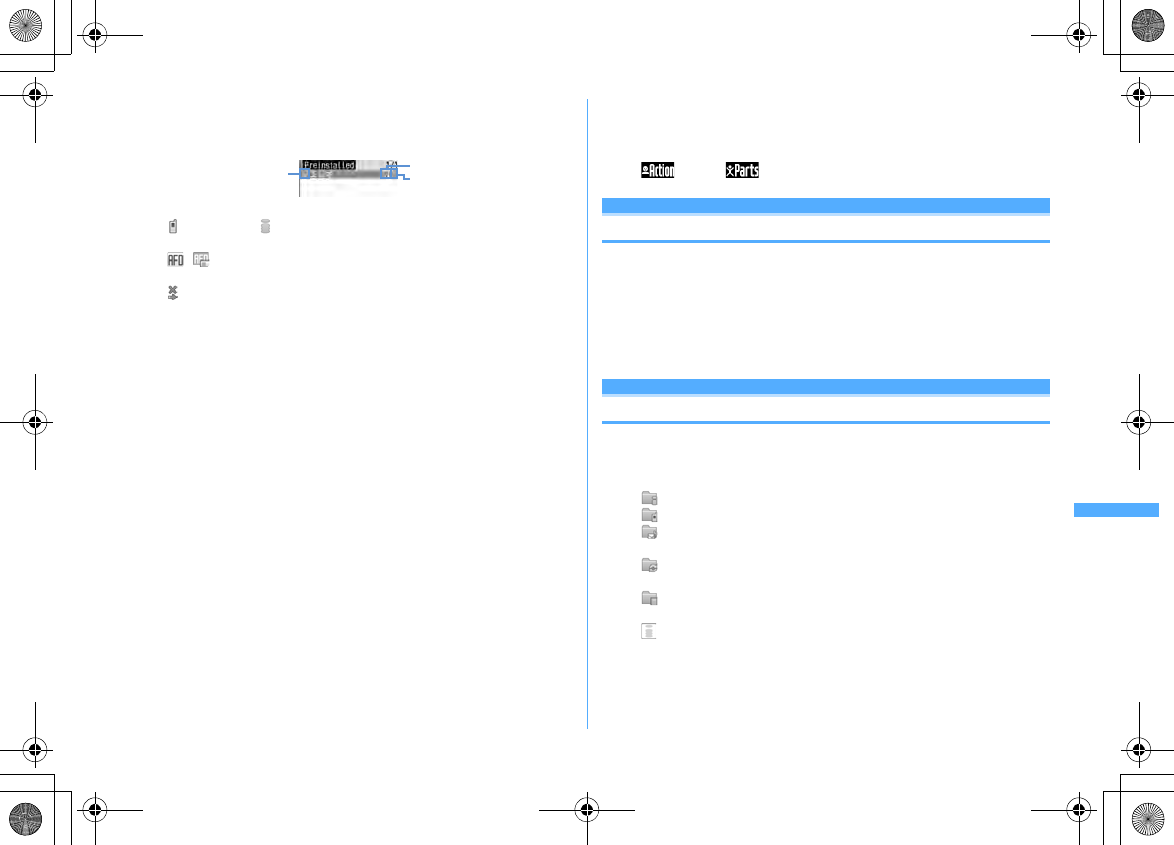
305
Data Display/Edit/Management
F906i_E1kou
2
Place the cursor on Chara-den
The display name of Chara-den and an icon indicating details of the Chara-den
are shown.
a
Originated
: Preinstalled : i-mode
b
File type
/ : AFD/Unavailable due to UIM operation restriction
c
File restriction
: File restricted
Making a Videophone call :
Ie
Enter a phone number or press
C
and
select from a phonebook
eI
・
To make a call specifying conditions, enter a phone number and press
m
.
→
P59
Setting as Substitute image :
a
Setting to the stand-by display :
am3e
Set the required items
eC
・
When "Action" or "Action of Parts" is set, you can select an action from
the actions list. Selection is unavailable for some Chara-den.
・
When "Input" is selected, specify an action by entering digits to the entry
field.
・
When setting Interval to "OFF", the action occurs only once.
・
If actions are set for Missed call or Unread message, but there is no
Missed call or Unread message, the action set as ordinary occurs. When
there are Missed call and Unread message with both set, both actions
are repeated alternately; but if Interval is set to "OFF", the action for
Missed call occurs only once.
b
"Yes (Same size)" or "Yes (Large size)"
・
If i-
α
ppli stand-by display is set, a cancellation confirmation screen of
the i-
α
ppli stand-by display appears.
3
g
j
: Large size/Same size
1
-
9
: Perform applicable action
0
: Stop action
a
: List actions
a
(1 sec. or more) : Switch Action/Action of Parts
・
The current action type is indicated with icons below appearing in the
lower-left corner in the screen.
: Action : Action of Parts
Settings
Setting operating conditions of Chara-den
・
By default, Display size is set to "Large" and Set lighting to "Terminal settings".
1
m
[Data Box]
8em5e
Set the required items
eC
Display size :
Set whether to enlarge.
Set lighting :
Set lights operation during play. When setting to "Terminal
settings", it depends on Display light time (Normal use) of settings of
Display & Key light.
Making full u se of melody
Playing melodies
・
Melody in SMF or MFi format can be played.
1
m
[Data Box]
5e
Select a folder
・
The folder contents are as given below.
i-mode :
Melody downloaded from a site or a mail
Preinstalled :
Melodies for ring tone stored by default
→
P429
Mail attach melody :
Melodies for mail attachment stored by default
→
P429
Data transfer :
Melody read with Bar code reader or acquired from
microSD card or external devices
My album :
Melodies moved from another folder
・
Appears when album is added.
→
P317
Search by i-mode
→
P298
Switching to microSD card list : On the folder list,
I
ab
c
F906i.book Page 305 Monday, April 21, 2008 10:59 PM
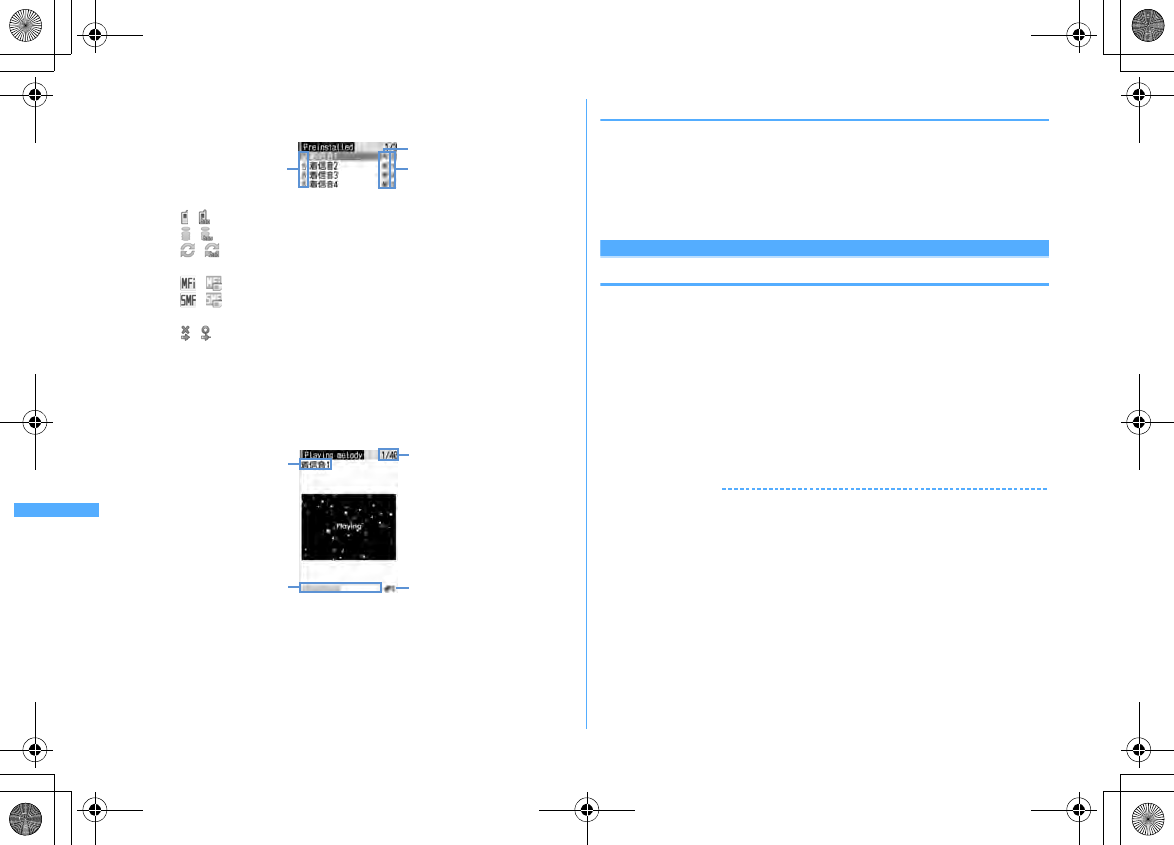
306 Data Display/Edit/Management
F906i_E1kou
2
Place the cursor on a melody
・
Icon definitions.
a
Originated
/ : Preinstalled, Mail attach melody/3D sound supported
/ : i-mode, mail/3D sound supported
/ : Data transfer/3D sound supported
b
File type
/ : MFi/Unavailable due to UIM operation restriction
/ : SMF/Unavailable due to UIM operation restriction
c
File restriction
/ : File restricted/unrestricted
Searching by i-mode
→
P298
Attaching to mail :
a
3
g
In the melody play screen, the display name of melody being played, played
position and icon indicating sound volume are displayed.
・
While playing, the operations below are available.
h
, Side keys [
▲▼
] : Adjust volume
j
, Side keys [
▲▼
] (1 sec. or more) : Play previous/next melody
g
,
c
: Stop
◆
Setting melody for ring alert
・
Melodies in "Mail attach melody" folder cannot be set as ring alert.
1
m
[Data Box]
5e
Select a folder
e
Place the cursor on a
melody and
m2e1
-
9
・
When "Contact alert:Call" or "Contact alert:Mail" is selected, select a
phonebook entry
→
Press
C
.
Settings
Setting operating conditions of melody
・
By default, Volume is set to "Level 4", Light pattern to "Flash", Light color to
"Lime", Vibrate to "OFF", Play position to "Play all", Play background to
"Standard" and Stereo/3D sound to "ON".
1
m
[Data Box]
5em6e
Set the required items
eC
・
If setting Light pattern to "Light pattern 1", "Light pattern 2" or "Sync
melody", the light blinks in multiple colors. Light color cannot be set.
・
When setting Play position to "Play portion", the melody is partially played.
・
When setting Play background to "Select", you can select an image saved
in Image folders.
・
Settings to Stereo/3D sound are reflected to Melody in Stereo sound effect.
✔
INFORMATION
・
Operations from melody list or melody play screen :
m8
・
Even if setting Lighting pattern to "Sync melody", or setting Play position to "Play
portion", some melodies are not synchronized.
c
b
aa
Melody number/
Number of melodies
Current play position
Display name
Play volume
F906i.book Page 306 Monday, April 21, 2008 10:59 PM
307
Data Display/Edit/Management
F906i_E1kou
Making full us e of microSD ca rd
microSD card
You can save data such as recorded still images, movies or melodies or make
backup of data such as phonebook or schedule to microSD card. Movies created
with external devices can be saved in microSD card to play with FOMA terminal (
→
P452) or the data can be operated from a PC by recognizing microSD card in
FOMA terminal as a drive (
→
P316).
・
A microSD card is required. If you have none, purchase it in an electric appliance
store.
・
Note that the operation of microSD card formatted by other FOMA terminal, a
PC, etc., or that formatted half way is not guaranteed.
・
Data in microSD card except i-motion compatible with contents transfer cannot
be set as stand-by display, ring alert or incoming image.
・
F906i supports microSD cards of up to 2 Gbytes, and micoSDHC cards of up to
8 Gbytes (as of April, 2008). For the latest operation confirmation information of
microSD card including the manufacturer, capacity etc., refer to the websites
below. Operation may be unavailable for except microSD card described.
- From i-mode
"
@
F
ケータイ応援団
(@ F mobile phone supporters)" (as of April, 2008)
iMenu
→
メニューリスト
(Menu list)
→
ケータイ電話メーカー
(Mobile phone
manufacturer)
→
@
F
ケータイ応援団
(@ F mobile phone supporters)
*
The access method may be changed without previous notice.
-From a PC
FMWORLD (http://www.fmworld.net/)
→携帯電話
(Mobile phone)
→
microSD state
Information described is the result of operation confirmation and does not guarantee all
operations.
◆
Precautions for using microSD card
・
Do not subject FOMA terminal to strong impact such as dropping when a
microSD card is attached. microSD card may pop out or the data may be
destroyed.
・
Do not attach labels or stickers on the microSD card.
・
appears at the top of the display and the terminal is in the data transfer mode
(same condition as out of service area) while data is being copied, moved or
deleted, the microSD card is being formatted or information is being updated,
the terminal is not available for phone calls, i-mode operation or data
communication. Also, you cannot switch to other functions by pressing
s
.
・
When write protection is set for the microSD card by other devices such as a PC,
saving data into the card, deleting data and format cannot be performed.
・
Data saved from other devices such as a PC into a microSD card may not be
displayed or played with FOMA terminal. Also, data saved in the microSD card
from FOMA terminal may not be displayed or played on other devices.
・
Data with file size exceeding 2 Gbytes cannot be used.
・
With some microSD card, the saved movie is distorted.
・
It is recommended that the data saved in microSD card be separately backed up
for storage. DoCoMo assumes no responsibility for accidentally erased or
changed data.
QR code for
site access
F906i.book Page 307 Monday, April 21, 2008 10:59 PM
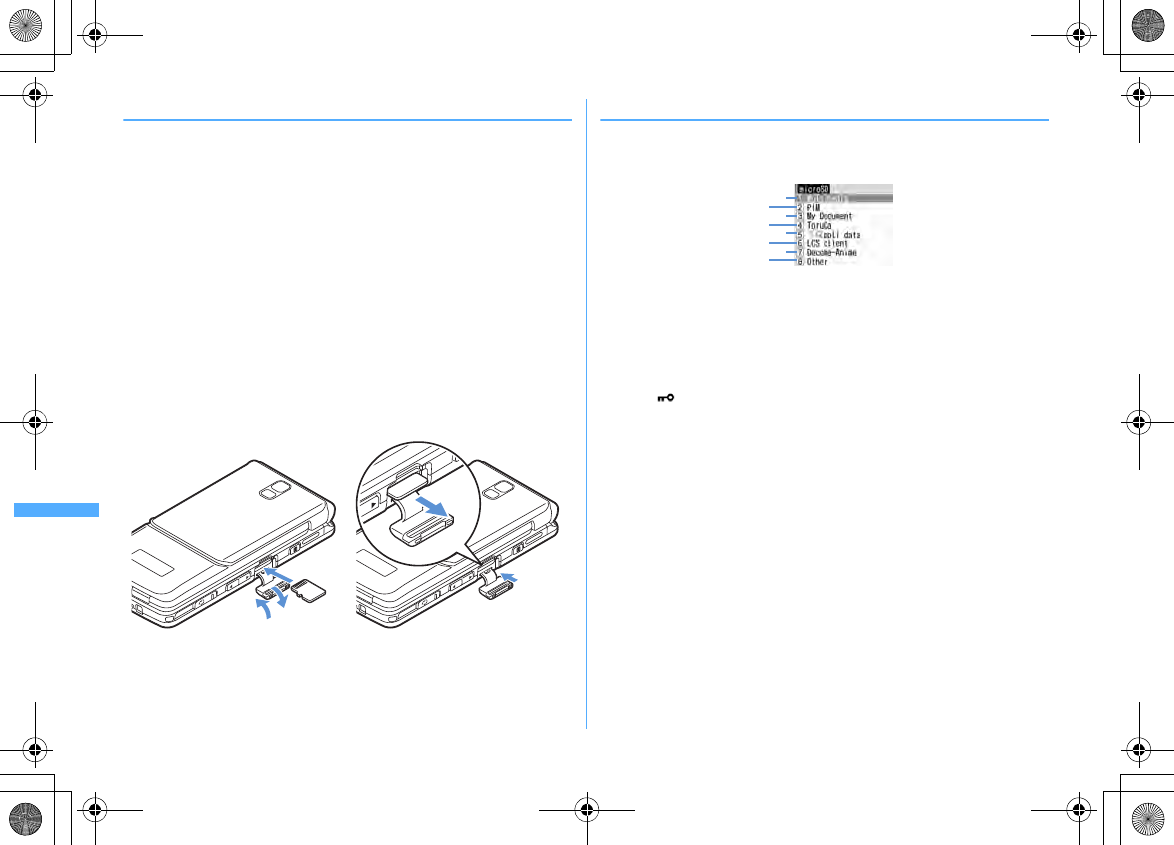
308 Data Display/Edit/Management
F906i_E1kou
◆
Installing/Removing microSD card
・
Be sure to turn FOMA terminal OFF in advance.
・
In the microSD card slot, do not install anything except microSD card. Do not
install microSD card with scratches, deformation or stain. It may cause
malfunction.
・
Install the microSD card correctly into FOMA terminal. You cannot perform
operation such as copying or backing up data, if you have not installed microSD
card correctly.
・
Be careful to avoid touching metal connectors of microSD card.
・
When installing/removing the microSD card, it may pop out of the slot
occasionally.
■
Installing
Open the cover in the direction of
a
and slowly install microSD card into the slot
holding the microSD card printed surface downward (
b
). Install microSD card
until it clicks and close the cover in the direction of
c
.
■
Removing
Open the cover in the direction of
a
and press lightly the center of microSD card
in the direction of
d
. Pull out the popped out microSD card straightly in the
direction of
e
, then close the cover in the direction of
c
.
◆
microSD card folder structure
■
When displaying on FOMA terminal (
m
[LifeKit]
3
)
Data saved and the savable number in each folder are as given below. The savable
number may be reduced by the capacity of microSD card.
a
My Picture (up to 9,999 items can be saved)
Still image shot with camera, JPEG of DCF standard, GIF
Other images (up to 9,999 items can be saved)
JPEG of DCF nonstandard, GIF animation, Flash graphics
Deco-mail pictograms (up to 9,999 items can be saved)
Movies (up to 4,095 items can be saved)
Movie/i-motion
Movies (up to 1,000 items can be saved)
i-motion compatible with contents transfer
Other movies (up to 9,999 items can be saved)
Movie/i-motion containing only sound
Melodies (up to 9,999 items can be saved)
Music (Chaku-uta full
®
can be saved up to 1,000 items and WMA files can be
saved up to 500 items)
1Seg (up to 99 items can be saved)
1Seg video
b
Phonebook/Schedule/Inbox/Unsent/Outbox/Note/Bookmark (up to 9,999 of
the total of an individual item and backup data items can be saved)
c
My Document (up to 999 items can be saved)
PDF data
d
ToruCa (up to 999 items can be saved)
e
i-
α
ppli data (up to 1,200 items can be saved)
f
LCS client (up to 999 items can be saved)
g
Decome-Anime template (up to 9999 items can be saved)
h
Other (up to 999 items can be saved)
Word, Excel or PowerPoint file, etc.
a
c
b
e
d
g
f
h
e
dc
a
b
F906i.book Page 308 Monday, April 21, 2008 10:59 PM
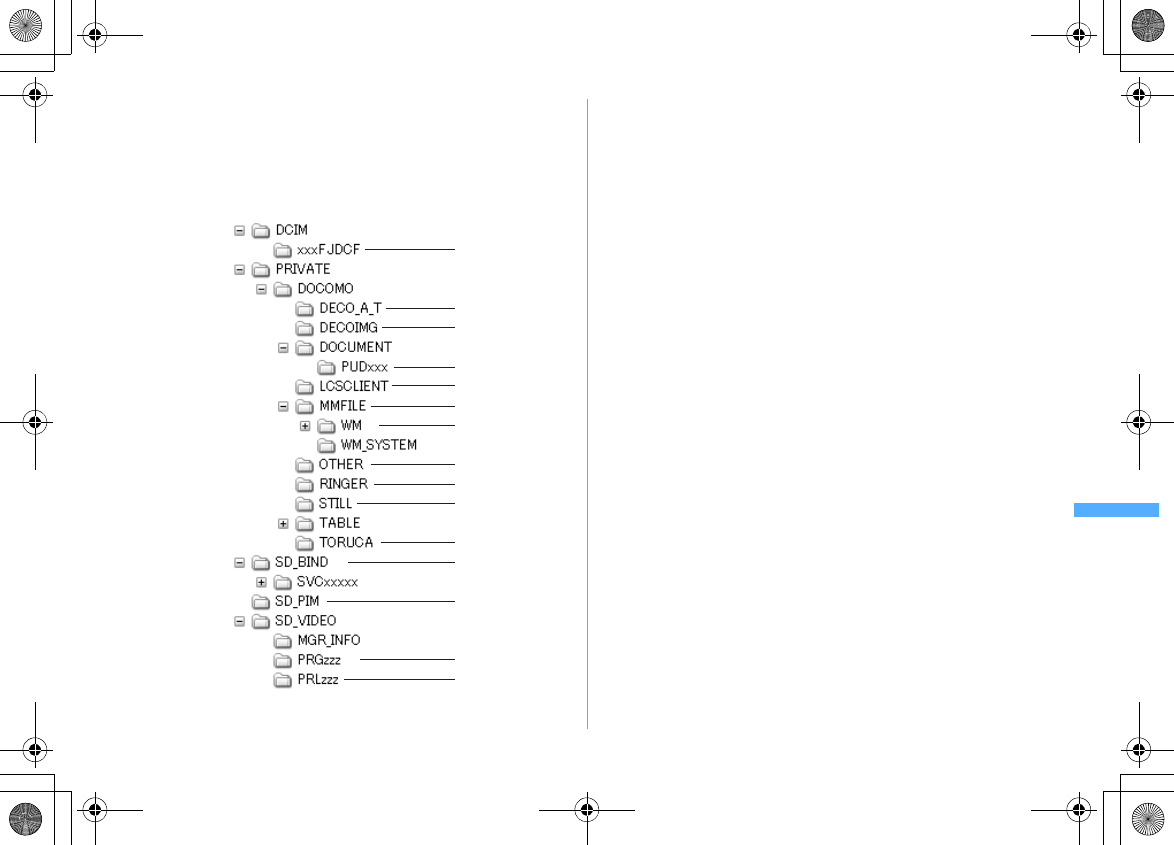
309
Data Display/Edit/Management
F906i_E1kou
■
When displayed by installing in a PC
When data is moved/copied to microSD card from FOMA terminal or still image or
video recorded is saved directly to microSD card, a folder associated with the file
is automatically created. The structure of folders and the file format to be saved are
as shown below.
When saving data to the microSD card from a PC etc., save the data in the specified
folder with the specified file format and name and update the information.
→
P315
*1
Do not delete or rename files in this folder. It may disable correct display or play on FOMA
terminal.
*2
A hidden folder. It does not appear with some PC settings.
a
My Picture (aaaaxxxx.JPG/GIF)
b
Decome-Anime template (DEATxxxx.VGT)
c
Deco-mail pictograms (DIMGxxxx.JPG/GIF)
d
My Document (
*
.PDF)
・
A long file name format of up to 64 one-byte characters including extension
is supported. If a file name is duplicated etc., the file name may be changed
to "PDFDCxxx.PDF" format.
・
Files with extensions except "PDF" are also saved. Extensions have
meanings given below.
"$DF" : PDF data failed in downloading
"DDF" : File for managing i-mode bookmark or icon information
"JPG" : File for thumbnail display
e
LCS client (LSCDCxxx.LSC)
f
Other movies (MMFxxxx.3GP/ASF/MP4)
・
Files with extension "3GP" or "MP4" are treated as MP4 format.
・
Music data of AAC format can be saved.
g
Music player (
*
.WMA)
・
When saving, use Windows Media Player. No information update is
necessary after saving.
h
Others (aaaaaaaa.aaa)
i
Melodies (RINGxxxx.MID/MLD/SMF)
j
Other images (STILxxxx.JPG/GIF/SWF)
k
ToruCa (TORUCxxx.TRC)
l
Data compatible with contents transfer (
*
.aaa)
m
PIM folders (PIMxxxxx.VBM/VCF/VCS/VMG/VNT)
・
Files with extension "PIM" are also saved for managing PIM data.
n
1Seg (MOVzzz.MAI/MOI/SB1, PRGzzz.PGI)
o
Movies (MOLzzz.3GP/ASF/MP4)
・
Files with extension "3GP" or "MP4" are treated as MP4 format.
a
l
m
n
o
f
g
h
i
k
j
c
b
d
e
*1, 2
*1
*1
*1
*1
*1
F906i.book Page 309 Monday, April 21, 2008 10:59 PM
310 Data Display/Edit/Management
F906i_E1kou
・
Naming rules for folders and files are as given below. Characters to use should
be one-byte characters except "
*
".
"xxx" 001-999 (100-999 only for "xxxFJDCF")
"xxxx" 0001-9999
"xxxx" 0001-65535
"zzz" 001-FFF (Hexadecimal)
"a" A-Z (Upper case), 0-9, _ (Under bar)
"
*
" Arbitrary string
✔
INFORMATION
・
If you change or delete a folder name in a microSD card with a PC etc., FOMA terminal
cannot correctly display data.
Exchanging data between FOMA terminal and
microSD card
・
Data given below can be moved or copied.
- Image (except created animation), Deco-mail pictogram, Movie/i-motion, Melody, PDF
data (except partially downloaded data), ToruCa (including details), Decome-Anime
template, Word, Excel, PowerPoint data
・
Data given below can be copied or backed up.
- Phonebook, Schedule, mail, Note, Bookmark, LCS client of GPS
・
1Seg video can be moved only to microSD card.
・
Moving the music data of Music
→
P345
◆
Checking the memory space of microSD card
・
If the memory space of microSD card is insufficient, data may not be saved.
Operate after checking the memory space.
1
m
[LifeKit]
3em
✔
INFORMATION
・
The actually available memory space of microSD card is smaller than the displayed
memory space.
・
Size of data that cannot be recognized by FOMA terminal is also included in the used
memory space.
◆
Moving/Copying data from FOMA terminal to microSD
card
・
You cannot move or copy data whose output from FOMA terminal is inhibited
(except data with File restriction set to "File restricted" on the local terminal or
data in "Data transfer").
・
When phonebook is copied, none of saved movies or PushTalk phonebook is
copied. Saved still images are copied, but they cannot be displayed on terminals
except FOMA terminal.
・
Even if copying a mail with attachment files, the part of the files in excess of 100
Kbytes are not copied.
・
When schedule is copied, member list or image is not copied.
・
i-motion compatible with contents transfer can only be moved.
→
P304
<Example> Moving/Copying images
1
m
[Data Box]
1e
Select a folder
2
Place the cursor on the image and
m5e4
or
5
・
Submenu names or item numbers vary by list screens. "Move/Copy"
→
Select "Move to microSD" or "Copy to microSD". For 1Seg Video(Phone
memory) list, select "Move to microSD".
・
Before selecting "Copy to microSD", select "Data backup" on phonebook
list, or select "Ir/iC/microSD" on Day view screen of schedule, or select
"microSD"on LCS clients list. You do not need to perform Step 3.
・
On bookmark or mail list, select "Move/microSD" or "Move/Copy" before
selecting "Copy to microSD"
→
"Copy one item"/"One item". You do not
need to perform Step 3.
・
デコメ
®
For Decome-Anime template, select "Copy to microSD".
3
1
-
3
Moving/Copying selected items :
2e
Select images
eC
4
"Yes"
F906i.book Page 310 Monday, April 21, 2008 10:59 PM
311
Data Display/Edit/Management
F906i_E1kou
✔
INFORMATION
・
When data in My Picture, i-motion, Melody, 1Seg, Other or Decome-Anime template
is moved/copied, the file name is automatically changed according to the rule for
saving data to a PC. For some PDF data, the file name is changed.
→
P309
・
The memory size of the moved/copied still image may become larger than the size
displayed on FOMA terminal. In this case, the size displayed on microSD card is the
actual size.
◆
Backing up data saved in FOMA terminal to microSD
card
・
Movies saved in phonebook cannot be backed up. Still images can be backed
up, but not displayed.
・
Even if backing up a mail with attachment files, the files of the part in excess of
100 Kbytes are not backed up.
・
When schedule is backed up, watching reservation/recording reservation of
1Seg are not backed up.
<Example> Backing up PIM data
1
m
[LifeKit]
32e1
-
7em14e
Authenticate
e
"Yes"
The selected data is merged collectively and backed up to microSD card.
・
When phonebook entry is backed up, PushTalk phonebook entry and User
information data are also backed up.
・
Bookmark backup operation causes both the i-mode and Full Browser
bookmarks to be backed up.
・
If the backup is stopped by pressing
g
, data already backed up is
discarded.
Backing up LCS client :
m
[LifeKit]
36e
Select a
folder
em16e
Authenticate
e
"Yes"
・
This operation is unavailable unless copy or backup data is saved to
microSD card. On LCS clients list, press
m82
to operate.
✔
INFORMATION
・
If backing up protected i-mode mail, the protection is canceled.
・
Backing up data of phonebook group with secret attribute set cancels secret attribute
of group and sets secret attribute to phonebook entries of group.
・
Operations from phonebook list :
m73
・
Operations from bookmark list :
m542
・
Operation from mail list :
m442
(
422
on unsent mail list)
・
Operations from List of notes :
m96
・
Operations from calendar screen of Schedule :
m93
・
Operations from Day view screen of schedule :
m86
◆
Moving/Copying data from microSD card to FOMA
terminal
・
Savable number
→
P471
・
When exceeding the savable number/area (data in Data Box)
→
P322
❖
Moving/Copying multimedia data
・
i-motion compatible with contents transfer can only be moved.
→
P304
1
m
[LifeKit]
31e1
-
4
,
6
or
7e
Select a
folder
e
Place the cursor on the data and
m3e1
or
2
2
1
-
3
Moving/Copying selected items :
2e
Select a data
eC
3
"Yes"
The data is saved to "Data transfer" folder of My Picture, i-motion or Melody.
・
Deco-mail pictogram is saved in "Deco-mail pict" folder of My Picture
❖
Copying PIM or LCS client
・
Backup data cannot be copied to FOMA terminal.
<Example> Copying PIM data to FOMA terminal
1
m
[LifeKit]
32e1
-
7
Copying LCS client data :
m
[LifeKit]
36e
Select a folder
2
Place the cursor on the data and
m11e
"Yes"
F906i.book Page 311 Monday, April 21, 2008 10:59 PM