Contents
Manual Part 1 6
201
Data Display/Edit/Management
F905i_E2kouF905i_E2kou
◆
Searching for a character string
1
Display data
e5e
Enter a character
string in the field for text to search
e
Set the
required items
Search method :
Select "Partial match" or "Exact
match" for Search method.
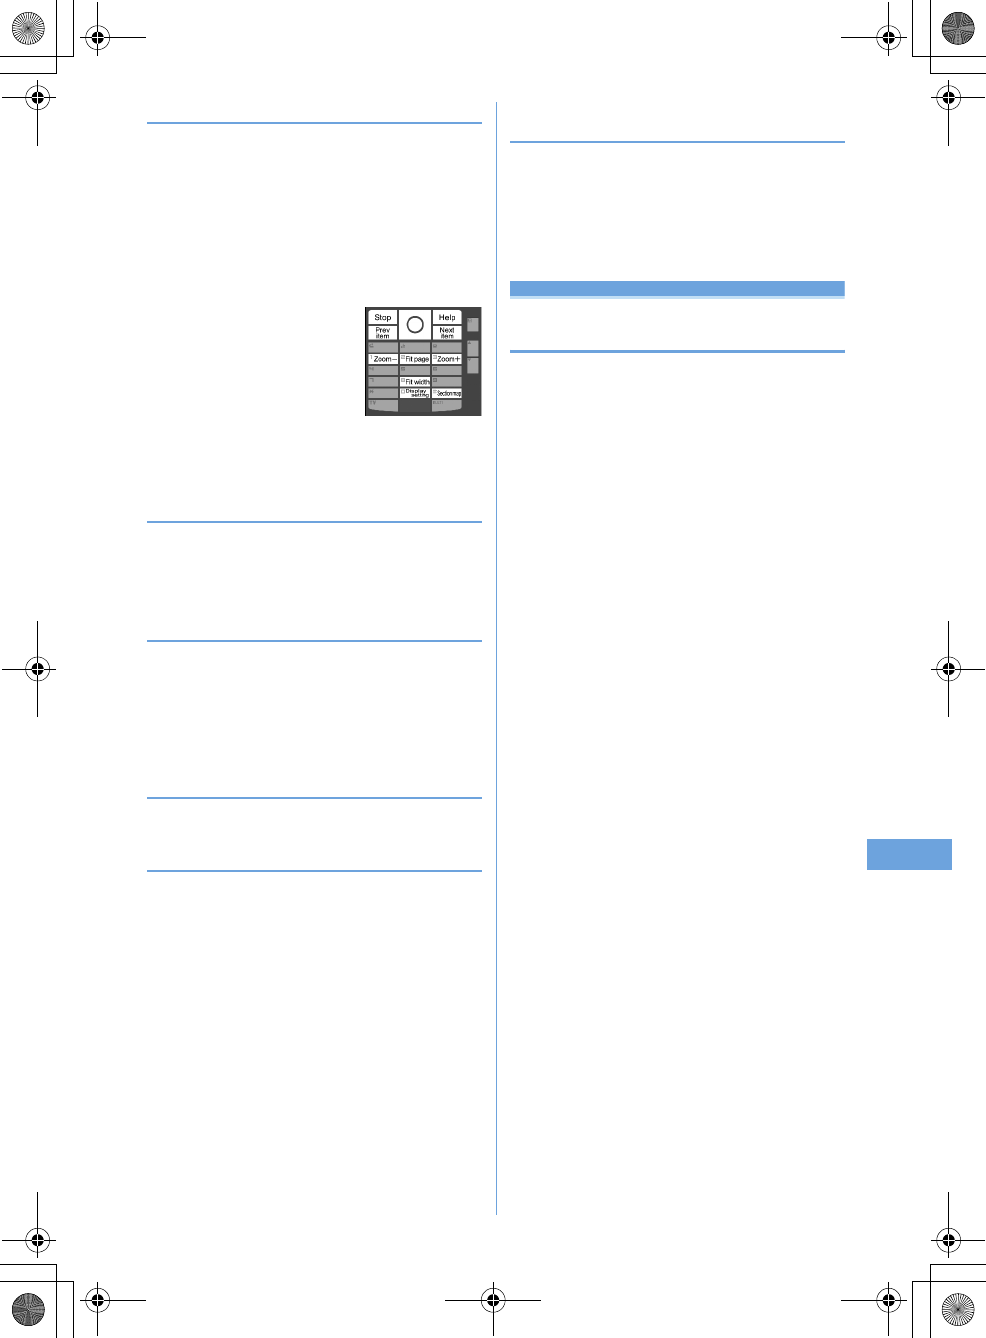
2
p
p
: Display Key function help
•
You can also press a key with a key function help
displayed. When returning to the original screen
without doing any operations, press
g
.
◆
Jumping from page to page
1
Display data
eme1e1
-
5
•
When "Specified page" is selected, enter a page to
jump to and press
g
.
◆
Zooming in/out the display
1
Display data
eme3e1
or
2
Specifying a magnification : Display
data
eme33e
Enter a magnification
•
It does not operate if specifying a magnification
smaller than that for Fit page.
◆
Rotating display
1
Display data
eme4e1
-
3
◆
Changing screen display setting
Switch status or title display/hide. The settings remain after
the display is closed.
1
Display data
eme6e1
or
2
You can also set it by pressing
0
during data
display. Each time you press it, the display switches as
title hide
➝
status hide
➝
all hide
➝
all display.
◆
Switching the displaying method <Display
mode switching>
You can set if you display a screen with the PC screen size
(PC mode(full scale)) or aligned with the lateral display size of
the terminal (Mobile mode).
•
This item can be set to Word only.
1
Data display
eme8
Settings
Setting operating conditions of Word,
Excel and PowerPoint
1
me
[Data Box]
e7eme5e1
or
2
•
Set "Display icons" for thumbnail display or "List view"
for list display.
F905i.book Page 201 Monday, April 21, 2008 10:53 AM
202 Data Display/Edit/Management
F905i_E2kou
F905i.book Page 202 Monday, April 21, 2008 10:53 AM
203
F905i_E2kou
Music Playback
Handling music data
This manual refers to Full Track Music, WMA (Windows Media
Audio) , and MP3 (MPEG Audio Layer-
3) files played with Music player as "music data".
The terminal can play WMA/MP3 file or Full Track Music protected by copyright protection technologies.
When downloading music data from Internet websites, etc., check the use conditions (permitted or
prohibited actions, etc.).
WMA/MP3 files protected by copyright protection technologies are played using information specific to the
terminal. When information specific to the terminal is changed due to failure, repair or modifications of the
terminal, existing WMA/MP3 files may not be played.
Note that DoCoMo assumes no responsibility for handling of copy control CD (CCCD) or for reactions to
disability of converting music data to WMA/MP3 files.
Music data saved in the terminal or microSD memory card is allowed for personal use only. When using
the music data, take extreme care not to infringe intellectual property rights of a third party such as
copyrights, etc. Do not move or copy music data saved in the terminal or microSD memory card to other
devices such as PC.
Music player
Playing music
•
The methods for playing music with the terminal are as follows :
- Playing with Music player
Full Track Music downloaded from sites or music data (WMA/MP3 file) downloaded from the Internet websites or CDs using PC and
transferred to microSD memory card is played.
- Playing as i-motion
i-motion containing only sound downloaded in i-mode and saved to Data Box of the terminal is played. Playing is enabled from microSD
memory card to which i-motion is saved.
Playing i-motion from Data Box
➝
P283
Playing i-motion from microSD memory card
➝
P297
•
Using the display of mail or i-mode site, etc. while listening to music is enabled (Background play).
➝
P338, 428
•
When there is any incoming call, message, etc. while listening to music, play may be paused.
➝
P330
F905i.book Page 203 Monday, April 21, 2008 10:53 AM
20 Music Playback
F905i_E2kou
Music player
Full Track Music downloaded from sites and Windows
Media
Audio (WMA) files transferred from music CDs or
Internet, etc. to a PC can be saved to the terminal or
microSD memory card and played in stereo sound.
Playing is enabled with the terminal folded or open while
using other functions. Music play can be enjoyed in
various ways, i.e., playing playlist or using shuffle play or
introduction play, which is convenient for checking
tunes.
•
Music player is compatible with Full Track Music and
Windows Media Audio (WMA) files.
•
Full Track Music acquired from i-mode and WMA/MP3 files
are saved using Windows Media Player from PC.
•
WMA/MP3 files cannot be saved to the terminal.
•
Note that using Music player consumes a lot of batteries.
•
Precautions for operations and handling of microSD
memory card
➝
P291 "microSD memory card"
•
For Windows Media Player, contact the manufacturer of
your PC.
Saving music data
◆
Downloading Full Track Music
•
The maximum size of Full Track Music that can be saved is
5 Mbytes.
1
Display a site including Full Track
Music
e
Select Full Track Music
Download starts.
Pausing downloading :
pe
"No"
Saving the downloaded part : Select "Save
temporary".
•
The information of music can be checked by selecting
"File property" before saving.
•
The remaining data of Full Track Music partially
saved can be downloaded.
➝
P330 Step 2 in
"Continuously playing music data in the folder"
2
"Save"
Playing : "Play"
Displaying detail information : "File
property"
➝
P334
Canceling saving : "Back"
e
"No"
3
Enter a display name
ep
•
"Title name-Artist name" of Full Track Music detail
information is preset as Display name.
•
When " " appears in the lower-left corner of the
guide area, each pressing of
t
switches the save
destination between the terminal and microSD
memory card. With " Save" displayed, press
p
to save to the microSD memory card. After saving,
the saving location can be checked with the icon on
the music data list screen of Music player.
➝
P328
F905i.book Page 204 Monday, April 21, 2008 10:53 AM
20
Music Playback
F905i_E2kou
◆
Saving WMA/MP3 files
Use Windows Media Player to save WMA/MP3 file to microSD
memory card.
•
It is recommended that you use PC's OS and Windows
Media Player in combination with the versions below :
- For Windows XP Service Pack 2 or later as PC's OS
Windows Media Player 10 (10.00.00.3802 or later
version)
or Windows Media Player 11 (11.0.5721.5145 or later
version)
- Windows Media Player 11 (11.0.6000.6324 or later
version) when OS of PC is Windows Vista
•
For operations, see the help of Windows Media Player 10/
11. For latest information on operating environments, see
Fujitsu's website.
•
Be sure to check the version of Windows Media Player
before connecting the terminal to PC.
•
It is recommended that you keep Windows XP, Windows
Vista or Windows Media Player updated by always
updating. If updating is not made, sufficient performance
cannot be maintained; operating or displaying transferred
WMA/MP3 files is slow.
•
Playlists can be transferred from PCs. However, up to 400
music data in the playlist can be transferred.
•
WMA/MP3 files cannot be saved to the terminal.
•
WMA/MP3 file saved to microSD memory card from
another terminal may not be displayed/played on this
terminal. Also, if you use a microSD memory card used for
forwarding a WMA/MP3 file from a different terminal, it may
not be recognized by PC even if you switch to MTP mode.
In such a case, perform Delete all WMA's and MP3's, or
initialize the microSD memory card (
➝
P299, 335). Note
that, if you initialize the microSD memory card, all the files
including other than music files are also deleted.
1
Prepare WMA/MP3 file in PC using Windows
Media Player
e
Change USB mode settings
of the terminal to "MTP mode"
USB mode settings
➝
P300
•
Install microSD memory card before switching to
"MTP mode".
2
Start Windows Media Player
e
Connect the
terminal to PC using USB cable
Procedure for connecting the terminal to PC
➝
P301
3
Transfer WMA/MP3 file from PC
e
When data
transfer is over, change USB mode settings
of the terminal to "Communication
mode"
e
Remove USB cable
Removing USB cable
➝
P301
✔
INFORMATION
•
Do not remove the USB cable during data transfer. It may cause
malfunction or data loss.
•
Switching from MTP mode to another mode is disabled while
accessing microSD memory card inserted in the terminal from
a PC.
•
Switching to MTP mode is unavailable while playing by Music
player.
•
To change to MTP mode during Music player operation, on a
screen except the player screen,
m➝
Select "MTP
mode"
➝
Select "Yes". MTP mode is set and Music player ends.
•
WMA/MP3 files saved in microSD memory card inserted in the
terminal can also be deleted using Windows Media Player while
the terminal is connected to a PC.
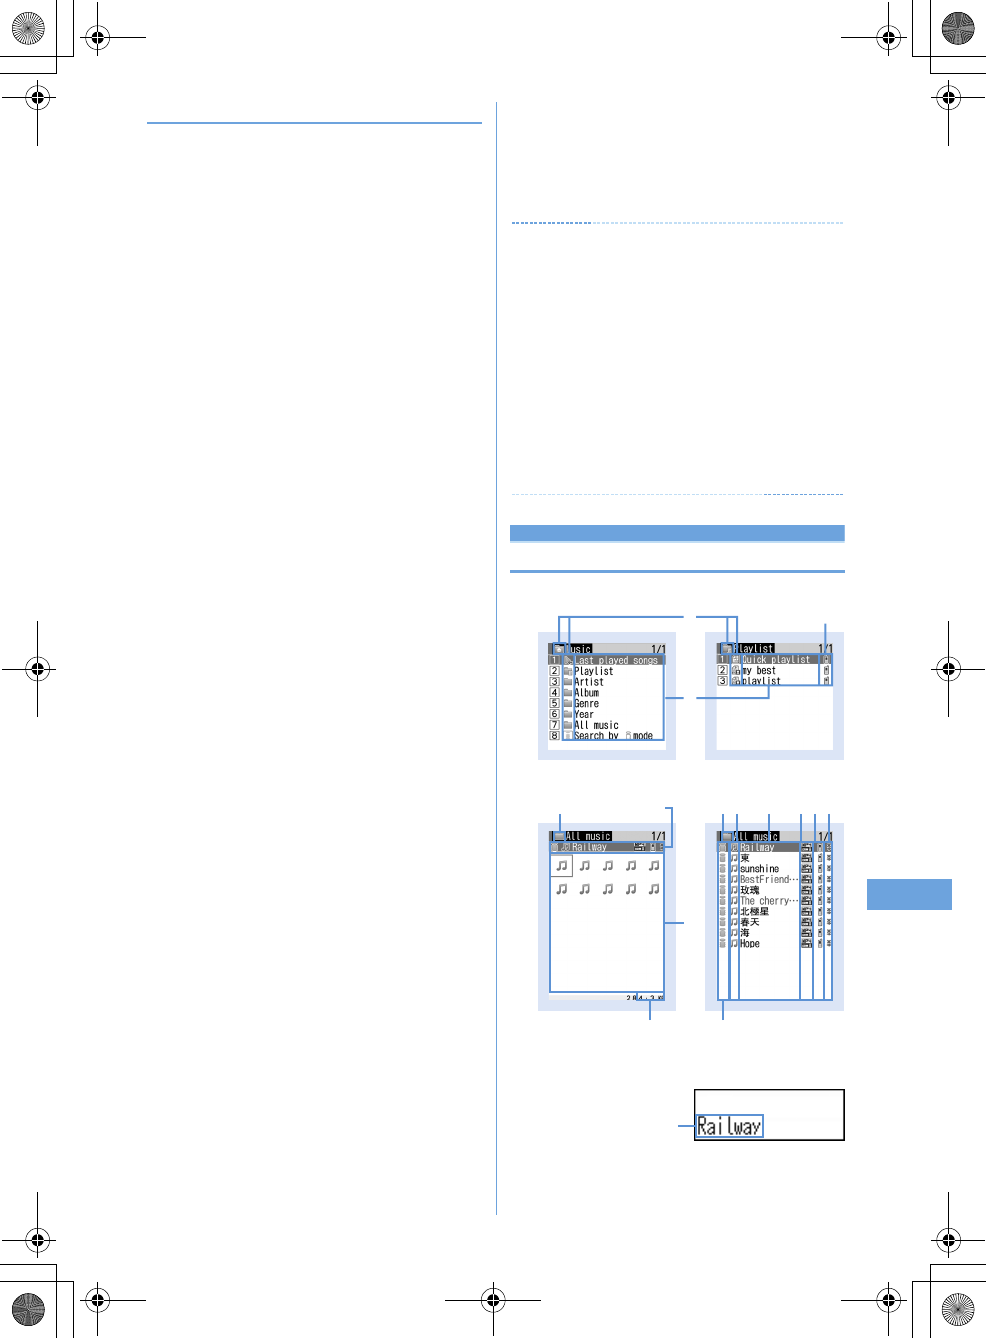
Reading Music player screen
■
Folder/Playlist/Music data list screen
f
a
d
Folder list display Playlist display
bcdefg
Music data list screen
(List display)
Music data list screen
(Jacket image display)
h
a ac d efg
ib
d
Music data list screen (Sub-display)
F905i.book Page 205 Monday, April 21, 2008 10:53 AM
20 Music Playback
F905i_E2kou
a
Folder/Playlist/Types of functions
: Top folder
: Play previous tune
: Playlist folder
: Ordinary folder
: Search by i-mode
➝
P283
: Playlist
: Quick playlist
: Playlist created by the terminal
: Playlist transferred from PC
*
On the sub-display, appears on the left of the folder/play-
list name.
b
Originated
: i-mode : Data exchange
c
Replay restriction
(orange) : Replay unrestricted
: Data partially saved
*1
: Restriction on the number of times
*1
: Restriction on expiration
*1
: Restriction on period
*1
Display only Full Track Music
d
Folder name/Playlist name/Music display name
e
File format and copyright management
: Full Track Music
: Full Track Music with UIM operation restriction,
DoCoMo
: WMA file, Windows Media digital rights management
technology (WMDRM)
: WMA/MP3 file, no copyright management
f
Save location
: Terminal
: microSD memory card
g
File restriction
: File restricted
h
Jacket image
Jacket images contained in music data are displayed.
When Jacket images cannot be displayed for data, the
icons below appear :
: No Jacket image
: Data with UIM operation restriction
: Data partially saved
i
File size of the music data at the cursor position (Size)
✔
INFORMATION
•
On the music data list screen, each pressing of
t
switches
Jacket image and list displays.
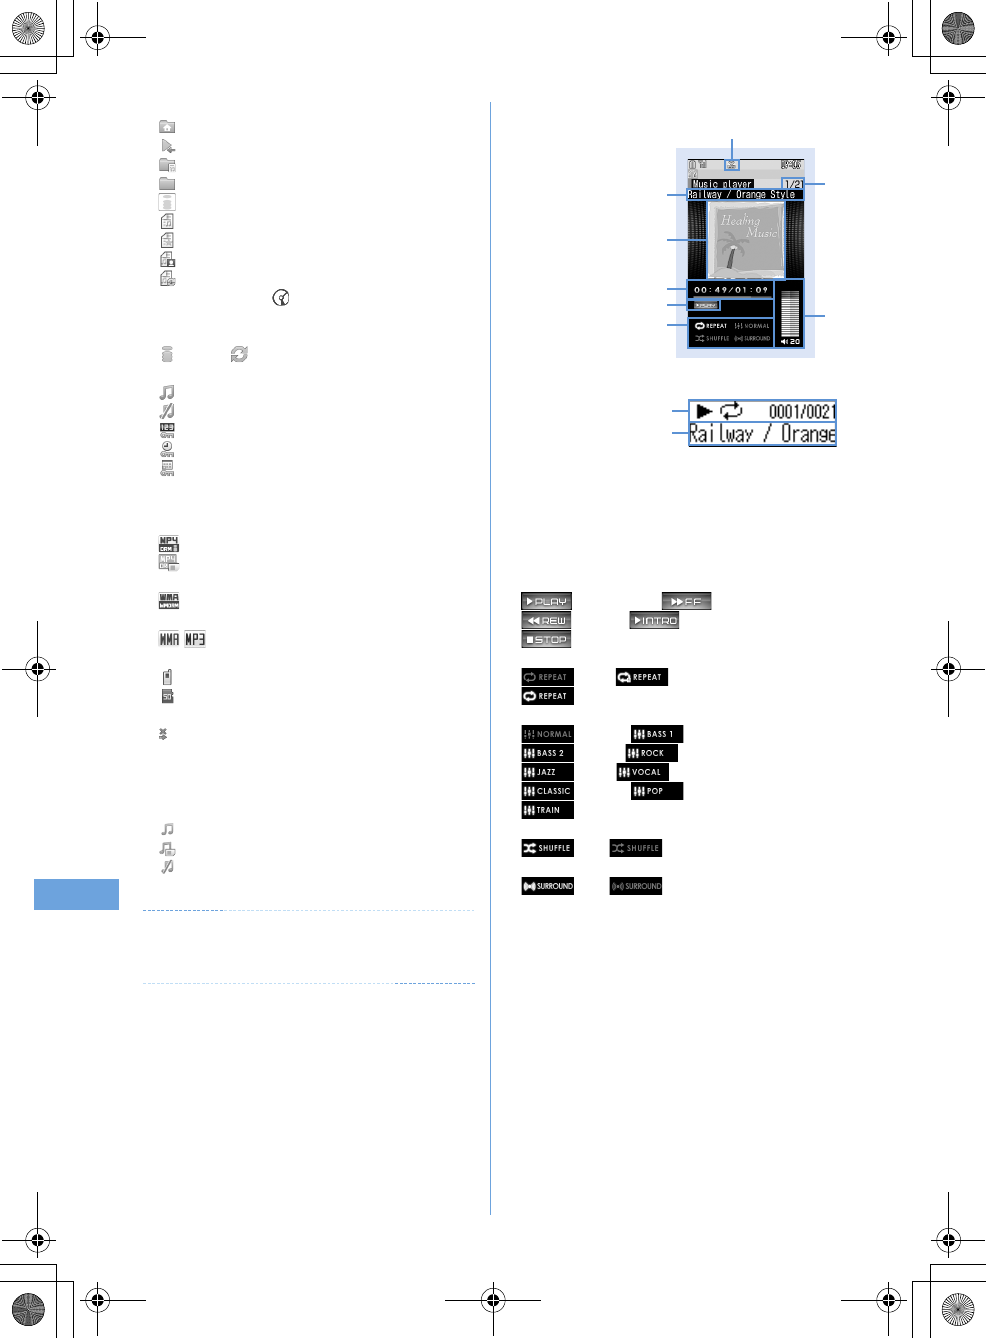
■
Player screen
a
Tune number/number of tunes in folder or playlist
b
Tune title/artist name
c
Jacket image of tune
d
Play time/total time
e
Play position indicator
f
Play status
: Ordinary play : Fast forward
: Rewind : Introduction play
: In pause
g
Repeat play
: OFF : Play one
: Play all
h
Equalizer
: Normal : Bass1
: Bass2 : Rock
: Jazz : Vocal
: Classic : Pop
: In-a-train
i
Shuffle
: ON : OFF
j
Surround
: ON : OFF
k
Play volume
l
b
c
ef
hi
jk
g
Player screen
a
d
ghjb
c
During play (Sub-display while the FOMA terminal is folded)
F905i.book Page 206 Monday, April 21, 2008 10:53 AM
20
Music Playback
F905i_E2kou
❖
Operations on player screen
g
,
M
: Play/Pause
j
, side keys [
ST
] : Adjust volume
l
(1 sec. or more)/
r
(1 sec. or more) : Rewind/fast forward
l
, Side key [
S
] (1 sec. or more) : Move to the beginning of
the current tune
*1
r
, Side key [
T
] (1 sec. or more) : Move to the next tune
a
/
P
(1 sec. or more) : Display music data list screen
without stopping playing
*2
c
: Stop playing and display music data list screen
M
(Pressing twice quickly) : Save the current tune or tune in
pause to Quick playlist
*4
M
(1 sec. or more) : Stop Music player
P
: Display the clock
*5
*1
Operation within 3 seconds from the start of tune moves you to
the previous tune.
*2
Press
a
to return to the player screen.
*3
The confirmation sound is heard.
*4
This is enabled only when the terminal is closed.
•
With the terminal folded and music data list screen
displayed on the sub-display during playing, press
P
to
display the player screen.
•
With the terminal folded, on the music data list screen,
folder list screen or playlist list screen, press and hold
P
for
1 second or more to move to the upper folder. While
displaying the top folder, press and hold
P
for 1 second or
more to stop Music player.
✔
INFORMATION
•
When the tune cannot be recognized by deleting the original
music data saved to the playlist of the terminal or removing
microSD memory card, the name of the tune displayed on the
playlist is "---" and the tune cannot be played. When the original
music data is deleted, remove from the playlist. When the
microSD memory card to which the original music data is saved
is removed, the name of the saved tune appears by inserting
the microSD memory card.
Playing music data
MENU [Data Box] 2
MENU [LifeKit] 318
MENU [MUSIC] 1
◆
Continuously playing music data in the
folder
1
M
(1 sec. or more)
e
Select a folder or
playlist
•
From the menu on the sub-display, Music player can
be started.
➝
P33
2
Select music data.
Playing starts.
•
The light goes lit or flashing depending on operations.
•
Full Track Music partially downloaded due to
downloading failure or interruption cannot be played.
When selected, a confirmation screen for
downloading the remaining data appears. When it
cannot be downloaded by retry, data partially saved is
deleted.
Full Track Music partially downloaded cannot be
downloaded again after the replay period or replay
expiration. In this case, a confirmation screen for
deletion appears and Full Track Music partially saved
can be deleted.
When selecting "Last played songs"
Play the tune played when turning ON the terminal last
time
When selecting "Search by i-mode"
You can connect to i-mode and select the tune to
download.
➝
P326
✔
INFORMATION
•
In the cases below, play is paused. Play restarts automatically
after the operation is over.
- When there is an incoming voice call or a videophone call
- When mail is received (Display priority is "Show message")
- When i-mode inquiry is performed
- When the date and time specified in Countdown timer, Alarm clock
or schedule comes
- When a function that cannot be used simultaneously with Music
player is executed
Combination of Multitask functionsŮP428
•
When many functions are used simultaneously, the tune being
played may be interrupted.
•
If the remaining battery level is l 2 or lower, a confirmation
screen for playing appears.
F905i.book Page 207 Monday, April 21, 2008 10:53 AM

20 Music Playback
F905i_E2kou
❖
Continuously playing only the heads of tunes
<Introduction play>
Only the first 7 seconds of tunes in the folder can be played
one after another.
1
On the music data list screen, place the
cursor on music data and
p
.
•
During introduction play, pressing
g
cancels
introduction play and the play continues.
❖
When replay restrictions for music data are set
Replay restriction types and contents to check are as follows :
Restriction on the number of times
The remaining replay count and a confirmation screen for
playing are displayed. If the specified replay count is reached,
a confirmation screen for notifying exhaustion of the replay
count and deleting music data appears at the next playing.
Restriction on expiration
If the period is expired, a confirmation screen for notifying the
expiration and deleting music data appears at the next
playing.
Restriction on period
Before the period, a message indicating unplayability
appears. After the period, a confirmation screen for notifying
ending of the period and deleting music data appears at the
next playing.
Managing folders, playlists and files
◆
Moving music data
You can move music data between the terminal and microSD
memory card.
•
Only Full Track Music can be moved.
<Example>
Moving music data (1 item)
1
On the music data list screen except playlist,
place the cursor on music data and
me4e1
or
2
2
1e
"Yes"
Music data is moved and and are switched.
Moving selected music data in a folder :
2e
Select music data
epe
"Yes"
Moving all music data in a folder :
3e
"Yes"
✔
INFORMATION
•
Music data being played cannot be moved.
•
Full Track Music partially saved, or Full Track Music exceeding
play limit cannot be moved.
•
If music data set for ring alert is moved from the terminal to
microSD memory card, the ring alert setting returns to default.
◆
Deleting music data
<Example>
Deleting music data (1 item)
1
On the music data list screen except playlist,
place the cursor on music data
eme5
F905i.book Page 208 Monday, April 21, 2008 10:53 AM
20
Music Playback
F905i_E2kou
2
1e
"Yes"
Deleting selected music data in a folder :
2e
Select music data
epe
"Yes"
Deleting all music data in a folder :
3e
Authenticate
e
"Yes"
✔
INFORMATION
•
Music data being played cannot be deleted.
•
When all music data is removed from a folder, the folder itself is
also deleted. However "Playlist", "Artist", "Album", "Genre",
"Year" or "All music" folder in the top folder is not deleted.
•
If music data set for ring alert is deleted, the ring alert setting
returns to default.
◆
Creating playlist
Using playlists, you can manage a play order, etc. of a group
of music data.
•
Playlists can be created on PC and transferred with music
data.
➝
P327
1
On the folder list screen, select a Playlist
folder
eme1e
Enter a playlist
name
ep
An empty playlist is created.
•
As playlist name, "playlistYYYYMMDD" (where
YYYYMMDD is the year, month and day of creating
the playlist) is preset.
◆
Creating playlist from music data to save
<Example>
Creating a playlist with music data saved (1
item)
1
On the music data list screen except playlist,
place the cursor on the music data and
me311
Saving selected music data : On the music data list
screen,
me312e
Select music
data
ep
Saving all the music data in folder : On the music
data list screen,
me313
2
Enter the playlist name
ep
◆
Saving music data to playlist
❖
Operating from playlist to save data
<Example>
Saving music data (1 item)
1
Select a playlist
eme31
2
1e
Select a folder
e
Select music data
Saving selected or all music data in a folder :
2
or
3e
Select a folder
e
Select music
data
ep
❖
Adding music data to playlist
<Example>
Adding music data (1 item)
1
On the music data list screen except playlist,
place the cursor on music data and
me321
Adding selected music data : On the music data list
screen,
me322e
Select music
data
ep
Adding all music data in a folder : On the music data
list screen,
me323
2
Select a playlist.
The music data is added to the end line of the playlist.
❖
Saving music data in playlist containing no
music data
1
Select a playlist including no music
data
e
"Yes"
e
Select a folder
e
Select
music data
ep
F905i.book Page 209 Monday, April 21, 2008 10:53 AM
21 Music Playback
F905i_E2kou
◆
Saving music data to Quick playlist on the
player screen
Quick playlist is a playlist for saving the tune being played or
paused by simply operation.
•
Quick playlist is saved by default. Creation and deletion of
it are disabled.
1
On the player screen, press
M
twice.
When saved, the confirmation sound is emitted.
✔
INFORMATION
•
Quick playlist cannot be renamed.
•
Music data in Quick playlist can be operated in the same way
as another playlist.
◆
Removing music data from playlist
•
Removing music data in Quick playlist or playlist does not
delete that music data itself.
•
Music data cannot be removed from playlists transferred
from PC.
<Example>
Removing music data (1 item)
1
On the music data list screen in a playlist,
place the cursor on music data and
me321e
"Yes"
Removing selected music data : On the music data
list screen in the playlist,
me322e
Select music
data
epe
"Yes"
Removing all music data : On the music data list
screen in the playlist,
me323e
"Yes"
◆
Deleting playlists
1
On the folder list screen, select a Playlist
folder
e
Place the cursor on a playlist and
me3e
"Yes"
◆
Renaming playlist
•
The name of the quick playlist or playlist transferred from
PC cannot be changed.
1
On the folder list screen, select a Playlist
folder
e
Place the cursor on a playlist and
me5e
Enter a playlist name
ep
Displaying a playlist name : Select a Playlist folder
on the folder list screen
e
Place the cursor on a
playlist and
me4
◆
Copying playlist
1
On the folder list screen, select a Playlist
folder
e
Place the cursor on a playlist and
me2
•
When copying playlists in microSD memory card,
press
2
to select "Yes". The copied playlists are
saved to the terminal as playlists created by the
terminal.
◆
Changing display order of music data
<Sort>
You can change an order of music data by a specified
criterion.
1
On music data list screen,
me6e
Set
the required items
ep
✔
INFORMATION
•
Sorting is unavailable during playing.
•
Sorting is disabled in playlist.
◆
Sorting play order in playlist freely
•
Sorting is enabled only in Quick playlist or playlist created
in the terminal.
1
On a playlist music data screen,
me33e
Place the cursor on music
data and
t
or
aep
F905i.book Page 210 Monday, April 21, 2008 10:53 AM
21
Music Playback
F905i_E2kou
◆
Setting music data for ring alert
You can select "Full song ring tone" to set whole music data
as a ring alert or "Point ring tone" to set a part of it.
•
WMA/MP3 files cannot be set as ring alert.
<Example>
Setting music data of the terminal to full song
ring tone
1
On the music data list screen, place the
cursor on music data and
me1
2
1
-
9e1
•
When setting as a contact alert (Call, Mail), select
phonebook entry to set it and press
p
.
Setting music data in the terminal as Point ring tone
:
1
-
9e2e
Select a part to set
•
Press
p
to play the part to set.
Setting music data of microSD memory card to full
song ring tone :
1
-
9e1e
"Yes" on
confirmation screen
The music data moves to the terminal and is set as ring
alert.
Setting music data of microSD memory card to
Point ring tone :
1
-
9e2e
Select a
part to set
e
"Yes" on confirmation
screen
e
Enter display name
ep
The selected part of the music data is saved in i-motion
folder of the terminal as i-motion compatible with
contents transfer and is set as ring alert.
✔
INFORMATION
•
Music with Full song ring tone or Point ring tone of detail
information (
➝
P334) set to "Unavailable" cannot be set as ring
alert.
•
Ring alert cannot be set during playing.
◆
Displaying detail information of music data
<Displaying detail Information>
1
On a music data list screen, place the cursor
on music data and
me21e
Select
information
Changing detail information of music data :
a
On a music data list screen, place the cursor on
music data and
me22e
Select an
item
e
Enter new data
•
You can change detail information also by
pressing
p
while it is displayed.
bp
✔
INFORMATION
•
If detail information of music data in pause is changed, that
music data may not be played from the beginning when Music
player starts next time.
•
Detail information of WMA/MP3 file cannot be changed.
•
Detail information cannot be changed during playing.
F905i.book Page 211 Monday, April 21, 2008 10:53 AM
21 Music Playback
F905i_E2kou
◆
Displaying images or lyrics of music data
•
Images in JPEG or GIF format can be displayed.
•
Images and lyrics can be saved.
•
Lyrics is saved as image data.
1
On the music data list screen, place the
cursor on music data and
me23
•
When operating during playing or in pause on the
player screen, press
m2
.
2
1
-
3
Displaying on a full-screen :
t
•
When there are multiple images or lyrics,
j
can be
used to display previous or next image or lyric.
•
Press any of
c
,
m
,
t
,
p
or
a
to restore
the display.
Saving :
p
•
The images or lyrics are saved to "i-mode" folder of
My Picture.
✔
INFORMATION
•
Some images or lyrics may not be saved.
•
For a WMA/MP3 file, only Jacket images contained in data can
be displayed, but Jacket images cannot be saved.
◆
Deleting WMA/MP3 files all at once <Delete
all WMAs/MP3s>
1
On the folder list screen in the top folder,
me1e
Authenticate
e
"Yes"
WMA/MP3 files and playlists saved to microSD memory
card are deleted.
✔
INFORMATION
•
Performing Delete all WMAs/MP3s deletes the WM folder in
microSD memory card, WM_SYSTEM folders and all data from
these folders. Note that data not used by Music player is also
deleted.
•
During play, Delete all WMAs/MP3s cannot be performed.
Settings/Setting
Setting Music player
1
On the folder list screen, music data list
screen or player screen,
me
"Setting"
e
Set the required
items
ep
✔
INFORMATION
•
These settings are maintained even after Music player is exited.
•
Surround and Equalizer cannot be changed while playing music
player.
F905i.book Page 212 Monday, April 21, 2008 10:53 AM
21
Music Playback
F905i_E2kou
Enjoying music in various ways
BGM play
Using i-
α
ppli while playing music
You can set if you play Music player tune in background
while using i-
α
ppli.
1
me
[Settings & NW services]
e17e1
-
2
Remote controller with microphone
Using remote controller with micro-
phone
You can use the switch of a remote controller with a
microphone to operate Music player.
R
(1 sec. or more)
*1
: Start
*2
/End
R
: Play/Pause
R
(Pressing twice quickly on the player screen)
*1
: Save
the current or paused tune to Quick playlist
+-
(Player screen) : Adjust volume
+-
(Folder list screen, playlist list screen, music data
list screen) : Move the cursor.
+
(1 sec. or more) : Move to the next chapter/tune
-
(1 sec. or more)
*3
: Move to the header of the next
chapter/tune
W
(Slide in the direction of
T
) : Disable
R
,
+
and
-
keys.
W
(Slide in the opposite direction of
T
) : Enable disabled
keys
*1
This is enabled only for Music player. When saving to Quick
playlist or starting/ending Music player, the confirmation
sound is emitted.
*2
This is enabled only when the terminal is closed.
*3
Operation within 3 seconds from the start of a chapter/tune
moves you to the previous tune.
F905i.book Page 213 Monday, April 21, 2008 10:53 AM
21 Music Playback
F905i_E2kou
F905i.book Page 214 Monday, April 21, 2008 10:53 AM
215
F905i_E2kou
Other Convenient Functions
F905i.book Page 215 Monday, April 21, 2008 10:53 AM
216 Other Convenient Functions
F905i_E2kou
Multiaccess
Multiaccess
Multiaccess is the function that allows you to use 3
functions; voice call, packet communication and short
message (SMS) simultaneously.
•
The icon indicating the function in progress appears on the
task area.
•
The functions below are available simultaneously :
- Voice call : 1 communication
-i-mode, i-
α
ppli, i-mode mail, packet communication connected
with PC : 1 communication of these
- SMS : 1 communication
•
You are charged separately for each communication when
using the Multiaccess function.
•
Combination of Multiaccess functions
➝
P427
◆
Main operations available with Multiaccess
❖
Receiving voice call during communication
<Example> Answering a voice call during i-mode
1
A call is comes in during i-mode
en
The call is connected.
•
Press
f
to end the current function on the display.
❖
Performing another communication during
communication
<Example> Connecting to i-mode during a voice call
1
During a voice call,
se21
•
Press
f
to end the current function on the display.
<Example> Sending i-mode mail during a voice call
1
During a voice call,
se12e
Send
an i-mode mail
•
Press
f
to end the current function on the display.
Multitask
Multitask
Multitask allows you to execute multiple functions at the
same time and perform operations by switching the
screen.
•
The icon indicating the function in progress appears on the
task area.
•
Up to 2 functions can be executed at the same time.
However, Dial, User information or Silent mode ON/OFF
function may be started even while 2 other functions are
active.
•
Combination of Multitask functions
➝
P428
◆
Executing new function
<Example> Saving schedule during a call
1
During a call
,se71e
Save
schedule
•
Press
f
to end the current function on the display.
◆
Exiting all running functions
1
In Multitask,
sepe
"Yes"
Auto power ON/OFF
Turning power ON/OFF automatically
The power can be automatically turned ON/OFF at the
specified time.
<Example> Turning power ON automatically
1
me
[Settings & NW
services]
e722
Turning power OFF automatically :
me
[Settings
& NW services]
e723
2
Set the required items
ep
✔
INFORMATION
•
Even when Auto power OFF is "ON", when the specified time
arrives while the terminal is in any mode except stand-by, the
power is not turned OFF. The power is turned OFF after exiting
the currently active function.
In addition to turning the terminal OFF, keep Auto
power ON set to "OFF" in areas where use of a
mobile phone is prohibited, such as in airplanes,
medical facilities or hospitals.
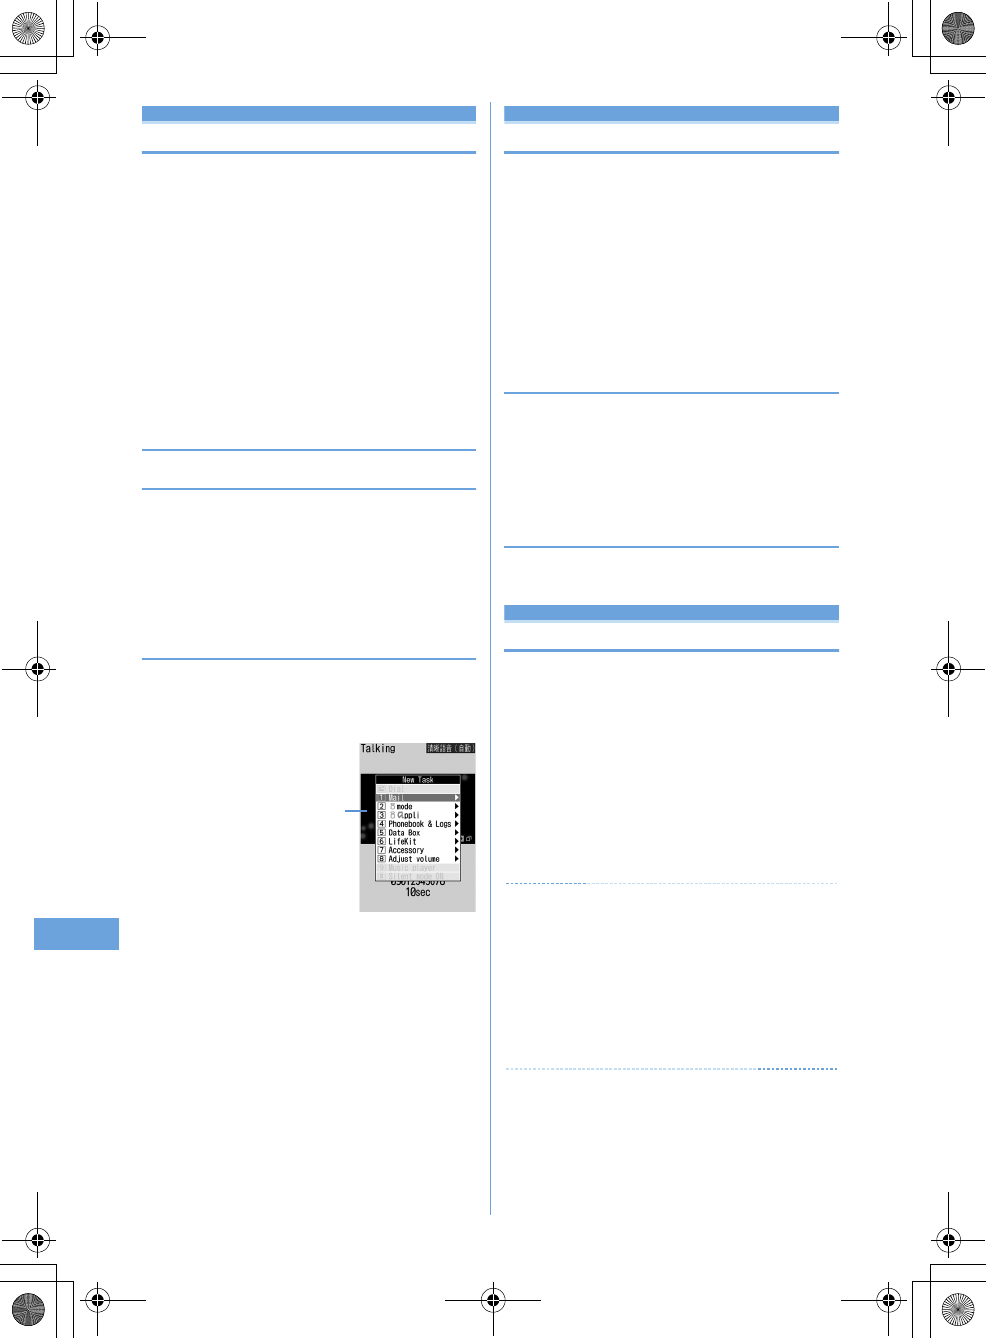
New Task start menu
F905i.book Page 216 Monday, April 21, 2008 10:53 AM
217
Other Convenient Functions
F905i_E2kou
Countdown timer
Setting the timer with a simple opera-
tion
MENU [Accessory] 6
On the stand-by display, you can enter and set the time
(minutes) to elapse before the timer sounds.
1
Enter a time (minutes)
er
•
The time is entered between 1 and 60 minutes.
•
When
c
or
f
is pressed during the
countdown, a screen appears for confirming the end.
•
Press
f
to stop the timer.
•
When no operation is carried out for about 1 minute
or any key except
f
or side key [
T
] is pressed,
the timer stops.
Alarm clock
Ringing alarm clock at specified time
•
Up to 9 alarm clocks can be set.
1
me
[Accessory]
e3e1
-
9
Setting/canceling : Place the cursor on a set alarm
clock and
m
.
•
appears at the left of the time for the set alarm
clock.
2
Set the required items.
Time :
Enter the time to sound an alarm clock.
Repeat :
Set a repeating operation.
•
When "Day of week" is selected, select "Day/
Week", select a day of week and press
p
.
•
When Repeat is set, appears to the right of the
time in an alarm clock list.
Message :
Enter a message to be displayed on the
screen upon activation of the alarm clock.
Snooze(Snz) :
Set whether to repeat Snooze operation
(sounding continues approx. 1 minute and stops) for
approx. 30 minutes.
•
Select "5 min", "10 min" or "15 min" to stop approx.
4 minutes, 9 minutes or 14 minutes, respectively.
3
h
to switch to Set sound screen
e
Set the
required items
4
p
•
When Alarm clock is set, or (when a schedule
reminder is also set) appears on the stand-by display.
❖
When the specified time arrives
•
Press
f
to stop the alarm clock.
•
When no operation is carried out for about 1 minute or any
key except
f
and side key [
▼
] is pressed, the alarm
clock stops or Snooze operation starts.
•
While alarm clock is stopped with Snooze operation
activated, "
瞌睡鬧鈴
" appears on the display and the light
blinks slowly.
•
While Alarm clock is stopped, press
c
or
f
to
deactivate it. While alarm clock is stopped with Snooze
operation activated, press
f
to deactivate.
✔
INFORMATION
•
If alarm clock and a schedule reminder are set for the same
date and time, the alarm clock sounds, succeeded by
notification of the schedule reminder. When
f
is pressed,
the schedule reminder ends, but the alarm clock stops or
snooze operation is performed.
F905i.book Page 217 Monday, April 21, 2008 10:53 AM
218 Other Convenient Functions
F905i_E2kou
Alarm auto power ON
Turning power ON automatically at set
alarm time
You can set whether to automatically turn the power ON
to activate the alarm if the power is OFF when the date
and time specified for the alarm clock or schedule arrive.
1
me
[Settings & NW
services]
e725e1
or
2
✔
INFORMATION
•
This function does not operate if power supply to the terminal is
stopped in a way except power OFF operation or Auto power
OFF settings, (e.g. by removing the battery pack).
•
In addition to turning the terminal OFF, keep this function set to
"OFF" in areas where use of a mobile phone is prohibited, such
as in hospitals, medical facilities or airplanes.
Scheduler
Managing schedule
You can save various schedules. At the specified time,
you are notified with the display and/or alarm.
◆
Displaying calendar
MENU [Accessory] 1
1
p
(1 sec. or more)
•
While displaying a calendar screen, the operations
below are enabled :
k
: Move date
g
: Day view screen
t
/
a
: Switching previous/next month
m0
: Key operation list display
•
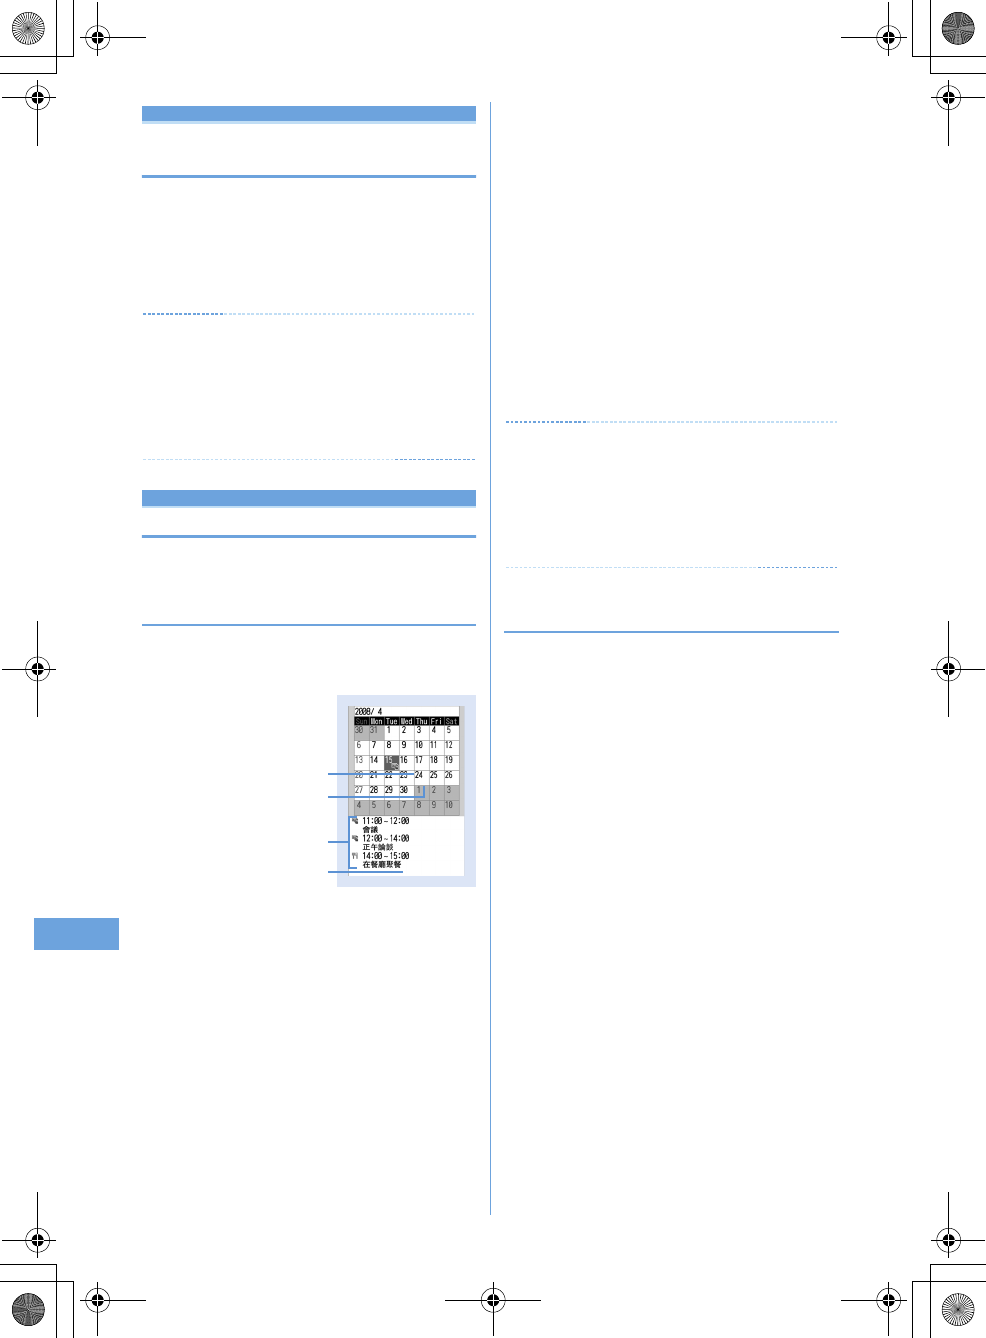
Reading the screen is described below :
a
Item icon
•
For a date with multiple schedules set, the
schedule item icon set for the earliest time is
indicated.
b
List of schedules set for the date at cursor
position
•
Reading the list is in the same way as Day view
screen (
➝
P344).
c
Indicates 4 or more schedules
Specifying a particular date to display (Move date) :
me42e
Enter a date
•
Press
m41
to restore the current date.
•
When operating from the Day view screen, press
m52
. Press
m51
to restore the
current date.
✔
INFORMATION
•
The calendar can display dates between January 1, 2000 and
December 31, 2060.
•
The displayed color may differ depending on the settings of
Kisekae Tool and Color scheme.
•
The list of schedules does not appear on the horizontal display
of the calendar screen.
◆
Setting display style for calendar <Calendar
view mode>
•
By default, Scroll mode is "Monthly mode", Display mode is
"Normal mode", and Zoom style is "Normal".
1
p
(1 sec. or more)
eme61e
Set
the required items
ep
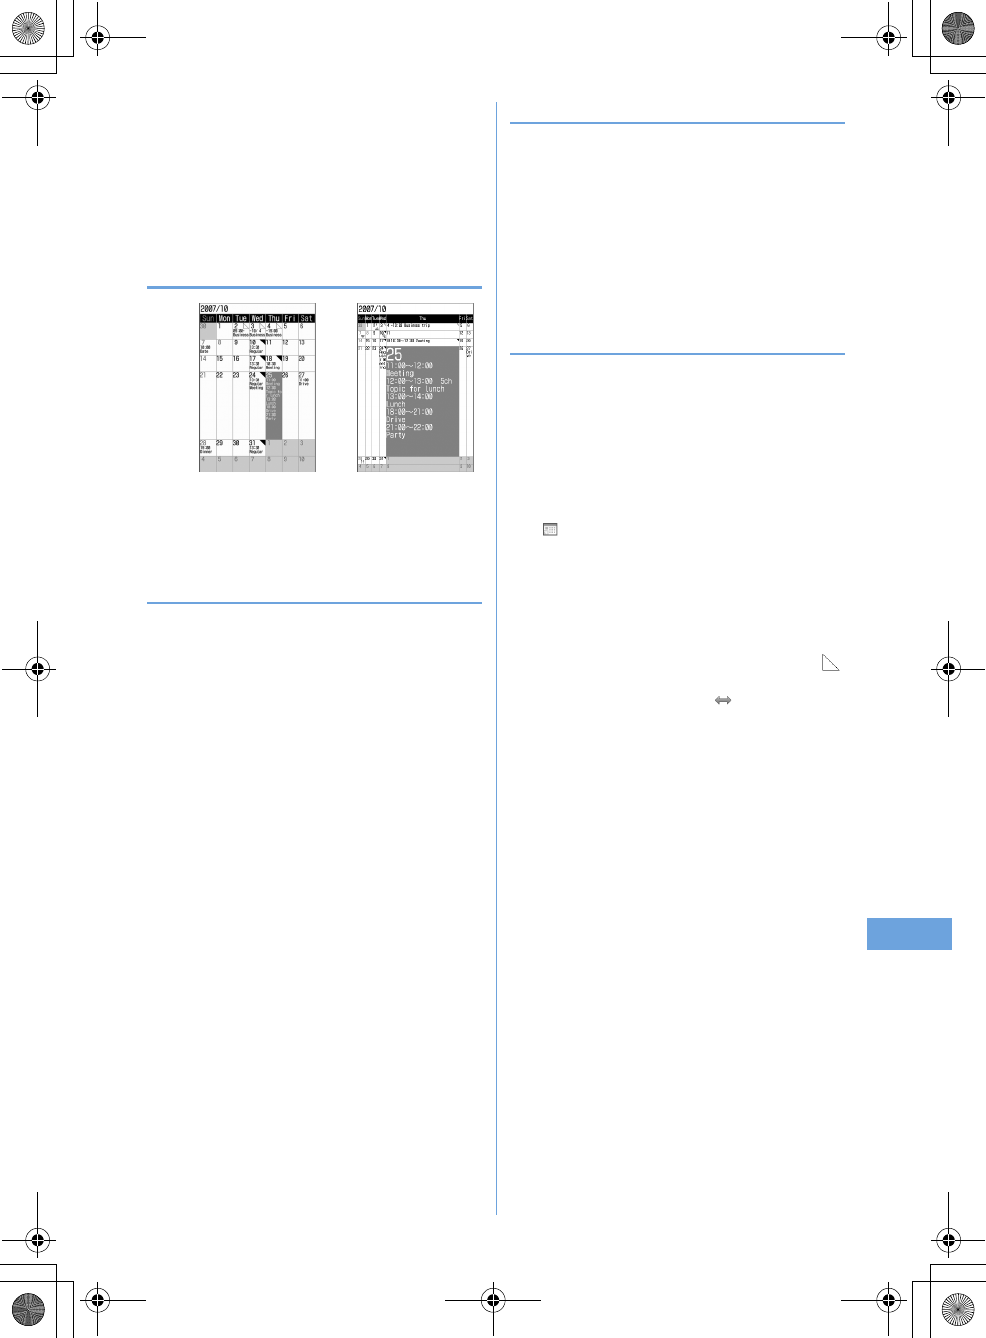
Scroll mode :
Set a calendar display style of the date
moved by pressing
k
.
•
Set "Monthly mode" to switch the display by month.
Set "Slide mode" to scroll and switch the display by
week.
Calendar screen
c
b
Cursor
a
F905i.book Page 218 Monday, April 21, 2008 10:53 AM
219
Other Convenient Functions
F905i_E2kou
•
Display mode :
Set the first day of the week (Leftmost
position).
•
The first day is Sunday in "Normal mode" and
Monday in "Business mode".
Zoom style :
Select whether to zoom the display.
•
"Normal" causes no zooming. Set "Weekly zoom"
for enlarging based on weeks and "Daily zoom" for
enlarging based on days.
❖
Enlarging display
•
The operations below can be performed :
1
/
3
: Zoom in/out
2
: Initial screen reappears
◆
Setting days off <Days off>
•
Up to 30 days off can be registered.
<Example> Setting by specifying the date
1
p
(1 sec. or more)
2
Place the cursor on a date and
me621
The date specified is highlighted on the calendar screen.
•
Press
m622
to set day off to be
repeated yearly.
Canceling : Place the cursor on a date and
me62e3
or
4
Setting by specifying the day of the week :
ame63e
Select a day of week
•
When a day of week other than Sunday is
selected, press
m
to restore to the default.
bp
◆
Setting holiday <Holiday settings>
•
Up to 30 holidays can be saved newly.
1
p
(1 sec. or more)
eme64
2
p
Changing : Select a holiday
e
Go to Step 3
Deleting : Place the cursor on a holiday and
me
"Yes"
3
Set the required items
ep
◆
Saving schedules
•
You can save multiple schedules for the same day.
1
p
(1 sec. or more)
e
Place the cursor on a
date and
p
•
When operating from the Day view screen, press
p
.
2
Set the required items.
(Item icon) :
Select an item icon.
Schedule (Content entry field) :
The schedule content
entered for the selected item icon appears.
All day :
To set All day schedule without specifying the
hour, select "ON".
Start time :
Enter a start date/time.
End time :
Enter an end date/time.
•
When the set date is later than the Start time,
appears in the upper right corner of the set date on
the calendar screen. And, appears below the
individual item icons of the schedule list of the
calendar screen, Day view screen or schedule
details screen (Long-term schedule).
Weekly zoom (initial screen) Daily zoom (maximum)
F905i.book Page 219 Monday, April 21, 2008 10:53 AM
220 Other Convenient Functions
F905i_E2kou
•
Note :
Enter details, etc.
3
h
to switch to the Select members
screen
e
"<Select member list>"
e
Select a
member from the phonebook
•
Up to 5 members can be saved.
•
To delete a member, place the cursor on that member
and press
m
.
4
h
to switch to Reminder screen
e
Set the
required items
Alarm on time (Schedule reminder)
: To set a
reminder, select "Yes" and select an alarm sound.
•
When selecting "i-motion", "Melody" or "Music",
select alarm sound.
•
If you set "Phone setting", it depends on the
Schedule reminder of Ring alerts & Sounds.
Setting Music
➝
P87
Alarm in advance :
Select "Yes" to sound Alarm in
advance before the start time.
•
The selection method is the same as for Alarm on
time.
Alarm before time :
Set a time to start Alarm in advance
with a number of minutes before the start time.
5
h
to switch to Other settings screen
e
Set
the required items
Repeat :
Set a repeating operation.
•
When a "31st" day or "February 29" in a leap year
is set as the starting date and "Every month" or
"Every year" is selected for repeat, the schedule is
repeated on the last day of the same year/month
instead of the specified date (that is, "30th" or "Feb.
28th").
•
When "Day of week" is selected, select "Day/
Week", select a day of week and press
p
.
•
When Repeat is set, appears in the upper-right
corner of the set date on the calendar screen. And,
appears below the item icon on the schedule
list of the calendar screen, Day view screen or
schedule details screen (Repeat schedule).
Image :
To change the schedule reminder screen,
select "Yes", select "Image" and select the image.
•
Flash graphics cannot be set.
6
p
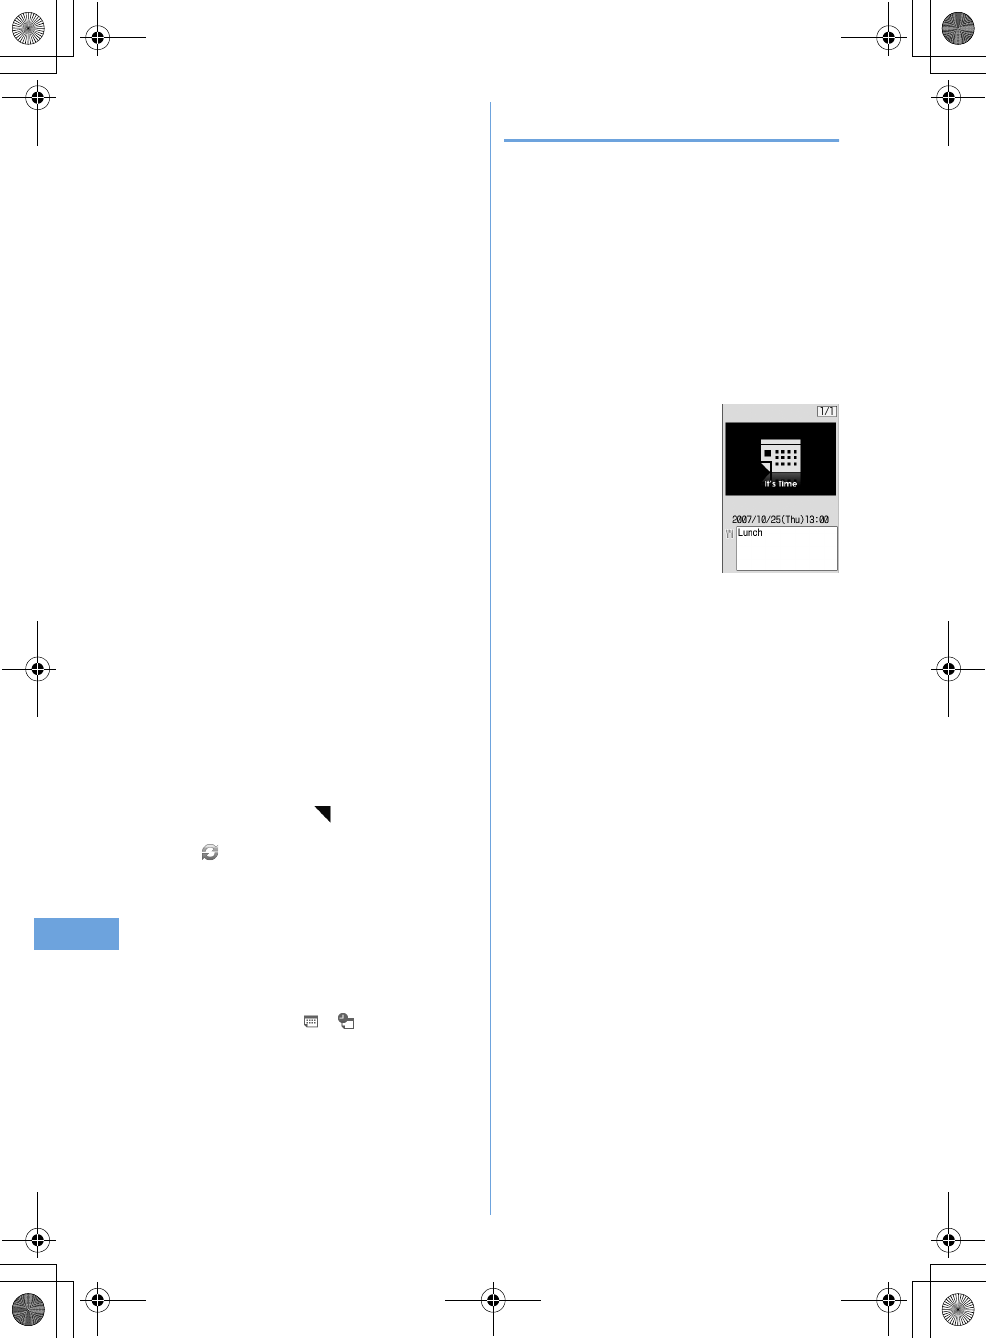
•
When a schedule that sets Alarm on time and Alarm
in advance is saved, or (when Alarm clock is
also set) appears on the stand-by display.
❖
Saving schedules from stand-by display
<Quick schedule>
You can save a schedule by a simple key operation on the
stand-by display without displaying the calendar screen.
1
Enter date/time in 8-digit number
ep
The Main (New) screen of schedule appears.
•
For 09:05 on October 25, enter
10250905
.
•
When 4 digits (2 digits for hour and 2 digits for minute)
are entered, the Main (New) screen for the current
day (or the next day if the entered time is the one
before the current time) appears.
The next procedure
➝
P342 Step 2 and the following
steps in "Saving schedules"
F905i.book Page 220 Monday, April 21, 2008 10:53 AM
221
Other Convenient Functions
F905i_E2kou
✔
INFORMATION
•
The schedule with All day set to "ON" operates the schedule
reminder at 0 o'clock on the specified day.
◆
Setting default value for schedule reminder
<Reminder option>
You can change the default values for the schedule reminder
of a new schedule.
1
(1 sec. or more)
eme65e
Set the
required items
ep
Set by scheduler :
Set default values for saving a
schedule from the calendar screen.
Set by quick-schedule :
Set default values for saving a
schedule from the stand-by display.
◆
Checking and changing saved schedule
<Example> Checking schedules
1
p
(1 sec. or more)
e
Select the saved
schedule day
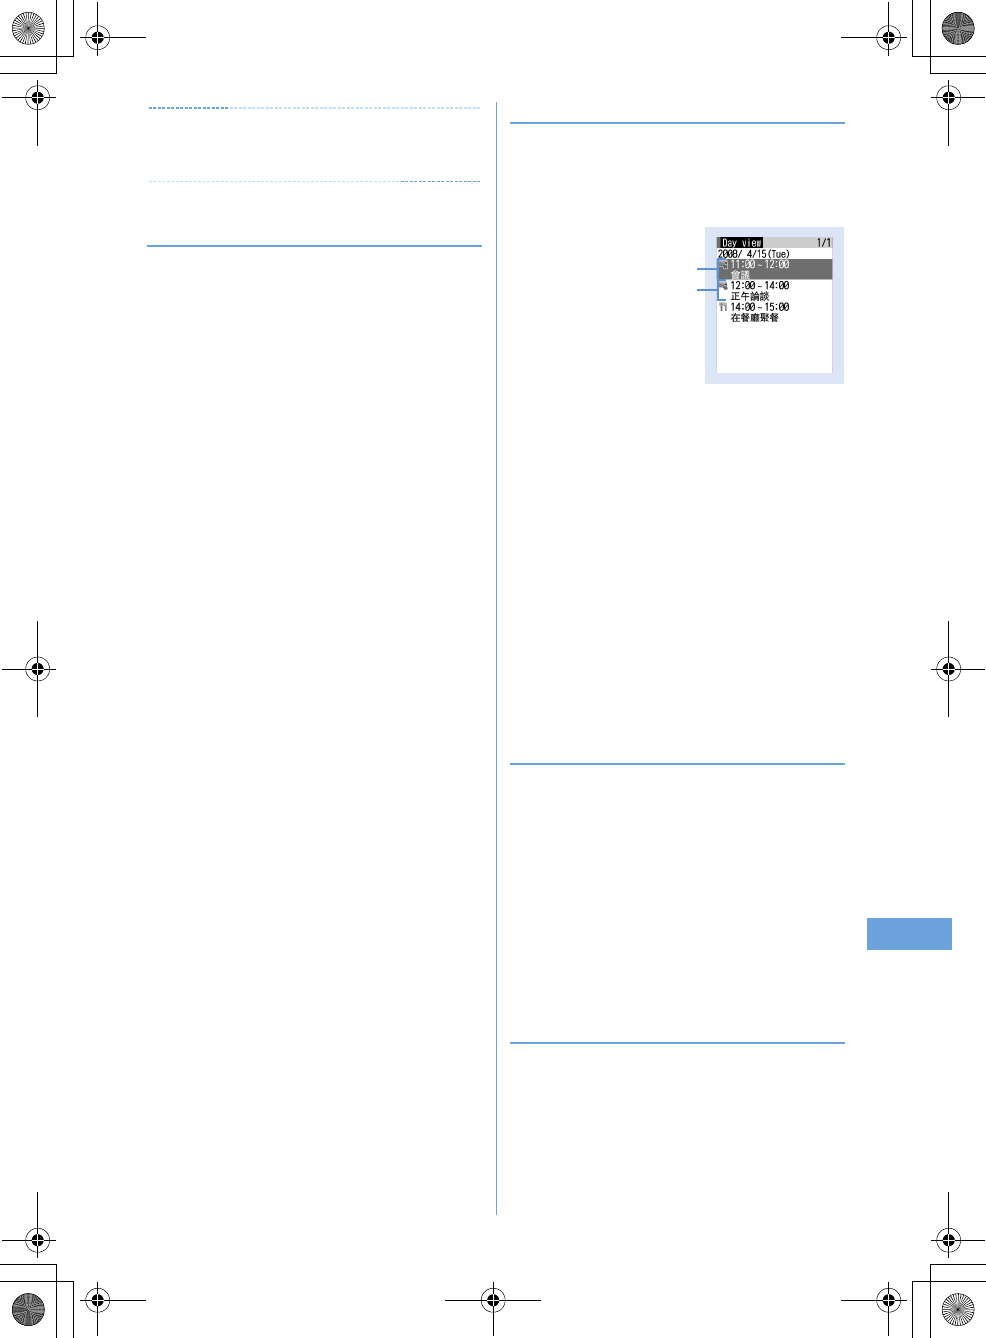
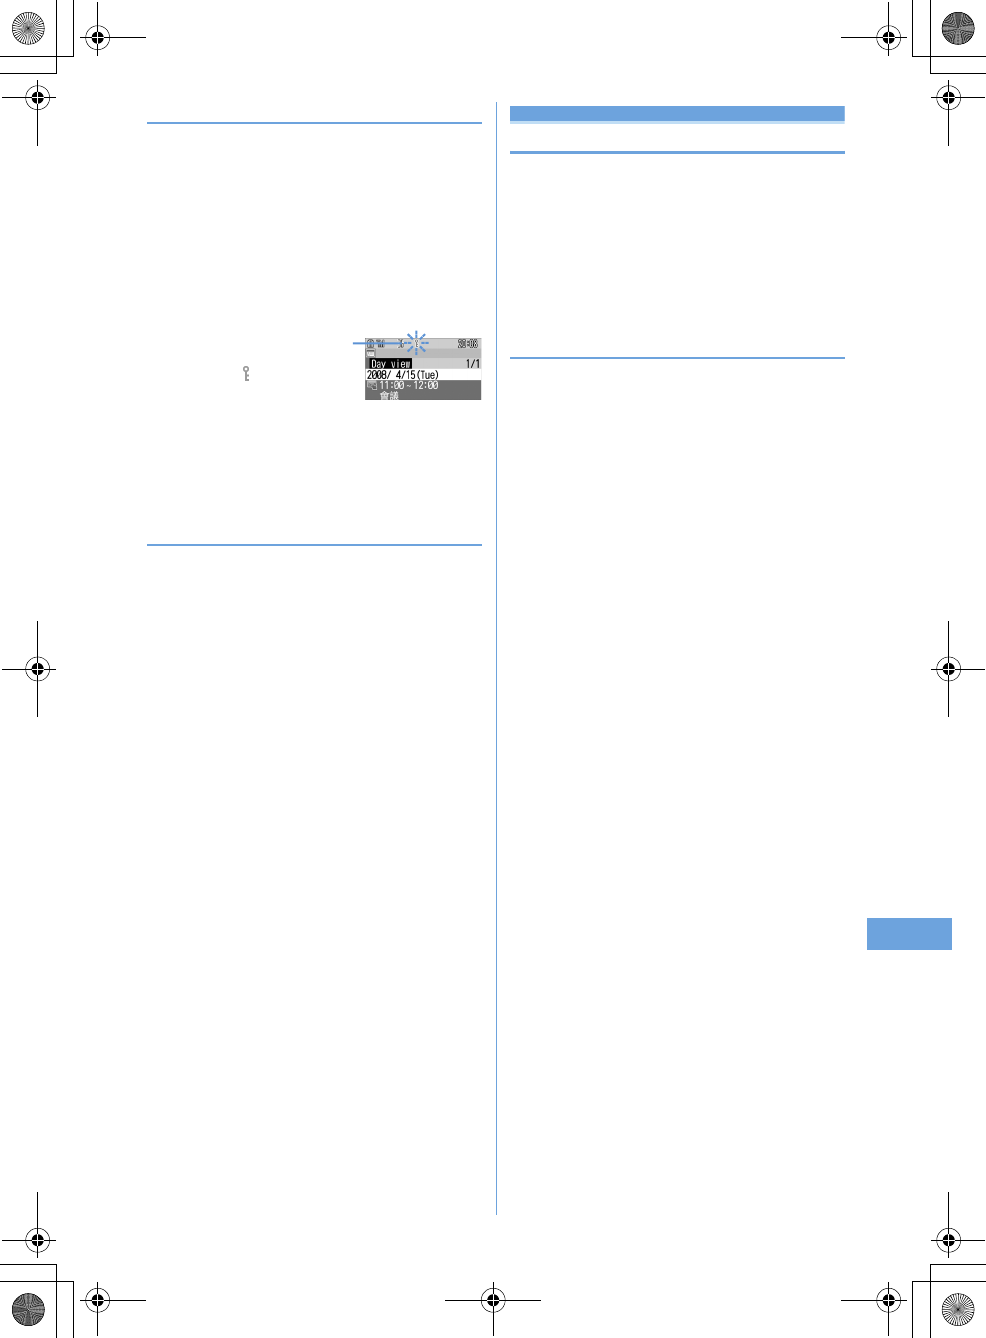
a
Item icon, start time-end time, schedule
b
Reserved program/recording reservation icon,
start time-end time, channel, program name
•
Press
h
to switch the date.
2
Select a schedule.
Changing : Place the cursor on a schedule and
me2
Displaying after specifying an item (Display by type
mode) :
ame42
b
Select an item icon.
The selected item icon appears in the upper-right
corner of the calendar or the Day view screen and
only the schedule for the item icon appears.
❖
Copying and pasting a schedule
•
Of the copied schedules, only the latest one remains
recorded until the Scheduler is ended, allowing to paste to
other days any number of times.
1
p
(1 sec. or more)
e
Select the saved
schedule day
e
Place the cursor on the
schedule and
me61
2
ce
Place the cursor on the date to paste
and
me5
•
When operating from Day view screen, press
m62
.
◆
Deleting schedules
<Example> Deleting from the Day view screen
1
p
(1 sec. or more)
e
Select the saved
schedule day
eme3e1
-
4e
"Yes"
•
When "Delete all" is selected, perform authentication.
Day view screen
a
b
F905i.book Page 221 Monday, April 21, 2008 10:53 AM
222 Other Convenient Functions
F905i_E2kou
•
When operating from the calendar screen, press
m2
and press
1
-
3
.
•
When operating from the schedule details screen,
press
m3
.
◆
Using member lists
You can make voice calls and create mails by selecting a
member list.
1
p
(1 sec. or more)
e
Select the saved
schedule day
e
Select a schedule
eh
to
display the Members screen
2
Place the cursor on a member and perform
the necessary operation.
Making calls :
n
or
t
•
To make a call specifying conditions, press
m4
.
➝
P51
Creating an i-mode mail :
a
The selected mail address of the member is set for the
receiver and the schedule is entered in the message in
the Date To format.
•
Press
m52
to send i-mode mail to all
members.
Displaying site :
me6e
"Yes"
•
Press
t
after
6
to display with Full Browser.
F905i.book Page 222 Monday, April 21, 2008 10:53 AM
223
Other Convenient Functions
F905i_E2kou
◆
Protecting secret schedules <Secrecy>
Set secret attribute to a schedule. In Privacy mode ("Hide set
schedule" set for Schedule), the schedule with secret attribute
does not appear.
•
Setting Privacy mode
➝
P114
1
p
(1 sec. or more)
e
Select the saved
schedule day
2
Place the cursor on a schedule and
me9
•
To cancel the secret attribute, place the cursor on the
schedule and press
m9
.
•
When operating from the schedule details screen,
press
m6
.
◆
Checking number of saved schedule items
<No. of items>
You can check the numbers of schedule data and Set day off.
1
p
(1 sec. or more)
eme7
Custom menu
Registering often-used functions
MENU [Settings & NW services] 222
You can register frequently used functions and make
your own menu.
•
One of functions saved in the first level of custom menu can
be activated by pressing and holding the related key (
1
-
9
) for 1 second or more on the stand-by display.
However, a menu with lower level functions, person or
group saved cannot be activated.
◆
Creating custom menu
•
Up to 9 menu items can be registered in a level of custom
menu.
1
mep
2
Register the menu item.
Adding a function to item :
ame11
b
Place the cursor on a menu item and
p
.
•
A menu item without lower levels can be
registered also by selecting the menu item.
Adding a person to item :
me12e
Select
a person from phonebook
•
The image (except Flash graphics and movies/i-
motion) or character icon registered in the phonebook
appears on the menu screen.
Adding a group to item :
ame13e
Enter the group name
•
Up to 9 two-byte (18 one-byte) characters can be
entered.
bp
When secret attribute is set for
the schedule at the cursor
position, blinks
F905i.book Page 223 Monday, April 21, 2008 10:53 AM
224 Other Convenient Functions
F905i_E2kou
Adding to a group :
The custom menu can have up to 3 levels. No groups
can be added to the third level.
a
Select a group.
•
When no menu items have been added to the
group, the item selection screen appears.
bme1e1
-
3e
Perform adding
operation
Replacing menu item : Place the cursor on a menu
item to replace and
me2e1
-
3e
Perform registering operation
•
When replacing a group, a screen for confirming the
overwrite appears.
◆
Using custom menu
You can execute a function or make a call to a person.
•
Shortcut operations are also available while custom menu
is used.
1
mepe
Select a menu item
•
When a function is selected, the function is activated
or menu items in lower levels appear.
•
When a person is selected, the registered phonebook
data becomes available.
➝
P348 Step 2 in "Using
person"
•
When a group is selected, the menu items registered
in the group are displayed.
❖
Using person
1
mep
2
Place the cursor on a person and perform the
necessary operation.
Making calls :
n
or
t
•
To make a call specifying conditions, select a person
and press
1
.
➝
P51
•
When 2 or more phone numbers are saved, select a
phone number to use from the phonebook details
screen.
Creating an i-mode mail :
a
•
When 2 or more mail addresses are saved, select a
mail address to use from the phonebook details
screen.
Creating SMS :
a
(1 sec. or more)
•
When 2 or more phone numbers are saved, select a
phone number to use from the phonebook details
screen.
Displaying site : Select a person
e4e
"Yes"
•
Press
t
after
4
to display with Full Browser.
Display detail information : Select a person
e5
◆
Editing custom menu
•
Restore to default.
➝
P101
1
mep
2
Place the cursor on a menu item and perform
the necessary operation.
Replacing menu items :
me3e
Select the
destination menu item
e
"Yes"
Changing an icon :
me4e
Select an icon
•
Press
m4p
to restore the icon.
Renaming a group :
me5e
rename a
group
ep
Deleting menu item :
me6e1
or
2e
"Yes"
•
When "All items" is selected, perform authentication.
F905i.book Page 224 Monday, April 21, 2008 10:53 AM
225
Other Convenient Functions
F905i_E2kou
Turn-display option
Setting a function to be activated/
operated by turning the display
You can set a function to be activated or operated when
the display is turned right or left 90 degrees.
1
me
[Settings & NW
services]
e71e
Set the required
items
ep
•
If "No setting" is set, no function is activated or
operated.
Stand-by turned right/Stand-by turned left :
Select a
function to be activated by turning the display right or
left in stand-by mode in the vertical position.
•
With "Others" set, "Other" of Data Box is activated.
Mailer turned right/Mailer turned left :
Select a
function to be activated by turning the display right or
left while entering characters in the vertical position.
Receiving call :
Set if you make it possible to answer a
voice call received in horizontal display by rotating the
display to vertical.
•
If the call can be answered in horizontal display
and Select language is set to ***mojibake_L19-
223-1*** (Japanese), "(***mojibake_L19-223-
2***)" appears. However, it does not appear while
Answer machine is active, but you can answer the
call.
❖
Using entry function of Turn-display option
1
Display character entry screen in the vertical
position
e
Turn the display right or left 90
degrees to put it in horizontal position
An entry function set from Turn-display option is
activated, displaying the character or symbol selection
screen.
•
The entry function cannot be activated while
converting characters.
2
Place the cursor on a character or symbol
and return the display to vertical position.
The character entry screen reappears and the character
or symbol is entered.
•
You can also enter a character or symbol by selecting
it on the horizontal display.
✔
INFORMATION
•
While using Camera or editing or saving data, incoming calls
may not be answered by turning the display.
Side key shortcut
Setting a function to be activated by
pressing and holding a side key
You can set a function so that it is activated by pressing
and holding one of side keys [
ST
] for 1 second or more
with the terminal folded.
1
me
[Settings & NW
services]
e77e
Set the required
items
ep
Up Key: Press & hold/Down Key: Press & hold :
Select a function to be activated by pressing and
holding one of side keys [
ST
] for 1 second or more.
•
If "No setting" is set, no function is activated.
Simple light
Using as small size light
The light of the terminal can be used as a small size light.
•
Operate the terminal in folded state.
1
Press Left side key for 1 second and more.
or
1
P
while sub-display light is ON
e
Place the
cursor on "Quick light" using side keys
[
ST
] and
M
The light goes lit for about 30 seconds.
•
When the terminal is opened or any of
P
,
M
or side
keys [
ST
] are pressed, the light is turned off.
•
With "Simple light" set in Side key shortcut, pressing
and holding the side key set for "Simple light" for 1
second or more while the light is lit extend the lighting
time by about 30 seconds.
Profile Information
Register your name
MENU [Phonebook & Logs] 9
IRegister your mobile number, name, or e-mail address.
1
me
[Profile]
•
Profile information does not display your own mobile
number.
2
pe
Authentication operation
e
Set up
each item
ep
•
Setting items
➝
P75 Step 2 and the following steps in
"Adding entries into the terminal phonebook" (None
of phonebook number or group can be set.)
✔
INFORMATION
•
The Profile does not show your own mobile number. Neither
does it allow you to edit it. However, if you have registered your
F905i.book Page 225 Monday, April 21, 2008 10:53 AM
226 Other Convenient Functions
F905i_E2kou
own mobile number to the SIM/USIM card with a terminal other
than F905i, it will be displayed as your own mobile number.
•
To view your own mobile number in the Profile information,
register the number to [telephone number] in the edit screen.
Then you can check your number from the detailed screen.
◆
Checking user information details
1
me
[User
information]
ege
Authenticate
•
Each time you press
h
, the details screen is
switched.
•
When the registered phone number has Caller ID
settings, appears in the top of the details screen.
Displaying user information :
me81
The phone number, mail address, etc. of the first entry
appear.
Switching details screen display :
me82e1
-
3
Setting items
➝
P79 "Switching details screen display"
Editing the recorded data :
me2e
Edit and
p
Resetting the recorded data :
me3e
"Yes"
Voice memo/Movie memo
Recording voice/image
You can record voice or images while talking over a call
or in stand-by mode.
•
Up to 4 voice memo while talking or voice memo in stand-
by can be recorded in total, with up to 30 seconds for each
memo.
•
Movie memos up to 30 seconds each can be recorded.
•
Some messages such as out of service area notice or
number change information may not be recorded.
•
The recording of the voice memo while talking or movie
memo may be distorted or the image may be blurred if the
signal quality is poor.
◆
Recording voice/image of the other party
while talking
1
During a call, side key [
S
] (1 sec. or more).
Recording starts.
•
During movie memo recording, pressing
g
switches
display between lapse of the recording time and call
duration.
•
When the remaining time becomes about 5 seconds,
2 short beeps noticing the end of recording sound. A
long beep sounds at the end of recording.
•
To stop in the middle of recording, press and hold
side key [
S
] for 1 second or more.
•
Movie memo is saved in "Camera" folder of i-motion.
F905i.book Page 226 Monday, April 21, 2008 10:53 AM
227
Other Convenient Functions
F905i_E2kou
◆
Recording your own voice during stand-by
MENU [Phonebook & Logs] 73
•
Operate the terminal in open state.
1
Side key [
S
] (1 sec. or more)
e3
After about 3 seconds, a long beep sounds and
recording starts.
•
When the remaining time becomes about 5 seconds,
2 short beeps noticing the end of recording sound. A
long beep sounds at the end of recording.
◆
Playing voice memos
MENU [Phonebook & Logs] 74
•
Operate the terminal in open state.
1
Side key [
S
] (1 sec. or more)
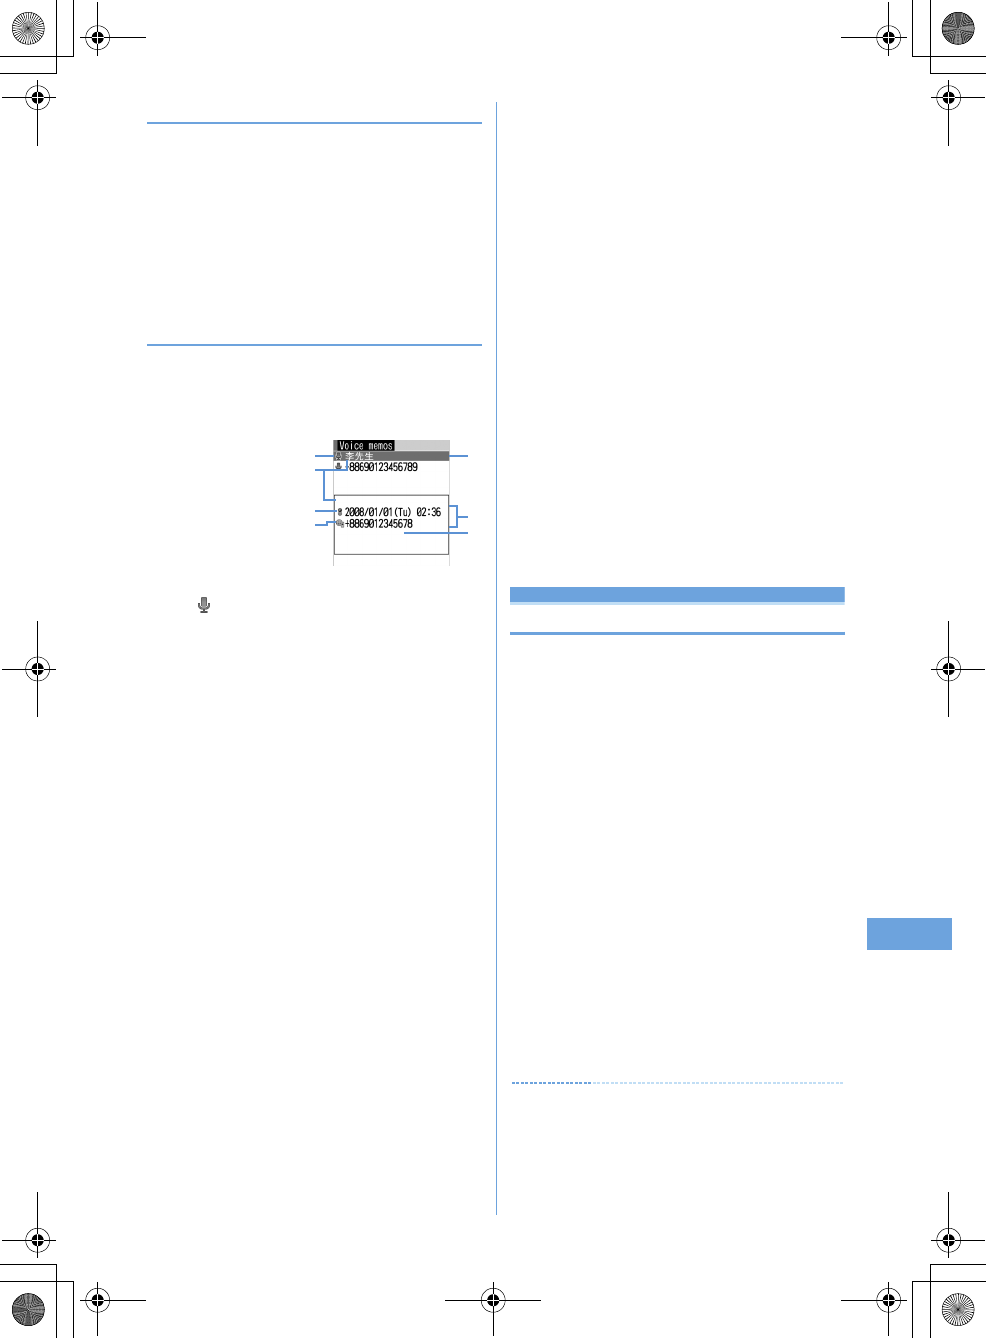
e4
a
Status icon
: Voice memo while talking
No icon : Voice memo in stand-by
b
Voice memo icon appearing overseas (except
GMT+08:00)
*1
c
Voice memo while talking icon appearing in
international call
d
Phone number
*2
/name (if saved in the
phonebook)/reason for hiding caller ID/Voice
memo (Voice memo in stand-by)
e
Recording date/time of item at cursor position
(local date/time in overseas), phone number
*2
/
reason for hiding caller ID/Voice memo (Voice
memo in stand-by)
f
Multi number name of outgoing/incoming call
(when subscribing to Multi number)
*1
This may not appear, for example, when recording date/
time is not recorded.
*2
For international call, "+" appears before phone number.
2
Select voice memo.
•
During playing, elapsed playing time appears in the
bottom of the screen.
•
During playing, the operations below are enabled :
j
/Side keys [
ST
] : Adjust volume
g
: Stop
n
: Switch the speakerphone function ON/OFF
Deleting : Place the cursor on a voice memo and
me2e1
or
2e
"Yes"
•
When "All items" is selected, perform authentication.
Making call : Place the cursor on the voice memo
while talking and
n
or
t
•
To make a call specifying conditions, press
m3
.
➝
P51
Adding a phone number to the phonebook :
a
Place the cursor on the voice memo while
talking and
me4
or
5e1
or
2
•
When adding data to existing phonebook entry,
select the phonebook entry to add.
b
Save the name, phone number, etc.
Phonebook new entry
➝
P75, 76
3
Select if you delete the voice memo.
Calculator
Using Calculator
You can perform addition, subtraction, multiplication and
division (+, –,
×
,
÷
) calculation on your terminal.
•
Up to 8 digits can be entered.
•
You can use the calculator from the entry fields of
Scheduler or Notepad and quote the calculation
result.
➝
P366
1
me
[Accessory]
e4e
Calculate
Functions assigned to the terminal keys appear on the
calculator screen.
0
-
9
: Enter digits
rlud
: Enter +, –,
×
, and
÷
g
: Enter = (Executing calculation)
*
: Enter a decimal point
#
: Switch +and – of entered numbers
a
: Delete one digit from the number entered
c
: Delete an entered number or calculation result
Copying a calculation result :
me1
•
To paste the copied number, press
m2
.
•
Of the copied numbers, only the latest one remains
recorded until the terminal is turned OFF, allowing to
paste to other locations any number of times.
a e
f
g
d
c
b
F905i.book Page 227 Monday, April 21, 2008 10:53 AM
228 Other Convenient Functions
F905i_E2kou
✔
INFORMATION
•
An error is generated and "E" appears when the integral part of
the calculation result exceeds 8 digits or a divide-by-zero
occurs. When the number including a decimal point exceeds 8
digits, any decimals that do not fit in the display are rounded off.
Notepad
Creating notes
You can enter important information or notes in Notepad.
•
Maximum number of recorded items
➝
P447
1
me
[Accessory]
e2ep
•
When operating from the Display notepad screen,
press
m1
.
2
Set the required items
ep
Catg icons :
Select the category icon.
Note content :
Enter notes.
Due date :
To set an expiration date, select "ON" and
enter a date.
◆
Checking notes
1
me
[Accessory]
e2
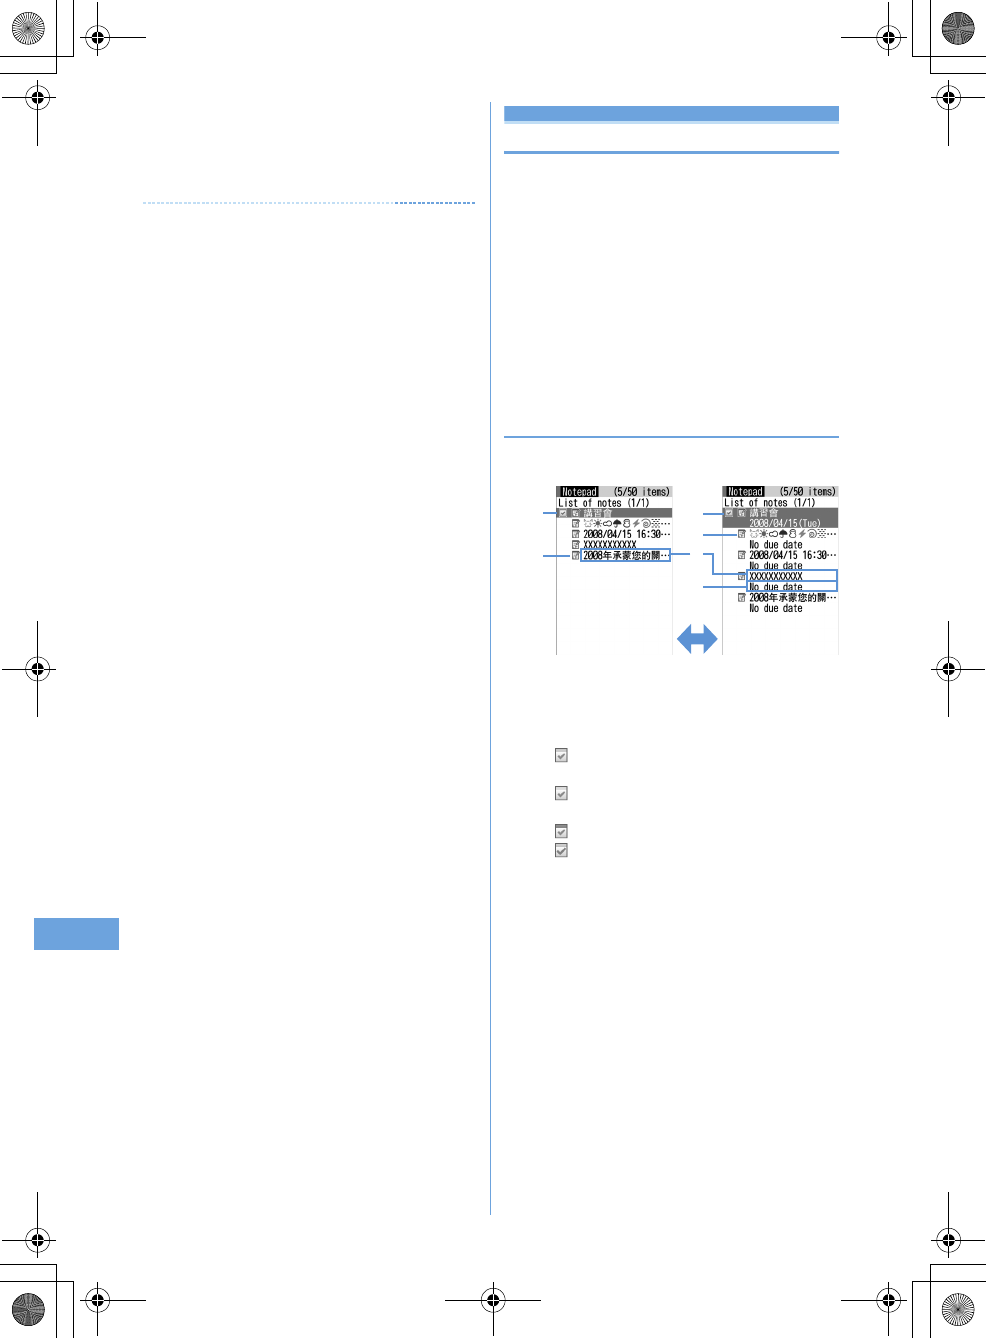
a
Status icon
Indicate expiration status of a note (Completed/
Uncompleted)
(Top in green) : Uncompleted (2 or more days
before expiration)
(Top in yellow) : Uncompleted (The previous day
or current day of expiration)
(Top in red) : Uncompleted (Past expiration)
(Check in red) : Completed
No icon : No expiration
b
Category icon
c
Note content
d
Expiration
1-row display
a
b
2-row display
t
a
b
c
d
F905i.book Page 228 Monday, April 21, 2008 10:53 AM
229
Other Convenient Functions
F905i_E2kou
2
Select note.
Display notepad screen appears.
Specifying category icon to display (List by
category mode) :
me42e
Select a
category icon
The selected category icon appears in the upper-right
corner of List of notes and only the note for category icon
appears.
•
Press
m41
to restore the display.
Specifying Completed/Uncompleted to display (List
by status) :
me5e2
or
3
The completed note list or uncompleted note list
appears.
•
Press
m51
to restore the display.
Changing Completed/Uncompleted : Place the
cursor on a note with expiration set and
a
.
•
When operating from the Display notepad screen,
press
m4
.
Sorting notes :
me6e
Set the required
items
ep
By :
Select a sort type.
Order :
Select sorting order.
Creating an i-mode mail : Place the cursor on a note
and
me7
•
When operating from the Display notepad screen,
press
m5
.
Changing a memo : Place the cursor on a note and
me2
•
When operating from the Display notepad screen,
press
p
.
The next procedure
➝
P354 Step 2 in "Creating notes"
◆
Deleting notes
<Example> Deleting a note
1
me
[Accessory]
e2
2
Place the cursor on a note and
me31
•
When operating from the Display notepad screen,
press
m3
.
Deleting selected notes :
me32e
Select
notes
ep
Deleting all notes :
me33e
Authenticate
Deleting completed notes only :
me34
3
"Yes"
Earphone/microphone with switch
Using the earphone/microphone with
switch
By connecting the optional Flat-plug Earphone/
Microphone with Switch (including stereo earphone set)
to the earphone/microphone jack, it is possible to make
voice calls or receive voice and videophone calls simply
by pressing the switch.
•
When using remote controller with microphone F01
(optional), press
F
before operation.
◆
Connecting earphone/microphone with
switch
For the connection of Flat-plug Earphone/Microphone with
Switch to the terminal, open the cover and insert the
connection plug of Flat-plug Earphone/Microphone with
Switch.
➝
P25
•
With Flat-plug Earphone/Microphone with Switch
connected in Silent mode, the sound is emitted from the
earphone regardless of the settings of Alert preference. If
the earphone is disconnected before completion, a melody
stops. i-
α
ppli, Music, Movie/i-motion, etc. is performed and
played silently.
◆
Setting switch operation of earphone/
microphone <Headset key control>
You can set so that the switch of Flat-plug Earphone/
Microphone with Switch allows to make a voice call.
•
Headset quick-dial
➝
P356
1
me
[Settings & NW
services]
e543e
Set the required
items
ep
Control function :
Set if you use the switch to make
voice calls.
Phonebook No. :
Search the party to call with Headset
quick-dial from the terminal phonebook and set.
F905i.book Page 229 Monday, April 21, 2008 10:53 AM
230 Other Convenient Functions
F905i_E2kou
◆
Making voice call by pressing switch
<Headset quick-dial>
You can make a voice call to a party set with Headset key
control by pressing a switch of Flat-plug Earphone/
Microphone with Switch.
1
Press the switch (1 sec. or more) until you
hear 2 short beeps
e
When ending the call,
press the switch (1 sec. or more) until you
hear a short beep
✔
INFORMATION
•
When the phonebook No. of Headset key control contains
multiple phone numbers, the voice call is made to the first
phone number registered.
•
When the phonebook entry of the phonebook No. in Headset
key control is deleted, overwritten by another phonebook entry,
or its phonebook No. is switched, Headset key control is
canceled.
◆
Receiving calls by pressing switch Auto
answer <Headset quick-answer>
1
When there is an incoming call, press the
switch (1 sec. or more) until you hear 2 short
beeps
e
When ending the call, press the
switch (1 sec. or more) until you hear a short
beep
✔
INFORMATION
•
In reply to a videophone call received, a camera image is sent
if the terminal is open or a substitute image is sent if the terminal
is folded.
•
When the terminal is folded during a call by connecting Flat-plug
Earphone/Microphone with Switch, the operations below take
place :
- The call can be continued regardless of Close settings.
- A substitute image appears on the terminal of the other party during
a videophone call.
- If a camera image with frame is being sent, the frame is released and
a substitute image appears on the other party's terminal.
◆
Answering call automatically with earphone
connected <Auto answer setting>
If you receive an incoming call when connecting Flat-plug
Earphone/Microphone with Switch, you can set if you answer
the call automatically after the specified ring time.
•
This function is unavailable to incoming calls during another
call.
1
me
[Settings & NW
services]
e542e
Set the required
items
ep
Auto answering :
Set if you automatically answer while
Flat-plug Earphone/Microphone with Switch is
connected.
Delayed time(Sec) :
Set time before automatically
answering an incoming call in the range of 0-120
seconds.
✔
INFORMATION
•
When a videophone call has been answered by Auto answer, a
substitute image is sent and a videophone call is automatically
started.
•
The same time period cannot be set for both Delayed time and
greeting response time of Answer machine.
•
With Delayed time set within the time of Ring alert delay, Auto
answer does not operate when a call is received from a caller
not saved in Phonebook.
◆
Hearing the ring tone only through the
earphone <Alert preference>
By connecting Flat-plug Earphone/Microphone with Switch,
you can set to hear the ring tone through both headset and
speaker or only through the headset.
•
Alert tone such as alarm sound is operated according to
this setting.
1
me
[Settings & NW
services]
e541e1
-
3
•
With "HS, + SP after 20sec" set, the ring alert is
emitted from the speaker about 20 seconds after the
ring alert is emitted only from the earphone.
Quick start-up
Shortening start time after power-ON
You can set if you shorten the start-time after turning ON
the terminal.
1
me
[Settings & NW
services]
e75e1
or
2
✔
INFORMATION
•
The terminal starts normally in the cases below.
- When the remaining battery level is 2 or lower
F905i.book Page 230 Monday, April 21, 2008 10:53 AM
231
Other Convenient Functions
F905i_E2kou
- When the battery pack is removed and installed
- When 24 hours elapse after the terminal is turned OFF
Confirm
Confirming current settings of func-
tions
You can confirm the terminal settings.
1
me
[Settings & NW
services]
e762eh
to confirm
current settings
✔
INFORMATION
•
In Personal data lock, the set conditions for locked items are
displayed as "---".
•
In Privacy mode ("Authorized access" set for My Picture or i-
motion), authentication is required.
Reset
Resetting functions
This function resets functions to their default settings.
•
For the functions to be returned to the default settings, see
"Menu list".
➝
P398
•
The functions below and data items are restored to their
default settings, though they are not listed in "Menu list" :
- Preferences : Silent mode, setting of Kisekae Tool, input history
of Pictogram/Symbol/Smiley
- Full Browser Settings : Cookie data, Showing/hiding pointer,
Switching enlarge/small size display, Section map colors,
Character string search setting
- Predict dict. data : Data recorded using the input prediction
function
1
me
[Settings & NW
services]
e765e
Authenticate
e
Select an item to reset
epe
"Yes"
Delete all data
Deleting registered data all at once
Data saved, registered and set in the terminal can be
deleted all at once.
•
The protected data is also deleted.
•
The preinstalled data below is deleted :
-i-
α
ppli
-Chara-den
- Images in "Deco-mail picture", "Deco-mail pict" and "Item"
folders in My Picture
•
The functions listed in Reset return to the default.
•
The data and functions below saved, registered or set, if
any, are deleted or return to the default :
- Date & time
-Redial
- Received calls
- Recorded status message
- Recorded messages (including the recorded greeting message)
- External device
- Phonebook data
- Settings made from Phonebook
- Stereo sound effect
- Menu operation log
- Select language
- Terminal security code
- Fingerprint authentication
- Privacy mode setting
- Privacy mode
- Receive display option
- Side key hold
- Security indicator
- Still camera
- Movie camera
- Data read by Bar code reader
-Enter URL
-Entry URL log
-Browser history
- Original certificate
- Bookmark
- Save shortcut for Bookmark
- Screen memo
-i-mode mail
- Mail template
- Mail logs
- Sort method
- Mail group
-SMS
-i-
α
ppli
- Settings made from i-
α
ppli list
- Display history of i-
α
ppli
- Data saved in My Picture, Music, i-motion, Melody, Kisekae
Tool, Chara-den and Other
- Settings made from My Picture, Music, i-motion, Melody,
Kisekae Tool, Chara-den and Other
- Created folders and albums
- Changed folder name
- Data in INBOX of infrared communication
- Data exchange settings
- Sound recorder
-Alarm clock
- Schedule
- Settings made from Scheduler
- Custom menu
- User information (except for My phone number)
- Voice memos
-Notepad
- Record reply message of Additional service
-Save phrase
- Password saved in Password manager
F905i.book Page 231 Monday, April 21, 2008 10:53 AM

232 Other Convenient Functions
F905i_E2kou
1
me
[Settings & NW
services]
e766e
Authenticate
e
"Yes"
Delete all data is performed while restarting.
✔
INFORMATION
•
When restarting after this function is executed, the same screen
as that for the first activation of the terminal appears
(AdvancedMode setting appears only when the confirmation
screen is closed without any settings).
➝
P39
•
The data below cannot be deleted. Also, they cannot be
restored to the default :
- Data saved, registered or set in the terminal and the microSD
memory card
- Data communication settings set from PC
•
When deleting a large size of data, restarting may take
approximately 1 minute. Be careful not to turn the power OFF
before deletion completes.
F905i.book Page 232 Monday, April 21, 2008 10:53 AM

233
F905i_E2kou
Character Entry
F905i.book Page 233 Monday, April 21, 2008 10:53 AM
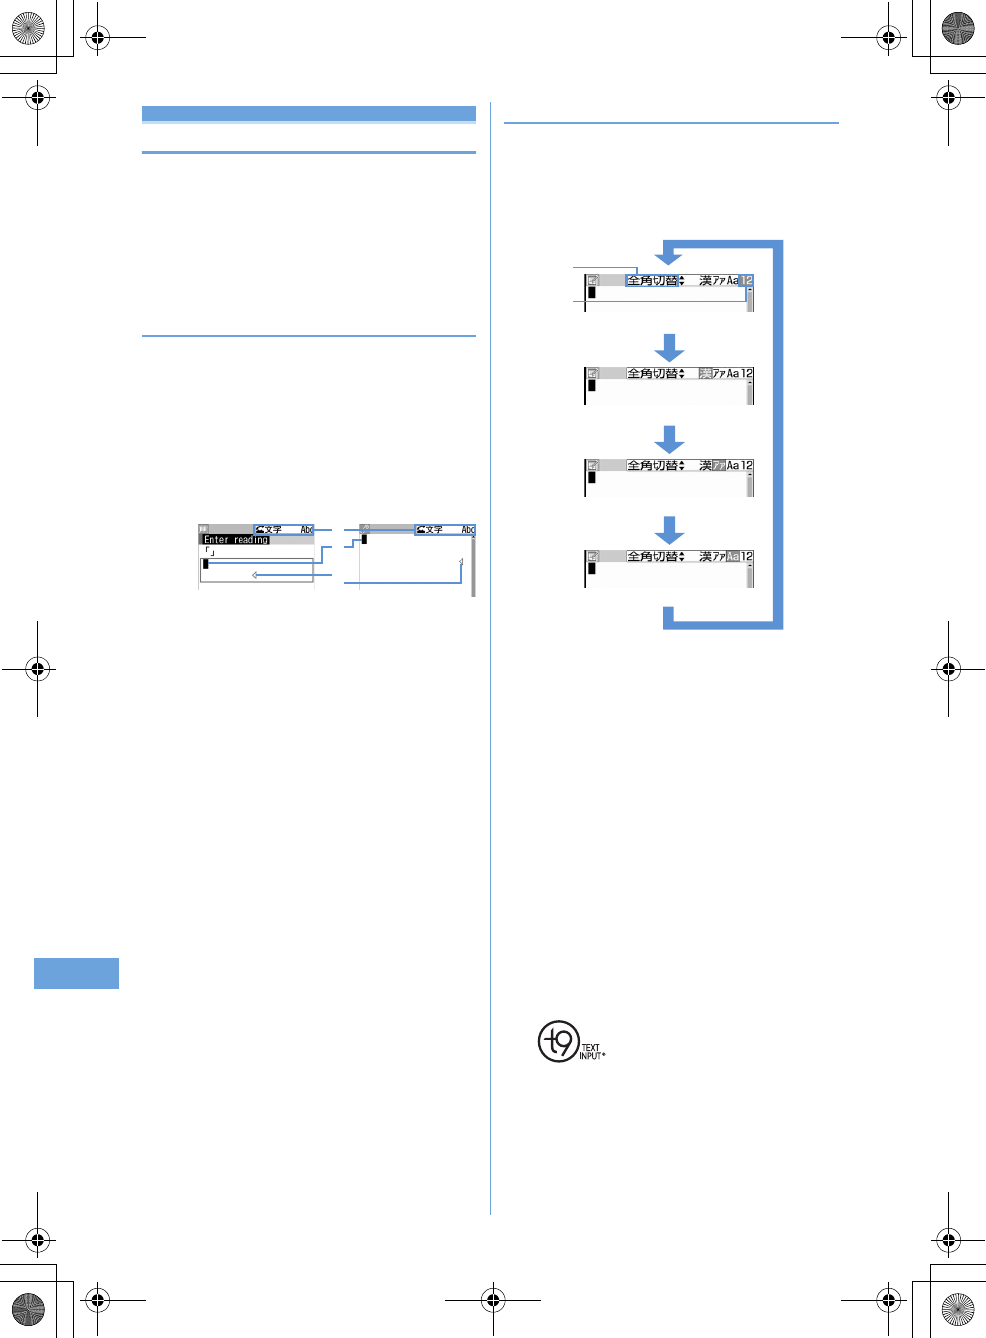
234
F905i_E2kou
Entering characters
This section explains how to enter characters.
•
The kinds of characters you can enter are: double-byte
characters (Chinese characters/alphabets/numbers/
symbols/pictograms) and single-byte characters
(alphabets/numbers/symbols)
•
You can enter about 13000 Chinese characters of the Big5
set.
◆
Character entry screen
There are 2 kinds of character entry screens : in-line entry
mode and full-screen entry mode.
In-line entry :
Place the cursor on the field without switching
screens and enter characters directly.
Full-screen entry :
Select the field to display the full-screen
entry area.
•
When fixed phrases pasted or entered exceed the
allowable number of input characters, the excessive
characters are deleted.
a
Input mode
b
Cursor (blinking)
Indicate location where characters are entered or inserted.
Use
h
to move the cursor.
c
Entry range
This icon indicates limitation of entry area.
•
For the field to enter date and time, etc., you may be able
to enter numbers by pressing
j
.
◆
Switching the entry mode
<Example>
When in the BoPoMoFo entry mode
1
f
in the character entry screen.
•
The input mode changes each time the key is pressed
as follows :
a
Switching Items
The color of the cursor location changes.
•
You can also switch the entry modes by pressing
h
.
b
Switching display
The item at the cursor is highlighted.
•
In the English entry mode you can switch among
the starting upper case/upper case/lower case with
j
.
Zhuyin (BoPoMoFo entry mode): Type Chinese with
BoPoMoFo by using the T9 Chinese PTI
character entry prediction conversion.
Stroke (Stroke entry mode): Enter Chinese with
Stroke by using the T9 Chinese PTI character
entry prediction conversion.
Aa/AA/aa (English entry mode): Enter English by
using T9
character entry prediction conversion
12 (number entry mode): Enter numbers.
•
T9 is a trademark or registered trademark of Nuance
Communications, Inc. or its affiliates in the United
States and/or other countries
2
Place the cursor on the switching item to use
then
g
.
c
a
b
In-line entry Full-screen entry
One-byte numbers
One-byte katakana
One-byte alphabetic characters
Hiragana/kanji (two-byte)
a
b
F905i.book Page 234 Monday, April 21, 2008 10:53 AM
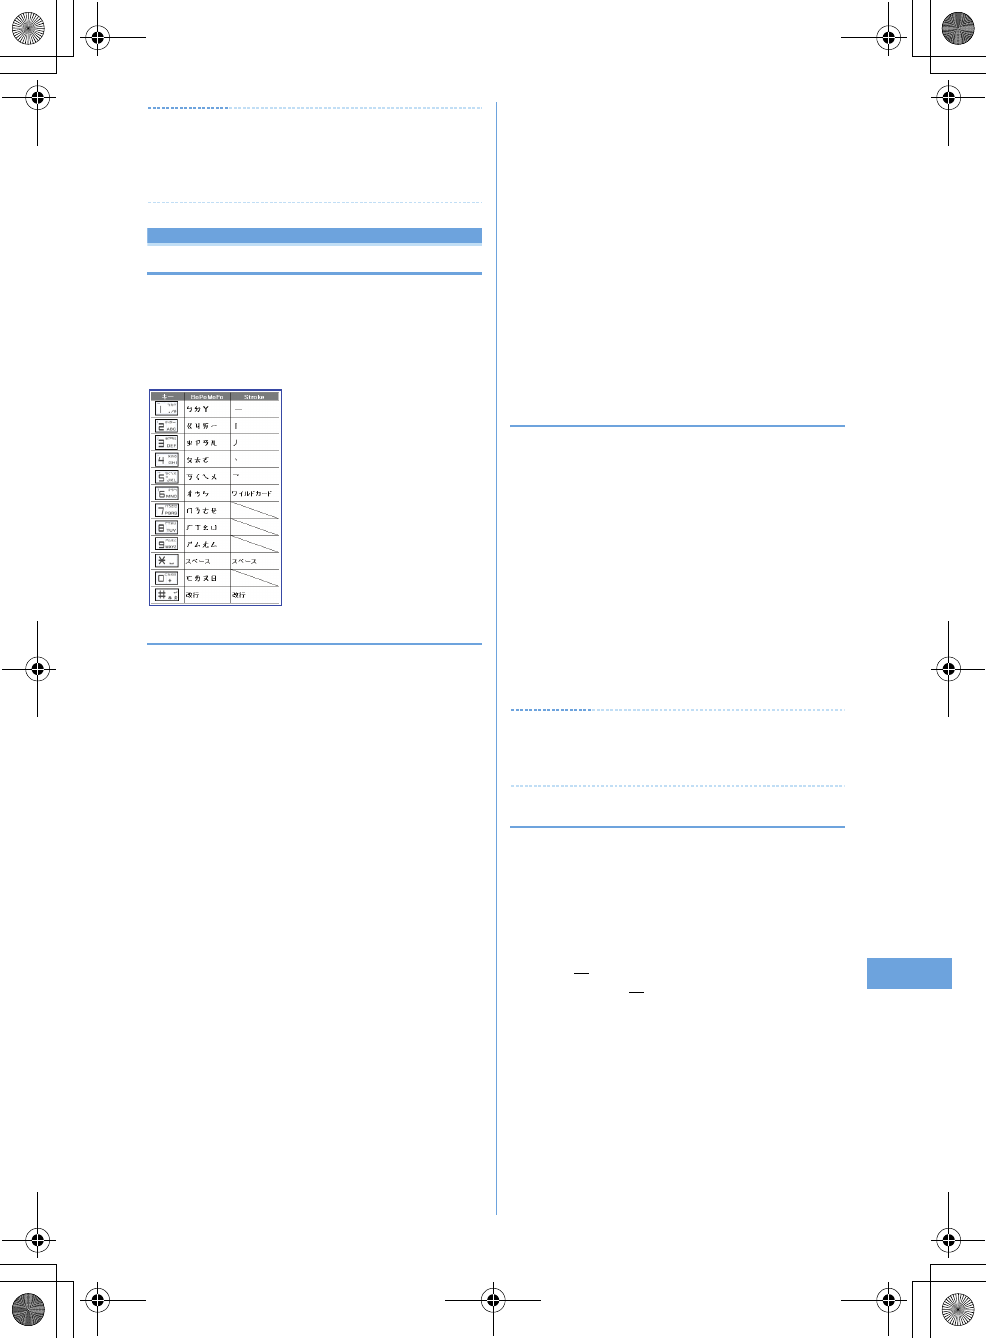
235
F905i_E2kou
✔
INFORMATION
In the English entry mode you can choose not to use the T9
character entry prediction conversion. Refer to P369 "Setting up
the entry method" for how to set it up.
Character entry
Entering Chinese
IYou enter Chinese either using the BoPoMoFo entry
mode or the Stroke entry mode. These entry modes
display suggestions by searching in the dictionary using
the Zhuyin and stroke assigned to the key.
The key assignment is as follows.
◆
Entering characters using Zhuyin
<Example>
Entering "
生日快樂
"
1
Enter characters in BoPoMoFo entry mode
9905
•
You can do the following operation while typing.
Cancel characters
c
.
2
Move cursor to "
ㄕㄥㄖㄎ
" with
r
then
g
•
Revert back to the state before conversion:
c
.
Displaying a list of suggestions: If suggestions for
conversion range more than one page, pressing
t
or
a
change pages.
k
makes a selection
from suggestions.
3
geg
Inserting characters: Press
k
to shift the cursor to
the place you want to insert then type the
character. The character will then be inserted to
where the cursor is placed.
Deleting characters:
•
When the cursor is in the middle of the text
(Example:
生日快樂
)
- Pressing
c
will delete the character where the
cursor is located.
However, for tentatively confirmed characters
(underlined characters), the character right before the
cursor will be deleted.
- Pressing
c
for more than a second will delete the
character where the cursor is located and all the
subsequent characters.
•
When the cursor is at the end of the text
(Example:
生日快樂
)
- Pressing
c
will delete the character on the left of
the cursor.
- Pressing
c
more than a second will delete all the
characters entered.
Line break: Move the cursor to the place you want to
change the line and press
#
. If the cursor is at
the end of typed characters you can also change
lines by pressing
d
.
•
Depending on the column of the entry you may not
be able to change lines.
❖
Enter with JianPin
JianPin is a method that combines key entries by only the
consonants in Zhuyin pronunciation symbols and suggests
Chinese characters that match the combination of word's
combination of consonants. You can then select from the
suggestions to enter a character.
<Example>
Entering "
生日快樂
"
1
Enter characters in the BoPoMoFo entry
mode.
9905eg
with the cursor pointing to
"Jianpin".
2
geg
✔
INFORMATION
If the cursor is not pointing to "Jianpin", move the cursor to
"Jianpin" with
h
.
◆
Entering with Stroke
<Example>
Entering "
生
" in "
生日快樂
"
1
Enter characters with the Stroke entry mode
"
生
"
31121
(
丿--︱-
)
eg
2
Point the cursor to "
生
" with
k
then
g
•
"
生
" (underlined "
生
") is a possible radical.
Selecting "
生
" will display a list of characters that
have "
生
" as a radical.
3
geg
F905i.book Page 235 Monday, April 21, 2008 10:53 AM
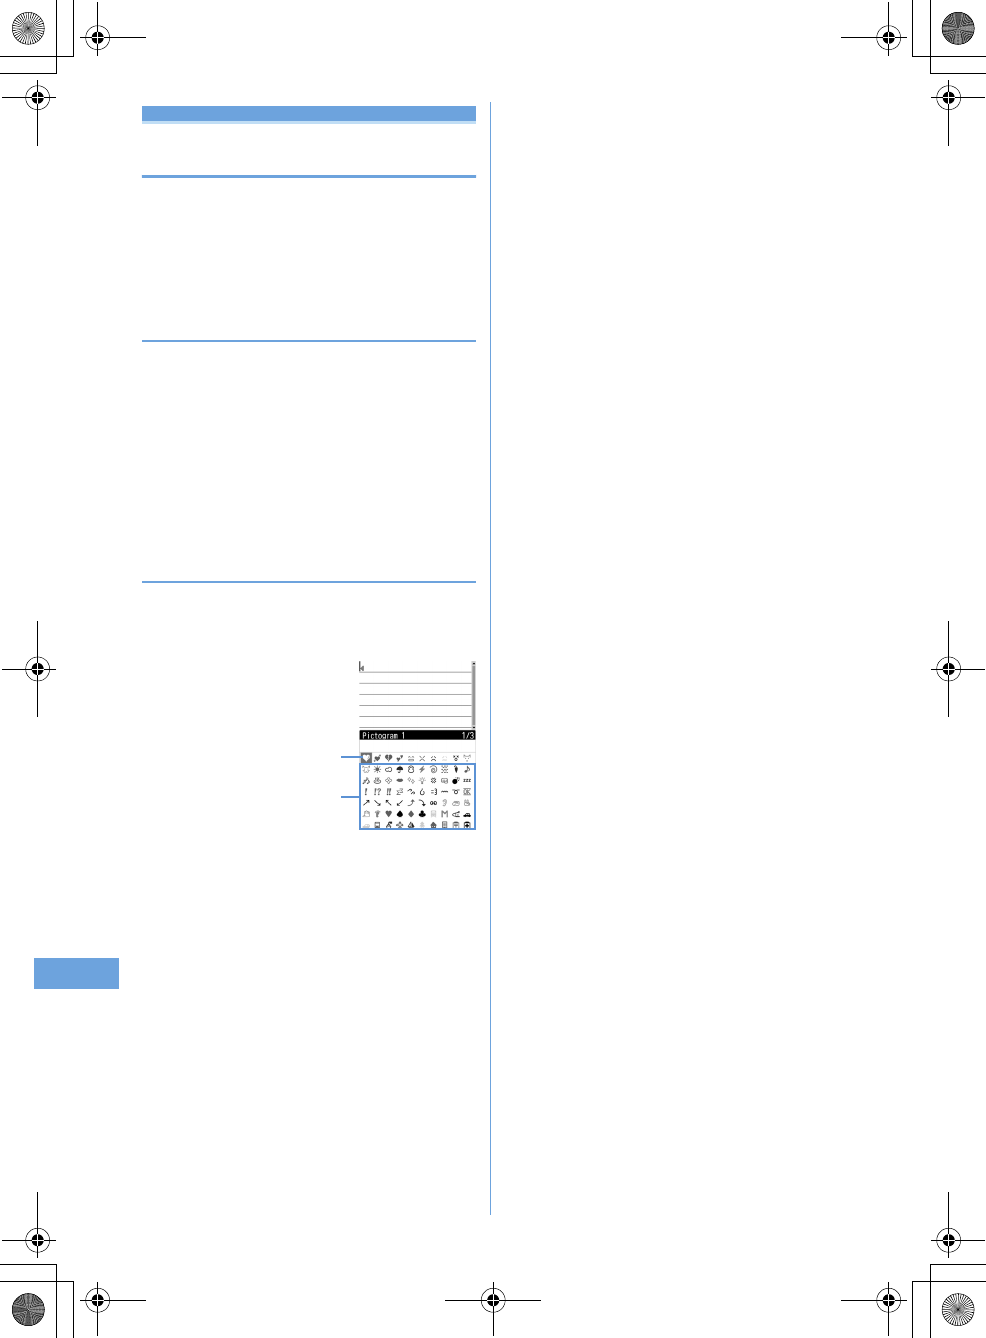
236
F905i_E2kou
Entering characters using useful entry
function
You can enter pictograms, symbols or fixed phrases, or
quote data from the submenu of the character entry
screen.
•
The submenus do not appear before characters are set, on
the decoration selection screen of Deco-mail or on the in-
line entry screen.
◆
Entering fixed phrases
•
List of fixed phrases
➝
P414
1
On the character entry screen,
me41e1
-
8
•
After fixed phrases are registered,
9
becomes
available.
•
Press
m51
on the message text entry
screen.
2
Select a fixed phrase.
◆
Entering pictograms and symbols
<Example>
Entering pictograms
1
On the character entry screen,
p
.
a
Input log field
The input log field appears on the first page of
Pictogram 1, 2 and Pictogram D of the pictogram list,
and one-byte/two-byte symbols of the symbol list.
b
Pictogram and symbol list
Only supported symbols appear.
•
Pressing
p
switches Pictogram 1 and 2.
•
Press
m
to enter symbols. Each time you press the
key, switches two-byte and one-byte symbols.
•
When there are multiple pages, press
t
or
a
to
switch pages.
Entering Deco-mail pictogram (Pictogram D) :
On message text entry and Edit signature entry screens,
each pressing of
p
switches pictogram list as
Pictogram 1
➝
Pictogram 2
➝
Pictogram D. On a
pictogram list of Pictogram D, images saved in "Deco-
mail pict" folders appear. Select a Deco-mail pictogram
to enter it.
Downloading Deco-mail pictogram
➝
P157
2
Select a pictogram to enter.
Press
c
to close the pictogram list.
•
In the input log field, up to 10 pictograms or symbols
(13 pictograms or symbols for wide display) from the
latest entry are displayed, allowing to select
characters from the list.
a
b
F905i.book Page 236 Monday, April 21, 2008 10:53 AM
237
F905i_E2kou
✔
INFORMATION
•
Pictograms and symbols transferred via infrared
communication may not appear correctly.
◆
Entering smileys
•
Smiley list
➝
P423
1
On the character entry screen,
me53e2
-
9
•
Press
m63
on the message text entry
screen.
•
Pressing
1
displays a list of up to 18 smileys
beginning with the latest one entered from input
history of smiley list.
2
Select Smileys.
❖
Quoting data to enter characters
Characters can be entered by quoting password saved in
Password manager, phonebook data, user information, the
calculation results on Calculator or character string of the data
scanned with Bar code reader.
•
Other data can be quoted except when a character entry
screen and quoted data have the same function (such as
phonebook data on a phonebook character entry screen).
❖
Quoting password data
1
On the character entry screen,
me43e
Authenticate
•
Press
m53
on the message text entry
screen.
2
Select password data to quote.
❖
Quoting phonebook data
1
On the character entry screen,
me44e
Select phonebook entry to
quote
•
Press
m54
on the message text entry
screen.
2
Select the data to quote.
❖
Quoting user information data
1
On the character entry screen,
me45e
Authenticate
•
Press
m55
on the message text entry
screen.
2
Select the user information data to quote.
❖
Quoting calculation results on Calculator
1
On the character entry screen of Notepad or
Scheduler,
me46e
Make a
calculation
eg
❖
Quoting data scanned with Bar code reader
1
On the URL entry screen,
me46
•
They can be used from the character entry screen
during i-mode or Full Browser connection.
2
Scan a code
eg
F905i.book Page 237 Monday, April 21, 2008 10:53 AM
238
F905i_E2kou
Save phrase
Storing fixed phrase
1
me
[Settings & NW
services]
e7339e
"<New
phrase>"
Deleting the saved fixed phrases : Place the cursor
on the fixed phrase and
me
"Yes"
•
To check the fixed phrase already stored, place the
cursor on the phrase to check and press
p
. Edit it
by pressing
g
.
2
Enter the fixed phrase.
3
p
Phrases are stored in "My phrase".
•
When editing a stored fixed phrase, a confirmation
screen appears. Select "Yes" to replace or "No" to
cancel the operation.
❖
Storing words during character entry
1
On the character entry screen,
me62
•
Press
m72
on the message text entry
screen.
2
Select the start point.
Selecting a whole sentence :
mege
Go to Step
4
•
On the message text entry screen, press
a
to
select the whole sentence. Go to Step 4.
3
Select the end point.
The characters in the selected range are displayed on
the edit phrase screen.
Selecting from the starting position to the beginning
of the sentence :
meg
Selecting from the starting position to the end of the
sentence :
peg
4
p
✔
INFORMATION
•
A character storing selected above that contains blank spaces
is processed as follows :
Blank spaces only : Cannot be stored as a fixed phrase.
Blank spaces before and after a character string : Only
character string is enabled.
Blank spaces between characters : Blank spaces are also
enabled.
Copying/cutting and pasting charac-
ters
•
Only the last item of the copied or cut characters are
recorded until the power is turned OFF, and they can be
pasted any number of times.
◆
Copying/cutting characters
1
On the character entry screen,
me1
or
2
•
On the message text entry screen, press
m31
to copy or
m32
to cut.
2
Select the start point.
Selecting the whole sentence :
meg
•
On the message text entry screen, press
a
to
select the whole sentence.
3
Select the end point.
The characters in the selected range are copied or cut.
Selecting from the starting position to the beginning
of the sentence :
meg
Selecting from the starting position to the end of the
sentence :
peg
◆
Pasting characters
•
When the pasted phrase exceeds the permitted number of
characters, a message appears indicating not all
characters can be pasted. Select "Yes" to paste the phrase
with excessive characters deleted.
1
On the character entry screen, place the
cursor at the position to paste characters
and
me3
The characters are inserted at the cursor position.
•
Press
m4
on the message text entry screen.
Save word
Saving frequently used words in
advance
If you save frequently used words in advance you can
access them easily for character conversion.
1
me
[Settings & NW
services]
e731
2
Enter a word to save in the word field.
Enter a word of 32 double-byte characters (64 single-
byte characters) or less
3
p
F905i.book Page 238 Monday, April 21, 2008 10:53 AM
239
F905i_E2kou
Password manager
Registering passwords in advance
With authentication information such as user names and
passwords saved, you can quote and enter saved
information to a site or website that requires such
information.
•
Fingerprint authentication must be enabled to use
Password manager.
➝
P108
•
Quoting saved password
➝
P366
1
me
[Settings & NW
services]
e47e
Authenticate
2
p
Deleting a password : Place the cursor on the
password and
me2e
"Yes"
Deleting selected passwords :
me3e
Select
passwords
epe
"Yes"
Deleting all passwords at a time :
me4e
"Yes"
Changing the order : Place the cursor on the
password and
me5
or
6
3
Enter the title in the title field.
4
Enter the password in the password field.
5
p
❖
Storing words during character entry
You can select entered characters and save them as a
password.
1
On the character entry screen,
me63
•
Press
me73
on the message text entry
screen.
2
Select the start position.
Selecting a whole sentence :
mege
Go to Step
4
•
When selecting the whole sentence from the
message text entry screen, press
a
, perform
authentication and go to Step 4.
3
Select the end position
e
Authenticate
The characters in the selected range are displayed in
the password entry field.
Selecting from the starting position to the beginning
of the sentence :
meg
Selecting from the starting position to the end of the
sentence :
peg
4
Enter a title name
ep
•
Passwords are displayed in the order they are saved.
Text input method
Configuring the input method settings
1
me
[Settings & NW
services]
e734e
Set up each
item
ep
Input prediction :
Select whether to set the
"BoPoMoFo input mode" or "Stroke input mode."
Input prediction :
Configure whether a list of
suggestions is displayed while entering characters in
the "English input mode."
•
If set to "Open", the character prediction
conversion is enabled using English T9
•
If set to "Closed", the characters are displayed
through the multi-tap method, without using
English T9
.
The multi-tap method refers to an input method that
switches letters each time you press multiple keys
assigned to one key.
Auto cursor :
Configure the time to pass before the
cursor moves to the right automatically.
•
If set to "OFF", the cursor will not move
automatically.
•
If set to "Slow", the cursor will move after about 1.5
seconds.
•
If set to "Normal", the cursor will move after about
1 second.
•
If set to "Fast", the cursor will move after about 0.5
second.
❖
Changing settings while entering characters
•
You cannot change settings before the characters are
confirmed or in the decomail decoration selection screen.
•
You can switch the input mode and change the auto cursor
while entering inline.
1
On the character entry screen,
m
in
the
character input screen
e7e1
-
3
•
Press
m8
in the input screen for the mail body.
•
Press
1
to switch between the ON/OFF for the
input prediction.
•
Press
2
then $1$Å`$4$ to select and configure
the time for the auto cursor movement.
F905i.book Page 239 Monday, April 21, 2008 10:53 AM
240
F905i_E2kou
F905i.book Page 240 Monday, April 21, 2008 10:53 AM
241
F905i_E2kou
Network Services
Network services available
F905i.book Page 241 Monday, April 21, 2008 10:53 AM
242
F905i_E2kou
Voicemail service
If you are at a place that receives no signal or if your
phone is off, this service forwards voice calls and video
calls to the Voice Mail service center and records the
caller's message.
It enables you to connect to the center to replay the
recorded message and setting up the phone number of
the center.
1
me
[Settings & NW
services]
e81e
Select a menu item
to operate
✔
INFORMATION
If the setting of the Select Menu has been left the same as when
you purchased, pushing $1$ for more than a second in the
standby screen enables you to replay the Voice Mail message.
Call waiting
When there is another incoming voice call during a voice
call, this service notifies you with the call waiting ring
tone. This allows you to place your current voice call on
hold and then answer the other voice call. You can also
make a call to another party, putting the current call on
hold.
•
When a videophone call is received during a videophone or
voice call, Call waiting does not operate but the call is
recorded as a missed call.
•
When using Call waiting service, set Arrival call act to
"Answer" in advance. If not, you cannot answer calls
received during a voice call with Call waiting service active.
•
To answer the other incoming voice call during a voice call,
perform the operations below.
n
: Put the current call on hold and answers the
incoming call
n
: The current call is disconnected and the calling
screen of the incoming call appears. Press
n
and
answer the call
•
During Call waiting, you can switch the party to talk to by
pressing
t
.
•
When making a voice call to another party during a current
voice call, press
m
and select "Dial up".
1
me
[Settings & NW
services]
e882e
Operate by
selecting a menu item
Menu items Functions and operations
a
Play messages
eO
perate following the audio guidance
instruction
b
Voice mail setting
e
Enter the phone number of the Voice
Mail service center
ep
If you are using a voice mail service
other than FET, change the service
connection field to "User Setting" and
enter a phone number that is less than
26 digits to the field.
Menu items Functions and operations
a
Activate
e
"Yes"
b
Deactivate
e
"Yes"
c
Check setting
e
"Yes"
F905i.book Page 242 Monday, April 21, 2008 10:53 AM
243
F905i_E2kou
Call Forwarding
If you are engaged in a phone call, did not answer the
phone within a specified ringtime, are at a place that does
not receive a signal, or your phone is off and receives a
voice call or video call, this service forwards the call.
It enables you to change/cancel/confirm the redirection
service according to the kind of service.
1
me
[Settings & NW
services]
e8e
Select a menu item and
operate
3Call Forward (Voice)
e
Unconditional
a
Set and activate e *1
b
Clear and deactivatee "Yes"
c
Check settinge "Yes"
e
Busy
a
Set and activatee *1
b
Clear and deactivatee "Yes"
c
Check settinge "Yes"
e
No reply
a
Set and activatee *1
b
Clear and deactivatee "Yes"
c
Check settinge "Yes"
e
Not reachable
a
Set and activatee *1
b
Clear and deactivatee "Yes"
c
Check settinge "Yes"
e
Remove all settingse "Yes"
4 Call Forward(Videophone)
e
Unconditional
a
Set and activate *1
b
Clear and deactivatee "Yes"
c
Check settinge "Yes"
e
Busy
a
Set and activatee *1
b
Clear and deactivatee "Yes"
c
Check settinge "Yes"
e
No reply
a
Set and activatee *1
b
Clear and deactivatee "Yes"
c
Check settinge "Yes"
e
Not reachable
a
Set and activatee *1
b
Clear and deactivatee "Yes"
c
Check settinge "Yes"
e
Remove all settingse "Yes"
*1 (Set and activat) : "Yes"
e
Enter call forwarding number,
enter ring time [For the cases of No reply (voice), No reply
(video)]
ep
Incoming call barring service
This service prevents incoming voice calls and video
calls.
It enables to start/stop/confirm the setting of the
incoming call barring service according to the type of
service.
You can also change the password to set up the outgoing
and incoming call prohibition service.
1
me
[Settings & NW
services]
e8e
Select a menu item to
operate
5
Bar incoming call
6
Bar incoming videophone call
7
Stop all incoming call barring
e
"Yes"
e
Enter
outgoing and incoming call barring password
ep
8
Change password
e
"Yes"
e
Enter new and old
passwords
ep
Menu items Functions and operations
a
Activate
e
"Yes"
e
Enter outgoing and
incoming call prohibition
password
ep
b
Deactivate
e
"Yes"
e
Enter outgoing and
incoming call prohibition
password
ep
c
Confirm incoming
call prohibition
e
"Yes"
Menu items Functions and operations
a
Activate
e
"Yes"
e
Enter outgoing and
incoming call prohibition
password
ep
b
Deactivate
e
"Yes"
e
Enter outgoing and
incoming call prohibition
password
ep
c
Check setting
e
"Yes"
F905i.book Page 243 Monday, April 21, 2008 10:53 AM
244
F905i_E2kou
Caller ID
When you make a voice call or video call, this service
displays your mobile phone number (caller number) to
the destination phone.
It sets up the terminal to show/hide the caller ID and
confirms the network setting.
When a call is made, the terminal setting determines if the
caller ID will be showd or hidden.
1
me
[Settings & NW
services]
e89e
Select a menu item
to operate
tion
✔
INFOEMATION
Priority of caller ID
There are several ways to show/hide your phone number to the
person you are calling.. If you set up or operate them at the same
time, the following priority is applied to determine whether or not
to show your phone number. Note that the status displayed on the
screen may be different from the actual show/hide setting.
a
Specify showing or hiding the number through the call option
when you make a call
a
Add "*31#" (show) or "#31#" (hide) before the phone number
of the person you are calling
b
Caller ID configuration in the phonebook
c
Caller ID configuration for the terminal
d
Caller ID network configuration
Menu items Functions and operations
a
Activate
a
Show caller ID
Set to show caller ID
b
Hide caller ID
Set to hide caller ID
c
Unspecified No setting will be made whether to show/
hide caller ID and the network setting will
be used.
b
Check setting
e
"Yes"
F905i.book Page 244 Monday, April 21, 2008 10:53 AM
245
F905i_E2kou
Overseas use
F905i.book Page 245 Monday, April 21, 2008 10:53 AM
246
F905i_E2kou
Network search mode
Setting type of searching for telecom-
munications carrier
You can automatically search for an applicable
telecommunications carrier and make reconnection when
starting international roaming or the terminal is placed
outside a current network.
•
Setting may be disabled for some wave and/or network
conditions.
1
me
[Settings & NW
services]
e911e1
-
3
Auto :
Automatically reconnect to applicable
telecommunication carrier.
Manual :
Display Available networks. Select a
telecommunication carrier.
Network re-search :
When "Auto" is set,
telecommunications carriers are automatically
switched. When "Manual" is set, a list of
telecommunications carriers appears after re-
searching. Select a telecommunication carrier.
m
: Re-searching telecommunications carriers
✔
INFORMATION
•
appears for unavailable telecommunications carrier in
Available networks, 3G appears for 3G Network and GSM
appears for GSM/GPRS Network.
•
When the terminal is placed out of the connected network of the
selected telecommunications carrier while "Manual", search for
the telecommunications carrier again, or set to "Auto".
•
NW search is possible for USIM, but not for SIM.
PLMN setting
Setting a telecommunications carrier
to be connected by priority
You can set priority of a telecommunications carrier to be
connected when Network search mode is "Auto".
1
me
[Settings & NW
services]
e911e4
Telecommunications carriers are listed from the one
with the highest priority.
•
Connection priority levels, operator codes (MCC-
MNC), country names, operator names and RAT (3G,
GSM, 3G/GSM) appear.
2
Place the cursor on the telecommunications
carrier and
me2
Displaying detail information : Select the
telecommunications carrier
Operator codes (MCC-MNC), country names, operator
names, telecommunications carrier name and RAT (3G,
GSM, 3G/GSM) appear.
Deleting 1 telecommunications carrier : Place the
cursor on the telecommunications carrier and
me31e
"Yes"
Deleting selected telecommunications carriers :
me32e
Select telecommunications
carriers
epe
"Yes"
Deleting all telecommunications carriers :
me33e
Authenticate
e
"Yes"
3
Select a priority level
ep
The telecommunications carrier moves to the selected
priority with a different level.
•
To give the lowest priority, select "<Insert last>".
F905i.book Page 246 Monday, April 21, 2008 10:53 AM

247
F905i_E2kou
◆
Adding telecommunications carriers to
priority network list
<Example>
Adding a telecommunications carrier
not registered in the terminal
1
me
[Settings & NW
services]
e911e4
2
me11e
Set the required
items
ep
MCC :
Enter the country code by 3 digits.
MNC :
Enter the network number by 2-3 digits.
Selecting a telecommunications carrier from a list of
those registered in the terminal :
me12e
Select the country
name
e
Select the telecommunications carrier
Select a telecommunications carrier from a list of
those currently available :
me13e
Place the cursor on the
telecommunications carrier and
pe
Go to Step
4
3
1
-
3ep
4
Select a priority level
ep
The telecommunications carrier added to the selected
priority with a different level.
•
To give the lowest priority, select "<Insert last>".
3G/GSM setting
Switching networks
•
When set to "AUTO", automatically connected to an
available network even when moving to a service area of a
different type of network.
1
me
[Settings & NW
services]
e92e1
-
3
✔
INFORMATION
•
When set to "AUTO", if both 3G and GSM/GPRS Networks are
detected, 3G Network takes precedence.
Area service status
Displaying current Area service status
1
me
[Settings & NW
services]
e764
The service status of the currently connected network
appears.
Stand-by display during international
roaming services
◆
Setting if you display an operator name
<Operator name disp.>
You can display an operator name at the top of the display.
1
me
[Settings & NW
services]
e93e1
or
2
✔
INFORMATION
•
No operator name appears in the following cases, regardless of
the settings of this function :
- When using FOMA Network
- When out of service area
◆
Setting if you display Two time zone clocks
<Two time zone clocks>
You can display the times of the country you stay and Taipei.
1
me
[Settings & NW
services]
e94e1
or
2
✔
INFORMATION
•
With Auto time adjust is "ON", Two time zone clocks appear in
24 hour when the time difference correction information is
received from a telecommunications carrier of the country you
stay to be connected.
•
On Two time zone clocks, Japan time is displayed on the right
side. When displaying time of another country on the right side,
set Two time zone clocks to "OFF" and set the design of Clock
display format to "World time clock".
•
Two time zone clocks do not appear in the cases below :
- When movie/i-motion or Chara-den is set on the stand-by display
-When i-
α
ppli stand-by display is set
F905i.book Page 247 Monday, April 21, 2008 10:53 AM
248
F905i_E2kou
F905i.book Page 248 Monday, April 21, 2008 10:53 AM
249
F905i_E2kou
Appendix/External Devices/
Troubleshooting
F905i.book Page 249 Monday, April 21, 2008 10:53 AM
250 Appendix/External Devices/Troubleshooting
F905i_E2kou
List of keypads and character assignments
*1
The symbols are as follows.
, 。 ? ! . : ; … 、 ` “ SP ( ) 《 》 @ 々 & , - ¥ $ € £
| \ ~ % = / # + * ^ < > { } _ [ ] ・ ℃ ℉
(Note: SP is a space, LF is a line feed)
*2
The symbols are as follows.
. - ? ! ‘ @ : ; /
*3
You can enter by pressing the relevant key for more than a second
Key BoPoMoDo entry mode Stroke entry mode English entry mode Number entry mode
1
ㄅ ㄉ ㄚ
1 Symbols (*1)
一
1 Symbols (*1) 1 Symbols (*2) 1
2
ㄍ ㄐ ㄞ ㄧ
2 A a B b C c
丨
2 A a B b C c A a B b C c 2 2
3
ㄓ ㄗ ㄢ ㄦ
3 D d E e F f
丿
3 D d E e F f D d E e F f 3 3
4
ㄆ ㄊ ㄛ
4 G g H h I i
丶
4 G g H h I i G g H h I i 4 4
5
ㄎ ㄑ ㄟ ㄨ
5 J j K k L l
¬
5 J j K k L l J j K k L l 5 5
6
ㄔ ㄘ ㄣ
6 M m N n O o ? 6 M m N n O o M m N n O o 6 6
7
ㄇ ㄋ ㄜ ㄝ
7 P p Q q R r S s 7 P p Q q R r S s P p Q q R r S s7 7
8
ㄏ ㄒ ㄠ ㄩ
8 T t U u V v 8 T t U u V v T t U u V v 8 8
9
ㄕ ㄙ ㄤ ㄥ
9 W w X x Y y Z z 9 W w X x Y y Z z W w X x Y y Z z 9 9
0
ㄈ ㄌ ㄡ ㄖ
0000 + *3
* Single-byte space Single-byte space Single-byte space * P *3
# Line feed Line feed Line feed # T *3
F905i.book Page 250 Monday, April 21, 2008 10:53 AM
251 Appendix/External Devices/Troubleshooting
F905i_E2kou
Combination of Multiaccess functions
Availability of operations of processes generated or to be performed for each operation currently in
progress is shown below :
•
In i-mode (i-mode connection) includes i-Channel communications (except information reception) and Full Browser or data
broadcasting site communication.
•
i-mode mail reception includes reception of MessageR/F and i-Channel information.
Åõ : New operations are enabled Å¢ : New operations are enabled depending on the condition
×
: New operations are enabled
*1
During a call, a subscribers to Call waiting can make or receive a call to/from another party.
*2
Voice Mail or Call forwarding service, if subscribed to, can be used.
*3
When Set arrival act is Activate, Arrival call act is used.
*4
When Call waiting is activated, calls are recorded as missed calls.
*5
Unanswered calls are recorded as missed calls.
*6
The ring tone does not sound.
*7
If Call forwarding service is active and Ring time is "0 Sec.", it is available by Call forwarding service.
*8
You are disconnected from i-mode.
*9
Depend on DataSession arv. act.
*10
Only connecting to data broadcasting site is available.
*11
If Voice Mail or Call forwarding service is active and Ring time is "0 Sec.", it is available by various services.
*12
When Call waiting is Activate, you can select either exiting current communication to answer the phone or rejecting the call.
Current status During a
voice call
During a
videophone
call
In i-mode
In Packet
communication with
a PC
In 64K data
communication
Processes
that occur or
are performed
Voice call
Send
U
*1
×{{ ×
Receive
U
*1, 2, 3
U
*2, 3, 4
{{ U
*2, 3, 12
Videophone
call
Send
××
{
*8
××
Receive
U
*2, 3, 4
U
*2, 3, 4
U
*9
U
*5, 14
U
*2, 3, 4
i-mode
Connec
t
{×U
*10
××
i-mode mail
Send
{×{××
Receive
{
*6
×{××
SMS
Send
{×{{ ×
Receive
{
*6
{
*6
{{ {
*6
Packet
communication
with a PC
Send
{×× × ×
Receive
{×× × ×
64K data
communication
Send
×× × × ×
Receive
U
*3, 5, 7
U
*3, 5, 7
U
*5, 7
U
*5, 7
U
*5, 7
F905i.book Page 251 Monday, April 21, 2008 10:53 AM
252
Appendix/External Devices/Troubleshooting
F905i_E2kou
Combination of Multitask functions
(TBD)
F905i.book Page 252 Monday, April 21, 2008 10:53 AM
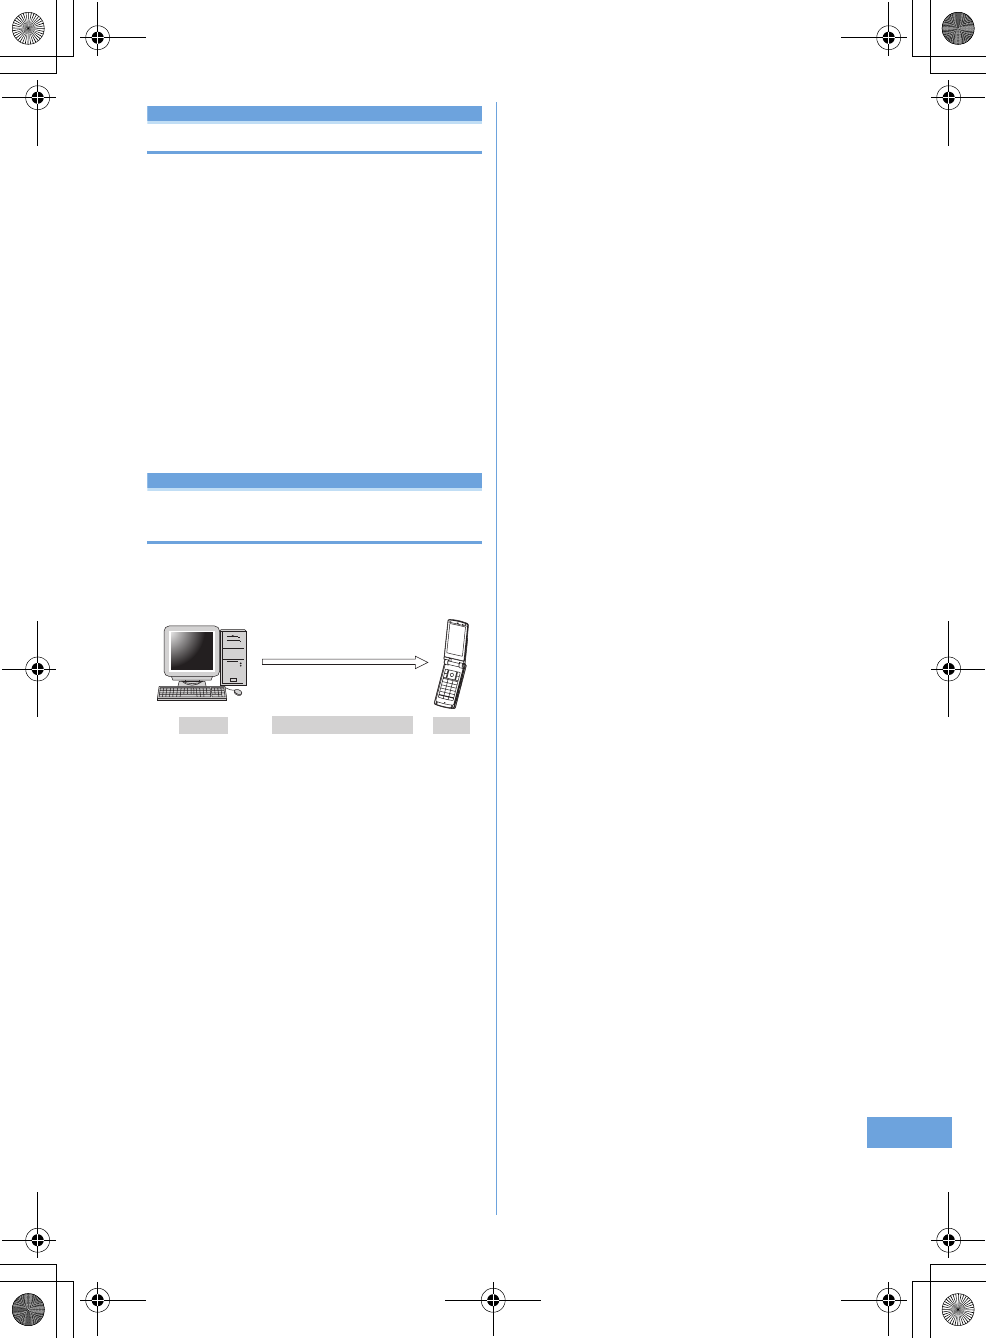
25
Appendix/External Devices/Troubleshooting 253
F905i_E2kou
Options and related devices
Combining the terminal with optional accessories
supports a wide variety uses from personal use to
business use. Some products are unavailable depending
on the area.
For details, contact a sales outlet such as DoCoMo Shop.
For details about the optional devices, refer to the
instruction manual for each device.
•
FOMA AC Adapter 01/02
*1
•
Battery Pack F10
•
Back Cover F23
•
FOMA USB Cable
*2
•
Remote controller with microphone F01
*1
Charging the battery using AC adapter
➝
P30
, 34
*2
If you use USB HUB, operations may not be performed cor-
rectly.
Data interchange with external device
Playing movie data transferred from
external device on the terminal
You can play movies (MP4 format) created with external
devices such as PC on the terminal by storing in microSD
memory card.
•
Playing multimedia data in microSD memory card
➝
P297
•
Playable MP4 format
➝
P283
*
For compatible external devices, see the website below.
From Personal Computer
FMWORLD(http://www.fmworld.net/)
➝
Functioning status of
movie playing function
•
To play movies stored in microSD memory card, you need
to save to fixed folders using FOMA F series SD utility, etc.
microSD memory card folder structure
➝
P293
Updating the microSD memory card information
➝
P300
*
For SD utility of FOMA F series, see the website below.
From Personal Computer
FMWORLD(http://www.fmworld.net/)
➝
Mobile phone
➝
Data link software
<Movie (MP4 format)>
F905i
microSD memory card
PC, etc.
F905i.book Page 253 Monday, April 21, 2008 10:53 AM
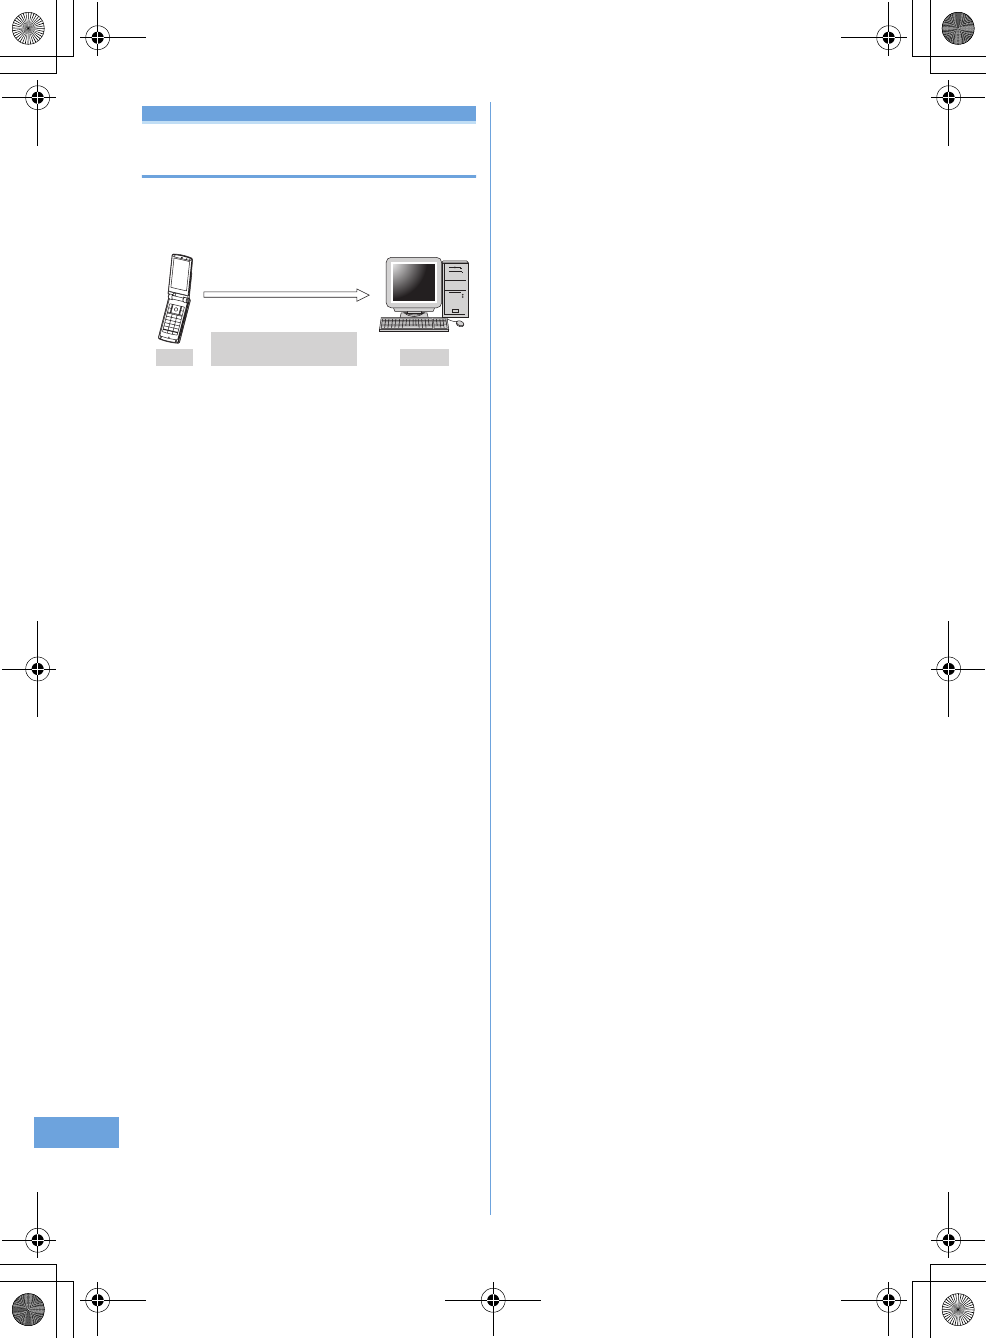
254 Appendix/External Devices/Troubleshooting
F905i_E2kou
Playing movie data recorded with the
terminal on PC
You can play movies (MP4 format) recorded with the
terminals on PC by storing in microSD memory card or
sending using data transfer such as mail attachment.
•
Movie file recorded with the terminal
➝
P127
<Movie (MP4 format)>
F905i
microSD memory card,
mail attachment, etc. PC, etc.
F905i.book Page 254 Monday, April 21, 2008 10:53 AM

25
Appendix/External Devices/Troubleshooting 255
F905i_E2kou
Troubleshooting
Troubleshooting
■
Power supply and charging
●
The terminal cannot be turned ON (the terminal cannot be
used).
•
Is the battery pack connected properly?
➝
P35
•
Is the battery depleted?
➝
P37, 39
•
When the mova terminal is active in Dual network service,
the terminal service is not available. Check whether the
terminal is active or not. For details, see "Mobile Phone
User's Guide [Network Services]".
●
The terminal cannot be charged.
•
Is the battery pack connected properly?
➝
P35
•
Is the charger terminal dirty? Clean the terminal with dry
cotton swab, etc.
•
Is the AC adapter connector securely inserted to the
terminals jack or the desktop holder connection terminal? Is
the terminal correctly mounted on the desktop
holder?
➝
P37
●
The light on sub-display flashes during charging.
•
End any calls or communications immediately. Remove the
AC adapter (Desktop holder) and DC adapter from the
terminal, then connect them correctly and start over.
➝
P37
•
If the problem still persists, contact a sales outlet such as
FET Service Center.
●
An icon on the top of the display blinks and alarm is
heard.
The battery is almost exhausted. Charge the battery.
➝
P36,
39
■
Phone
●
Calls cannot be made using the keypads.
•
Have you activated Self mode?
➝
P112
•
Have you activated Keypad dial lock?
➝
P113
•
Have you set Lock on close?
➝
P119
●
After dialing a number, you hear a busy tone and cannot
establish a call.
•
Have you dialed the area code?
•
Did you hear the dial tone before dialing?
•
Is åóäO (out of service area) displayed?
➝
P39
●
The ring alert does not sound.
•
Is Call alert volume of Adjust volume set to "Silent"?
➝
P88
•
Is the function below set?
- Specified caller
➝
P121
- Anonymous caller
➝
P121
- Ring alert delay
➝
P121
- Unregistered caller
➝
P122
•
Have you activated Silent mode?
➝
P91
•
Have you activated Self mode?
➝
P112
•
When Ring time for Voice Mail or Call forwarding service is
"0 Sec.", the ring tone does not sound. For details, see
"Mobile Phone User's Guide [Network Services]".
•
Is Greeting msg resp time "0 Sec."?
➝
P60
•
Is Delayed time(Sec) in Auto answer setting "0sec"?
➝
P357
●
During a voice call, the distant party's voice is hard to
listen to or too loud.
•
If you set Voice clear or Voice slowing to ON, the other
party's voice becomes easy to hear.
➝
P46
•
Has Listen volume of Adjust volume been changed?
➝
P46,
88
●
When a call comes in, the terminal operates in a ring alert,
image or light not set.
•
Ring alerts, if any, set in multiple functions sound according
to the priority levels.
➝
P88
•
Incoming images, if any, set for multiple functions appear
according to the priority levels.
➝
P96
•
Lighting patterns and/or light colors, if any, set for multiple
functions operate according to the priority levels.
➝
P102
•
Have you activated All lock?
➝
P111
•
Have you activated Personal data lock?
➝
P112
•
Have you activated Privacy mode?
➝
P114
•
Is Receive display option set?
➝
P118
●
When there is an incoming call, functions for displaying
the name or sounding the ring alert as saved in the
Phonebook are not activated.
•
The phone number of the caller does not match that saved
in Phonebook. Register the correct phone number in the
Phonebook (Name displays
➝
P74).
•
Have you activated All lock?
➝
P111
•
Have you activated Personal data lock?
➝
P112
•
Have you activated Privacy mode?
➝
P114
•
Is Receive display option set?
➝
P118
F905i.book Page 255 Monday, April 21, 2008 10:53 AM
256 Appendix/External Devices/Troubleshooting
F905i_E2kou
■
Settings and operations
●
The menu icon becomes a key, which is not selectable.
For a function not executable due to lock functions or no UIM
inserted, the icon appears.
➝
P34, 110
●
The Keypad sound is not generated.
•
Is Operation sound "OFF"?
➝
P90
•
Have you activated Silent mode?
➝
P91
●
"Insert UIM." appears when the terminal is powered on.
The UIM may not be properly attached or may be damaged.
Check UIM.
➝
P34
●
The authentication screen appears every time the
terminal is opened.
Lock on close is ON.
➝
P119
●
"All locked." appears on the display.
All lock is ON.
➝
P111
●
The authentication screen appears if trying to display
phonebook or mail
Privacy mode is ON. Perform authentication or cancel the
setting.ŮP114
●
appears on the stand-by display.
Side key hold is ON.
➝
P119
●
appears on the stand-by display and no operation can
be made.
Lock on close is ON.
➝
P119
●
With the terminal folded, the operation such as pressing
side keys has no effect.
Side key hold is ON.
➝
P119
●
The date and time is deleted.
With Auto time adjust "OFF" in Date & time is, removing the
battery pack or leaving it exhausted for a long time may delete
the date and time.ŮP40
●
The display is dim.
•
Is power saving mode active?
➝
P40
•
Is Brightness of Display light changed?
➝
P97
●
The lighting for the display and keypads does not go ON.
Is Normal use in Display light time in Display light "0
sec"?
➝
P97
●
Alarm clock or schedule reminder is set, but it does not
operate at the specified date and time while the power is
turned OFF.
Is Alarm auto power ON is "OFF"?
➝
P341
■
Mail, i-
α
ppli and data
●
Still images and movie taken with the camera are blurred.
•
Shoot in Shake reduce Auto mode.
➝
P141
•
When shooting an object nearby, use Auto focus or switch
to Macro shooting.
➝
P130, 138
●
When a mail is received, the terminal operates in a ring
alert, image or light not set.
•
Mail ring alerts, if any, set in multiple functions sound
according to the priority levels.
➝
P88
•
Lighting patterns and/or light colors, if any, set for multiple
functions operate according to the priority levels.
➝
P102
•
When movie/i-motion containing sound and image is set as
Mail ring alert, the set i-motion is used as the image.
•
If multiple mails are received at the same time, the terminal
operates as set for the last mail received.
•
Have you activated Privacy mode?
➝
P114
•
Is Receive display option set?
➝
P118
●
Names do not appear or ring alert does not sound at the
time of mail reception even though they have been
registered in the Phonebook.
•
The phone number or the mail address of the party does not
match that saved in Phonebook. Register the correct phone
number or mail address in the Phonebook (Name
displays
➝
P74).
•
Have you activated Privacy mode?
➝
P114
•
Is Receive display option set?
➝
P118
●
The still image and movie appear as and .
Destroyed data cannot be displayed correctly.
●
The screen reacts slowly when a key is pressed.
While transferring large-size data between the terminal and
microSD memory card, the reactions on the screen may be
delayed.
●
i-
α
ppli/i-
α
ppli stand-by display cannot be activated.
•
Cannot be activated due to UIM operation restriction.
➝
P34
•
Has i-
α
ppli been in suspended condition by IP (Information
Provider)?
•
Activating i-
α
ppliDX requires the date and time setting of the
terminal.
➝
P40
•
With i-
α
ppliDX, communication may be made to confirm the
validity of i-
α
ppli regardless of the network transmission
setting of i-
α
ppli. Some i-
α
ppli may not be activated until
confirmation of the validity have finished.
•
When All lock, Personal data lock or Privacy mode is ON
(when i-
α
ppli is "Authorized access"), i-
α
ppli stand-by
display cannot be activated.
➝
P111, 112, 114
●
The lighting for the display does not go ON while i-
α
ppli is
running.
•
Does not turn on when Normal use in Display light time in
Display light is "0 sec" and i-
α
ppli is "Phone setting."
➝
P97,
215
●
Data transfer is not performed
Are you using USB HUB? If you use USB HUB, operations
may not be performed correctly.
F905i.book Page 256 Monday, April 21, 2008 10:53 AM

25
Appendix/External Devices/Troubleshooting 257
F905i_E2kou
■
Other
●
At the time of authenticating or registering fingerprint,
"Scan failed." appears even though your finger is not in
contact with the sensor.
The surface of the sensor may be wet or dew may have
condensed on the surface. Wipe the water off with a soft cloth
before use.
●
Fingerprint authentication disabled with the terminal
connected to PC, etc.
When connecting the terminal using a USB cable to a device
which requires grounding such as a desktop PC, make sure
that the device is grounded in advance. If the connected
device is not grounded, fingerprint authentication may be
disabled. In such a case, perform fingerprint authentication
while touching a metallic part (frame, external connection jack,
etc.) of the connected device or after disconnecting the
terminal from the device.
●
The display has afterimages.
•
If the battery pack is removed from the terminal before the
terminal power is turned off, afterimages may remain.
Remove the battery pack with the power turned off.
•
If the terminal is left open for a while with the same screen
displayed, afterimages of that screen may remain even after
changing the screen for a certain operation.
●
The display has some dots always lit or unlit.
The terminal displays are manufactured by taking advantage
of highly advanced technology but some dots may be always
or never lit. Note that, this shows characteristics of liquid
crystal displays and not defects in the terminals.
●
Difference in lighting color and/or brightness
•
Note that, the phenomena below are caused by
characteristics of LEDs used for lighting, not defects of the
terminal :
- The lighting color and/or brightness differs among the terminals
or depending on LEDs.
- The actual lighting color may seem to discord from the lighting
color name depending on the terminal.
- Though the lighting color name described indicates the major
light source color of the LED, the lighting may appear in a
different color because the light source settings are delicately
different among functions.
•
Check that "Garnet", "Lime" and "Aqua" turn on with Light
alert. If one or more of these colors do not turn on, contact a
sales outlet such as DoCoMo Shop.
➝
P102
F905i.book Page 257 Monday, April 21, 2008 10:53 AM
258 Appendix/External Devices/Troubleshooting
F905i_E2kou
F905i.book Page 258 Monday, April 21, 2008 10:53 AM
F905i_E2kou
259
Can't use this master page
F905i.book Page 259 Monday, April 21, 2008 10:53 AM
260 Appendix/External Devices/Troubleshooting
F905i_E2kou
Error messages
Error messages
Major error messages displayed on the terminal are shown in the English alphabetical order as follows :
•
The "(number)" or "(XXX)" in error messages is a code used to distinguish the error sent from i-mode Center.
●
Address is not valid.(451)
Make sure that the address is correct.
●
Apply secret attribute to mail
address and SMS? Procedure may
take time depending on items.
This message appears when external
phonebook entries with Secret attribute
set are loaded or when Secret attribute
is set for phonebook entries.
➝
P117
●
Authentication interrupted.
Displayed when you stop
authentication by pressing
c
in the
Authentication screen.
●
Authentication type is not
supported.(401)
The authentication type is not
supported and connection to the
specified site or website is disabled.
●
Caution! This SMS includes Phone
Nos. or URLs. Be careful if you do
not recognize the sender.
•
With Message scan of Set scan set
to "Valid", you make an attempt to
display SMS containing a phone
number and/or URL description.
•
It does not appear when mopera
mail or voice mail reception
notification is received in SMS.
●
Certificate is rejected.(tampered)
The site certificate has been altered.
Connection is suspended.
●
Check address.
•
Failed to transmit the SMS. Check
the address.
•
An incorrect or no mail address was
input to the mail group.
●
Check SMS center setting.
SMS settings (SMSC) are
incorrect.
➝
P207
●
Connection failed.
Failed to connect to the i-mode Center.
Please retry in a place with good wave
conditions.
●
Connection failed.(403)
Failed to connect to the site for a
certain reason such as connection
rejection.
●
Connection failed.(503)
Failed to connect to the server due to
the maintenance or the rate of
congestion. Retry later.
●
Connection failed.(562)
Failed to connect to the i-mode Center.
Please retry in a place with good wave
conditions.
●
Connection interrupted.
Please retry in a place with good wave
conditions. If the error persists, retry
later.
●
Content length exceeds maximum
size for i-motion.
Download has suspended because the
data size exceeds 10 Mbytes while
downloading i-motion data.
●
Continue using i-
α
ppli and transmit
data?
After "Data transmission is frequent.
Continue transmission?" appears, an
attempt was made by i-
α
ppli to make
communications.
●
Corrupted data.
i-
α
ppli cannot be started from invalid
data read with Bar code reader.
●
Corrupted data. Restore default
setting?
The data contains error. Select "Yes"
to return to the default setting.
Functions cannot be started without
restoring the default setting.
●
Corrupted data or microSD.
Accessing microSD memory card is
disabled due to a problem in data
saved in the microSD memory card or
the card itself. Initialize the microSD
memory card or insert a new microSD
memory card.
➝
P294, 299
●
Corrupted data or microSD. Saving
to phone memory.
When "microSD" is the destination for
saving still images or movies and the
microSD memory card cannot be
accessed, the destination
automatically switches to "Phone".
●
Data transmission is frequent.
Continue transmission?
This message appears when
communications using i-
α
ppli are
made very frequently in a
predetermined period of time. Select
"Yes" to continue using i-
α
ppli, "No" to
continue i-
α
ppli stopping i-
α
ppli
communications or "Terminate i-
α
ppli"
to stop i-
α
ppli.
●
Date and time not set. Unable to
start.
Some functions cannot be activated
before date and time are set.
➝
P40
●
Dial callout restricted.
This prohibited operation is unavailable
in Keypad dial lock ON.
➝
P113
●
Download failed.
Communication was interrupted during
reception. Please retry in a place with
good wave conditions.
●
Error in image. Does not work
correctly.
Unable to display the Flash graphic
due to image data error.
●
Error in storage area. Unable to use
password manager. Quitting.
Password save/quote is disabled due
to an error in Password manager
storage area.
●
Failed to view message data.
Mail data cannot be referenced in chat
mail.
●
i-
α
ppli stand-by display terminated
due to security error.
The i-
α
ppli stand-by display has been
closed due to an unpermitted operation
or i-
α
ppli action.
●
Inbox full. Unable to retrieve new
messages.
•
Unable to receive SMS because of
insufficient storage space in the
Inbox of the terminal or UIM. Please
read, release protection or delete
unread mail.
➝
P184, 190, 209
●
Inbox is full.
Unable to receive i-mode mail because
of insufficient memory space in the
Inbox. Please read unread i-mode
mail, release protection or delete
unnecessary i-mode mail.
➝
P184, 190
F905i.book Page 260 Monday, April 21, 2008 10:53 AM
261
Appendix/External Devices/Troubleshooting
F905i_E2kou
●
Infrared Connection interrupted.
An error occurred during infrared
communication. During infrared
communication, do not move the
terminal from the right location before
data sending/receiving
completes.
➝
P307
●
Infrared Failed to connect via
authentication.
Sending all data was failed because
the authentication password is not
correct.
➝
P308
●
Infrared No response. Retry data
exchange?
A certain period of time elapsed in
infrared communication state, but no
communicating parties are found.
Locate your and the other party's
terminals correctly.
➝
P307
●
Infrared No UIM inserted. Unable to
start requested software.
Even if an i-
α
ppli To is set to data
received by infrared communication, it
is not activated due to UIM operation
restriction.
➝
P34
●
Input error (205)
Input data for the site or website is
incorrect.
●
Insufficient memory.
Operation interrupted due to
insufficient memory. If it appears
frequently, once turn OFF the terminal
and then turn it ON.
●
Insufficient memory. Quit
application.
Insufficient memory. The application is
terminated stopping operation.
●
Invalid data
The data contains an error and cannot
be downloaded.
●
Invalid data. Connection cannot be
established. (400)
Cannot be connected because of the
error in the site or website. Make sure
the URL.
●
Invalid data. Unable to save.
•
The downloaded Chara-den
contains invalid data.
•
Data received through infrared
communications cannot be saved
because it is in a format incompatible
with the terminal.
●
Invalid data.(xxx)
•
Unable to display because there is
an error in the received data.
•
Sending auto-send message failed.
●
Invalid information. Unable to play.
Playing is impossible because
attached data is incorrect.
●
Invalid microSD. Unable to use DRM
function.
Accessing the authentication area in
microSD memory card is disabled for a
certain reason. Data compatible with
data transfer cannot be saved to
microSD memory card with errors.
●
Invalid UIM. Requested service not
available.
Operation is disabled by UIM operation
restriction. Insert the same UIM used
when saving data and/or files.
➝
P34
●
Invalid UIM. Requested software
failed to start.
i-
α
ppli cannot start by UIM operation
restriction. Before using, insert the
same UIM used when downloading i-
α
ppli.
➝
P34
●
Mails could not be sent to following
address.(561)
Sending i-mode mail to the following
address failed : Press
g
to display
the receiver address of the failed
message sending. Check the receiver
address and retry sending in a place
with good wave conditions. Mail
addresses displayed in the message
vary depending on the destinations.
●
Memory full. Unable to save.
The terminal does not have enough
memory space and the SMS cannot be
saved. Move SMS to UIM or delete
messages/SMS.
➝
P190, 208
●
Message cannot be read. Still
retrieving message data.
The message cannot be viewed
because the message or the folder is
used by the other process.
●
Message kept in center.
The SMS have already been sent.
●
microSD memory full.
Moving/copying items, back-up of data
and Sync data info is not allowed
because the storage space in microSD
memory card is full. Delete
unnecessary data.
➝
P305
●
No content is available.(204)
Could not find data at the specified
site.
●
No microSD.
This message appears when microSD
memory card is selected with no such
card inserted in the terminal or
microSD memory card is removed
while its contents are being displayed.
●
No requested software
The software specified is not stored in
your terminal.
●
No response.(408)
Unable to receive a response from a
site or website within the specified time
and the communication is
disconnected. Retry later.
●
Number of items in microSD
reached limit. Saving to phone
memory.
When the microSD memory card
becomes full with "microSD" set for
Save to: for Still camera or for Movie
camera, Save to: is automatically
switched to "Phone".
●
Out of service area.
Unable to execute because the
terminal is in a place where radio
waves do not reach or out of the
service area.
●
Page is not found.(404)
Make sure the URL is correct.
●
Password is not correct.(401)
The user name or password entered
on the Authentication screen of sites or
website is incorrect.
●
Phone memory full.
Moving/copying items from microSD
memory card and restoration of data
are unavailable because the number of
saved item in the terminal is full. Delete
unnecessary data.
➝
P305
●
Please wait.
•
Failure in the voice line/packet
communications facilities or
congestion in voice line network/
packet communications network.
Retry later.
•
A call can be made to 112. However,
the connection may not be
established depending on the
conditions.
●
Please wait for a while (Packet)
Failure in the packet communications
facilities or congestion in packet
communications network. Retry later.
●
PUK blocked.
Contact FET Repair Center.
F905i.book Page 261 Monday, April 21, 2008 10:53 AM

262 Appendix/External Devices/Troubleshooting
F905i_E2kou
●
Receiving messages stopped. Some
messages unreceived.
Unable to receive all SMS because an
error occurred during reception. Please
execute the Check new message
function for SMS in a place with good
wave conditions again.
➝
P207
●
Registration is in progress. (554)
User registration with i-mode is in
process. Retry later.
●
Replay period has not yet started.
Replaying is disabled as it is still before
the replay period set to i-motion or
music data. Check the detail
information or the program
information.
➝
P304, 324, 334
●
Requested software unavailable.
i-
α
ppli cannot be started because of an
error in i-
α
ppli. Starting i-
α
ppli To is
disabled if there is a problem in i-
α
ppli
settings or start-up conditions.
●
Root certificate has expired.
Connect?
The CA certificate has been expired.
(
➝
P162)
This may appear when date and time
are not set or wrong.
➝
P40
●
Root certificate is not valid.
The terminal certificate is invalidated
by setting. To connect, change the
setting.
➝
P162
●
Save unsaved data to phone
memory or delete.
Infrared communication INBOX is full.
Save the data from INBOX into the
terminal or delete it.
➝
P309
●
Service not registered.
•
Unable to run because you are not
an i-mode subscriber. You need to
subscribe to use the service.
•
If you have subscribed to i-mode
after purchasing the terminal, once
turn the terminal power OFF and
then turn ON.
●
Service unavailable.
The SMS service is not available.
●
Size of this page is not supported.
•
The size of site or Web page was
larger than the limit size. Press
g
to display the data already acquired
normally.
•
The downloading data was larger
than the limit size.
●
Software terminated due to security
error.
i-
α
ppli has been terminated due to an
unpermitted operation or i-
α
ppli action.
●
Software updated.
The i-
α
ppli has already been upgraded
to the latest version.
●
SSL session cannot be established.
SSL session was interrupted due to a
session error or an authentication error
on the server side.
●
SSL session failed.
A problem was detected with the
authentication process during SSL
session. Session is suspended.
●
SSL/TLS session cannot be
established.
SSL/TLS session was interrupted due
to a session error or an authentication
error on the server side.
●
SSL/TLS session failed.
A problem was detected with the
authentication process during SSL/TLS
session. Session is suspended.
●
The data cannot be saved.
Download?
The data cannot be saved. Select
"Yes" to download.
●
The software contains an error.
Unable to import because i-
α
ppli data
contains an error.
●
This certificate has expired.
Connect?
The term of validity of the site
certificate is premature or overdue.
➝
P162
This may appear when date and time
are not set or wrong.
➝
P40
●
This certificate is not valid for this
URL. Connect?
CN name (server name) of the site
certificate does not match the actual
server name.
➝
P162
●
This data may not be replayed.
i-motion or movie file format is not
supported on the terminal.
●
This site is not certified. Connect?
The site certification is not supported
by the terminal.
F905i.book Page 262 Monday, April 21, 2008 10:53 AM

263
Appendix/External Devices/Troubleshooting
F905i_E2kou
●
This software is not supported by
this phone.
The i-
α
ppli is not compatible with this
terminal.
●
This software is presently out of
use.
Using i-
α
ppli is stopped by the IP
(Information Provider).
●
This UIM cannot be recognized.
The UIM is not correctly installed or the
card is faulty.
Check that UIM is inserted
correctly.
➝
P34
●
Time out
The i-mode Center is busy. Retry later.
●
Time reset. Unable to download/play
data. Set auto time adjustment ON
in Date & Time and restart phone.
With Auto time adjust "OFF" in Set
date and time, removing the battery
pack or leaving it exhausted for a long
time may cause the date and time to
be deleted.
➝
P40
●
Too much data was entered.
Unable to transmit data because too
many characters were entered in the
entry field of the site or Web page.
Please reduce the number of
characters and retry transmission.
●
Too much text entered. Entry
uncompleted.
An attempt is made to save an item
containing characters exceeding the
limit selected from a site, etc. to
phonebook. Press
g
to display
phonebook registration screen with
excess characters erased.
●
Transmission failed.
Failed to transmit the SMS. Please
move to another location with good
signal quality and retry transmission.
●
Transmission failed.(552)
Failed to transmit the i-mode mail
because of an error of the i-mode
Center. Retry later.
●
UIM full.
UIM does not have enough storage
space and SMS cannot be saved.
Delete or move SMS in the UIM to the
terminal.
➝
P209
●
UIM not inserted. Requested service
unavailable.
The UIM is not inserted.
➝
P34
●
Unable to check new messages.
Please retry in a place with good wave
conditions. If the error persists, retry
later.
●
Unable to download. Data exceeds
maximum size. (452)
The size of site or Web page exceeds
the limit size.
●
Unable to obtain data due to replay
restriction data error.
Cannot acquire because the replay
restriction data is incorrect.
●
Unable to play. Connect phone to
PC and start application to update
music if necessary.
The music data cannot be replayed
because it is already expired, its replay
expiration cannot be confirmed or
information specific to the terminal is
changed due to a trouble, repair or
replacement of the terminal. To play,
check that it is not expired using a PC
and connect the terminal to the PC for
synchronization.
➝
P326, 327
●
Unable to retrieve the requested
URL.(504)
Failed to connect to the specified site,
etc. for a certain reason.
●
Unable to save specified image.
Failed to save because the image
contains error.
●
Unable to send. "xxx.tw" is not
available temporarily.(555)
i-mode Center is busy. Please wait for
a while and retry. The domain name
displayed in the message varies
depending on the receiver.
●
Unable to shoot serially.
You cannot shoot serially because of
insufficient memory space. Continuous
shoot is cancelled automatically.
●
Unable to switch to data transfer
mode.
As the terminal is performing
communication, data transfer mode
cannot be set. Try again after the
communication ends.
●
Unable to update pattern
definitions.
Updating the pattern definitions has
failed. Stop all other functions currently
running and retry the update in a place
with good signal quality.
●
Unable to use data type.
Data in a file format incompatible with
the terminal cannot be moved/copied
from a microSD memory card to the
terminal or searched for.
●
Unmatched to saved fingerprint.
The fingerprint did not match that
registered. Retry fingerprint
authentication or perform
authentication operation with terminal
security code. Note that authentication
with terminal security code is disabled
when Fingerprint access is
"ON".
➝
P106, 109
●
Unsupported content.
Because of the content not supported
by the terminal, operations selecting
the contents are not available.
●
URL address changed.(301)
The site or website automatically
performs URL transfer or the URL was
changed.
●
URL address is not valid.(xxx)
Make sure the URL.
●
URL is too long to register.
Unable to register as a Bookmark
because the number of characters of
URL exceeds the limit.
●
You have no certificate. Connect?
The user certificate has not been
downloaded.
●
Your certificate has expired.
Connect?
The user certificate has
expired.
➝
P162
●
Your HTTP version is not
supported.(505)
The specified site or website does not
support i-mode.
F905i.book Page 263 Monday, April 21, 2008 10:53 AM
F905i_E2kou
264 Can't use this master page
F905i.book Page 264 Monday, April 21, 2008 10:53 AM
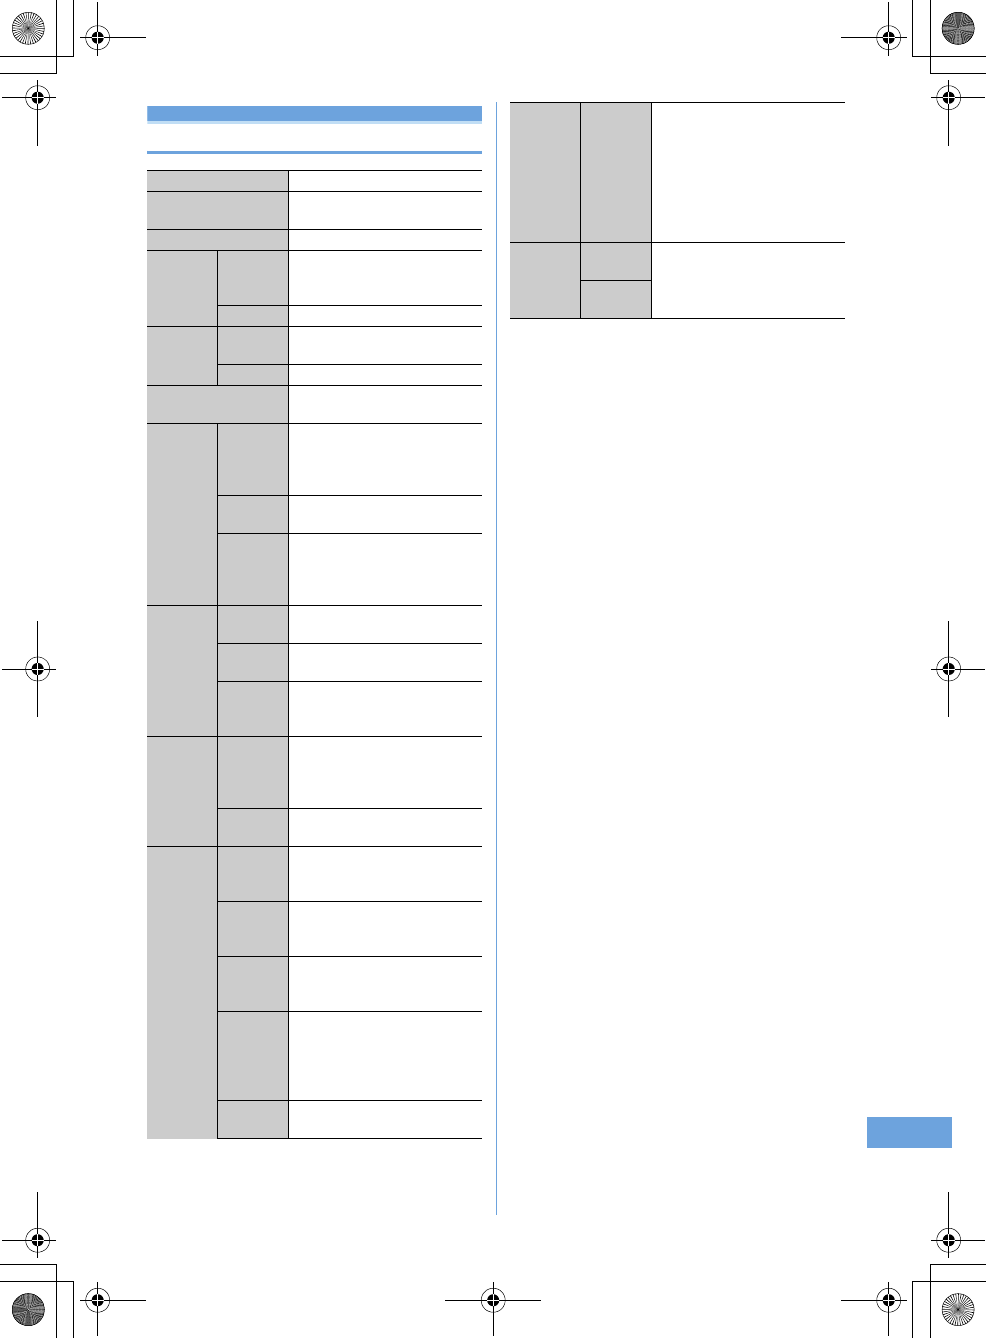
26
Appendix/External Devices/Troubleshooting 265
F905i_E2kou
Specifications
*1
Continuous stand-by time indicates the estimated time that the ter-
minal can receive signals normally. The call and stand-by times
may be about half depending on factors such as the battery charg-
ing condition, function settings, operating environment such as
ambient temperature, and signal condition in the area of use
(whether the signal is weak or absent). Stationary continuous
stand-by time indicates the average utilization time the terminal is
folded and able to receive signals normally remains stationary.
Moving continuous stand-by time indicates the average utilization
time when the terminal is folded and able to receive signals nor-
mally with a combination of "stationary", "moving", and "out of
service area" status.
*2
The continuous stand-by and continuous call times are reduced by
making i-mode communications, creating i-mode mail, activating
downloaded i-appli, making i-appli stand-by display settings, play-
ing tune with Music player, etc.
*3
Continuous call time indicates the estimated call time that the ter-
minal can send or receive signals normally.
*4
1Seg watching time may be shortened depending on factors such
as the battery charging condition, function settings, operating envi-
ronment such as ambient temperature, and signal condition in the
area of use (whether the signal is weak or absent).
*5
Charging time indicates the estimated time for charging an empty
battery with the terminal turned OFF. Charging with the terminal
turned ON requires longer time.
*6
The number of still images saved is valid for image size
"128
×
96", quality "Standard" and file size 10 Kbytes.
*7
The movie recording time means allowable time for one movie. It
varies depending on the image size, quality and movie to be
recorded.
*8
Background playing is available.
*9
AAC format files
Product name
FOMA F905i
Size
108 (H)
×
50 (W)
×
21 (T) (Unit :
mm, Folded)
Weight
Approx. 138 g (with battery)
Continuou
s stand-by
time
*1, 2
3G
Stationary (Auto) : Approx. 505 H
Moving (Auto) : Approx. 330 H
Moving (3G static) : Approx. 360 H
GSM
Stationary (Auto) : Approx. 300 H
Continuou
s call
time
*2, 3
3G
Voice call : Approx. 190 min.
Videophone call : Approx. 110 min.
GSM
Approx. 200 min.
Charging time
*5
AC adapter : Approx. 150 min.
DC adapter : Approx. 150 min.
LCD Type
Display :
TFT 16,777,216 colors
Sub-display :
Monochrome FSTN1 colors
Size
Display : Approx. 3.2 inch
Sub-display : Approx. 0.65 inch
Number of
pixels
Display :
414,720 pixels (480
×
864)
Sub-display :
2,880 pixels (96
×
30)
Image
pickup
device
Type
In-camera : CMOS
Out-camera : CMOS
Size
In-camera : 1/7.4 inch
Out-camera : 1/2.8 inch
Number of
effective
pixels
In-camera : Approx. 320,000 pixels
Out-camera : Approx. 3,200,000
pixels
Camera
section
Number of
recording
pixels
(Max.)
In-camera : Approx. 310,000 pixels
Out-camera : Approx. 3,200,000
pixels
Zoom
(digital)
In-camera : Up to approx. 2
×
Out-camera : Up to approx. 25.6
×
Recording
section
Number of
still images
recorded
*6
Approx. 601
Continuous
shooting of
still images
2-9
File format
for still
image
JPEG
Movie
recording
time
*7
Up to approx. 91 min. (saved to
phone)
Up to approx. 58 min.
(saved to 64MB microSD memory
card)
File format
for Movie
MP4, H.264, ASF
Playing
music
Continuous
play time
i-motion (sound only):
Approx. 705 min.
*9
Full Track Music :
Approx. 1180 min.
*8, 9
WMA file :
Approx. 1167 min.
*8
MP3:
(TBD)
Recording
size
Chaku-
uta
Approx. 104 MB
Full Track
Music
F905i.book Page 265 Monday, April 21, 2008 10:53 AM
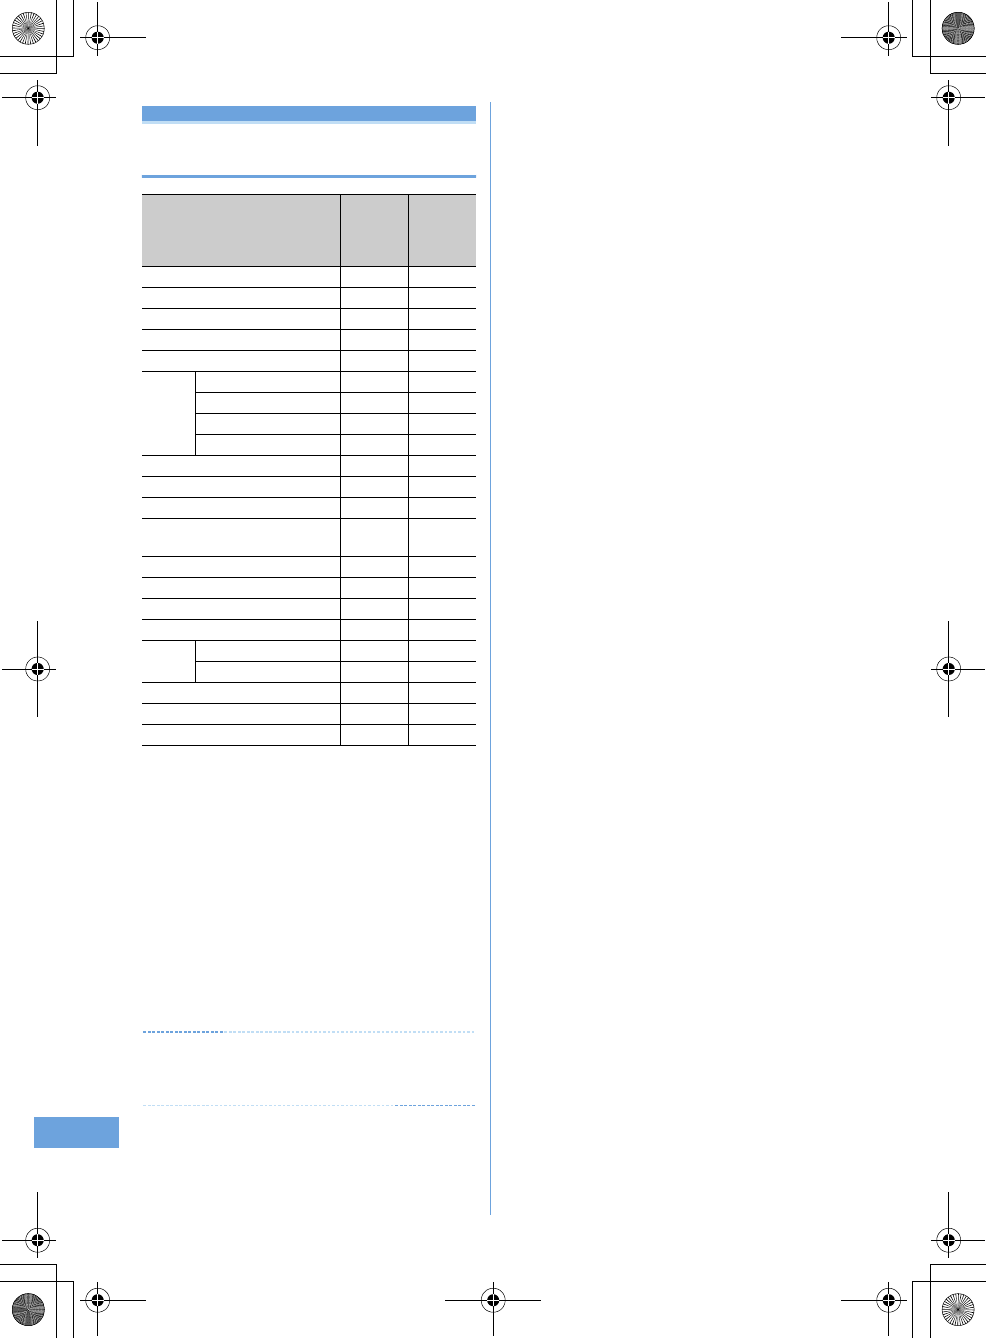
266 Appendix/External Devices/Troubleshooting
F905i_E2kou
Number of saved/recorded/protected
items in F905i
*1
Depending on the size of data or usage status of common memory
space, the actual number of items that can be saved and recorded
may be fewer.
*2
The number of Kisekae Tools recorded by default is included.
*3
The default font is included in the number of fonts.
*4
The total number of i-mode mail and SMS.
*5
The number of mail templates recorded by default is included.
*6
The total number of sent and received SMS. The SMS report
request is not included.
*7
The number of i-
α
ppli recorded by default is included. Up to 5
items of message i-
α
ppli items can be saved (included in the up to
300 i-
α
ppli items that can be saved).
*8
Number of data items of "Deco-mail picture", "Deco-mail pict"
and "Item" folders recorded by default is included.
*9
The number of Chara-den items recorded by default is included.
✔
INFORMATION
•
The display of the data in the terminal file size may contain
some error depending on the function that handles the data.
Type
No. of
saved/
recorded
items
No. of
protected
items
Phonebook
*1
Up to 1000 -
Kisekae Tool
*1, 2
Up to 50 -
Bookmark (i-mode)
Up to 100 -
Bookmark (Full Browser)
Up to 100 -
Screen memo
*1
Up to 100 Up to 50
Mail Received message
*1, 4
Up to 1000 Up to 500
Sent message
*1, 4
Up to 200 Up to 100
Unsent message
*1, 4
Up to 200 Up to 100
Mail template
*1, 5
Up to 100 -
UIM SMS
*6
Up to 20 -
i-
α
ppli
*1, 7
Up to 300 -
Image
*1, 8
Up to 1000 -
Movie/i-motion/sound recorded
with the Sound Recorder
*1
Up to 100 -
Playlists of movie/i-motion
Up to 100 -
Chara-den
*1, 9
Up to 50 -
Melody
*1
Up to 500 -
Word, Excel, PowerPoint
*1
Up to 100 -
Video/
Image
*1
Video
Up to 10 -
Image
Up to 100 -
Music
*1
Up to 30 -
Scheduler
*12
Up to 300 -
Notepad
Up to 50 -
F905i.book Page 266 Monday, April 21, 2008 10:53 AM
267
F905i_E2kou
Index/Quick Manual
Index ............................................................................................................................................. 268
Quick Manual ............................................................................................................................... 268
F905i.book Page 267 Monday, April 21, 2008 10:53 AM
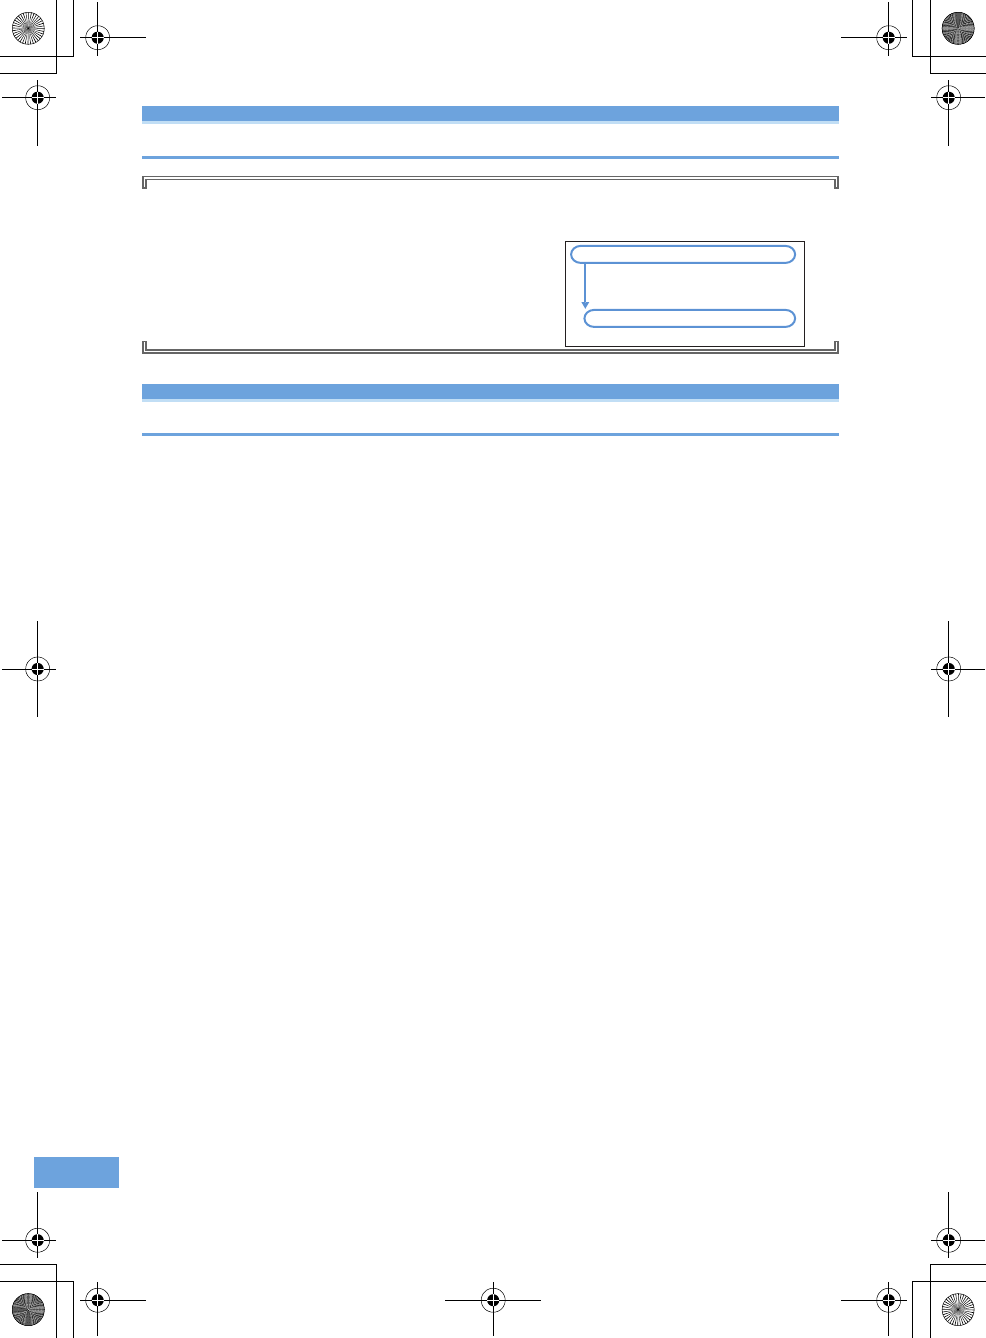
268 Index/Quick Manual
F905i_E2kou
Index
Using Index
You can also use this index listing function names and keywords
as "Alphabetical keyword reference". For functions such as "Set"
and "Delete", first search by a function name of the first level
(
bold
) and then by an index item of the second layer.
Quick Manual
(TBD)
<Example> Downloading Chara-den
Chara-den
........................ 61, 289
Deleting
.............................. 305
Detail information/Edit detail
information
......................... 304
Download
........................... 158
Moving
............................... 302
F905i.book Page 268 Monday, April 21, 2008 10:53 AM