Getac Technology 007 Notebook PC User Manual chapter 2
Getac Technology Corp. Notebook PC chapter 2
Contents
chapter 2

A-760 Series Notebook Operator's Manual Chapter
2
Rev. 00 2-1
Chapter 2
Operation
2-1 Introduction
This chapter tells how to use the notebook.
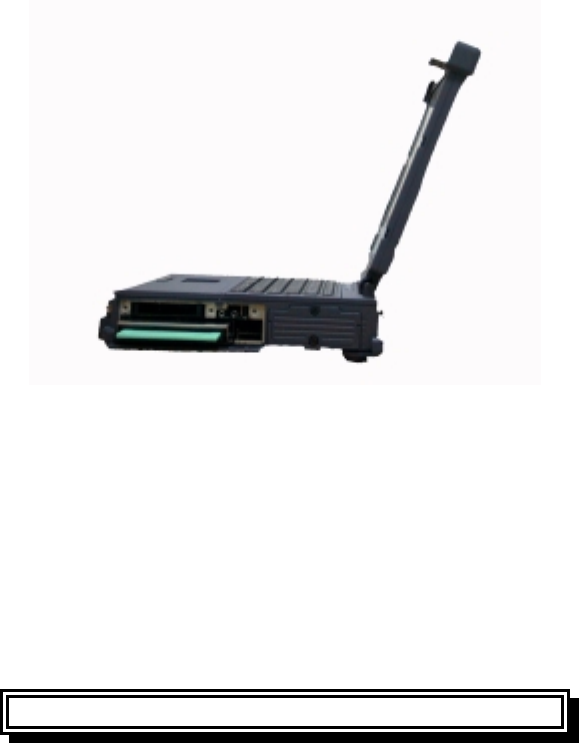
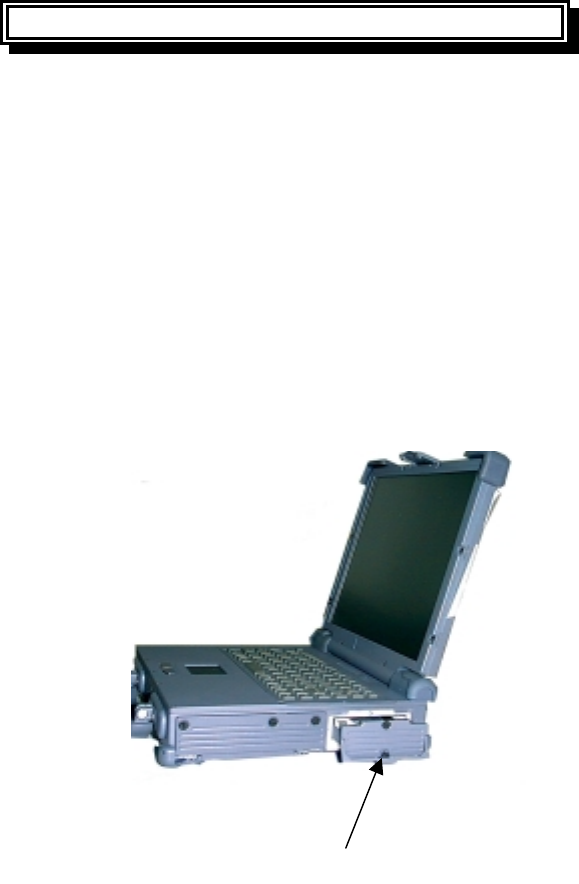
2-2 Opening and Closing the Notebook
This section tells how to open the notebook cover and access doors. See Figure 2-1.
2-2.1 Opening the Cover
To open the notebook, press hook outward and tilt the cover up to a comfortable
viewing angle. (Usually about 110°) See Figure 2-1.
2-2.2 Closing the Cover
To close the notebook, tilt the cover down until it clicks shut. The computer stays on
if you close the cover while system power is applied.
2-2.3 Opening the PCMCIA/FDD/CD ROM Door
Open doors only when it is required to access components behind them.
To open a door:
1. Insert a small flat edged object (coin edge or screw-driver) in a door or cover securing
captive screw.
2. Turn the screw counterclockwise until it comes loose from its socket.
3. Repeat steps 1 and 2 for each securing screw.
Figure 2-1 Opening the Notebook
A-760 Series Notebook Operator's Manual Chapter
2
Rev. 00 2-2
4. Grab a securing screw and open a door.
2-2.4 Shutting the PCMCIA/FDD/CD-ROM Door
1. Shut the door or put the PCMCIA/FDD/CD-ROM back in place.
2. Align the door or cover securing screws with their sockets.
3. Use a flat edged tool (coin or screw driver) to turn the screws clockwise until tight.
NOTE
Keep all access doors and covers tightly shut when not in use.
Figure 2-2 Opening a Door
A-760 Series Notebook Operator's Manual Chapter
2
Rev. 00 2-3
2-3 Connecting and Installing Devices
This section gives instructions for installing, removing, changing, or connecting
devices via the notebook external ports or sockets.
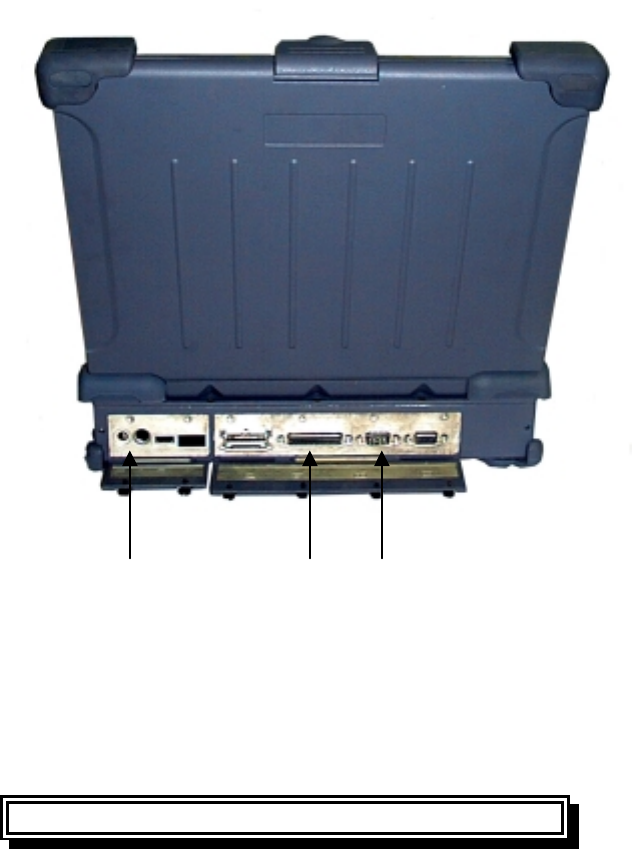
2-3.1 Serial and Parallel Port
Item 1, Item2, Figure 2-3 shows how to connect serial and parallel cables. Make sure
the mating connector is tightly secured by pushing it to the end and lock the screws.
2-3.2 External Power Adapter
Item 3, Figure 2-3 shows how to connect the power adapter. Make sure the mating
connector is tightly secured by pushing it to the end.
NOTE
The notebook can be on or off when connecting or disconnecting the
adapter.
Figure 2-3 Connecting the External Power, Serial , and Parallel ports
3 2 1
A-760 Series Notebook Operator's Manual Chapter
2
Rev. 00 2-4
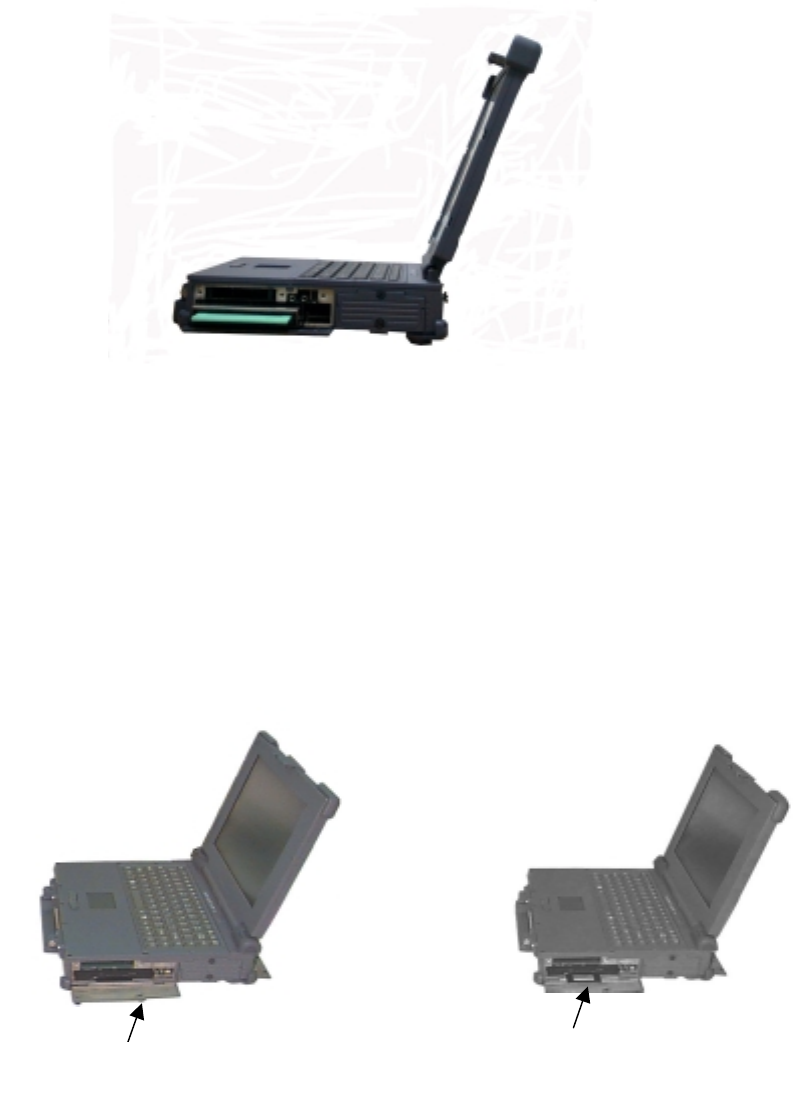
2-3.3 Diskettes
To install a diskette,
1. Open the PCMCIA slot/ diskette drive access door.
2. Slide the diskette into the drive with the printed label facing up until it clicks in place.
To remove the diskette, press the ejector button on the right side of the drive. See
Figure 2-4.
2-3.4 Remove the Floppy Diskette Drive / CD-ROM / Bay 1 Battery
1. Open the PCMCIA /FDD/CD-ROM door.
2. Push the ejector handle at the front bottom of the FDD/CD-ROM/Bay 1 battery
compartment to let it spring back about 0.4 cm..
3. Pull out the handle outwards about 3 cm and stop pulling to prevent it from being
damaged.
4. Hold two sides of the FDD / CD-ROM/Bay 1 battery module and slide it out smoothly.
Figure 2-4 Removeing a Diskette
1 2
Open Door Push Eject Handle
A-760 Series Notebook Operator's Manual Chapter
2
Rev. 00 2-5
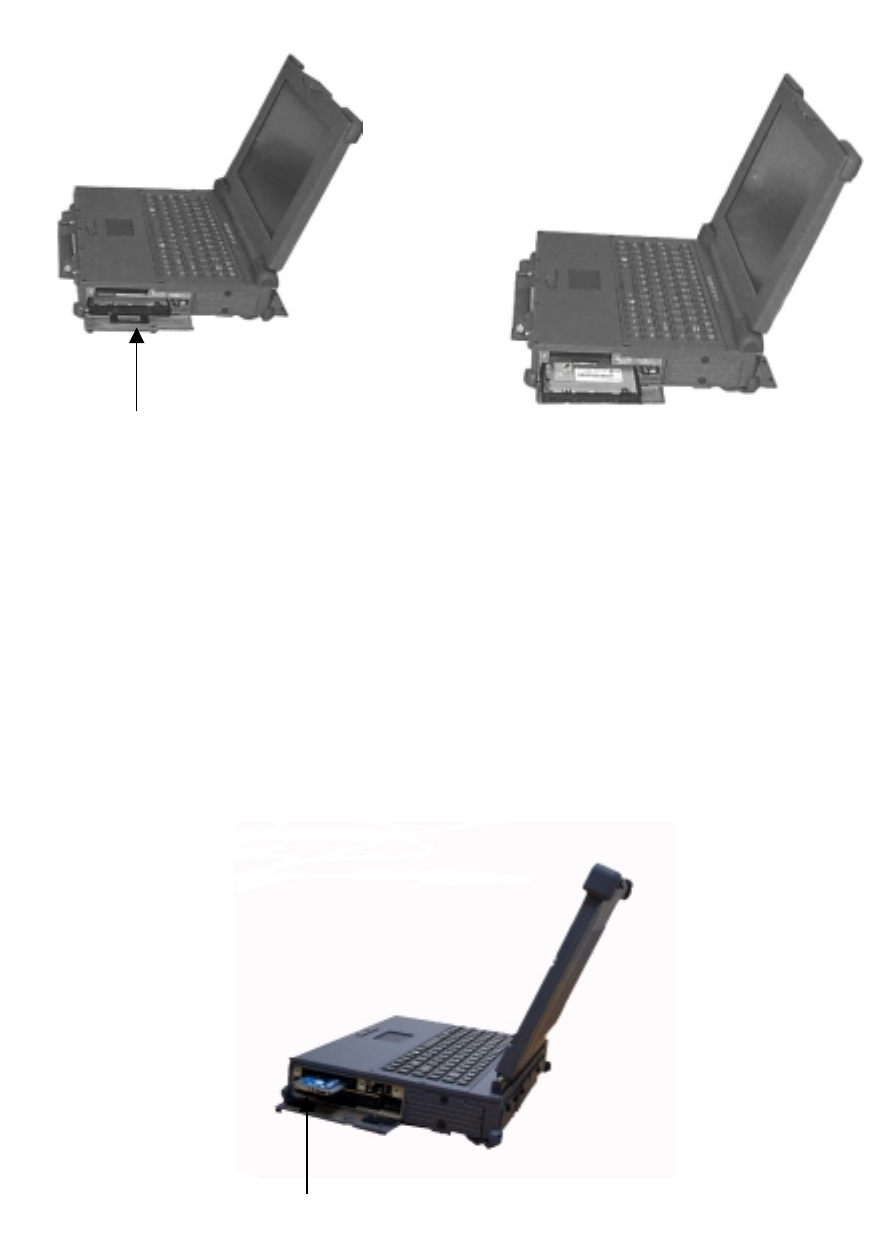
2-3.5 PCMCIA Cards
The PCMCIA ports support up to two type-II PCMCIA cards or one type-III PCMCIA
card. A type-III PCMCIA card occupies both slots.
1. Open the PCMCIA slot/diskette drive door.
2. Slide the card into the slot with the insert marking facing up until it seats.
To remove the upper card, press the eject button on the left. To remove the lower card,
press the button on the right. (See Figure 2-6).
Figure 2-5 Removing a FDD/CD-ROM
Figure 2-6 Removing a PCMCIA Cards
43
Don’t Pull it.
PCMCIA Card
A-760 Series Notebook Operator's Manual Chapter
2
Rev. 00 2-6
2-3.6 Hard Disk
CAUTION!
Installing or removing a hard disk when the computer is on can destroy
the system board and hard disk.
To remove and change the hard disk:
1. Turn the computer off.
2. Loose the screws from up, down of the Hdd disk.
3. Grab the handle of the hard disk module and pull it out. (See Figure 2-7).
4. Insert the new hard disk module in the slot until it seats firmly.
5. If necessary, run the system configuration program when the system boots next time.
See chapter 3 for details.
Figure 2-7 Removing a Hard Disk
Hard Disk
A-760 Series Notebook Operator's Manual Chapter
2
Rev. 00 2-7
2-4 First Time Use
This section describes activities to complete prior to using the notebook the first time.
1. Put the rechargeable battery pack into the battery compartment.
2. Connect the power adapter to the power port.
3. Connect the power adatper into a properly rated power source.
4. Turn on the computer.
2-4.1 Configuring the System
The notebook is configured in the factory. Run the SETUP program when the
computer boots for the first time to record the system settings. For more details about
configuring the system and when to do it, see Chapter 3.
2-4.2 Installing Software Driver
Before you install your new software, make a backup copy of the original program
disk using the DOS Diskcopy command or the Windows disk copy utility in file
manager.
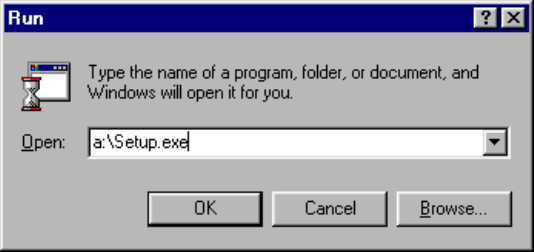
2-4.2.1.1 Installation Cardworks in Windows 95
At First you install Cardworks for Windows 95 before, you must install Patch
Program, otherwise that can’t confirm PCMCIA card. (Please user can self catch the
W95SU523.exe from http://www.toshiba.ca/my_html/files2.htm).
1. With Windows running, insert Cardworks Software disk into drive A.
2. In the Windows program manager, select Run.... from the File menu and type
A:\Setup.exe. Press ENTER, or choose OK.