Samsung Electronics Co SCHI300 Dual-Band Analog/PCS Phone (AMPS/CDMA) User Manual
Samsung Electronics Co Ltd Dual-Band Analog/PCS Phone (AMPS/CDMA) Users Manual
Contents
Users Manual Part 5
MAIL 193
9
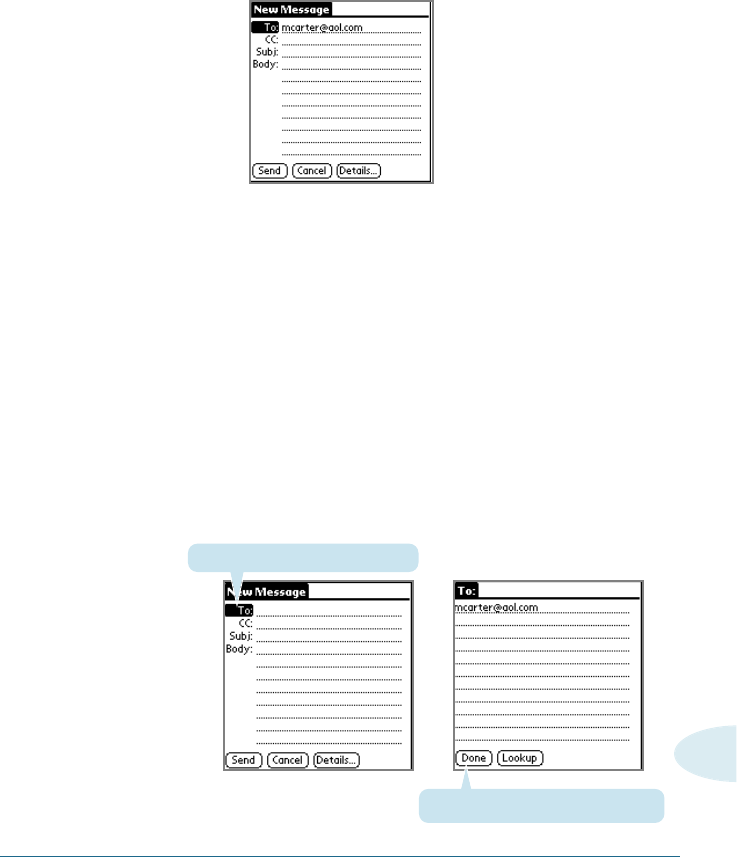
3. To send a copy of the e-mail item to additional recipients, tap
the CC field, and enter the e-mail addresses of the additional
recipients, separating the addresses with a comma followed
by a space.
4. Tap the Subject (Subj:) field and enter a subject for your e-mail
item.
5. Tap the Body field and enter the text of your e-mail item.
Tip: If the address, CC, subject, or body exceeds the capacity of the
screen display, tap the name of the field (for example, tap “To:”) to
expand that field. Tap Done to return to the New Message screen.
Tap to return to New Message screen.
Tap the name of the field to open it.
➜
➜
194 MAIL
To reply to an e-mail item:
1. Tap an e-mail item in the Message List to display it on the
screen.
2. Tap Reply.
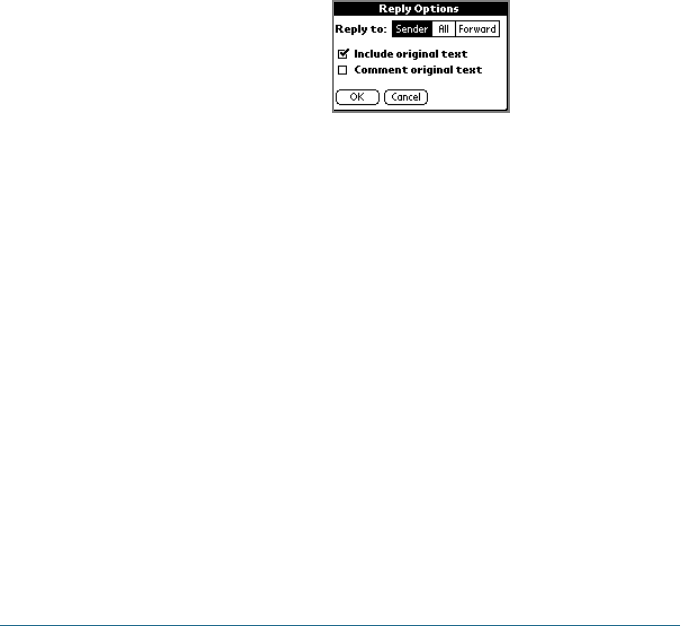
3. In the Reply Options dialog box, tap the Reply To pick list. Tap
to select who should receive the reply—the sender only or all
recipients; or tap Forward to reply to someone who didn’t see
the original e-mail item.
4. Tap Include Original Text to include the original e-mail
message in the reply. Clearing the option creates a blank reply.
5. If you selected Include Original Text, tap Comment Original
Text to let you edit the original text.
6. Tap OK.
7. Enter the text of your reply.
8. If you are forwarding the message, enter a recipient in the To
field.
9. Tap Send to place your reply in the Outbox.
MAIL 195
9
Looking Up an Address
To identify the recipient of an e-mail item, you must enter that
person’s e-mail address. You can either enter the data directly in
the To or CC field, or use the Look Up command to access the
information in your Address Book.
To look up an e-mail address:
1. Tap either the To or CC field name to expand it.
2. Choose from the following options:
• Tap Lookup to display the Lookup dialog box. The Lookup
screen lists all records that contain information in an e-mail
field.
• Enter the first few letters of the last name of the person
whose address you want to find, and tap Lookup. If your
Smartphone completes the desired address for you, tap
Done to return to the New Message screen.
Tip: You can also display the Lookup dialog box from the New Message,
To or CC screens by tapping the Menu icon on the front of your
Smartphone; then tap Options and tap Lookup. Or use the Graffiti®
Command stroke /L.
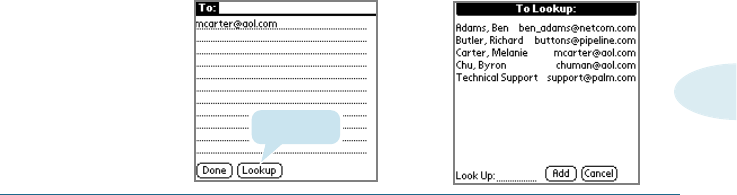
3. In the Lookup dialog box, enter the first letter of the entry you
want, to scroll to the first entry that begins with that letter.
Enter additional letters to have the list scroll to the first entry
that starts with those letters.
Tap Lookup.
➜
➜

196 MAIL
6. Tap Done to return to the New Message screen.
Adding Details to E-mail Items
Before you send your e-mail item, you can additional information to
the message if your desktop e-mail application supports the feature.
For example, you can specify the message’s priority, create a blind
courtesy copy, add a signature, or confirm that the message was
delivered or read. Your Smartphone cannot attach to an e-mail items
details or attributes that your desktop e-mail application doesn’t
support.
To add details to an e-mail item:
1. In the New Message screen, tap Details.
5. Tap an address to select it. Tap Add.
Tap here to enter address in field.
Tap to select.
Tap here
MAIL 197
9
2. Choose from the following options:
Priority Selects a ranking for the e-mail item from the
Priority pick list. Choices are High, Normal, or Low
priority. The Priority setting must be set for each
e-mail item you create.
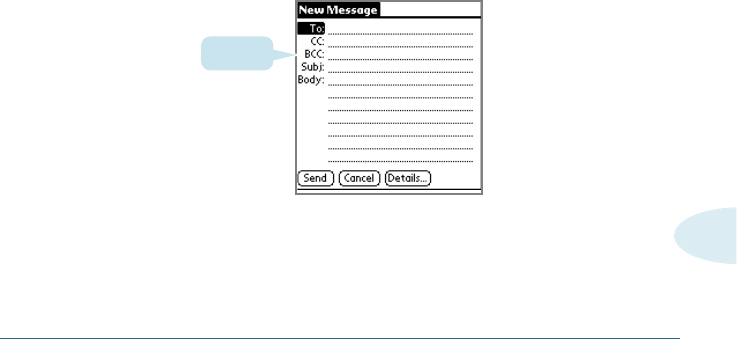
BCC Creates a blind courtesy copy. The BCC option
must be set for each e-mail item.
Signature Attaches your signature to all subsequently
created e-mail items until you deselect this option.
The signature is visible only to the e-mail
recipient, and does not appear in your e-mail item.
See “Creating a signature for your e-mail item” for
information on defining a signature.
Confirm Requests a confirmation that the e-mail item was
Read read.
Confirm Requests a confirmation that the e-mail item was
Delivery delivered.
3. Tap OK.
BCC field
4. If you selected the BCC option, in the New Message screen,
tap the BCC field and enter an address.

198 MAIL
Adding a Signature for Your Message
By defining information as a signature, you can automatically
attach it to the close of e-mail items and avoid recreating the
information for each e-mail item. A signature can contain
information on you or your company—such as your name,
address, phone and fax numbers, and any other text you want to
include. The signature is visible only to the e-mail recipient, and
does not appear in your e-mail item.
For information on attaching a signature to an e-mail item, see
“Adding details to e-mail items.”
To create a signature:
1. Tap the Menu icon to open the Mail menus.
2. Tap Options, and then tap Preferences.
3. Tap the Signature text field and enter the text of your
signature.
4. Tap OK.
Add signature
text here

MAIL 199
9
Storing and Editing E-mail Items
Sending an e-mail item from your Smartphone stores it in the
Outbox folder until you perform a HotSync operation. You can
edit unsent e-mail as long as you have not yet performed a
HotSync operation.
You can also draft e-mail items and store them until you’re ready
to send them, and you can file e-mail items.
Storing and Editing Unsent E-mail Items
The e-mail items you send from your Smartphone are actually
stored in the Smartphone Outbox folder until you perform a
HotSync operation to synchronize your device with your
computer. During synchronization, your Smartphone transfers e-
mail items stored in the Outbox folder to your desktop e-mail
application. The next time you send mail from this desktop
application, it sends the mail created on your Smartphone.
When you edit an e-mail item, your Smartphone removes the
item from the Outbox folder and displays the New Message
screen, where you can edit the item and resend it, save it as a
draft, or delete it.
For instructions on synchronizing your device, see “Synchronizing
Mail with your e-mail application.”
To store an e-mail item in the Outbox folder:
1. Create a new e-mail item or reply to an item. (See “Creating e-
mail items.”)
2. Then tap Send.
200 MAIL
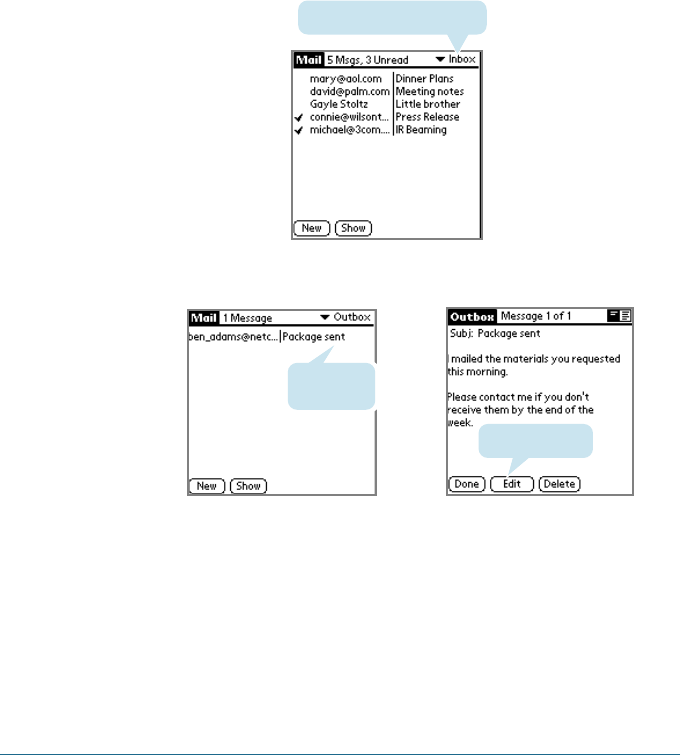
To edit an unsent e-mail item:
1. In the Mail list, tap Outbox in the pick list in the upper right
corner of the screen.
2. Tap the e-mail item you want to retrieve.
3. Tap Edit. Change the e-mail item as desired.
4. Choose from the following options:
• To return the e-mail item to the Outbox, tap Send.
• To store the e-mail item in the Draft folder, tap Cancel. If
prompted, tap Yes.
Tap here to display folder list
Tap to edit item.
Tap here to
select item. ➜
➜
MAIL 201
9
➜
➜
Drafting E-mail
You can save e-mail items that you’re drafting and not ready to
send by storing them in the Draft folder.
To save an e-mail item as a draft:
1. Create an e-mail item.
2. Choose from the following options:
• Tap the Menu icon . Tap Message, and then tap Save
Draft.
• In the New Message screen, tap Cancel, and then tap Yes at
the prompt.
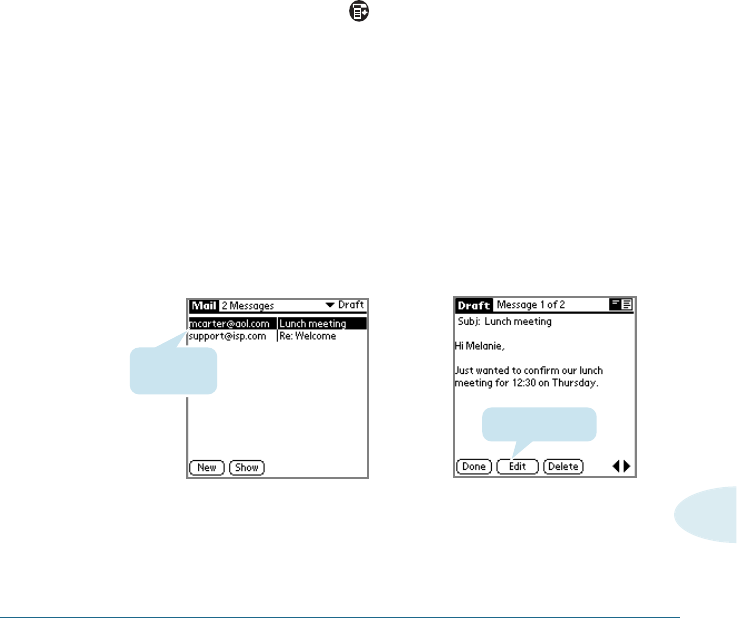
To edit an e-mail item saved as a draft:
1. In the Message screen, tap Draft in the pick list in the upper
right corner of the screen.
2. Tap the e-mail draft you want to display.
3. Tap Edit.
4. Enter any changes.
Tap to edit item.
Tap to
select item.

202 MAIL
5. Choose from the following options:
• To resave the draft in the Draft folder, tap the Menu icon ,
tap Message, and tap Save Draft; or tap Cancel and if
prompted, tap Yes.
• To transfer the item to your Outbox folder, tap Send.
Filing an E-mail Item
You can file e-mail in your Smartphone’s Filed folder. During a
HotSync operation, your Smartphone stores a backup copy of the
Filed folder on your computer hard drive, but does not
automatically synchronize the contents of this folder with your
desktop e-mail application.
You can retrieve an e-mail item from the Filed folder, edit it, send
it, save it as a draft, or return it to the Filed folder.
To file an e-mail item:
1. In the Mail list, tap an e-mail item to open it.
2. Tap the Menu icon .
3. Tap Message, and then tap File.
4. Tap No to save the e-mail item in the Filed folder, or tap Yes to
file the item in the Filed folder and keep a copy in the Inbox.

MAIL 203
9
To retrieve an e-mail item from the Filed folder:
1. In the Mail list, tap Filed from the pick list in the upper right
corner of the screen.
2. Tap the e-mail item you want to restore.
3. Tap Edit to display and modify the item.
4. To store the e-mail item, choose from the following options:
• Tap Cancel and tap Yes to store the item in the Draft folder.
• Tap Send to store the e-mail in the Outbox.
• Return the message to the Filed folder, following the
preceding procedure.
Deleting E-mail Items
When you delete an e-mail item, your Smartphone stores it in the
Deleted folder until you purge the folder’s contents or perform
the next HotSync operation. You can purge the contents of the
Deleted folder to avoid having deleted e-mail monopolize your
Smartphone’s storage space. Synchronization deletes the e-mail
item, as well as purged items, from your desktop e-mail
application.
You can restore a deleted e-mail item by removing it from the
Deleted folder, if you haven’t purged the folder contents or
performed a HotSync operation.

204 MAIL
To delete e-mail:
1. In the Mail list, tap the e-mail you want to delete to open.
2. Tap Delete.
3. If prompted, tap Yes.
To restore an e-mail item by moving it out of the Deleted
folder:
1. In the Mail list, tap Deleted from the pick list in the upper right
corner of the screen.
2. Tap the e-mail item you want to restore.
3. Choose from the following options:
• If you created the e-mail item that you deleted, tap Edit to
display and modify the item. You can send the item or save
it as a draft.
• If you received the e-mail item that you deleted, tap
Undelete to move the selected item to the Inbox and mark it
as Read.

MAIL 205
9
To purge the contents of the Deleted folder:
1. Tap the Menu icon .
2. Tap Message, and then tap Purge Deleted.
3. Tap Yes.
Note: You cannot restore e-mail items after you purge them.
To display a prompt before e-mail is deleted:
1. In the Mail list or in a Message screen, tap the Menu icon .
2. Tap Options, and then Tap Preferences.
3. To display a prompt, tap the Confirm Deleted Message screen.
To delete a message without a prompt, clear the check box.

206 MAIL
Categorizing and Sorting E-mail Items
You can display e-mail items by the folders your Smartphone
provides for categorizing mail, and according to the e-mail date.
The Date column is hidden in the Mail list by default to increase
the available screen space.
You can also sort e-mail items by the date sent, by sender, or by
subject. No matter how you sort the list, high-priority e-mail
items always appear first.
To select an e-mail folder to display:
1. In the Mail list, tap the pick list in the upper right corner or
your screen to display a list of folders.
2. Tap a folder to choose one of the following options:
Inbox Contains the e-mail from your desktop E-Mail
application Inbox, minus any that you have
excluded using filtering options. See “Creating
special filters” later in this chapter.
Outbox Contains the e-mail you created and sent on the
organizer since the last HotSync operation.
Deleted Contains the e-mail you deleted since the last
HotSync operation.
Find Contains the e-mail you want to store on the
organizer.
Draft Contains the e-mail you created using the
organizer but are not yet ready to send.
3. To change the folder displayed, repeat steps 1 and 2 to choose
another folder.
MAIL 207
9
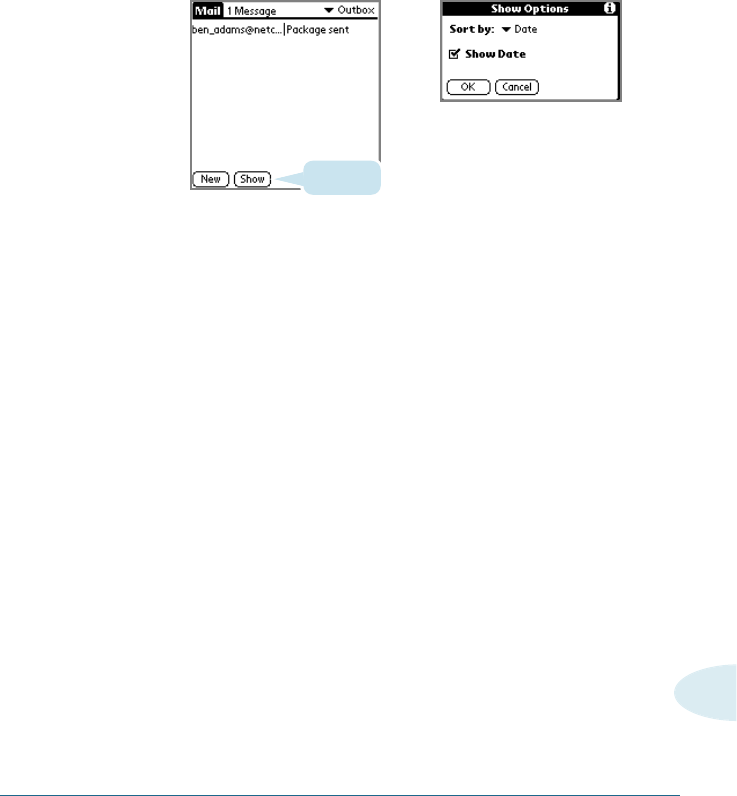
To display the Date column in e-mail items:
1. In the Mail list, tap Show.
2. Tap the Show Date check box to select it.
3. Tap OK.
To sort the Message List:
1. In the Mail list, tap Show.
2. Tap the Sort By pick list and tap one of the following options
to select it:
Date Sorts e-mail by date and displays the most recent
e-mail item at the top of the screen.
Sender Sorts e-mail by the sender’s user name and
displays items in ascending alphabetical order,
based on the first word of the From field.
Subject Sorts e-mail by the subject and displays items in
ascending alphabetical order, based on the first
word of the Subject field.
3. Tap OK.
Tap Show
➜
➜

208 MAIL
Managing Your E-mail Application with
HotSync
You can manage your e-mail application more effectively by
selecting HotSync options to control which e-mail items
download when you synchronize your Smartphone and your
computer. You can define different settings for local and remote
synchronization.
For example, you may want to download all of your e-mail items
when you’re working at the office and synchronizing your devices
locally, but only urgent e-mail items when you’re away from your
office and synchronizing your devices remotely. Once defined,
your Smartphone determines if synchronization is occurring
locally or remotely and uses the appropriate settings for the
HotSync operation.
You can filter messages to control which ones are downloaded,
and you can set truncation options to download only part of
lengthy e-mail items.
Downloading transmits only e-mail items and any text
information, not attachments, to your Smartphone. Downloaded
attachments are left in your desktop e-mail application.
To set HotSync Options to control synchronizing e-mail
items:
1. Tap to open the Applications Launcher, and tap Mail.
2. Tap the Menu icon .
3. Tap Options, and then tap HotSync Options.
MAIL 209
9
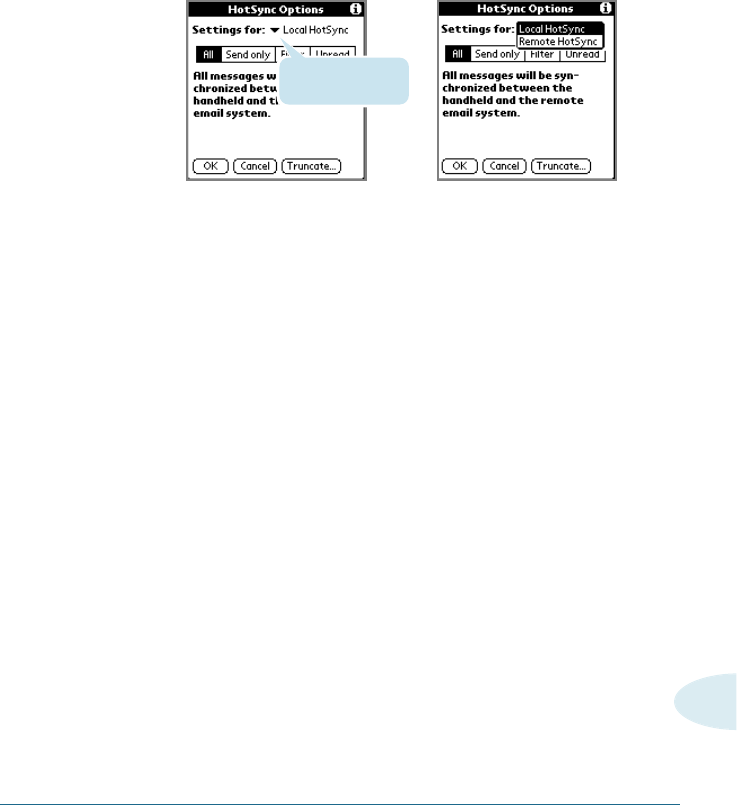
4. Tap the Settings For pick list, and select Local HotSync or
Remote HotSync.
Note: For more information about Local and Remote HotSync operations,
see Chapter x.
5. Tap the filtering option you want to apply during
synchronization:
All Downloads all e-mail items in your desktop Inbox
to your Smartphone, and sends all e-mail items in
your Smartphone Outbox to your desktop e-mail
application.
Send Only Sends only the e-mail items in your Smartphone
Outbox to your desktop e-mail application; from
there, the application sends the items to their
destinations.
Filter Downloads all e-mail items in your desktop Inbox
that meet specific criteria to your Smartphone,
and sends e-mail items that meet specific criteria
from your Smartphone Outbox to your desktop
application. When you select the Filter setting,
the HotSync Options dialog box opens and
displays additional filter settings. See “Creating
special filters” later in this chapter.
Tap here to display
HotSync options.
➜
➜

210 MAIL
Unread Downloads only unread e-mail items from your
desktop Inbox to your Smartphone, and all items in your
Smartphone Outbox to your desktop e-mail application.
6. Choose from the following options:
• If you selected All, Send Only, or Unread, tap OK.
• If you selected Filter, continue to the next section.
Using Filters to Control Downloading
You can create special filters to control the type of e-mail items
that download to your Smartphone during synchronization.
Special filters ignore or retrieve items that contain specific
information in their header fields, according to what you’ve
instructed your Smartphone to look for in the To, From, and
Subject fields.
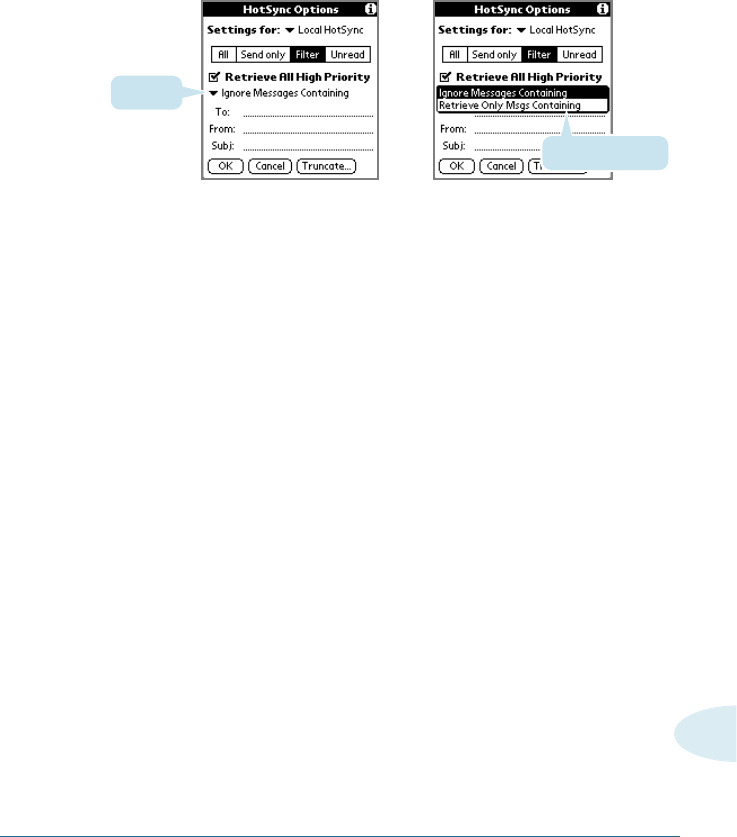
To access the special filter settings:
1. In the Hot Sync Options dialog box, tap Filter.
2. If your e-mail application can flag high-priority items, tap
Retrieve All High-Priority items to retrieve these items and
override any filter settings.
3. Tap the pick list in the center of the HotSync Options dialog
box, and choose whether to ignore or retrieve e-mail items
based on the matching information:
MAIL 211
9
• Tap Ignore Messages Containing to have your Smartphone
exclude e-mail items that meet the defined criteria and
download all other e-mail items during synchronization. In
general, this filter downloads more e-mail during
synchronization because it blocks only one defined subset of
e-mail.
• Tap Retrieve Only Msgs Containing to have your Smartphone
include only the e-mail items that meet the defined criteria
and ignore all other e-mail items during synchronization.
This filter can block more e-mail during synchronization
because it downloads only one subset of e-mail.
5. Enter a filter string in the To, From, and Subject fields. For
information on creating filter strings, see “Defining filter
strings” later in this chapter.
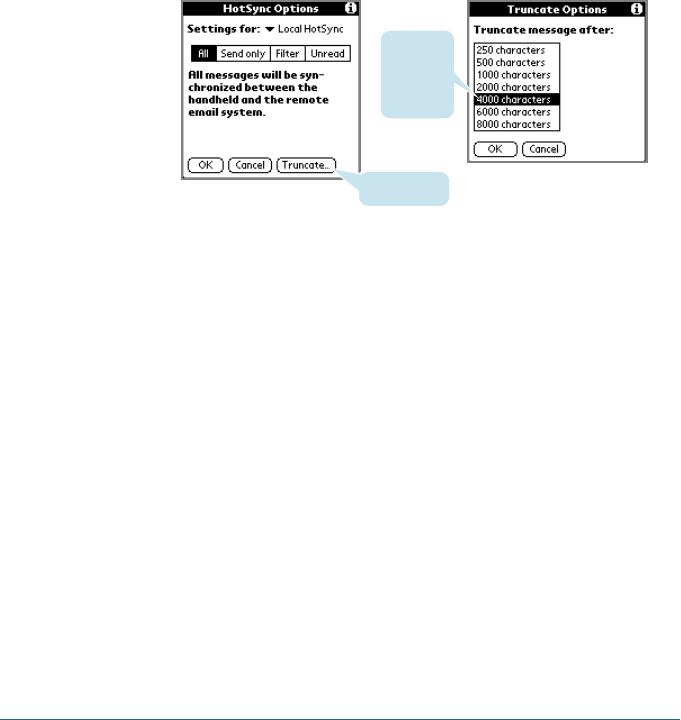
6. Tap Truncate to stop long e-mail items from downloading, and
then specify a number of characters, between 250 and 8,000
(the default is 4,000.). Tap OK.
Tap here
Select Filter option
➜
➜
212 MAIL
A lower value reduces the time to synchronize your desktop
e-mail and Mail and the e-mail storage space that your
Smartphone needs. Messages longer than 8,000 characters
will be truncated.
Tap Truncate.
Tap to
select
maximum
length.
7. Tap OK.
Defining Filter Strings
Your Smartphone filters e-mail items based on information in
their To, From, and Subject fields, called a filter string. You create
a filter string by listing the words you want your Smartphone to
find and separating them by either a comma or a space. Each
word in the filter string is joined by an implicit OR; your
Smartphone adds the logical connectors like AND or OR.
To create a more complex filter, you can define filter strings for
the To, From, and Subject fields. Your Smartphone joins the filter
strings for these fields using an implicit AND, and adds the
logical connector for you.
➜
➜
MAIL 213
9
➜
➜
For example, you might want to receive only e-mail items from
John Smith (jsmith@aol.com) or Jack Jones (jjones@aol.com)
concerning the Apollo Project. You would create the following
filter strings:
• In the To field: jsmith@aol.com, jjones@aol.com
• In the Subject field: Apollo Project
Your Smartphone interprets this as, “Accept e-mail items about
the Apollo Project from John Smith or Jack Jones. Do not accept
e-mail items from other people. Do not accept e-mail items from
John or Jack about any other subject.”
When you define a string, your Smartphone searches for any
instance of that sequence of characters. For example, if you
define a filter that retrieves only e-mail items with the string
“info,” appropriate matches would include “info,” “rainforest”
and “kinfolk.”
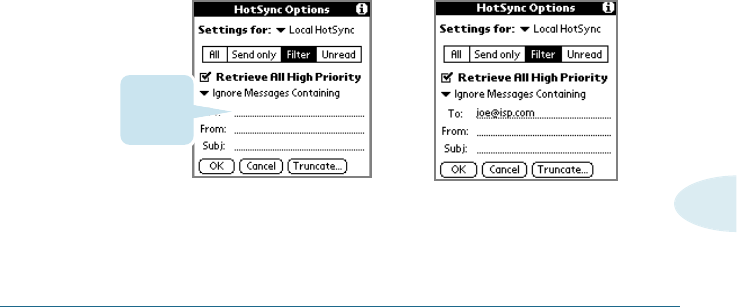
To define a filter string:
1. Tap the To, From, or Subject header field in the HotSync
Options dialog box.
Tap here
to insert
cursor.
214 MAIL
2. Enter your filter string, using commas or spaces to separate
the words. Do not add connectors, such as AND or OR,
between words in a string.
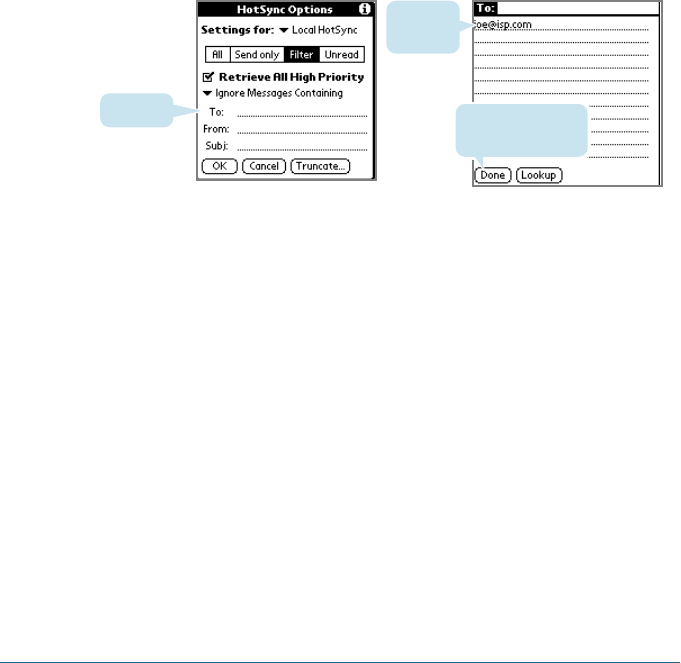
3. If your string exceeds the length of the field, tap the name of
the field to display the Notes screen for that header field. See
“Creating e-mail items” earlier in this chapter.
Tap here Tap Done to return
to HotSync Options.
Enter filter
data.
4. Tap Done to return to the HotSync Options dialog box.
5. Tap OK.
➜
➜

MAIL 215
9
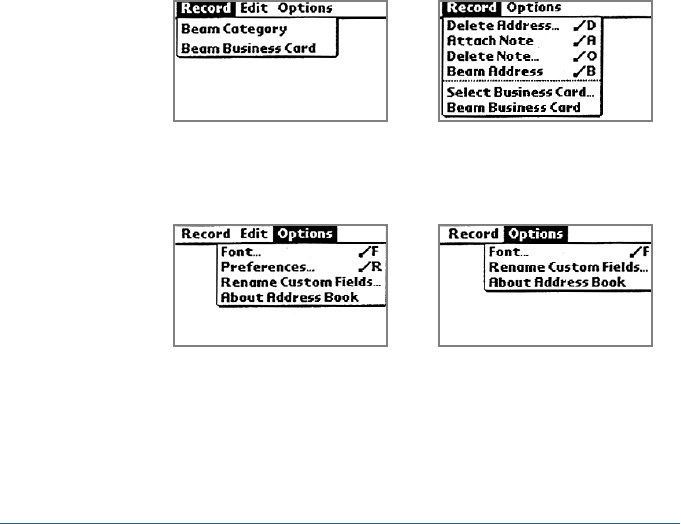
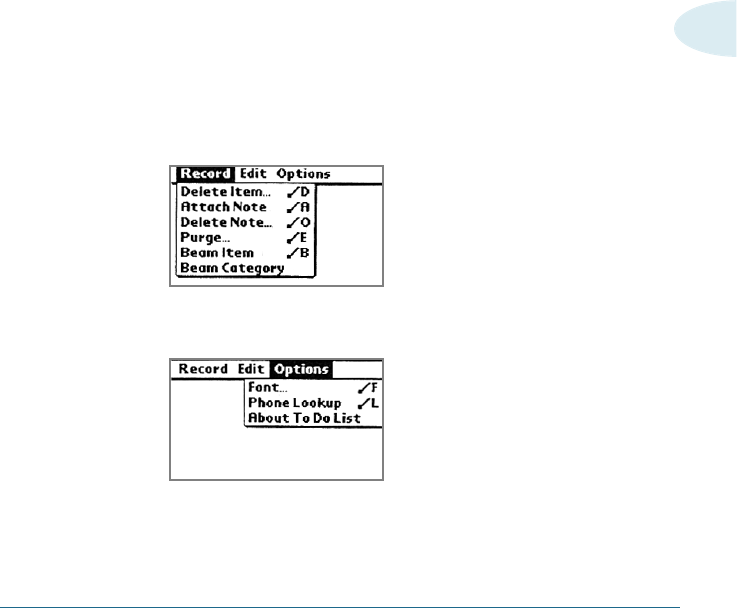
Mail Menus
Mail menus are shown here for your reference, and Mail features
that are not explained elsewhere in this book are described here.
See “Using Menus” in Chapter x for information about choosing
menu commands.
Message menus
The Message menu varies depending on whether you are
viewing an e-mail item, creating an e-mail item, or viewing the
Message List.
Options menus
The Options menu varies depending on whether you are creating
or editing an e-mail item.
About mails
Shows version information for Mail.
Message List
➛View Message
New Message
Message List
New Message

216 MAIL
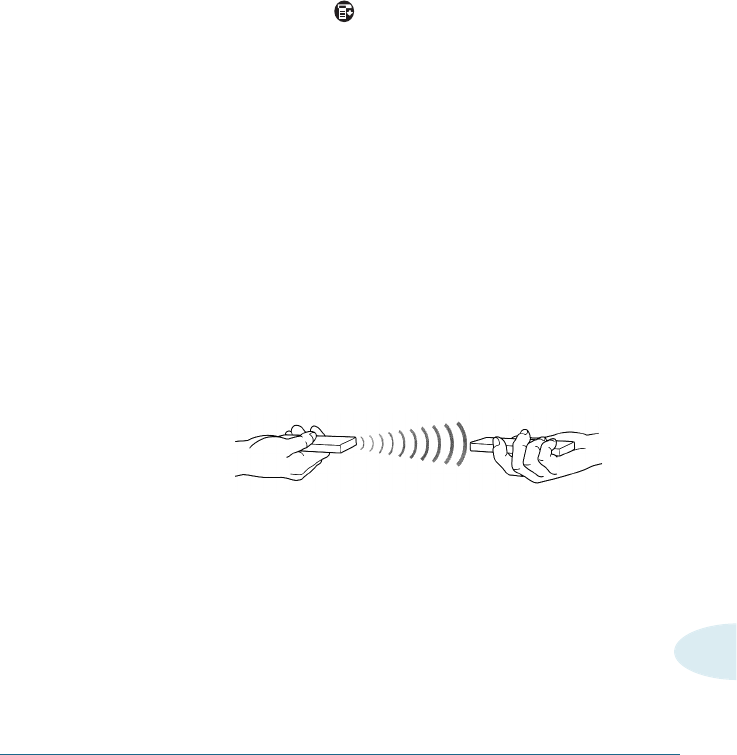
Beaming Information
Your Smartphone is equipped with an IR (infrared) port that you
can use to beam information to another Palm Computing®
connected device that’s close by and also has an IR port. The IR
port is located at the top of the smartphone, behind the small
dark shield.
You can beam the following information between Palm
Computing®connected devices:
• The record currently displayed in Date Book, Address Book, To
Do List, or Memo Pad.
• All records of the category currently displayed in Address
Book, To Do List, or Memo Pad.
• A special Address Book record that you designate as your
business card, containing information you want to exchange
with business contacts.
• An application installed in RAM memory.
To select a business card:
1. Create an Address Book record that contains the information
you want on your business card.
2. Tap the Menu icon .
3. Tap Record, and then tap Select Business Card.
4. Tap Yes.
MAIL 217
9
To beam a record, business card, or category or records:
1. Locate the record, business card, or category you want to
beam.
2. Tap the Menu icon .
3. Tap Record, and then tap one of the following:
The Beam command for an individual record
In Address Book only:
Beam Business Card, Beam Category.
4. When the Beam Status dialog box appears, point the IR port
directly at the IR port of the receiving organizer.
Tip: For best results, Smartphone should be between 10 centimeters
(approximately 4 inches) and 1 meter (approximately 39 inches)
apart, and the path between the two devices must be clear of
obstacles. Beaming distance to other Palm Computing®connected
devices may be different.
5. Wait for the Beam Status dialog box to indicate that the
transfer is complete before you continue working on your
phone.

218 MAIL
To beam an application:
1. Tap to open the Applications Launcher.
2. Tap the Menu icon .
3. Tap App, and then tap Beam.
4. Tap the application you want to transfer.
Note: Some applications are copy-protected and cannot be beamed. These
are with a lock icon next to them.
5. Tap Beam.
6. When the Beam Status dialog box appears, point the IR port
directly at the IR port of the receiving device.
7. Wait for the Beam Status dialog box to indicate that the
transfer is complete before you continue working on your
phone.

MAIL 219
9
To receive beamed information:
1. Turn on your phone.
2. Point the IR port directly at the IR port of the transmitting
organizer to open the Beam Status dialog box.
3. Tap Yes.
4. Wait for the Beam Status dialog box to indicate that the
transfer is complete, and then tap OK to display the new entry.
Incoming records are placed in the Unfiled category.
Tips on beaming information:
• You can press the Address Book application button for
about two seconds to beam your business card.
• You can set the full-screen pen stroke to beam the current
entry. See “Pen preferences” in Chapter x for more
information.
• You can use the Graffiti Command stroke /B to beam the
current entry.

MEMO PAD 221
Memo Pad
The Memo Pad provides a place to take notes that are not
associated with records in the Date Book, Address Book, or To Do
List.
Use the Memo Pad to:
• Take notes or write any kind of message on your connected
organizer.
• Drag and drop memos into popular computer applications like
Microsoft®Word when you synchronize using Palmtop
software, if app and HotSync®technology.
• Assign memos to categories so that you can organize and view
them in logical groups.
• Write down phone numbers and other types of information.
Later, you can copy and paste this information into other
applications.
CHAPTER10
10
Memo Pad
222 MEMO PAD
Opening the Memo Pad
You can also open the Memo Pad by tapping the Memo icon in
the Application Launcher.
1. Tap to open the Application Launcher.
2. Tap the Memo icon.
Creating Memos
A record in the Memo Pad is called a memo. A memo can contain
up to 4,000 characters. The number of memos you can store is
limited only by the memory available on your Smartphone.
When you create a new memo, you can add information to it
from the Address Book application, such as a phone number or
address, using the Phone Lookup option. See “Using Phone
Lookup” in Chapter x, “Common Tasks.”
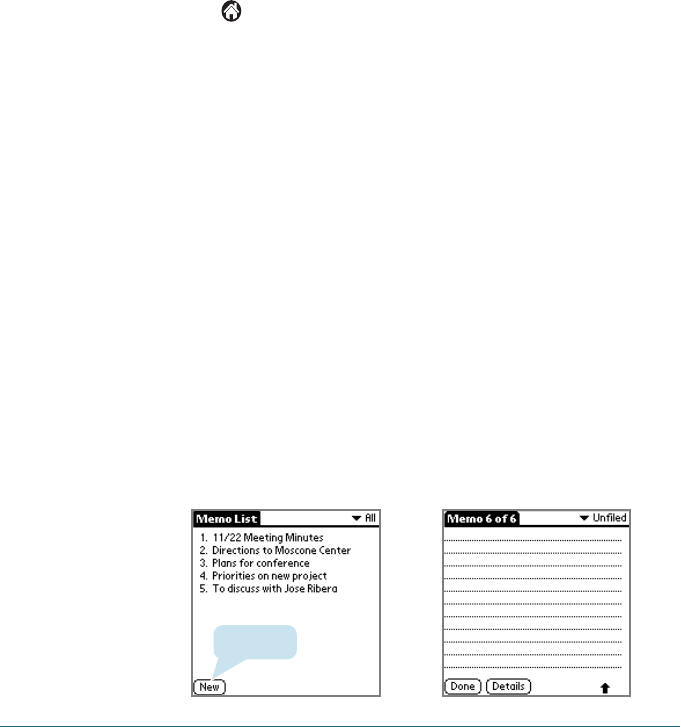
To create a new memo:
1. Open the Memo Pad application.
2. Tap New.
Tap New.
➜
➜
MEMO PAD 223
10
Tip: You can also create a new memo by beginning to write in the Graffiti
writing area in the Memo List screen. The first letter is automatically
capitalized and begins your new memo.
3. Enter the text you want to appear in the memo. Use the
carriage return stroke to move down to new lines in the memo.
4. Tap Done.
You can categorize memos and sort them by categories. See
“Categorizing Records” and “Sorting Records” in Chapter x,
“Common Tasks” for more information.
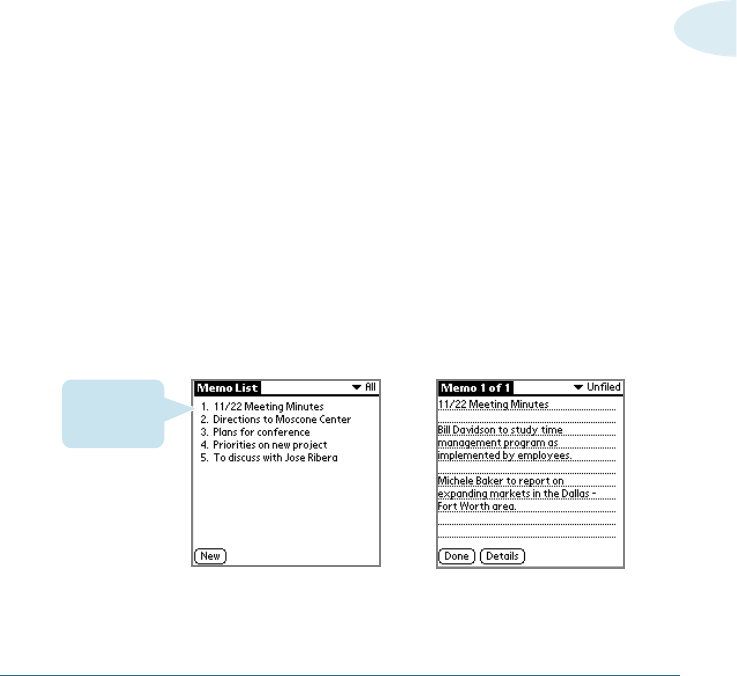
Reviewing Memos
The Memo List displays the first line of a memo. This makes it
easy to locate and review your memos. You can easily sort
memos in the Memo List or move through memos using Memo
options.
To review a memo:
1. In the Memo List, tap the text of the memo.
➜
➜
Tap a meno to
review its
contents
2. Review or edit the text in the memo.
3. Tap Done.

224 MEMO PAD
To move through a memo you’re reviewing:
1. In the Memo List, tap the text of the memo you want to review
to it.
2. Tap the Menu icon in the lower left corner of the screen of
your Smartphone to open the Memo Pad menus.
3. Tap Options.
4. Tap one of the following options to go to the beginning or end
of the memo:
• Tap Go to Top of Page to move to the top (first) line of the
memo.
• Tap Go to Bottom of Page to move to the bottom (last) line
of the memo.
To change the order in which memos appear in the Memo
List:
1. In the Memo List, tap the Menu icon in the lower left
corner of the screen of your Smartphone to open the Memo
Pad menus.
2. Tap Options.
3. Tap Preferences, and choose one of the following options:
• Tap Manual to sort new memos in the sequence in which
you create them.
• Tap Alphabetical to sort new and existing memos in
numerical and then alphabetical sequence.
4. Tap OK.
MEMO PAD 225
10
Making a Private Memo
You can designate a specific memo as “private.” When you
activate the Security features, you Smartphone hides all private
entries and you must enter a password to display them on the
screen.
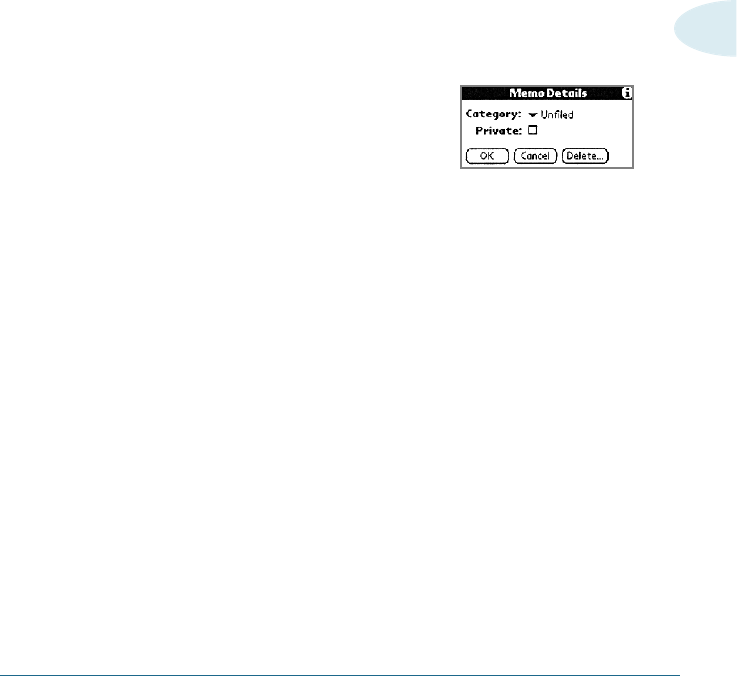
To mark a memo as privated:
1. Tap the memo you want to mark as private to display it on the
screen.
2. Tap Details to open the Memo
Details dialog for that memo.
3. Select the Private check box.
4. Tap OK.
Deleting a Memo
There are three ways to delete a memo: simply delete the text of
the memo, use the Menu Command (as described in the “Record
Menu” section in this chapter)or use the Memo Details dialog.
To delete a memo with the Memo Details dialog:
1. Tap the memo that you want to delete to display it on the
screen.
2. Tap the Details button to open the Memo Details alert.
3. Tap the Delete button to open the Delete Memo alert.
4. Tap the OK button to confirm that you want to delete the
current memo.
226 MEMO PAD
Memo Pad Menus
Memo Pad menus are shown here for your reference, and Memo
Pad features that are not explained elsewhere in this book are
described here.
See “Using menus” in Chapter x for information about choosing
menu commands.
The Record and Options menus differ depending on whether
you’re displaying the Memo List or an individual memo.
Record menu
Option menu
Memo List Memo screen
Memo List Memo screen

USING THE TODOLIST 227
To Do List
The To Do List is a convenient place to create reminders and
prioritize the things that you have to do.
Use the To Do List to:
• Make a quick and convenient list of things to do.
• Assign a priority level to each task.
• Assign a due date for any or all of your To Do List items.
• Assign To Do List items to categories so that you can organize
and view them in logical groups. For more information, see
“Categorizing records” in Chapter x, “Common Tasks.”
• Sort your To Do List items either by due date, priority level, or
category.
• Attach notes to individual To Do List items for a description or
clarification of the task. For more information, see “Attaching
notes” in Chapter x, “Common Tasks.”
CHAPTER11
11
To Do List
228 USING THE TODOLIST
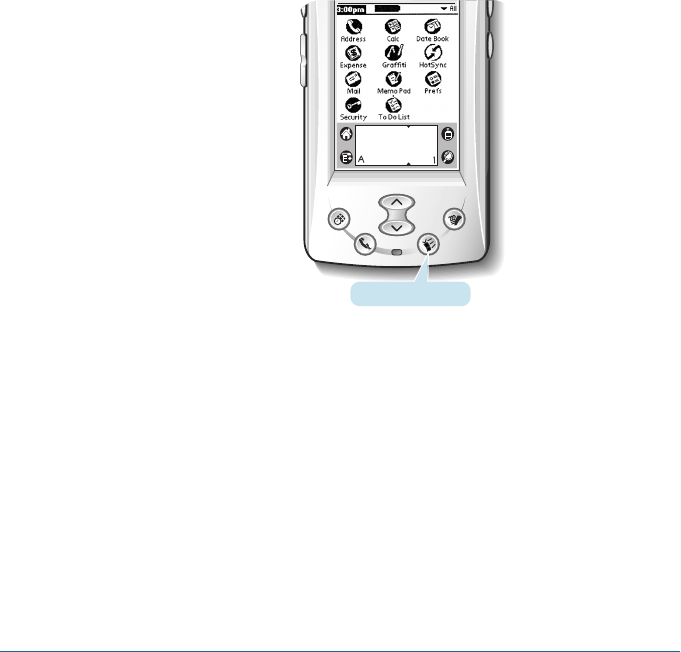
Opening the To Do List
Press the To Do List application button on the front panel of your
Smartphone. To Do List opens to display the category of items
you last viewed.
Note: Press the To Do List application button repeatedly to cycle through the
categories in which you have items.
You can also open the To Do List by tapping the To Do icon in the
Applications Launcher.
To Do List button
USING THE TODOLIST 229
11
3. Enter the text of the To Do List item. The text can be longer
than one line.
Tip: You can add a name, address, and phone number to a To Do List item
using the Phone Lookup option. For more information, see “Using
Phone Lookup” in Chapter x, “Common Tasks.”
4. Tap anywhere on the screen to deselect the To Do List item.
Tip: If no To Do List item is currently selected, writing in the Graffiti
writing area automatically creates a new item.
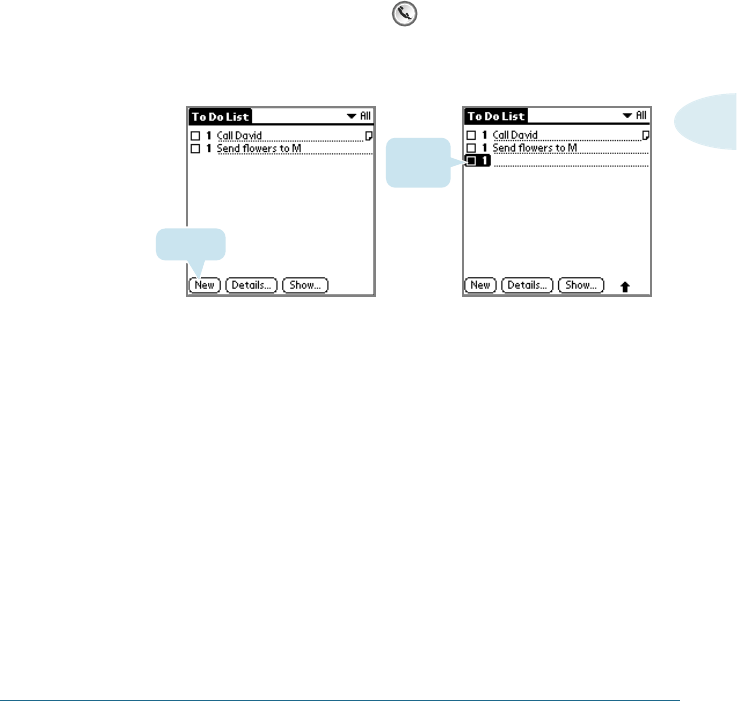
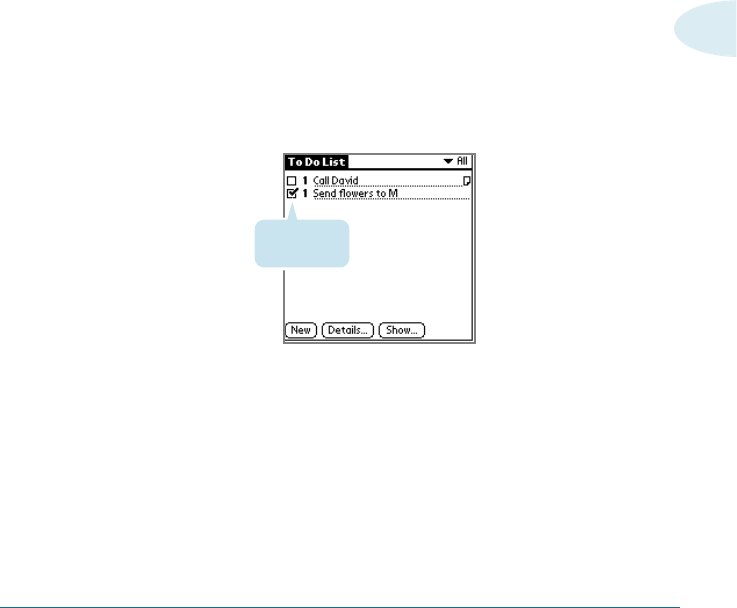
Creating To Do List Items
A To Do List item is a reminder of some task that you have to
complete. A record in the To Do List is called an item.
To create a To Do List item:
1. Press the To Do List button on the front of your
Smartphone to display the To Do List.
2. Tap New.
Tap New
New To
Do item
➜
➜
230 USING THE TODOLIST
Setting Priorities
You can set priorities for tasks in your To Do List according to
their importance or urgency. Items appear by priority and due
date at the top of the To Do List by default, with 1 the highest
priority. Changing an item’s priority may move its position in the
list.
New To Do List items automatically have a priority of 1. If you
select another item first, before creating a new item, the item
you create appears beneath the selected item with the same
priority as the selected item.
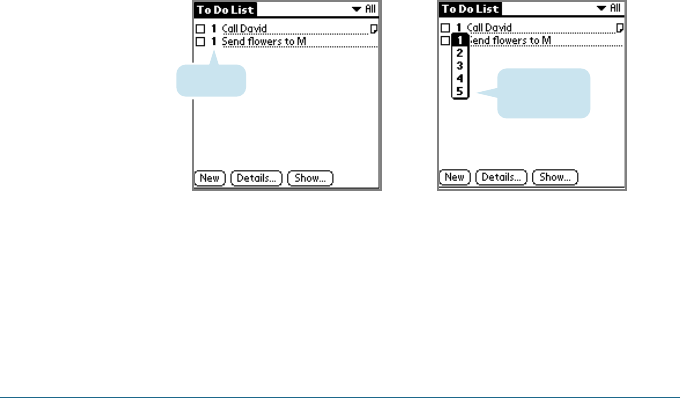
To set the priority lever for a To Do List item:
1. If priorities aren’t visible in the To Do List, tap Show at the
bottom of the list, tap Show Priorities, and tap OK.
2. Tap the Priority number on the left side of the To Do List item.
3. Tap the Priority number that you want to set, with 1 the most
important and 5 the least important.
Tap here. Tap to select
priority.
USING THE TODOLIST 231
11
Completed To
Do List item
Checking Off To Do List Items
You can check off a To Do List item to indicate that you’ve
completed it.
To check off a To Do List item:
1. In the To Do List, tap Show. Tap Show Completed Items. If you
clear this setting, your To Do items disappear from the list
when you complete (check) them.
Note: Items that no longer appear on the list because Show Completed
Items is turned off have not been deleted. They are still in the
memory of your Smartphone. You must purge completed items to
remove them from memory.
2. Tap the check box on the left side of the item.
232 USING THE TODOLIST
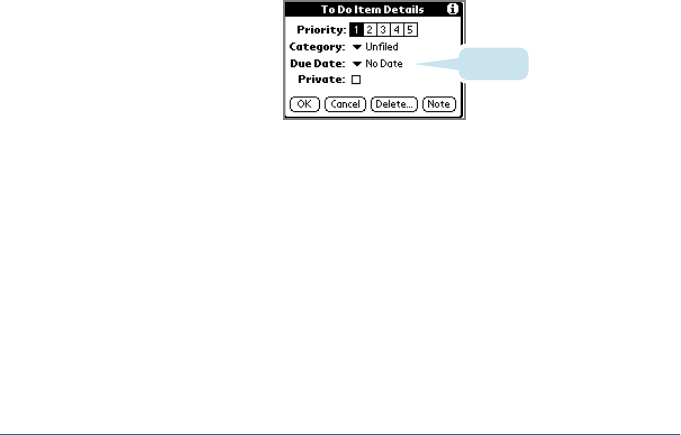
Changing Priorities and Due Dates
You can change the To Do List to display the due date assigned
to an item, change its priority, and assign a category to the task
with the To Do Item Details dialog box.
You can then sort To Do List items by priority, due date, or
category.
To change the priority and due date of a To Do List item:
1. In the To Do List, tap the item that you want to change.
2. Tap Details.
3. In the Details dialog box, tap No Date to open the Due Date
pick list.
4. Tap the date that you want to assign the item. Options are
Today, Tomorrow, One week later from the current date, No
Date to remove the due date from the item, or Choose Date to
display the date selector and select a date. tomorrow’s date.
5. Tap Private to hide this item when Security is turned on.
For more information, see “Making records private” in Chapter
x, “Common Tasks.”
Tap here.
USING THE TODOLIST 233
11
6. Tap OK.
Tip: If you turn on the Show Due Dates option in the To Do Preferences
dialog box, you can tap directly on the due date in the To Do List to
open the pick list shown in step 2.
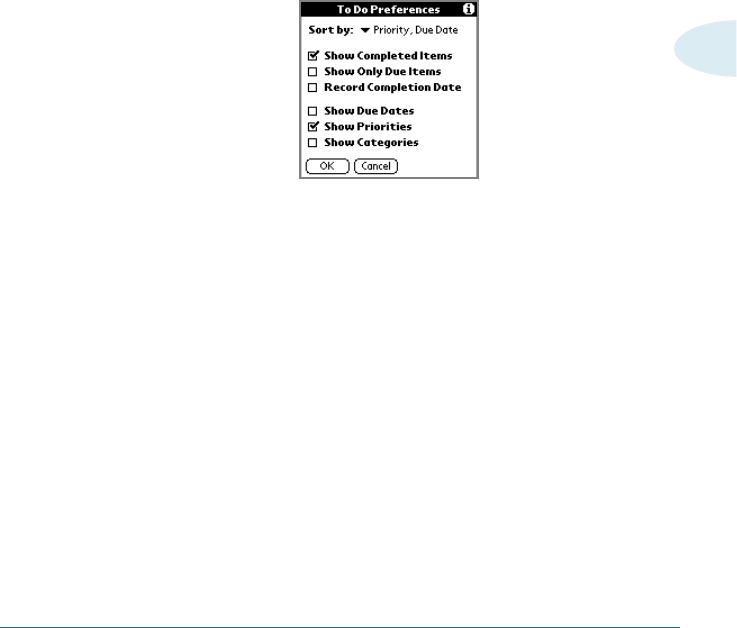
To sort To Do items:
1. In the To Do List, tap Show.
2. In the To Do Preferences screen, tap Sort By, and then select
an option from the pick list:
• Tap Priority, Due Date to sort items by priority first, and then
due date. Tap Due Date, Priority to reverse that order.
• Tap Category, Priority to sort items by category first, and
then priority. Tap Priority, Category to reverse that order.
3. Tap OK.
234 USING THE TODOLIST
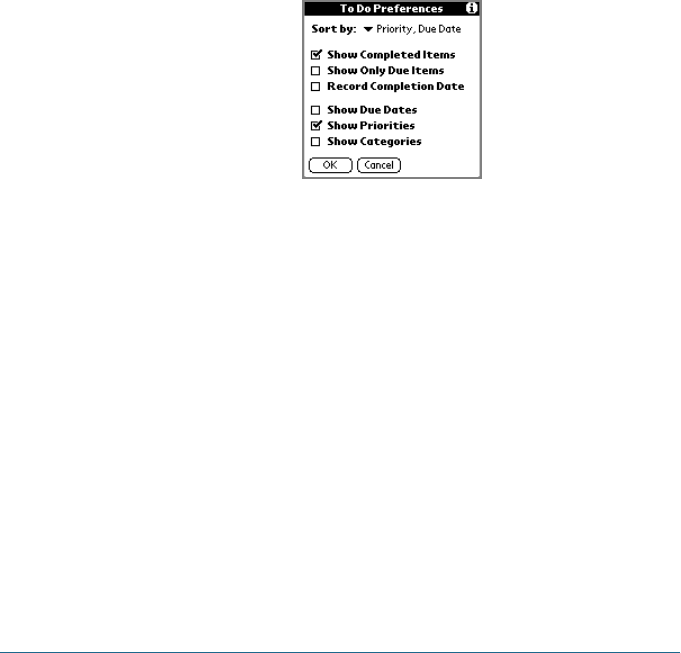
Displaying Completed and Due Items
You can have the To Do List display completed items and their
completion dates, as well as due items and their due dates.
To display completed and due items in the To Do List:
1. In the To Do List, tap Show.
2. In the To Do Preferences dialog box, choose from the following
settings:
Show Displays your completed items in the To Do List.
Completed If this setting is turned off, completed To Do
Items items disappear from the list, but are kept in the
memory of your Smartphone. You must purge
completed items to remove them from memory.
Show Shows only the items that are currently due,
Only Due past due, or have no due date specified.
Items When this setting is active, items that are not
yet due do not appear in the list until their due
date.
Record Replace the due date with the actual date when
Completion you complete (check) the item. If you do not
assign a due date to an item, the completion
date still records when you complete the item.
USING THE TODOLIST 235
11
Show Due Displays the due dates for items in the To Do List
Dates and to display an exclamation mark next to items
that remain incomplete after the due date
passes.
To Do List Menus
To Do List menus are shown here for your reference, and To Do
List features that are not explained elsewhere in this book are
described here.
See “Using menus” in Chapter 1 for information about choosing
menu commands.
Record menu
Options menu

EXCHANGING AND UPDATING DATA USING HOTSYNC®OPERATIONS 237
Exchanging and Updating Data
Using HotSync®Operations
HotSync®technology lets you synchronize–exchange and
update–data between one or more Palm Computing®connected
phones and Palm™ Desktop software or another PIM such as
Microsoft Outlook. To synchronize data, you must connect your
Smartphone and Palm Desktop either directly, by placing your
Smartphone in the cradle attached to your computer, or indirectly,
with a modem or network.
CHAPTER12
12

238 EXCHANGING AND UPDATING DATA USING HOTSYNC®OPERATIONS
The HotSync process automatically synchronizes data between
your Smartphone and Palm Desktop software. Changes you make
on your Smartphone or Palm Desktop software appear in both
places after a HotSync operation. HotSync technology
synchronizes only the needed portions of files, thus reducing
synchronization time.
You can synchronize your data by connecting your Smartphone
directly to your computer with the cradle or indirectly with a
modem or network. This chapter describes how to select HotSync
options and perform a HotSync operation via a modem or
network.
See Chapter x, “Mail,” for information on performing HotSync
operations via a modem or network.

EXCHANGING AND UPDATING DATA USING HOTSYNC®OPERATIONS 239
12
Performing a HotSync Operation for the First
Time
The first time you synchronize your data, you must enter user
information on both the Smartphone and Palm Desktop software.
After you enter this information and synchronize, the HotSync
Manager recognizes your Smartphone and doesn’t ask for this
information again.
If you are a system administrator preparing several Smartphones
for a group of users, you may want to create a user profile. See
“Creating a user profile” later in this chapter before performing
the following steps.
Important: You must perform your first HotSync operation with a
local, direct connection, rather than using a modem.
The following steps assume that you have already installed the
Palm Desktop software.
240 EXCHANGING AND UPDATING DATA USING HOTSYNC®OPERATIONS
The bottom edge of the Smartphone should align smoothly
with the cradle when it is inserted properly.
3. Insert your Smartphone into the cradle.
4. Turn on the computer.
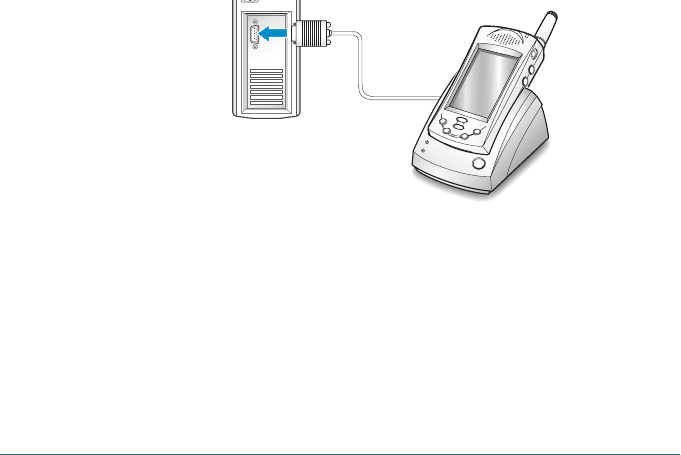
To perform a local HotSync operation:
The Cradle that comes with your Smartphone enables you to
synchronize the information on your phone with the Palm
Desktop software using the HotSync technology.
If you are planning to synchronize data between the Smartphone
and your computer do the following:
1. Turn off the computer.
2. Plug the serial cable from the cradle into the serial
communications(COM) port on your computer.
Note: Your Smartphone requires a dedicated port. It cannot share a port
with an internal modem or other device. If you are unsure about
the exact location of the serial port on your computer, refer to the
manual supplied with the computer.
EXCHANGING AND UPDATING DATA USING HOTSYNC®OPERATIONS 241
12
5. If the HotSync Manager is not running, start it:
• On the Windows desktop, click Start, and then choose
Programs. Navigate to the Palm Desktop software program
group and choose HotSync Manager.
• Alternatively, you can start the Palm Desktop software
which automatically opens the HotSync Manager.
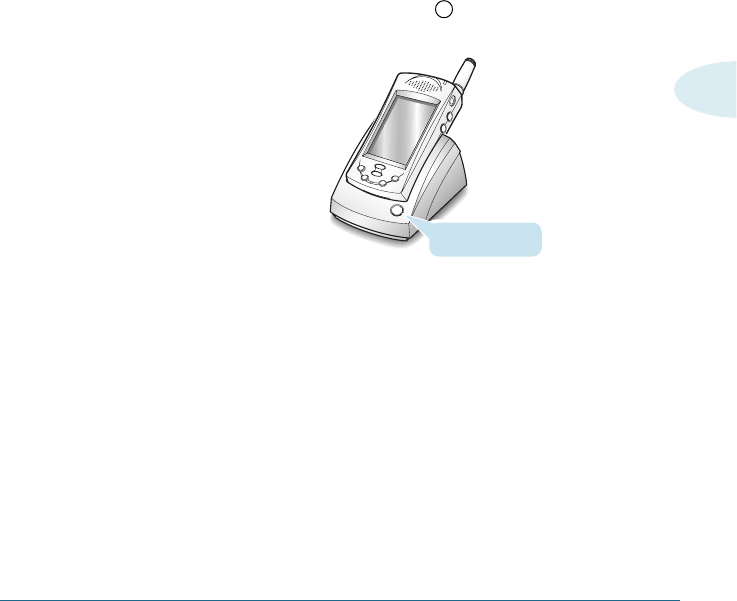
6. Press the HotSync button on the cradle.
Note: If you are using an optional HotSync cable instead of a cradle,
click the HotSync Manager icon in the Windows system tray
and select Local from the menu.
HotSync button
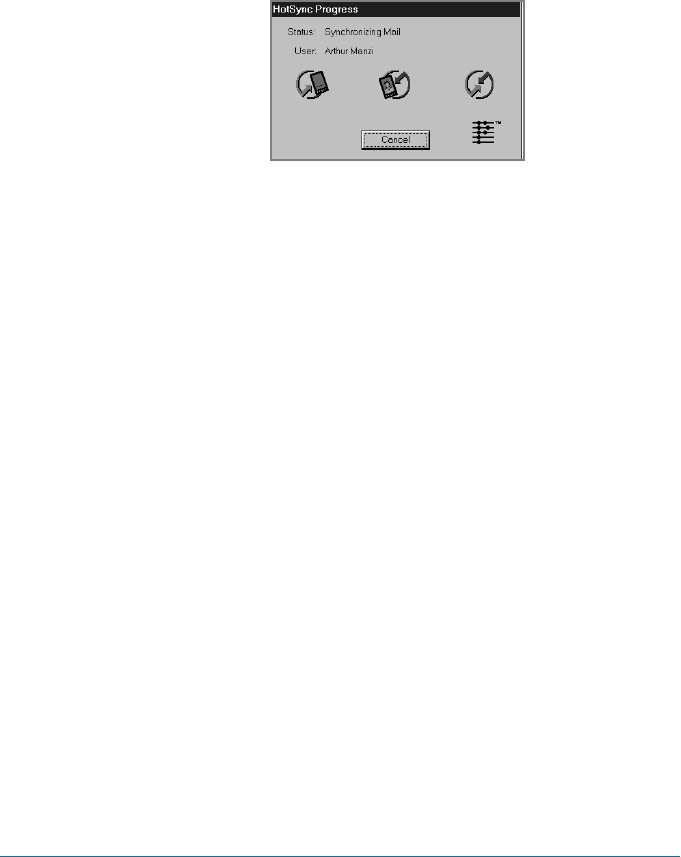
7. If you are performing the HotSync operation for the first time,
you must enter a user name in the New User dialog box and
click OK. The HotSync Progress dialog box appears and
synchronization begins.
Every Smartphone should have a unique name. To prevent loss
of a user’s records, never try to synchronize more than one
Smartphone to the same user name.
242 EXCHANGING AND UPDATING DATA USING HOTSYNC®OPERATIONS
8. Wait for a message on your Smartphone indicating that the
process is complete.
When the HotSync process is complete, you can remove your
Smartphone from the cradle.
Creating a User Profile
You can create a user profile to load data into an Smartphone
without associating that data with a user name, using the File
Link feature. This feature lets system administrators configure
several Smartphones with specific information such as a
company phone list before distributing them to their actual users.
For more information on the File Link option, see “Using File Link”
later in this chapter.
The User Profile feature is designed only for the first-time
HotSync operation, before you assign a User ID to a particular
Smartphone.
To create a user profile:
1. Open Palm Desktop software.
2. From the Tools menu, choose Users.

EXCHANGING AND UPDATING DATA USING HOTSYNC®OPERATIONS 243
12
3. Click Profiles.
4. Click New. Enter a unique name for the profile, and click OK.
5. Repeat steps 3 and 4 for each profile that you want to create.
When you have finished, click OK to return to Palm Desktop
software.
6. Select the profile from the User list and create the data for the
profile (for example, company phone list, and so on).
To use a profile for the first-time HotSync operation:
1. Place the new Smartphone in the cradle.
2. Press the HotSync button on the cradle.
3. Click Profiles.
4. Select the profile that you want to load on the Smartphone,
and click OK.
5. Click Yes to transfer all the profile data to the Smartphone.
The next time you perform a HotSync operation, Palm Desktop
software prompts you to assign a user name to the Smartphone.
244 EXCHANGING AND UPDATING DATA USING HOTSYNC®OPERATIONS
Selecting HotSync Setup Options
You can choose when you want HotSync Manager to run. If
necessary, you can adjust the local and modem HotSync settings
as well.
To set the HotSync options:
1. Click the HotSync Manager icon in the Windows system
tray.
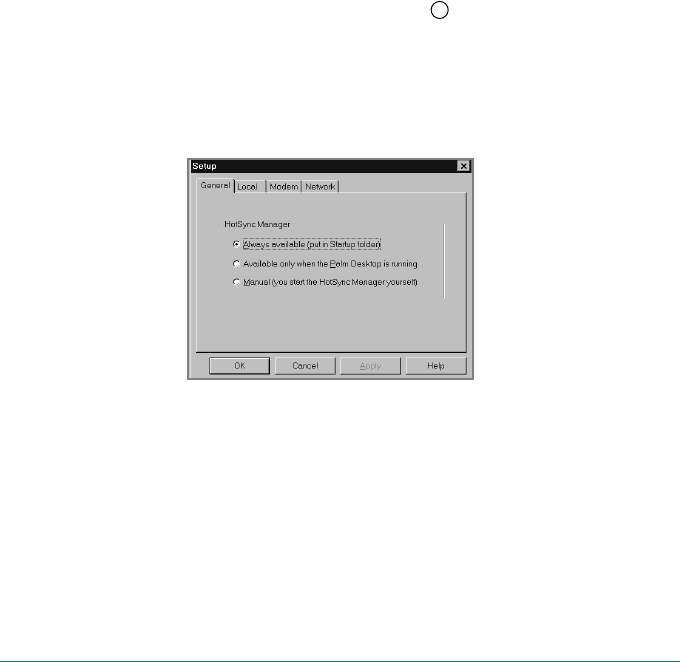
2. Choose Setup.
3. Click the General tab, and select one of the following options:
• Always Available adds HotSync Manager to the Startup
folder and constantly monitors the communication port for
synchronization requests from your Smartphone. With this
option, the HotSync Manager synchronizes data even when
Palm Desktop software is not running.
• Available Only When Palm Desktop software Is Running
starts HotSync Manager and monitors requests
automatically when you open Palm Desktop software.