Cygnion HRCU10102 Cordless Phone User Manual Chapter2
Cygnion Corporation Cordless Phone Chapter2
Cygnion >
Contents
CG2400 chaper 2

13
Chapter
2Installation
Successful Installation
To install the CG 2400 system successfully, you must
follow the installation instructions precisely.
NOTE: Do not attach
the base station
to your PC until
you are instructed
to do so during the
installation process!
The base station driver is not preloaded into
Microsoft ® Windows®98, so connecting the base
station before the driver is loaded may prevent the
system from successfully recognizing the hardware.
There are four basic steps to successful installation:
•Charging the handset
•Installing the software
•Setting up the base station
•Running the Configuration Wizard
If installation fails, uninstall the program before
trying to reinstall. See “Reinstalling the Software” on
page179 for procedures.
System Requirements
Minimum
hardware
and software
233 MHZ PROCESSOR60 MB FREE HARD DISK SPACE
32 MB RAM CD ROM
16-BIT SOUND CARD 1 ANALOG PHONE LINE
MICROSOFT WINDOWS 98 USB PORT
(PRE-INSTALLED)
Recommended
hardware
300 MHZ PROCESSOR140 MB FREE HARD DISK SPACE
64 MB RAM OR HIGHER2ND ANALOG PHONE LINE
Optional FAX/M ODEMMICROSOFT O UTLOOK
CG 2400 User Guide
14
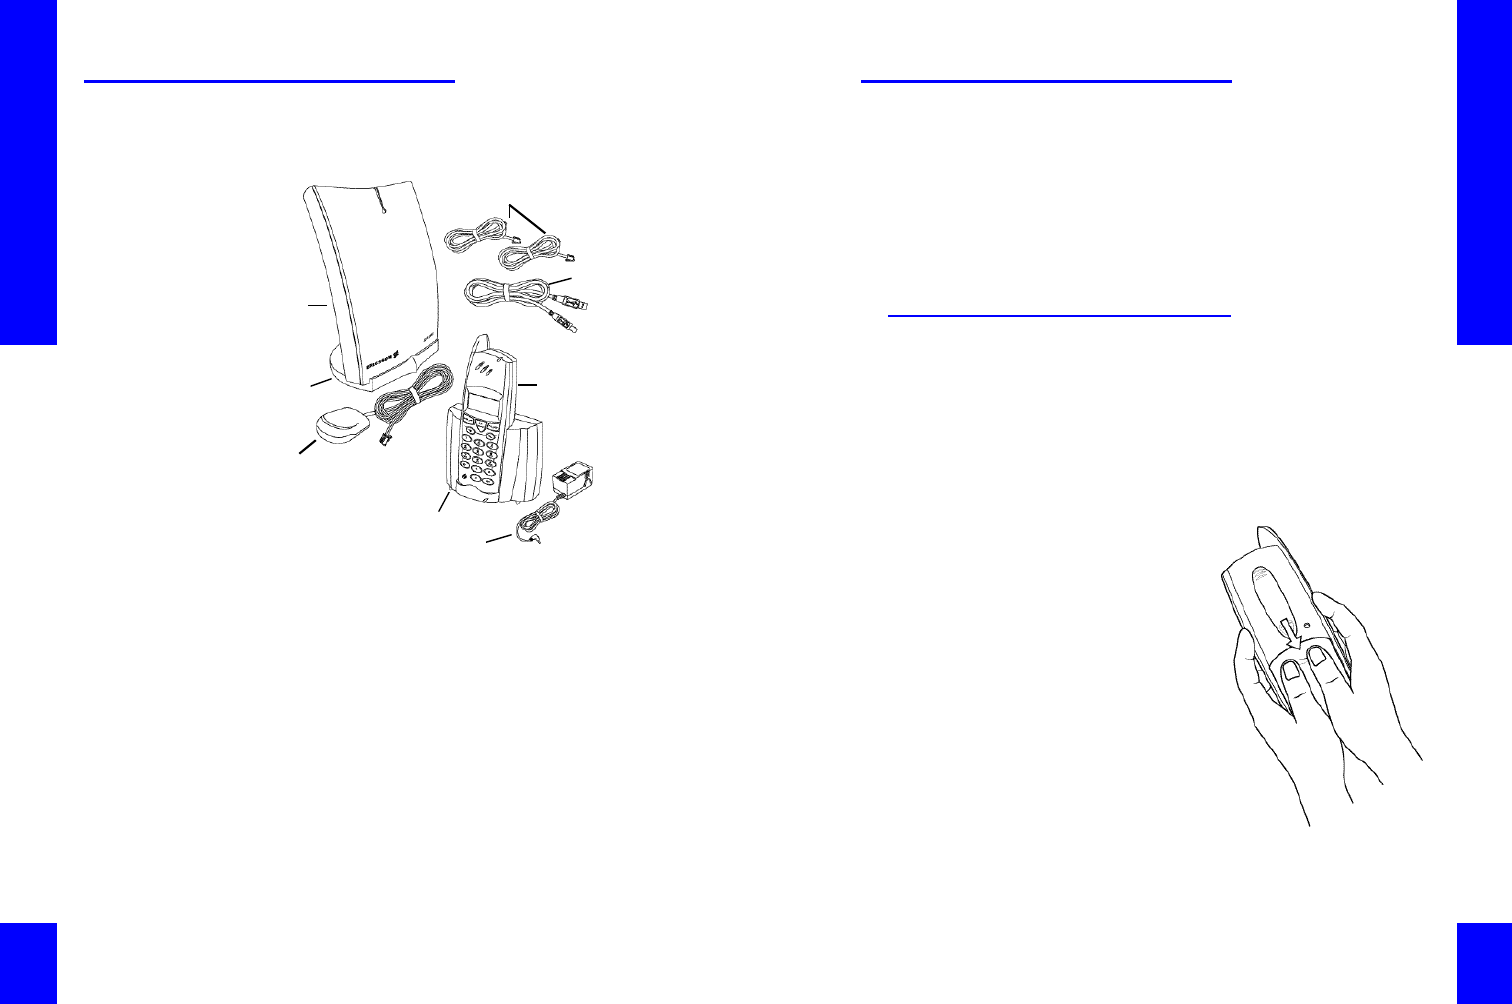
System Components
The complete CyberGenie CG 2400 system includes:
Not shown: •Base station wall mount
•NiMH battery pack for the handset
•CyberGenie@Work CD-ROM
•Quick Installation sheet
•CG 2400 User Guide
•Handset Quick Reference
Verify that you have all of the components listed. If
components are missing, contact your dealer or place
of purchase.
DA 202
Base
Station
DG 200 Handset
with detachable clip
XA 200 Handset charger
with desk mount
2 standard phone cords
Base
station
desk
stand
Base
station power supply
Handset charger power supply
USB
cable
Chapter 2: Installation
15
The DG 200 Handset
One pre-subscribed handset is included with the
system. Up to nine additional handsets can be
subscribed to a single base station.
If you’ve purchased additional handsets, you will
want to subscribe them after basic installation.
Handset subscription procedures are covered in
“Subscribing a Handset to the Base Station” on
page76.
Charging the Handset
The components you will need:
•Handset
•Handset battery pack
•Handset charger and charger support (desk or
wall mount)
•Handset charger power supply
To install the
battery pack:
1. Press down with
your thumbs, then
pull in the direction
of the arrow to
open the handset.
CG 2400 User Guide
16
2. Plug the battery wire into the connector. The plug
and connector are keyed to fit in one direction
only.
3. Route the wire through the guide.
4. Place the battery securely inside the battery
compartment.
5. Replace the cover.
Chapter 2: Installation
17
To assemble the handset charger:
1. Insert the power
supply plug into the
socket on the back
center of the charger.
2. Align the bottom tabs
on the charger
support with the
bottom holes on the
back of the charger.
Rotate the mount
toward the charger
until it clicks in place.
3. Plug the power supply
into an approved
electrical outlet.
To charge the handset:
NOTE: Let the handset
charge for at least
three hours before
first use.
1. Insert the handset securely into the charger.
2. If the handset is on, press the key for
approximately two seconds, or until the handset
turns off.
3. While charging, the green indicator light on the
charger will be on. If it does not come on within
10 to 20 seconds of putting the handset into the
charger, verify that the metal contacts on the
bottom of the handset align with the metal pins in
the charger.
When the handset is fully charged, the indicator light
will go off.

CG 2400 User Guide
18
Maintaining Battery Charge
When not in use, leave the handset in the charger to
keep it charged.
When the batteries are fully charged, the battery
meter on the handset display shows . When the
batteries are low, both the battery meter and the red
indicator light on the handset flash. An alarm sounds
from the handset when less than 15 minutes of
calling time are left.
Fully charged batteries provide 15 hours of calling
time or 100 hours of standby time. The rechargeable
nickel metal hydride (NiMH) battery pack should last
for a year or longer under normal conditions.
Chapter 2: Installation
19
The CyberGenie@Work
Software
CyberGenie@Work is the software that drives the CG
2400 system. It provides an interface between a
public phone service, the CG 2400 system, and the
user.
CyberGenie’s Speech-Activated
Dialer and Microsoft Outlook
The Messaging Application Programming Interface,
or MAPI, is a Microsoft standard for messaging
software that allows different types of message
information (email, voicemail, contact lists, etc.) to
interact through a common interface.
NOTE: Outlook Express
is not MAPI-compliant.
The CG 2400 system is designed to work seamlessly
with Microsoft Outlook and other MAPI-compliant
software by using the contacts list to create a
speech-activated dialer. (If you don’t have Outlook,
you can create a contacts list in CyberGenie@Work.)
NOTE: The dial-by-
name feature lets you
ask CyberGenie to dial
numbers from your
contacts list if they
have been activated for
speech recognition.
If you have names and numbers set up in Microsoft
Outlook, the CyberGenie@Work Installation Wizard
lets you activate any name in the book for speech
recognition. A minimum of contact data is required:
•First or last name
•At least one phone number

CG 2400 User Guide
20
How the Programs Integrate
NOTE: If
CyberGenie@Work
does not detect
Microsoft Outlook or
Windows Messaging
Service (both MAPI-
compliant), it will
automatically install
WMS during the
installation process.
CyberGenie@Work requires a MAPI-compliant
program to work fully. It shares your Microsoft
Outlook database, adding fields to each name and
address for speech activation or for downloading
contact information to your handset. When you add a
record through CyberGenie@Work, it is also added to
your Microsoft Outlook database.
If you do not use Microsoft Outlook, you can set up
your phonebook directly with CyberGenie’s contacts
feature, including speech activation, and retrieve
your messages from the System Inbox.
Ensuring Outlook Support
If you use Microsoft Outlook, you will need to add the
MAPI components by installing Outlook’s Corporate
or Workgroup E-mail Service component before
installing CyberGenie (if not already installed). This
allows CyberGenie@Work to implement the unified
messaging functions that make it possible for you to
access your voicemail, email, and faxes from one
source.
To add this component:
1. Insert your Microsoft Outlook CD into the CD-
ROM drive.
2. When the installation program automatically
activates, click Install Outlook, then Add New
Components.
3. Select whether to add the component from the
CD or from the Microsoft web site.
4. Select Corporate or Workgroup E-mail
Service.
5. Follow the instructions on the screen.
If you have questions, refer to your Outlook manual.
Chapter 2: Installation
21
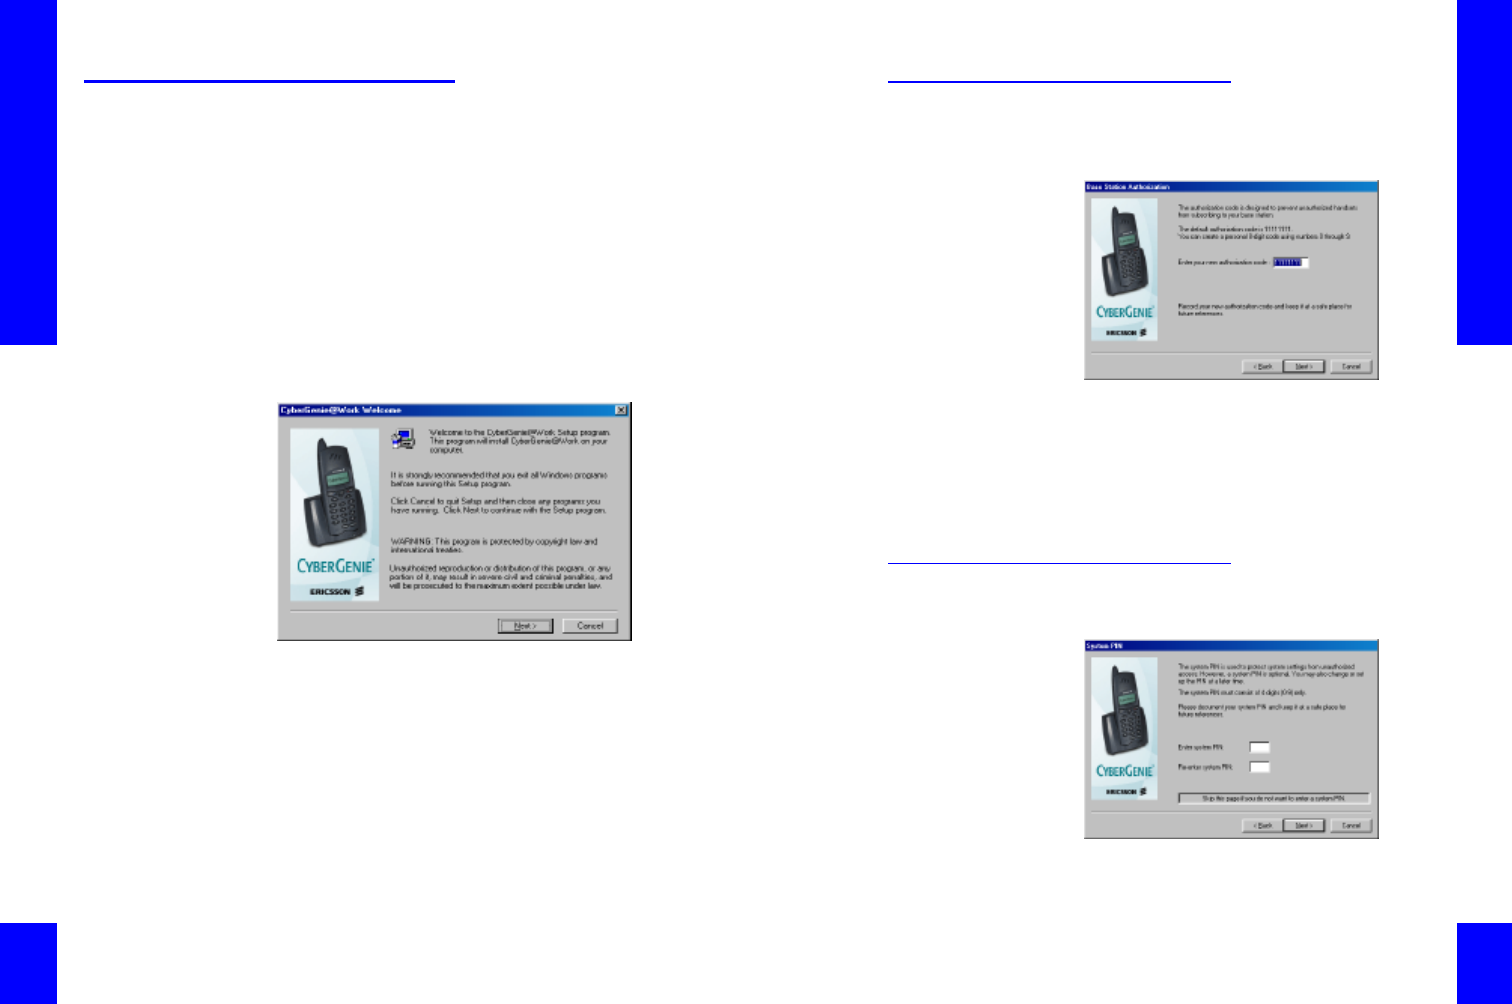
Loading the Software
Before you load the software, you will need to
prepare Windows. The steps you perform prior to
installing CyberGenie@Work keep the system
standby mode turned off, ensuring that CyberGenie
can respond in a timely manner.
Once the software is installed, a configuration wizard
will automatically launch to take you through the
basic configuration steps that get your system up
and running immediately.
Prior to installing CyberGenie@Work:
1. Close any open software programs.
2. From the Windows Start menu, select Settings>
Control Panel.
3. Click Power Management.
4. On the Power Schemes tab, select Always On for
Power schemes.
5. Select Never for System standby (not present
in all installations).
6. Select Never for Turn off hard disk.
7. Click OK to save.
NOTE: Do not attach
the base station
to your PC until
you are instructed
to do so during the
installation process!
To install CyberGenie@Work:
1. Insert the CyberGenie@Work CD into the CD-
ROM drive.
2. When the installation program loads, the
CyberGenie Installation window appears. Click
Install.
3. The Welcome window appears. Click Next.
4. The Software License Agreement dialog box
appears. Read this agreement. If you agree with
the terms, click Yes.
5. The Choose Destination Location screen appears.
Click Browse to select another location, or click
Next to confirm the default location. The
software will load.

CG 2400 User Guide
22
6. Follow the instructions on the screen until a
prompt appears that reads: Connect the base
station to your PC USB port. At this point,
pause in the software installation procedure and
prepare your base station (next topic).
Chapter 2: Installation
23
The Base Station
To set up the base station, you will need:
•Base station
•Desk stand or wall mount with screws
•Base station power supply
•USB cable
•One or two phone cords (depending on how many
analog phone lines you plan to use)
Assembling the Base Station
You have two mounting options: desk mount or wall
mount. Before beginning assembly, decide which to
use:
•With the desk mount,
you can place the base
station on any flat
surface and reposition
it easily.
•The wall mount
requires permanent
installation but does
not take up desk or
counter space.
To mount the base
station:
1. Read the warning
sticker on the bottom
of the base station,
then remove it so the
connection sockets are
visible.
2. Mount the base station:
Desktop mount For desktop use, attach the base station to the
base station stand as shown above.
CG 2400 User Guide
24
Wall mount If using the wall
mount, ensure
that the power
supply cord
reaches from
the base station
to an outlet,
that the USB
cable reaches
the back of the
computer, and
that the phone
lines will reach
the phone
jacks.
Screw the mount onto the wall with the provided
screws.
Plug in the cables before attaching the base
station to the wall mount (see next step for
procedure).
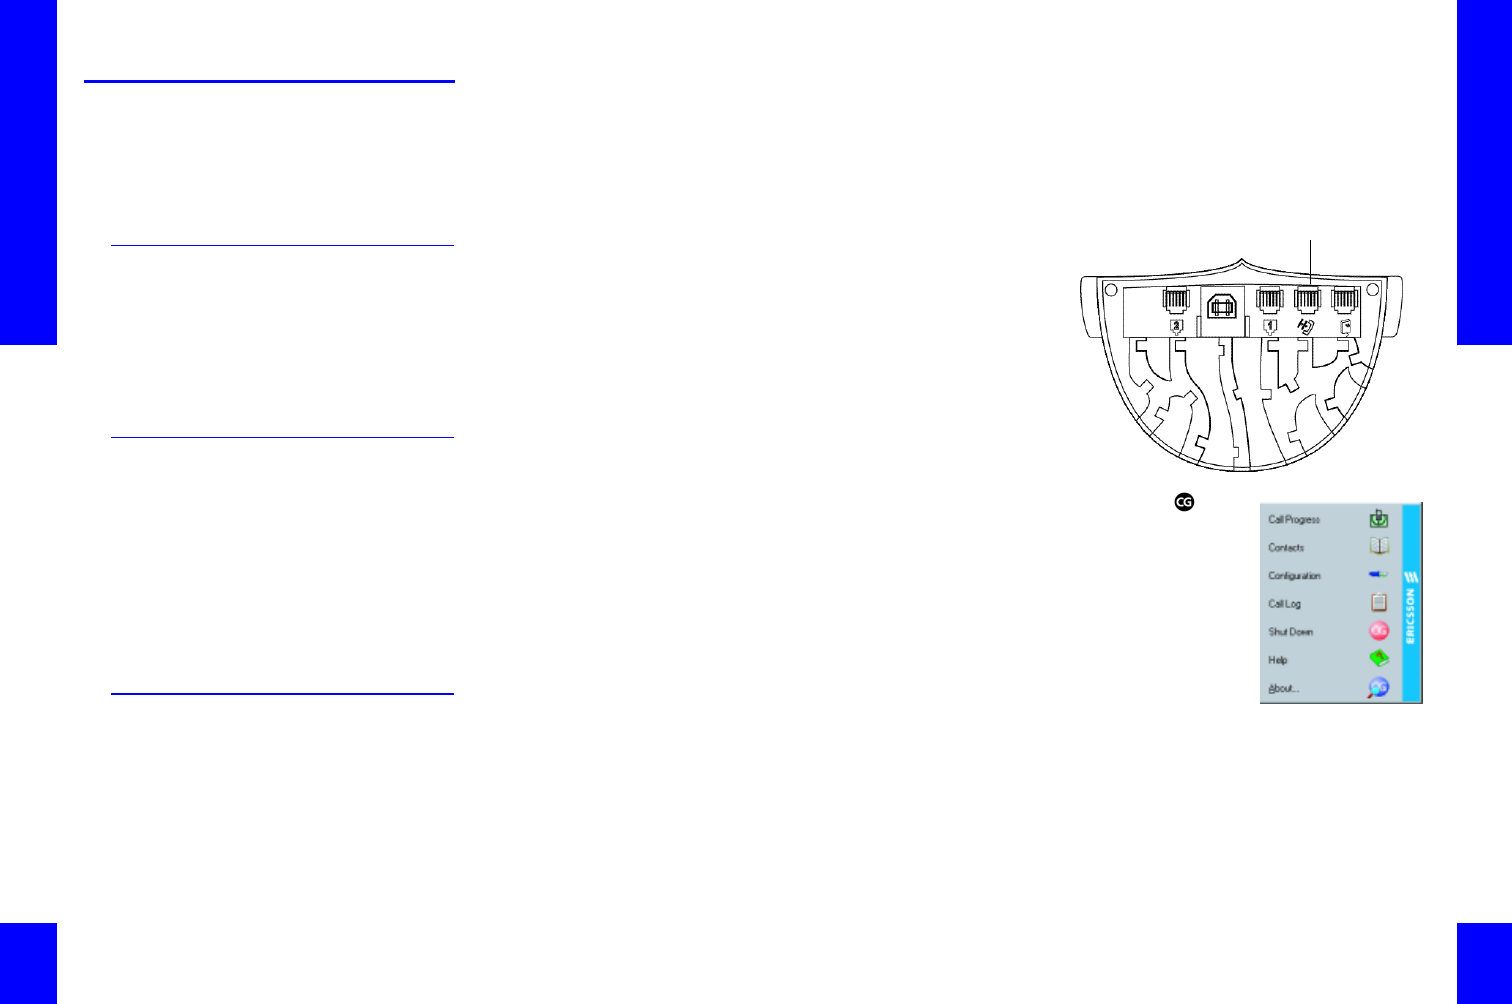
3. Connect the cables to the base station:
Power socket
Line 2
socket
Fax/modem socketUSB connection
Line 1 socket
Wire guides
Chapter 2: Installation
25
NOTE : If you want
Internet access for Line
1 on your base station,
see “Sharing a Base
Station Line with a
Modem” on page34. If
your computer has a
dedicated modem line,
you will not need the
base station fax/
modem socket.
4. If using the desk mount, run the cables through
the wire guides.
5. Plug each phone
line into the
corresponding
wall phone jack.
6. Plug the USB
cable into the
computer.
7. Plug the power
supply into an
approved
electrical outlet.
Once the power is
connected, the
indicator light on
the base station should start blinking amber.
8. If using the wall mount, slip the base station into
place on the wall mount until it clicks firmly into
place.
Completing Software
Installation
Once the base station is successfully connected and
powered, you can complete software installation.
Follow the directions on the screen. When the Setup
Complete dialog box appears, click Yes, I want to
restart my computer now.
CG 2400 User Guide
26
The Configuration Wizard
Complete system configuration is done in two steps:
Configuration Wizard The Configuration Wizard walks you through the
minimum requirements to get the basic system up
and running quickly.
Full System
Configuration
Full system configuration lets you refine the
CyberGenie@Work program to more completely fit
your needs. (Procedures are covered in “Full System
Configuration” starting on page57.)
NOTE: Once the
system has rebooted,
if an error message
appears that says
Windows Messaging
Service or Microsoft
Outlook is not
configured properly,
see “Configuring Your
MAPI Application
Correctly” on page181
for procedures.
When the base station is fully assembled and
connected and the system has rebooted, the
CyberGenie@Work Configuration Wizard launches,
and the following window appears:
Click Next to start the wizard.
Chapter 2: Installation
27
Changing the Base Station
Authorization Code
The Base Station Authorization dialog box opens:
NOTE: The
authorization code can
be changed at any
time. See “Base Station
Setup” on page65.
The authorization code is used to subscribe new
handsets to the base station and to prevent
unauthorized handset subscription.
To change the authorization code:
Click Next to accept the default, or
Type in a new code, then click Next.
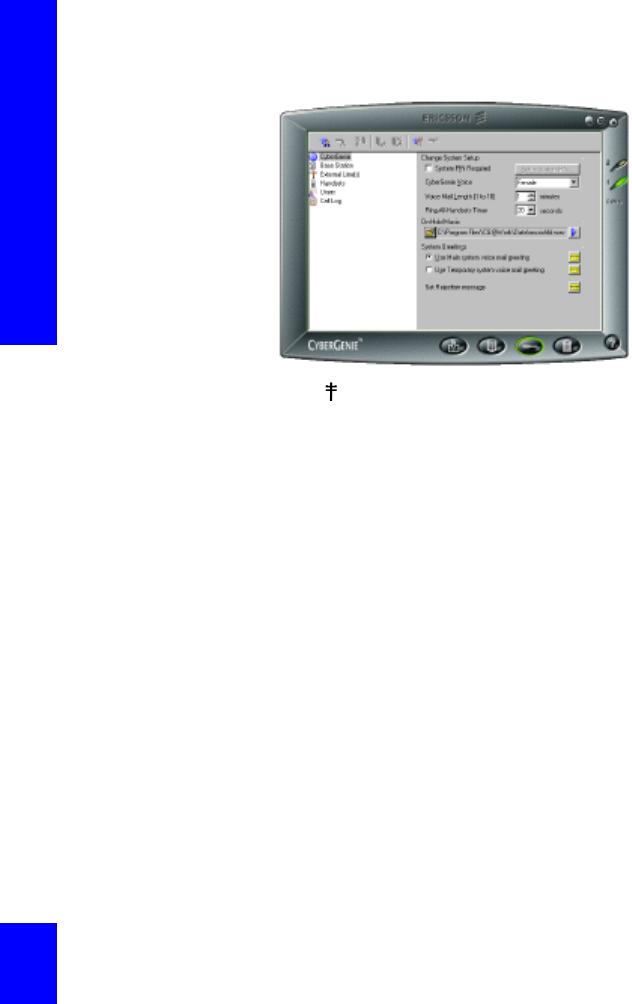
Defining the System PIN
The System PIN dialog box opens:
CG 2400 User Guide
28
NOTE: It is
recommended that you
leave the system PIN
blank during
installation. A system
PIN can be added later.
See “Changing System
Setup” on page60.
The system PIN controls PC access to system
configuration and handset access to system
voicemail greetings.
A system PIN is optional. All PINs must be four digits.
If you enter a system PIN, note it down and put it
where you can find it! If you forget it later, you will
have to reinstall the software to regain system
configuration access.
To change the system PIN:
Click Next to leave the system PIN blank, or
Type in a system PIN, type again to confirm, then
click Next.
Defining External Phone Lines
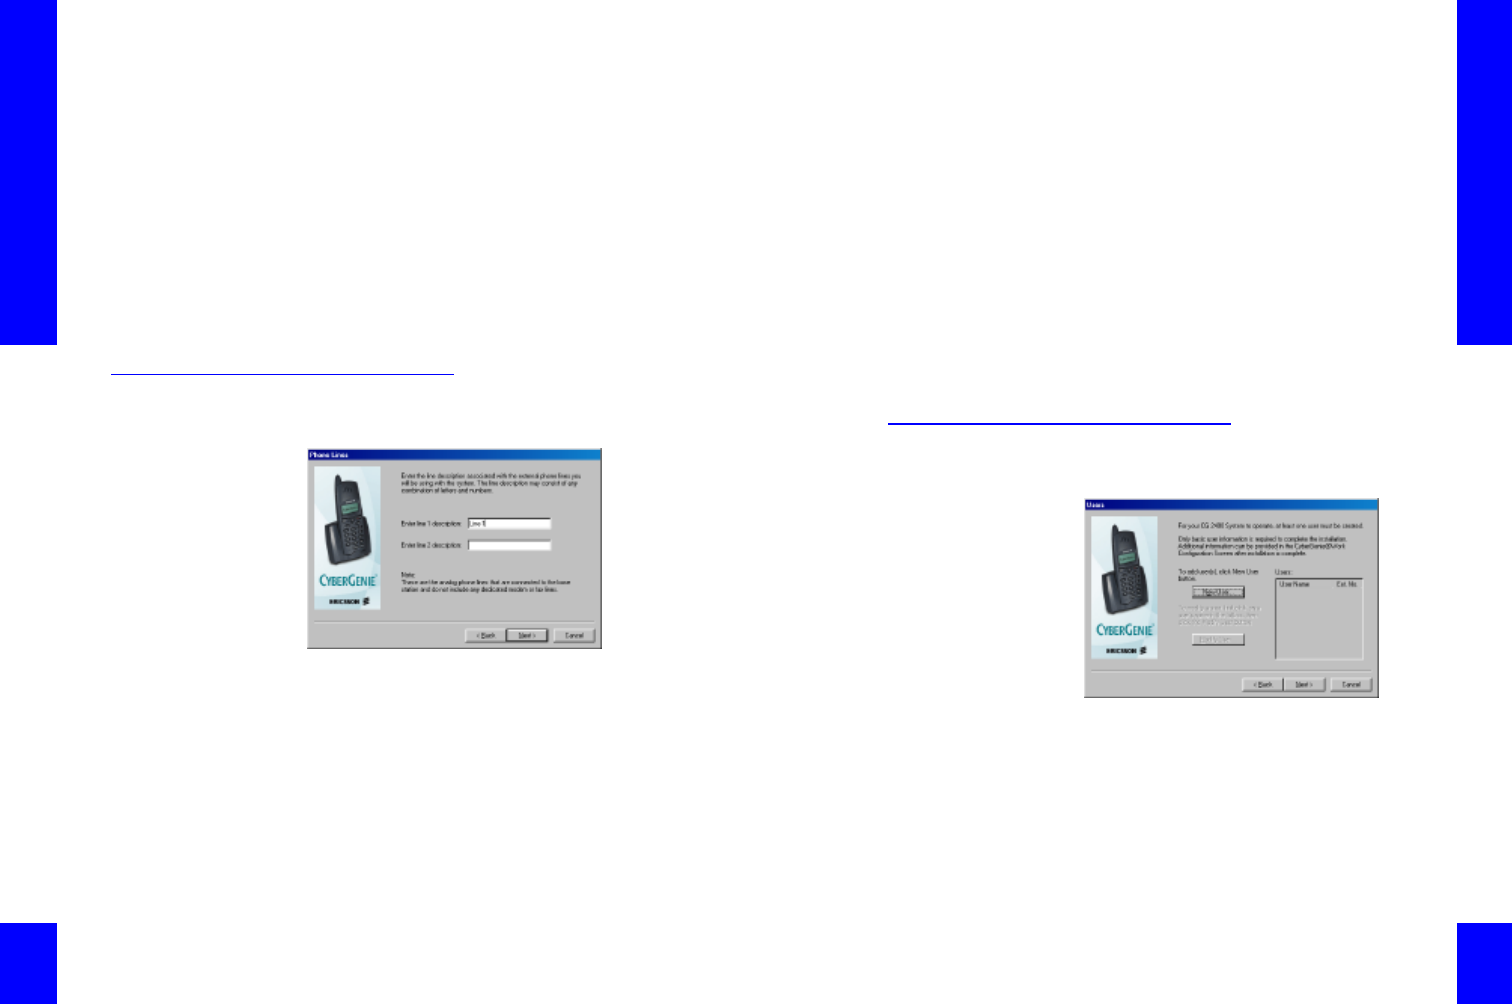
The Phone Lines dialog box opens:
Line descriptions are names you assign to external
phone lines. These descriptions alert
CyberGenie@Work that you have one or two lines
physically connected to the base station.
The information is for description only and does not
affect a line’s function, except for two important
aspects:
•You must enter some description for a line to be
activated. For example, you can enter a phone
number, a line number or a text description such
Chapter 2: Installation
29
as “Main line.” If no description is entered,
CyberGenie@Work will not recognize the line.
•If you enter a description for Line 2 when you
only have one line physically connected,
CyberGenie@Work will attempt to access the
second line even though it isn’t there.
During the configuration process, you must enter a
description for Line 1 for your CG 2400 system to
work.
NOTE: You can change
the description or add a
second line description
at any time. See
“Adding and Deleting
External Phone Lines”
on page67.
To enter a line description:
1. Type the appropriate line description for each
analog line connected to the base station.
2. Click Next.
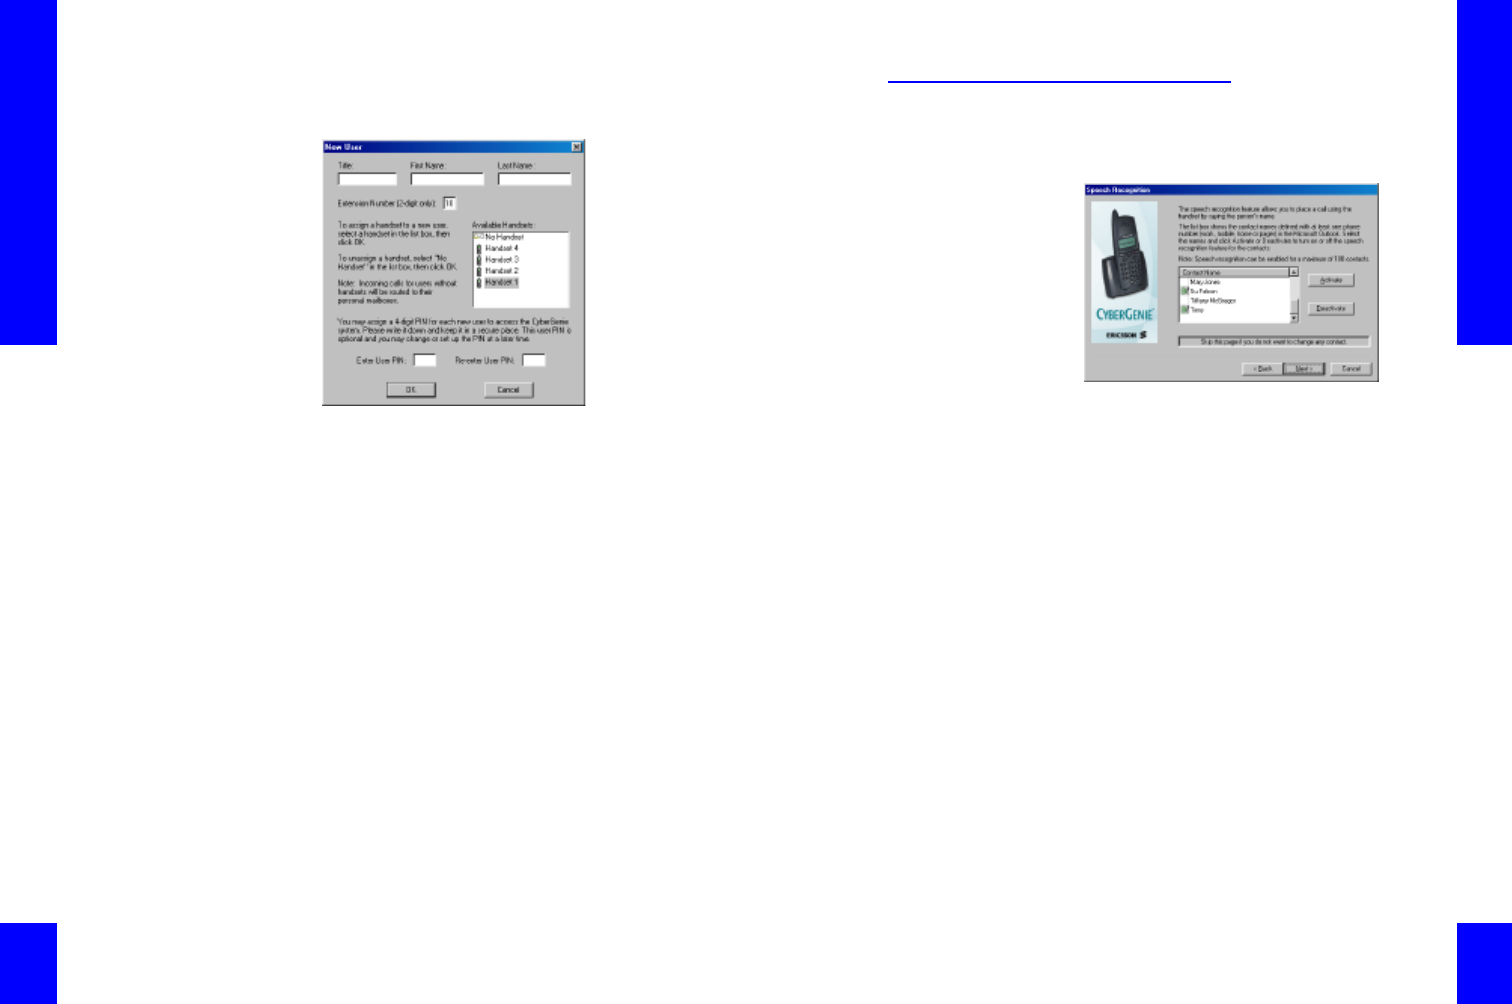
Defining Users
The Users dialog box opens:
A user is anyone who has an assigned handset or
who has a mailbox. The system supports up to 20
users.
You must set up at least one user.
CG 2400 User Guide
30
To set up a user:
NOTE: You can add
new users or change
any of the user data at
any time. See “Setting
up a New User” on
page80.
1. Click New User. The New User dialog box opens:
2. Enter a Title (optional), First Name and Last
Name, tabbing from one field to the next.
NOTE: To add other
users, click No
Handset to set up
voicemail only. You can
assign a handset later.
See“Assigning a
Handset to a User” on
page77.
3. Enter an extension number for this user, or
accept the default number displayed. The
extension number is unique to that user. It can be
any number from 10 to 98.
4. When running Configuration Wizard the first time,
only one handset should be available.
5. To assign a handset, click the Handset 1 icon.
6. The user PIN controls user access to personal
voicemail and voice messages. Type the PIN in
the Enter User PIN box, then verify the PIN in
the Re-enter User PIN box. Make a note of the
PIN assigned.
NOTE: If you forget the
user PIN or lose it, you
will need to delete that
user record, then re-
enter it.
7. When all user data is entered, click OK.
8. Repeat steps 1 through 7 as needed. When done,
click Next.
Chapter 2: Installation
31
Activating Contacts for Speech
Recognition
The dialog box opens:
You can use CyberGenie to place calls to names in
the contacts list that are activated for speech
recognition.
If you use Microsoft Outlook, CyberGenie@Work will
access the information in the Microsoft Outlook
address book and display the names in this window.
If you do not have names already set up in Outlook,
no contact names will display.
This window only activates or deactivates a contact
for speech recognition with CyberGenie. It has no
other effect on the contact records.
You can activate up to 100 contacts for speech
recognition.
NOTE: Contact records
can be added, edited
and activated or
deactivated for speech
recognition at any time.
See “Adding and
Updating Contact
Records” on page107.
To activate a contact for speech
recognition:
1. Highlight the displayed name, then click the
Activate button.
2. To activate multiple contacts at the same time,
use the shift key to select a range of names.
3. To disable speech recognition for a contact,
highlight the displayed name, then click the
Deactivate button.
4. When done, click Next.
CG 2400 User Guide
32
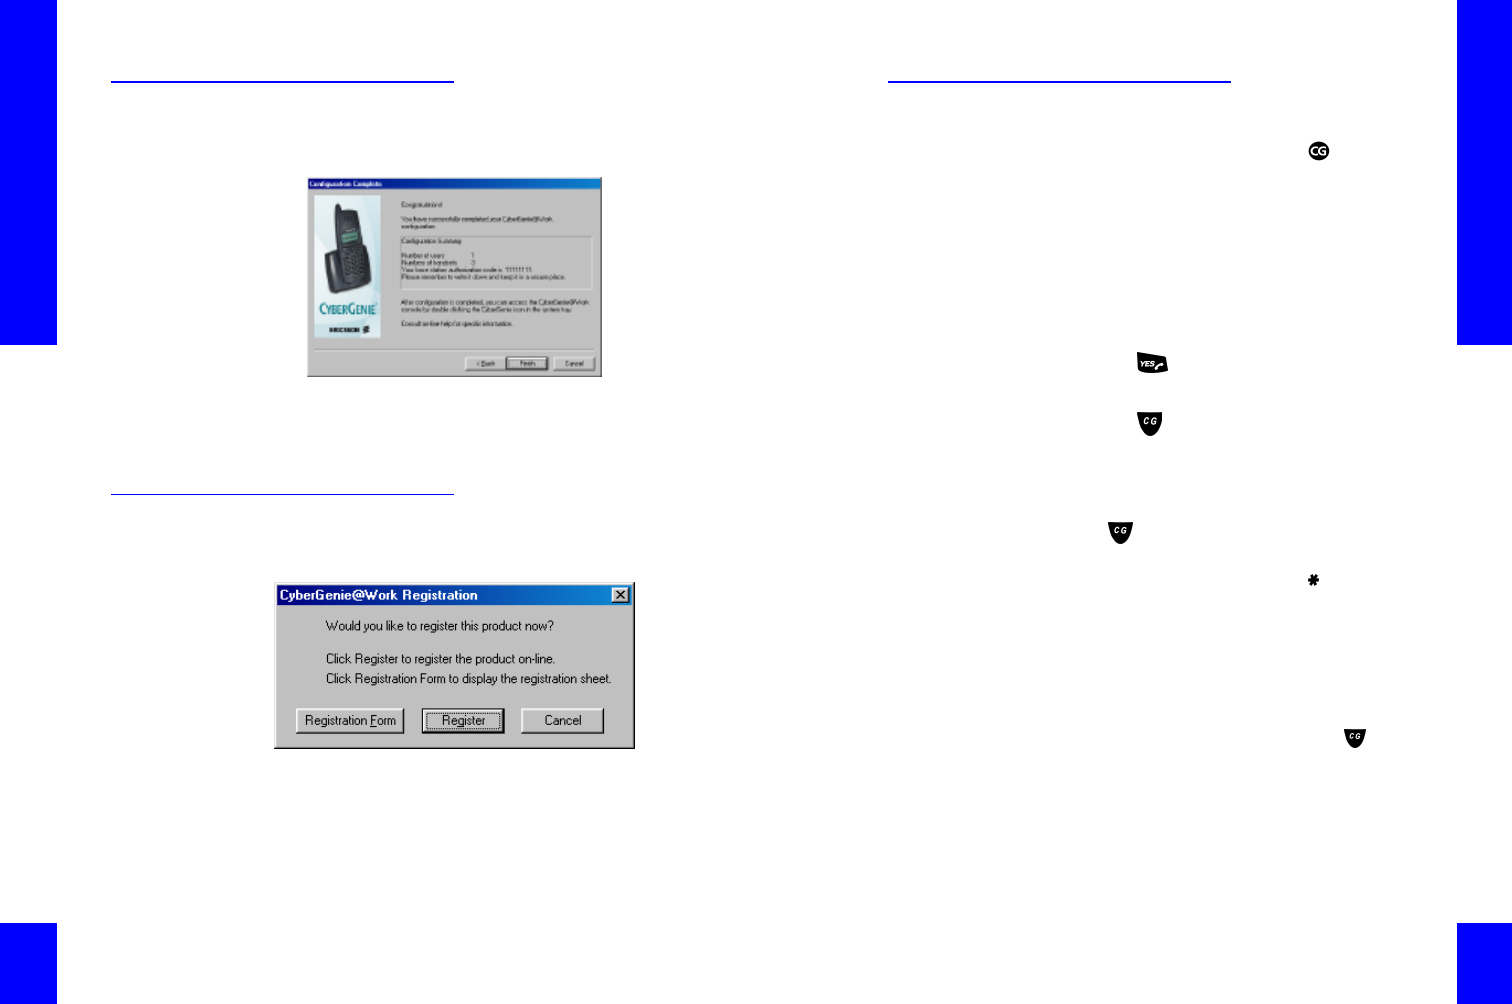
Completing Configuration
The Configuration Complete dialog box provides a
configuration summary:
To complete configuration:
1. Verify that the information displayed is correct.
2. Click Finish .
Registering the Product
Product registration ensures that you get support
and notice of updates to the system:
To register your product:
NOTE: Register your
product now to ensure
product support!
Click Registration Form to print and fax or mail
your registration, or
Click Register to complete registration online.
Chapter 2: Installation
33
Start Using Your System!
When installation is complete, the Windows desktop
appears with the CyberGenie@Work monitor
button displayed on the Windows system tray.
Once the handset is fully charged, you can use it to
place outgoing calls and receive incoming calls. If
you set up contacts for speech activation while
running the Configuration Wizard, you can also use
CyberGenie’s call-by-name.
To place a call using the keypad:
1. Pre-dial the number using the handset keypad.
2. Press the key to place the call.
To place a call using CyberGenie:
1. Press the key on the handset.
2. When CyberGenie asks Who would you like to
call?, say the contact name.
To set up your personal voicemail greeting:
1. Press .
NOTE: For full
information on the
types of outgoing
messages you can use
and how to record
them, see “Unified
Messaging Features
from the PC” on
page117.
2. When CyberGenie asks Who would you like to
call?, say CyberGenie, or press on the
handset.
3. Following CyberGenie's response, say Personal
Greetings, or press 8, then 1 on the handset.
4. Following CyberGenie’s response, say Main
Greeting, or press 1.
5. Next, say Record, or press 2.
Record your message. When done, press , then
say Save, or press 1.
Learn more about
your system
For a full description of the system interface options
and how to use them, see “The User Interface”
starting on page37.
CG 2400 User Guide
34
Other Hardware Installation
Options
You can expand your CG 2400 system by adding
handsets. You can also configure a base station to
share a phone line with your PC’s fax/modem card.
Subscribing Additional
Handsets
Your system comes with one handset, but additional
handsets can be purchased. The system will support
up to 10 handsets.
See “Subscribing a Handset to the Base Station” on
page76 for procedures.
Using Your Handset with Other
DA 202 BaseStations
The handset that comes with your system is pre-
subscribed to the base station it came with. However,
if you use more than one base station, you can also
subscribe it to multiple base stations.
You can use the same handset with your base station
at the office and the base station at home.
See “Base Stations and Your Handset” on page166
for how to use additional base stations.
Sharing a Base Station Line
with a Modem
If you want to share your base station’s Line 1 with a
modem, you need to configure both the hardware
and software to support it.
This option is available only for Line 1.
Chapter 2: Installation
35
To configure your system to support a fax/
modem on Line 1:
1. Connect one end of a phone cable (not included)
to the fax/modem socket on the bottom of your
base station, and the other end to the Line socket
on your fax/modem.
2. Right-click the
button in the Windows
system tray to open the
CyberGenie rollup
menu.
3. Select Configuration.
The Configuration
application window will
open.
Optional fax/modem socket
CG 2400 User Guide
36
4. Click External Line(s) in the left panel to
access the External Line Summary panel.
5. Double-click Line 1.
6. If the General Properties tab is not on top, click
the General tab.
7. To allow the line to accept fax calls as well as
voice calls, click Share this line with modem,
then click Both. For more information on line
configuration, see “External Line Setup” on
page66.