Novatel Wireless NRM-EU860D Dual Band Licensed Modular Transmitter User Manual book
Novatel Wireless, Inc. Dual Band Licensed Modular Transmitter book
Contents
- 1. Part 1
- 2. Part 2
- 3. Manual 1
- 4. Manual 2
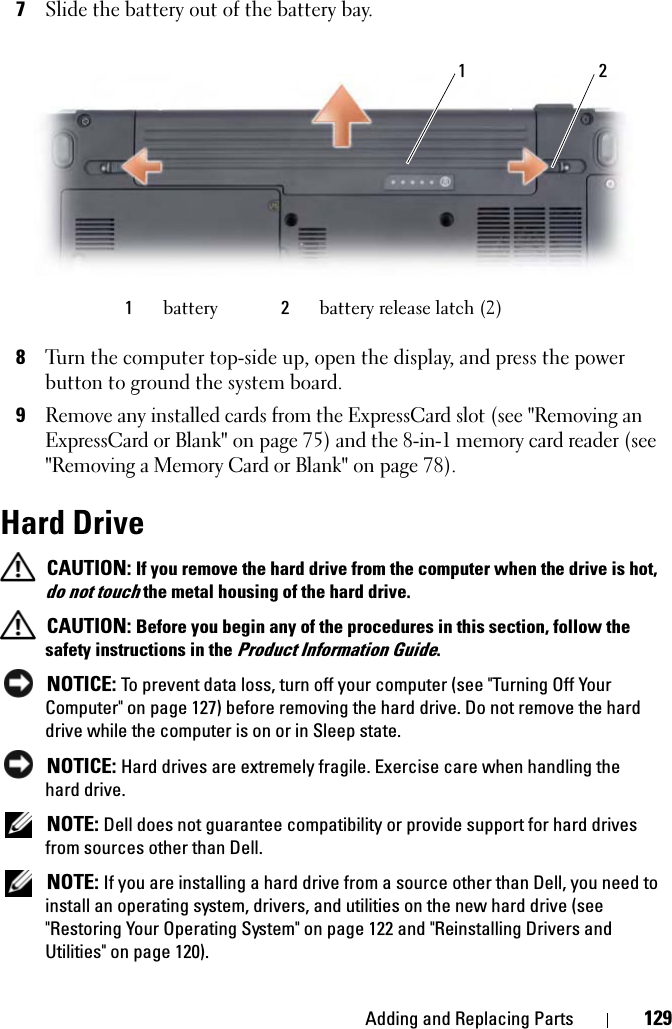
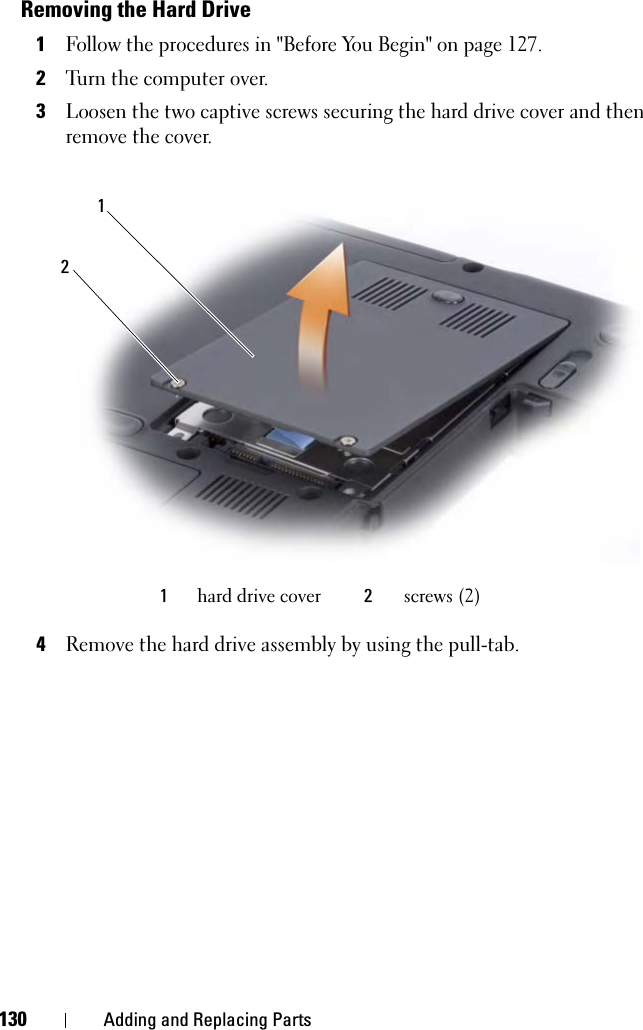
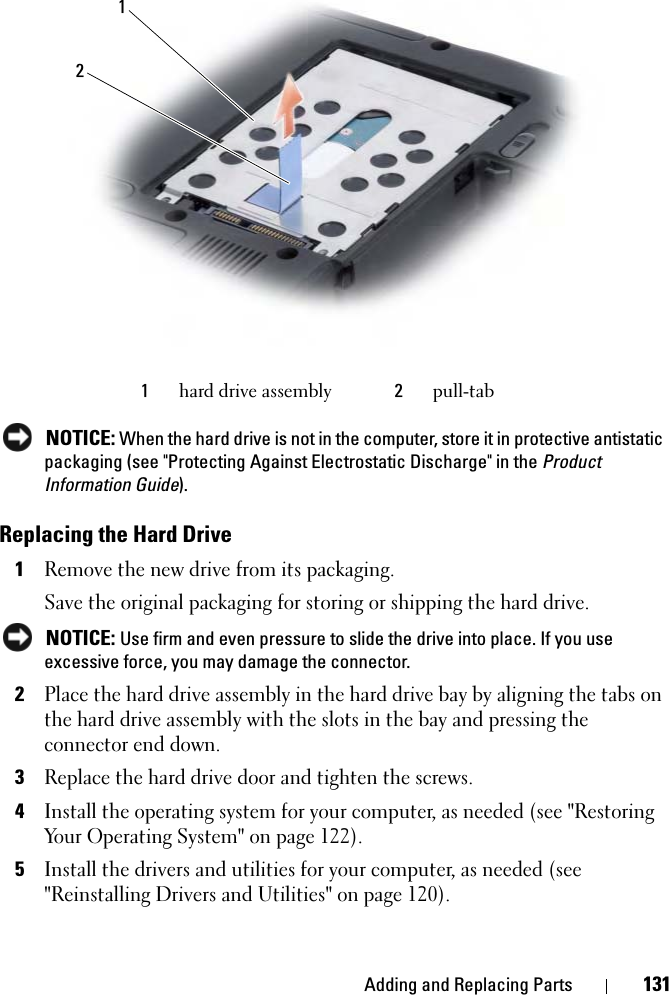
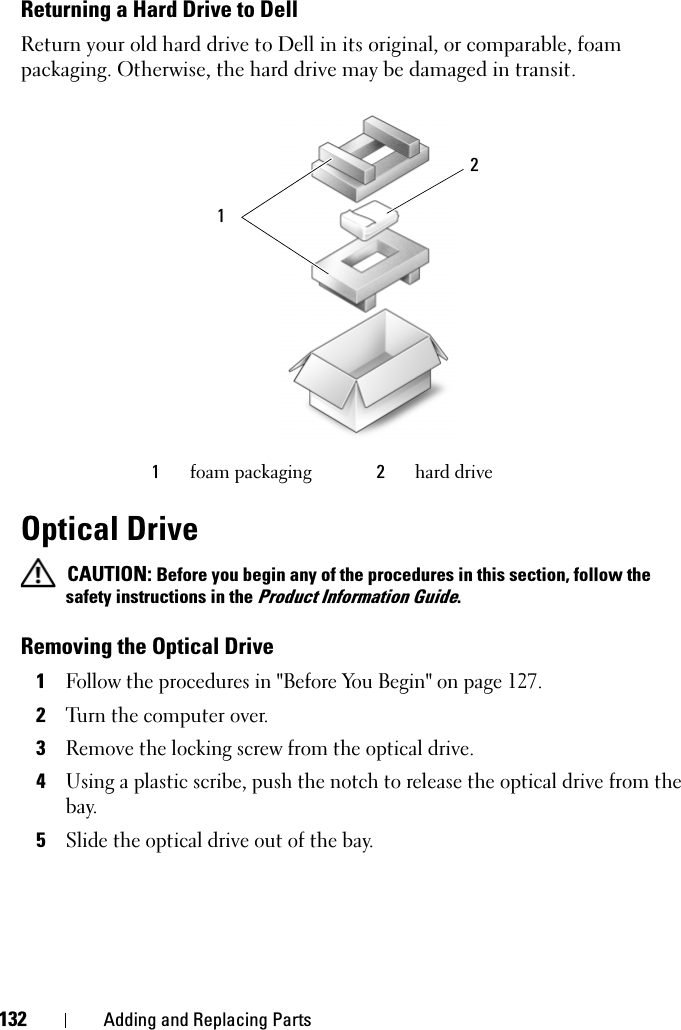
- 5. Manual 3
- 6. Manual 4
- 7. User Manual 1
- 8. User Manual 2
- 9. User Manual M1210
- 10. User Manual D430
- 11. User Manual D420
- 12. User Manual Corsica
- 13. User Manual Sapporo
- 14. User Manual Vostro 1
- 15. User Manual Vostro 2
- 16. Users Manual Vostro 3
- 17. Users Manual Vostro 4
- 18. User Manual 3
- 19. User Manual 4
- 20. User Manual Gilligan
User Manual 3
![Troubleshooting 105ExpressCard ProblemsCAUTION: Before you begin any of the procedures in this section, follow the safety instructions in the Product Information Guide.CHECK THE EXPRESSCARD —Ensure that the ExpressCard is properly inserted into the connector.CHECK THAT THE CARD IS RECOGNIZED BY WINDOWS —Double-click the SafelyRemove Hardware icon in the Windows taskbar. Some cards do not support this feature. If the card supports this Windows feature, the card will be listed.IF YOU HAVE PROBLEMS WITH A DELL-PROVIDED EXPRESSCARD —Contact Dell (see "Contacting Dell" on page 164). Also, for Mobile Broadband (WWAN) ExpressCards, see "Mobile Broadband (Wireless Wide Area Network [WWAN])" on page 111.IF YOU HAVE PROBLEMS WITH AN EXPRESSCARD NOT PROVIDED BY DELL —Contact the ExpressCard manufacturer.IEEE 1394 Device ProblemsCAUTION: Before you begin any of the procedures in this section, follow the safety instructions in the Product Information Guide.ENSURE THAT THE IEEE 1394 DEVICE IS RECOGNIZED BY WINDOWS —1ClickStart →Control Panel → System and Maintenance → DeviceManager.NOTE: The User Account Control window may appear. If you are an administrator on the computer, click Continue; otherwise, contact your administrator to continue the desired action.If your IEEE 1394 device is listed, Windows recognizes the device.IF YOU HAVE PROBLEMS WITH A DELL-PROVIDED IEEE 1394 DEVICE —ContactDell or the IEEE 1394 device manufacturer (see "Contacting Dell" on page 164). IF YOU HAVE PROBLEMS WITH AN IEEE 1394 DEVICE NOT PROVIDED BY DELL —Contact Dell or the IEEE 1394 device manufacturer (see "Contacting Dell" on page 164). Ensure that the IEEE 1394 device is properly inserted into the connector](https://usermanual.wiki/Novatel-Wireless/NRM-EU860D.User-Manual-3/User-Guide-792097-Page-5.png)

![Troubleshooting 111Network ProblemsFill out the "Diagnostics Checklist" on page 163 as you complete these checks.CAUTION: Before you begin any of the procedures in this section, follow the safety instructions in the Product Information Guide.CHECK THE NETWORK CABLE CONNECTOR —Ensure that the network cable is firmly inserted into both the network connector on the back of the computer and the network jack.CHECK THE NETWORK LIGHTS ON THE NETWORK CONNECTOR —No light indicates that no network communication exists. Replace the network cable.RESTART THE COMPUTER AND LOG ON TO THE NETWORK AGAINCHECK YOUR NETWORK SETTINGS —Contact your network administrator or the person who set up your network to verify that your network settings are correct and that the network is functioning.Mobile Broadband (Wireless Wide Area Network [WWAN])NOTE: The Dell Mobile Broadband Card Utility user’s guide and the Mobile Broadband ExpressCard user’s guide are available through Windows Help and Support (click Start →Help and Support). You can also download the Dell Mobile Broadband Card Utility user’s guide from support.dell.com.NOTE: The icon appears in the notification area if the computer has a Dell WWAN device installed. Double-click the icon to launch the utility.ACTIVATE THE MOBILE BROADBAND EXPRESSCARD —You must activate the Mobile Broadband ExpressCard before you can connect to the network. Position the mouse over the icon in the notification area to verify the status of the connection. If the card is not activated, follow the card activation instructions located within the Dell Mobile Broadband Card Utility. To access the utility, double-click the icon located in the taskbar, at the lower-right corner of your screen. If your ExpressCard is not a Dell-branded card, see the manufacturer’s instructions for your card.](https://usermanual.wiki/Novatel-Wireless/NRM-EU860D.User-Manual-3/User-Guide-792097-Page-11.png)
![Troubleshooting 119DriversWhat Is a Driver?A driver is a program that controls a device such as a printer, mouse, or keyboard. All devices require a driver program.A driver acts like a translator between the device and any other programs that use the device. Each device has its own set of specialized commands that only its driver recognizes.Dell ships your computer to you with required drivers already installed—no further installation or configuration is needed.NOTICE: Your Drivers and Utilities media may contain drivers for operating systems that are not on your computer. Ensure that you are installing software appropriate for your operating system.Many drivers, such as the keyboard driver, come with your Microsoft®Windows® operating system. You may need to install drivers if you:• Upgrade your operating system.• Reinstall your operating system.• Connect or install a new device.Identifying DriversIf you experience a problem with any device, identify whether the driver is the source of your problem and, if necessary, update the driver.1ClickStart, and then right-click Computer.2ClickProperties, and then click Device Manager.NOTE: The User Account Control window may appear. If you are an administrator on the computer, click Continue; otherwise, contact your administrator to continue.Scroll down the list of devices and check for an exclamation point (a circle with a [!]) next to the device name. If an exclamation point is next to the device name, you may need to reinstall the driver or install a new driver (see "Reinstalling Drivers and Utilities" on page 120).](https://usermanual.wiki/Novatel-Wireless/NRM-EU860D.User-Manual-3/User-Guide-792097-Page-19.png)