TOSHIBA TEC Singapore S-0601 Dot Printer User Manual Ch 5 Maintenance Rev 1 b
TOSHIBA TEC Singapore Pte Ltd Dot Printer Ch 5 Maintenance Rev 1 b
Contents
- 1. Users Manual 1
- 2. Users Manual 2
- 3. Users Manual 3
- 4. Users Manual 4
- 5. Users Manual 5
- 6. Users Manual 6
- 7. Users Manual 7
- 8. Users Manual 8
- 9. Users Manual 9
- 10. Users Manual 10
- 11. Users Manual 11
- 12. Users Manual 12
- 13. Users Manual 13
- 14. Users Manual 14
- 15. Users Manual 15
- 16. Users Manual 16
- 17. Users Manual 17
- 18. Users Manual 18
Users Manual 11
5
Maintenance
Your printer requires very little care. Occasional cleaning and replacement of the ribbon
cartridge are all that is required.
Lubrication of the printer is not usually necessary. If the print head carriage does not move
smoothly back and forth, clean the printer in the manner described in this chapter. If the
problem continues, contact your dealer to determine whether lubrication may be necessary.
Cleaning
The front and back covers and the acoustic cover of the printer help protect it against dust,
dirt, and other contaminants. However, paper produces small particles that accumulate
inside the printer. This section explains how to clean and vacuum the printer and how to
clean the paper bail rollers.
It is easier to clean the printer when the cover is open.
Cleaning and Vacuuming the Printer
If the print head carriage does not move smoothly back and forth or paper particles have
accumulated in the printer, clean the printer.
Warning: To avoid any possibility of injury, before cleaning the printer, turn off the
power to both the printer and the computer, and unplug the printer.
To clean and vacuum the printer:
1. Remove any paper from the printer. Make sure that the power is off, and then
disconnect the printer power cord.
2. Using a soft vacuum brush, vacuum the exterior of the printer. Be sure to vacuum
the air vents at the front, left sides, and bottom of the printer. Also vacuum the cut
sheet edge
3. Use a soft, damp cloth to wipe the exterior of the printer, including the cover. A mild
detergent may be used.
Warning: Do not use solvents, kerosene, or abrasive cleaning materials that may
damage the printer.
Maintenance
5-2
4. Open the cover of the printer and remove the ribbon cartridge. Using a soft vacuum
brush, gently vacuum the platen, the print head carriage and shaft, and surrounding
areas. You can easily slide the print head to the left or right when the power is off.
Be careful not to press too hard on the flat ribbon cable that extends from the print
head carriage.
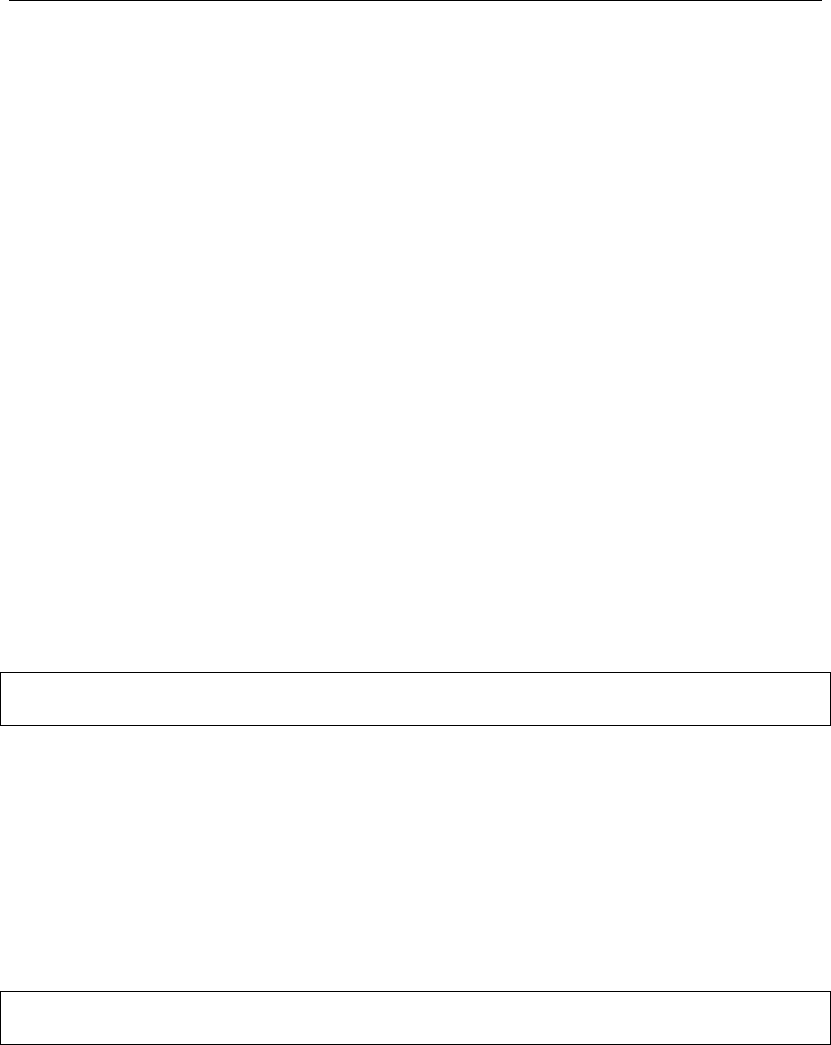
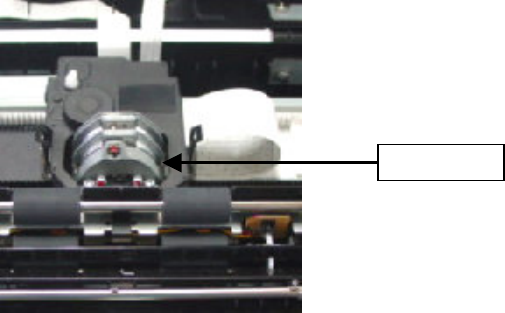
Printer Interior
5. Re-install the ribbon cartridge.
6. Open the cover; vacuum the inside of the cover, the bail rollers, the single sheet
entry, the form tractors and the surrounding areas.
Cleaning the Platen and Paper Bail Rollers
Clean the platen and paper bail rollers once a month or when stains or smudges appear on
the paper. Use water as appropriate.
WARNING
Do not use alcohol to clean the platen. Alcohol may cause the rubber to harden.
To clean the platen and the bail rollers:
1. Apply a small amount of water to a soft cloth. Avoid spilling water inside the printer.
2. Place the cloth against the platen and manually rotate the platen.
3. To dry the platen, place a dry cloth against the platen and manually rotate the
platen.
4. Gently wipe the paper bail rollers using the cloth moistened with water. Dry the
rollers using a dry cloth.
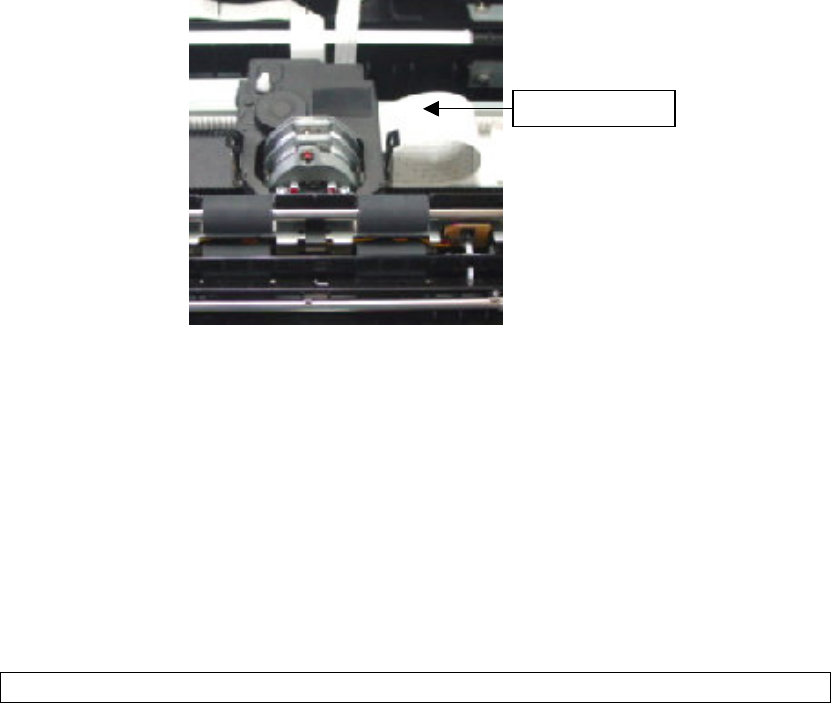
Ribbon Cable
Maintenance
5-3
Cleaning the Print Head
If the paper is smudged or stained by ink, clean the nose of the print head with a dry cloth.
For removing and installing the print head, see the section contact a technician.
Replacing the Ribbon Cartridge
If printing is too light because of ribbon wear, replace the ribbon cartridge. Appendix A lists
the order number for the ribbon cartridge.
The replacement is almost the same as the installation except that it involves removing the
old ribbon cartridge and unpacking the purchased ribbon cartridge from the carton. The
installation of the ribbon cartridge is detailed in the section, “Installing the Ribbon Cartridge,”
in the Installation Guide. This section describes only the removal of the old ribbon cartridge.
To remove the ribbon cartridge:
1. Turn off the printer.
2. Open the top cover. For easy removal, slide the print head carriage between the second
and the third bail rollers (from left to right).
Warning: The print head may be hot if you have been printing recently.
3. Move the print gap lever to the rear.
4. To remove the ribbon cartridge, press the ribbon release levers located on the sides of the
cartridge and carefully lift the cartridge out of the printer.
Maintenance
5-4
Replacing the Print Head
If a specific dot is not printed for all characters, replace the print head.
Warning:
The print head may be hot if you have been printing recently
.
To remove the print head:
1. Turn off the printer.
2. Open the cover and remove the ribbon cartridge.
3. Pull the right end of the head lock wire forward to release it from the hook at the
right of the print head carriage. Then release the wire from the center hook.
4. Lift the print head to remove it from the connector on the carriage.
Warning: A
technician should preferably handle this procedure.
Maintenance
5-5
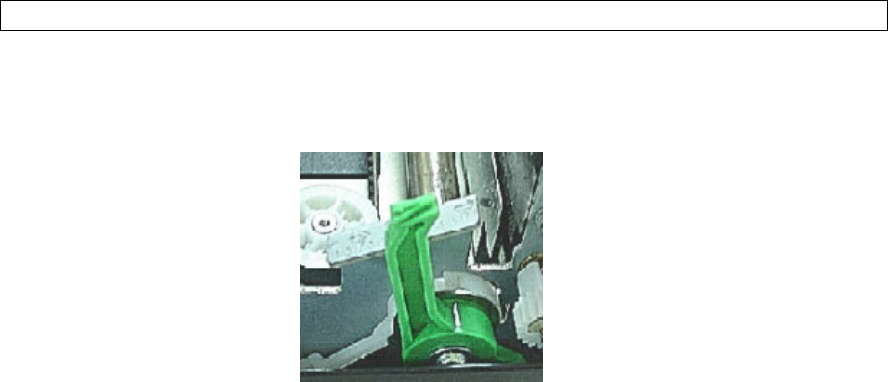
Removing the Print Head
To install the print head:
1. Carefully fit the mounting guide grooves of the print head on the locating studs on
the carriage.
2. Push the print head into the connector and hook the wire into place in the reverse
order of removal.
3. Remove the new ribbon cartridge from its package and install.
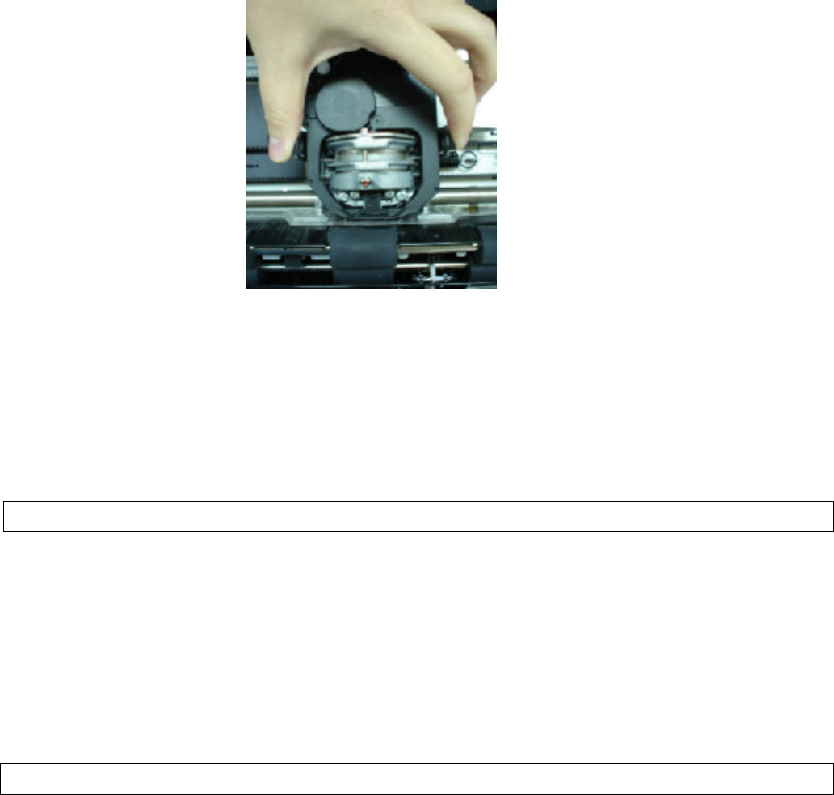
Print Head