TOSHIBA TEC Singapore S-0601 Dot Printer User Manual 12
TOSHIBA TEC Singapore Pte Ltd Dot Printer Users Manual 12
Contents
- 1. Users Manual 1
- 2. Users Manual 2
- 3. Users Manual 3
- 4. Users Manual 4
- 5. Users Manual 5
- 6. Users Manual 6
- 7. Users Manual 7
- 8. Users Manual 8
- 9. Users Manual 9
- 10. Users Manual 10
- 11. Users Manual 11
- 12. Users Manual 12
- 13. Users Manual 13
- 14. Users Manual 14
- 15. Users Manual 15
- 16. Users Manual 16
- 17. Users Manual 17
- 18. Users Manual 18
Users Manual 12

6
Trouble-Shooting
Your printer is extremely reliable, but occasional problems may occur. You can solve many
of these problems yourself, using this chapter. If you encounter problems that you cannot
resolve, contact your dealer for assistance.
This chapter is organized as follows:
• Solving problems
• Diagnostic functions
• Returning the printer for maintenance
• Contacting your authorized service provider
Solving problems
The tables in this section describe common printer problems and their solutions. The
following types of problems are considered:
• Print quality problems
• Paper handling problems
• Operating problems
• Printer failure
Print Quality Problems and Solutions
Poor print quality or other printing problems are often caused by incorrect printer set-up or
incorrect software settings. A gradual decrease in print quality usually indicates a worn
ribbon. The following table identifies common print quality problems and suggests solutions.
Trouble-Shooting
6-2
Problem Solution
Printing is too light or too dark.
Make sure that the ribbon cartridge is properly
installed and that the ribbon feeds smoothly.
Make sure that the Print Gap lever is set for the
thickness of your paper. See Chapter 2, Paper
Handling
Check ribbon wear. Replace the ribbon if necessary.
Smears and stains appear on
the page.
Make sure that the Print Gap lever is set for the
thickness of your paper. See “Adjusting for Paper
Thickness” in Chapter 2, Paper Handling.
Check ribbon wear. Replace the ribbon if necessary.
Check whether the tip of the print head is dirty.
Clean the head with a soft cloth if necessary. The
print head should be changed by a technician.
The page is blank Make sure that the ribbon cartridge is properly
installed. See “Installing the Ribbon Cartridge” in the
Installation Guide.
Printing is erratic or the wrong
characters are printed. Many
“?” or unexpected characters
are printed.
Make sure that the interface cable is securely
connected to both the printer and computer.
Make sure that the printer Emulation selected in your
software is the same as the Emulation selected on
the printer. See “Connecting the Printer to Your
Host System,” in the Installation Guide.
Printing is vertically
misaligned (jagged).
Use the printer's vertical alignment function to check
the vertical print alignment. If necessary, adjust the
print alignment. See the section, “Checking Vertical
Alignment,” in this chapter.
Trouble-Shooting
6-3
Problem Solution
The top margin is wrong. The top margin is the sum of the printer’s top-of-form
setting, the software-specified top margin, and the
printer’s TOP-MRGN setting. Proceed as follows:
• Make sure that the top-of-form setting is correct.
The factory default is 0 mm (0 inch). See
“Adjusting Top of Form Origin,” in Chapter 4, Set-
Up Mode.
• Check the software-specified top margin. Refer to
your software documentation.
• Check the printer’s TOP-MRGN setting. See
“Changing Macro Options,” in Chapter 4,
Set-Up Mode.
Lines are double spaced
instead
of
single spaced.
Change the LINE MODE setting in the printer Set-Up
mode to CR=LF+CR. See “Changing Macro
Options,” in Chapter 4, Set-Up Mode.
The printer overprints on the
same line
Change the LINE MODE setting in the printer Set-Up
mode to CR=LF+CR. See “Changing Macro
Options,” in Chapter 4, Set-Up Mode.
The next print line starts
where the previous line ended
instead of at the left margin.
Change the LINE MODE setting in the printer Set-Up
mode to LF=LF+CR. See the section, “Changing
Macro Options,” in Chapter 4, Set-Up Mode.
The printer overprints on the
same line while the next print
line starts where the previous
line ended instead of at the
left margin.
Change the LINE MODE setting in the printer Set-Up
mode to LFCR=LF+CR. See the section, “Changing
Macro Options,” in Chapter 4, Set-Up Mode.
Trouble-Shooting
6-4
Paper Handling Problems and Solutions
The following table describes common paper handling problems and suggests solutions.
See Chapter 2, “Paper Handling,” for detailed procedures on loading and using paper.
Problem Solution
Paper cannot be loaded or fed. Make sure that the Print Gap select lever located on
the top left of the printer is set correctly. Move the
lever to the rear for continuous forms or to the front
for single sheets.
Make sure that the paper covers the paper-out
sensor, (i.e., the left paper edge is within 52 mm for
single sheets or 41 mm for continuous forms from
the left edge of the platen.) This problem cannot
occur if you use the forms tractor unit or insert a
single sheet with its right edge in contact with the
right paper guide.
Paper jams while loading. Turn off the printer and remove the jammed paper.
Remove any obstructions from the paper path.
Make sure that the Print Gap lever is set for the
thickness of your paper. See “Adjusting for Paper
Thickness” in Chapter 2, Paper Handling.
Make sure that the paper is not folded, creased, or
torn.
Make sure that the left and right tractors are set so
that the continuous forms are stretched taut. See
“Using Continuous Forms,” in Chapter 2, Paper
Handling.
Paper jams while printing. Turn off the printer and remove the jammed paper.
Remove any obstructions from the paper path.
Make sure that the Print Gap lever is set for the
thickness of your paper. See the table, “Adjusting for
Paper Thickness,” in Chapter 2, Paper Handling.
For continuous forms, make sure that the incoming
and outgoing paper stacks are correctly placed.
Paper should feed straight. See “Positioning the
Paper Stack,” in Chapter 2, Paper Handling.
Make sure that the forms tractors are positioned
correctly for the width of your paper and that the
perforated holes of the paper fit directly over the
tractor pins. See “Using Continuous Forms,” in
Chapter 2, Paper Handling.
Paper slips off the forms
tractors or the perforated holes
of the paper tear during
printing.
Trouble-Shooting
6-5
Operating Problems and Solutions
The following table identifies common operating problems and suggests solutions. If you
cannot resolve a problem, contact your dealer.
Problem Solution
The power does not turn on. Make sure that the “I” on the printer power switch is
depressed.
Make sure that the power cord is securely connected
to both the printer and the battery. Make sure that
the power outlet is functional.
Turn the power off. Wait a minute and then turn the
printer on again. If the printer still has no power,
contact your dealer.
Make sure that the Ready indicator is lit. See
“Operation of the Control Panel,” in Chapter 2, Paper
Handling.
If you use the interface cable make sure it is securely
connected to both the printer and the computer.
Make sure that the blue tooth is securely set. See
“Connecting the Printer to Your Host System,” in the
Installation Guide.
If the Fault indicator is lit, load the paper. See
Chapter 2, “Paper Handling”.
Run the printer printing test. If the printing test
executes normally, the problem is caused by the
interface, the computer, incorrect printer settings, or
incorrect software settings. See “Testing the Printer,”
in the Installation Guide.
Make sure that the printer Emulation selected in your
software is the same as the Emulation selected on
the printer. See “Connecting the Printer to Your Host
System,” in the Installation Guide.
Printer Failures
A user cannot generally resolve a problem involving defective printer hardware. On detecting
a fatal error, the printer will:
• Stop printing
• Beep four times if it is not disabled by the Set-Up mode
• Turn the Ready indicator off
The printer is on but it will not
print.
Trouble-Shooting
6-6
• Blink the Paper Out indicator (with a fault indicator lit indicating the error type).
The following errors cause the printer to turn off the power:
• Print head error
• Space motor error (print head carriage motor)
• Line feed motor error
• +34 V overvoltage error
No error condition is displayed if any of these errors occurs.
Turn the printer power switch off and back on, then rerun the same job to check if the error
was transient. If the error recurs, contact your dealer.
Diagnostic Functions
The printer diagnostic functions are print-test and hex-dump.
• Print-test tells you whether the printer hardware is functioning correctly. It prints the
print-test pattern. If the printer hardware is functional, any problems you are having
are probably caused by incorrect printer settings, incorrect software settings, the
interface, or the computer.
• Hex-dump allows you to determine whether the computer is sending the correct
commands to the printer, and whether the printer is executing the commands
correctly. This function is useful to programmers or others who understand how to
interpret hex dumps.
For details on using these functions, all of which are available in the printer Set-Up mode,
see “Using the Diagnostic Functions,” in Chapter 4, Set-Up Mode.
Besides the above functions, the serial interface loopback test and the parallel interface
loopback test are provided in the printer Set-Up mode. These tests are for service engineers.
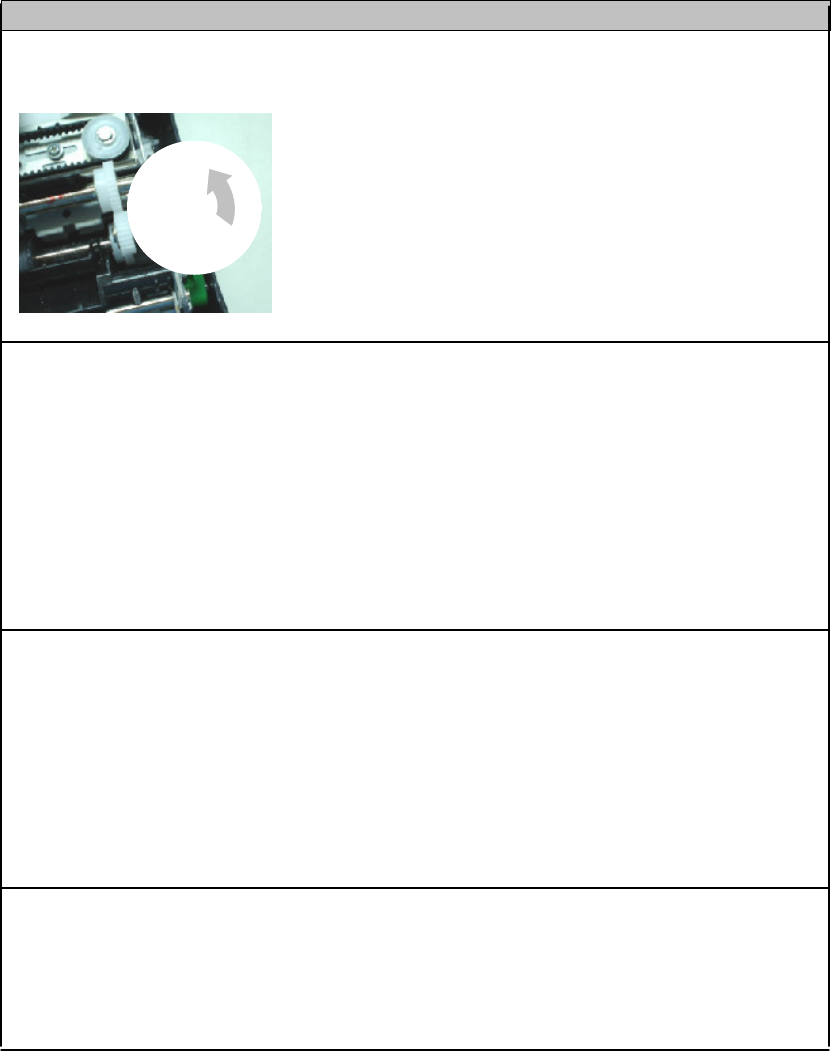
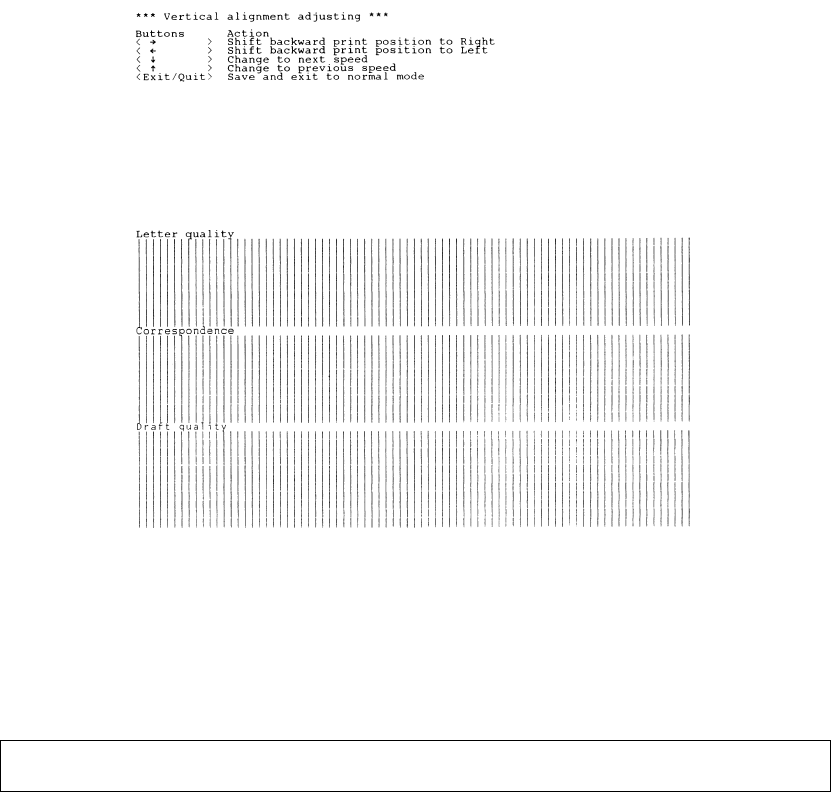
Checking Vertical Alignment
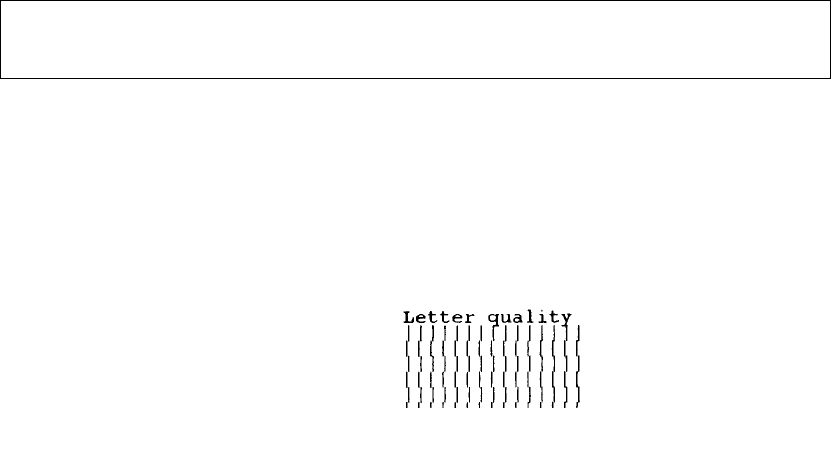
In bidirectional printing, characters printed from left to right tend to misalign with characters
printed from right to left as shown below:
This example shows how printing looks
when characters are vertically
misaligned. Note that the left
margin is not straight.
The vertical alignment function corrects the vertical character displacement that sometimes
occurs with bidirectional printing and results in a poor appearance especially in printing
tables. This function is defined as one of the power-on initiated test functions. If you notice
misaligned printing, start this function to check and correct the vertical print alignment.
Make sure that continuous forms paper or single sheet paper is loaded in the printer. If
possible, use forms at least 216 mm (8.5 inches) wide. Then proceed as follows:
Trouble-Shooting
6-7
1. Start the vertical alignment test.
Turn the printer on while pressing the READY and LOAD buttons until the printer
beeps. The printer prints the help menu and then starts printing rows of parallel
bars at Letter quality speed.
Note: Do not press any buttons alone or in combination except for pressing the
READY and LOAD buttons alone when turning the printer on, to avoid
initiating unexpected tests not permitted for the user.
2. Adjust the vertical print alignment at Letter quality speed.
Examine the parallel bars. If the bars are aligned (not jagged), go to step 3. If the
bars are offset, repeatedly press the PREVIOUS button or the NEXT button until
the bars are aligned.
3. Adjust the vertical print alignment at Correspondence and Draft
quality speed.
Press the ALT-PREVIOUS button or the ALT-NEXT button to switch Letter quality
to Correspondence and Draft quality.
Examine the parallel bars and adjust the vertical print alignment as described in
step 2.
Offset of Bars
Trouble-Shooting
6-8
Vertical Alignment
4. Exit the vertical alignment function.
Press the SETUP/EXIT button to save the new vertical alignment settings and exit
the vertical alignment function
.
Note: To exit the vertical alignment function without saving changes, turn the printer
off.