TOSHIBA TEC Singapore S-0601 Dot Printer User Manual 5
TOSHIBA TEC Singapore Pte Ltd Dot Printer Users Manual 5
Contents
- 1. Users Manual 1
- 2. Users Manual 2
- 3. Users Manual 3
- 4. Users Manual 4
- 5. Users Manual 5
- 6. Users Manual 6
- 7. Users Manual 7
- 8. Users Manual 8
- 9. Users Manual 9
- 10. Users Manual 10
- 11. Users Manual 11
- 12. Users Manual 12
- 13. Users Manual 13
- 14. Users Manual 14
- 15. Users Manual 15
- 16. Users Manual 16
- 17. Users Manual 17
- 18. Users Manual 18
Users Manual 5
Selecting Paper
The printer can handle either single sheets or continuous forms. Single sheets, also called
cut sheets, include envelopes and non-continuous, multipart forms. Continuous forms
include labels and multipart forms fed into the printer using the forms tractors.
For best results, use paper that meets the specifications listed in the following table. (See
Appendix B, “Printer and Paper Specifications,” for detailed specifications.) If you are unsure
of the suitability of a particular type of paper, try testing the paper or consult your dealer.
Paper Specifications
Paper Size
Parameter Fixed Unit Portable Unit
Width -- Cut Sheet 102 to 267 mm 102 to 248 mm
Width -- Fan-Fold 102 to 216 mm 102 to 216 mm
Length 102 mm or greater 102 to 279 mm
Thickness Up to 0.35 mm Up to 0.35 mm
Paper Thickness and Number of Copies
Description
Thickness 0.35 mm (0.014 in) maximum total thickness.
Copies 1 to 3 copies, including the original.
For carbon-interleaved paper, the carbon counts as
a copy.
Overview of Paper Operations
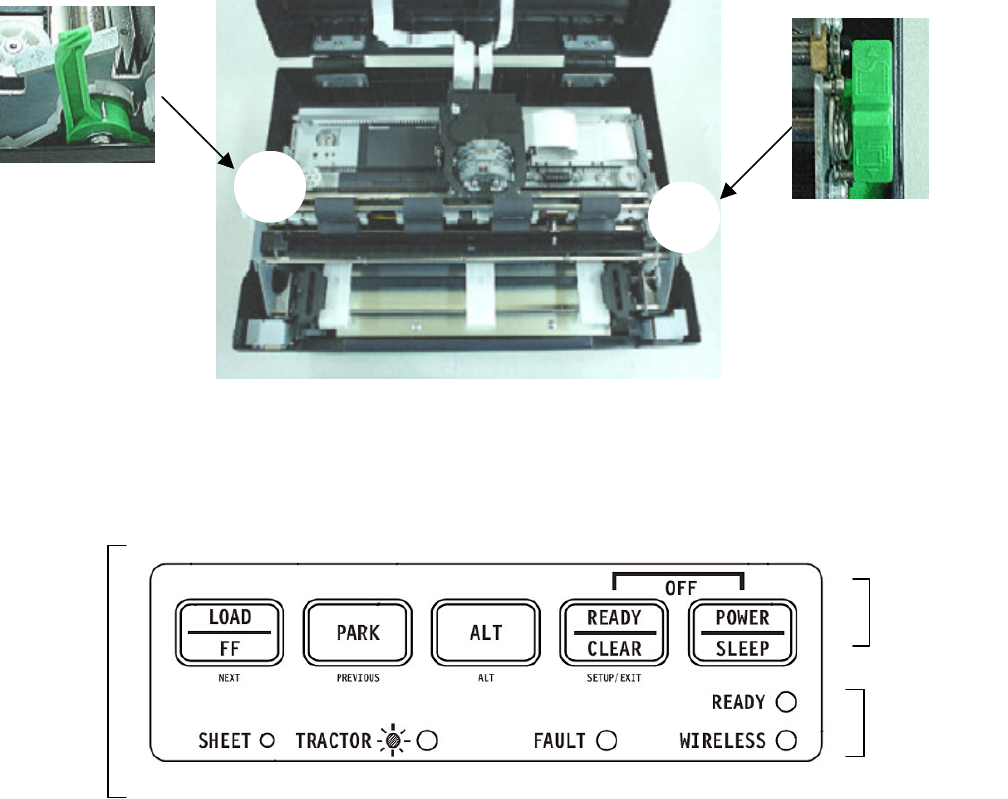
The following levers and buttons are used in paper handling:
Lift the cover to locate these levers inside the printer.
• Print Gap lever on the left side under the cover
• Paper Select lever on the right side under the cover
The following figure shows the location of each lever, indicators, and buttons:
• All buttons on the control panel for primary and alternative functions are labeled
below and above respectively.
Printer Controls and Buttons
Control
Panel
Indicator
Lights
Control
Buttons
Print Gap Lever
Paper Select Lever
The following table summarizes the use of levers and buttons in paper handling. More
detailed information is provided later in this chapter.
Caution: To load or feed paper, the printer must be:
• In the Ready state but not receiving or printing data
• In the Pause state
Levers and Buttons Used for Paper Handling
Lever/Button Purpose Action
FF/LOAD Form Feed Press FF/LOAD to execute a form feed.
Continuous forms are fed forward by one page.
Single sheets are ejected.
Load paper Press FF/LOAD to feed paper to the top of form
position.
PARK Unload forms Press PARK to retract continuous forms to the
“park position.”
SETUP/EXIT + ALT Press SETUP/EXIT and ALT at the same time to
enter TOF Adjustment mode where the paper
loading position can be adjusted.
See Top-of-Form Adjustment later in this chapter.
Paper select lever * Move the paper select lever forward for
continuous sheets.
Move the paper select lever backward for single
forms.
Print Gap Lever Select the number corresponding to the number
of copies (including the original). Vary the setting
upward or downward to optimize printing.
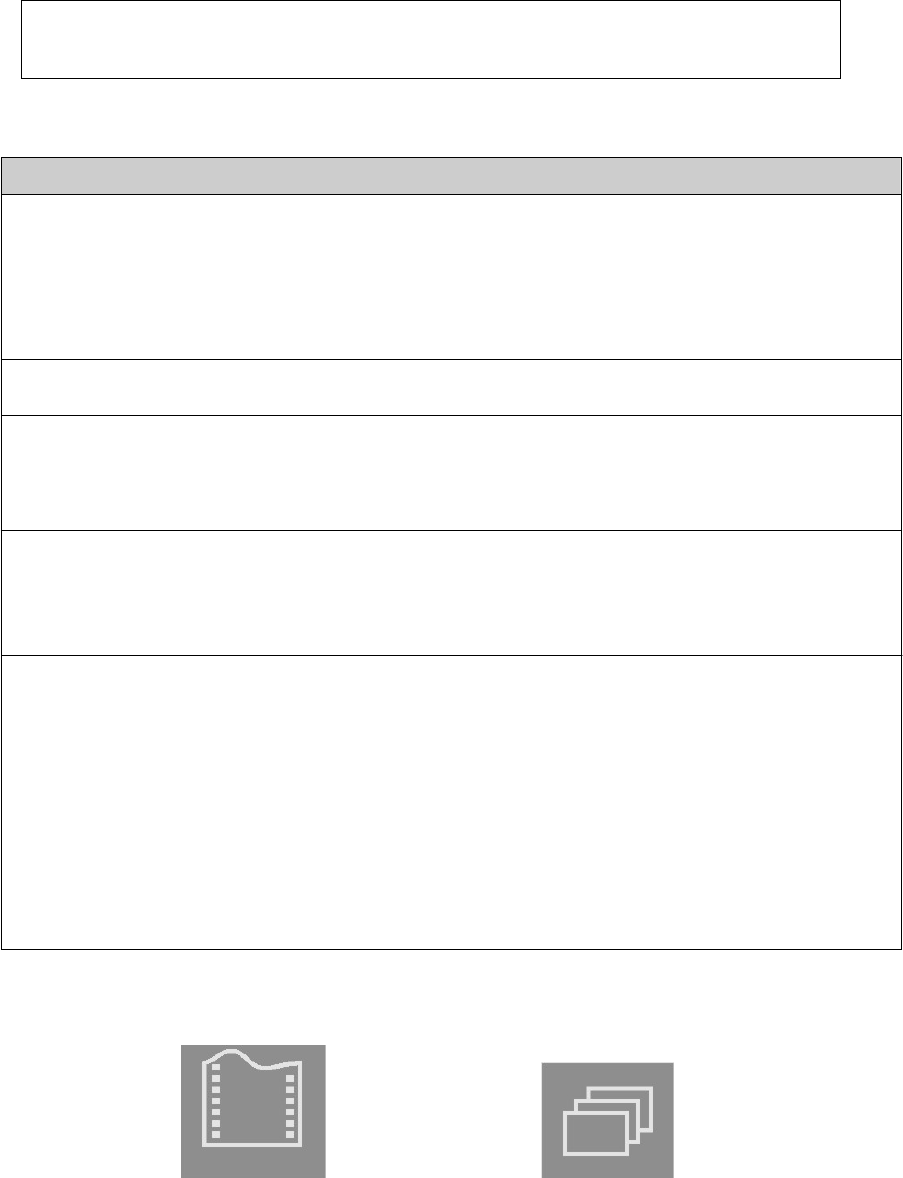
* The following graphics are engraved on the casing.
Continuous Forms Single Sheet
Enter Top-of-
Form
(TOF) Adjustment
mode
Adjust for paper
thickness or
number of copies
Select paper path
The printer can handle paper with different thicknesses, including multipart forms with up to
four parts (original plus three copies). For details on paper thickness specifications, see
Appendix B “Printer and Paper Specifications.”
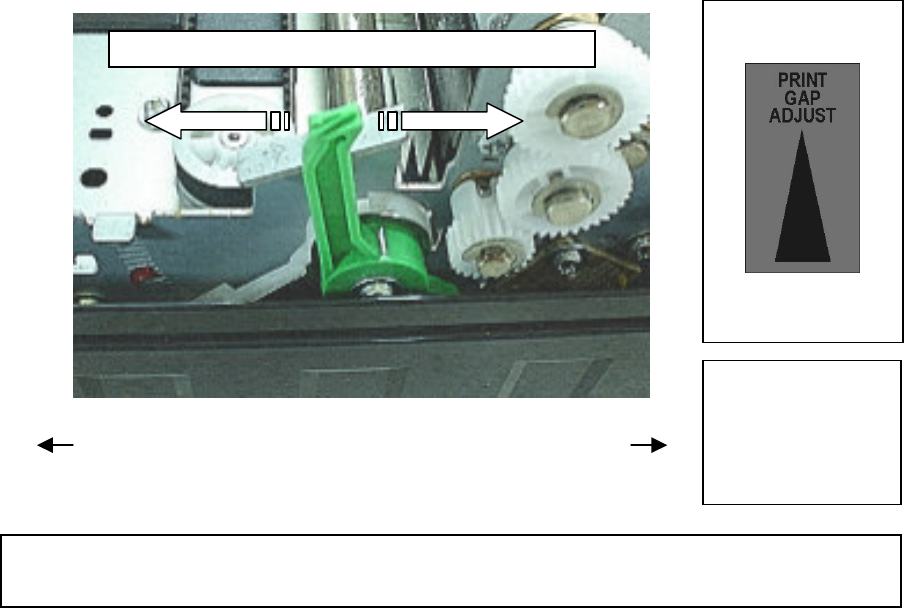
The Print Gap lever, located on the left under the cover, allows you to adjust for different
paper thicknesses. Be sure to adjust the Print Gap lever whenever you change the number
of copies being printed.
The print gap lever has twelve settings.
Moving the Print Gap lever to front of printer reduces the Print Gap.
Adjusting the Print Gap Lever
Using Continuous Forms
Continuous forms paper, fanfolded at the horizontal perforations, is ideal for printing rough
drafts, long files, forms and invoices. The paper is fed into the printer using the forms tractor
unit. The Push tractor is at the front/bottom of the printer. The paper is loaded and adjusted
via pushbuttons. The forms may be advanced to tear off position by operator or automatically
through a timeout.
Rear of Printer
Left Side View
Front of Printer
Important:
Open Print Gap
lever to maximum
to replace ribbon.
Caution: If printing smears, the ribbon misfeeds, or the paper jams, move the lever one position wider.
Small Print Gap
Large Print Gap