TOSHIBA TEC Singapore S-0601 Dot Printer User Manual Ch 3 Printing Rev C2 b
TOSHIBA TEC Singapore Pte Ltd Dot Printer Ch 3 Printing Rev C2 b
Contents
- 1. Users Manual 1
- 2. Users Manual 2
- 3. Users Manual 3
- 4. Users Manual 4
- 5. Users Manual 5
- 6. Users Manual 6
- 7. Users Manual 7
- 8. Users Manual 8
- 9. Users Manual 9
- 10. Users Manual 10
- 11. Users Manual 11
- 12. Users Manual 12
- 13. Users Manual 13
- 14. Users Manual 14
- 15. Users Manual 15
- 16. Users Manual 16
- 17. Users Manual 17
- 18. Users Manual 18
Users Manual 9
3
Printing
This chapter describes the following typical printing operations:
• Starting, stopping, or resuming printing and viewing last printed lines
• Removing printed pages
The PARK, LOAD and the READY buttons are used for these operations, which are
described in detail in this section. For a summary of the operation of these buttons, see the
section, “Getting to Know the Printer’s Major Parts and the Control Panel,” in Chapter 2,
“Paper Handling.”
Instructions for loading and handling paper are also given in Chapter 2, “Paper Handling.”
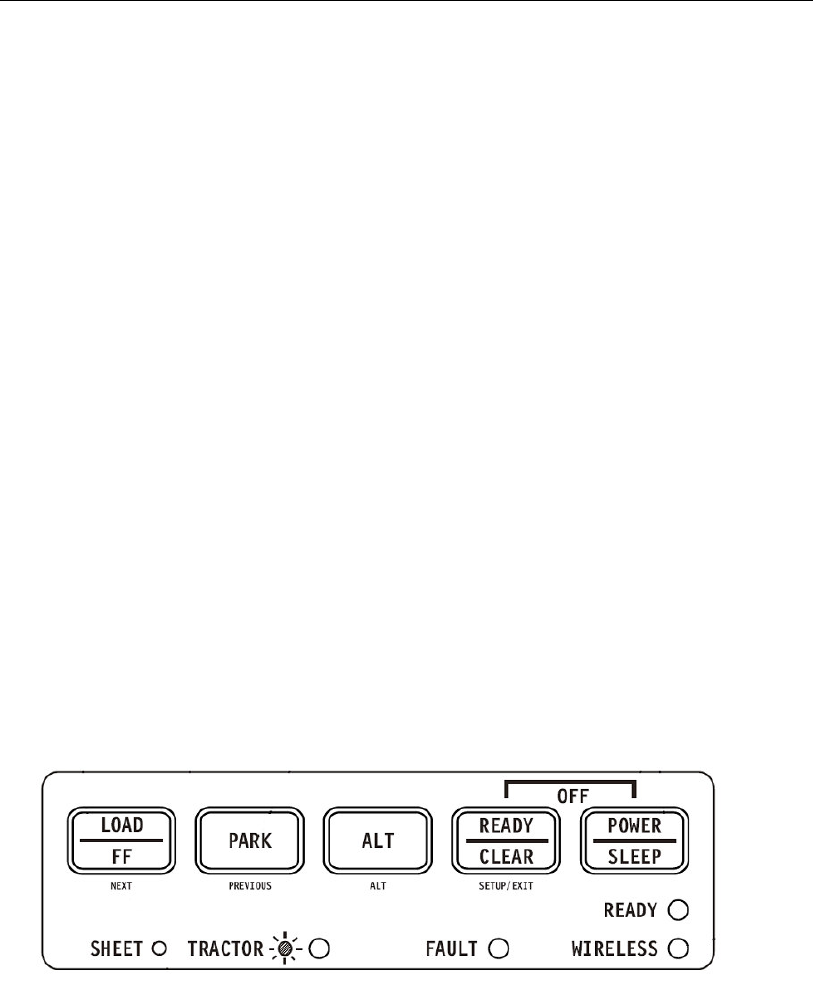
Using the Control Panel
Some print features can be selected from the control panel. These features are, two
predetermined sets (macros) of print features, and two emulations. Use the Macro, and
Emulation buttons as follows:
Printer Control Panel
Printing
3-2
Starting or Stopping Printing
Starting Printing
Before you start to print, make sure that paper is loaded. Also, verify that the Print Gap lever
is set to the appropriate position.
To start printing, make sure that the Ready indicator is lit (the printer is ready). If not so,
press the READY button to place the printer in the Ready state. Start your print job.
Stopping and Viewing Printing
To stop printing, press the READY button to place the printer in the Pause state. The printer
stops after printing the current and next lines. You can also use your software to stop printing,
but there will be a slight delay before printing stops. After the printer enters the Pause state,
it still receives data until the print buffer becomes full of new data. The data in the print buffer
will be lost if you turn the printer off.
When the printer stops printing, the paper is advanced to the viewing position so that you
can view the last printed lines. This function is valid for single sheets and continuous forms in
push-tractor feed mode.
Resuming Printing
To resume printing, press the READY button again. If the paper is advanced for viewing, it is
backed to the previous position before printing. To cancel printing, use the cancel commands
provided by your software or computer. To clear the print buffer, turn the printer off. Any data
sent to the print buffer before you canceled printing will be lost.
Resuming from a Paper-Out
The printer can “sense” when paper runs out. The printer stops printing and lights the Fault
indicator. To resume printing when paper runs out, follow the procedures described below:
1. Install paper on the forms tractor unit or on the cut sheet stand as described in
Chapter 2, “Paper Handling.”
2. To load the first sheet of paper, press the FF/LOAD button for continuous forms.
Single sheets are automatically loaded unless you change the factory setting. The
Fault indicator will turn off and the printer resumes printing.
Removing Printed Pages
This section describes the best methods for removing single sheets or continuous forms
paper after printing.
Removing Single Sheets
When you print using software, the printer automatically ejects each sheet of paper when the
end of the printed page is reached. To eject sheets manually:
• Press the FF/Load button to execute a form feed.
Printing
3-3
Note: Proper use of the Tear-off function requires the paper be positioned at Top of
Form either by software command (form Feed) or by pressing the FF/Load
button.
If you have set the TEAR option to MANUAL, use the READY button to control the Tear-Off
function.
Note: See the section, “Tearing Off Continuous Forms,” in Chapter 2, “Paper
Handling.”