ZTE VICKI Wireless Netbook User Manual 00 C DC for XP
ZTE Corporation Wireless Netbook 00 C DC for XP
ZTE >
Contents
user manual pt7
Peripherals
38
Using USB Compatible Peripherals
・Before connection, please install the driver of USB
device.
・Ensure the specific direction for plugging USB cable.
DO NOT force to plug the cable into the port.
・Plural USB ports are located in the notebook, you can
choose the port you want to use.
・If you need more USB ports, you can connect a USB
hub to increase the ports.
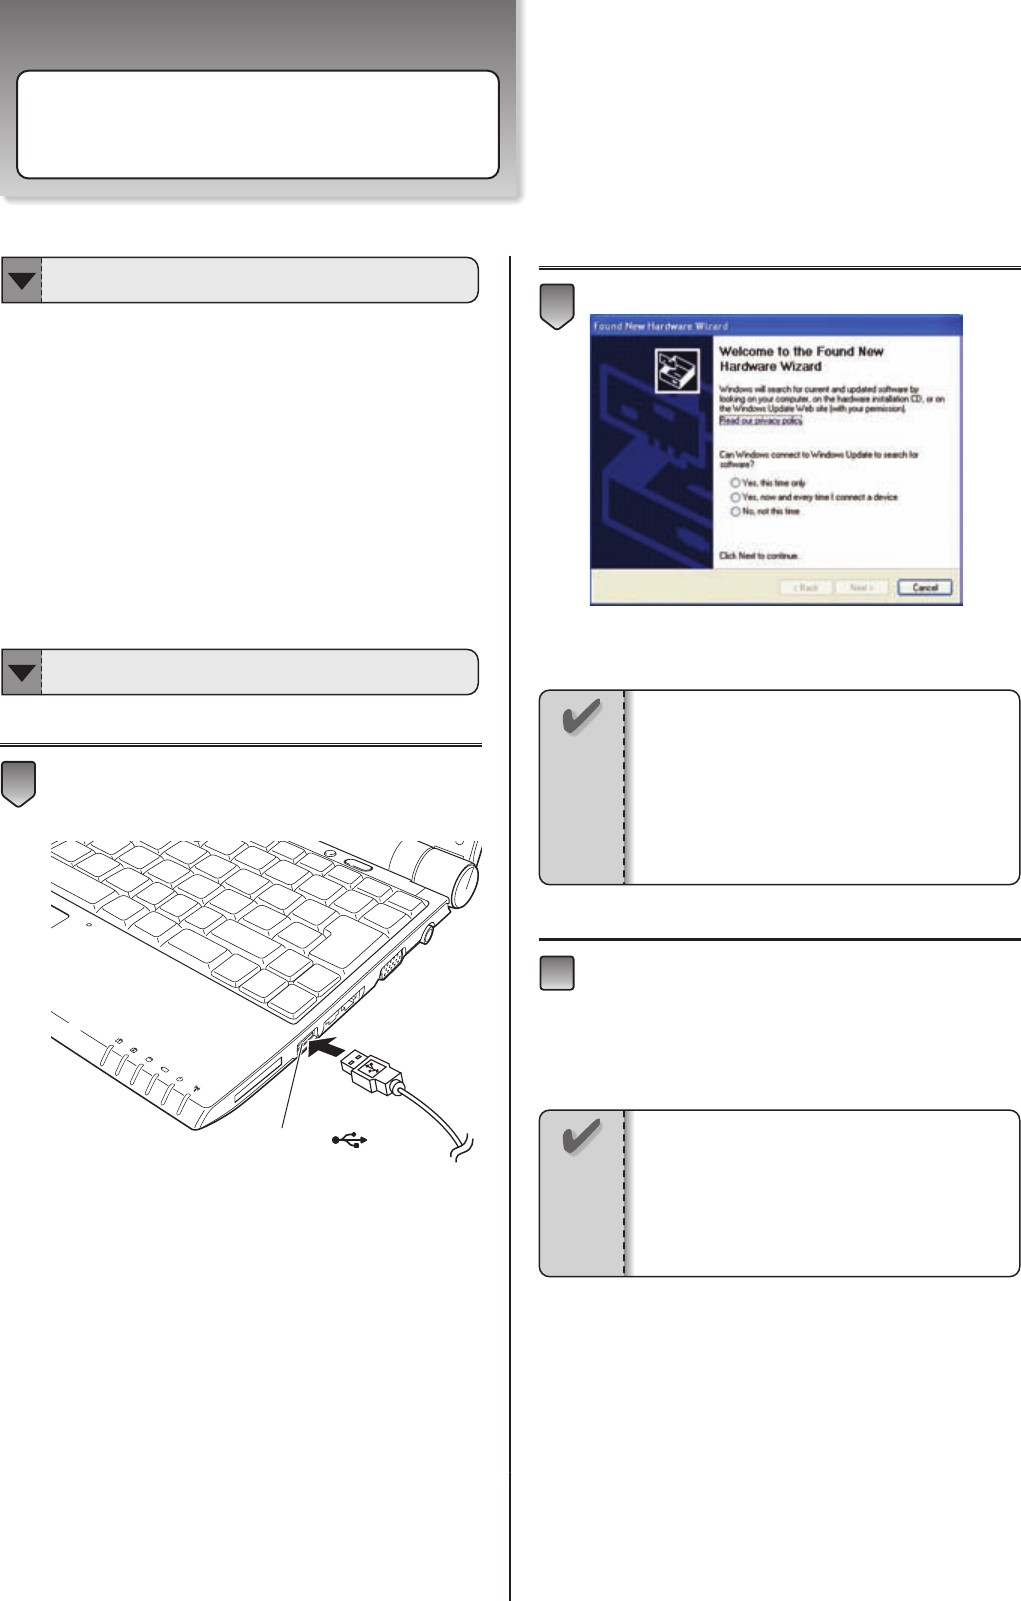
Plug the USB cable into the USB port of the
notebook.
After plugging the USB cable, the “Found New
Hardware Wizard” will appear.
Follow the instruction of the wizard until [Finish]
button appears. It means the USB connection
setting is done.
Click [Finish] button.
Depends on what USB device you connect, the
software installation may be required later.
3
2
USB Port ( )
1
Notice
・If the wizard doesn’t pop up, please unplug
the USB cable and plug it again after 3 seconds.
・The specific USB drivers is required, if it is not
built in this USB device.
Notice
・You can use the USB device immediately,
when plug it into the USB port next time.
・If the USB device is connected to the different
USB port, the “Found New Hardware Wizard”
will appear. Please follow the steps above to
do the setup again.
Must Know for USB Connection
Connecting USB Compatible Peripherals
Peripherals
39
Using Memory Card
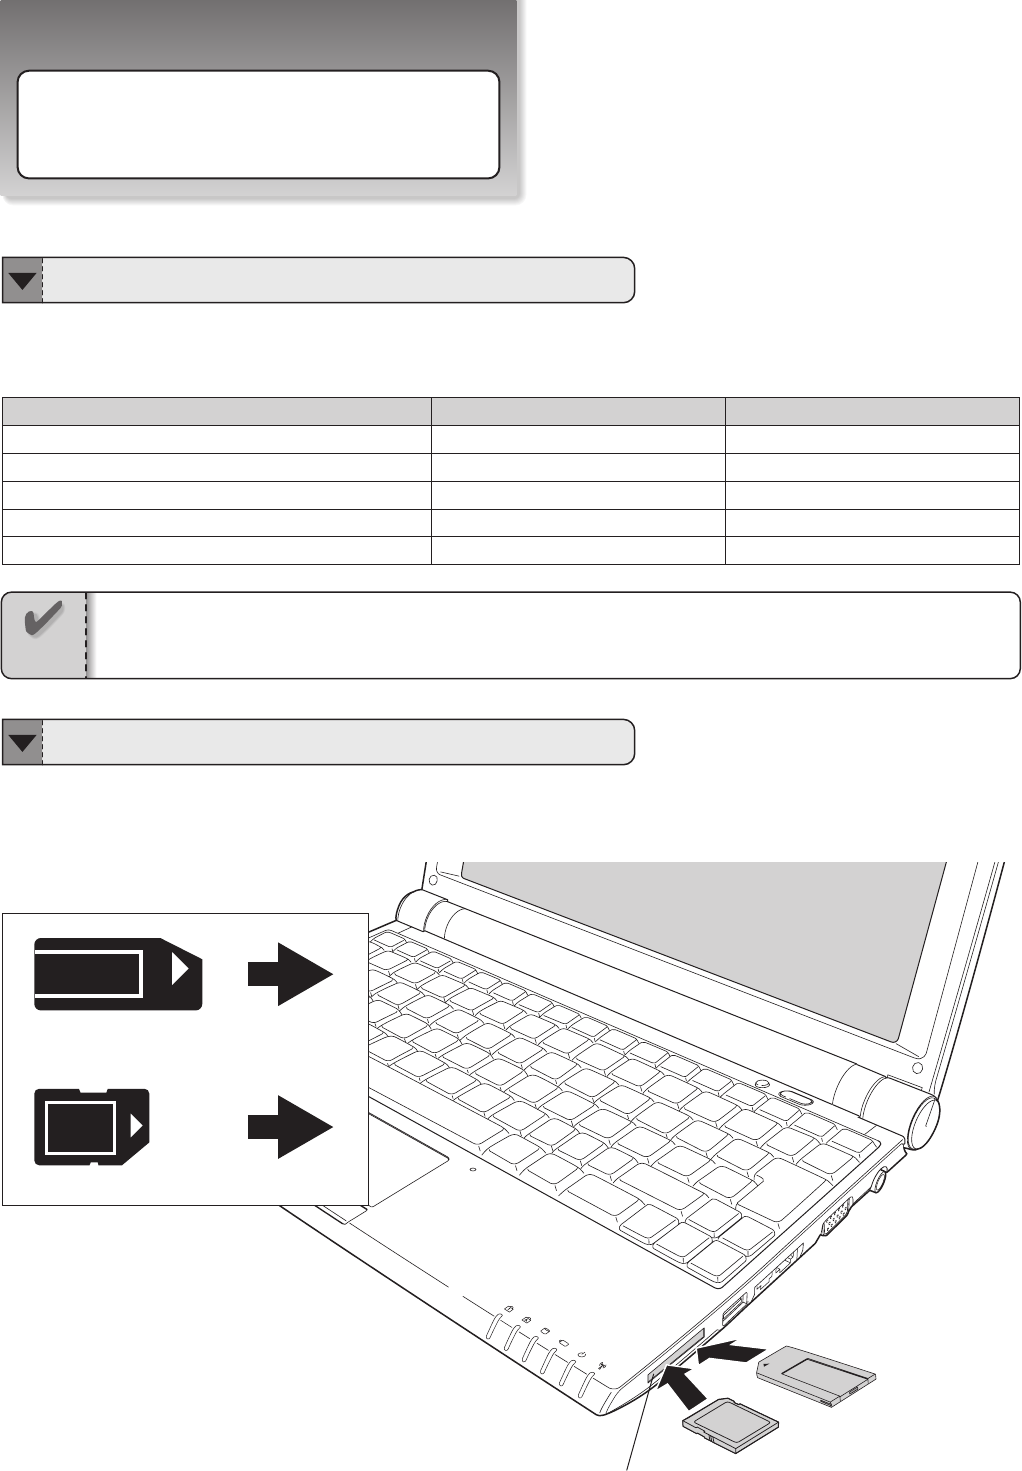
The different insert directions of memory cards are showed below.
Verifying the correct direction and inserting the card.
The following types of memory card listed below can be used on this notebook.
You can use memory cards to store or read your files.
Memory Card
SD
SDHC
MMC
Memory Stick
Memory Stick Pro
Copyright Protection
Yes
Yes
No
Yes
Yes
Erasion Prevention
Yes
Yes
No
Yes
Yes
Memory card’s insert direction
SD Card/MMC
Memory Stick
Memory Stick Pro
Memory Card Slot
Notice
・The information disclosured in this manual is based on the data collected when compiled this manual.
Type of Memory Cards
Insert Direction for Memory Cards
40
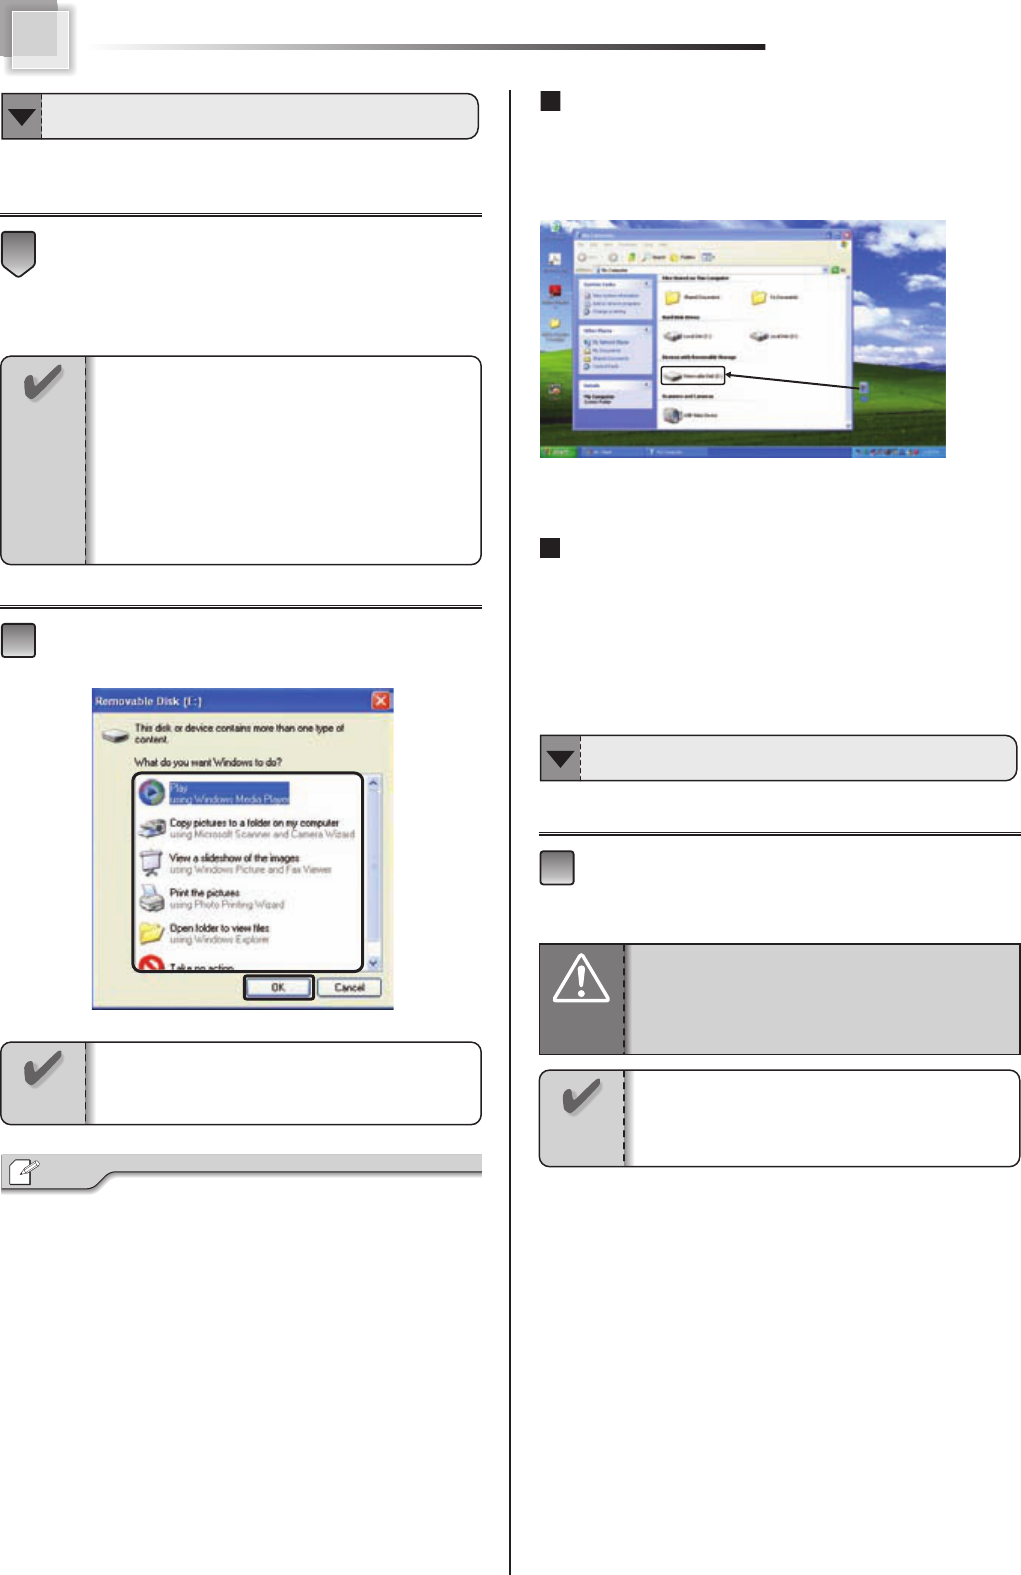
The procedures of using memory card are showed below.
Ensure the correct insert direction and insert the
card into the slot surely.
Select the action you want and click [OK].
・Click [Cancel], if you want to terminate this action.
File Copy
When the system recognize the memory card, you can drag
and drop file from the other disk to the card. The file can be
copied into the card.
About the Write-Protect Switch
There is an write-protect switch on the side of the SD card, and
the rear of the memory stick.When the switch is adjusted to the
“LOCK” position, it can prevent the data elimination or overwriting.
Before removing the memory card, please ensure
the card operation is finished (data reading and
writing has been done).
1
Tip
2
1
Inserting Memory Card
・Each kind of card has its specific insert direction.
Ensure you insert the card in right direction.
・The“miniSD card” or the “memory stick duo”
and so on which does not mentioned in the
manual, cannot be used with the notebook.
Before inserting the memory card, please verify
card types.
Notice
Depends on different cards you insert, the contents
, the contents of the dialog box can be different.
Memory Card Removal
When “Safe To Remove Hardware”icon appears,
the windows is not able to recognize the memory
card until Windows is restarted.
Attention
While using various memory cards on Windows,
please do not remove the memory card
unattentively. It is possible to damage the memory
card and the memory card slot.
Notice
Notice
Peripherals
41
Memory, is something like the desk. When the top of the desk is wide, your job is easy to do. When entire capacity of
memory is large, the operation of application software becomes smooth.
Installing Memory Module
About Memory
When the memory is small・・・
Attention
Pay attention when handling memory module
・Before installation, please turn off the notebook
・Before installation, please remove the battery
pack and AC adapter.
・Memory is the extremely weak part in static
electricity. It is possible to damage it when people
or objects touch it with static electricity. Please
remove static electricity of the body before touch
the memory.
( Page 35)
・DO NOT touch the pin of memory. It is possible
to cause memory broken by pin contact failure.
・Memory is a extremely weak part, please keep
or remove it carefully.
Work Flow for Memory Installation
● Turn off the notebook
● Remove battery pack and AC adapter
● Memory Installation(Page 42)
●Verify the memory installed(Page 43)
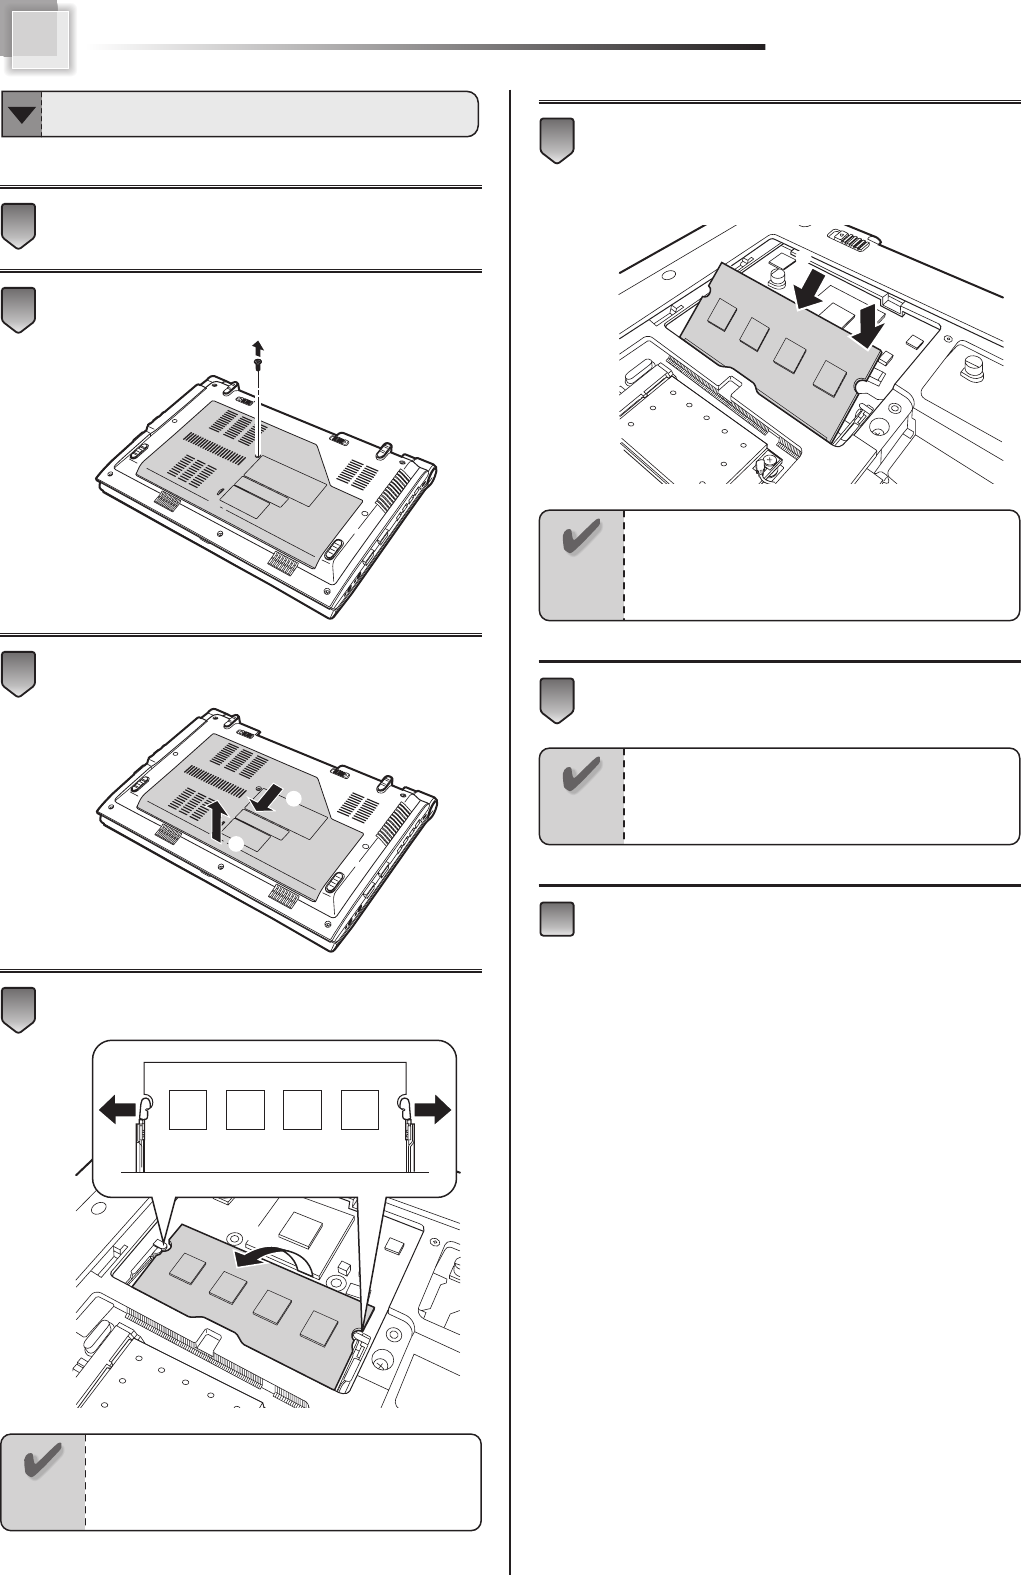
42
Close the LCD lid and turn over the notebook.
Remove the screw which locks the memory module
cover.
Slide the memory module cover forward
(①) Raise and remove the cover(②)
Open the hook which locks memory(①)
Remove memory from the memory slot (②)
Insert new memory module to the connector of the
memory slot(①)
Push down and insert the memory to the memory slot
connector until the "click" sounds.
(②)
Install the memory module cover, lock with the
screw.
Install battery pack and connect AC adapter.
7
6
①
②
5
① ①
②
4
①
②
3
2
1
Exchange Memory
Notice
・Please make sure not insert the memory in
the wrong direction.
・Please make sure the notch on memory’s lower
part is agreeable to the convex section of the slot.
Notice
Please do not break the nail on the right side of
the memory module cover surface when you install
the memory module cover.
Notice
When opening the hook, do not apply
unreasonable force and do it prudently. When
the power is applied too much, It is possible to
bend the hook.