Pioneer K031 Multi-Media AVN Navigation Server System with BT User Manual 12
Pioneer Corporation Multi-Media AVN Navigation Server System with BT 12
Pioneer >
Contents
User Manual 12
Calculating the fuel consumption
When you enter the fueling information to the
navigation system, and export the data to SD
memory cards, you can check the fuel con-
sumption information by using the utility pro-
gram AVIC FEEDS, which is available
separately, on your PC.
pUp to 24 sets of data can be stored. You
can also export the data, as described
below.
If the entries reach the maximum number,
a new entry will overwrite the oldest one.
These calculations are based only on the infor-
mation that you provide and not on any data
from the vehicle. The fuel mileage displayed is
only a reference value, and does not guarantee
the fuel mileage displayed can be obtained.
1 Display the “Navi Settings”screen.
=For details, refer to Displaying the “Navi
Settings”screen on page 148.
2 Touch [Gas Mileage].
The “Gas Mileage Setting”screen appears.
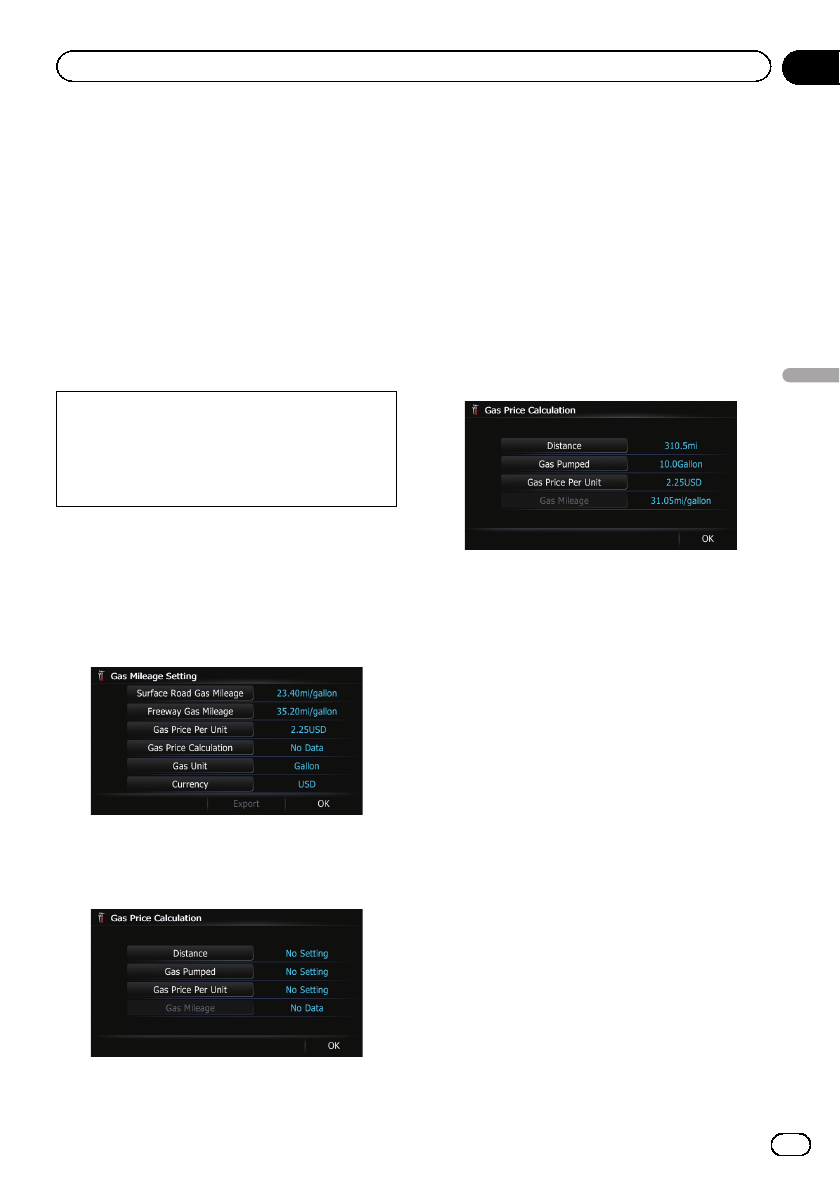
3 Touch [Gas Price Calculation].
The “Gas Price Calculation”screen appears.
4 Enter the fuel consumption informa-
tion.
Enter the following items:
!Distance:
Enter the distance traveled since the pre-
vious fueling.
pThe distance is entered automatically
only when the distance traveled since
the previous fueling is recorded.
!Gas Pumped:
Enter the amount of fuel pumped.
!Gas Price Per Unit:
Enter the fuel unit price.
When all the items are entered, the fuel con-
sumption is displayed next to “Gas Mileage”.
5 Touch [OK].
The “Gas Mileage Setting”screen appears.
Exporting the data of fuel cost
information
Exporting the fuel cost data to an SD memory
card is possible.
pThe data stored in this navigation system
will be cleared as exporting it to the SD
memory card.
pIf there is previous data in the SD memory
card, the data is overwritten with new data
when current data is exported.
1 Insert an SD memory card into the SD
card slot.
=For details of the operation, refer to Insert-
ing and ejecting an SD memory card on
page 15.
2 Display the “Navi Settings”screen.
=For details, refer to Displaying the “Navi
Settings”screen on page 148.
3 Touch [Gas Mileage].
The “Gas Mileage Setting”screen appears.
En 151
Chapter
31
Customizing preferences
Customizing preferences

4 Touch [Export].
After a message confirming whether to export
the data appeared, exporting the data to the
SD memory card starts.
The “Gas Mileage Setting”screen appears
when it is done.
Recording your travel history
Activating the track logger enables you to re-
cord your driving history (called “track log”
below). You can review the travel history later.
pIf an SD memory card is inserted into the
SD card slot, the track logs will be stored in
the SD memory card.
1 Insert an SD memory card into the SD
card slot.
=For details of the operation, refer to Insert-
ing and ejecting an SD memory card on
page 15.
2 Display the “Navi Settings”screen.
=For details, refer to Displaying the “Navi
Settings”screen on page 148.
3 Touch [Drive Log Settings].
The “Drive Log Settings”screen appears.
4 Touch [Drive Log Settings].
Each time you touch the key changes that set-
ting.
!On:
You can export your track log to the SD
memory card.
!Off (default):
You cannot export your track log to the SD
memory card.
pWhile the setting is “On”, the navigation
system continues to store the track logs in
the inserted SD memory card.
5 Touch [Type].
Each time you touch the key changes that set-
ting.
!Private (default):
Changes the track log attribute to “Private”.
!Business:
Changes the track log attribute to “Busi-
ness”.
!Other:
Changes the track log attribute to
“Other”.
Using the demonstration
guidance
This is a demonstration function for retail
stores. After a route is set, touching this key
starts the simulation of route guidance.
1 Display the “Navi Settings”screen.
=For details, refer to Displaying the “Navi
Settings”screen on page 148.
2 Touch [Demo Mode].
Each time you touch the key changes that set-
ting.
!On:
Repeats demo drive.
!Off (default):
Demo Mode is set off.
3 Display the map screen.
The demonstration guidance will begin.
Registering your home
Registering your home position saves time
and effort. Also, routes to home positions can
be calculated easily with a single touch of the
key from the “Destination Menu”. The regis-
tered home position can also be modified
later.
1 Display the “Navi Settings”screen.
=For details, refer to Displaying the “Navi
Settings”screen on page 148.
2 Touch [Set Home].
The “Set Home”screen appears.
En
152
Chapter
31 Customizing preferences
3 Touch [Home].
The “Select Search method”screen appears.
#Touch [Phone#].
When you have already registered your home,
you can edit your home number.
4 Search for a location.
=For details, refer to Chapter 6.
After searching for a point, the map of the se-
lected position is displayed.
5 Touch [OK].
The location is registered, and then the “Set
Home”screen appears.
6 Touch [OK].
The registration is completed.
Correcting the current location
Touch the screen to adjust the current position
and direction of the vehicle displayed on the
map.
1 Display the “Navi Settings”screen.
=For details, refer to Displaying the “Navi
Settings”screen on page 148.
2 Touch [Modify Current Location].
3 Scroll to the position where you want
to set, then touch [OK].
4 Touch the arrow key on the screen to
set the direction, then touch [OK].
Changing the eco-function
setting
You can change the eco-function setting.
1 Display the “Navi Settings”screen.
=For details, refer to Displaying the “Navi
Settings”screen on page 148.
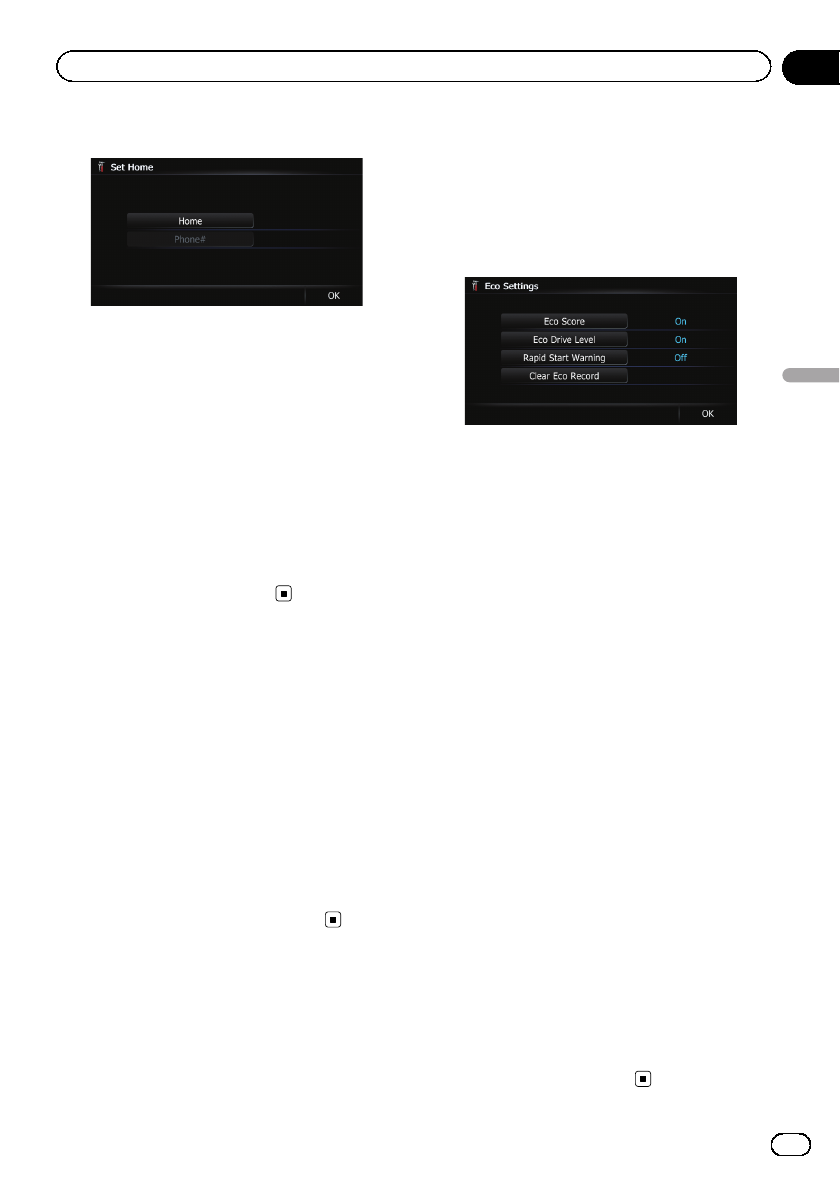
2 Touch [Eco Settings].
The “Eco Settings”screen appears.
3 Touch each item.
Eco Score
!On (default):
Displays “Eco Score”.
!Off:
Hides “Eco Score”.
=For details, refer to Displaying “Eco Graph”
on page 31.
Eco Drive Level
!On (default):
After you arrive the destination, a message
appears and a beep sounds if the level of
“Eco Drive Level”have increased or de-
creased.
!Off:
No message appears and no sound beeps
when the vehicle reaches the destination.
=For details, refer to Displaying Eco Drive
Level guidance on page 32.
Rapid Start Warning
!On:
A message appears and a sound beeps
when the vehicle experiences a sudden
start.
!Off (default):
No message appears and no sound beeps
when the vehicle experiences a sudden
start.
=For details, refer to Sudden start alert on
page 32.
Clear Eco Record
Fuel consumption data are cleared.
4 Touch [OK].
The settings are completed.
En 153
Chapter
31
Customizing preferences
Customizing preferences
Displaying the “Map
Settings”screen
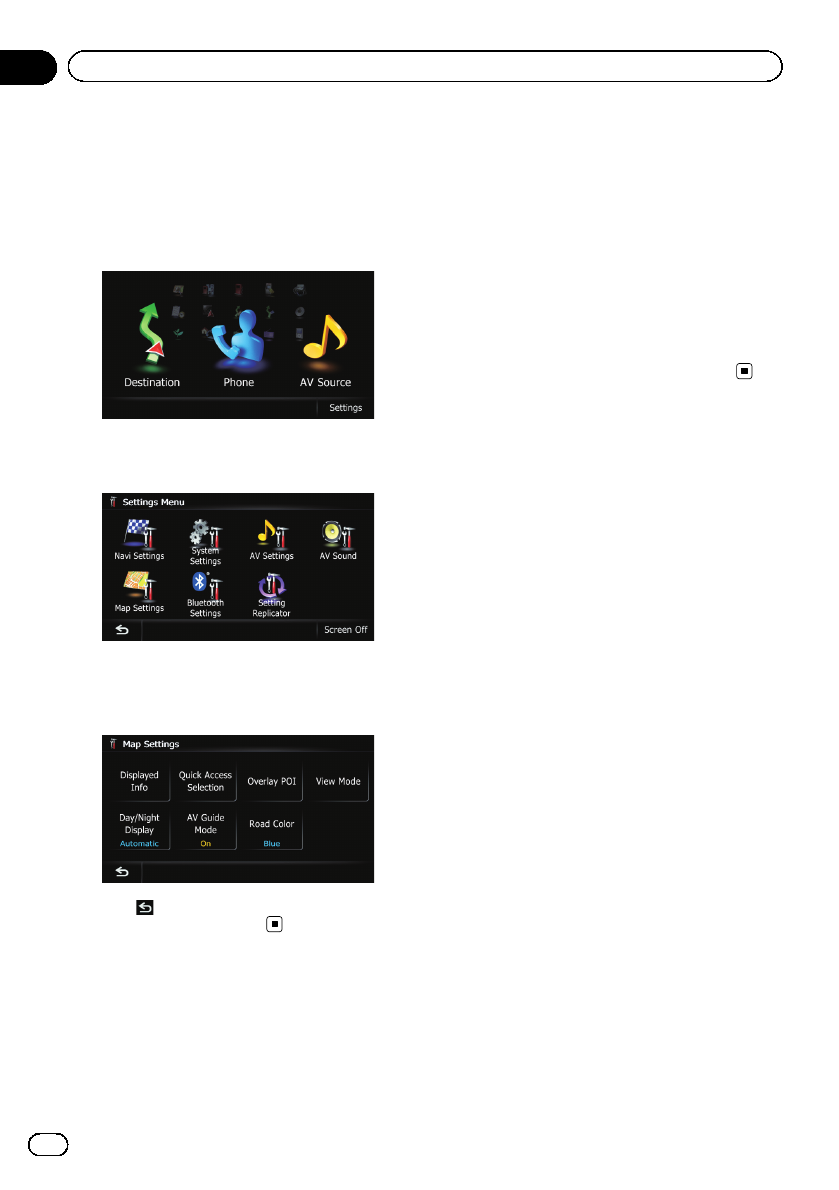
1 Press the HOME button to display the
“Top Menu”screen.
2 Touch [Settings].
The “Settings Menu”screen appears.
3 Touch [Map Settings].
The “Map Settings”screen appears.
4 Touch the item that you want to
change the setting.
#Touch .
Returns the previous screen.
Setting the auto-zoom display
This setting enables switching to an enlarged
map around the point where your vehicle is
approaching an intersection, entrance/exit of
freeway or a junction.
1 Display the “Map Settings”screen.
=For details, refer to Displaying the “Map
Settings”screen on this page.
2 Touch [Displayed Info].
The “Displayed Information”screen appears.
3 Touch [Close Up View].
Each time you touch the key changes that set-
ting.
!On (default):
Switches to an enlarged map.
!Off:
Does not switch to an enlarged map.
En
154
Chapter
31 Customizing preferences

Setting the detailed city map
You can select whether to display the city map
when in certain metropolitan city areas.
pThe detailed city map and this setting are
available for AVIC-Z120BT only.
pThe city map is displayed when the map
scale is 0.05 mile (50 meters) or less.
1 Display the “Map Settings”screen.
=For details, refer to Displaying the “Map
Settings”screen on the previous page.
2 Touch [Displayed Info].
The “Displayed Information”screen appears.
3 Touch [City Map].
Each time you touch the key changes that set-
ting.
!On (default):
Automatically switches to the city map
when in a city map area.
!Off:
Does not show the city map.
pEven if you switch “City Map”to “On”,
city map cannot be displayed in areas
where there is no city map data.
Setting the barrier graphic
for city map
On the city map screen, you can display a
“barrier graphic”pattern where no city map
data is available. This prevents a normal map
of a different scale from being displayed at the
same time, greatly enhancing the clarity of the
city map on screen.
pThe detailed city map and this setting are
available for AVIC-Z120BT only.
1 Display the “Map Settings”screen.
=For details, refer to Displaying the “Map
Settings”screen on the previous page.
2 Touch [Displayed Info].
The “Displayed Information”screen appears.
3 Touch [City Map Barrier].
Each time you touch the key switches between
“On”and “Off”.
!On (default):
Displays the barrier graphic for city map.
When the vehicle position or cursor enters
the barrier graphic area, the graphic disap-
pears and a normal map is displayed full
screen.
!Off:
Does not display the barrier graphic for city
map. When the vehicle position or cursor
enters the area where no city map data is
available, a normal map is displayed full
screen.
Displaying the traffic
notification icon
Selects whether to display or hide the traffic
notification icons on the map when incidents
occur on your route.
=For details, refer to Checking traffic informa-
tion manually on page 58.
1 Display the “Map Settings”screen.
=For details, refer to Displaying the “Map
Settings”screen on the previous page.
2 Touch [Displayed Info].
The “Displayed Information”screen appears.
3 Touch [Show Traffic Incident].
Each time you touch the key changes that set-
ting.
!View (default):
Displays the icons on the map.
!Hide:
Hides the icons on the map.
En 155
Chapter
31
Customizing preferences
Customizing preferences

Displaying the Bluetooth
connection icon
Selects whether to display or hide the icon for
current status of the phone connection via
Bluetooth wireless technology.
1 Display the “Map Settings”screen.
=For details, refer to Displaying the “Map
Settings”screen on page 154.
2 Touch [Displayed Info].
The “Displayed Information”screen appears.
3 Touch [Bluetooth Connected].
Each time you touch the key changes that set-
ting.
!View (default):
Displays the Bluetooth connection icon on
the map.
!Hide:
Hides the Bluetooth connection icon on the
map.
=For details about the Bluetooth connection
icon, refer to Bluetooth connection icon
on page 26.
Setting the current street
name display
Selects whether to display or hide the street
name (or city name) that your vehicle is travel-
ing along.
1 Display the “Map Settings”screen.
=For details, refer to Displaying the “Map
Settings”screen on page 154.
2 Touch [Displayed Info].
The “Displayed Information”screen appears.
3 Touch [Current Street Name].
Each time you touch the key changes that set-
ting.
!View (default):
Displays the street name (or city name) on
the map.
!Hide:
Hides the street name (or city name) on the
map.
Setting the “Favorites”icon
display
You can select whether to display the “Favor-
ites”icon on the map.
pFavorites icons are displayed when the
map scale is 10 mile (20 kilometers) or less.
=For details, refer to Editing the entry in the
“Favorites”list on page 46.
1 Display the “Map Settings”screen.
=For details, refer to Displaying the “Map
Settings”screen on page 154.
2 Touch [Displayed Info].
The “Displayed Information”screen appears.
3 Touch [Favorites Icon].
Each time you touch the key changes that set-
ting.
!On (default):
Displays the “Favorites”icon on the map.
!Off:
Hides the “Favorites”icon on the map.
Displaying the 3D landmarks
You can select whether to display the 3D land-
mark on the map.
pThe 3D landmarks and this setting are
available for AVIC-Z120BT only.
p3D landmark only appears when the view
mode is “3D View”and the map scale is
set to 0.25 mile (200 m) or lower.
1 Display the “Map Settings”screen.
=For details, refer to Displaying the “Map
Settings”screen on page 154.
2 Touch [Displayed Info].
The “Displayed Information”screen appears.
3 Touch [3D Land Mark].
Each time you touch the key changes that set-
ting.
!On (default):
Displays the 3D landmark on the map.
!Off:
Hides the 3D landmark on the map.
En
156
Chapter
31 Customizing preferences
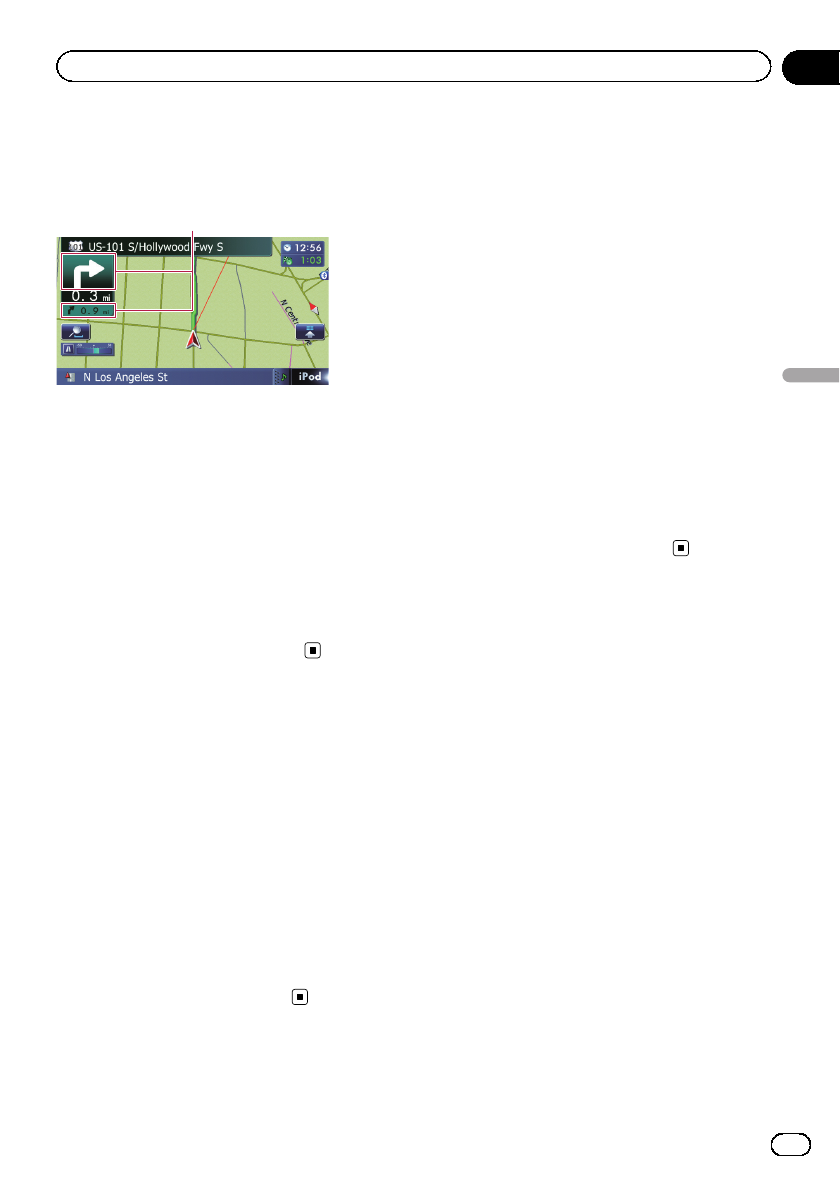
Displaying maneuvers
Selects whether to display or hide maneuvers
on the map.
Maneuvers
1 Display the “Map Settings”screen.
=For details, refer to Displaying the “Map
Settings”screen on page 154.
2 Touch [Displayed Info].
The “Displayed Information”screen appears.
3 Touch [Show Maneuver].
Each time you touch the key changes that set-
ting.
!View (default):
Displays maneuvers on the map.
!Hide:
Hides maneuvers on the map.
Displaying the MSN Direct
icons
Selects whether to display or hide the received
MSN Direct icons on the map.
=For details of the icons, refer to How to read
MSN Direct information on the map on
page 54.
%Touch [MSN Direct].
Each time you touch the key changes that set-
ting.
!On (default):
Displays the icons on the map.
!Off:
Hides the icons on the map.
Displaying the fuel
consumption information
Selects whether to display Eco-Meter, indicat-
ing the fuel consumption information, on the
map.
pEco-Meter appears when “2D View”or
“3D View”is selected.
1 Display the “Map Settings”screen.
=For details, refer to Displaying the “Map
Settings”screen on page 154.
2 Touch [Displayed Info].
The “Displayed Information”screen appears.
3 Touch [Show Eco Meter].
Each time you touch the key changes that set-
ting.
!View (default):
Displays Eco-Meter on the map.
!Hide:
Hides Eco-Meter on the map.
Displaying POI on the map
Displays icons for the surrounding facilities
(POI) on the map.
pPOI icons are not displayed when the map
scale is 0.75 mile (1 kilometers) or more.
Displaying preinstalled POIs on
the map
pYou can select up to 10 items from the sub-
categories or detailed categories.
1 Display the “Map Settings”screen.
=For details, refer to Displaying the “Map
Settings”screen on page 154.
2 Touch [Overlay POI].
The “Overlay POI”screen appears.
En 157
Chapter
31
Customizing preferences
Customizing preferences
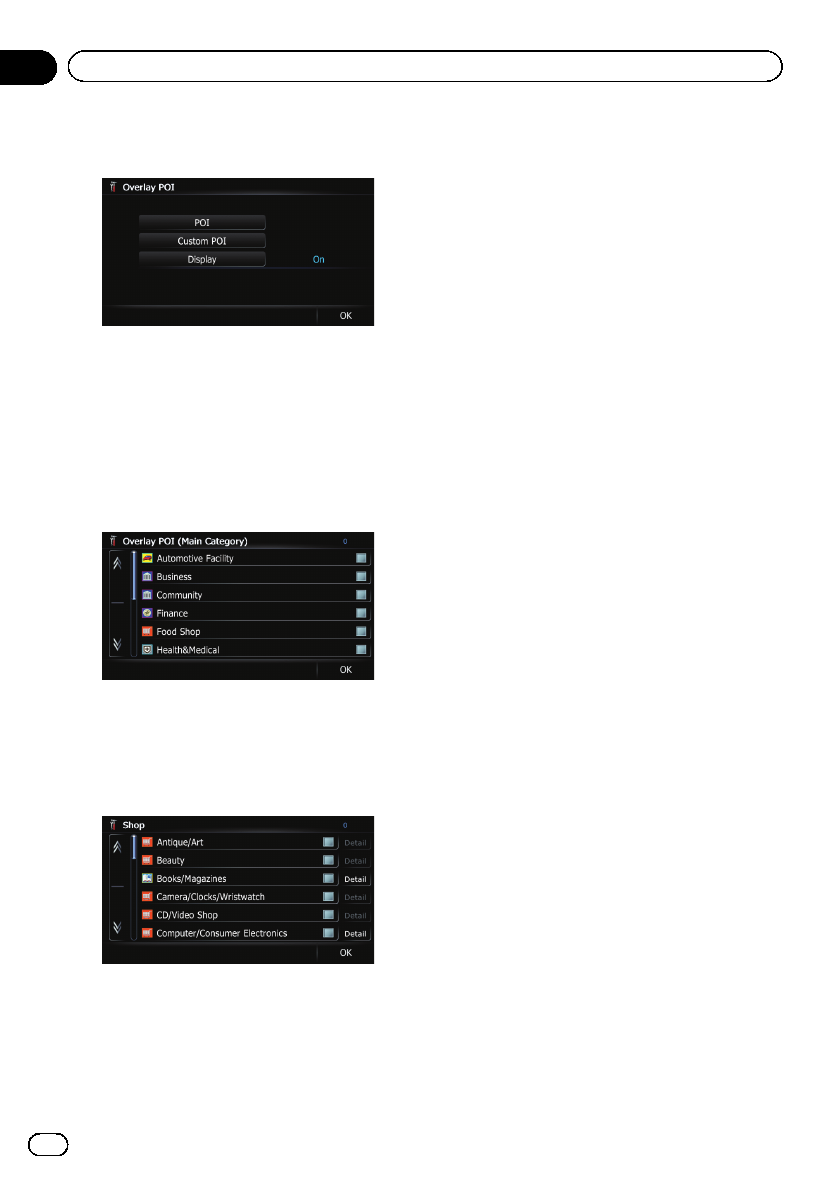
3 Touch [Display] to change the setting to
“On”.
pIf you do not want to display the POI icon
on the map, touch [Display] to turn it
“Off”. (Even if “Display”is turned “Off”,
the POI selection setting is retained.)
4 Touch [POI].
The “Overlay POI (Main Category)”screen
appears.
5 Touch the main category you want.
A list of subcategories under the selected
main category appears.
pCategories that are already selected will
have a blue check mark.
6 Touch the subcategory to display.
A red check mark appears next to the selected
category. To cancel the selection, touch the
entry again.
If there are more detailed categories within the
subcategory, [Detail] is active. If you select
the subcategory that has more detailed cate-
gories, all detailed categories within the sub-
category is selected and [Detail] becomes
inactive.
#Touch [Detail].
The detailed category list is displayed. Touch the
item and touch [OK] to complete selecting the
detailed categories you want to display.
pWhen only a few types of the detailed cate-
gories are selected, blue check marks will
appear.
7 Touch [OK].
The “Overlay POI (Main Category)”screen
returns.
If you want to select or deselect other items,
repeat these steps as many as necessary.
8 To finish the selection, touch [OK] in
the “Overlay POI (Main Category)”screen.
Displaying the customized POIs
Creating a customized POI is possible by
using the utility program AVIC FEEDS which is
available separately, on your PC. (AVIC FEEDS
will be available on our website.) Storing the
customized POI properly and inserting the SD
memory card enables the system to display
the icons on the map screen.
pYou can select up to 10 items from the sub-
categories or detailed categories.
1 Insert an SD memory card into the SD
card slot.
=For details of the operation, refer to Insert-
ing and ejecting an SD memory card on
page 15.
2 Display the “Map Settings”screen.
=For details, refer to Displaying the “Map
Settings”screen on page 154.
3 Touch [Overlay POI].
The “Overlay POI”screen appears.
En
158
Chapter
31 Customizing preferences
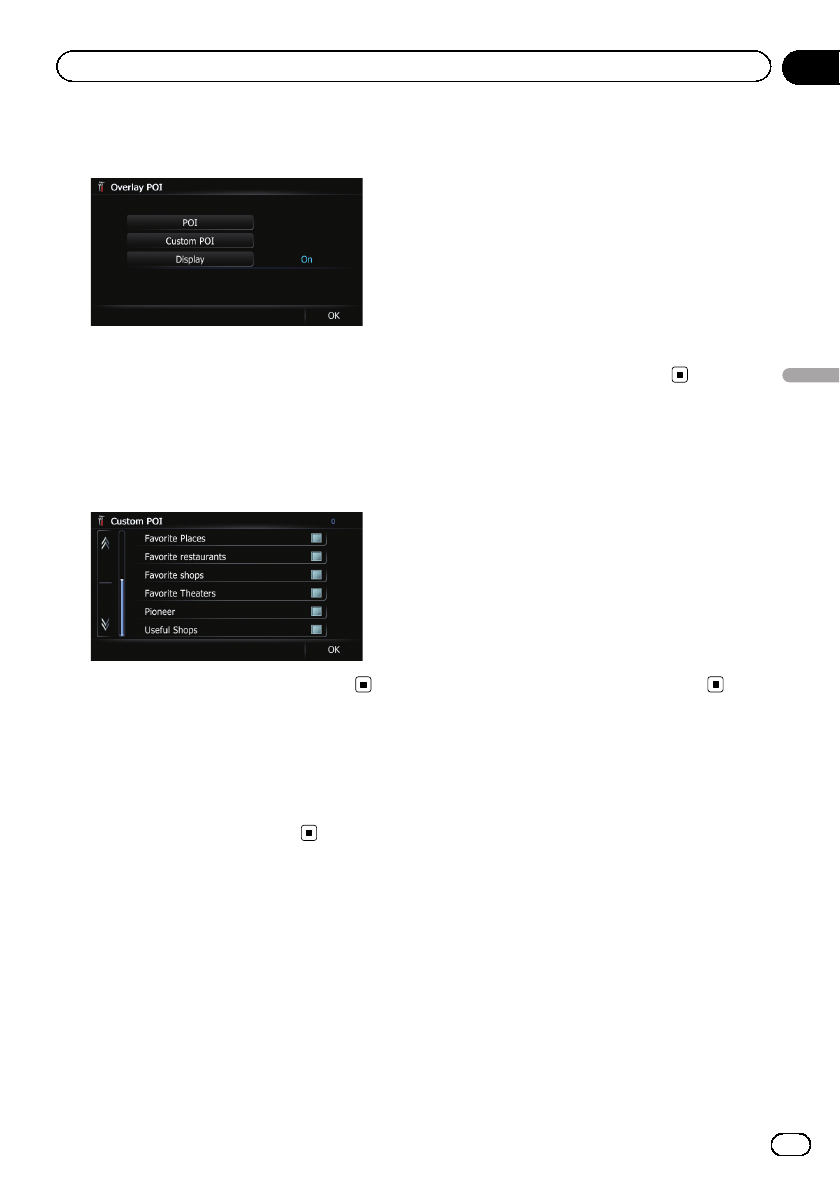
4 Touch [Display] to change the setting to
“On”.
pIf you do not want to display the POI icon
on the map, touch [Display] to turn it
“Off”. (Even if “Display”is turned “Off”,
the POI selection setting is retained.)
5 Touch [Custom POI].
The list of POI categories appears.
6 Touch the items you want to display.
7 To finish the selection, touch [OK].
Changing “View Mode”
Various types of screen displays can be se-
lected for navigation guidance.
=For details of the operation, refer to Switch-
ing the view mode on page 29.
Setting the map color change
between day and night
To improve the visibility of the map during the
evening, you can set the timing for changing
the combination of the map color.
1 Display the “Map Settings”screen.
=For details, refer to Displaying the “Map
Settings”screen on page 154.
2 Touch [Day/Night Display].
Each time you touch the key changes that set-
ting.
!Automatic (default):
You can change the colors of a map be-
tween daytime and nighttime according to
whether the vehicle lights are on or off.
!Day:
The map is always displayed with daytime
colors.
pTo use this function with “Automatic”, the
orange/white lead of the navigation system
must be connected correctly.
Changing the road color
You can set the road color to bluish or reddish.
1 Display the “Map Settings”screen.
=For details, refer to Displaying the “Map
Settings”screen on page 154.
2 Touch [Road Color].
Each time you touch the key changes that set-
ting.
!“Blue”(default):
Changes to blue based road colors.
!“Red”:
Changes to red based road colors.
En 159
Chapter
31
Customizing preferences
Customizing preferences

Changing the setting of
navigation interruption screen
Set whether to automatically switch to the na-
vigation screen from the audio screen when
your vehicle approaches a guidance point
such as an intersection while displaying a
screen other than navigation.
1 Display the “Map Settings”screen.
=For details, refer to Displaying the “Map
Settings”screen on page 154.
2 Touch [AV Guide Mode].
Each time you touch the key changes that set-
ting.
!On (default):
Switches from the AV operation screen to
the map screen.
!Off:
Does not switch the screen.
pThis setting is effective only when “Close
Up View”is set to “On”.
Selecting the “Quick Access”
menu
Select items to display on the map screen. In
the list displayed on screen, the items with red
checks are displayed on the map screen.
Touch the item you want to display and then
touch [OK] when a red check appears. You
can select up to five items.
1 Display the “Map Settings”screen.
=For details, refer to Displaying the “Map
Settings”screen on page 154.
2 Touch [Quick Access Selection].
The “Quick Access Selection”screen appears.
3 Touch the item that you want to set in
“Quick Access”.
You can select the following items:
pSettings marked with an asterisk (*) show
that these are default or factory settings.
!:Registration*
Register information on the location indi-
cated by the cursor to “Favorites”.
=For details, refer to Registering a location
by scroll mode on page 46.
!:Vicinity Search*
Find POIs (Points Of Interest) in the vicinity
of the cursor.
=For details, refer to Searching for a nearby
POI on page 37.
!:Overlay POI*
Displays icons for surrounding facilities
(POI) on the map.
=For details, refer to Displaying POI on the
map on page 157.
!:Volume*
Displays the “Volume Settings”screen.
=For details, refer to Setting the Volume
for Guidance and Phone on page 163.
!:Contacts*
Displays the “Contacts List”screen.
=For details, refer to Calling a number in
the “Contacts List”on page 69.
!:Whole Route Overview
Displays the entire route (currently set) with
the “Route Overview”screen.
=For details, refer to Displaying the
“Route Overview”screen on page 42.
!:Stock Info
Displays stock prices.
=For details, refer to Browsing stock
quotes on page 61.
!:Traffic On Route
Displays a list of traffic information on the
route.
=For details, refer to Checking traffic infor-
mation on the route on page 56.
!:Traffic Events
Displays a list of traffic events information.
=For details, refer to Checking all traffic in-
formation on page 55.
!:Day/Night Display
Switches Day/Night Display setting.
=For details, refer to Setting the map color
change between day and night on the
previous page.
!:Favorites Icon
Switches Favorites Icon setting.
En
160
Chapter
31 Customizing preferences