Pioneer K031 Multi-Media AVN Navigation Server System with BT User Manual 14
Pioneer Corporation Multi-Media AVN Navigation Server System with BT 14
Pioneer >
Contents
User Manual 14
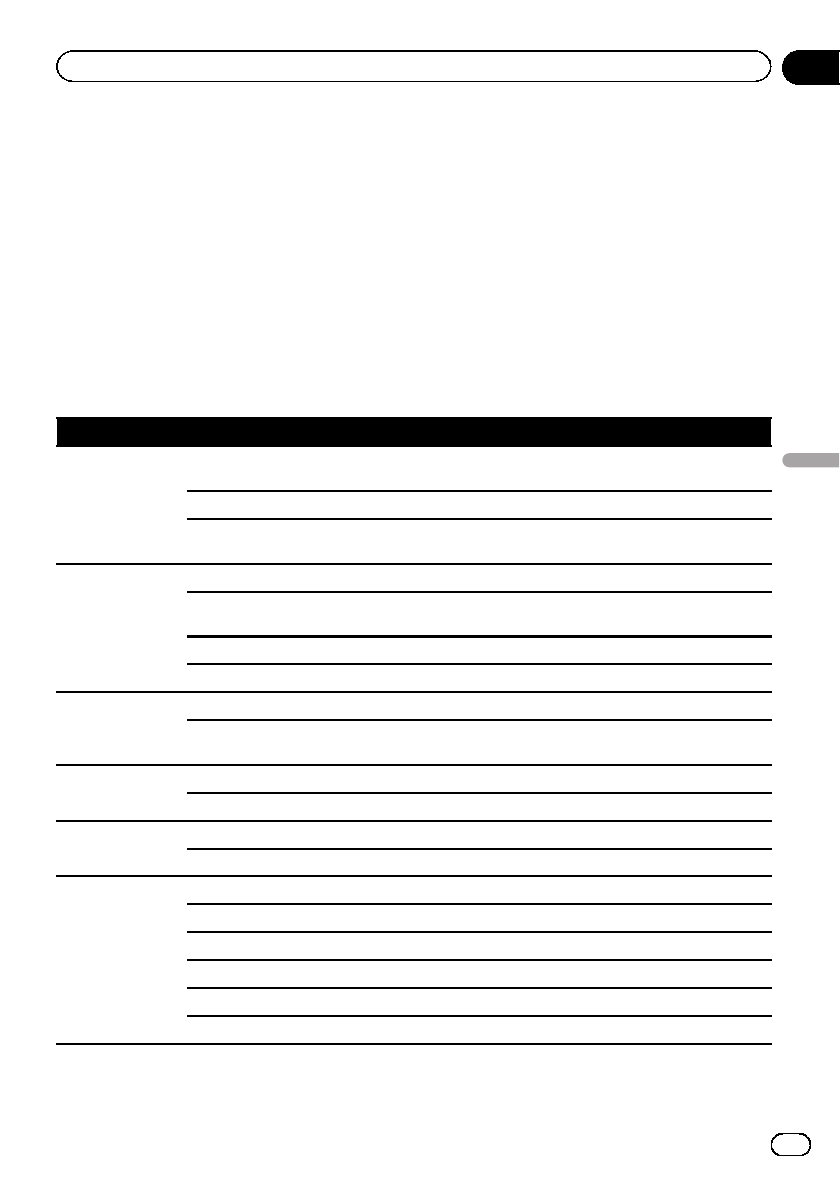
Available Basic Voice Commands
The navigation system can also recognize the words in the following list.
pTerms written in italics are voice commands.
Basic commands
Voice commands and operations
Back dThe previous screen returns.
Cancel dCancels the voice operation.
Help dOutputs the brief operating instruction by voice.
Next page,Previous page dSwitches the page.
Last page,First page dSwitches to the last or first page.
Voice operation for the iPod
For <Artist name>, <Album name>, <Playlist name>, <Genre name> shown on the following chart, say the
name their name in the iPod.
pPlayback of iPod movies is not available using voice commands.
Voice commands and operations
Shuffle play dPlays all songs randomly.
Resume dResumes the song or the video currently playing .
Pause dPauses the song or the video currently playing .
Next song dPlays the next song.
Previous song dPlays the previous song or return to the beginning of the song currently playing.
Play songs dStarts playback from the top of “Songs”.
Play artists dDisplays the artist list dSay the artist name that you want to play.
Play the artist <Artist name> dStarts playback from the top of the selected artist.
Play albums dDisplays the album list dSay the album name that you want to play.
Play the album <Album name> dStarts playback from the top of the selected album.
Play playlists dDisplays the playlist dSay the playlist that you want to play.
Play the playlist <Playlist name> dStarts playback from the top of the selected playlist.
Play genres dDisplays the genre list dSay the genre that you want to play.
Play the genre <Genre name> dStarts playback from the top of the selected genre.
Browse artists dDisplays the artist list together with sub-screen to continue the voice operation. dSay the desired
voice commands.
Browse the artist <Artist name> dDisplays the album list of the selected artist together with sub-screen to con-
tinue the voice operation. dSay the desired voice commands.
Browse albums dDisplays the album list together with sub-screen to continue the voice operation. dSay the de-
sired voice commands.
Browse the album <Album name> dDisplays the song list of the selected album together with sub-screen to con-
tinue the voice operation. dSay the desired voice commands.
En 181
Chapter
32
Operating Your Navigation System with Voice
Operating Your Navigation System with Voice
Voice commands and operations
Browse playlists dDisplays the playlist together with sub-screen to continue the voice operation. dSay the desired
voice commands.
Browse the playlist <Playlist name> dDisplays the song list of the selected playlist together with sub-screen to
continue the voice operation. dSay the desired voice commands.
Browse genre dDisplays the genre list together with sub-screen to continue the voice operation. dSay the desired
voice commands.
Browse the genre <Genre name> dDisplays the song list of the selected genre list together with sub-screen to con-
tinue the voice operation. dSay the desired voice commands.
Play more music artist dPlays the songs related to the currently playing artist.
Play more music album dPlays the songs related to the currently playing album.
Play more music genre dPlays the songs related to the currently playing genre.
Next page,Previous page dDisplays the previous or next page of the selection list. (*1)
First page,Last page dDisplays the first or last page of the the selection list. (*1)
(*1) The voice commands is available only when the selection list is displayed.
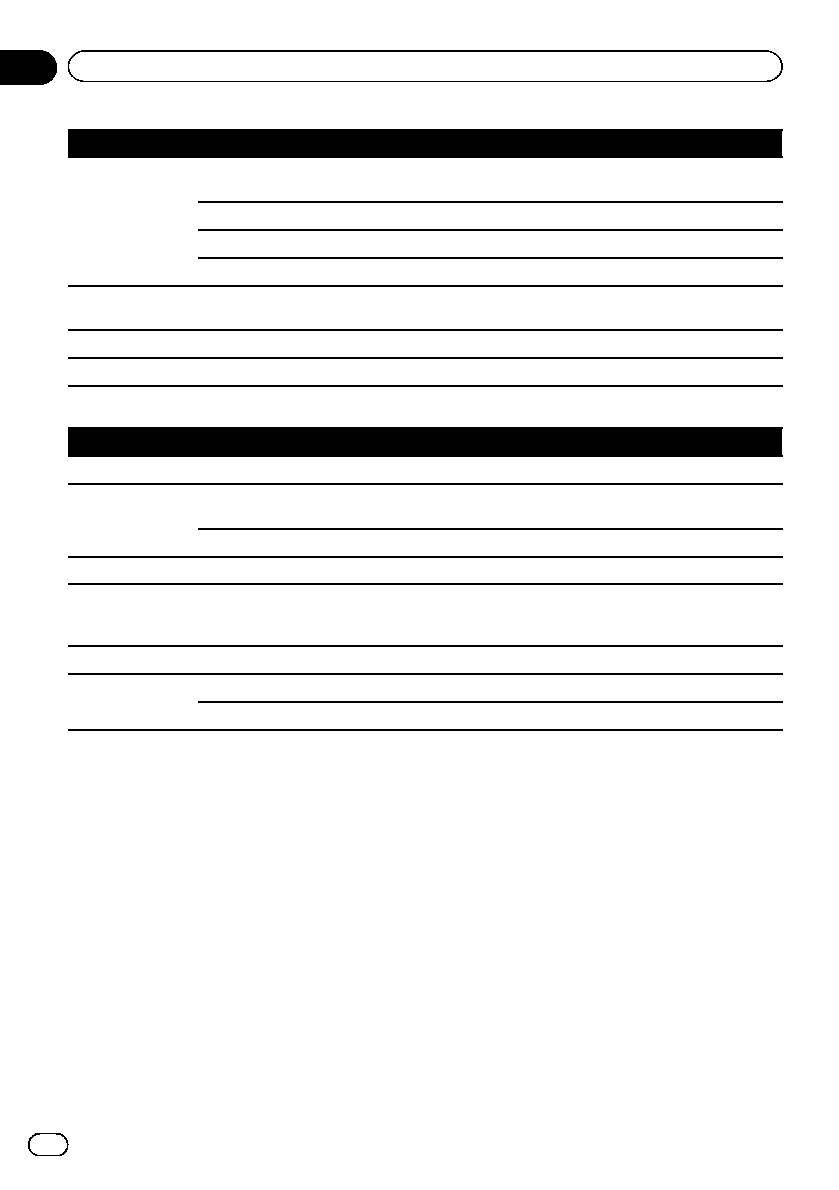
Voice operation for AV source (other than iPod)
AV source selection
Voice commands and operations
Change Source to DISC dSwitches the AV source to Disc.
Change Source to FM dSwitches the AV source to FM.
Change Source to AM dSwitches the AV source to AM.
Change Source to XM Satellite Radio dSwitches the AV source to XM.
Change Source to SIRIUS Satellite Radio dSwitches the AV source to SIRIUS.
Change Source to HD Radio dSwitches the AV source to Digital Radio.
Change Source to SD Media dSwitches the AV source to SD.
Change Source to USB dSwitches the AV source to USB.
Change Source to iPod dSwitches the AV source to iPod.
Change Source to Bluetooth Audio dSwitches the AV source to Audio.
Built-in DVD drive, external storage device (USB, SD)
Voice commands and operations
Shuffle play dPlays all songs randomly.
Pause dPauses the track or file currently playing.
Resume dResumes the track or file currently playing.
Next song dPlays the next track or file.
Previous song dPlays the previous track or file, or returns to the beginning of the track or file currently playing.
En
182
Chapter
32 Operating Your Navigation System with Voice
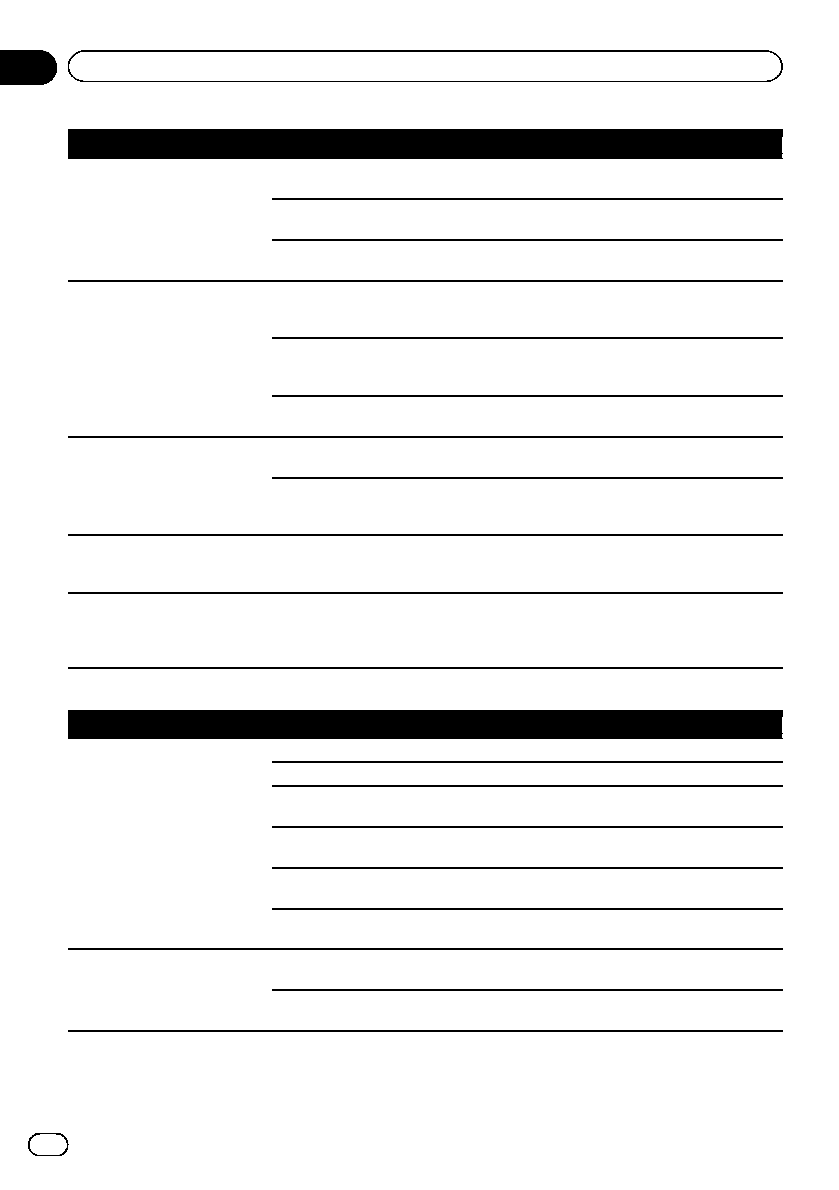
Voice commands related to hands-free phoning
pYou can make a phone call by voice dialing if the cellular phone featuring Bluetooth wireless technology is being
paired with the navigation system.
pFor <entry’s name> shown on the following chart, say the name of the entry stored in “Contacts”.
pFor <phone number> shown on the following chart, say the desired phone number.
Voice commands and operations
Call <entry’sname>dMakes a call to the entry (*2).
Call <entry’sname>general dDisplays the message confirming whether to dial dSay Yes dDials the general
phone number of the entry (*3).
Call <entry’sname>mobile dDisplays the message confirming whether to dial dSay Yes dDials the cellular
phone number of the entry (*3).
Call <entry’sname>home dDisplays the message confirming whether to dial dSay Yes dDials the home
phone number of the entry (*3).
Call <entry’sname>work dDisplays the message confirming whether to dial dSay Yes dDials the office phone
number of the entry (*3).
Call <entry’sname>other dDisplays the message confirming whether to dial dSay Yes dDials the other phone
number of the entry (*3).
Call <phone number> dDisplays the message confirming whether to dial dSay Yes dDials the phone number.
Make a call dSay the phone number you want to call dDisplays the message confirming whether to dial dSay
Yes dThe system starts dialing to the number.
Make a call dSay the name of entry stored on “Contacts”you want to call dDisplays the message confirming
whether to dial dSay Yes dThe system starts dialing to the number (*2).
List outgoing calls dDisplay the list of recent outgoing calls (“Dialed Calls”) to select the number and call (*4).
List recent calls dIncoming calls dDisplay the list of recently received calls (“Received Calls”) to select the num-
ber and call (*4).
List recent calls dOutgoing calls dDisplay the list of recent outgoing calls (“Dialed Calls”) to select the number
and call (*4).
List recent incoming calls dDisplay the list of recently received calls (“Received Calls”) to select the number and
call (*4).
Find the nearest dDisplays the category list dSay the category that you want to set to your destination dDisplays
the list of candidates with number dShow me details for <the number that you want to select>dCall dDialing
starts.
(*2) If the entry has multiple phone number data, selection list may appear. In such case, say the type of phone
number.
(*3) If there is no corresponding type on the entry, the system may suggest you other phone numbers of the entry. In
such case, say the type of phone number.
(*4) Touching the item on the screen also enables you to select the desired list.
En 183
Chapter
32
Operating Your Navigation System with Voice
Operating Your Navigation System with Voice

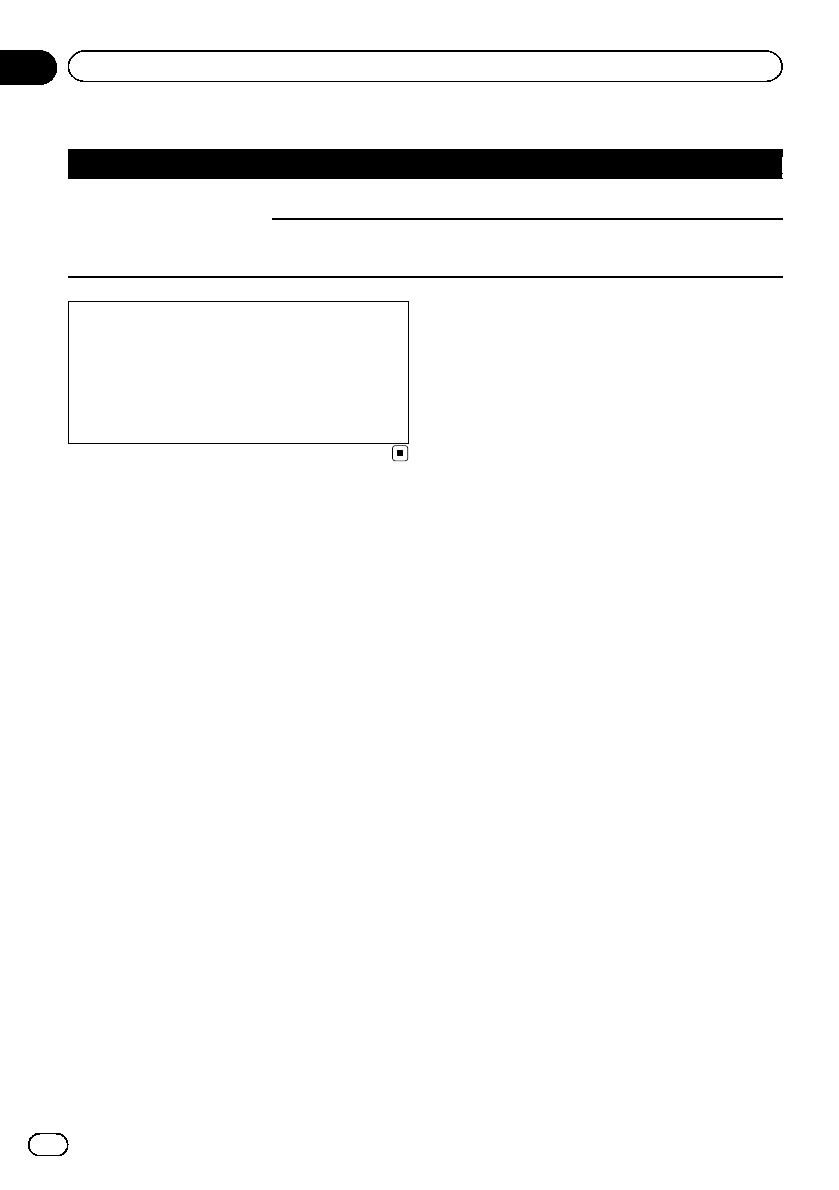
Tips for Voice Operation
For your voice commands to be correctly re-
cognized and interpreted, ensure that condi-
tions are suitable for recognition.
Close the vehicle windows
Please note that wind through the vehicle win-
dow or miscellaneous noise from outside the
vehicle can interfere with voice operation.
Position the microphone carefully
For optimum pick-up, the microphone should
be fixed at a suitable distance directly in front
of the driver.
Pause before giving a command
Speaking too soon may cause the recognition
to fail.
Pronounce your commands carefully
Speak slowly, deliberately, and clearly.
En
184
Chapter
32 Operating Your Navigation System with Voice
Setting the anti-theft function
You can set a password for the navigation sys-
tem. If the back-up lead is cut after the pass-
word is set, the navigation system prompts for
the password at the time of next boot up.
Setting the password
1 Press the HOME button to display the
“Top Menu”screen.
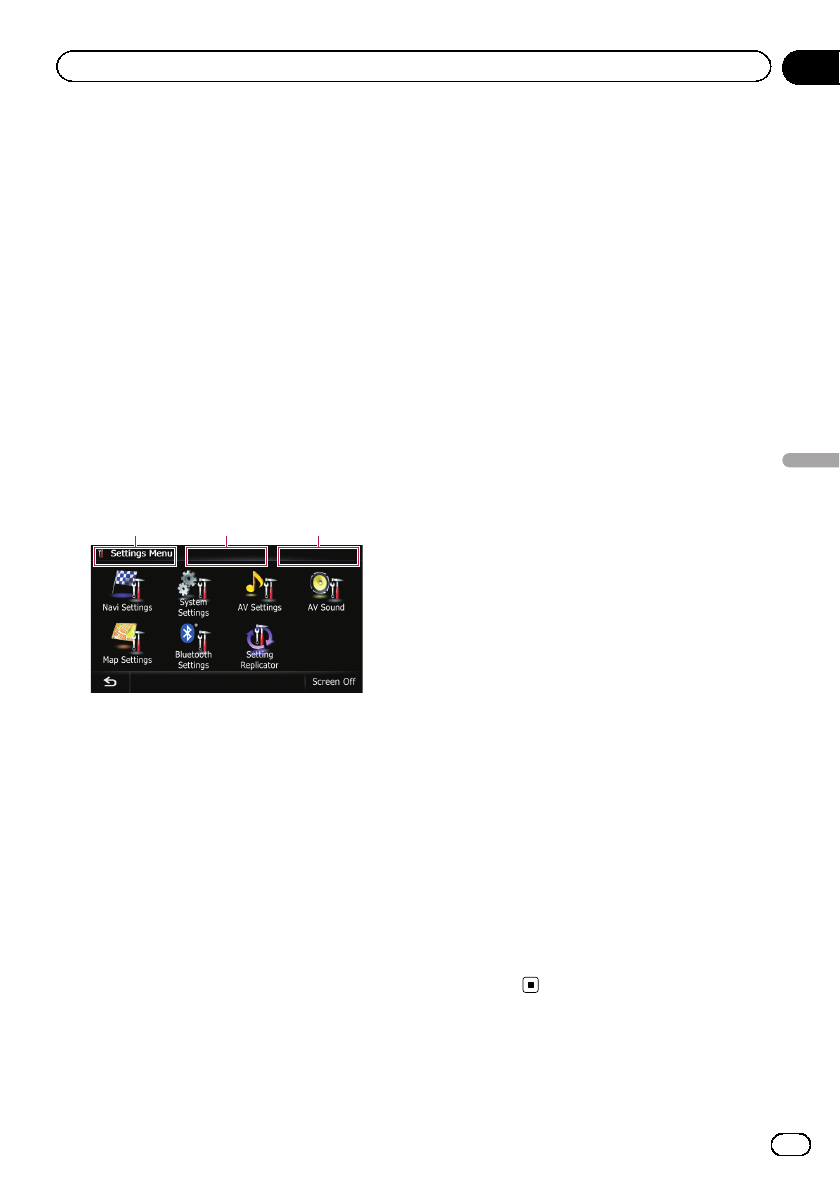
2 Touch [Settings].
The “Settings Menu”screen appears.
pThis can also be operated using the “Short-
cut Menu”screen.
3 Touch Area1, followed by Area2, and
then touch and hold Area3.
Area1 Area2 Area3
4 Touch [Set Password].
The password setting screen appears.
5 Enter the password you want to set.
p5 to 16 characters can be entered for a
password.
6 Touch [OK].
7 Reenter the password to confirm the
setting.
8 Touch [OK].
Password protection is applied.
pIf you want to change the password cur-
rently set, enter the current password and
then enter the new one.
Entering the password
On the password input screen, you must enter
the current password. If you enter an incorrect
password three times, the screen is locked
and operations using touch panel keys are dis-
abled.
1 Enter the password.
2 Touch [OK].
The message “The unit has been locked be-
cause an invalid password was entered
three times. Turn ACC off and on, and
enter your password.”appears if you entered
the correct password and the navigation sys-
tem is unlocking.
Deleting the password
The current password can be deleted.
1 Press the HOME button to display the
“Top Menu”screen.
2 Touch [Settings] on the “Top Menu”.
3 Touch Area1, followed by Area2, and
then touch and hold Area3.
4 Touch [Clear password].
The password setting screen appears.
5 Enter the current password.
6 Touch [OK].
7 Touch [Yes].
The message for deletion appears and then
the current password is deleted.
Forgotten password
Contact the nearest authorized Pioneer Ser-
vice Station.
En 185
Chapter
33
Other functions
Other functions

Returning the navigation
system to the default or
factory settings
You can return settings or recorded content to
the default or factory settings. There are some
methods to clear user data, and the situations
and the cleared content are different for each
method. For information regarding the content
that is cleared by each method, see the list
presented later.
Method 1: Remove the vehicle battery
This transforms the system into the same
state as when the navigation system is unin-
stalled.
Method 2: Restore Factory Settings
This clears some items in the “Navi Settings”
menu.
=For details, refer to Restore Factory Set-
tings on page 188.
Method 3: Touch [Clear user information]
on the “Select Items to Reset”screen.
=For details, refer to Displaying the “Select
Items to Reset”screen on page 188.
Method 4: Touch [Reset] on the “Select
Items to Reset”screen.
=For details, refer to Displaying the “Select
Items to Reset”screen on page 188.
En
186
Chapter
33 Other functions
Setting items to be deleted
The items to be deleted vary depending on the
reset method. The items listed in the following
table return to the default or factory settings.
pAlmost all items not listed below will be re-
tained. However, some of the items to be re-
turned to their default values are not listed
if the setting value can be easily recovered
by user, such as the last map scale, the last
status of AV operation screen, etc.
—: The setting will be retained.
1: The setting will be cleared and returned to
the default or factory settings.
Navigation functions Method 1 Method 2 Method 3 Method 4
Map function
View mode and scale setting on
the map
——11
Direction of the map ——11
Last cursor position on the map
screen
—111
Route Setting
Current route 1—11
Guidance state of the current
route
——11
Vehicle position information ——11
Options —111
Others
Keyboard —111
Learnt data used in Learning
Route 1—11
Destination Point registered in Favorites ——1—
History ——1—
Map Settings View Mode ——11
Other settings —111
Navi Settings
3D Calibration Status ————
Drive Log Settings ——1—
Demo Mode 1111
Set Home ——1—
Modify Current Location ——11
Other settings —111
En 187
Chapter
33
Other functions
Other functions
Navigation functions Method 1 Method 2 Method 3 Method 4
System Settings
Program Language,Voice
Language ——11
Time ——11
Back Camera 1———
Other settings —111
Bluetooth Set-
tings All settings (*1) —111
Phone Menu All settings (*1) —111
Other functions Anti-theft password ————
(*1) All stored data of 5 users is deleted.
AV functions Method 1 Method 2 Method 3 Method 4
Volume 1———
AV Settings
Wide Mode,Mute,VR Cata-
log Menu —111
Other settings 1———
AV Sound All settings 1———
CD,ROM,DVD-V,
DivX,FM,AM,
Audio
All settings (*2) 1———
SD,USB All settings (*2) 1—1—
Other functions
Picture Adjustment 1———
Tilt 1———
(*2) All settings including the setting on the “Function”menu are deleted.
Restore Factory Settings
pBe sure to read “Setting items to be deleted”
before you perform this operation.
1 Display the “System Settings”screen.
=For details, refer to Displaying the “System
Settings”screen on page 161.
2 Touch [Restore Factory Settings].
The message confirming whether to restore
the settings appears.
3 Touch [Yes].
Displaying the “Select Items to
Reset”screen
pBe sure to read “Setting items to be deleted”
before you perform this operation.
1 Park your vehicle in a safe place and
apply the parking brake.
2 Turn the ignition switch off and back
on.
The navigation system restarts, and the splash
screen appears.
En
188
Chapter
33 Other functions

3 Press and hold the MODE button and
the TRK (c) button while splash screen ap-
pears.
pFor users of AVIC-Z120BT, press the MODE
button and the TRK (m) button.
The “Select Items to Reset”screen appears.
4 Touch [Clear user information] or
[Reset].
The message confirming whether to erase the
data appears.
5 Touch [Yes].
The recorded contents are cleared.
En 189
Chapter
33
Other functions
Other functions

Troubleshooting
If you have problems operating your navigation system, refer to this section. The most common
problems are listed below, along with likely causes and solutions. If a solution to your problem
cannot be found here, contact your dealer or the nearest authorized Pioneer service facility.
Problems with the navigation screen
Symptom Cause Action (Reference)
The power doesn’t turn on. The
navigation system doesn’t oper-
ate.
Leads and connectors are incor-
rectly connected.
Confirm once more that all connections are
correct.
The fuse is blown. Rectify the reason for the fuse blowing, then
replace the fuse. Be very sure to install a cor-
rect fuse with the same rating.
Noise and other factors are causing
the built-in microprocessor to oper-
ate incorrectly.
Park your vehicle in a safe place, and turn off
the engine. Turn the ignition key back to Acc
off. Then start the engine again, and turn the
power to the navigation system back on.
You cannot position your vehicle
on the map without a significant
positioning error.
The GPS antenna is in an unsuitable
location.
The quality of signals from the GPS satellites
is poor, causing reduced positioning accu-
racy. Check the GPS signal reception and the
position of the GPS antenna if necessary.
Obstacles are blocking signals from
the satellites.
The quality of signals from the GPS satellites
is poor, causing reduced positioning accu-
racy. Check the GPS signal reception and the
position of the GPS antenna if necessary, or
continue driving until reception improves.
Keep the antenna clear.
The position of satellites relative to
your vehicle is inadequate.
The quality of signals from the GPS satellites
is poor, causing reduced positioning accu-
racy. Continue driving until reception im-
proves.
Signals from the GPS satellites have
been modified to reduce accuracy.
(GPS satellites are operated by the
US Department of Defense, and the
US government reserves the right to
distort positioning data for military
reasons. This may lead to greater
positioning errors.)
The quality of signals from the GPS satellites
is poor, causing reduced positioning accu-
racy. Wait until reception improves.
If a vehicle phone or cellular phone
is used near the GPS antenna, GPS
reception may be lost temporarily.
The quality of signals from the GPS satellites
is poor, causing reduced positioning accu-
racy. When using a cellular phone, keep the
antenna of the cellular phone away from the
GPS antenna.
En
190
Appendix
Appendix

Symptom Cause Action (Reference)
You cannot position your vehicle
on the map without a significant
positioning error.
Something covers the GPS antenna. Do not cover the GPS antenna with spray
paint or vehicle wax, because this may block
the reception of GPS signals. Snow buildup
can also degrade the signals.
Signals from the vehicle’s speed
pulse are not being picked up prop-
erly.
Check that the cables are properly connected.
If necessary, consult the dealer that installed
the system.
The navigation system may not be
mounted securely in your vehicle.
Check that the navigation system is securely
mounted and, if necessary, consult the dealer
that installed the system.
The navigation system is installed
with an extreme angle exceeding
the installation angle limitations.
Confirm the installation angle. (The naviga-
tion system must be installed within the al-
lowed installation angle. For details, refer to
Installation Manual.)
Indication of the position of your ve-
hicle is misaligned after a U-turn or
reversing.
Check whether or not the reverse gear signal
input lead (violet) is connected properly. (The
navigation system works properly without the
lead connected, but positioning accuracy will
be adversely affected.)
“Eco Graph”is not available. The navigation system is unable to
obtain past average fuel mileage
data, so “Eco Graph”cannot be dis-
played.
Drive about 6 miles (10 km) on a road without
obstructions. Then park your vehicle in a safe
place, turn off the navigation system and turn
the power to the navigation system back on.
The map color does not switch
automatically between daytime
and nighttime.
“Day/Night Display”is set to
“Day”.
Check “Day/Night Display”setting and
make sure “Automatic”is selected. (Page
159)
The orange/white lead is not con-
nected.
Check the connection.
The screen is too bright. Picture quality adjustment of the
display is not correct.
Adjust the picture quality. (Page 167)
The display is very dim. The vehicle’s light is turned ON, and
“Automatic”is selected on “Day/
Night Display”.
Read about “Day/Night Display”setting
and, if desired, select “Day”. (Page 159)
Picture quality adjustment of the
display is not correct.
Adjust the picture quality. (Page 167)
No sounds of AV source are pro-
duced.
The volume level will not rise.
The volume level is low. Adjust the volume level.
The attenuator or mute is on. Turn the attenuator or mute off.
A speaker lead is disconnected. Check the connection.
The volume of navigation gui-
dance and beeps cannot be ad-
justed.
VOL (+/–) button is used to adjust
the volume.
Turn the volume up or down using [Volume]
on the “System Settings”menu. (Page 163)
The person on the other end of
the phone call cannot hear the
conversation due to an echo.
The voice from the person on the
other end of the phone call is output
from the speakers and then picked
up by the microphone again, creat-
ing an echo.
Use the following methods to reduce the
echo:
—Lower the volume on the receiver
—Have both parties pause slightly before
speaking
En 191
Appendix
Appendix
Appendix
Symptom Cause Action (Reference)
There’s no picture. The parking brake cord is not con-
nected.
Connect the parking brake cord, and apply
the parking brake.
The parking brake is not applied. Connect the parking brake cord, and apply
the parking brake.
The backlight of the LCD panel is
turned off.
Turn on the backlight. (Page 177)
Rear display picture disappears. The source disc being listened to in
the navigation system has been
ejected.
Before ejecting the disc, switch the source.
This problem may occur when certain con-
nection methods are used.
There is a problem with the “Rear
display”, for example a faulty wiring
connection.
Check the “Rear display”and its connection.
An AV source that cannot output to
the rear display is selected.
Select an appropriate AV source.
Nothing is displayed and the
touch panel keys cannot be
used.
The setting for the rear view camera
is incorrect.
Select the appropriate setting for the rear
view camera.
The shift lever was placed in [R]
when the rear view camera was not
connected.
Select the correct polarity setting for “Back
Camera”. (Page 164)
There is no response when the
touch panel keys are touched, or
a different key responds.
The touch panel keys deviate from
the actual positions that respond to
your touch for some reason.
Perform touch panel calibration. (Page 165)
The external storage device
(USB, SD) cannot be used.
The USB storage device has been
removed immediately after plugging
it.
Park your vehicle in a safe place, and turn off
the engine. Turn the ignition key back to Acc
off. Then start the engine again, and turn the
power to the navigation system back on.
Problems in the AV screen
Symptom Cause Action (Reference)
CD or DVD playback is not pos-
sible.
The disc is inserted upside down. Insert the disc with the label upward.
The disc is dirty. Clean the disc.
The disc is cracked or otherwise da-
maged.
Insert a normal, round disc.
The files on the disc are an irregular
file format.
Check the file format.
The disc format cannot be played
back.
Replace the disc.
The loaded disc is a type this system
cannot play.
Check what type of disc it is. (Page 205)
The screen is covered by a cau-
tion message and the video can-
not be shown.
The parking brake lead is not con-
nected or applied.
Connect the parking brake lead correctly, and
apply the parking brake.
The parking brake interlock is acti-
vated.
Park your vehicle in a safe place and apply
the parking brake.
En
192
Appendix
Appendix

Symptom Cause Action (Reference)
No video output from connected
equipment.
No video output from connected
iPod.
“AV1 Input”or “AV2 Input”setting
is incorrect.
Correct the settings. (Page 145)
The connection of the USB interface
cable for iPod is incorrect.
Connect both the USB plug and the RCA
cable side. (If only one of these connection
has been made, the iPod will not work prop-
erly.) (Page 19)
The audio or video skips. The navigation system is not firmly
secured.
Secure the navigation system firmly.
No sounds are produced.
The volume level will not rise.
Cables are not connected correctly. Connect the cables correctly.
The system is performing still, slow
motion, or frame-by-frame playback
with DVD-Video.
There is no sound during still, slow motion, or
frame-by-frame playback with DVD-Video.
The system is paused or performing,
fast reverse or forward during the
disc playback.
For the media other than music CD (CD-DA),
there is no sound on fast reverse or forward.
The icon 9is displayed, and op-
eration is not possible.
The operation is not compatible
with the video configuration.
This operation is not possible. (For example,
the DVD playing does not feature that angle,
audio system, subtitle language, etc.)
The picture stops (pauses) and
the navigation system cannot be
operated.
The reading of data is impossible
during disc playback.
After touching gonce, start playback once
more.
The picture is stretched, with in-
correct aspect ratio.
The aspect setting is incorrect for
the display.
Select the appropriate setting for that image.
(Page 169, Page 107)
A parental lock message is dis-
played and DVD playback is not
possible.
Parental lock is on. Turn parental lock off or change the level.
(Page 108)
Parental lock for DVD playback
cannot be canceled.
The code number is incorrect. Input the correct code number. (Page 108)
Playback is not with the audio
language and subtitle language
settings selected in “DVD/
DivX® Setup”.
The DVD playing does not feature
dialog or subtitles in the language
selected in “DVD/DivX® Setup”.
Switching to a selected language is not possi-
ble if the language selected in “DVD/DivX®
Setup”is not recorded on the disc. (Page
107)
The picture is extremely unclear/
distorted and dark during play-
back.
The disc features a signal to prohibit
copying. (Some discs may have
this.)
Since the navigation system is compatible
with the copy guard analog copy protect sys-
tem, the picture may suffer from horizontal
stripes or other imperfections when a disc
with that kind of protection signal is viewed
on some displays. This does not mean the na-
vigation system is malfunctioning.
iPod cannot be operated. The iPod is frozen. !Reconnect the iPod with the USB interface
cable for iPod.
!Update the iPod software version.
An error has occurred. !Reconnect the iPod with the USB interface
cable for iPod.
!Park your vehicle in a safe place, and turn
off the engine. Turn the ignition key back to
Acc off. Then start the engine again, and turn
the power to the navigation system back on.
!Update the iPod software version.
En 193
Appendix
Appendix
Appendix
Problems with the phone screen
Symptom Cause Action (Reference)
Dialing is not possible because
the touch panel keys for dialing
are inactive.
Your phone is out of range for ser-
vice.
Retry after re-entering the range for service.
The connection between the cellular
phone and the navigation system
cannot be established now.
Perform the connection process.
If the screen becomes frozen...
Park your vehicle in a safe place, and turn off
the engine. Turn the ignition key back to Acc
off. Then start the engine again, and turn the
power to the navigation system back on.
En
194
Appendix
Appendix
Messages and how to react to them
The following messages may be displayed by your navigation system. Refer to the table below to
identify the problem, then take the suggested corrective action.
There are occasions when you may see error messages other than those shown here. In such a
case, follow the instructions given on the display.
Messages for navigation functions
Message Cause Action (Reference)
System detected improper
connection of Parking Brake
lead. Please check your con-
figuration for safety. Please
see Operation Manual for
more information regarding
safe operation.
Parking brake lead is incorrectly
connected.
Confirm once more that their connections are
correct.
Route calculation was not
possible.
Route calculation has failed be-
cause of a malfunction in map data,
software, or hardware.
!Change the destination.
!Consult the Pioneer Local dealer if this mes-
sage persists.
Route calculation not possi-
ble. Destination too far.
The destination is too far. Set a destination closer to the starting point.
Route calculation not possi-
ble. Destination too close.
The destination is too close. Set a destination farther from the starting
point.
Route calculation not possi-
ble. Navigation cannot be
provided around destination
or starting point.
The destination, waypoint(s), or
starting point are in an area where
no road exists (e.g. a mountain) and
the route calculation is impossible.
!Set a destination and waypoint(s) on roads.
!Reset the destination after you drive the ve-
hicle to any road.
Route to destination cannot
be calculated.
The destination or waypoint(s) are in
an isolated island, etc. without a
ferry and the route calculation is im-
possible. If there is no road con-
nected to your starting point or
destination, this message will ap-
pear.
Change the destination.
Failed to create route profile In rare cases, a route calculation
error may occur.
!Retry.
!Consult the Pioneer Local dealer if this mes-
sage persists.
No picture folder. Save jpeg
file to /Pictures/ folder
Cannot load the image because
“Pictures”folder is not found in the
inserted external storage device.
Use appropriate data and store it correctly.
(Page 164)
“Pictures”folder exists on the SD
memory card but there is no load-
able data in the folder.
Use appropriate data and store it correctly.
(Page 164)
Data Read error. Failed to read the data for some rea-
son.
Use appropriate data and store it correctly.
(Page 164)
The file is corrupt The data is damaged or an attempt
was made to set an image file that
was not made to specifications as
the splash screen.
Use appropriate data and store it correctly.
(Page 164)
En 195
Appendix
Appendix
Appendix
Message Cause Action (Reference)
Connection failed. The cellular phone’s Bluetooth wire-
less technology is turned off.
Activate the target phone’s Bluetooth wire-
less technology.
The cellular phone is paired (con-
nected) with another device.
Cancel the pairing (connection) and retry.
Rejection has been received from
the cellular phone.
Operate the target phone and accept the con-
nection request from the navigation system.
(Furthermore, check the connection settings
on your cellular phone.)
The target cellular phone cannot be
found.
Check whether your cellular phone is acti-
vated and, whether the distance to your cellu-
lar phone is not too far.
Could not find any available
phone.
No available phone exists in the sur-
roundings when the system
searches for connectable cellular
phones featuring Bluetooth wireless
technology.
!Activate the target phone’s Bluetooth wire-
less technology.
!Check whether your cellular phone is acti-
vated and, whether the distance to your cellu-
lar phone is not too far.
Registration failed. The cellular phone’s Bluetooth wire-
less technology is turned off during
the registration step.
Keep turning the target phone’s Bluetooth
wireless technology on during the registra-
tion.
Rejection by the cellular phone has
received.
Operate the target phone and accept the re-
gistration request from the navigation system.
(Furthermore, check the connection settings
on your cellular phone.)
Registration step has failed for
some reason.
Retry the registration and if the registration
still fails, try registering using your cellular
phone.
En
196
Appendix
Appendix
Messages for audio functions
When problems occur with AV source playback, an error message appears on the display. Refer
to the table below to identify the problem, then take the suggested corrective action. If the error
persists, record the error message and contact your dealer or your nearest Pioneer service center.
The messages in “()”will appear on the “Rear display”.
Built-in DVD drive
Message Cause Action (Reference)
Reading error
(ERROR-02-XX)
Dirty Clean the disc.
Scratched disc Replace the disc.
The disc is loaded upside down Check that the disc is loaded correctly.
Playback error. Please remove
the disc.
Electrical or mechanical !Replace the disc.
!Set the ACC to off and then set it to on
again.
Region code cannot be
matched (DIFFERENT REGION
DISC)
The disc does not have the same re-
gion number as the navigation sys-
tem.
Replace the DVD-Video with one bearing the
correct region number.
Unreadable disc This type of disc cannot be played
by the navigation system.
Replace the disc with one the navigation sys-
tem can play. (Page 208, Page 224)
Playback error due to irregu-
lar temperature. Please re-
move the disc. (THERMAL
PROTECTION IN MOTION)
The temperature of the navigation
system is out of the normal operat-
ing range.
Wait until the unit’s temperature returns to
within normal operating limits.
Error not defined (ERROR-FF-
FF)
Undefined error Set the ACC to off and then set it to on again.
Tracks that cannot be played
back will be skipped (FILE
SKIPPED)
Files that are protected by digital
rights management (DRM).
The protected files are skipped.
Cannot play back all tracks
(PROTECTED DISC)
All the files on the inserted disc are
secured by DRM.
Replace the disc.
Flash writing error. Impossible
to write on the flash. (CAN
NOT SAVE DATA)
The playback history for VOD con-
tents cannot be saved for some rea-
son.
!Retry.
!If the message appears frequently, consult
your dealer.
Authorization Error (AUTHOR-
IZATION ERROR)
The device does not match the de-
vice registered with the VOD provi-
der. VOD content cannot be played
back.
Check whether this device has been regis-
tered with the VOD provider.
Cannot play back HD file (FILE
NOT PLAYABLE-HIGH DEF)
High definition (HD) DivX video can-
not be played.
Create playable one and retry.
SD/USB/iPod
Message Cause Action (Reference)
Tracks that cannot be played
back will be skipped
Files that are protected by digital
rights management (DRM).
The protected files are skipped.
This type of file cannot be played by
this unit.
Replace it with the playable file. (Page 208,
Page 224)
En 197
Appendix
Appendix
Appendix
Message Cause Action (Reference)
Cannot play back all tracks All the files on the inserted external
storage device are secured by DRM.
Store playable files.
All of the files cannot be played by
this unit.
Replace it with the playable file. (Page 208,
Page 224)
USB flash drive was discon-
nected for device protection.
Do not connect this USB flash
drive to the unit. To restart
USB, restart the unit.
The USB connector or USB cable is
short-circuited.
Confirm that the USB connector or USB
cable is not caught in something or da-
maged.
The connected USB storage device
consumes more than 500 mA (maxi-
mum allowable current).
Disconnect the USB storage device and do
not use it. Turn the ignition switch to off, then
to ACC or on and then connect the compliant
USB storage device.
The USB interface cable for iPod is
short-circuited.
Confirm that USB interface cable for iPod or
USB cable is not caught in something or da-
maged.
Authorization failure. iPod is
not connected.
The iPod is not compatible with this
navigation system.
Use an iPod of a compatible version.
Communication failure !Disconnect the cable from iPod. Once iPod
main menu is displayed, connect the cable
again.
!If the message appears frequently, consult
your dealer.
En
198
Appendix
Appendix
Positioning technology
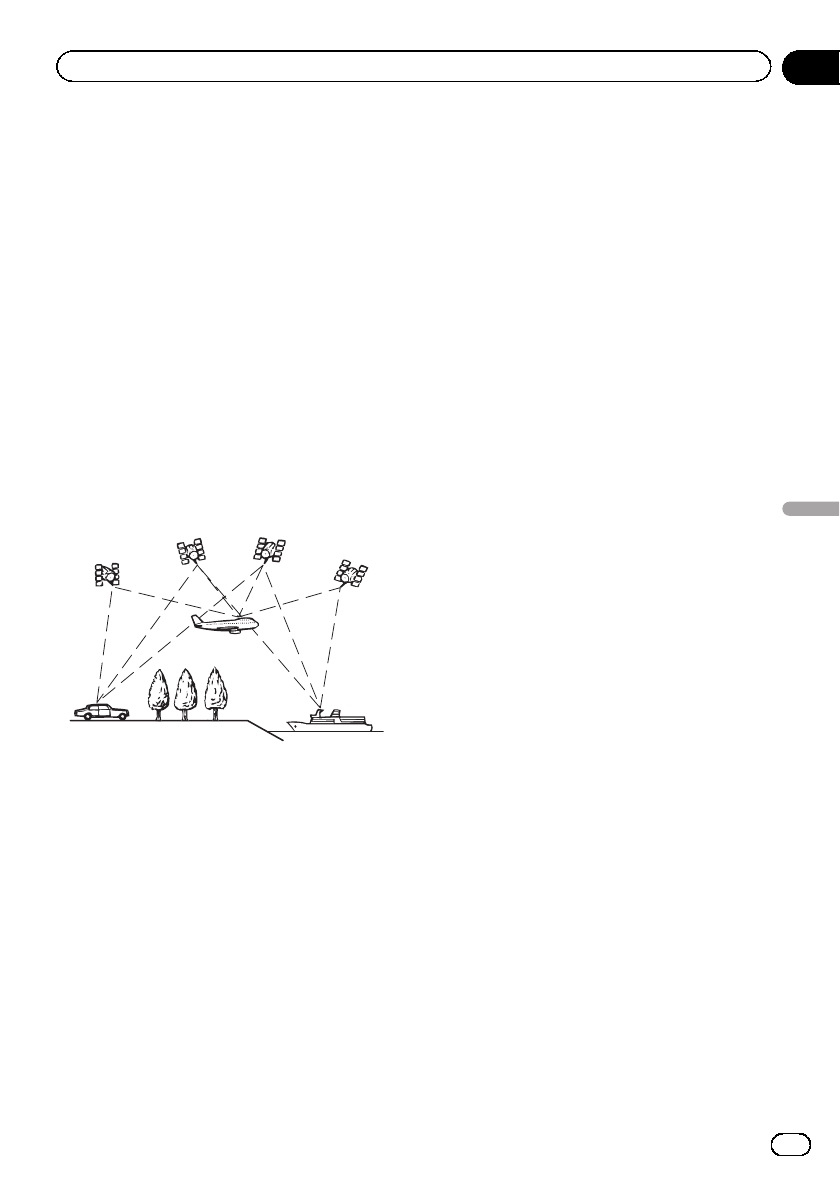
Positioning by GPS
The Global Positioning System (GPS) uses a
network of satellites orbiting the Earth. Each
of the satellites, which orbit at a height of
21 000 km, continually broadcasts radio sig-
nals giving time and position information. This
ensures that signals from at least three can be
picked up from any open area on the earth’s
surface.
The accuracy of the GPS information depends
on how good the reception is. When the sig-
nals are strong and reception is good, GPS
can determine latitude, longitude and altitude
for accurate positioning in three dimensions.
But if signal quality is poor, only two dimen-
sions, latitude and longitude, can be obtained
and positioning errors are somewhat greater.
Positioning by dead reckoning
The built-in sensor in the navigation system
also calculates your position. The current loca-
tion is measured by detecting driving distance
with the speed pulse, the turning direction
with the gyro sensor and inclination of the
road with the G sensor.
The built-in sensor can even calculate
changes of altitude, and correct the discrepan-
cies in the distance traveled caused by driving
along winding roads or up slopes.
If you use this navigation system with connect-
ing the speed pulse, the system will become
more accurate than no connection of speed
pulse. So you connect the speed pulse without
fail to get the accuracy of positioning.
pThe position of the speed detection circuit
vary depending on the vehicle model. For
details, consult your authorized Pioneer
dealer or an installation professional.
pSome types of vehicles may not output a
speed signal while driving at just a few kilo-
meters per hour. In such a case, the current
location of your vehicle may not be dis-
played correctly while in traffic congestion
or in a parking lot.
How do GPS and dead
reckoning work together?
For maximum accuracy, your navigation sys-
tem continually compares GPS data with your
estimated position as calculated from the data
of built-in sensor. However, if only the data
from the built-in sensor is available for a long
period, positioning errors are gradually com-
pounded until the estimated position becomes
unreliable. For this reason, whenever GPS sig-
nals are available, they are matched with the
data of the built-in sensor and used to correct
it for improved accuracy.
pIf you use chains on your wheels for winter
driving or put on the spare wheel, errors
may suddenly increase because of differ-
ence in wheel diameter. Initialize the sensor
status and it may recover the accuracy to
normal condition.
=For details, refer to Clearing status on
page 149.
En 199
Appendix
Appendix
Appendix
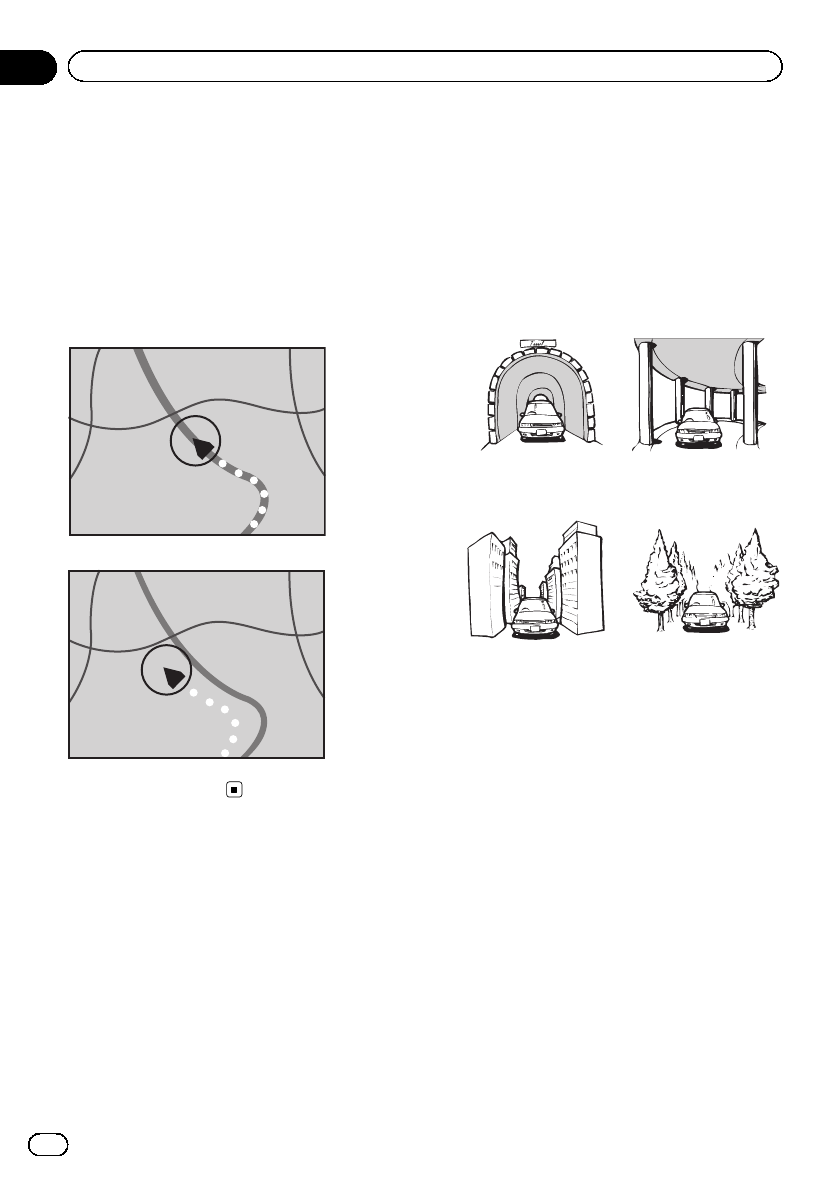
Map matching
As mentioned, the positioning systems used
by this navigation system are susceptible to
certain errors. Their calculations may, on occa-
sion, place you in a location on the map where
no road exists. In this situation, the processing
system understands that vehicles travel only
on roads, and can correct your position by ad-
justing it to a nearby road. This is called map
matching.
With map matching
Without map matching
Handling large errors
Positioning errors are kept to a minimum by
combining GPS, dead reckoning and map
matching. However, in some situations, these
functions may not work properly, and the error
may become bigger.
When positioning by GPS is
impossible
!GPS positioning is disabled if signals can-
not be received from more than two GPS
satellites.
!In some driving conditions, signals from
GPS satellites may not reach your vehicle.
In this case, it is impossible for the system
to use GPS positioning.
In tunnels or en-
closed parking
garages
Under elevated
roads or similar
structures
When driving
among high build-
ings
When driving through
a dense forest or tall
trees
!If a car phone or cellular phone is used
near the GPS antenna, GPS reception may
be lost temporarily.
!Do not cover the GPS antenna with spray
paint or car wax, because this may block
the reception of GPS signals. Snow buildup
can also degrade the signals, so keep the
antenna clear.
pIf a GPS signal has not been received for a
long time, your vehicle’s actual position
and the current position mark on the map
may diverge considerably or may not be up-
dated. In such case, once GPS reception is
restored, accuracy will be recovered.
En
200
Appendix
Appendix