Pioneer K031 Multi-Media AVN Navigation Server System with BT User Manual 4
Pioneer Corporation Multi-Media AVN Navigation Server System with BT 4
Pioneer >
Contents
User Manual 4
Setting a route to your
destination
1 Searching for a location.
=For details, refer to Chapter 6.
After searching for the destination, the Loca-
tion confirmation screen appears.
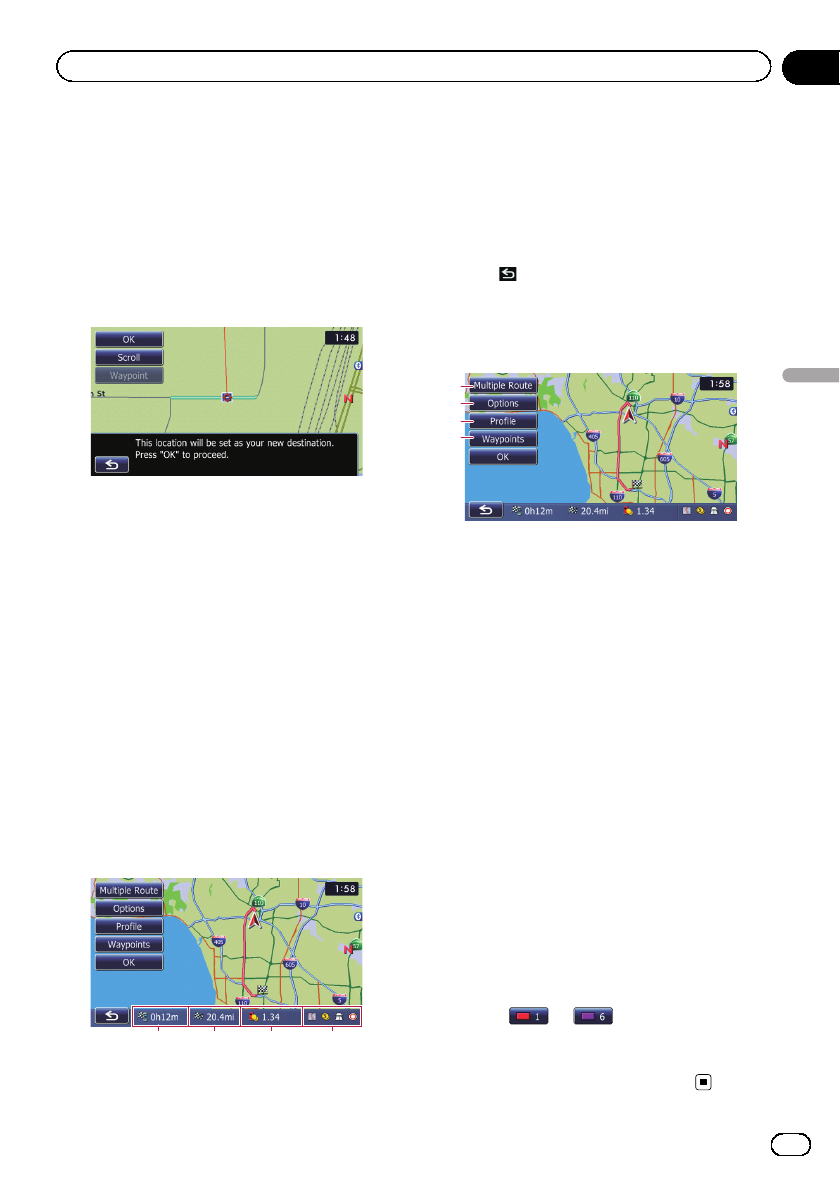
2 Touch [OK].
Location confirmation screen
The destination is set, and then route calcula-
tion starts.
When the route calculation is completed,
Route confirmation screen appears.
pIf you press the MODE button during route
calculation, the calculation is canceled and
the map screen appears.
#Touch [Scroll].
The map display changes to the scroll mode. You
can fine-tune the location in the scroll mode, and
then you can set the location as your destination
or do various operations.
#Touch [Waypoint].
The location is added to the “Waypoints List”
screen.
pIf a destination is not set, [Waypoint] is not
available.
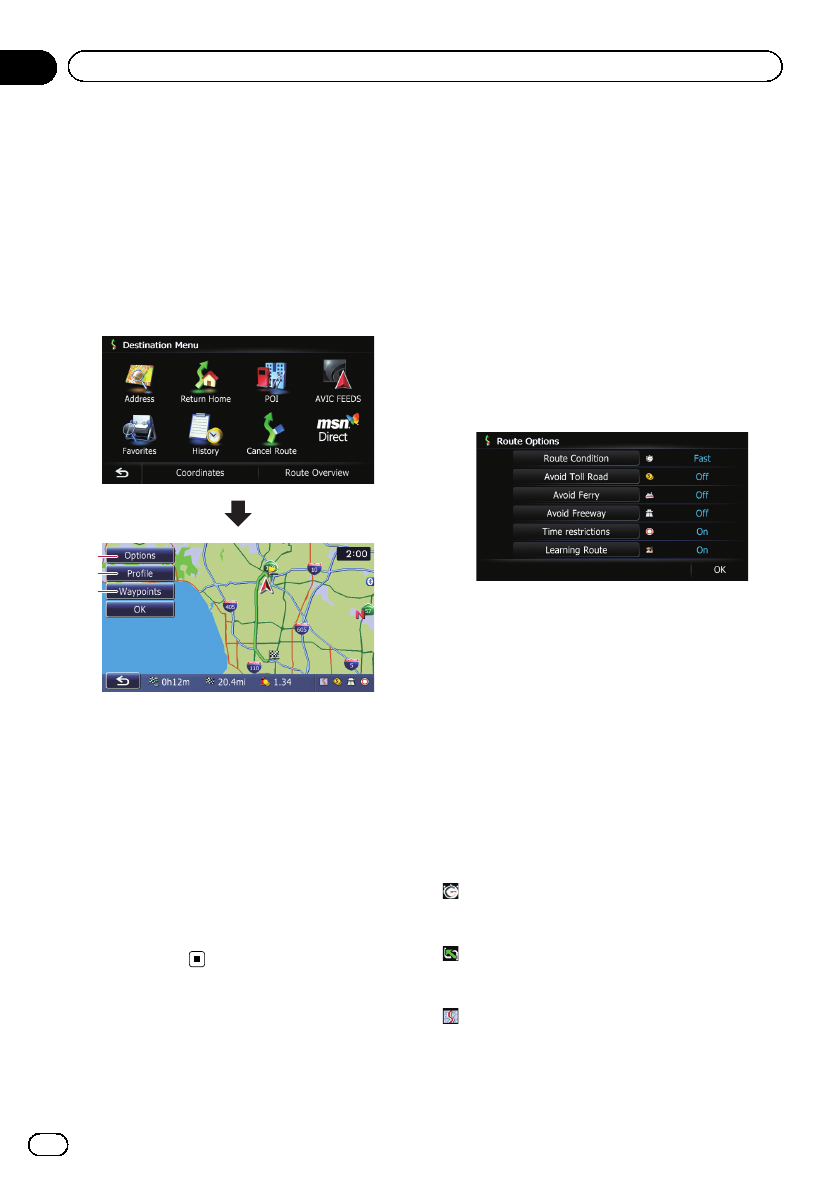
3 Touch [OK].
Route confirmation screen
123 4
Sets the displayed route as your route, and
starts the route guidance.
1Travel time to your destination
2Distance to the destination
3Estimated fuel cost to your destination
=For details, refer to Inputting the fuel
consumption information for calculating
the fuel cost on page 150.
4Route calculation condition
#Touch .
The message confirming whether to cancel the
calculated route appears.
Touch [Yes] to cancel the calculated route, and
then the map screen appears.
2
3
1
4
1Multiple Route
=For details, refer to Display multiple
routes on this page.
2Options
=For details, refer to Modifying the route
calculation conditions on the next page.
3Profile
=For details, refer to Checking the current
itinerary on page 43.
4Waypoints
=For details, refer to Editing waypoints on
page 44.
Display multiple routes
You can select a desired route from multiple
route options. Calculated routes are shown in
different colors.
pIf you set waypoints, you cannot display
multiple routes.
1 Touch [Multiple Route] on the Route
confirmation screen.
Multiple route options appear.
2 Touch to .
Another route is displayed.
3 Touch [OK].
Route confirmation screen appears.
En 41
Chapter
07
After the location is decided
After the location is decided
Displaying the “Route
Overview”screen
1 Press the HOME button to display the
“Top Menu”screen.
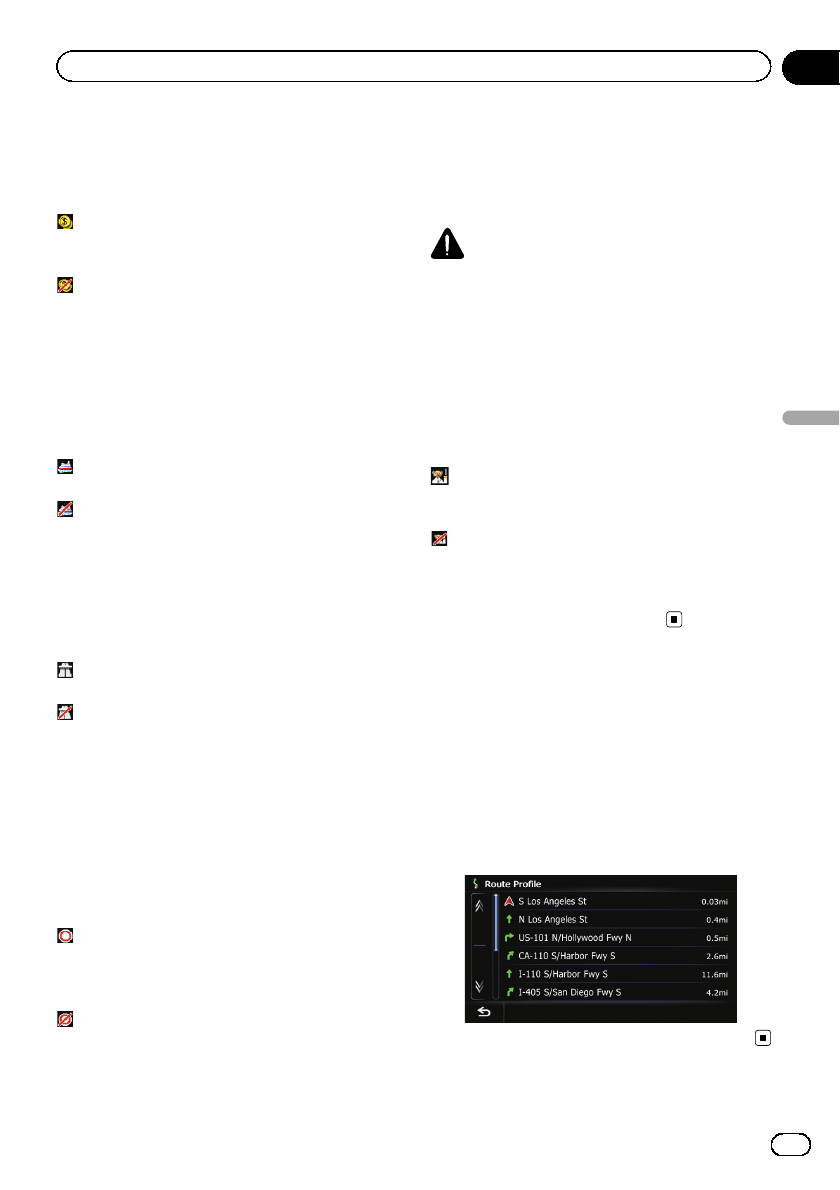
2 Touch [Destination].
The “Destination Menu”screen appears.
3 Touch [Route Overview].
2
3
1
1Options
=For details, refer to Modifying the route
calculation conditions on this page.
2Profile
=For details, refer to Checking the current
itinerary on the next page.
3Waypoints
=For details, refer to Editing waypoints on
page 44.
p[Route Overview] is active only when the
route is set.
4 Touch [OK].
Modifying the route
calculation conditions
You can modify the conditions for route calcu-
lation and recalculate the current route.
1 Display the “Route Overview”screen.
=For details, refer to Displaying the “Route
Overview”screen on this page.
2 Touch [Options].
3 Touch the desired items to change the
route calculation conditions and then
touch [OK].
The route is recalculated, and the Route con-
firmation screen appears.
Items that users can operate
Settings marked with an asterisk (*) show that
these are default or factory settings.
Route Condition
This setting controls how the route should be
calculated by taking into account the time, dis-
tance or main road.
Determines which condition takes priority for
route calculation.
Fast*:
Calculates a route with the shortest travel time
to your destination as a priority.
Short:
Calculates a route with the shortest distance
to your destination as a priority.
Main Road:
Calculate a route that passes major arterial
road as a priority.
En
42
Chapter
08 Checking and modifying the current route
Avoid Toll Road
This setting controls whether toll roads (in-
cluding toll areas) should be taken into ac-
count.
Off*:
Calculates a route that may include toll roads
(including toll areas).
On:
Calculates a route that avoids toll roads (in-
cluding toll areas).
pThe system may calculate a route that in-
cludes toll roads even if “On”is selected.
Avoid Ferry
This setting controls whether ferry crossings
should be taken into account.
Off*:
Calculates a route that may include ferries.
On:
Calculates a route that avoids ferries.
pThe system may calculate a route that in-
cludes ferries even if “On”is selected.
Avoid Freeway
This setting controls whether freeways may be
included in the route calculation.
Off*:
Calculates a route that may include freeways.
On:
Calculates a route that avoids freeways.
pThe system may calculate a route that in-
cludes freeways even if “On”is selected.
Time restrictions
This setting controls whether streets or
bridges that have traffic restrictions during a
certain time should be taken into account.
pIf you want to set your route to avoid raised
draw bridges, select “On”.
On*:
Calculates a route while avoiding streets or
bridges with traffic restrictions during a cer-
tain time.
Off:
Calculates a route while ignoring traffic re-
strictions.
pThe system may calculate a route that in-
cludes streets or bridges that are subject to
traffic restrictions during a certain time
even if “On”is selected.
CAUTION
If the time difference is not set correctly, the navi-
gation system cannot consider traffic regulations
correctly. Set the time difference correctly (=
Refer to Setting the time difference on page 162).
Learning Route
The system learns the travel history of your ve-
hicle for each road.
This setting controls whether or not the travel
history should be taken into account.
On*:
Calculates a route with the travel history taken
into account.
Off:
Calculates a route without the travel history
taken into account.
Clear:
Clears the current travel history.
Checking the current itinerary
You can check the route details.
1 Display the “Route Overview”screen.
=For details, refer to Displaying the “Route
Overview”screen on the previous page.
2 Touch [Profile].
The “Route Profile”screen appears.
En 43
Chapter
08
Checking and modifying the current route
Checking and modifying the current route
Editing waypoints
You can edit waypoints (locations you want to
visit on the way to your destination) and recal-
culate the route so that it passes through
these locations.
Adding a waypoint
Up to 5 waypoints can be set, and waypoints
and final destination can be sorted automati-
cally or manually.
1 Display the “Route Overview”screen.
=For details, refer to Displaying the “Route
Overview”screen on page 42.
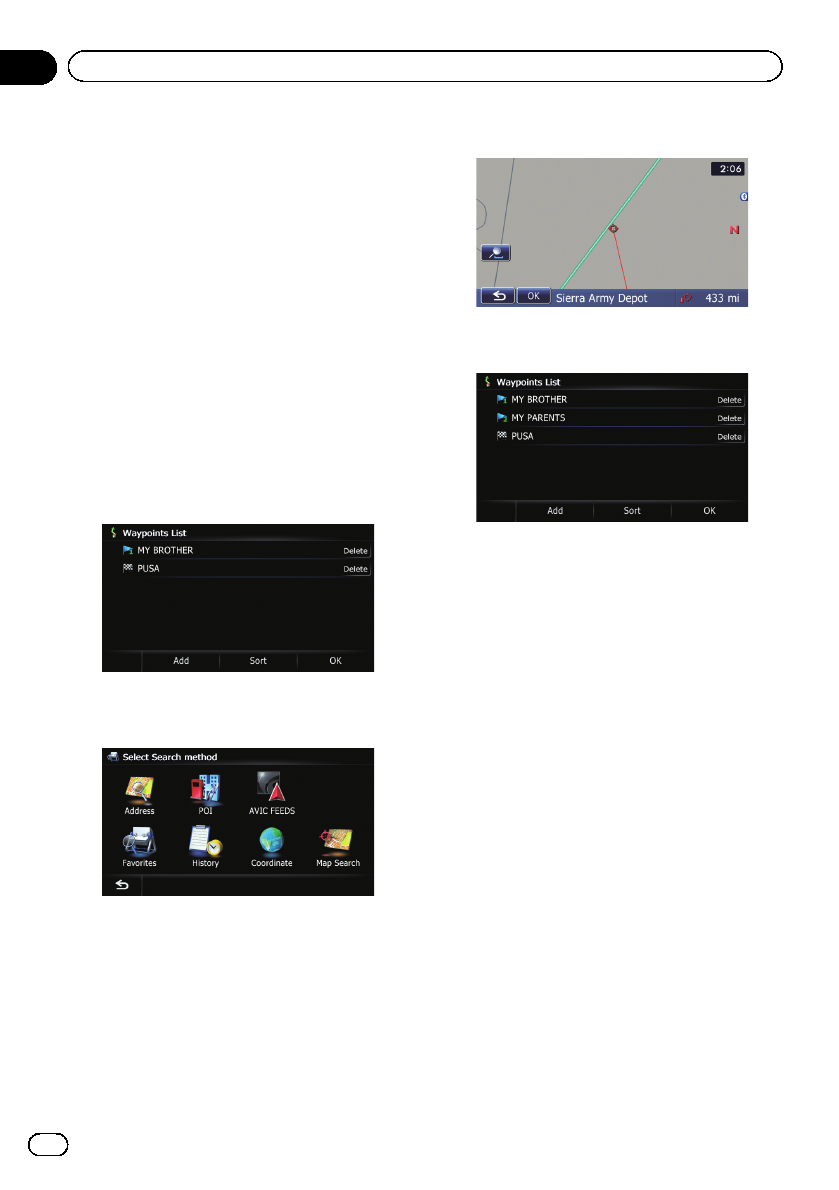
2 Touch [Waypoints].
The “Waypoints List”screen appears.
3 Touch [Add].
The “Select Search method”screen appears.
4 Search for a location.
=For details, refer to Chapter 6.
5 Touch [OK].
6 Touch [OK] on the “Waypoints List”
screen.
The route is recalculated, and the Route con-
firmation screen appears.
pIf you set waypoints, you cannot display
multiple routes.
Deleting a waypoint
You can delete waypoints from the route and
then recalculate the route. (You can delete
successive waypoints.)
1 Display the “Route Overview”screen.
=For details, refer to Displaying the “Route
Overview”screen on page 42.
2 Touch [Waypoints].
The “Waypoints List”screen appears.
3 Touch [Delete] next to the waypoint
that you want to delete.
The touched waypoint will be deleted from the
list.
4 Touch [OK] on the “Waypoints List”
screen.
The route is recalculated, and the Route con-
firmation screen appears.
5 Touch [OK].
The map of the current position appears.
En
44
Chapter
08 Checking and modifying the current route
Sorting waypoints
You can sort waypoints and recalculate the
route.
pYou cannot sort waypoints that you have al-
ready passed.
1 Display the “Route Overview”screen.
=For details, refer to Displaying the “Route
Overview”screen on page 42.
2 Touch [Waypoints].
The “Waypoints List”screen appears.
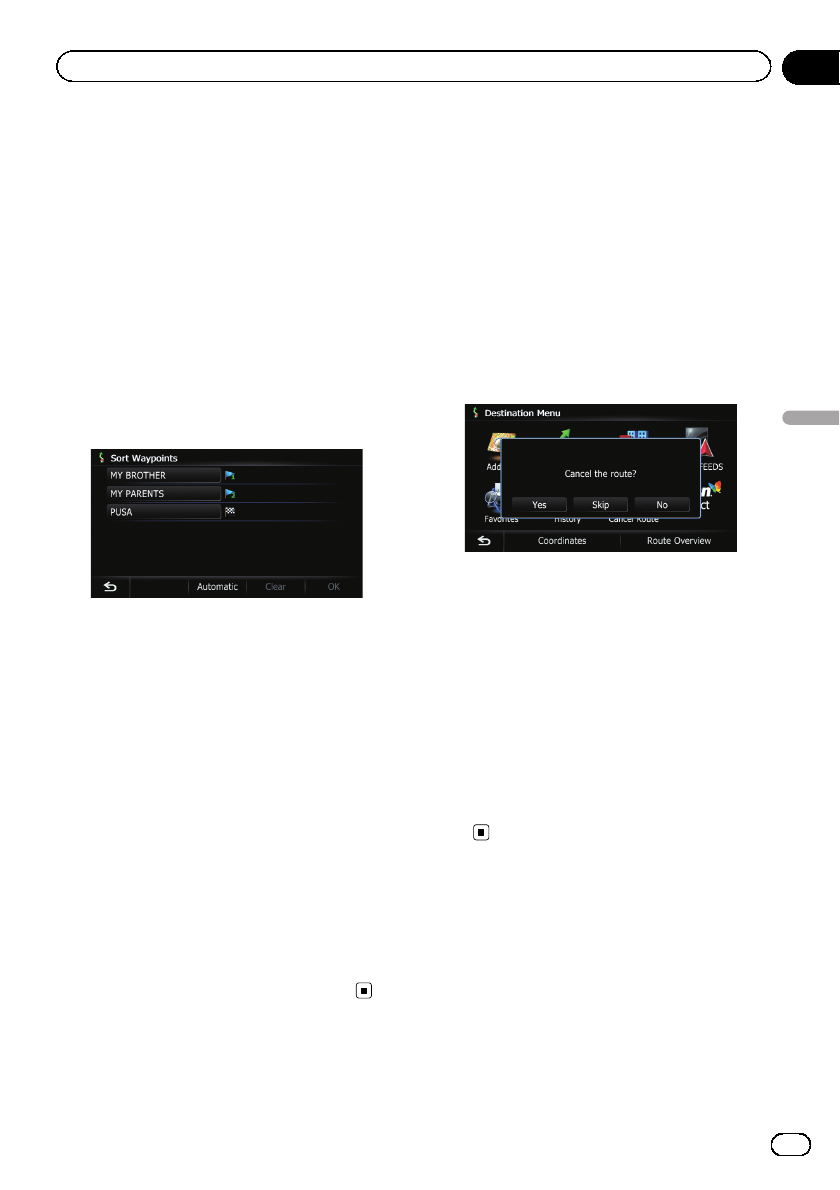
3 Touch [Sort].
The “Sort Waypoints”screen appears.
4 Touch the waypoint or destination.
Put them in the desired order.
#Touch [Automatic].
You can sort the destination and waypoints auto-
matically. The system will show the nearest way-
point (distance in a straight line) from the current
location as waypoint 1, and sort the other points
(including your destination) in order of distance
from the waypoint 1.
#Touch [Clear].
Waypoint sort is canceled.
5 Touch [OK].
The “Waypoints List”screen appears.
6 Touch [OK] on the “Waypoints List”
screen.
The route is recalculated, and the Route con-
firmation screen appears.
7 Touch [OK].
The map of the current position appears.
Canceling the route guidance
If you no longer need to travel to your destina-
tion, follow the steps below to cancel the route
guidance.
1 Display the “Destination Menu”screen.
=For details of the operations, refer to Screen
switching overview on page 22.
2 Touch [Cancel Route].
A message confirming the cancellation of the
current route appears.
3 Touch [Yes].
The current route is deleted, and a map of
your surroundings reappears.
#Touch [Skip].
The next waypoint along the route is skipped.
A new route to your destination through all re-
maining waypoints, except for the skipped way-
point, is calculated.
When the route calculation is completed, Route
confirmation screen appears.
p[Skip] is available only when a waypoint is
set.
#Touch [No].
The previous screen returns without deleting the
route.
En 45
Chapter
08
Checking and modifying the current route
Checking and modifying the current route
Storing a location in
“Favorites”
Storing your favorite locations as “Favorites”
provides you with the opportunity to save the
time and effort of re-entering this information.
Stored items can be made available on “Fa-
vorites”later.
Registering a location by
“Favorites”
Favorites can store up to 400 registered loca-
tions. These can include your home location,
favorite places, and destinations you have al-
ready registered.
p“Favorites”can store up to 400 locations.
pHome location is counted as one of the
items in “Favorites”.
1 Display the “Destination Menu”screen.
=For details of the operations, refer to Screen
switching overview on page 22.
2 Touch [Favorites].
The “Favorites”screen appears.
3 Touch [Add].
The “Select Search method”screen appears.
4 Search for a location.
=For details about the search methods, refer
to Chapter 6.
5 When the map of the location you
want to register is displayed, touch [OK].
The location is registered, and then the “Edit
Favorite”screen appears.
=For details, refer to Editing the entry in the
“Favorites”list on this page.
6 Touch [OK].
The registration is completed.
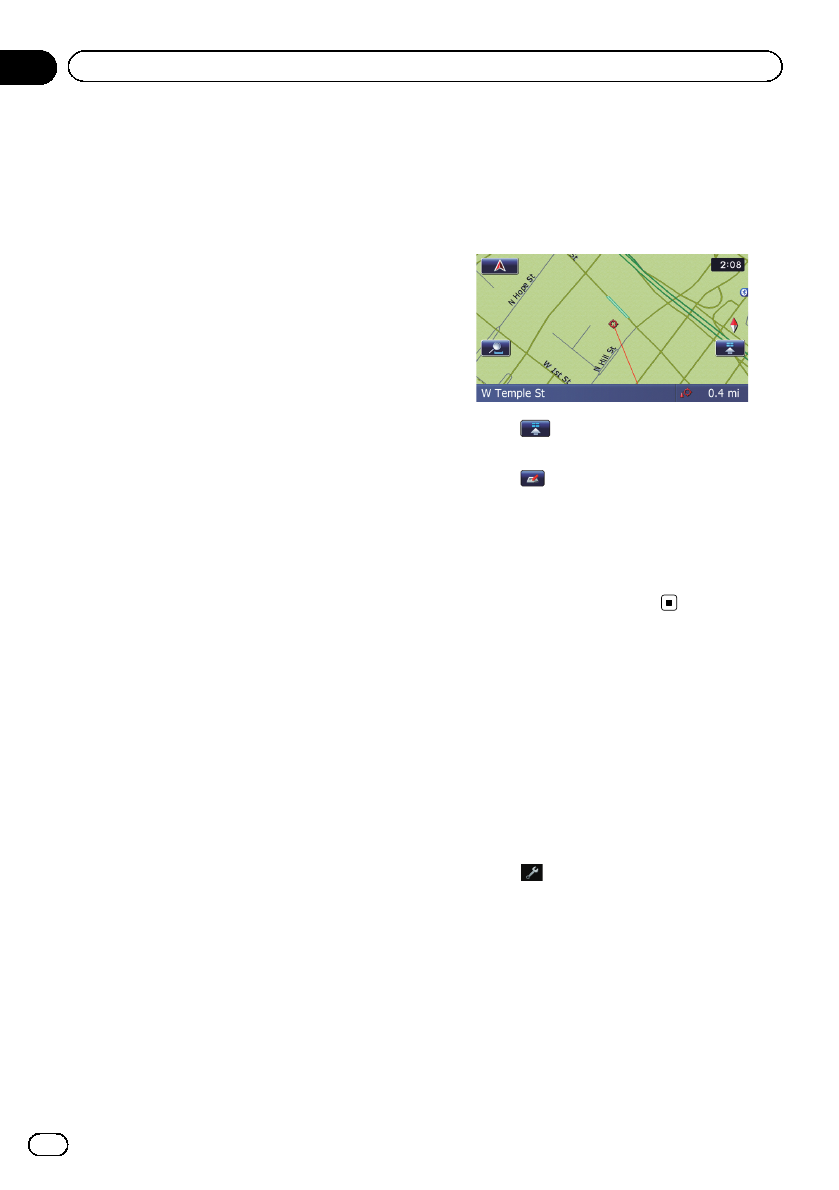
Registering a location by scroll
mode
1 Touch and drag the screen to scroll the
map to the position that you want to regis-
ter.
2 Touch to display the Quick Access
menu.
3 Touch .
The location is registered, and then the “Edit
Favorite”screen appears.
=For details, refer to Editing the entry in the
“Favorites”list on this page.
4 Touch [OK].
The registration is completed.
Editing registered locations
Editing the entry in the
“Favorites”list
1 Display the “Destination Menu”screen.
=For details of the operations, refer to Screen
switching overview on page 22.
2 Touch [Favorites].
The “Favorites”screen appears.
3 Touch next to the location that you
want to edit.
The “Edit Favorite”screen appears.
En
46
Chapter
09 Registering and editing locations
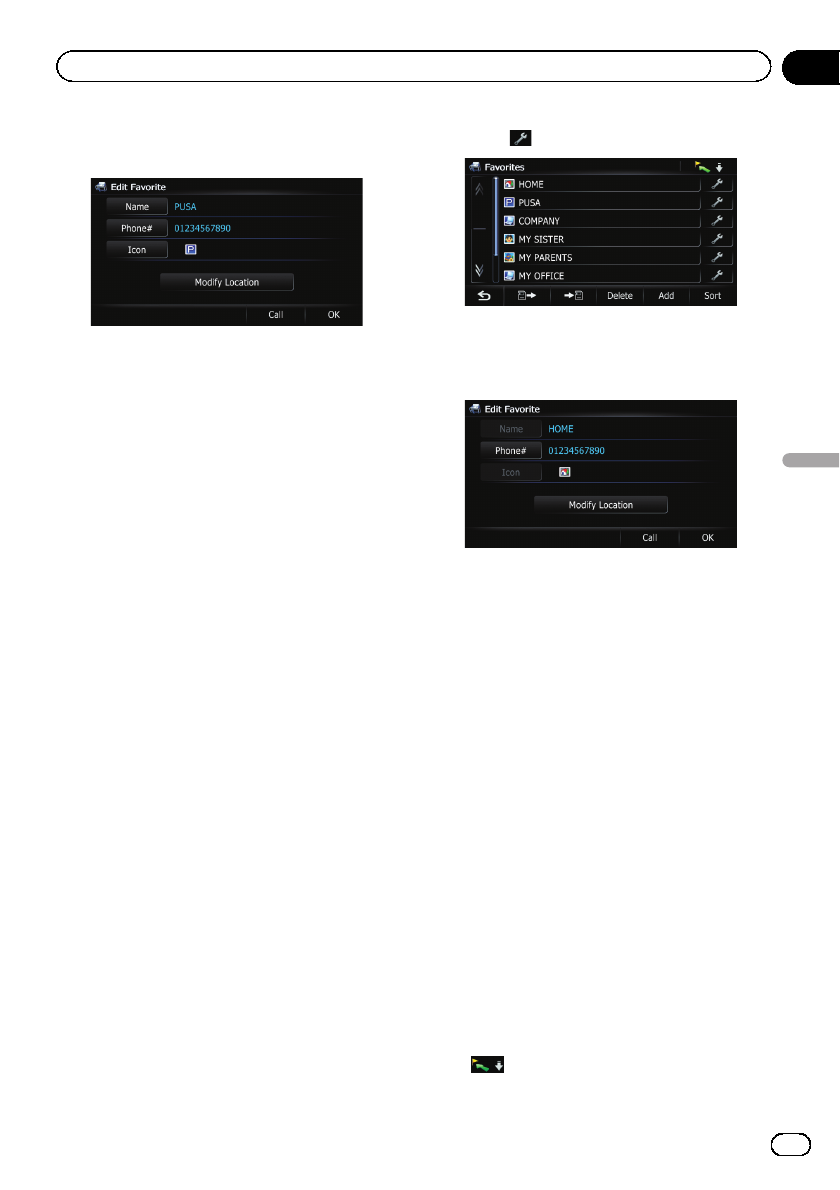
4 Touch the item that you want to
change the setting.
pUp to 17 characters can be input for the
name.
#Touch [Name].
You can enter the desired name.
#Touch [Phone#].
You can edit the registered phone number. To dial
the number, touch [Call].
The maximum digits you can enter for the phone
number is 15.
#Touch [Icon].
You can change the symbol displayed on the map
and “Favorites”.
#Touch [Modify Location].
You can change the registered location by scrol-
ling the map.
5 Touch [OK].
The registration is completed.
Editing your home
When you have already registered your home,
you can edit the information of your home.
1 Display the “Destination Menu”screen.
=For details of the operations, refer to Screen
switching overview on page 22.
2 Touch [Favorites].
pHome location is displayed on the top of
the list.
3 Touch next to the home location.
The “Edit Favorite”screen appears.
4 Touch the item that you want to
change the setting.
#Touch [Phone#].
To dial the number, touch [Call].
#Touch [Modify Location].
You can change the registered location by scrol-
ling the map.
pFor home information, [Name] and [Icon]
are not editable.
5 Touch [OK].
The registration is completed.
Sorting the entry in the
“Favorites”list
1 Display the “Destination Menu”screen.
=For details of the operations, refer to Screen
switching overview on page 22.
2 Touch [Favorites].
The “Favorites”screen appears.
3 Touch [Sort].
Each time you touch [Sort] changes the sort
order.
pCurrent order is indicated on the upper
right of the screen.
!:
En 47
Chapter
09
Registering and editing locations
Registering and editing locations
Sorts the items in the list in order by dis-
tance from the vehicle position.
!:
Sorts the items in the list alphabetically.
!:
Sorts the items in the list in order of the re-
cently used items.
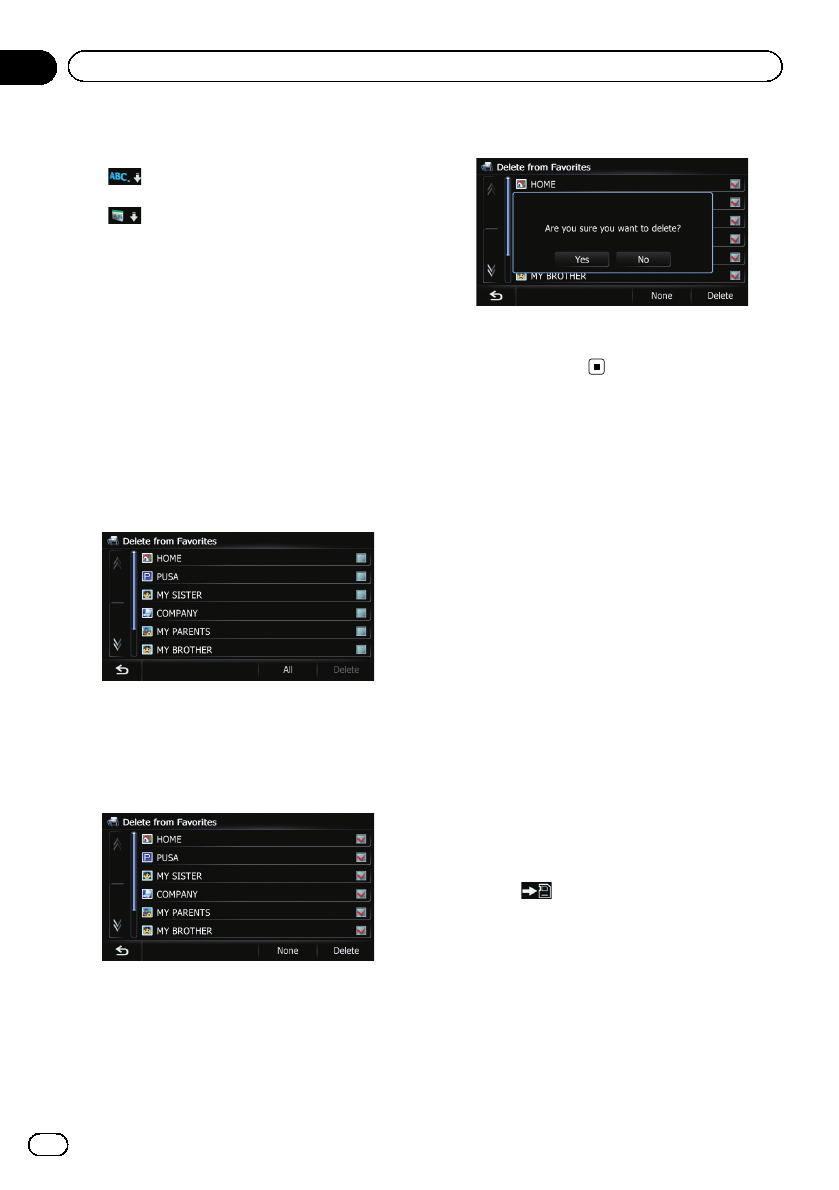
Deleting the entry from the
“Favorites”list
1 Display the “Destination Menu”screen.
=For details of the operations, refer to Screen
switching overview on page 22.
2 Touch [Favorites].
The “Favorites”screen appears.
3 Touch [Delete].
4 Select the location you want to delete.
A check mark appears next to the selected lo-
cation.
#Touch [All]or[None].
Selects or deselects all entries.
5 Touch [Delete].
A message will appear asking you to confirm
the deletion.
6 Touch [Yes].
The data you selected is deleted.
#Touch [No].
Cancels the deletion.
Exporting and importing
“Favorites”items
Exporting “Favorites”items
Exporting the “Favorites”data to an SD mem-
ory card for editing is possible by using the uti-
lity program AVIC FEEDS which is available
separately, on your PC.
pIf there is previous data in the SD memory
card, the data is overwritten with new data
when current data is exported.
1 Insert an SD memory card into the SD
card slot.
=For details of the operation, refer to Insert-
ing and ejecting an SD memory card on
page 15.
2 Display the “Destination Menu”screen.
=For details of the operations, refer to Screen
switching overview on page 22.
3 Touch [Favorites].
The “Favorites”screen appears.
4 Touch .
Data export starts.
After the data is exported, the completion mes-
sage appears.
En
48
Chapter
09 Registering and editing locations

5 Touch [OK].
The “Favorites”screen appears.
Importing the “Favorites”items
You can import the locations that you have edi-
ted on the utility program AVIC FEEDS which
is available separately to “Favorites”.
pWhen a location that is already registered
in “Favorites”is imported, the location is
overwritten.
1 Store the item into the SD memory card
by using the AVIC FEEDS.
2 Insert an SD memory card into the SD
card slot.
=For details of the operation, refer to Insert-
ing and ejecting an SD memory card on
page 15.
3 Display the “Destination Menu”screen.
=For details of the operations, refer to Screen
switching overview on page 22.
4 Touch [Favorites].
The “Favorites”screen appears.
5 Touch .
The message confirming whether to replace
the stored items appears.
6 Touch [Yes].
Data import starts.
After importing the data is finished, the “Fa-
vorites”screen appears.
Deleting the entry from the
“History”list
Items in “History”can be deleted. All entries
in “History”can be deleted at once.
1 Display the “Destination Menu”screen.
=For details of the operations, refer to Screen
switching overview on page 22.
2 Touch [History].
The “Destination History List”screen ap-
pears.
3 Touch [Delete].
The “Delete from History”screen appears.
4 Select the location you want to delete.
A check mark appears next to the selected lo-
cation.
#Touch [All]or[None].
Selects or deselects all entries.
5 Touch [Delete].
A message will appear asking you to confirm
the deletion.
6 Touch [Yes].
The data you selected is deleted.
#Touch [No].
Cancels the deletion.
En 49
Chapter
09
Registering and editing locations
Registering and editing locations