Pioneer K031 Multi-Media AVN Navigation Server System with BT User Manual 6
Pioneer Corporation Multi-Media AVN Navigation Server System with BT 6
Pioneer >
Contents
User Manual 6
1 Display the “Destination Menu”screen.
=For details of the operations, refer to Screen
switching overview on page 22.
2 Touch [MSN Direct].
The “MSN Direct”screen appears.
3 Touch [Local Events].
The “Local Event Date”screen appears.
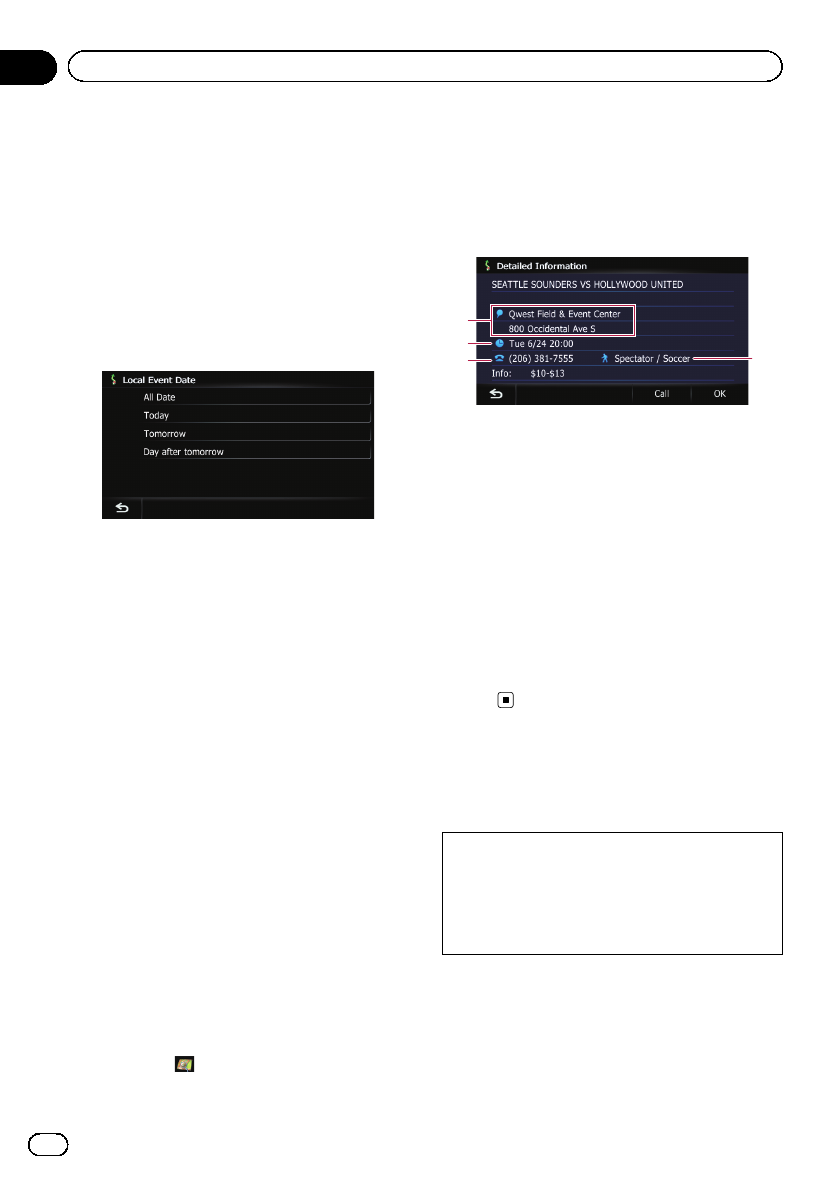
4 Touch the date on which you want to
check the events.
The “Local Event Groups List”screen ap-
pears.
5 Touch the category of events that you
want to check.
The “Local Event Sub Groups List”screen ap-
pears.
6 Touch the subcategory of events that
you want to check.
The “Local Events”screen appears.
If there is no data, “Unknown”or “–––––”is
displayed.
7 Touch the desired tab to change the
sort order.
Available options:
!Dist. (default):
Sorts the items in the list in order by dis-
tance from the vehicle position.
!Name:
Sorts the items in the list alphabetically.
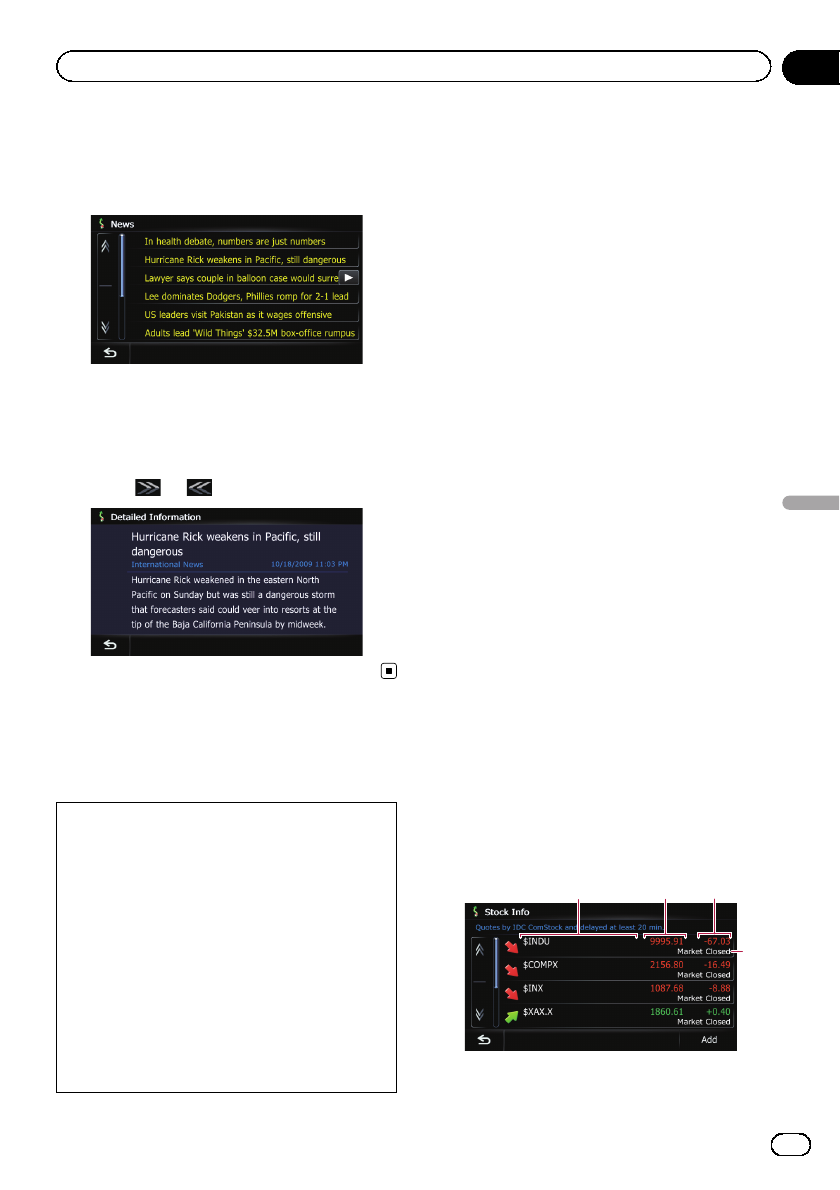
8 Touch the desired event to display de-
tailed information of the event.
The “Detailed Information”screen appears.
pTouching allows you to check the loca-
tion on a map.
#Touch [Refresh].
The information is updated.
p[Refresh] appears when the new informa-
tion is received.
9 Touch [OK].
24
3
1
1Address
2Start date, time and duration
3Telephone number
4Event name
pIf there is no information available,
“–––––”is displayed.
Location confirmation screen appears.
=For details, refer to Setting a route to your
destination on page 41.
#Touch [Call].
Enables you to call the position if a telephone
number is available. (Pairing with cellular phone
featuring Bluetooth wireless technology is re-
quired.)
Browsing news headlines
Recent news headlines are displayed in a list.
Although the MSN Direct service regularly up-
dates news headlines, the information pro-
vided may not necessarily correspond to
current news headlines. Please refer to Notice
about MSN Direct on page 50.
1 Display the “Destination Menu”screen.
=For details of the operations, refer to Screen
switching overview on page 22.
2 Touch [MSN Direct].
The “MSN Direct”screen appears.
En
60
Chapter
10 Browsing information on MSN Direct
3 Touch [News].
4 Touch the desired news headline.
Further details about the news are displayed.
#Touch [Refresh].
The information is updated.
p[Refresh] appears when the new informa-
tion is received.
5 Touch or to scroll the list.
Browsing stock quotes
Recent stock quotes are displayed in a list.
Although the stock quote displayed onscreen
is updated about 40 minutes (approx.), these
prices are not realtime values.
It may take up to 20 minutes for all the data to
become available under the following condi-
tions:
!When you use MSN Direct for the first time.
!When you have not performed this function
previously around the current area.
!After the navigation system has been
turned off for a few days.
Please refer to Notice about MSN Direct on
page 50.
Selecting stock symbols
Up to 30 stock symbols can be selected.
1 Display the “Destination Menu”screen.
=For details of the operations, refer to Screen
switching overview on page 22.
2 Touch [MSN Direct].
The “MSN Direct”screen appears.
3 Touch [Stocks].
The “Stock Info”screen appears.
pThe seven stock indices is always selected
and displayed on the bottom of the list.
4 Touch [Add].
The “Stock Info”screen appears.
5 Enter the stock symbol that you want
to select, and then touch [OK].
The selected stock symbol is added to the
“Stock Info”screen.
pIf the stock for the selected symbol is not
found, a message is displayed. To search
again, touch “Yes”and enter the symbol.
Viewing the detailed stock quotes
1 Display the “Destination Menu”screen.
=For details of the operations, refer to Screen
switching overview on page 22.
2 Touch [MSN Direct].
The “MSN Direct”screen appears.
3 Touch [Stocks].
The “Stock Info”screen appears.
2
4
31
1Symbol
Displays stock symbols.
En 61
Chapter
10
Browsing information on MSN Direct
Browsing information on MSN Direct
2Latest Price
Displays the most recent stock prices.
pIf there is no data, “–––––”is displayed.
3Change since last closing price
Displays change from the day before.
pIf there is no data, “–––––”is displayed.
4Timestamp
Displays the time of the latest stock prices.
When the market is closed, “Market
Closed ”is displayed.
pIf there is no data, “–––––”is displayed.
pArrow in the left of each item indicates the
stock price movement. If there is no stock
price movements than previous close, “—”
is displayed.
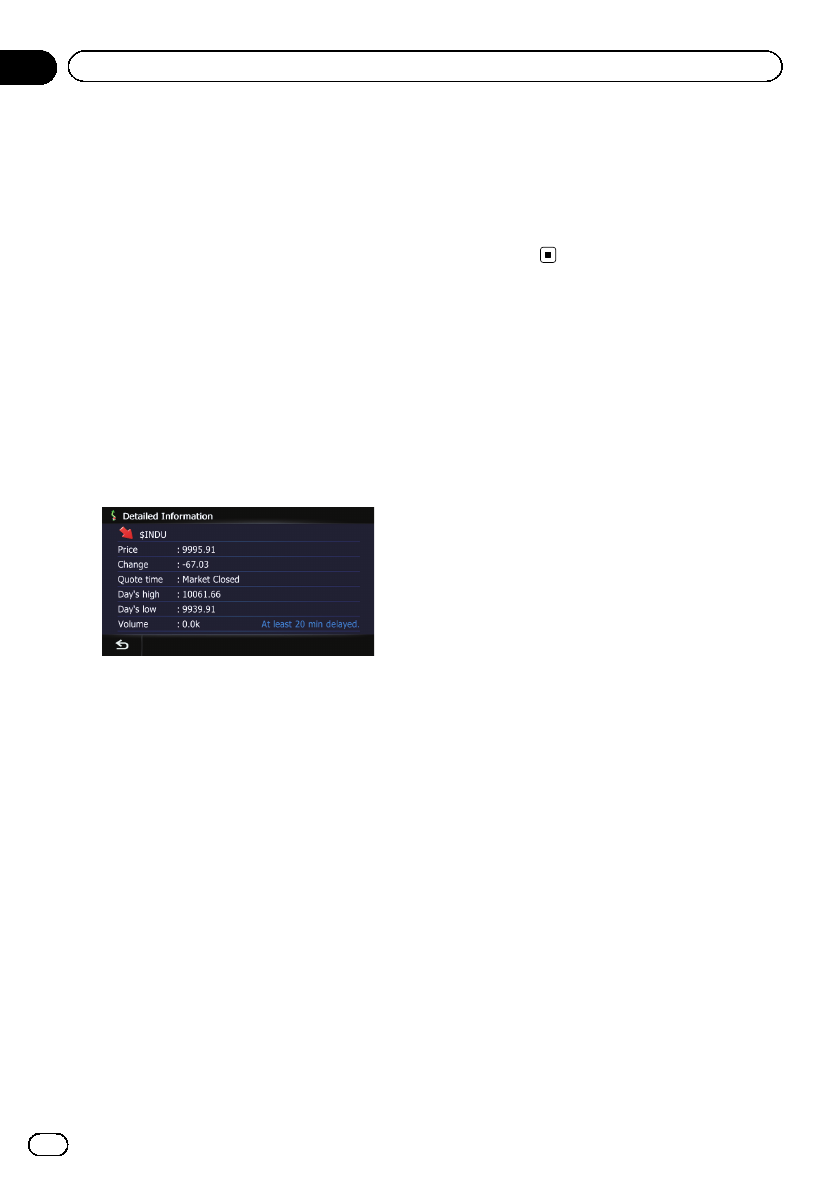
4 Touch the desired stock quote.
Detailed stock quote information is displayed.
#Touch [Delete].
The message confirming whether to delete the
entry appears.
And then touch [Yes] to delete the stock symbol
from the “Stock Info”screen.
Deleting registered stocks
1 Display the “Destination Menu”screen.
=For details of the operations, refer to Screen
switching overview on page 22.
2 Touch [MSN Direct].
The “MSN Direct”screen appears.
3 Touch [Stocks].
4 Touch the desired stock quote.
Detailed stock quote information is displayed.
5 Touch [Delete].
The message confirming whether to delete the
entry appears.
6 Touch [Yes].
Deletes the stock symbol from the “Stock
Info”screen.
En
62
Chapter
10 Browsing information on MSN Direct
If your devices feature Bluetoothâtechnology,
this navigation system can be connected to
your devices wirelessly. This section describes
how to set up a Bluetooth connection.
For details about the connectivity with the de-
vices featuring Bluetooth wireless technology,
refer to the information on our website.
Preparing communication
devices
This navigation system has a built-in function
to use devices featuring Bluetooth wireless
technology.
=For details, refer to Notes for hands-free
phoning on page 75.
You can register and use devices that feature
the following profiles with this navigation sys-
tem.
!HFP (Hands Free Profile)
!A2DP (Advanced Audio Distribution Pro-
file)
pIf the registered device features both HFP
and A2DP, the hands-free connection is
made and then the Bluetooth Audio con-
nection is made.
If the registered device features either pro-
file, the corresponding connection is made.
pWhen the navigation system is turned off,
the Bluetooth connection is also discon-
nected. When the system restarts, the sys-
tem automatically attempts to reconnect
the previously-connected device. Even
when the connection is severed for some
reason, the system automatically recon-
nects the specified device (except when the
connection is severed due to device oper-
ation).
Registering your Bluetooth
devices
You need to register your devices featuring
Bluetooth wireless technology when you con-
nect it for the first time. A total of 5 devices
can be registered. Three registration methods
are available:
!Searching for nearby Bluetooth devices
!Searching for a specified Bluetooth device
!Pairing from your Bluetooth devices
pIf you try to register more than 5 devices,
the system will ask you to select one of the
registered devices to delete.
=For details, refer to Deleting a registered
device on page 66.
Searching for nearby Bluetooth
devices
The system searches for available Bluetooth
devices near the navigation system, displays
them in a list, and registers them for connec-
tion.
1 Activate the Bluetooth wireless tech-
nology on your devices.
For some Bluetooth devices, no specific action
is necessary to activate Bluetooth wireless
technology. For details, refer to the instruction
manual of your devices.
2 Display the “Settings Menu”screen.
=For details of the operations, refer to Screen
switching overview on page 22.
3 Touch [Bluetooth Settings].
The “Bluetooth Settings”screen appears.
4 Touch [Registration].
The “Nearby Device List”screen appears.
The system searches for devices featuring
Bluetooth technology that are waiting for the
connection and displays them in the list if a
device is found.
pUp to 30 devices will be listed in the order
that the devices are found.
En 63
Chapter
11
Registering and connecting a Bluetooth device
Registering and connecting a Bluetooth device
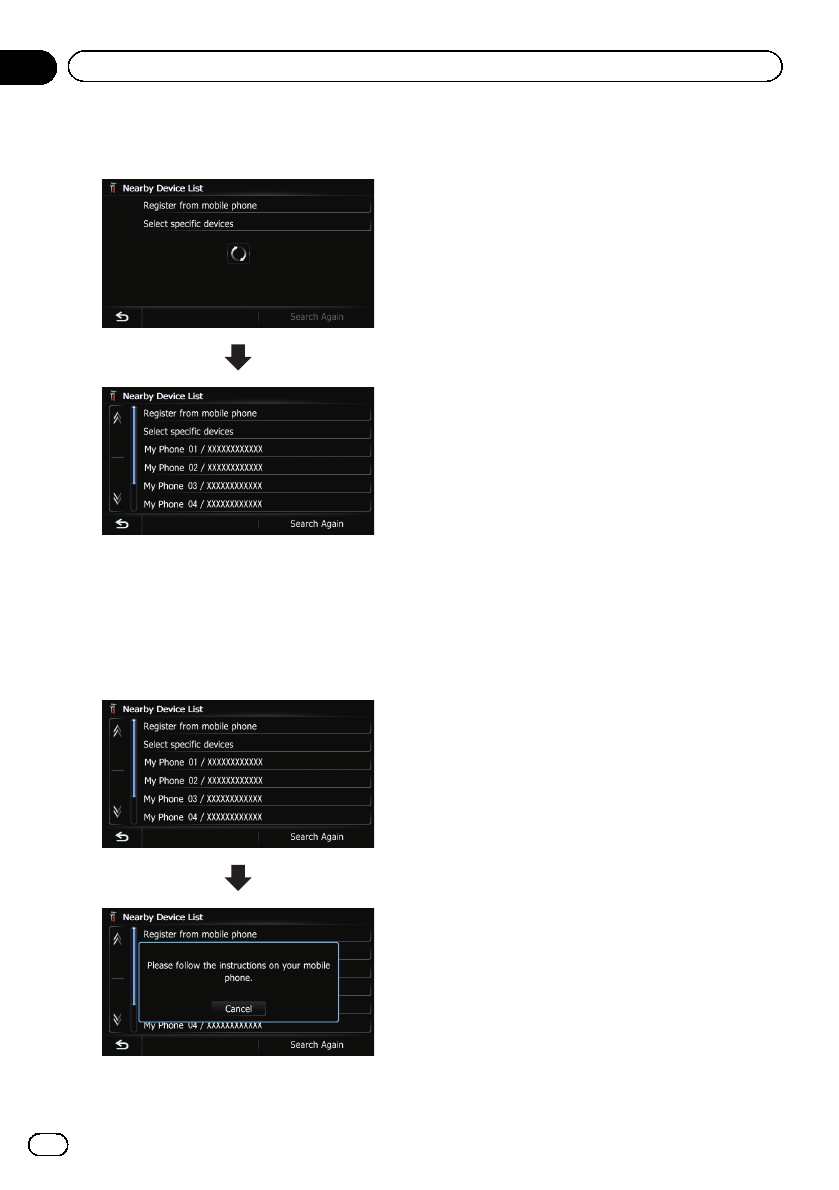
5 Wait until your Bluetooth device ap-
pears in the list.
pIf you cannot find the Bluetooth device that
you want to connect, check that the device
is waiting for the Bluetooth wireless tech-
nology connection.
6 Touch the Bluetooth device name you
want to register.
#Touch [Search Again].
The system searches for devices featuring Blue-
tooth technology that are waiting for the connec-
tion and displays them in the list if a device is
found.
7 Enter the PIN code (the default PIN
code is “1111”) using the Bluetooth device.
Enter the PIN code while the message “Please
follow the instructions on your mobile
phone.”appears.
The device is registered in the navigation sys-
tem.
After the device is successfully registered, the
Bluetooth connection is established from the
navigation system.
Pairing from your Bluetooth
devices
You can register the Bluetooth device by set-
ting the navigation system to standby mode
and requesting connection from the Bluetooth
device.
1 Activate the Bluetooth wireless tech-
nology on your devices.
For some Bluetooth devices, no specific action
is necessary to activate Bluetooth wireless
technology. For details, refer to the instruction
manual of your devices.
2 Display the “Settings Menu”screen.
=For details of the operations, refer to Screen
switching overview on page 22.
3 Touch [Bluetooth Settings].
The “Bluetooth Settings”screen appears.
4 Touch [Registration].
The “Nearby Device List”screen appears.
5 Touch [Register from mobile phone].
The navigation system waits for a Bluetooth
wireless technology connection.
En
64
Chapter
11 Registering and connecting a Bluetooth device
6 Register the navigation system on your
Bluetooth device.
If your device asks you to enter a password,
enter the PIN code (password) of the naviga-
tion system.
When the device is successfully registered,
the connection settings are made from the de-
vice.
pIf registration fails, repeat the procedure
from the beginning.
Searching for a specified
Bluetooth device
If you cannot connect your Bluetooth device
using the nearby device search and [Register
from mobile phone], try this method if your
Bluetooth device is found in the list.
1 Activate the Bluetooth wireless tech-
nology on your devices.
For some Bluetooth devices, no specific action
is necessary to activate Bluetooth wireless
technology. For details, refer to the instruction
manual of your devices.
2 Display the “Settings Menu”screen.
=For details of the operations, refer to Screen
switching overview on page 22.
3 Touch [Bluetooth Settings].
The “Bluetooth Settings”screen appears.
4 Touch [Registration].
The “Nearby Device List”screen appears.
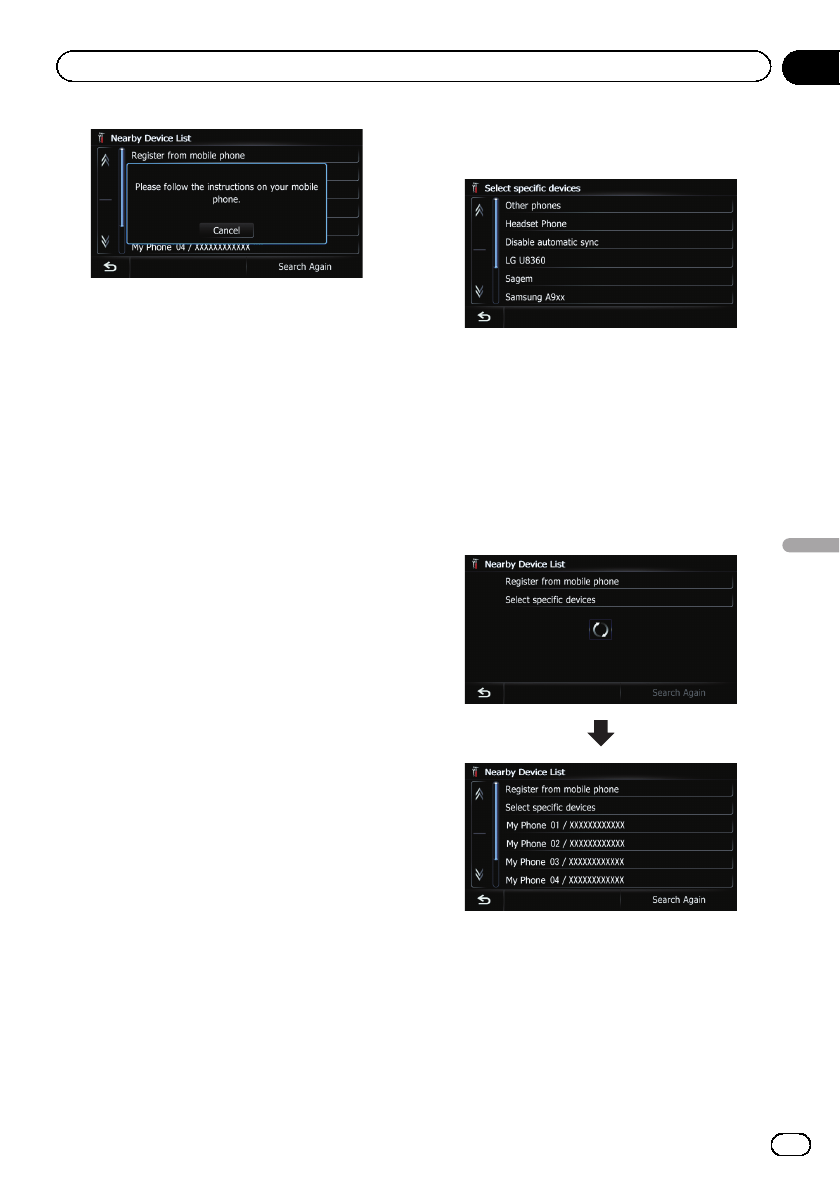
5 Touch [Select specific devices].
The “Select specific devices”screen appears.
6 Touch the Bluetooth device name to be
connected.
The system searches for devices featuring
Bluetooth technology that are waiting for the
connection and displays them in the list if a
device is found.
pIf you cannot find the desired device name
on the list, touch [Other phones] to search
the devices available nearby.
7 Wait until your Bluetooth device ap-
pears in the list.
pIf you cannot find the Bluetooth device that
you want to connect, check that the device
is waiting for the Bluetooth wireless tech-
nology connection.
En 65
Chapter
11
Registering and connecting a Bluetooth device
Registering and connecting a Bluetooth device

8 Touch the Bluetooth device name you
want to register.
#Touch [Search Again].
The system searches for devices featuring Blue-
tooth technology that are waiting for the connec-
tion and displays them in the list if a device is
found.
9 Enter the PIN code (the default PIN
code is “1111”) using the Bluetooth device.
Enter the PIN code while the message “Please
follow the instructions on your mobile
phone.”appears.
The device is registered in the navigation sys-
tem.
After the device is successfully registered, the
Bluetooth connection is established from the
navigation system.
Deleting a registered device
When you have already registered 5 Bluetooth
devices and you want to add another one, you
must first delete one of the registered devices.
pIf a registered phone is deleted, all the
phone book entries and call history lists
that correspond to the phone will be also
cleared.
1 Display the “Settings Menu”screen.
=For details of the operations, refer to Screen
switching overview on page 22.
2 Touch [Bluetooth Settings].
The “Bluetooth Settings”screen appears.
3 Touch [Registration].
A message prompting you to delete a regis-
tered device appears.
4 Touch [OK].
The “Delete from Connection List”screen
appears.
5 Touch the Bluetooth device name that
you want to delete.
The registration is canceled.
Connecting a registered
Bluetooth device
The navigation system automatically connects
the Bluetooth device selected as the target of
connection. However, connect the Bluetooth
device manually in the following cases:
!Two or more Bluetooth devices are regis-
tered, and you want to manually select the
device to be used.
En
66
Chapter
11 Registering and connecting a Bluetooth device
!You want to reconnect a disconnected
Bluetooth device.
!Connection cannot be established automa-
tically for some reason.
If you start connection manually, carry out the
following procedure. You can also connect the
Bluetooth device by having the navigation sys-
tem detect it automatically.
1 Activate the Bluetooth wireless tech-
nology on your devices.
For some Bluetooth devices, no specific action
is necessary to activate Bluetooth wireless
technology. For details, refer to the instruction
manual of your devices.
2 Display the “Settings Menu”screen.
=For details of the operations, refer to Screen
switching overview on page 22.
3 Touch [Bluetooth Settings].
The “Bluetooth Settings”screen appears.
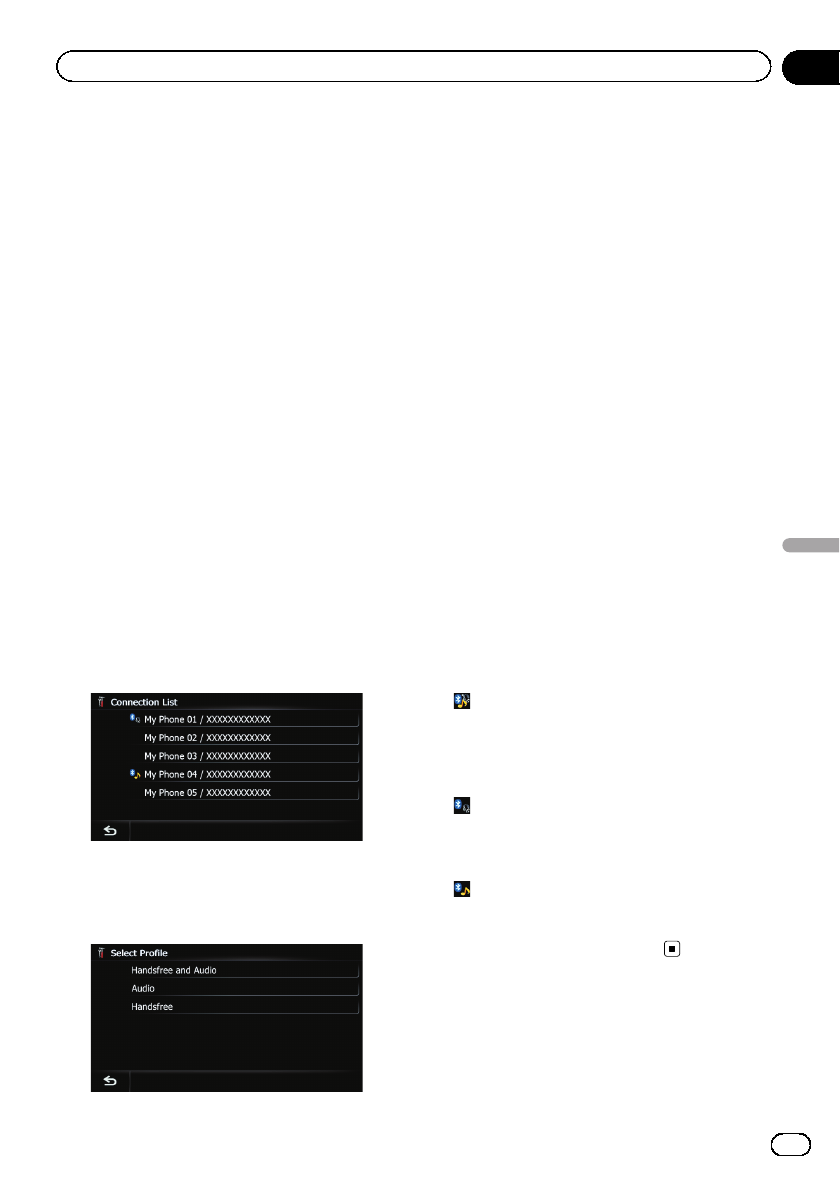
4 Touch [Connection].
The “Connection List”screen appears.
5 Touch the name of the device that you
want to connect.
The “Select Profile”screen appears.
6 Touch the profile that you want to con-
nect.
You can select the following profiles:
!Handsfree and Audio:
Connects the device as the hands-free
phone and the Bluetooth audio player.
!Audio:
Connects the device as Bluetooth audio
player.
!Handsfree:
Connects the device as the hands-free
phone.
Connection starts.
When a connection is successfully estab-
lished, a connection complete message ap-
pears and the map screen returns by touching
[OK].
pTo cancel the connection to your device,
touch [Cancel].
pIf connection fails, check whether your de-
vice is waiting for a connection and then
retry.
Setting for priority connecting
The selected device is set for priority connect-
ing.
And one of the following icons is indicated
next to the device name.
!:
Appears when the device is registered so
that it will be preferentially paired with both
the hand-free and Bluetooth audio connec-
tion.
!:
Appears when the device is registered so
that it can be preferentially paired with the
hand-free connection.
!:
Appears when the device is registered so
that it will be preferentially paired with the
Bluetooth audio connection.
En 67
Chapter
11
Registering and connecting a Bluetooth device
Registering and connecting a Bluetooth device
CAUTION
For your safety, avoid talking on the phone as
much as possible while driving.
If your cellular phone features Bluetooth tech-
nology, this navigation system can be con-
nected to your cellular phone wirelessly. Using
this hands-free function, you can operate the
navigation system to make or receive phone
calls. You can also transfer the phone book
data stored in your cellular phone to the navi-
gation system. This section describes how to
set up a Bluetooth connection and how to op-
erate a cellular phone featuring Bluetooth
technology on the navigation system.
For details about the connectivity with the de-
vices featuring Bluetooth wireless technology,
refer to the information on our website.
Displaying the Phone Menu
Use the “Phone Menu”if you connect the cel-
lular phone to the navigation system for utiliza-
tion.
=For details of the operation, refer to Regis-
tering and connecting a Bluetooth device on
page 63.
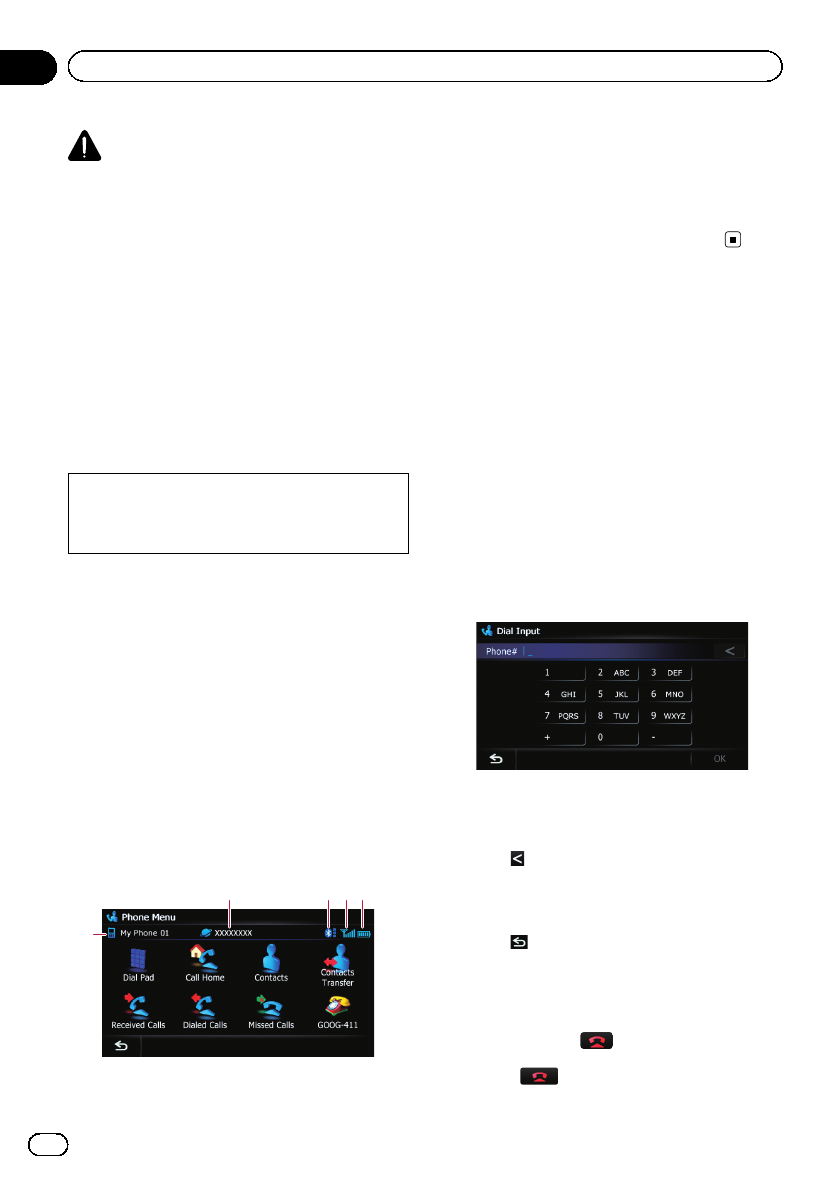
1 Press the HOME button to display the
“Top Menu”screen.
2 Touch [Phone].
The “Phone Menu”screen appears.
2
1
3 45
1Name of connected cellular phone
2Network name of the cellular phone com-
pany
3Strength of the Bluetooth connection be-
tween the navigation system and the device
4Reception status of the cellular phone
5Battery status of the cellular phone
Making a phone call
You can make a phone call in many different
ways.
Direct dialing
1 Display the “Phone Menu”screen.
=For details, refer to Displaying the Phone
Menu on this page.
2 Touch [Dial Pad].
The “Dial Input”screen appears.
3 Touch the number keys to enter the
phone number.
The phone number that was input is dis-
played.
And then [OK] is activated.
#Touch .
The input number is deleted a digit at a time from
the end of the number. Continuing to press this
deletes all of the digits.
#Touch .
The previous screen returns.
4 Touch [OK] to make a call.
pTo cancel the call after the system starts
dialing, touch .
5 Touch to end the call.
En
68
Chapter
12 Using hands-free phoning
Making a call home easily
You can call home without taking the time to
enter the phone number if the phone number
has been registered.
1 Display the “Phone Menu”screen.
=For details, refer to Displaying the Phone
Menu on the previous page.
2 Touch [Call Home].
Dialing home starts.
pIf you have not registered your home num-
ber, a message appears. Touch [Register]
to start registration.
=For details, refer to Registering your
home on page 152.
Calling a number in the
“Contacts List”
After finding the entry you want to call in the
“Contacts List”screen, you can select the
number and make the call.
pBefore using this function, you need to
transfer the phone book entries stored in
your cellular phone to the navigation sys-
tem.
=For details, refer to Transferring the phone
book on page 72.
1 Display the “Phone Menu”screen.
=For details, refer to Displaying the Phone
Menu on the previous page.
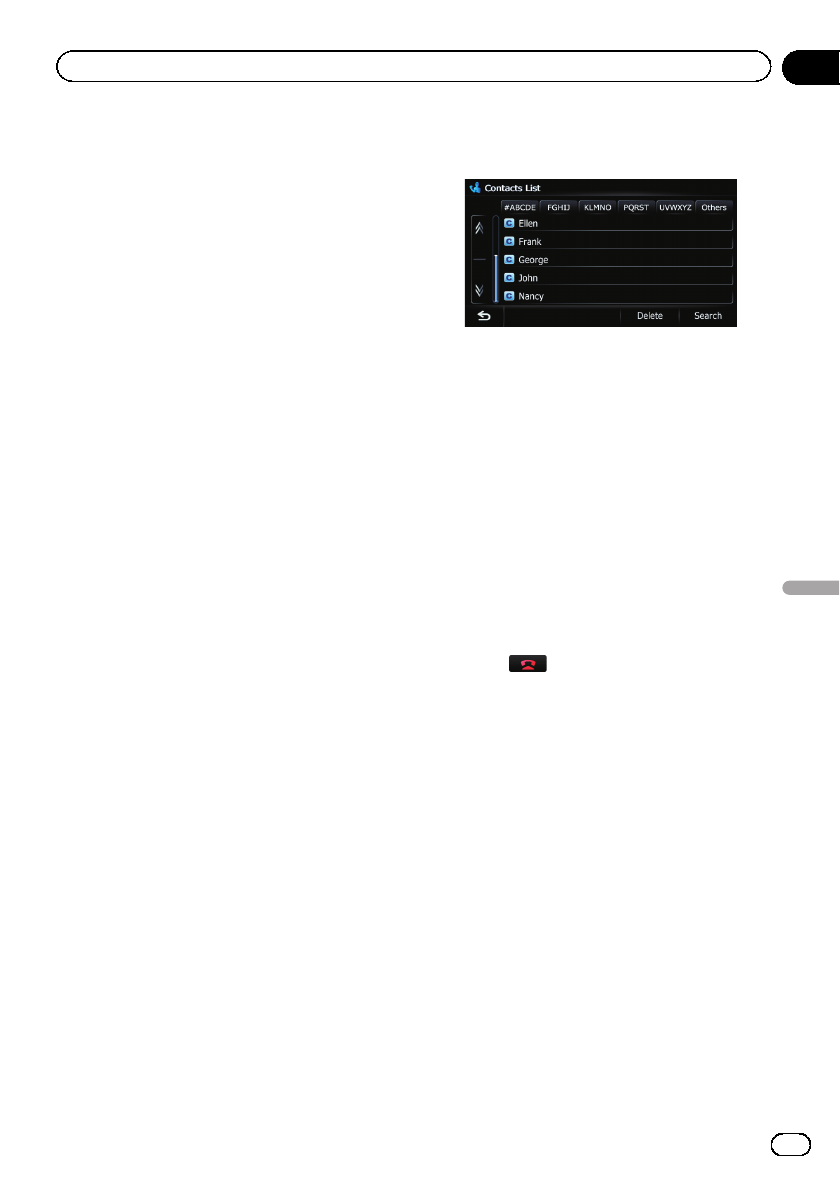
2 Touch [Contacts].
The “Contacts List”screen appears.
3 Touch [Search].
The “Contacts Name Search”screen appears.
You can search by the names registered in the
“Contacts List”screen.
4 Switch the page of the list to display
the desired entry.
#Touch alphabet tabs.
Makes the screen jump to the beginning of the
page including the entry whose names start with
any of selected letters or numbers.
Touching [#ABCDE] also displays the page in-
cluding the entry whose names start with primary
symbols or numbers.
Touching [Others] displays the page including
entries that are not assigned to any of the other
tabs.
5 Touch the desired entry on the list to
make a call.
pIf the entry has multiple phone number
data, a selection list appears.
6 Touch to end the call.
Dialing from the history
The most recent calls made (dialed), received
and missed are stored in the call history list.
You can browse the call history list and call
numbers from it.
pEach call history saves 30 calls per regis-
tered cellular phone. If the number of calls
exceeds 30, the oldest entry will be deleted.
1 Display the “Phone Menu”screen.
=For details, refer to Displaying the Phone
Menu on the previous page.
2 Touch [Received Calls], [Dialed Calls] or
[Missed Calls].
The selected call history list appears.
En 69
Chapter
12
Using hands-free phoning
Using hands-free phoning
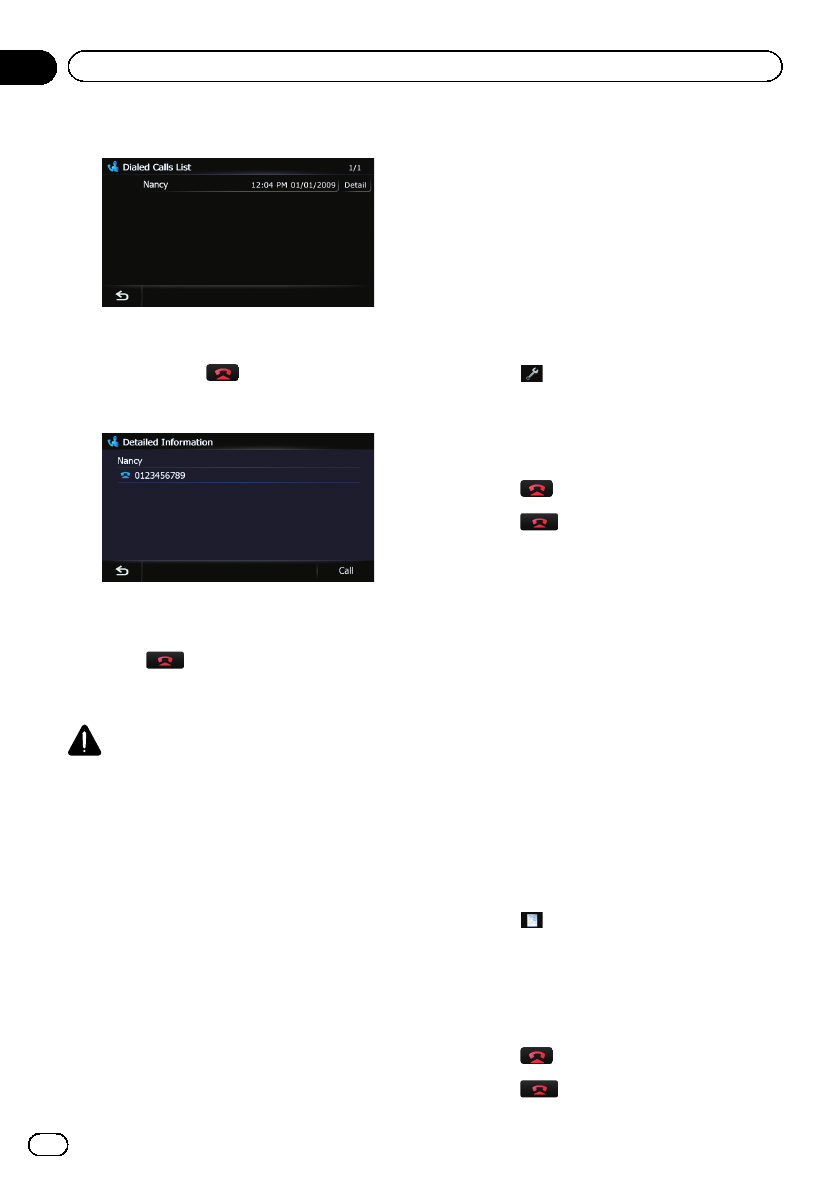
3 Touch an entry on the list.
Dialing starts.
pTo cancel the call after the system starts
dialing, touch .
#Touch [Detail].
The “Detailed Information”screen appears.
You can check the details of the party before mak-
ing a phone call.
4 Touch to end the call.
Dialing GOOG-411
CAUTION
Local and/or long distance charges for making a
phone call may apply.
You can dial GOOG-411 to dial the free busi-
ness listing service of Googleäwith one
touch.
1 Touch [GOOG-411] on the “Phone
Menu”.
=For details, refer to Displaying the Phone
Menu on page 68.
Dialing GOOG-411 starts.
2 You can now use the GOOG-411 phone
service.
For details about GOOG-411 service and avail-
ability, contact Google.
Dialing the entry stored in the
“Favorites”list
You can make a call to the entry stored in the
“Favorites”list.
1 Display the “Destination Menu”screen.
=For details of the operations, refer to Screen
switching overview on page 22.
2 Touch [Favorites].
The “Favorites”screen appears.
3 Touch next to the location that you
want to make a call.
The “Edit Favorite”screen appears.
4 Touch [Call] to make a call.
To cancel the call after the system starts dial-
ing, touch .
5 Touch to end the call.
Dialing a facility’s phone number
You can make a call to facilities with phone
number data.
pYou cannot make a call to locations or POIs
that have no phone number data.
1 Display the “Destination Menu”screen.
=For details of the operations, refer to Screen
switching overview on page 22.
2 Touch [POI].
The “POI Search”screen appears.
3 Search for the POI.
The “POI List”screen appears.
=For details of the operation, refer to Search-
ing for Points of Interest (POI) on page 36.
4 Touch next to the POI that you want
to call.
The “Detailed POI Information”screen ap-
pears.
5 Touch [Call] to make a call.
To cancel the call after the system starts dial-
ing, touch .
6 Touch to end the call.
En
70
Chapter
12 Using hands-free phoning