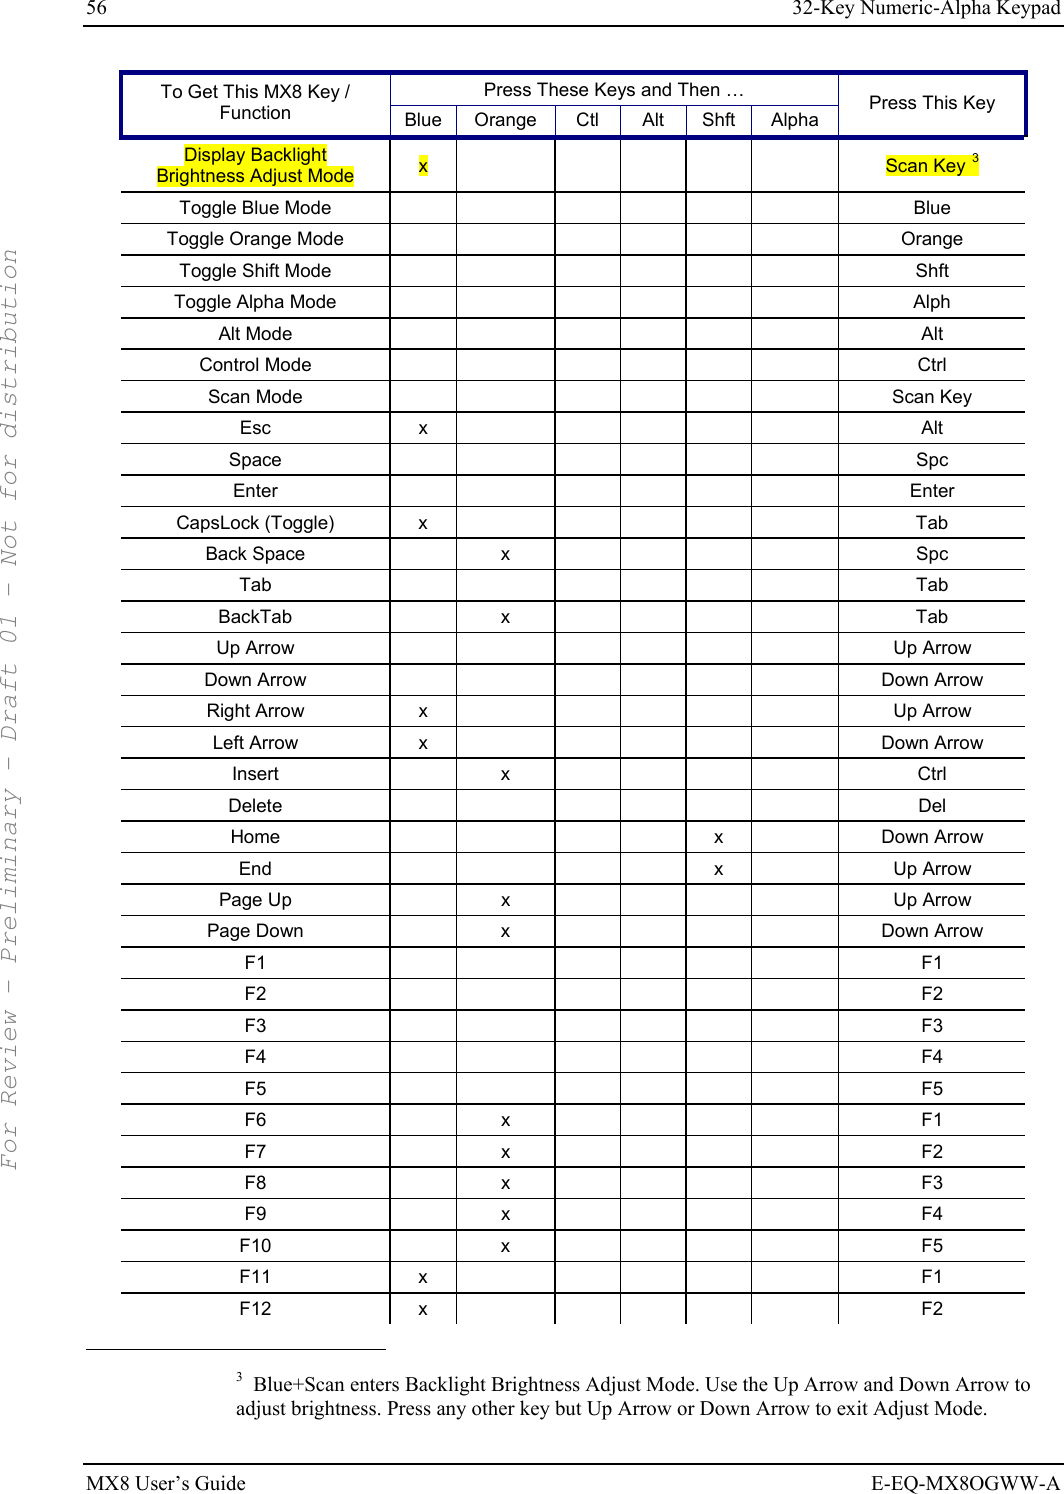
Honeywell LXE4830P 802.11g COMPACT FLASH MODULE User Manual MX8 User s Guide
Honeywell International, Inc. 802.11g COMPACT FLASH MODULE MX8 User s Guide
Contents
- 1. Manual HX1 rev3
- 2. Manual MX3X rev3
- 3. Manual MX5X rev3
- 4. Manual MX7 rev3
- 5. User Manual HX2
- 6. User Manual MX7
- 7. users manual
- 8. USERS MANUAL
- 9. User Manual MX3X
- 10. User Manual VX3X
- 11. User Manual VX6 part 1
- 12. User Manual VX6 part 2
- 13. User Manual VX7 part 1
- 14. User Manual VX7 part 2
- 15. Users Manual F300
- 16. Users Manual MX9
USERS MANUAL
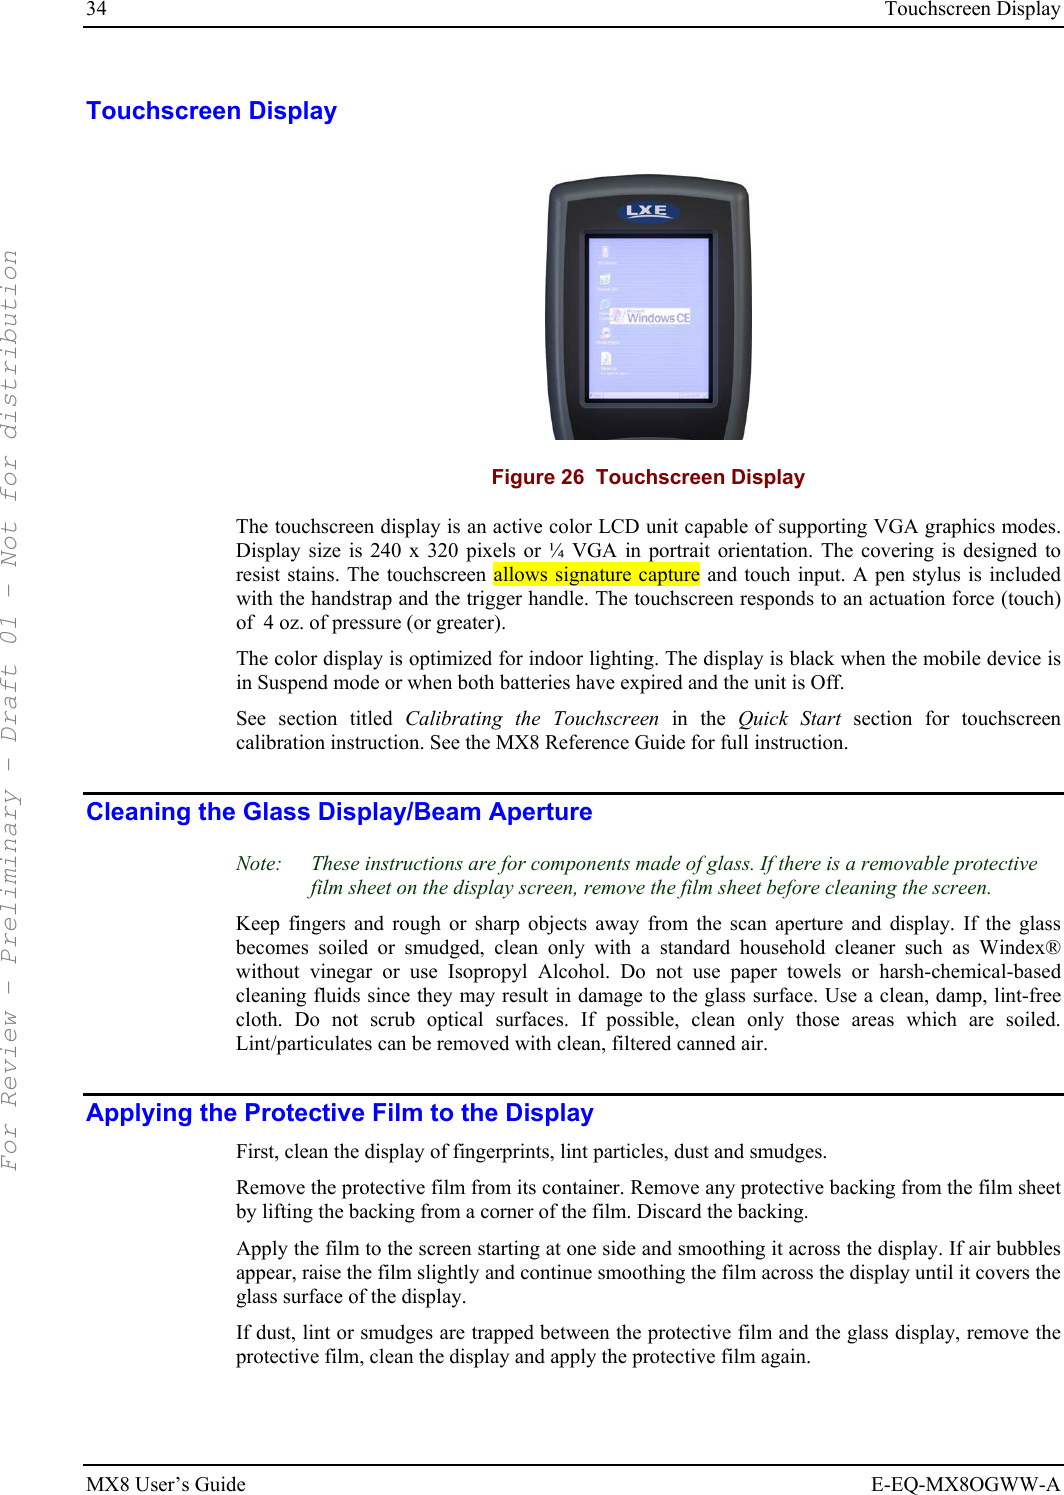
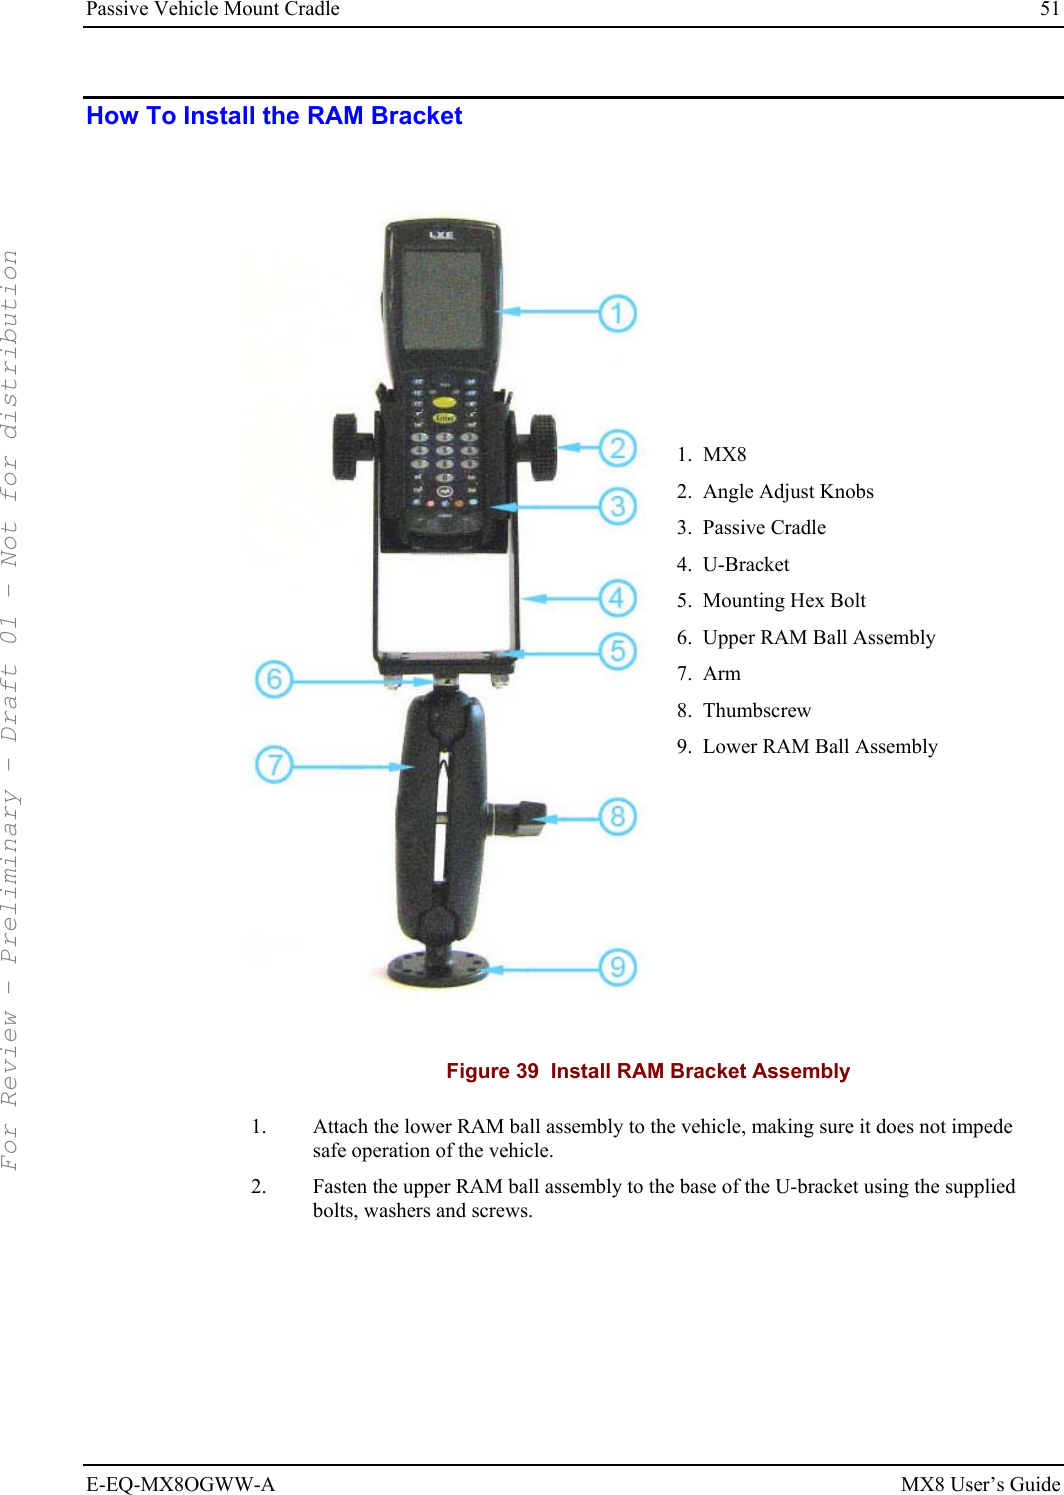
![4 Overview MX8 User’s Guide E-EQ-MX8OGWW-A Document Conventions ALL CAPS All caps are used to represent disk directories, file names, and application names. Menu | Choice Rather than use the phrase “choose the Save command from the File menu”, this guide uses the convention “choose File | Save”. “Quotes” or Italics Indicates the title of a book, chapter or a section within a chapter (for example, “Document Conventions” and Document Conventions). < > Indicates a key on the keypad (for example, <Enter> ). Indicates a reference to other documentation. ATTENTION Keyword that indicates vital or pivotal information to follow. Attention symbol that indicates vital or pivotal information to follow. Also, when marked on product, means to refer to the user’s guide. International fuse replacement symbol. When marked on the product, the label includes fuse ratings in volts (v) and amperes (a) for the product. Note: Keyword that indicates immediately relevant information. CAUTION Keyword that indicates a potentially hazardous situation which, if not avoided, may result in minor or moderate injury. WARNING Keyword that indicates a potentially hazardous situation which, if not avoided, could result in death or serious injury. DANGER Keyword that indicates a imminent hazardous situation which, if not avoided, will result in death or serious injury. Environmental Specifications Operating Temperature 14°F to 122°F (-10°C to 50°C) [non-condensing] Storage Temperature -4°F to 158°F (-20°C to 70°C) [non-condensing] Water and Dust IEC 60529 compliant to IP54 Operating Humidity 5% to 90% non-condensing at 104°F (40°C) Vibration Based on MIL Std 810D ESD 8 kV air, 4kV contact Bluetooth Range 32.8 feet (10 meters) Direct line of sight only. For Review - Preliminary - Draft 01 - Not for distribution](https://usermanual.wiki/Honeywell/LXE4830P.USERS-MANUAL/User-Guide-855643-Page-10.png)
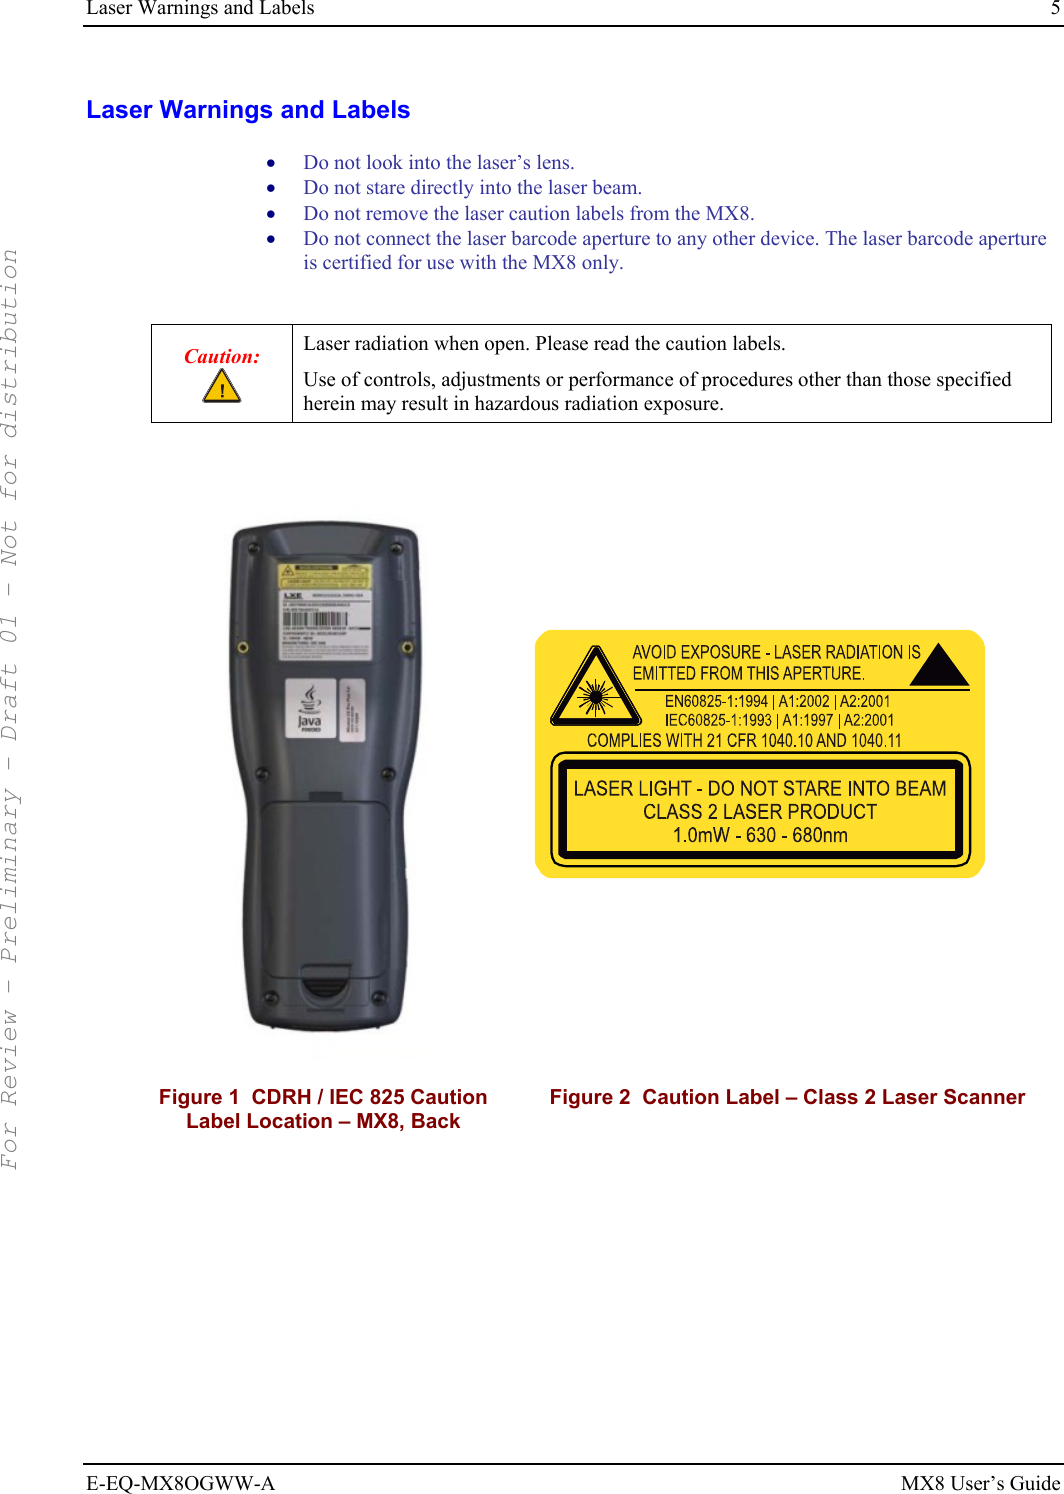


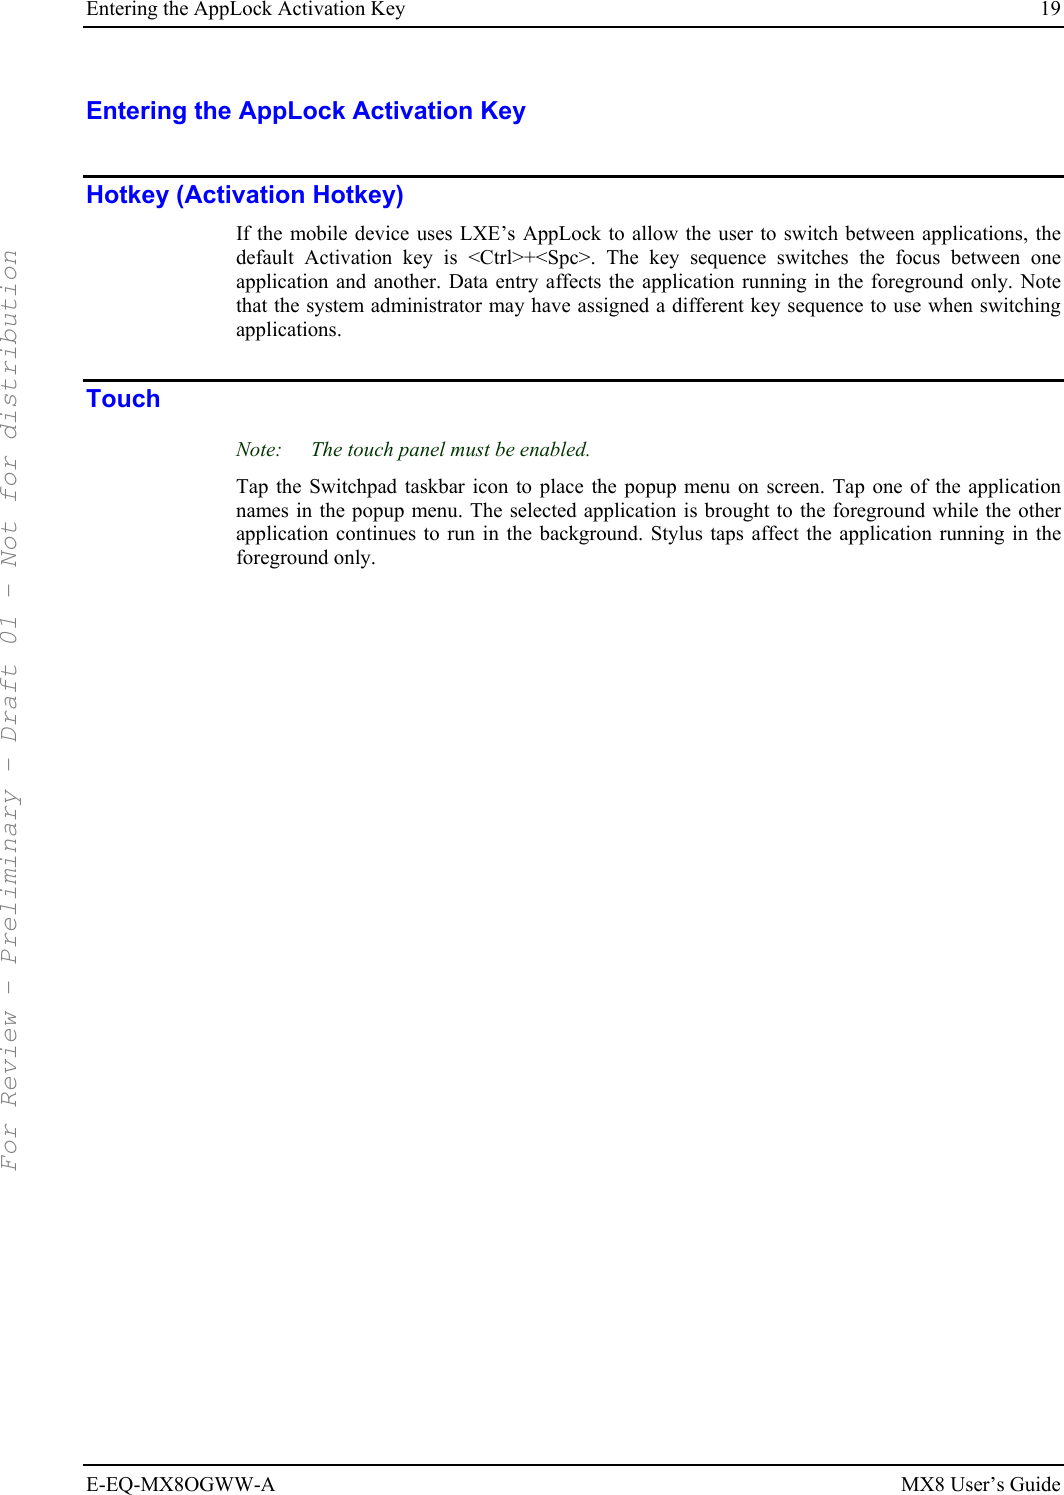
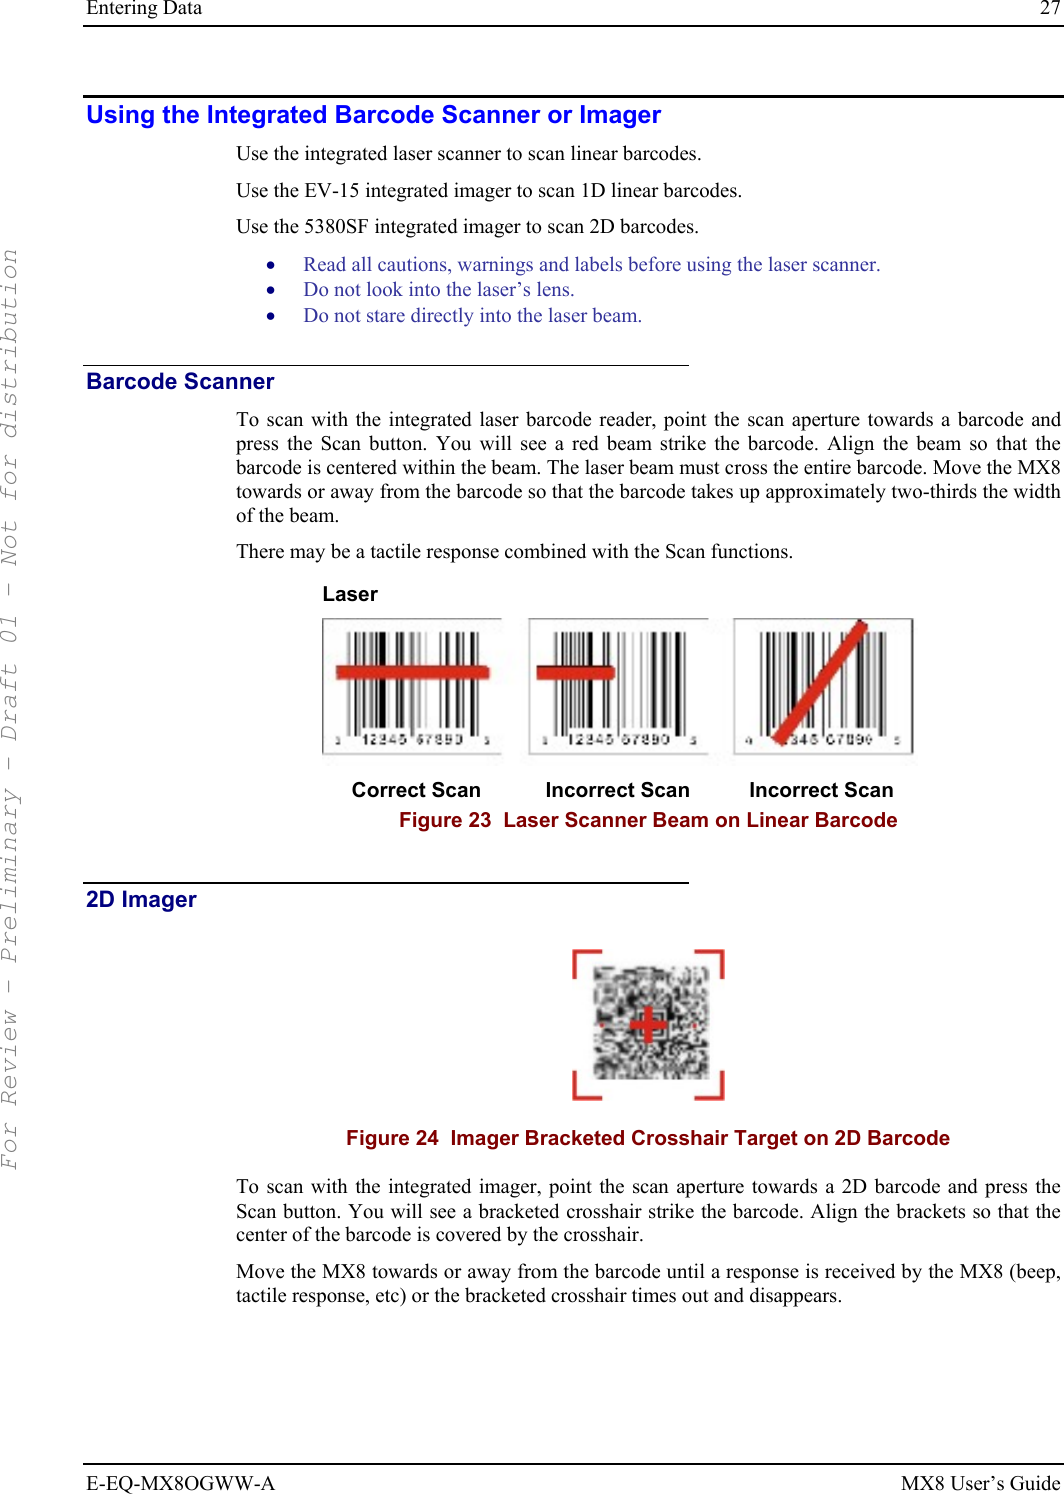
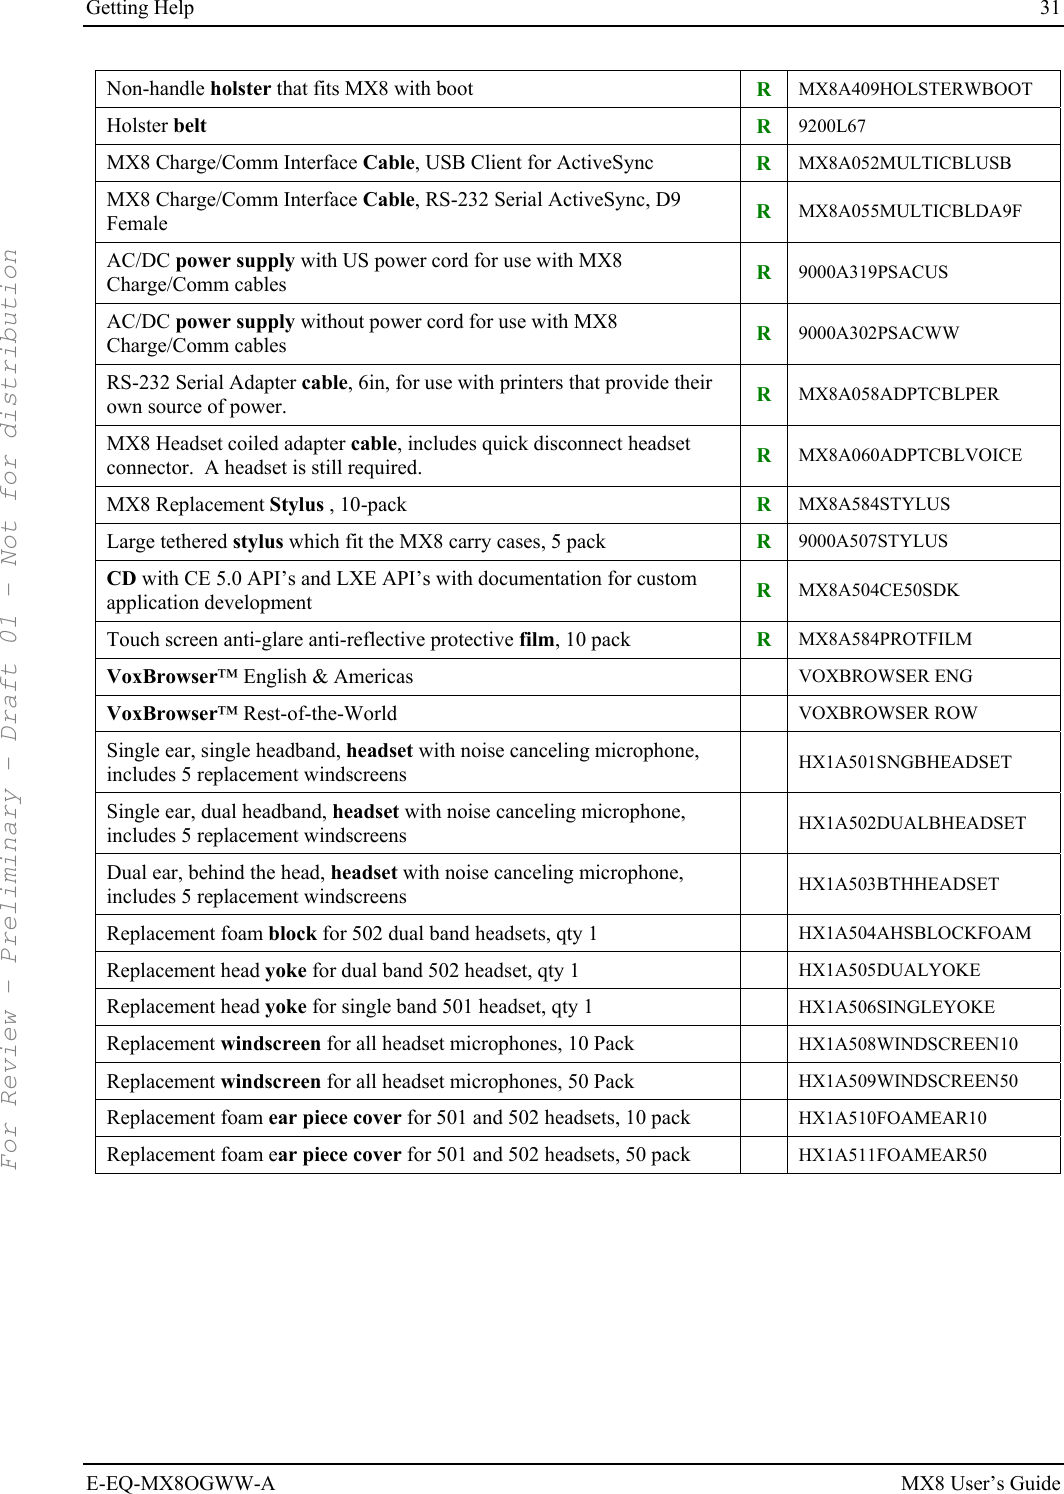
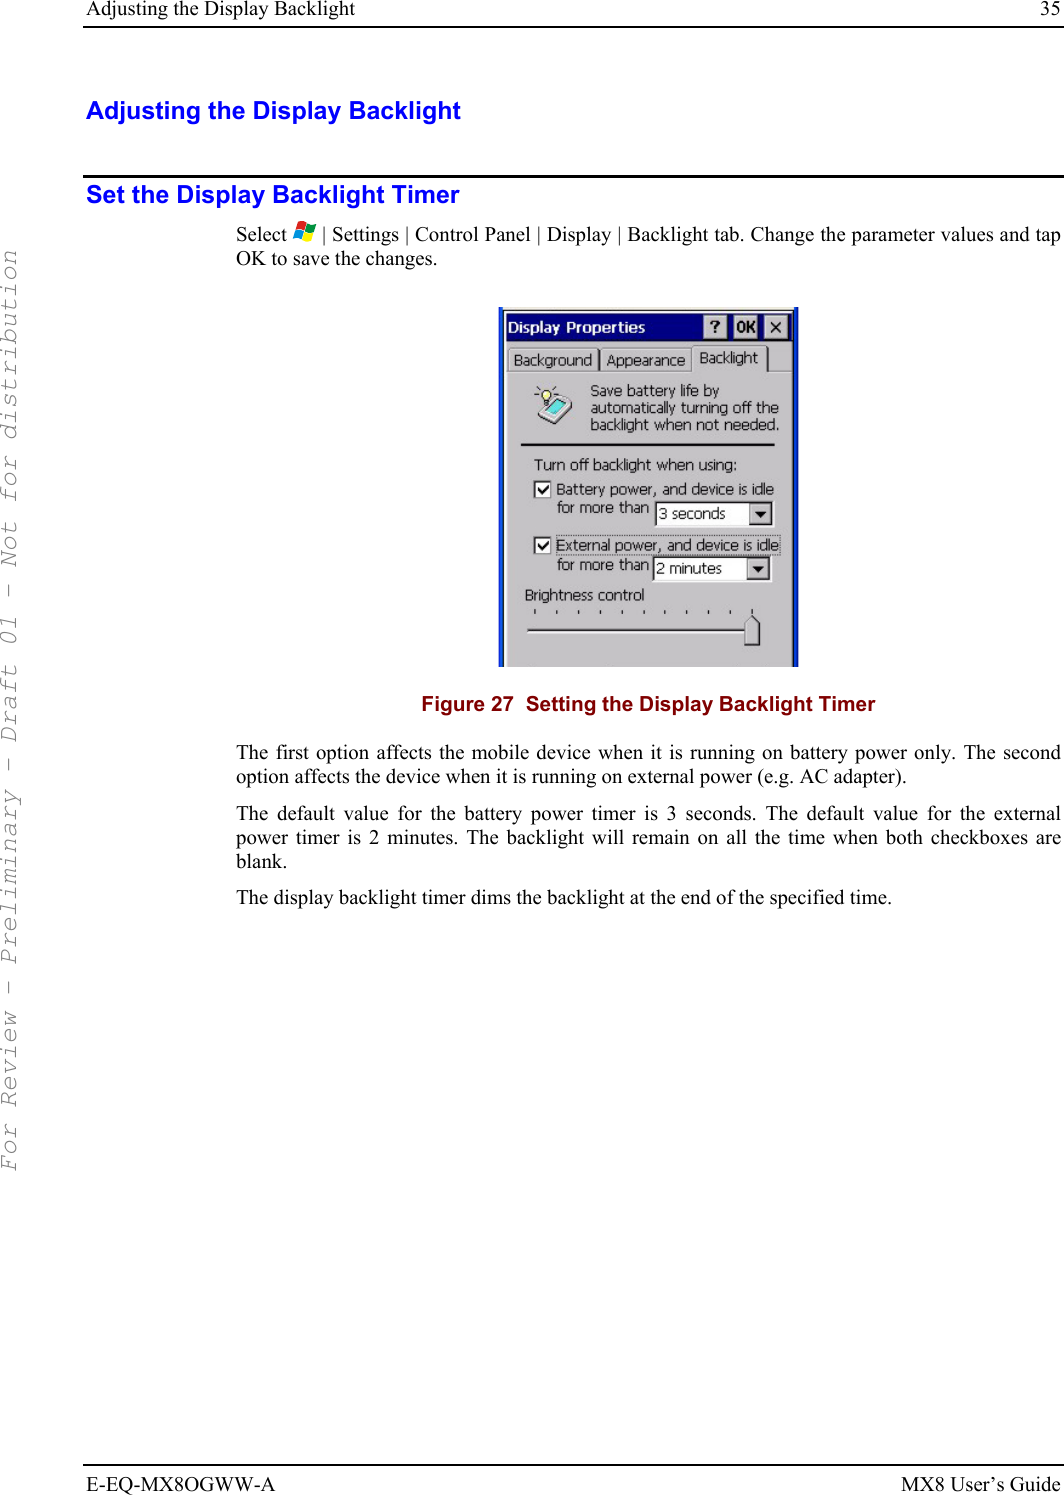

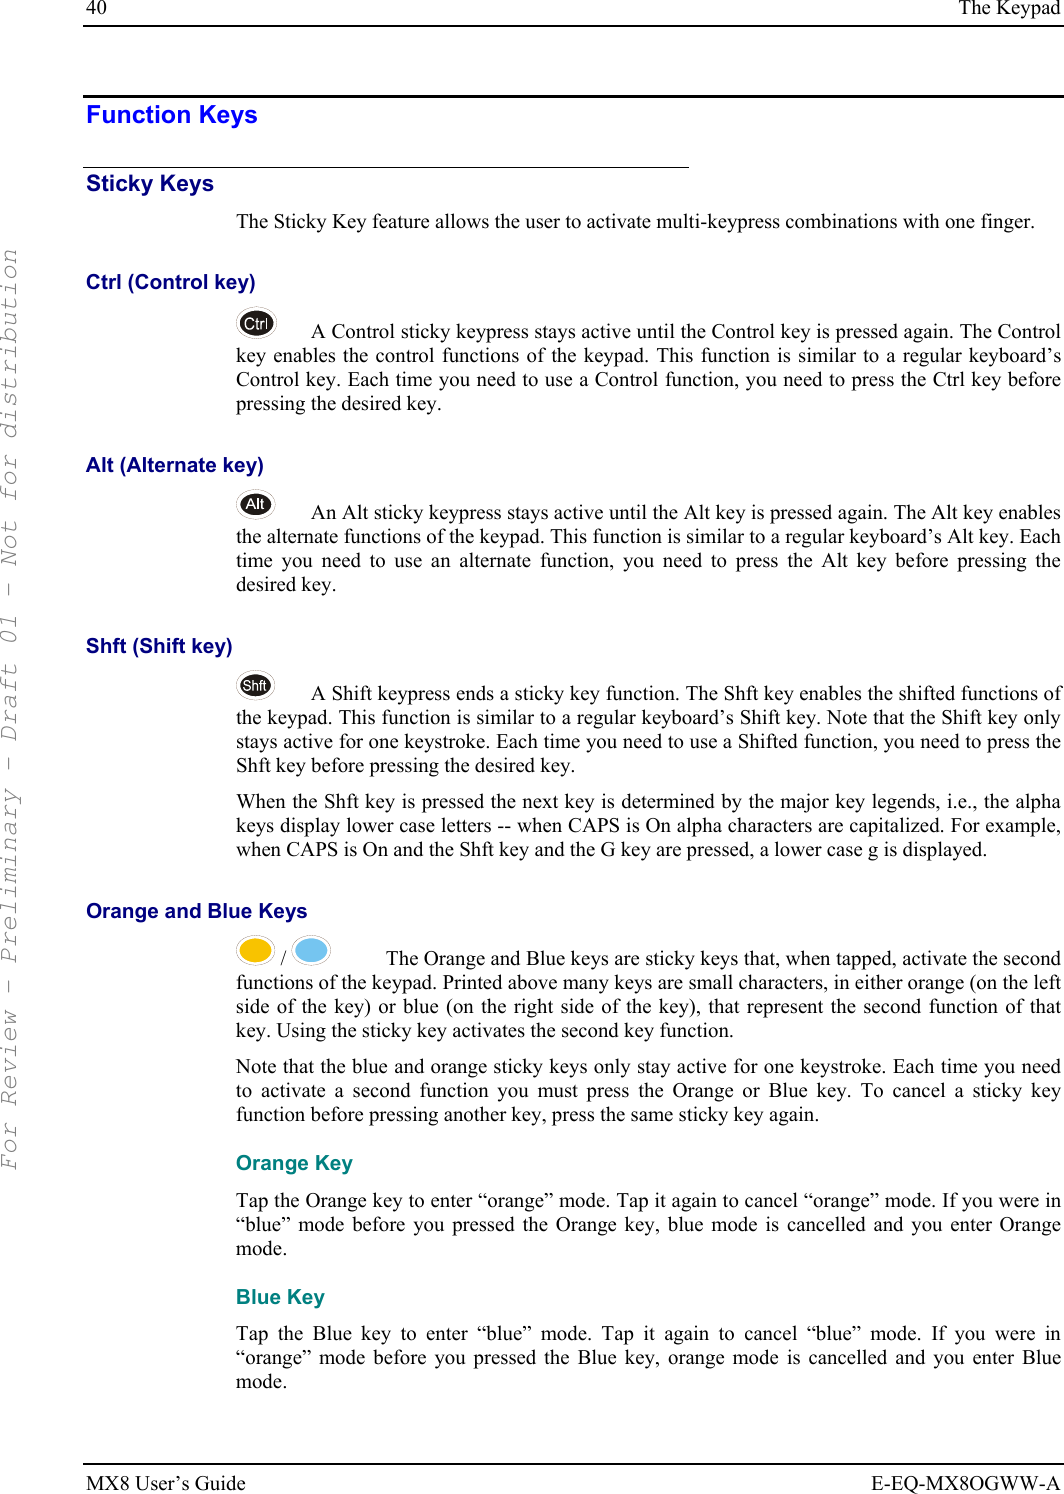
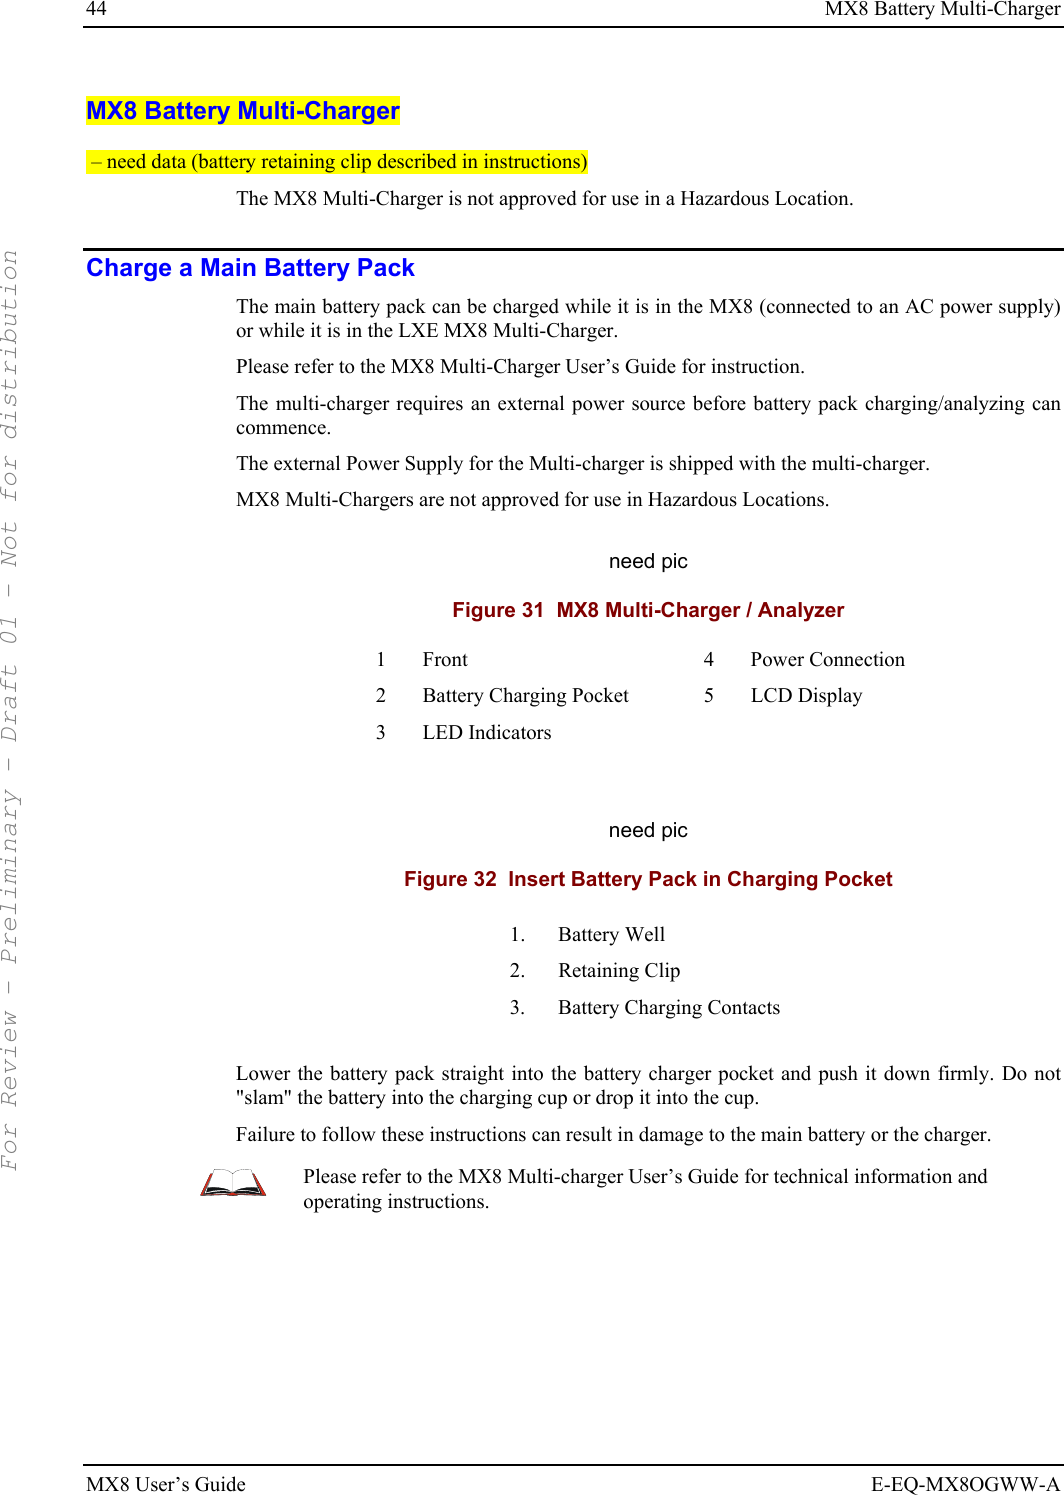
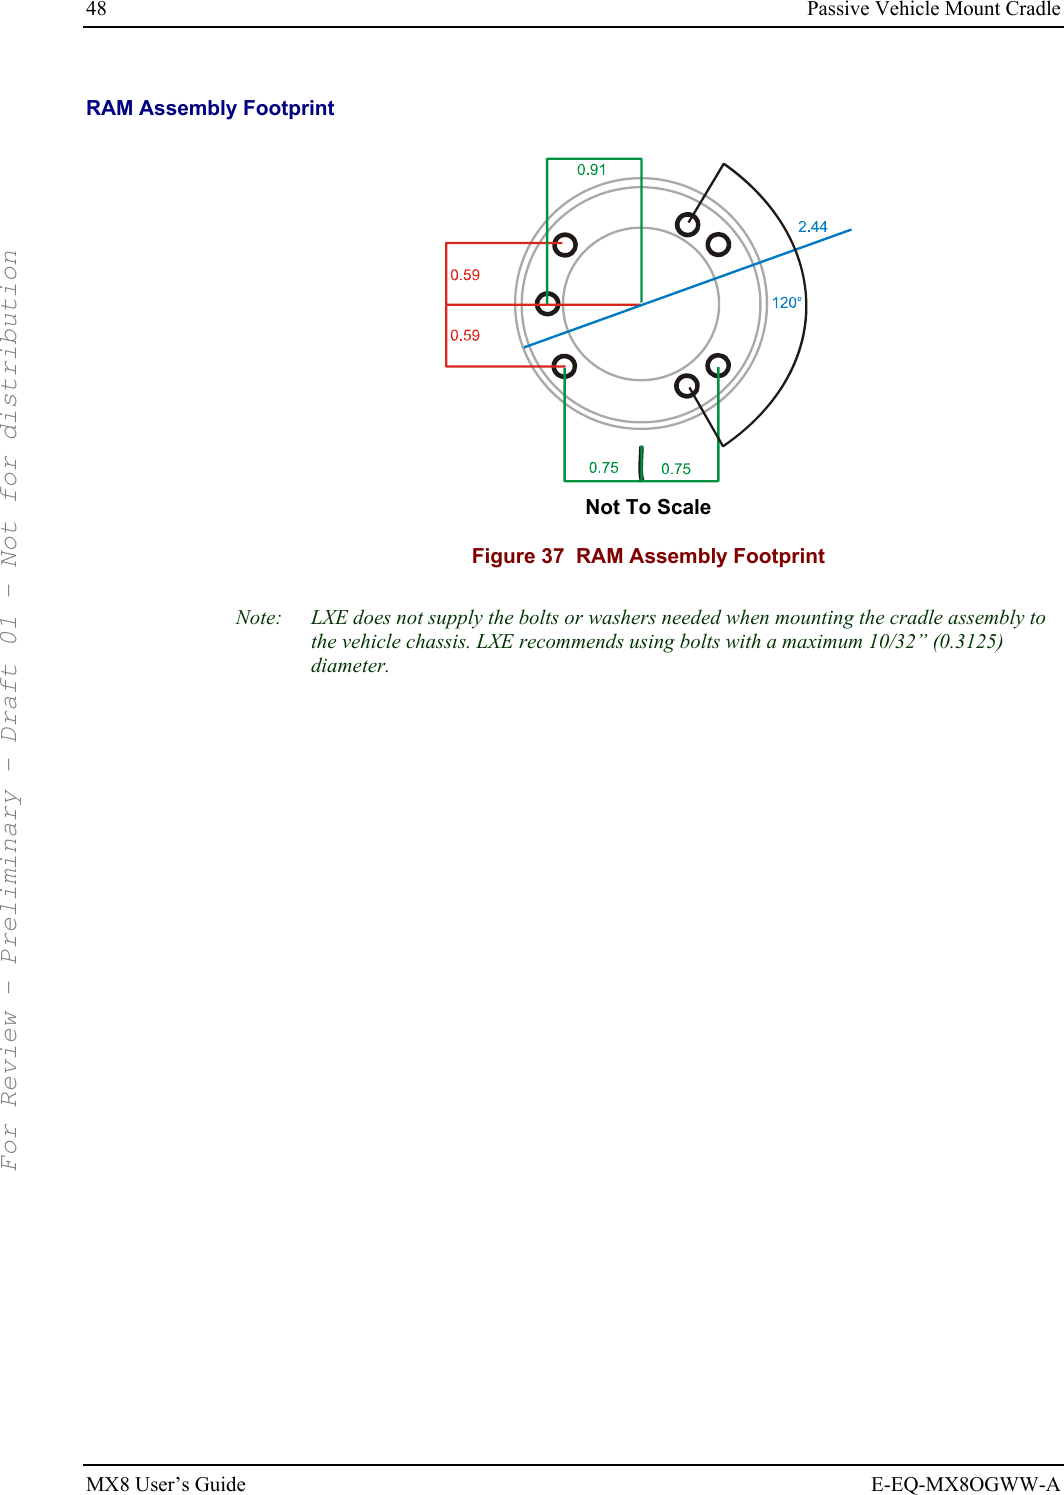

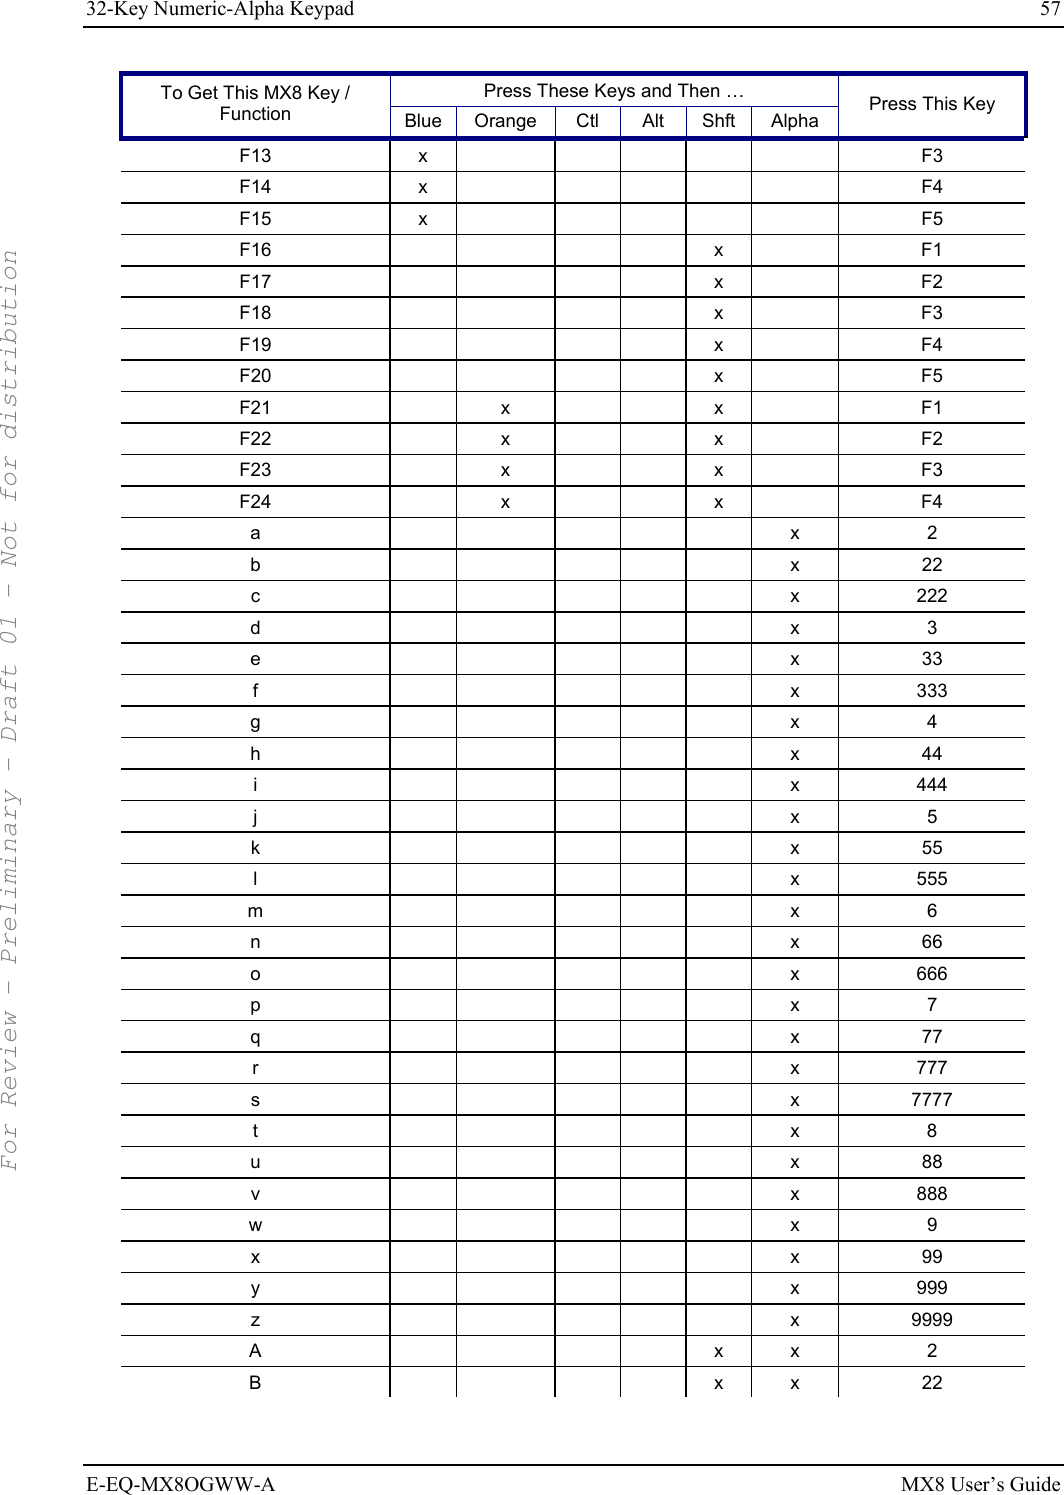
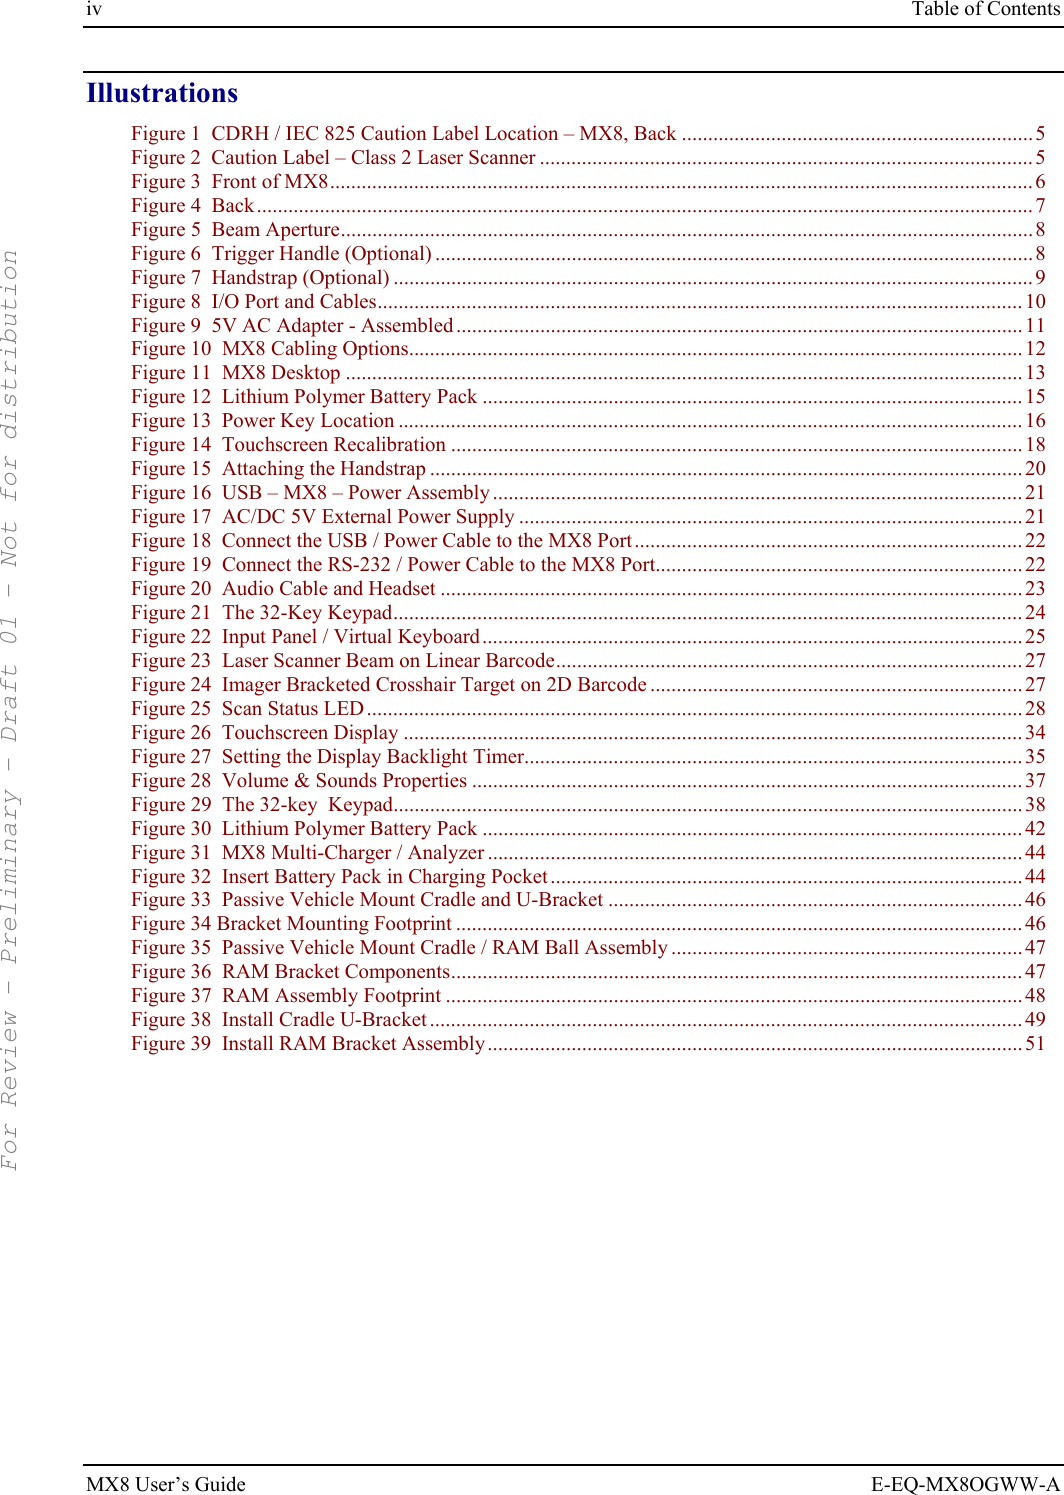
![32-Key Numeric-Alpha Keypad 59 E-EQ-MX8OGWW-A MX8 User’s Guide Press These Keys and Then … To Get This MX8 Key / Function Blue Orange Ctl Alt Shft Alpha Press This Key ] x x 3 or 3 > x 8 = x Diamond#2 { x 4 } x 5 / x 1 - x Spc + x Del * (asterisk) x x 8 or Diamond#1 : (colon) x 0 ; (semicolon) x 0 . (period) x Del ? x 8 ` (accent) x 6 _ (underscore) x 7 , (comma) x 6 ‘ (apostrophe) x Alph ~ (tilde) x 9 \ x 1 | x Alt “ x Alph ! x x Diamond#3 or 1 @ x x 2 or 5 # x x 3 or 4 $ x x 9 or 4 % x 5 ^ x x 6 or Ctrl For Review - Preliminary - Draft 01 - Not for distribution](https://usermanual.wiki/Honeywell/LXE4830P.USERS-MANUAL/User-Guide-855643-Page-65.png)
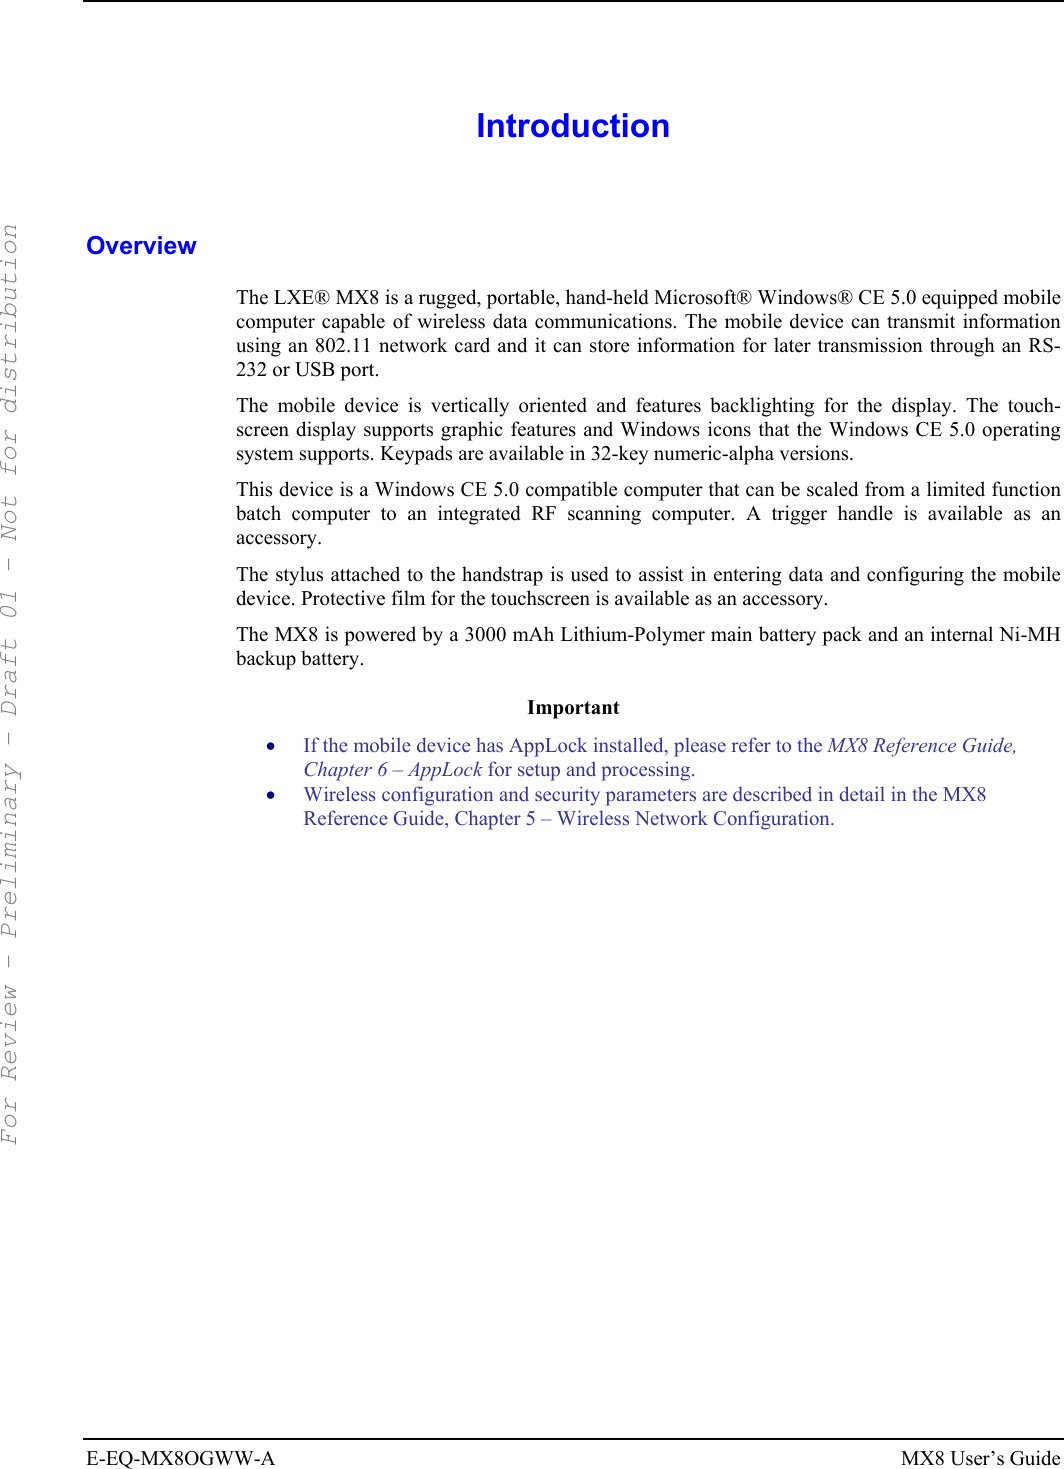
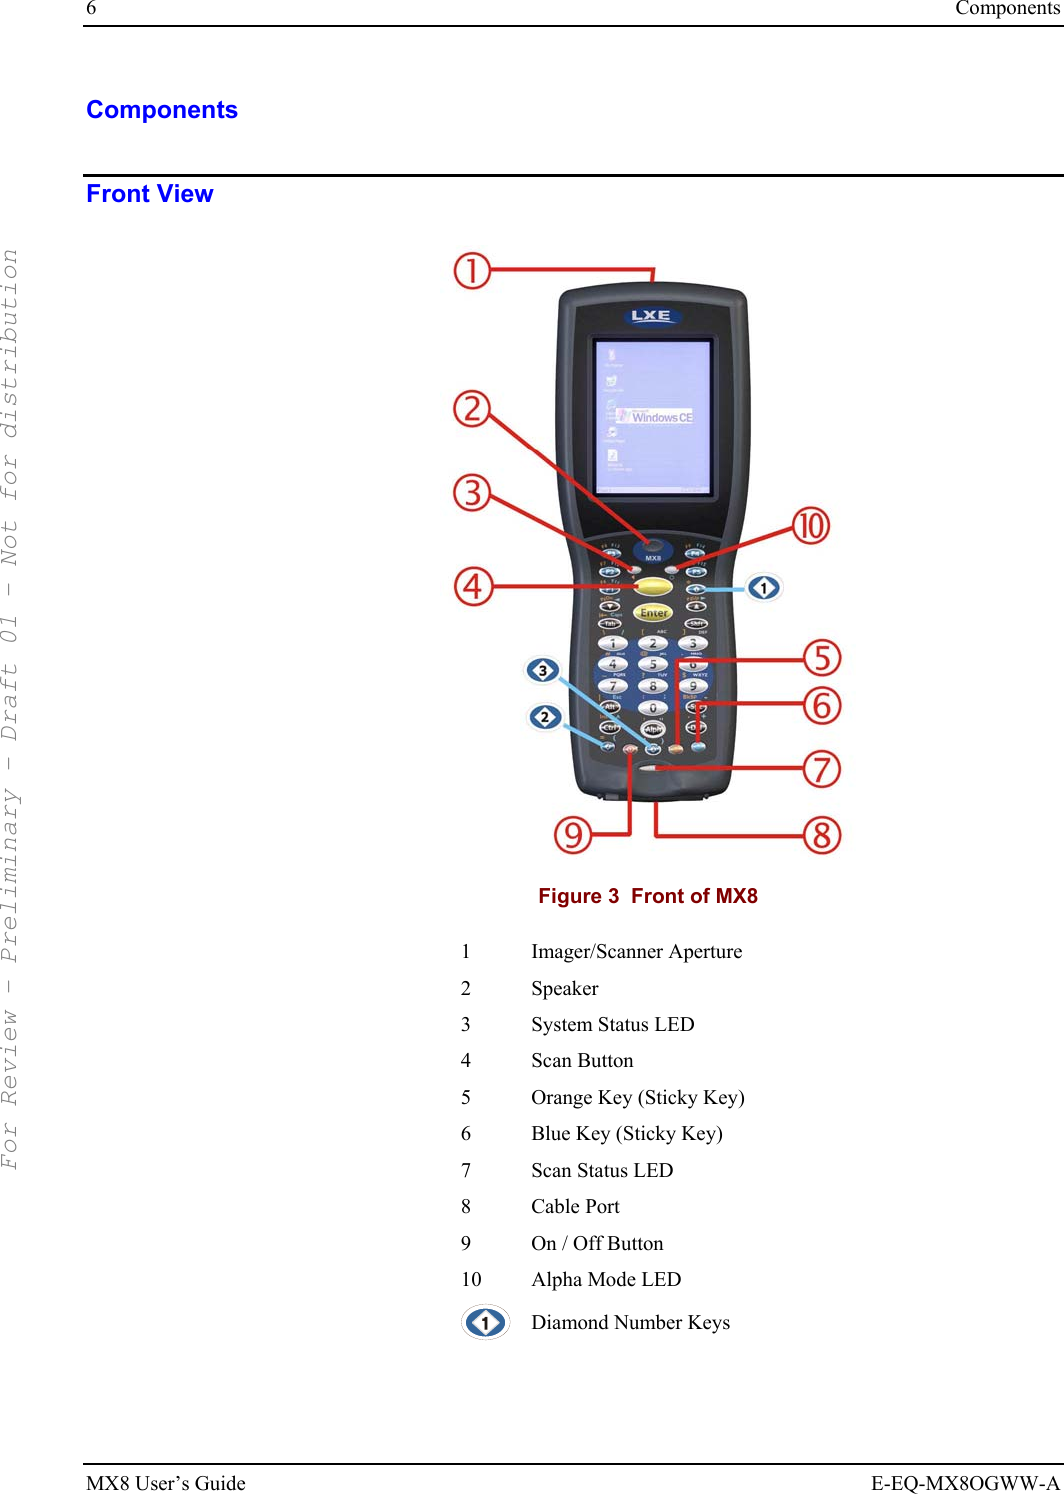
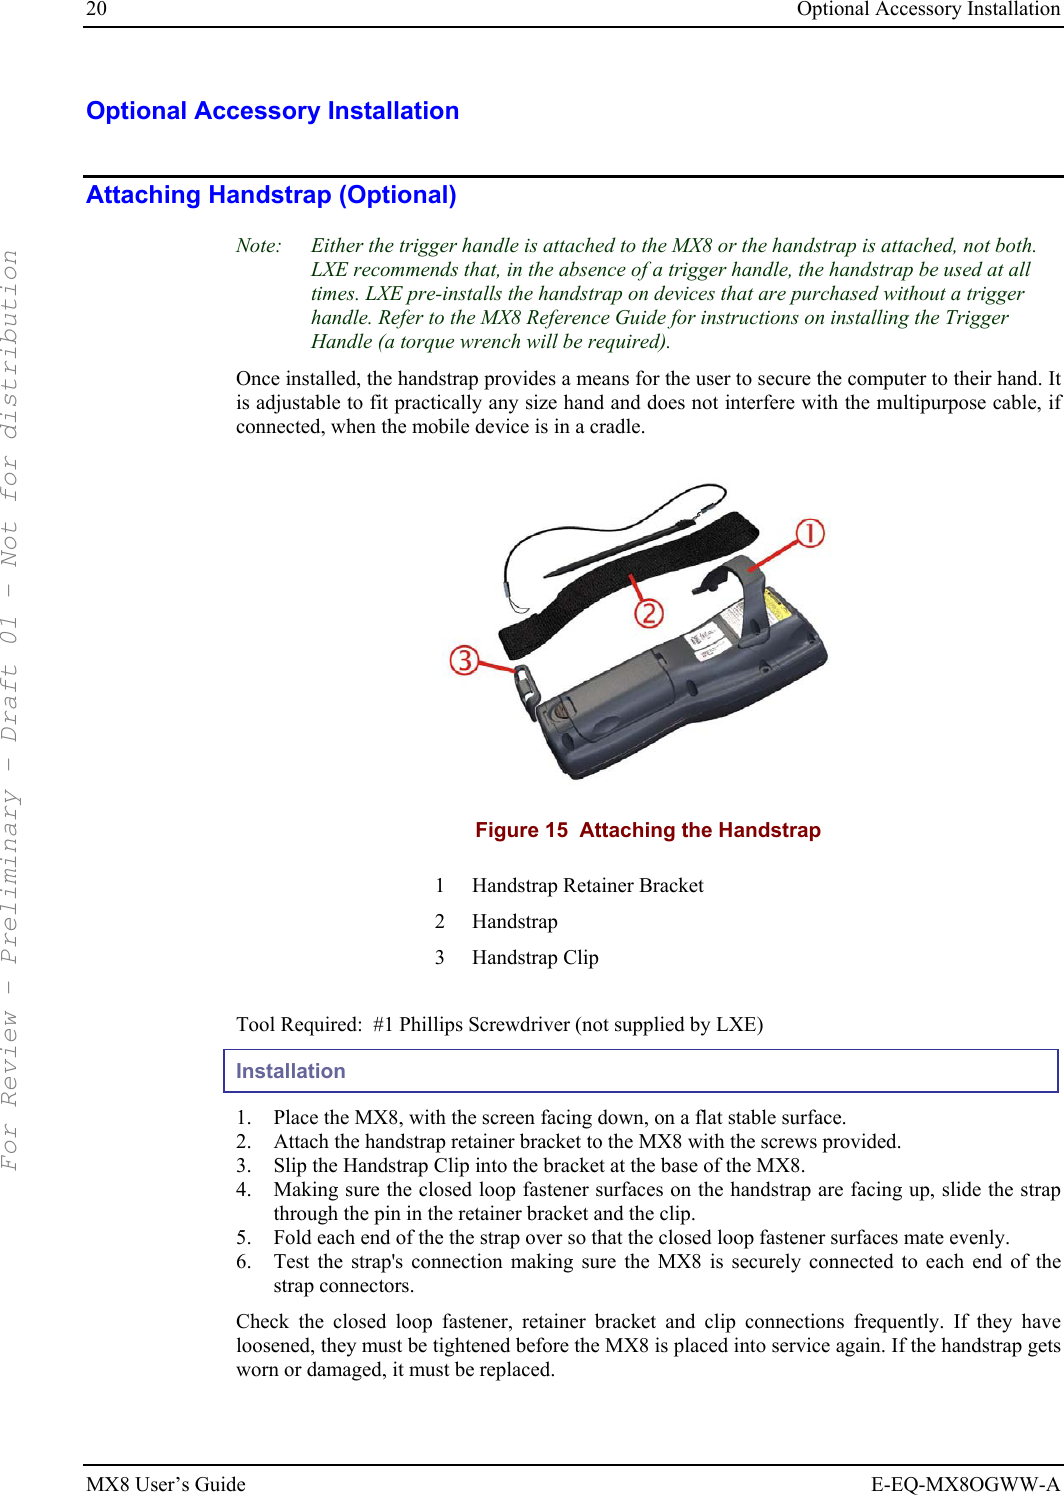
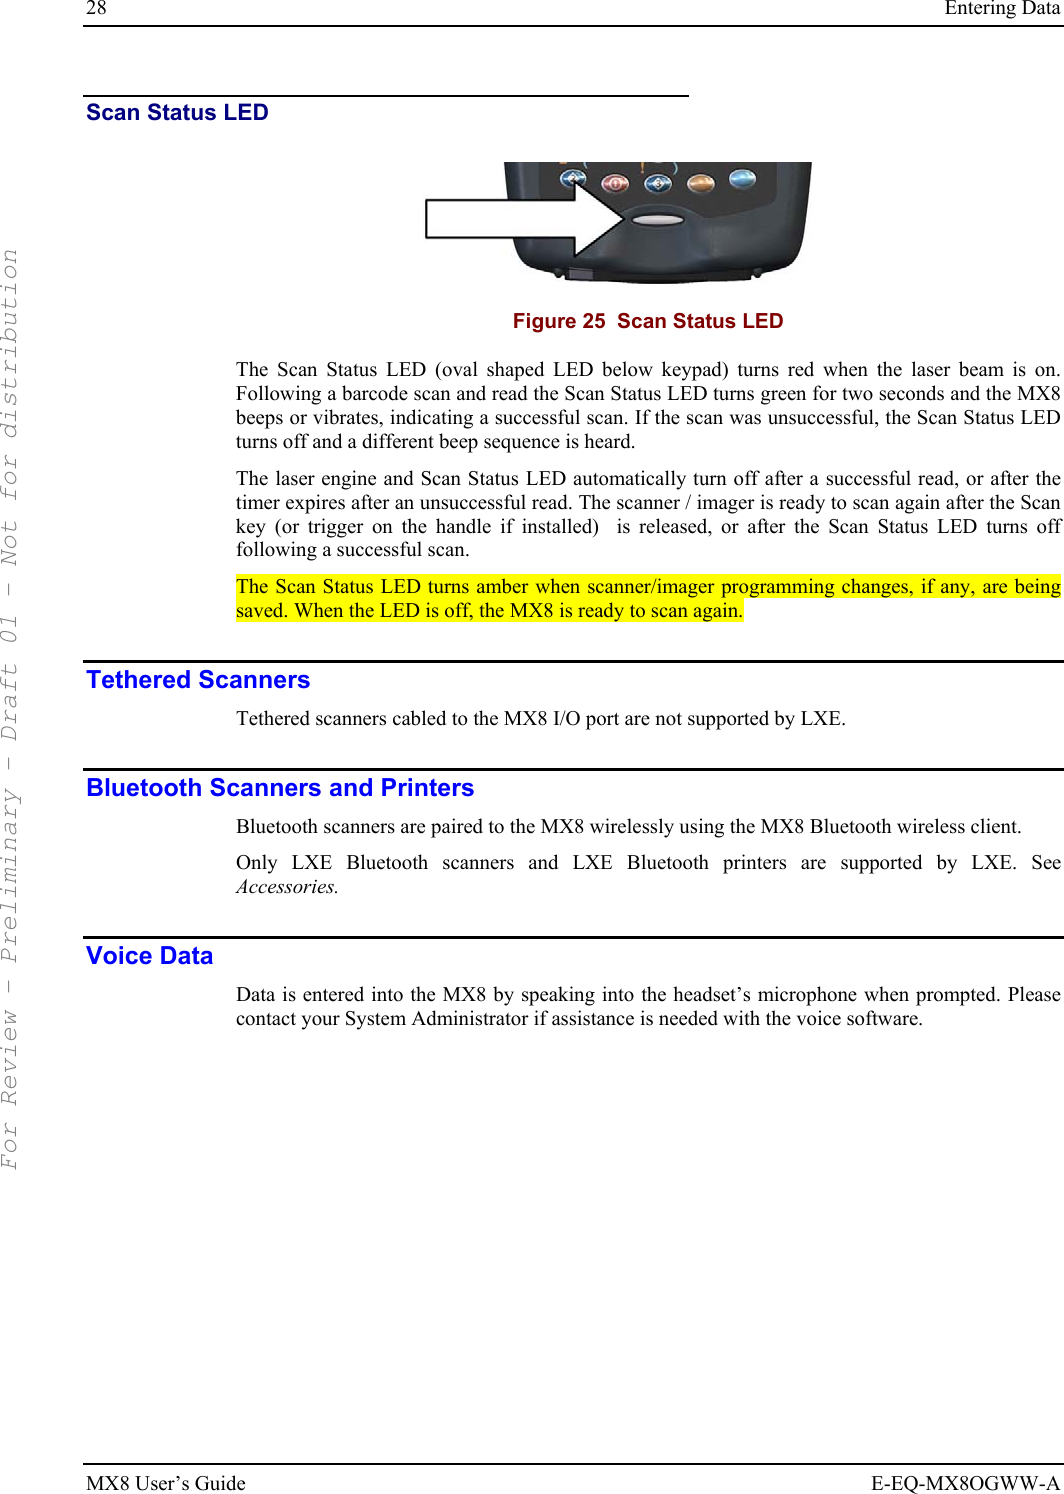
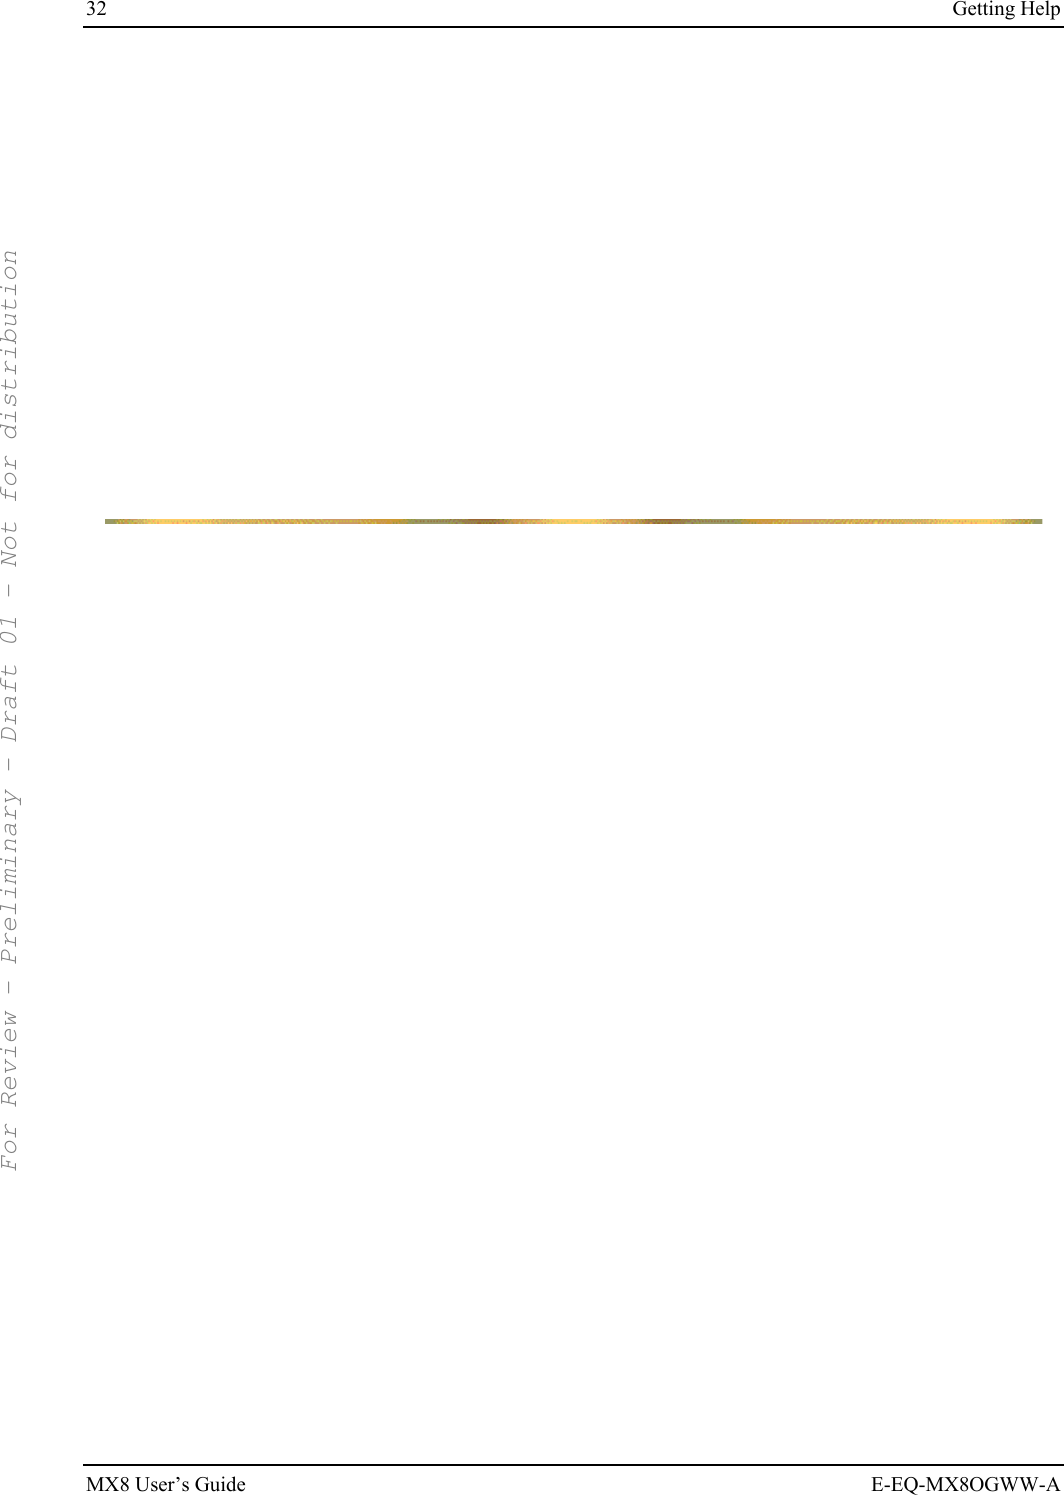
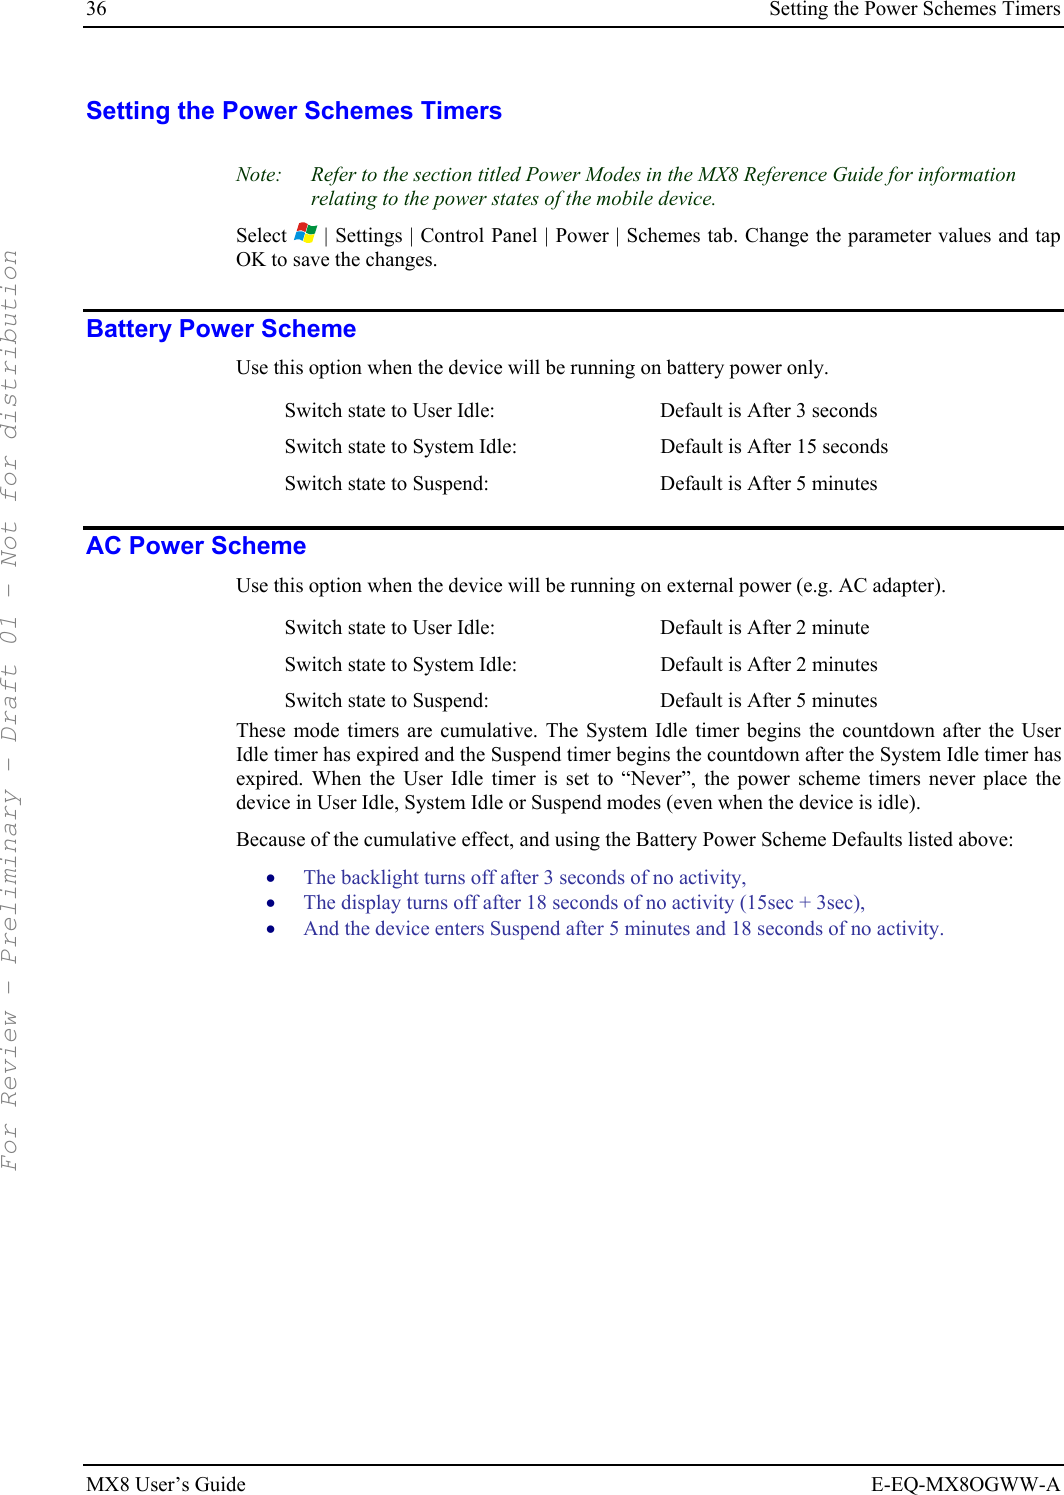
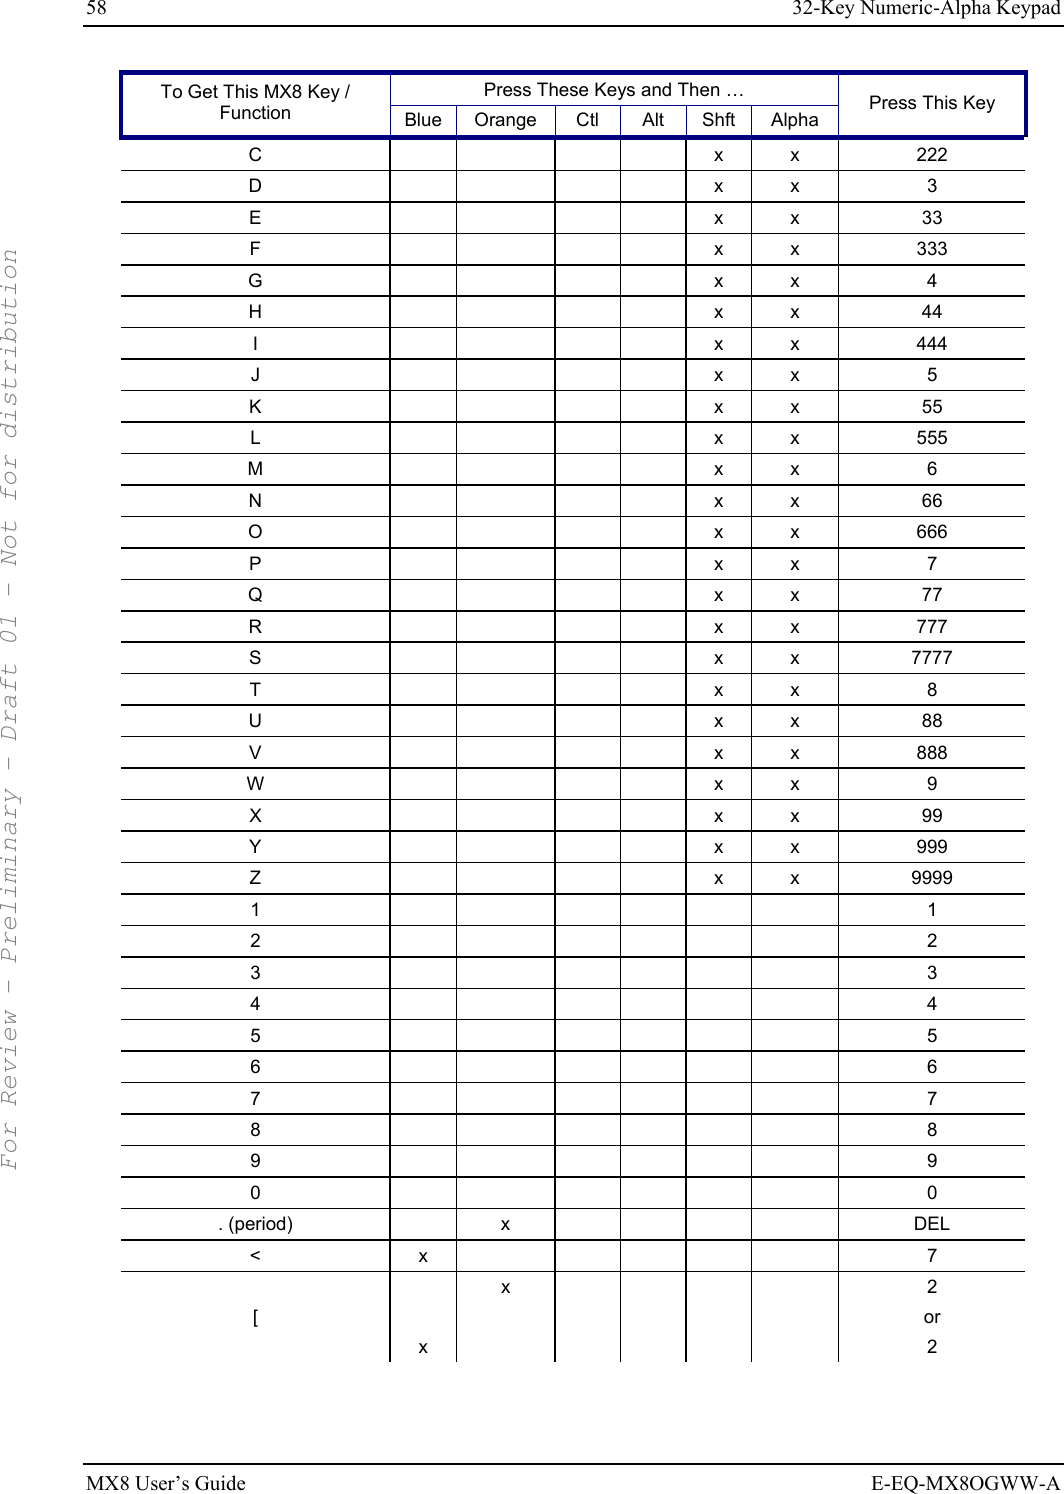
![62 Appendix B Regulatory Notices and Safety Information MX8 User’s Guide E-EQ-MX8OGWW-A This device contains transmitter Module FCC ID: KDZLXE4830P RF Safety Notice (Summit Client - 4830) Caution This portable device with its antenna complies with FCC’s and Industry Canada’s RF exposure limits set for an uncontrolled environment. This equipment has shown compliance with FCC and Industry Canada Specific Absorption Rate (SAR) limits. Highest reported SAR for the MX8 is .758W/kg on body. Any accessories not provided by LXE should not be used with this device. This device must not be co-located or operating in conjunction with any other antenna or transmitter. R&TTE Directive Requirements (Applies only to equipment operated within the EU/EFTA) Information to User A label on the exterior of the device should resemble one of the labels shown below (the label contains the LXE part number of the installed radio card). The labels shown below and affixed to the device, identify where the device may be used and where its use is restricted. Use of a device is prohibited in countries not listed below or otherwise identified by the label. (May or may not include the 0560 Notifed Body No. Substitute 4 digit Notified Body No. may also be applied.) Republic of Singapore - LXE Dealer License Number DA103458 complies with IDA Standards. MX8 Approvals/Standards Product EMI / EMC Standards Safety Standards MX8 FCC Part 15 Subpart B, Class A EN 55022 Class A (CISPR 22) EN 55024:1998 AS/NZS 3548, Class A (CISPR 22) UL 60950 / CSA C22.2 No. 60950 IEC/EN 60950-1 CDRH: 21 CFR 1040.10 IEC/EN 60825-1 Transceiver: Transceiver RF (2.4 GHz) standards RF Safety Standards MX8 with 802.11b/g [Summit Client - 4830] FCC Part 15.247, Subpart C FCC Bulletin OET-65 EN 300 328 IC-RSS 210 IC-RSS 102 FCC O.E.T. Bulletin 65 Industry Canada RSS 102 For Review - Preliminary - Draft 01 - Not for distribution](https://usermanual.wiki/Honeywell/LXE4830P.USERS-MANUAL/User-Guide-855643-Page-68.png)
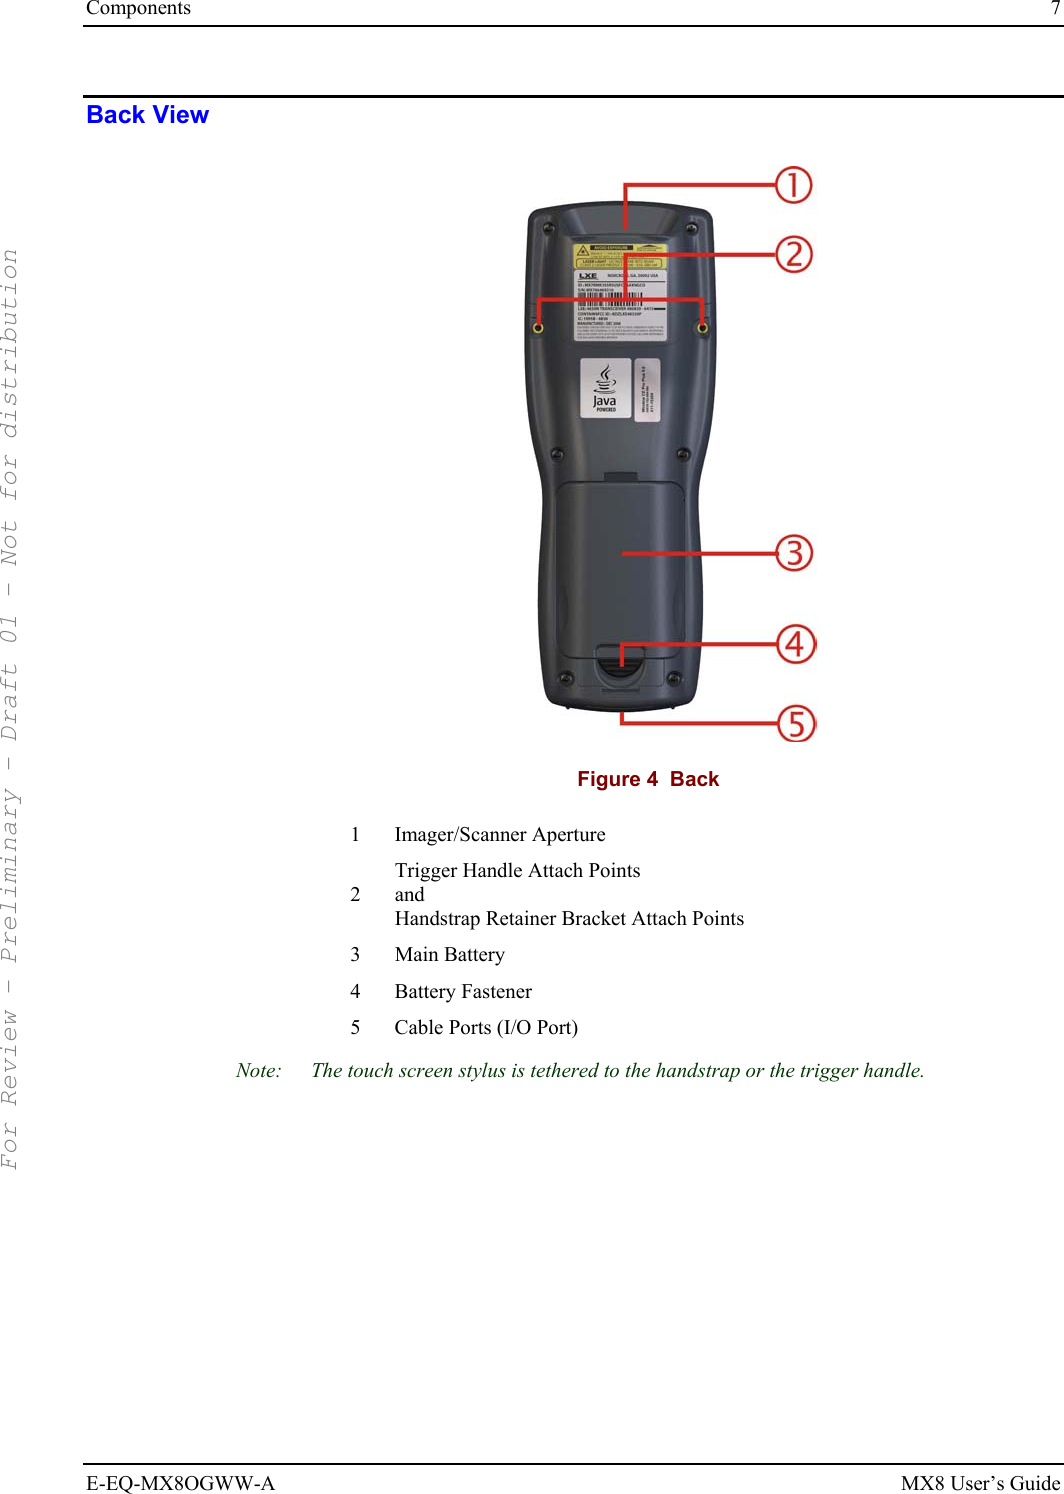
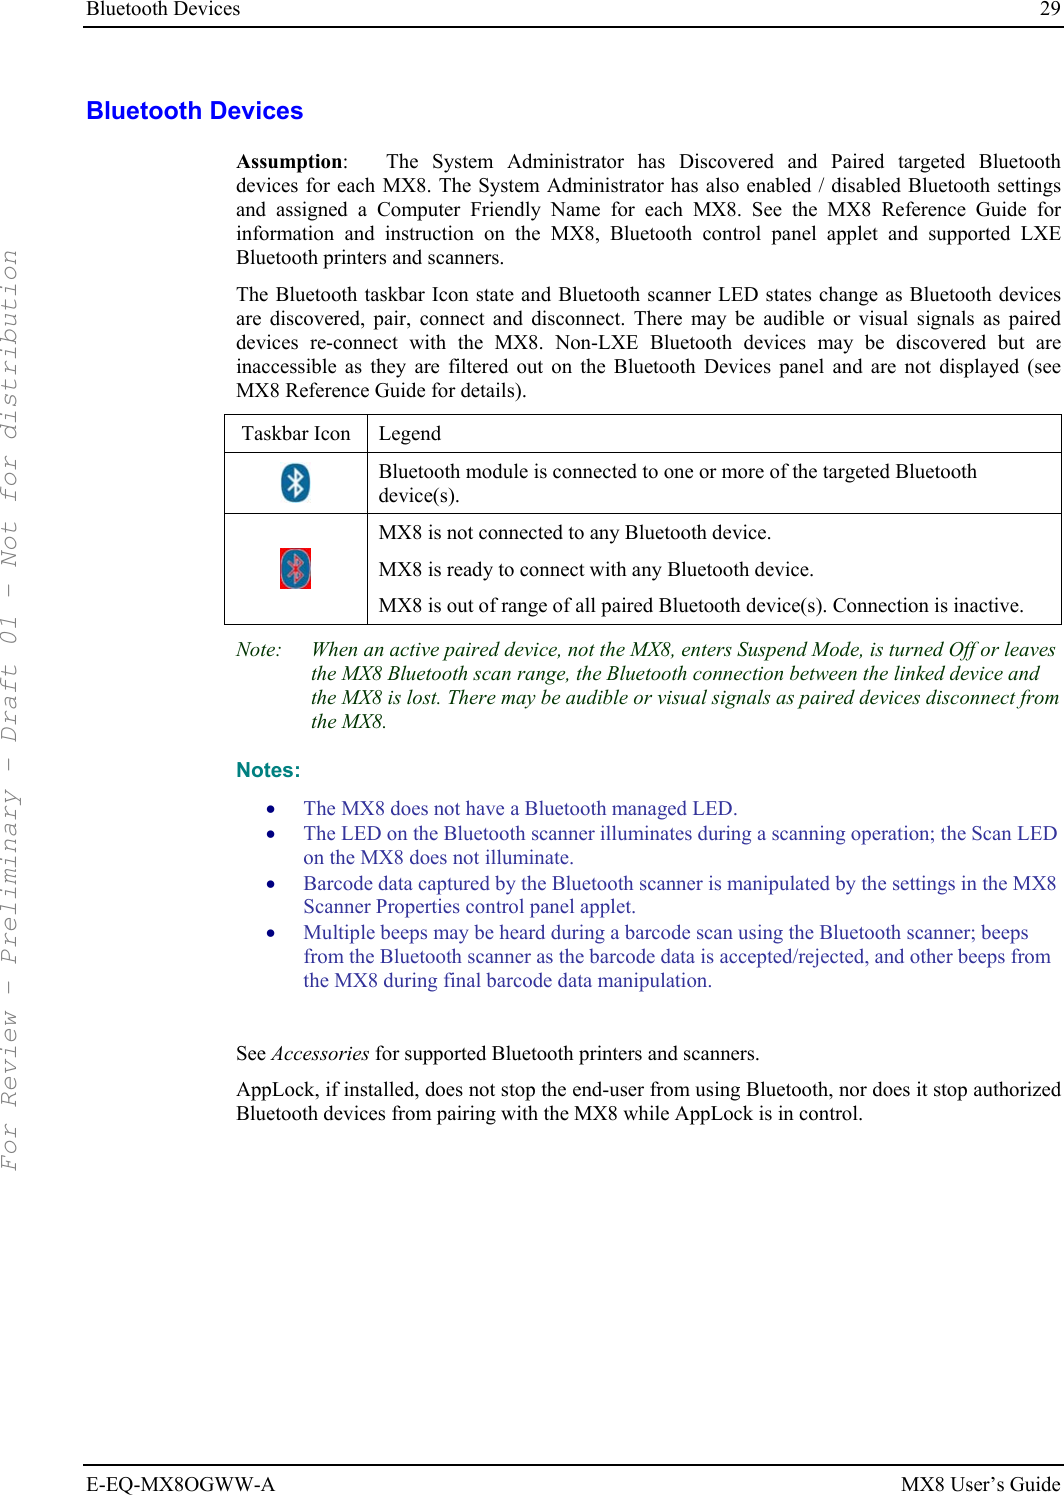
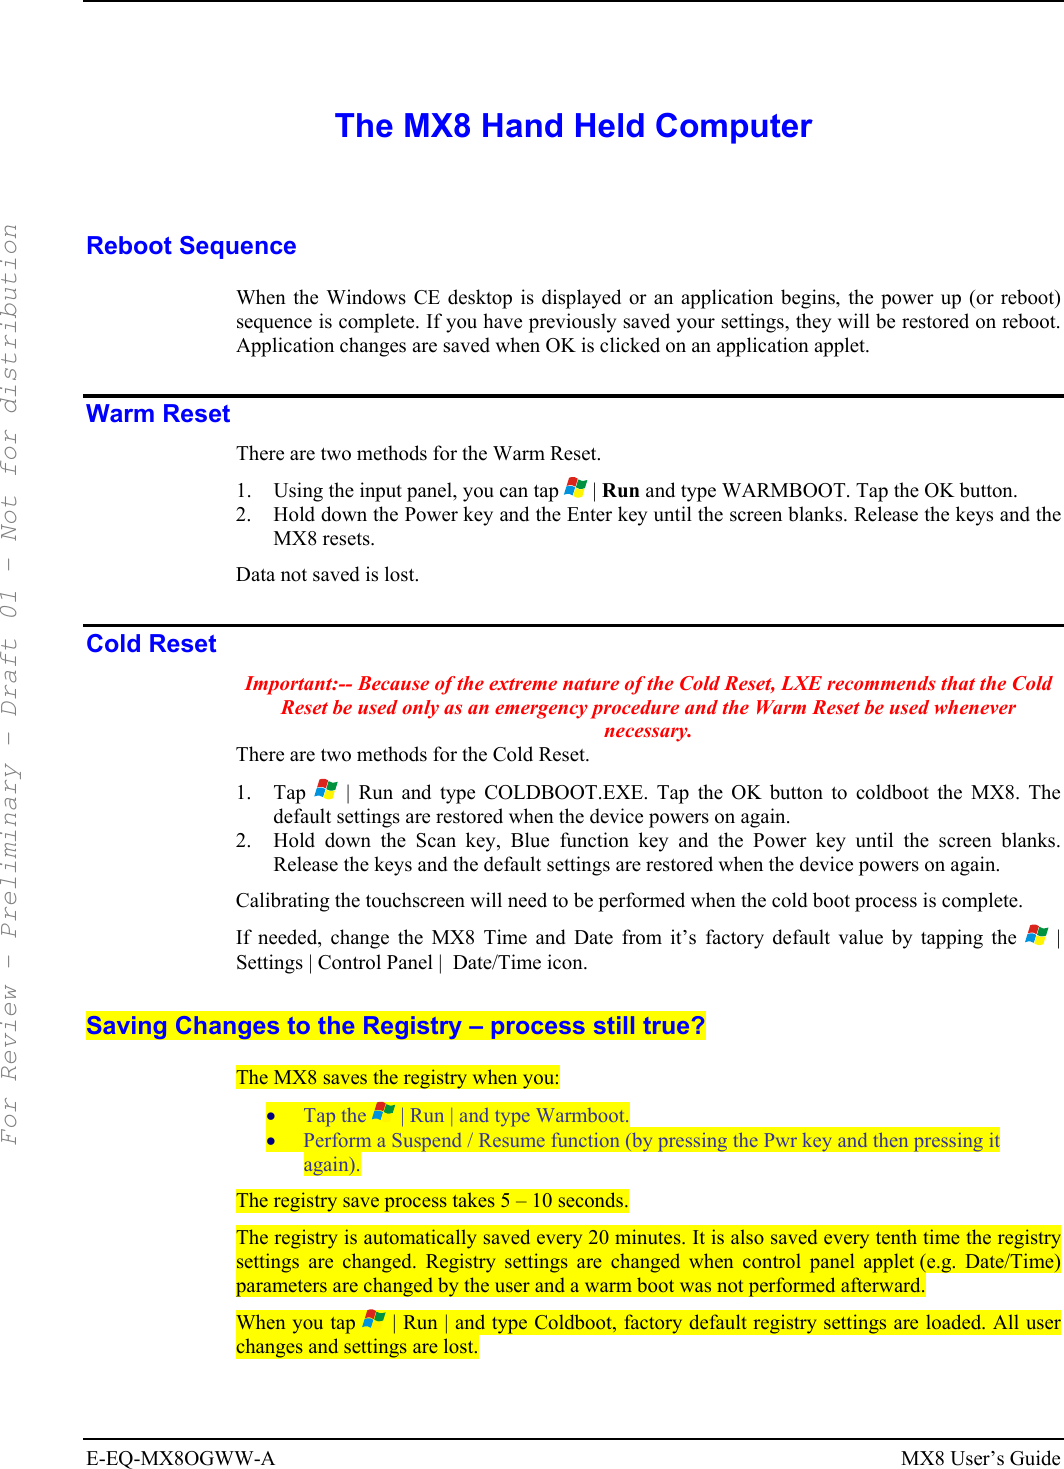
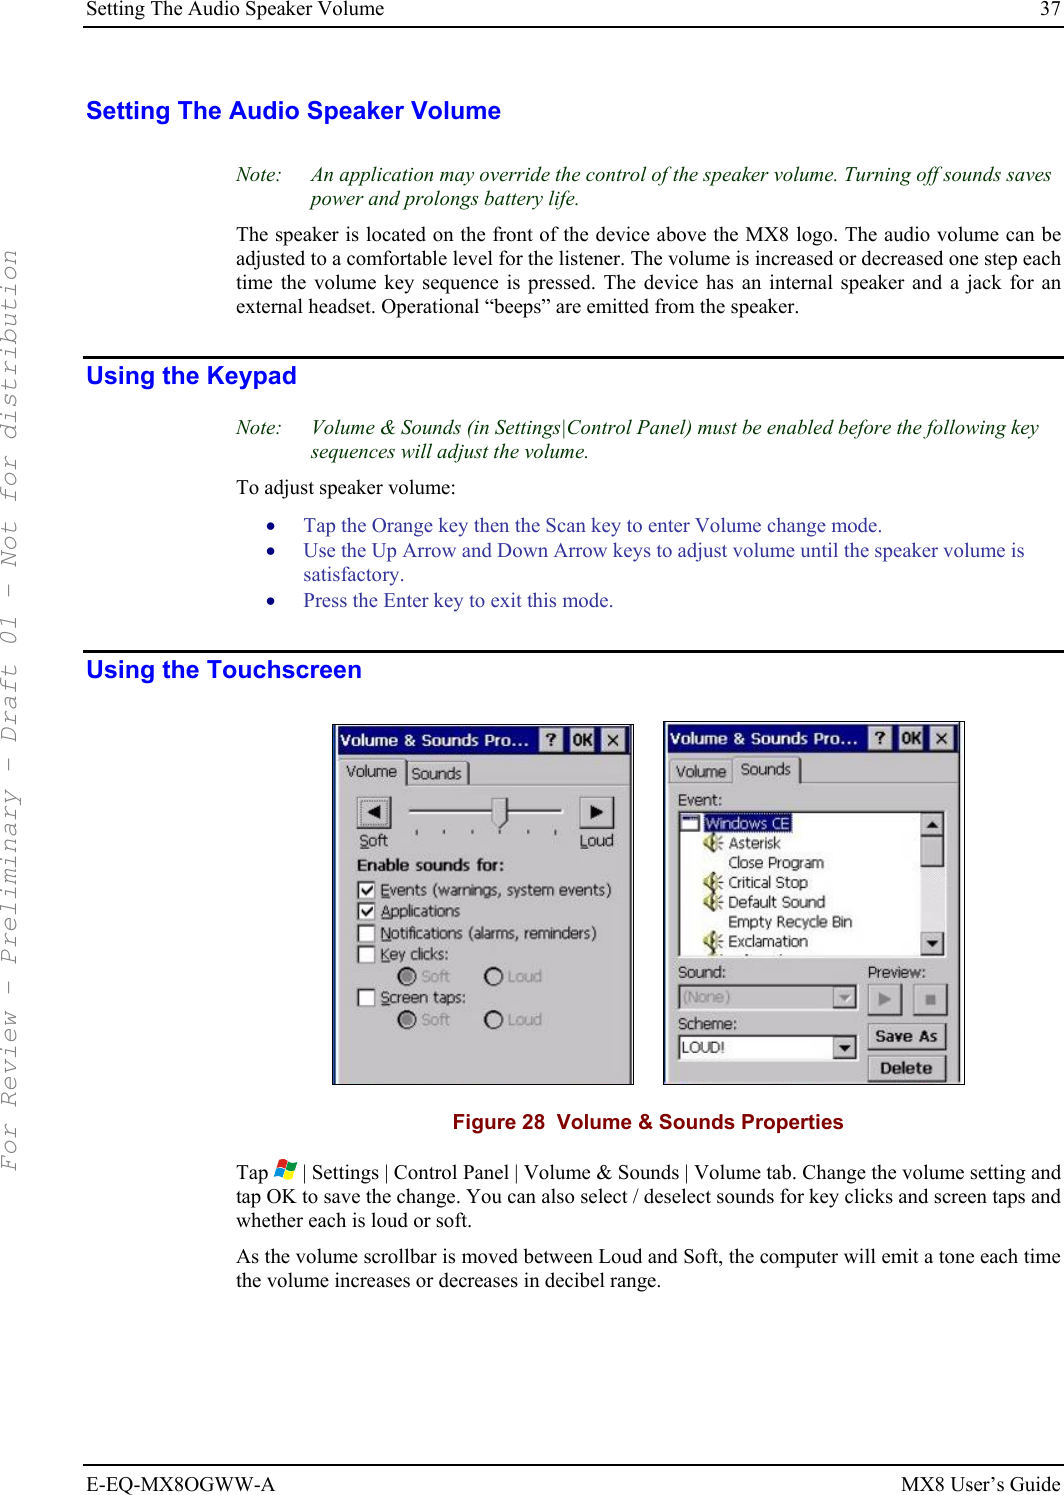
![68 Appendix B Regulatory Notices and Safety Information MX8 User’s Guide E-EQ-MX8OGWW-A Labels – MX8 Hand Held Computer [Summit Client] For Review - Preliminary - Draft 01 - Not for distribution](https://usermanual.wiki/Honeywell/LXE4830P.USERS-MANUAL/User-Guide-855643-Page-74.png)