Sintai Optical CWFB124 Wi-Fi module User Manual 2 of 4

Sintai Optical (Shenzhen) Co., Ltd. Wi-Fi module 2 of 4

User Manual (2 of 4).pdf
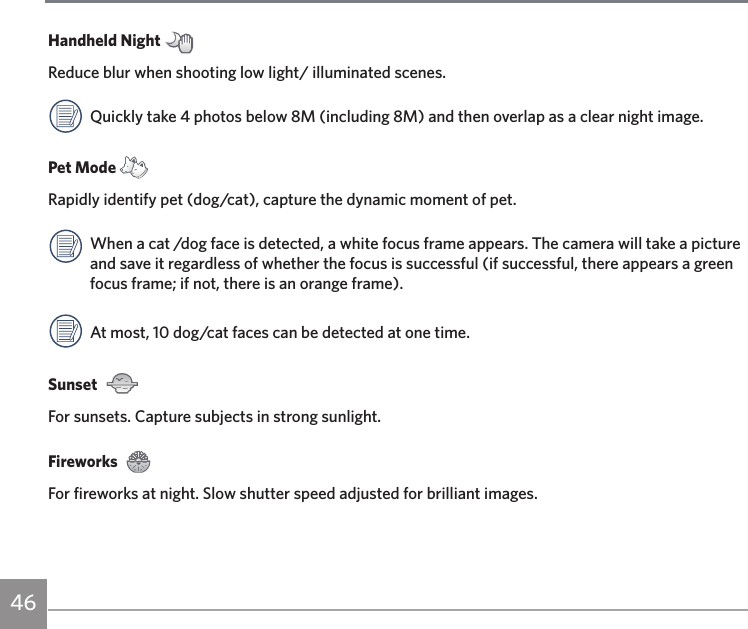
46Handheld Night Reduce blur when shooting low light/ illuminated scenes.Quickly take 4 photos below 8M (including 8M) and then overlap as a clear night image.Pet Mode Rapidly identify pet (dog/cat), capture the dynamic moment of pet.When a cat /dog face is detected, a white focus frame appears. The camera will take a picture and save it regardless of whether the focus is successful (if successful, there appears a green focus frame; if not, there is an orange frame).At most, 10 dog/cat faces can be detected at one time.Sunset  For sunsets. Capture subjects in strong sunlight.Fireworks For fireworks at night. Slow shutter speed adjusted for brilliant images.
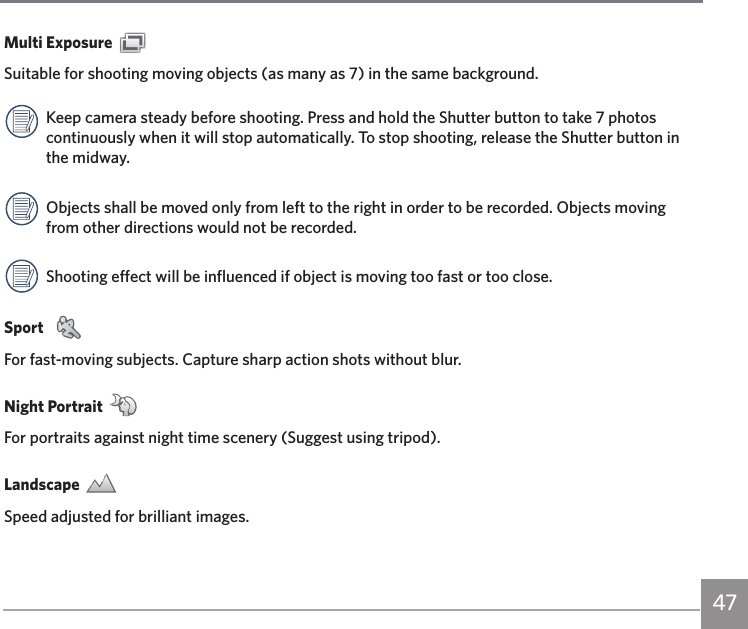
47Multi Exposure Suitable for shooting moving objects (as many as 7) in the same background.Keep camera steady before shooting. Press and hold the Shutter button to take 7 photos continuously when it will stop automatically. To stop shooting, release the Shutter button in the midway.Objects shall be moved only from left to the right in order to be recorded. Objects moving from other directions would not be recorded.Shooting effect will be influenced if object is moving too fast or too close.Sport  For fast-moving subjects. Capture sharp action shots without blur.Night Portrait For portraits against night time scenery (Suggest using tripod). Landscape Speed adjusted for brilliant images.
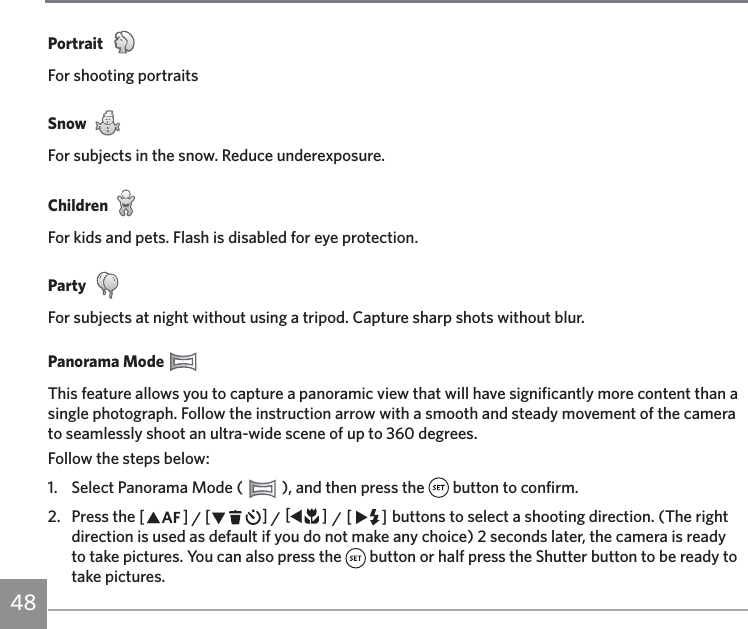
48Portrait For shooting portraitsSnow For subjects in the snow. Reduce underexposure.ChildrenFor kids and pets. Flash is disabled for eye protection.Party For subjects at night without using a tripod. Capture sharp shots without blur.Panorama Mode This feature allows you to capture a panoramic view that will have significantly more content than a single photograph. Follow the instruction arrow with a smooth and steady movement of the camera to seamlessly shoot an ultra-wide scene of up to 360 degrees.Follow the steps below:1.  Select Panorama Mode (   ), and then press the   button to confirm.2.  Press the AC / CA / AC / CA buttons to select a shooting direction. (The right direction is used as default if you do not make any choice) 2 seconds later, the camera is ready to take pictures. You can also press the   button or half press the Shutter button to be ready to take pictures.
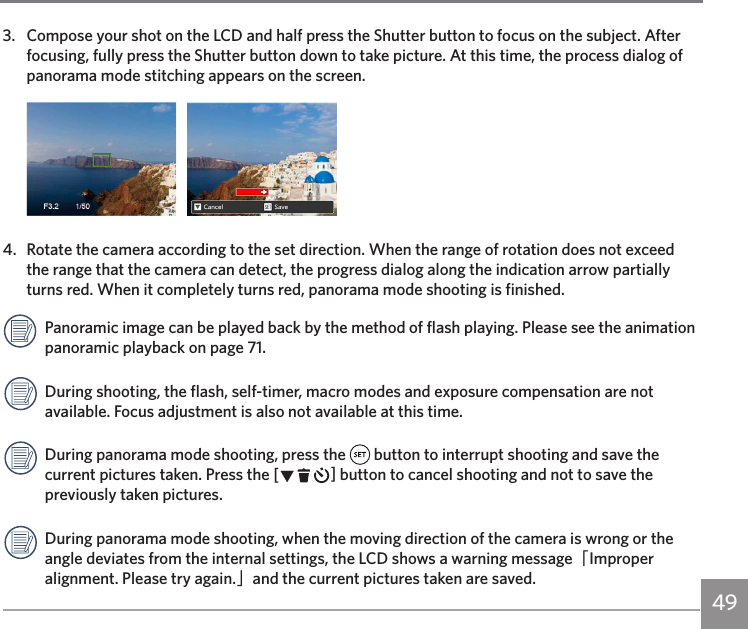
493.  Compose your shot on the LCD and half press the Shutter button to focus on the subject. After focusing, fully press the Shutter button down to take picture. At this time, the process dialog of panorama mode stitching appears on the screen.   4.   Rotate the camera according to the set direction. When the range of rotation does not exceed the range that the camera can detect, the progress dialog along the indication arrow partially turns red. When it completely turns red, panorama mode shooting is finished.Panoramic image can be played back by the method of flash playing. Please see the animation panoramic playback on page 71.During shooting, the flash, self-timer, macro modes and exposure compensation are not available. Focus adjustment is also not available at this time.During panorama mode shooting, press the   button to interrupt shooting and save the current pictures taken. Press the CA button to cancel shooting and not to save the previously taken pictures.During panorama mode shooting, when the moving direction of the camera is wrong or the angle deviates from the internal settings, the LCD shows a warning message「Improper alignment. Please try again.」and the current pictures taken are saved.
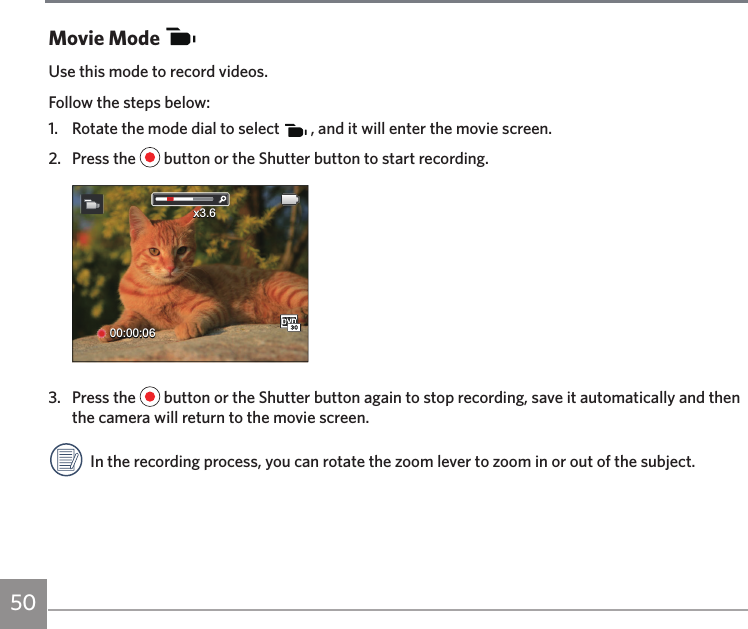
50Movie ModeUse this mode to record videos.Follow the steps below:1.  Rotate the mode dial to select   , and it will enter the movie screen.2.  Press the   button or the Shutter button to start recording.00:00:06x3.63.  Press the   button or the Shutter button again to stop recording, save it automatically and then the camera will return to the movie screen.In the recording process, you can rotate the zoom lever to zoom in or out of the subject.
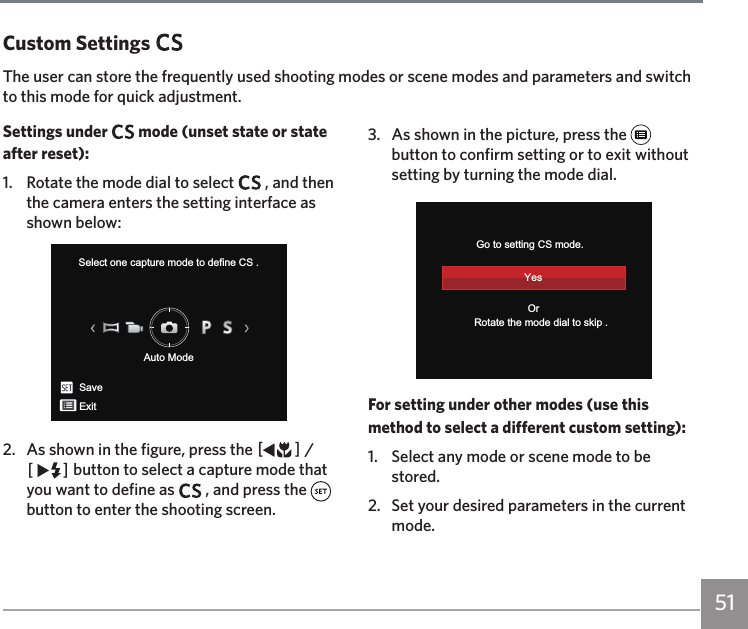
51Settings under   mode (unset state or state after reset):1.  Rotate the mode dial to select   , and then the camera enters the setting interface as shown below:Select one capture mode to define CS .Auto ModeSaveExit2.  As shown in the figure, press the AC / CA button to select a capture mode that you want to define as   , and press the button to enter the shooting screen.3.  As shown in the picture, press the   button to confirm setting or to exit without setting by turning the mode dial.           Rotate the mode dial to skip .Go to setting CS mode.YesOrFor setting under other modes (use this method to select a different custom setting):1.   Select any mode or scene mode to be stored.2.   Set your desired parameters in the current mode.Custom SettingsThe user can store the frequently used shooting modes or scene modes and parameters and switch to this mode for quick adjustment.
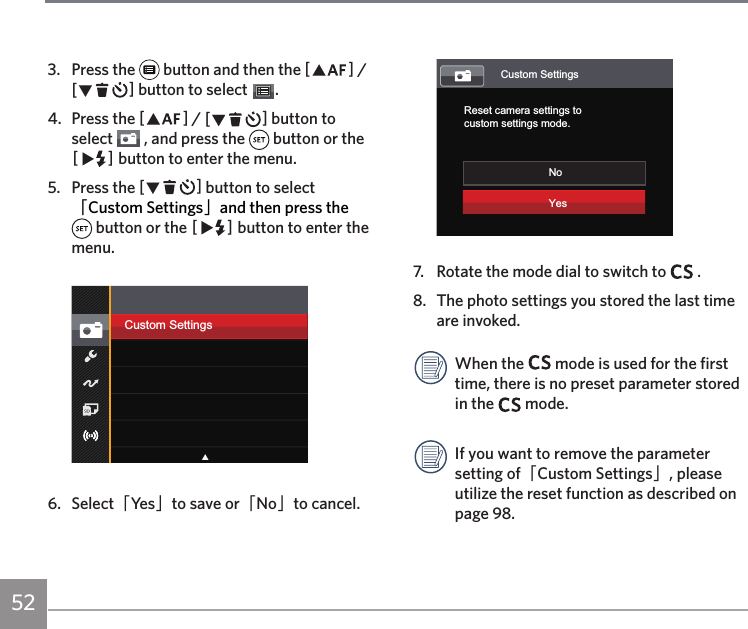
52 5352Custom SettingsReset camera settings to custom settings mode.NoYes7.  Rotate the mode dial to switch to   .8.  The photo settings you stored the last time are invoked.When the   mode is used for the first time, there is no preset parameter stored in the   mode.If you want to remove the parameter setting of「Custom Settings」, please utilize the reset function as described on page 98.3.   Press the   button and then the AC / CA button to select  .4.   Press the AC / CA button to select   , and press the   button or the CA button to enter the menu.5.  Press the CA button to select 「Custom Settings」and then press the  button or the CA button to enter the menu.Custom Settings6. Select「Ye s 」to save or「No」to cancel.
52 53Basic OperationUsing EVF (Electronic View Finder)EVF can be used to observe the scenes and objects.EVF has the following advantages:It will not be affected by ambient light and may avoid poor composition due to light reflection on the LCD.Follow the steps below:1.  Press the Power button to turn the camera on and press the   button to switch to the EVF display. At this time, the LCD is closed.2.   View the scenes and objects through the EVF.3.   Press the   button again or restart the camera to switch back to the LCD display.In Wi-Fi mode or Playback mode, the   button is invalid.
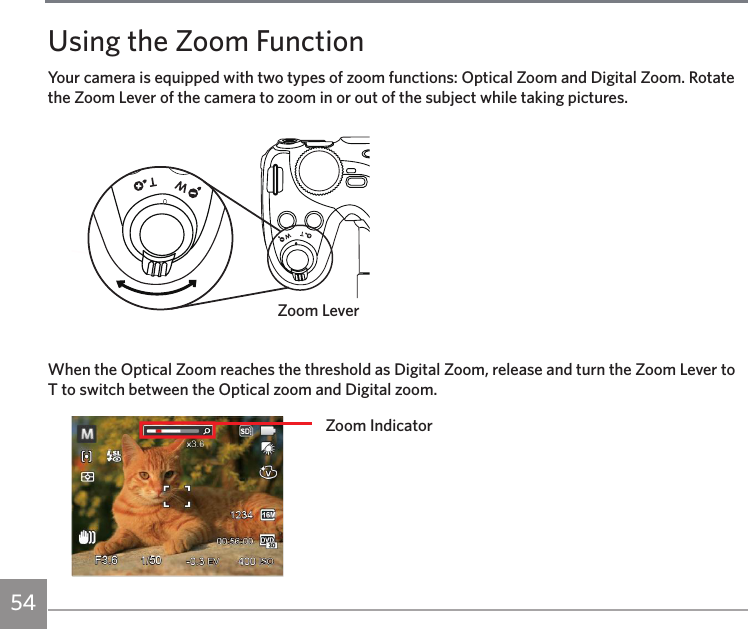
54Using the Zoom FunctionYour camera is equipped with two types of zoom functions: Optical Zoom and Digital Zoom. Rotate the Zoom Lever of the camera to zoom in or out of the subject while taking pictures.Zoom LeverWhen the Optical Zoom reaches the threshold as Digital Zoom, release and turn the Zoom Lever to T to switch between the Optical zoom and Digital zoom.Zoom Indicator
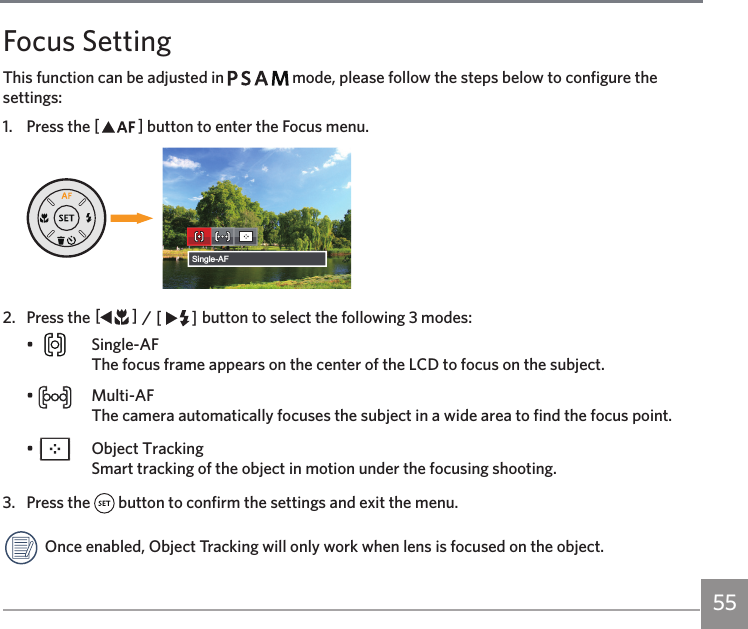
55Focus SettingThis function can be adjusted in         mode, please follow the steps below to configure the settings:1.  Press the AC button to enter the Focus menu.Single-AF2.  Press the AC / CA button to select the following 3 modes:•   Single-AF The focus frame appears on the center of the LCD to focus on the subject.•   Multi-AF The camera automatically focuses the subject in a wide area to find the focus point.•    Object Tracking Smart tracking of the object in motion under the focusing shooting.3.  Press the   button to confirm the settings and exit the menu. Once enabled, Object Tracking will only work when lens is focused on the object.
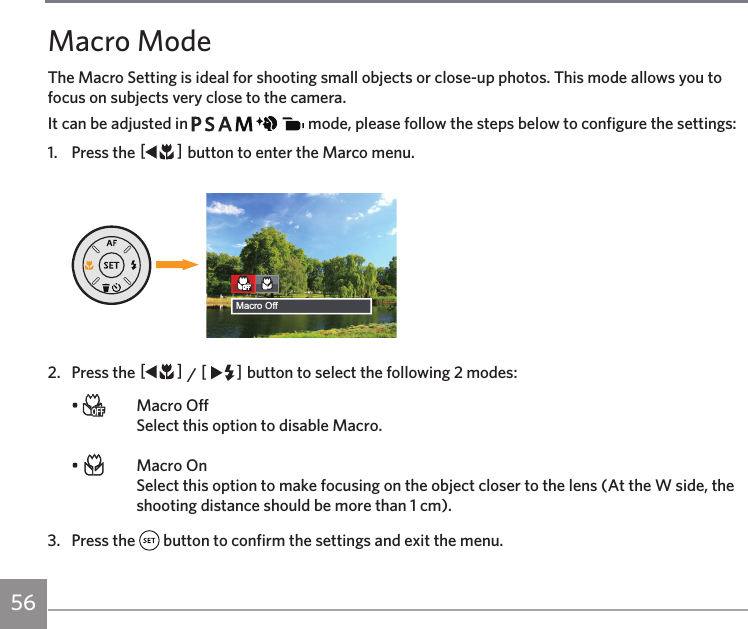
56Macro ModeThe Macro Setting is ideal for shooting small objects or close-up photos. This mode allows you to focus on subjects very close to the camera.It can be adjusted in             mode, please follow the steps below to configure the settings:1.  Press the AC button to enter the Marco menu.Macro Off2.  Press the AC / CA button to select the following 2 modes:•    Macro Off Select this option to disable Macro.•    Macro On Select this option to make focusing on the object closer to the lens (At the W side, the shooting distance should be more than 1 cm). 3.  Press the   button to confirm the settings and exit the menu.
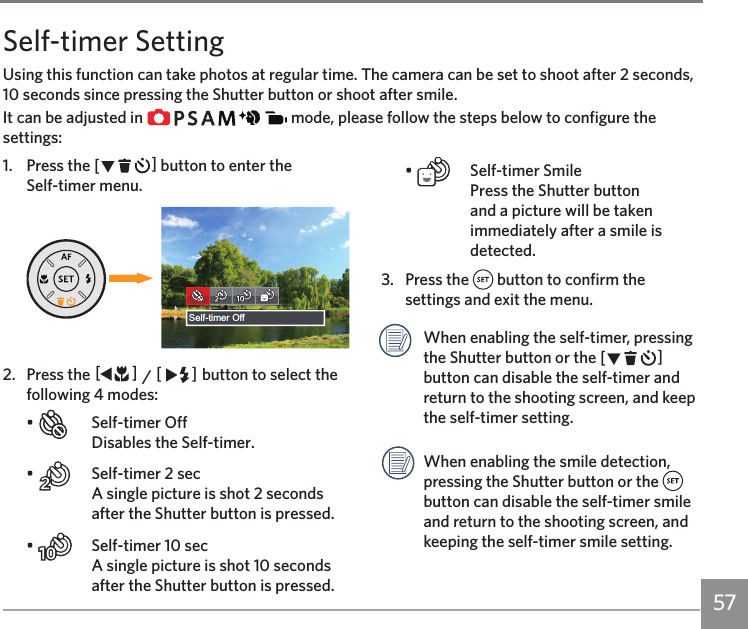
57Self-timer SettingUsing this function can take photos at regular time. The camera can be set to shoot after 2 seconds, 10 seconds since pressing the Shutter button or shoot after smile.It can be adjusted in               mode, please follow the steps below to configure the settings:1.  Press the CA button to enter the  Self-timer menu.Self-timer Off2.  Press the AC / CA button to select the following 4 modes:•    Self-timer Off Disables the Self-timer.•    Self-timer 2 sec  A single picture is shot 2 seconds after the Shutter button is pressed.•    Self-timer 10 sec  A single picture is shot 10 seconds after the Shutter button is pressed.•    Self-timer Smile Press the Shutter button and a picture will be taken immediately after a smile is detected.3.  Press the   button to confirm the settings and exit the menu. When enabling the self-timer, pressing the Shutter button or the CA button can disable the self-timer and return to the shooting screen, and keep the self-timer setting.When enabling the smile detection, pressing the Shutter button or the   button can disable the self-timer smile and return to the shooting screen, and keeping the self-timer smile setting.
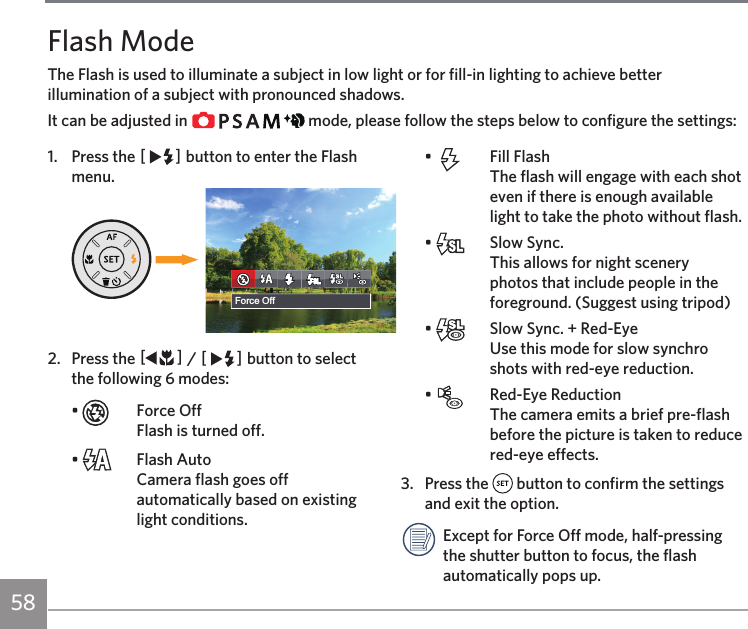
58Flash ModeThe Flash is used to illuminate a subject in low light or for fill-in lighting to achieve better illumination of a subject with pronounced shadows.It can be adjusted in             mode, please follow the steps below to configure the settings:1.  Press the CA button to enter the Flash menu.଎ܠ昘旅ਘ⥺斿ҰForce Off2.  Press the AC / CA button to select the following 6 modes:•    Force Off Flash is turned off.•    Flash Auto Camera flash goes off automatically based on existing light conditions.•    Fill Flash The flash will engage with each shot even if there is enough available light to take the photo without flash.•    Slow Sync. This allows for night scenery photos that include people in the foreground. (Suggest using tripod)•    Slow Sync. + Red-Eye Use this mode for slow synchro shots with red-eye reduction.•    Red-Eye Reduction  The camera emits a brief pre-flash before the picture is taken to reduce red-eye effects.3.  Press the   button to confirm the settings and exit the option.Except for Force Off mode, half-pressing the shutter button to focus, the flash automatically pops up.
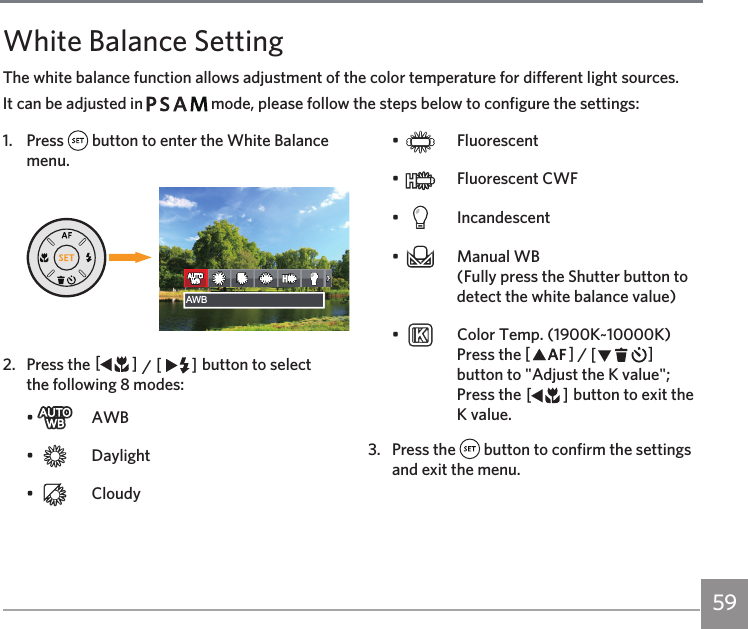
59White Balance SettingThe white balance function allows adjustment of the color temperature for different light sources. It can be adjusted in         mode, please follow the steps below to configure the settings:1. Press   button to enter the White Balance menu.଎ܠ昘旅AWBAWB2.  Press the AC / CA button to select the following 8 modes:•   AWB•   Daylight•   Cloudy•   Fluorescent•    Fluorescent CWF•   Incandescent•    Manual WB  (Fully press the Shutter button to detect the white balance value)•    Color Temp. (1900K~10000K)  Press the AC / CA button to "Adjust the K value"; Press the AC button to exit the K value.3.  Press the   button to confirm the settings and exit the menu.
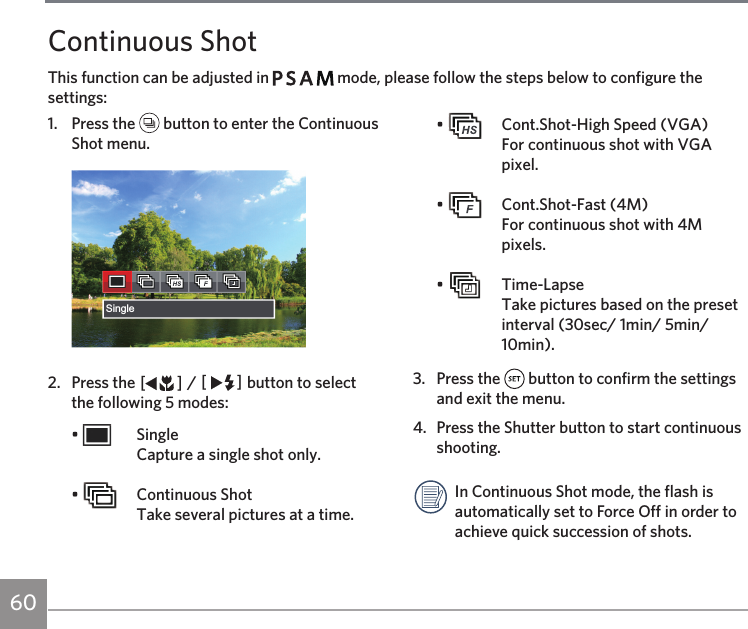
60Continuous ShotThis function can be adjusted in         mode, please follow the steps below to configure the settings:1.  Press the   button to enter the Continuous Shot menu.Single2.  Press the AC / CA button to select the following 5 modes:•   Single Capture a single shot only.•    Continuous Shot Take several pictures at a time.•    Cont.Shot-High Speed (VGA) For continuous shot with VGA pixel.•    Cont.Shot-Fast (4M)  For continuous shot with 4M pixels.•   Time-Lapse Take pictures based on the preset interval (30sec/ 1min/ 5min/ 10min).3.  Press the   button to confirm the settings and exit the menu. 4.  Press the Shutter button to start continuous shooting. In Continuous Shot mode, the flash is automatically set to Force Off in order to achieve quick succession of shots.
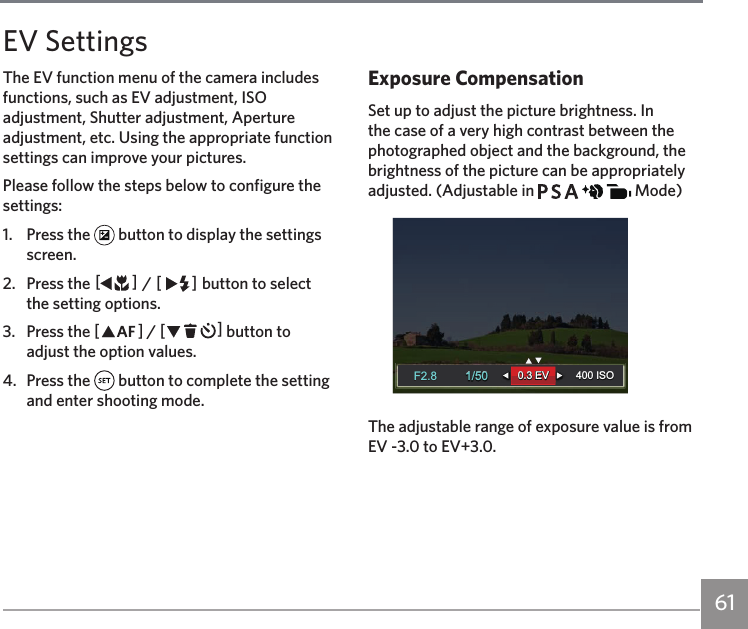
61Please follow the steps below to configure the settings:1.  Press the   button to display the settings screen.2.  Press the AC / CA button to select the setting options.3.  Press the AC / CA button to adjust the option values.4.  Press the   button to complete the setting and enter shooting mode.Exposure CompensationSet up to adjust the picture brightness. In the case of a very high contrast between the photographed object and the background, the brightness of the picture can be appropriately adjusted. (Adjustable in           Mode)1/50400 ISO1/50400 ISO0.3 EV0.3 EVF2.8F2.8The adjustable range of exposure value is from EV -3.0 to EV+3.0.EV SettingsThe EV function menu of the camera includes functions, such as EV adjustment, ISO adjustment, Shutter adjustment, Aperture adjustment, etc. Using the appropriate function settings can improve your pictures.
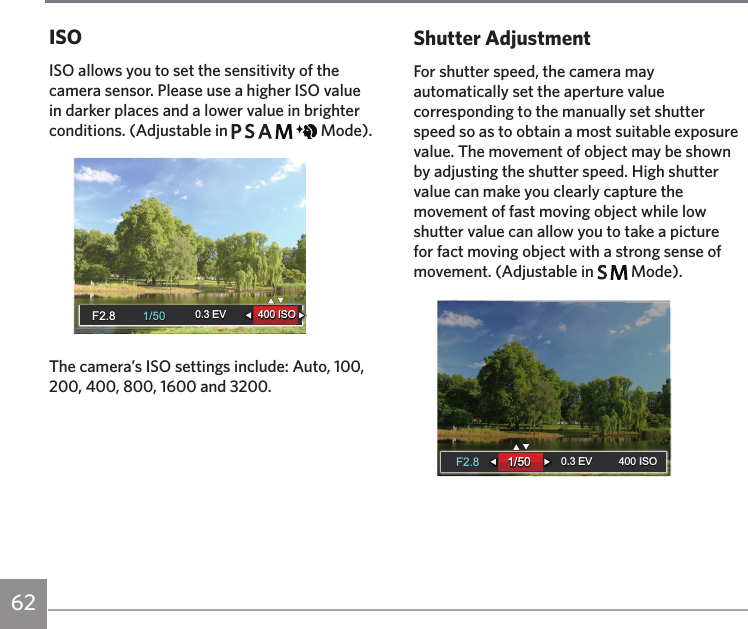
62ISOISO allows you to set the sensitivity of the camera sensor. Please use a higher ISO value in darker places and a lower value in brighter conditions. (Adjustable in           Mode).1/501/500.3 EV 400 ISO0.3 EV 400 ISOF2.8F2.8The camera’s ISO settings include: Auto, 100, 200, 400, 800, 1600 and 3200.Shutter AdjustmentFor shutter speed, the camera may automatically set the aperture value corresponding to the manually set shutter speed so as to obtain a most suitable exposure value. The movement of object may be shown by adjusting the shutter speed. High shutter value can make you clearly capture the movement of fast moving object while low shutter value can allow you to take a picture for fact moving object with a strong sense of movement. (Adjustable in     Mode).-1.0 EV1/50400 ISO1/50400 ISO0.3 EV0.3 EVF2.8F2.8
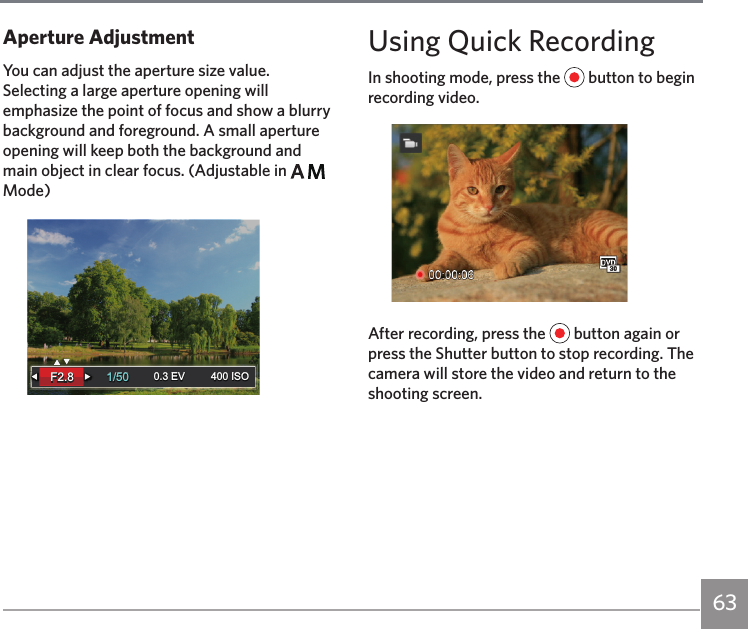
63Aperture AdjustmentYou can adjust the aperture size value. Selecting a large aperture opening will emphasize the point of focus and show a blurry background and foreground. A small aperture opening will keep both the background and main object in clear focus. (Adjustable in     Mode)400 ISO0.3 EV0.3 EV 400 ISO1/501/50F2.8F2.8Using Quick RecordingIn shooting mode, press the   button to begin recording video.After recording, press the   button again or press the Shutter button to stop recording. The camera will store the video and return to the shooting screen.
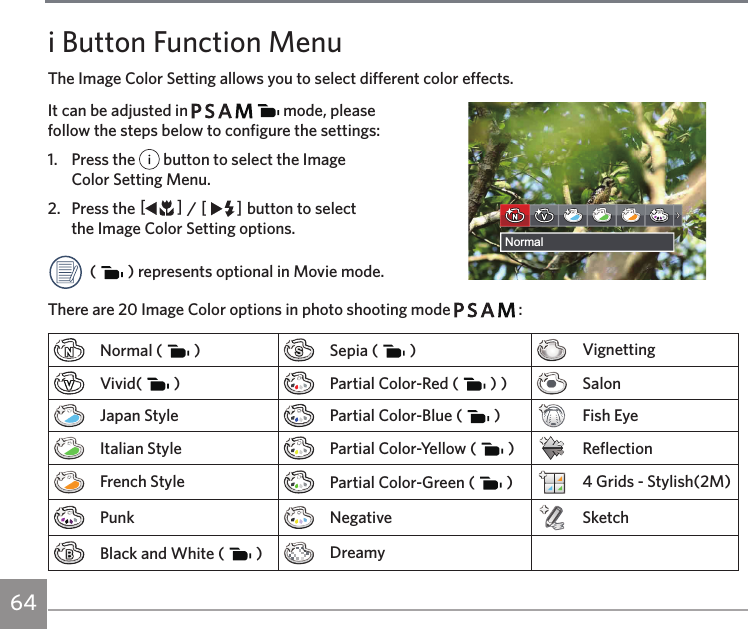
64 6564i Button Function MenuThe Image Color Setting allows you to select different color effects.It can be adjusted in           mode, please  follow the steps below to configure the settings:1.  Press the   button to select the Image  Color Setting Menu. 2.  Press the AC / CA button to select  the Image Color Setting options.(   ) represents optional in Movie mode.There are 20 Image Color options in photo shooting mode         :Normal (   ) Sepia (   ) VignettingVivid(   ) Partial Color-Red (   ) ) SalonJapan Style Partial Color-Blue (   ) Fish EyeItalian Style Partial Color-Yellow (   ) ReflectionFrench Style Partial Color-Green (   ) 4 Grids - Stylish(2M)Punk Negative SketchBlack and White (   ) DreamyNormal
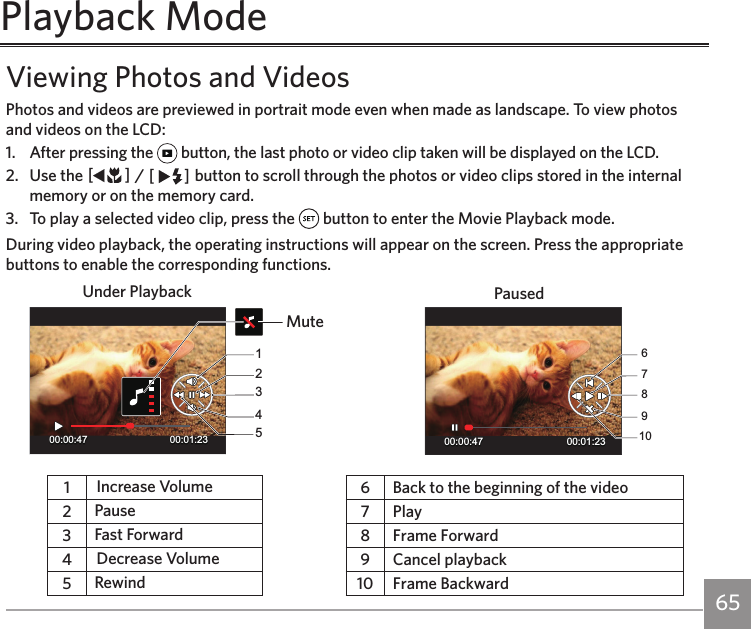
64 65Viewing Photos and VideosPhotos and videos are previewed in portrait mode even when made as landscape. To view photos and videos on the LCD:1.  After pressing the   button, the last photo or video clip taken will be displayed on the LCD.2.  Use the AC / CA button to scroll through the photos or video clips stored in the internal memory or on the memory card.3.  To play a selected video clip, press the   button to enter the Movie Playback mode.During video playback, the operating instructions will appear on the screen. Press the appropriate buttons to enable the corresponding functions.MuteUnder Playback Paused00:00:47 00:01:231234500:00:47 00:01:236789101Increase Volume 6 Back to the beginning of the video 2Pause 7 Play3Fast Forward 8 Frame Forward  4Decrease Volume 9 Cancel playback5Rewind 10 Frame BackwardPlayback Mode

Navigation menu