Sintai Optical CWFB124 Wi-Fi module User Manual Part 8
Sintai Optical (Shenzhen) Co., Ltd. Wi-Fi module Part 8
Contents
- 1. User Manual.pdf
- 2. User Manual Part 1.pdf
- 3. User Manual Part 2.pdf
- 4. User Manual Part 3.pdf
- 5. User Manual Part 4.pdf
- 6. User Manual Part 5.pdf
- 7. User Manual Part 6.pdf
- 8. User Manual Part 7.pdf
- 9. User Manual Part 8.pdf
- 10. User Manual Part 9.pdf
- 11. User Manual 1.pdf
- 12. User Manual 2.pdf
- 13. User Manual (1 of 4).pdf
- 14. User Manual (2 of 4).pdf
- 15. User Manual (3 of 4).pdf
- 16. User Manual (4 of 4).pdf
- 17. User Manual (1 of 2).pdf
- 18. User Manual (2 of 2).pdf
- 19. User Manual (1 of 5).pdf
- 20. User Manual (2 of 5).pdf
- 21. User Manual (3 of 5).pdf
- 22. User Manual (4 of 5).pdf
- 23. User Manual (5 of 5).pdf
User Manual Part 8.pdf
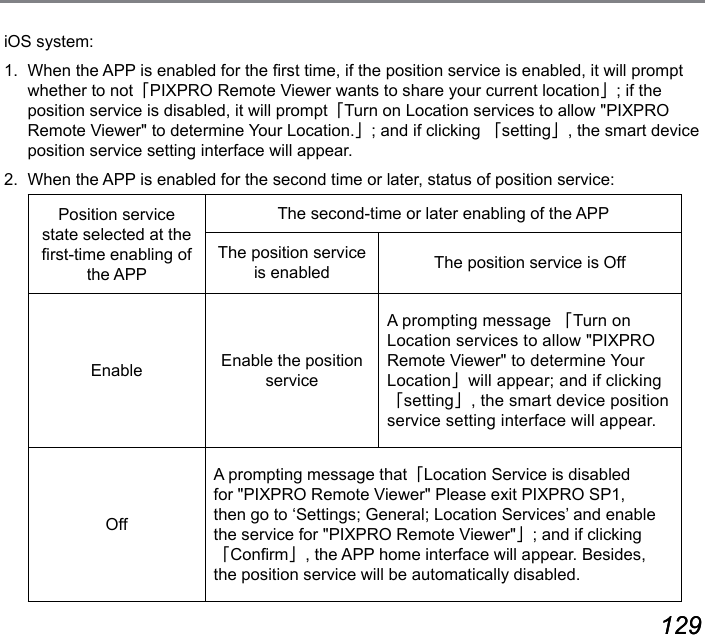
![128 129128 129Smart Device APP Operating MethodPosition Service FunctionIf your smart device supports GPS, APP can record GPS location on picture les. This function is non-available for video les.Android system:1. There will appear a prompt that ["PIXPRO Remote Viewer" Would Like to Use Your GPS services !!] in your rst time of enabling APP. If GPS of your smart device is off, you may select enabling or disabling it according to the prompt on the screen.2. If GPS is on in your second time of or later enabling APP, your device will directly enter the home page of APP; if GPS is off, you may select enabling or disabling it according to the prompt on the screen.10](https://usermanual.wiki/Sintai-Optical/CWFB124.User-Manual-Part-8-pdf/User-Guide-2154025-Page-3.png)
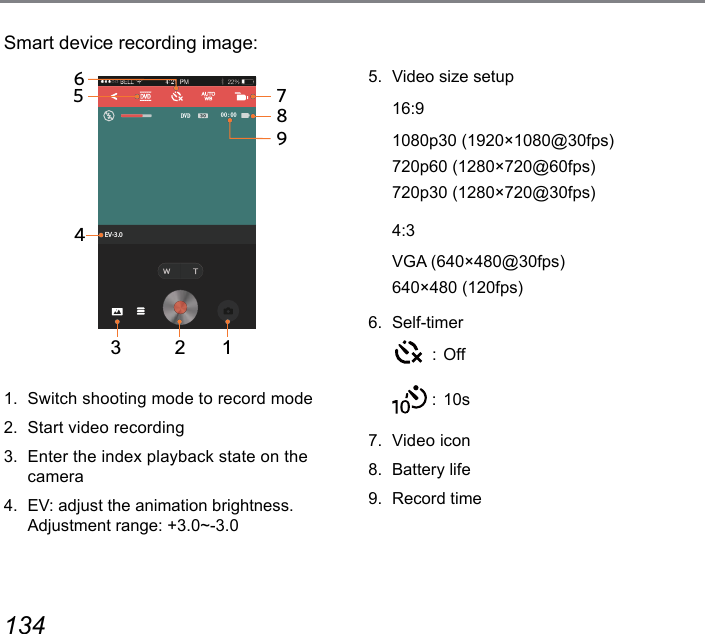
![130 131After connecting Wi-Fi, click the icon on the smart device interface and enter into APP homepage after setting the global positioning function.•[Playback]: Enter playback state•[Remote Viewnder]: Camera shooting is controlled through intelligent device. •[About]: Check the version of the APP.In the interface of the APP, click to back to the previous stage of interface. But in index Playback and Remote Viewnder states, click to back to the APP home directly.APP HomeClick [Remote Viewnder] in APP homepage to enter the shoot mode, use intelligent device to control the camera's recording.Intelligent device shooting image: EV-3.0 ISO400 F3.5 1/20001234516M12345678910 1211131415161718191. Enter the index playback state on the cameraRemote Viewnder](https://usermanual.wiki/Sintai-Optical/CWFB124.User-Manual-Part-8-pdf/User-Guide-2154025-Page-5.png)