Sintai Optical CWFB124 Wi-Fi module User Manual Part 7
Sintai Optical (Shenzhen) Co., Ltd. Wi-Fi module Part 7
Contents
- 1. User Manual.pdf
- 2. User Manual Part 1.pdf
- 3. User Manual Part 2.pdf
- 4. User Manual Part 3.pdf
- 5. User Manual Part 4.pdf
- 6. User Manual Part 5.pdf
- 7. User Manual Part 6.pdf
- 8. User Manual Part 7.pdf
- 9. User Manual Part 8.pdf
- 10. User Manual Part 9.pdf
- 11. User Manual 1.pdf
- 12. User Manual 2.pdf
- 13. User Manual (1 of 4).pdf
- 14. User Manual (2 of 4).pdf
- 15. User Manual (3 of 4).pdf
- 16. User Manual (4 of 4).pdf
- 17. User Manual (1 of 2).pdf
- 18. User Manual (2 of 2).pdf
- 19. User Manual (1 of 5).pdf
- 20. User Manual (2 of 5).pdf
- 21. User Manual (3 of 5).pdf
- 22. User Manual (4 of 5).pdf
- 23. User Manual (5 of 5).pdf
User Manual Part 7.pdf
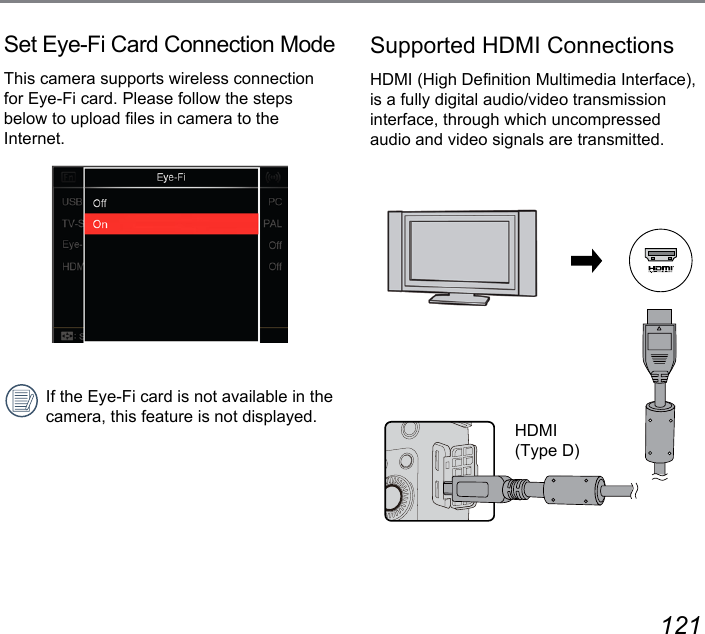
![110 111Using Zoom Playback (for still pictures only)In playing back pictures, you may press the button to zoom in them for 2 to 8 times.1. Press the button to enter playback screen.2. Press the [ ] / [ ] button to select a picture to be zoomed in for view.3. Press the button to enter zoom-in screen.4. Roll the [ ] clockwise to zoom in and counterclockwise to zoom out.5. The bottom right corner of the screen will display the number of times and area of the photo zooming operation.6. Press the [ ] / [ ] / [ ] / [ ] button to shift and select the part to be zoomed in and viewed.7. Press the button to return the image to its original scale.x2](https://usermanual.wiki/Sintai-Optical/CWFB124.User-Manual-Part-7-pdf/User-Guide-2154024-Page-1.png)
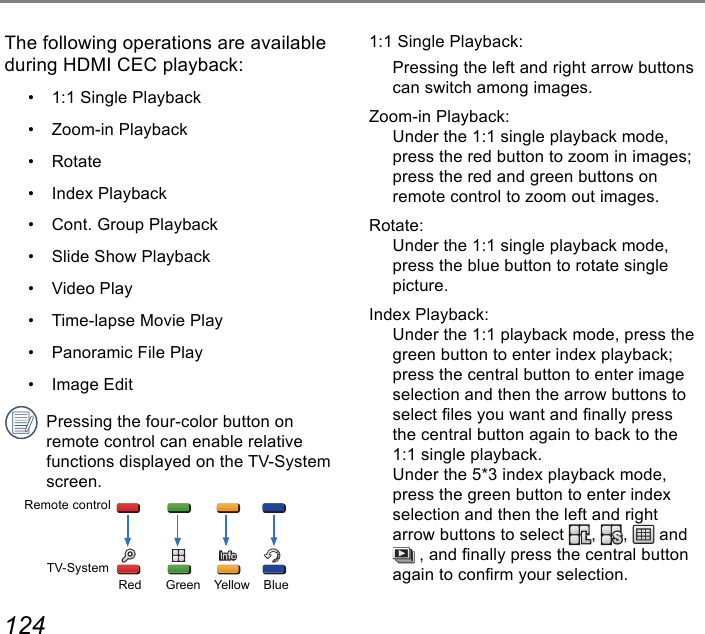
![112 113112 113Connection SettingsConnection to a ComputerYou can use a USB cable to connect the camera and copy (transmit) photos to a computer, printer or other device.Setting the USB ModeThe camera's USB port can be set to connect with either a computer or a printer. The following steps will allow you to ensure that the camera is correctly congured to connect with a PC.1. Press the [ ] / [ ] button to select「USB」and then press the button to enter the menu.2. Press the [ ] / [ ] button to select「PC」and then press the button to conrm.94 options in [ Connection Settings ] :• USB• TV-System• Eye-Fi• HDMI CEC Control](https://usermanual.wiki/Sintai-Optical/CWFB124.User-Manual-Part-7-pdf/User-Guide-2154024-Page-2.png)
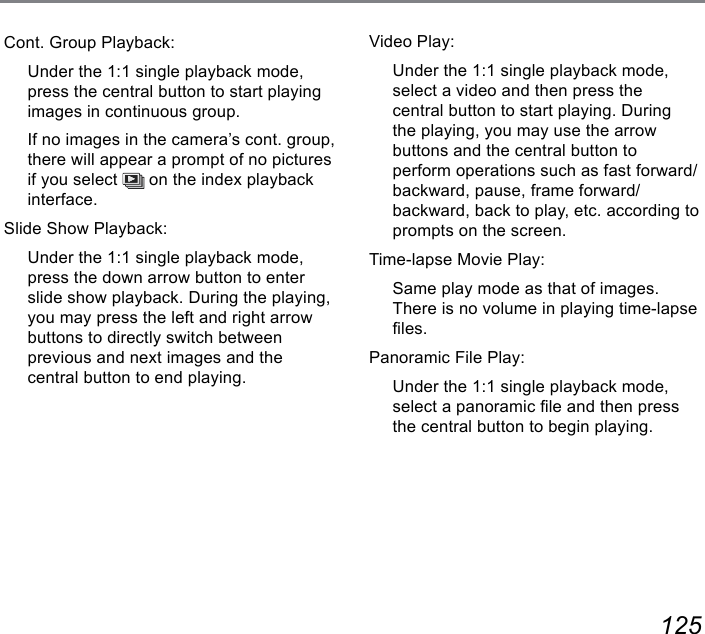
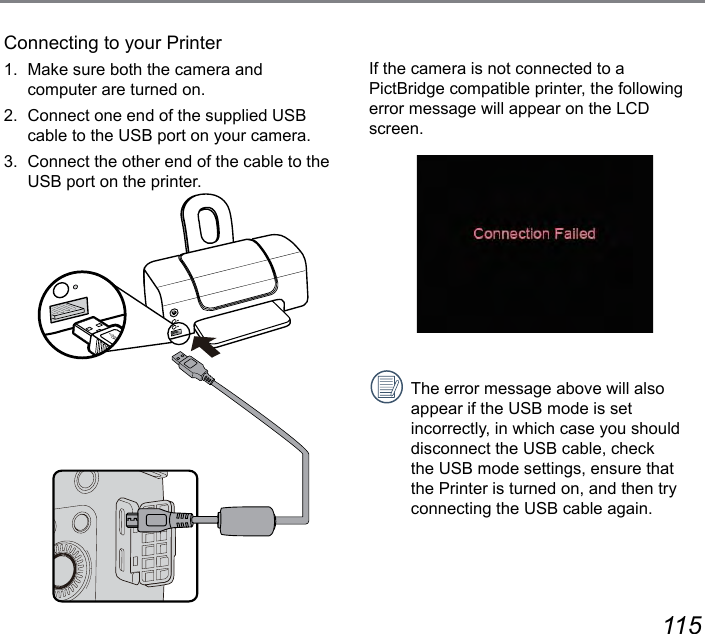
![114 115Connecting to a PictBridge Compatible PrinterPictBridge technology allows printing the photos saved in the memory card by the printer. To nd out if a printer is PictBridge compatible, simply look for the PictBridge logo on the packaging or check the owner's manual for specications. With the PictBridge function on your camera, you can print the captured photos directly to a PictBridge compatible printer using the supplied USB cable, without the need for a PC.Setting the USB ModeThe camera's USB port can be set to connect with either a PC or a Printer, the following steps will ensure that the camera is correctly congured to connect with a Printer.1. Press the [ ] / [ ] button to select「USB」and then press the button to enter the menu.2. Press the [ ] / [ ] button to select「Printer」and press the button to conrm.After the camera is reset, it will switch to PC mode automatically from USB mode.See "PictBridge" section on page 116.](https://usermanual.wiki/Sintai-Optical/CWFB124.User-Manual-Part-7-pdf/User-Guide-2154024-Page-4.png)
![116 117After setting the USB mode to Printer, the PictBridge Menu will appear.Press the [ ] / [ ] button to select a menu item and press the button to enter the item.Refer to the following sections for more detailed information on each setting.Print (with Date)If you have set the date and time on your camera, the date and time will be recorded and saved with each photo you take.1. In the PictBridge menu, select「Print (with Date)」and the screen as shown below appears.Back012. Press the [ ] / [ ] button to select a photo to be printed.Using the PictBridge Menu](https://usermanual.wiki/Sintai-Optical/CWFB124.User-Manual-Part-7-pdf/User-Guide-2154024-Page-6.png)
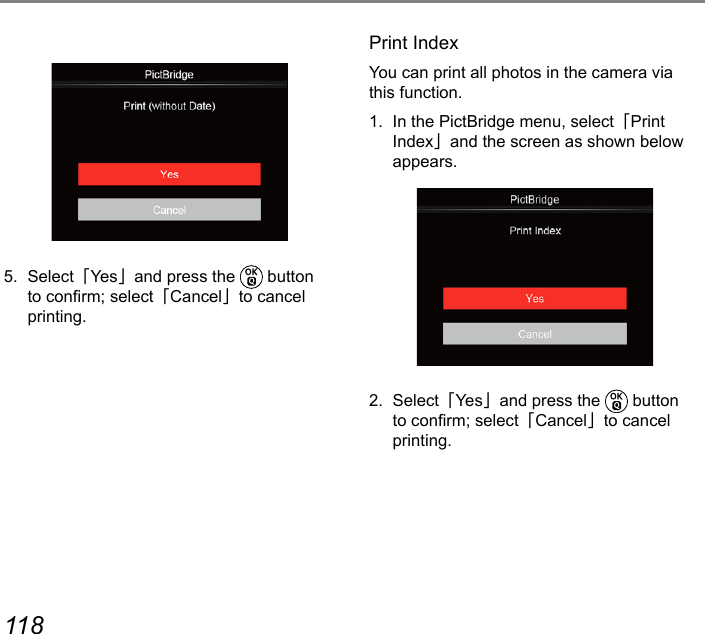
![116 1173. Press the [ ] / [ ] button to select the number of copies for the currently displayed photo.4. Press the button and the following screen will appear.5. Select「Ye s」and press the button to conrm; select「Cancel」to cancel printing.Print (without Date)Use this setting to print the photos without dates on them.1. In the PictBridge menu, select「Print (without Date)」and the screen as shown below appears.Back012. Press the [ ] / [ ] button to select a photo to be printed.3. Press the [ ] / [ ] button to select the number of copies for the currently displayed photo.4. Press the button and the following screen will appear.](https://usermanual.wiki/Sintai-Optical/CWFB124.User-Manual-Part-7-pdf/User-Guide-2154024-Page-7.png)
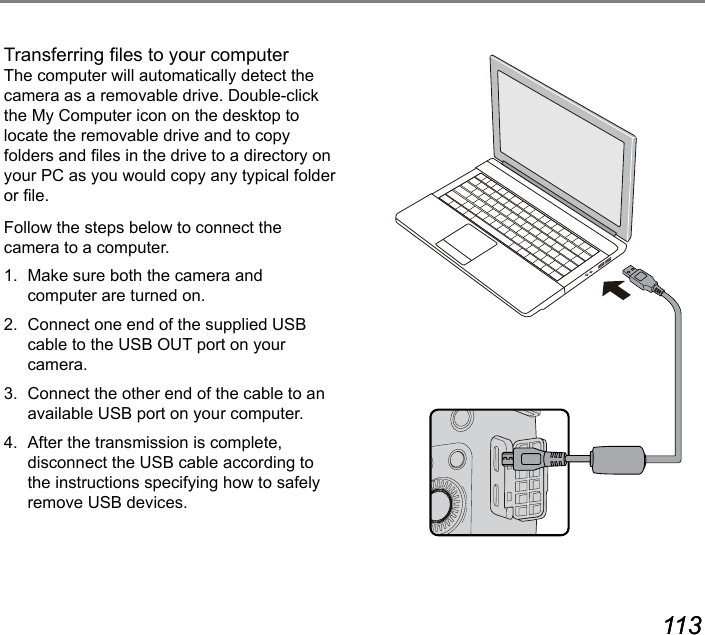
![120 121Video SystemYou can use the AV cable (which should be purchased separately) to connect the camera and the television for realizing the video output. Connect one end of the AV cable to USB/AV port of the camera, connect the other end to AV-OUT port of the television. Adjust the format of the video output system according to your requirements, and the steps are as follows:1. Press the [ ] / [ ] button to select「TV-System」and then press the button to enter the menu.2. Press the [ ] / [ ] button to select「NTSC」or「PAL」and the Press the button to conrm.NTSC: English, Chinese (Traditional), Japanese, French, Korean, Russian, Vietnamese, Greek, HungarianPAL: German, Spanish, Italian, Chinese (Simplied), Portuguese, Swedish, Danish, Finnish, Indonesia, Norwegian, Dutch, Turkish, Polish, Thai, Croatian, Czech, Arabic, HindiThe video output system would change accordingly based upon the changes of the selected language.](https://usermanual.wiki/Sintai-Optical/CWFB124.User-Manual-Part-7-pdf/User-Guide-2154024-Page-10.png)