Sintai Optical CWFB124 Wi-Fi module User Manual Part 7
Sintai Optical (Shenzhen) Co., Ltd. Wi-Fi module Part 7
Contents
- 1. User Manual.pdf
- 2. User Manual Part 1.pdf
- 3. User Manual Part 2.pdf
- 4. User Manual Part 3.pdf
- 5. User Manual Part 4.pdf
- 6. User Manual Part 5.pdf
- 7. User Manual Part 6.pdf
- 8. User Manual Part 7.pdf
- 9. User Manual Part 8.pdf
- 10. User Manual Part 9.pdf
- 11. User Manual 1.pdf
- 12. User Manual 2.pdf
- 13. User Manual (1 of 4).pdf
- 14. User Manual (2 of 4).pdf
- 15. User Manual (3 of 4).pdf
- 16. User Manual (4 of 4).pdf
- 17. User Manual (1 of 2).pdf
- 18. User Manual (2 of 2).pdf
- 19. User Manual (1 of 5).pdf
- 20. User Manual (2 of 5).pdf
- 21. User Manual (3 of 5).pdf
- 22. User Manual (4 of 5).pdf
- 23. User Manual (5 of 5).pdf
User Manual Part 7.pdf
110 111
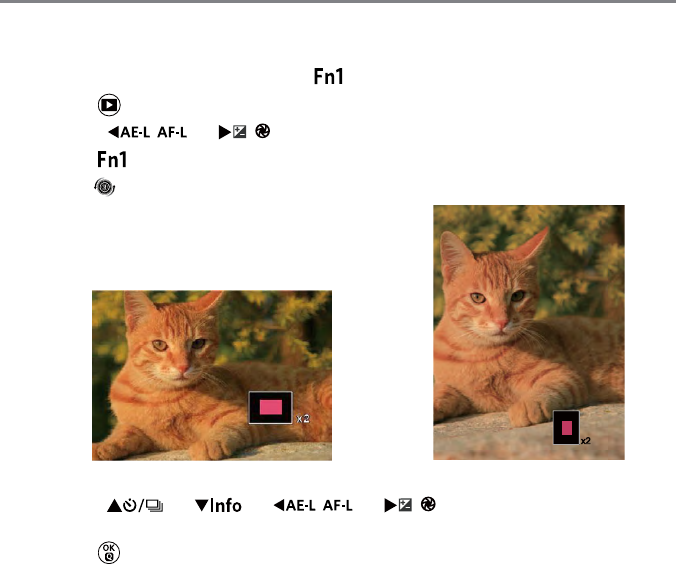
Using Zoom Playback (for still pictures only)
In playing back pictures, you may press the button to zoom in them for 2 to 8 times.
1. Press the button to enter playback screen.
2. Press the [
] / [
] button to select a picture to be zoomed in for view.
3. Press the button to enter zoom-in screen.
4. Roll the [ ] clockwise to zoom in and counterclockwise to zoom out.
5. The bottom right corner of the screen will display
the number of times and area of the photo
zooming operation.
6. Press the [ ] / [ ] / [
] / [
] button to shift and select the
part to be zoomed in and viewed.
7. Press the button to return the image to its original scale.
x2
112 113
112 113
Connection Settings
Connection to a Computer
You can use a USB cable to connect the
camera and copy (transmit) photos to a
computer, printer or other device.
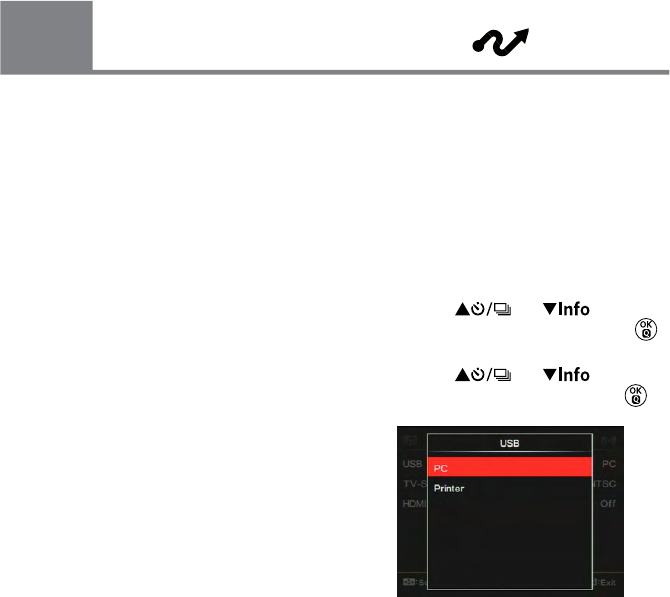
Setting the USB Mode
The camera's USB port can be set to
connect with either a computer or a printer.
The following steps will allow you to ensure
that the camera is correctly congured to
connect with a PC.
1. Press the [ ] / [ ] button
to select「USB」and then press the
button to enter the menu.
2. Press the [ ] / [ ] button
to select「PC」and then press the
button to conrm.
9
4 options in [ Connection Settings ] :
• USB
• TV-System
• Eye-Fi
• HDMI CEC Control

112 113
112 113
Transferring les to your computer
The computer will automatically detect the
camera as a removable drive. Double-click
the My Computer icon on the desktop to
locate the removable drive and to copy
folders and les in the drive to a directory on
your PC as you would copy any typical folder
or le.
Follow the steps below to connect the
camera to a computer.
1. Make sure both the camera and
computer are turned on.
2. Connect one end of the supplied USB
cable to the USB OUT port on your
camera.
3. Connect the other end of the cable to an
available USB port on your computer.
4. After the transmission is complete,
disconnect the USB cable according to
the instructions specifying how to safely
remove USB devices.

114 115
Connecting to a PictBridge Compatible Printer
PictBridge technology allows
printing the photos saved in the
memory card by the printer.
To nd out if a printer is
PictBridge compatible, simply
look for the PictBridge logo on
the packaging or check the owner's manual
for specications. With the PictBridge function
on your camera, you can print the captured
photos directly to a PictBridge compatible
printer using the supplied USB cable, without
the need for a PC.
Setting the USB Mode
The camera's USB port can be set to connect
with either a PC or a Printer, the following
steps will ensure that the camera is correctly
congured to connect with a Printer.
1. Press the [ ] / [ ] button
to select「USB」and then press the
button to enter the menu.
2. Press the [ ] / [ ] button to
select「Printer」and press the button
to conrm.
After the camera is reset, it will switch
to PC mode automatically from USB
mode.
See "PictBridge" section on page 116.
114 115
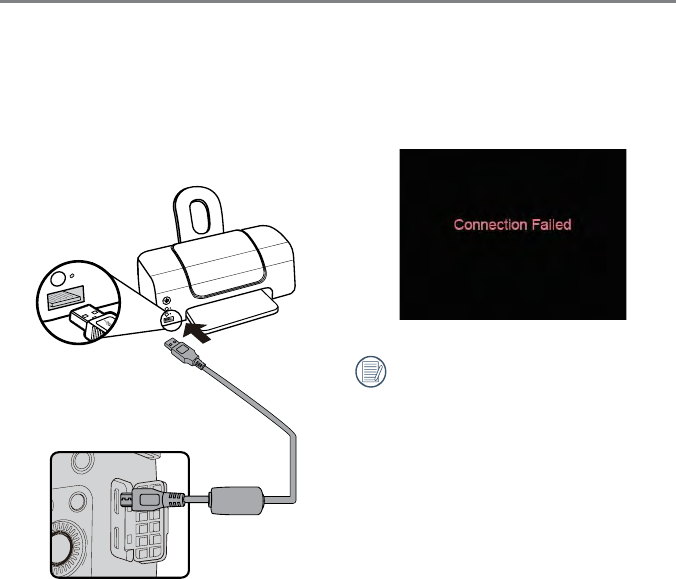
If the camera is not connected to a
PictBridge compatible printer, the following
error message will appear on the LCD
screen.
The error message above will also
appear if the USB mode is set
incorrectly, in which case you should
disconnect the USB cable, check
the USB mode settings, ensure that
the Printer is turned on, and then try
connecting the USB cable again.
Connecting to your Printer
1. Make sure both the camera and
computer are turned on.
2. Connect one end of the supplied USB
cable to the USB port on your camera.
3. Connect the other end of the cable to the
USB port on the printer.
116 117
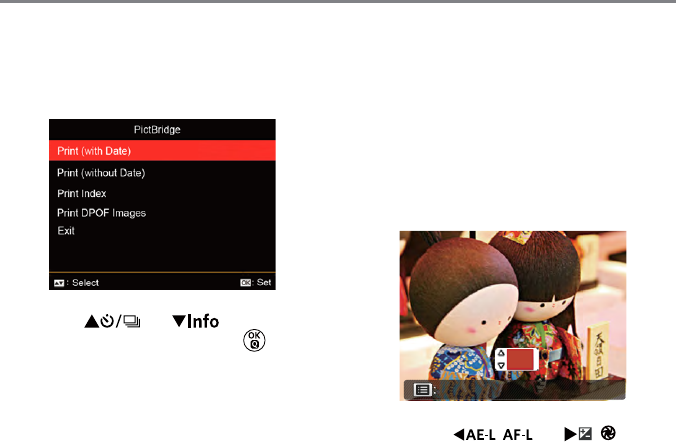
After setting the USB mode to Printer, the
PictBridge Menu will appear.
Press the [ ] / [ ] button to
select a menu item and press the button
to enter the item.
Refer to the following sections for more
detailed information on each setting.
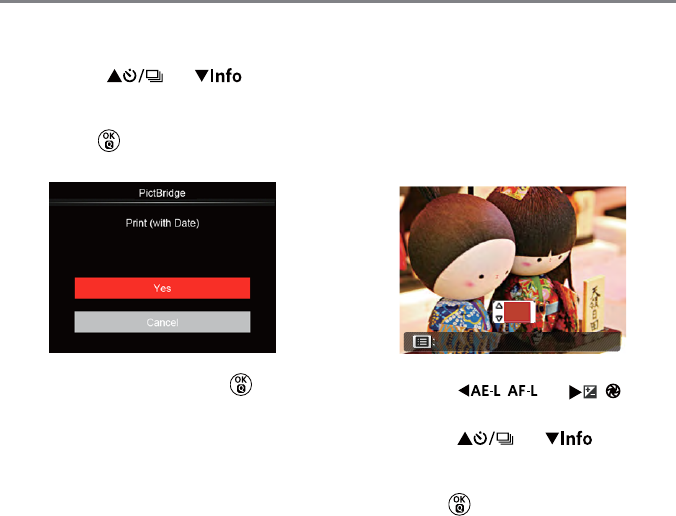
Print (with Date)
If you have set the date and time on your
camera, the date and time will be recorded
and saved with each photo you take.
1. In the PictBridge menu, select「Print
(with Date)」and the screen as shown
below appears.
Back
01
2. Press the [
] / [
]
button to select a photo to be printed.
Using the PictBridge Menu
116 117
3. Press the [ ] / [ ] button
to select the number of copies for the
currently displayed photo.
4. Press the button and the following
screen will appear.
5. Select「Ye s」and press the button
to conrm; select「Cancel」to cancel
printing.
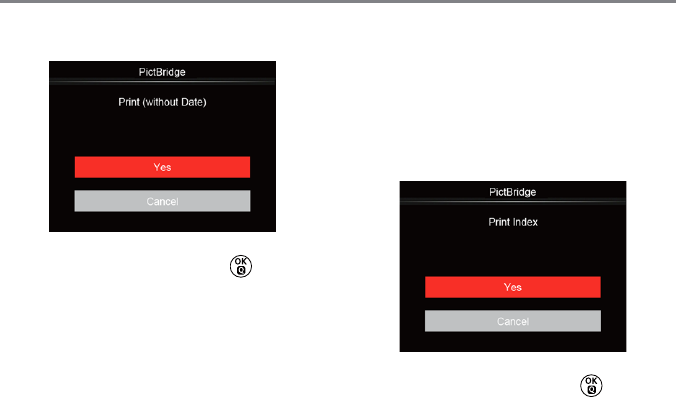
Print (without Date)
Use this setting to print the photos without
dates on them.
1. In the PictBridge menu, select「Print
(without Date)」and the screen as shown
below appears.
Back
01
2. Press the [
] / [
]
button to select a photo to be printed.
3. Press the [ ] / [ ] button
to select the number of copies for the
currently displayed photo.
4. Press the button and the following
screen will appear.
118 119
5. Select「Ye s」and press the button
to conrm; select「Cancel」to cancel
printing.
Print Index
You can print all photos in the camera via
this function.
1. In the PictBridge menu, select「Print
Index」and the screen as shown below
appears.
2. Select「Ye s」and press the button
to conrm; select「Cancel」to cancel
printing.
118 119
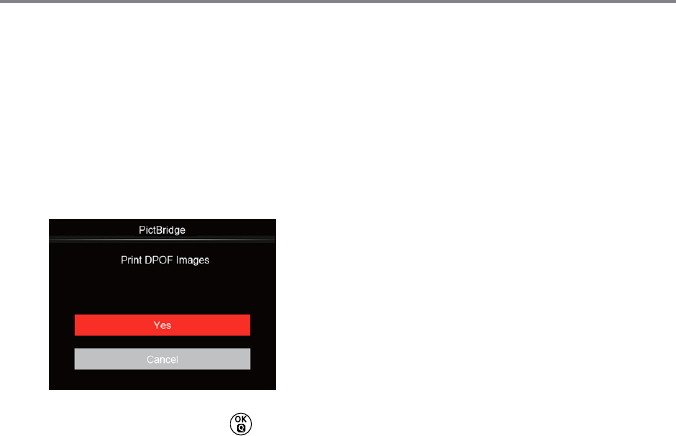
Print DPOF Images
To use DPOF printing, you must select your
photos for printing using the DPOF settings
beforehand. See “DPOF” section on page
103.
1. In the PictBridge menu, select「Print
DPOF Images」and the screen as shown
below appears.
2. Select「Ye s」and press the button
to conrm; select「Cancel」to cancel
printing.
Exit
Select「Exit」to exit the PictBridge menu.
At this time, the message「Remove USB
Cable!」appears on the screen.
Disconnect the USB cable from the camera
and printer.
120 121
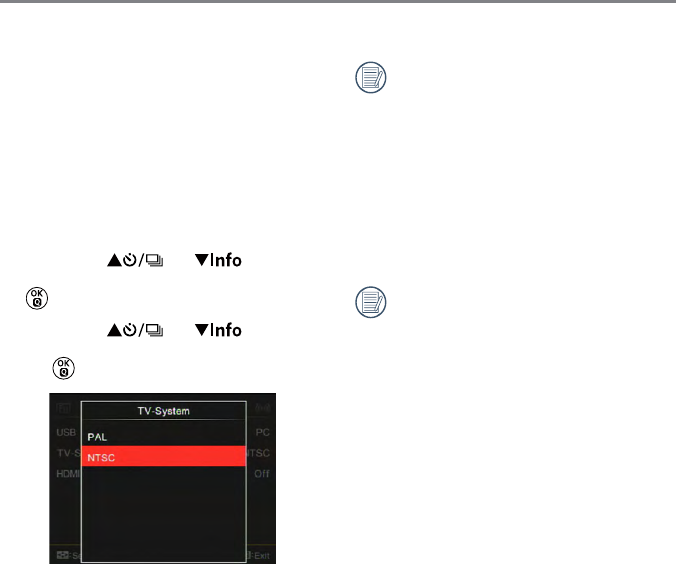
Video System
You can use the AV cable (which should
be purchased separately) to connect the
camera and the television for realizing
the video output. Connect one end of the
AV cable to USB/AV port of the camera,
connect the other end to AV-OUT port of
the television. Adjust the format of the
video output system according to your
requirements, and the steps are as follows:
1. Press the [ ] / [ ] button to
select「TV-System」and then press the
button to enter the menu.
2. Press the [ ] / [ ] button to
select「NTSC」or「PAL」and the Press
the button to conrm.
NTSC: English, Chinese (Traditional),
Japanese, French, Korean,
Russian, Vietnamese, Greek,
Hungarian
PAL: German, Spanish, Italian,
Chinese (Simplied),
Portuguese, Swedish, Danish,
Finnish, Indonesia, Norwegian,
Dutch, Turkish, Polish, Thai,
Croatian, Czech, Arabic, Hindi
The video output system would change
accordingly based upon the changes
of the selected language.
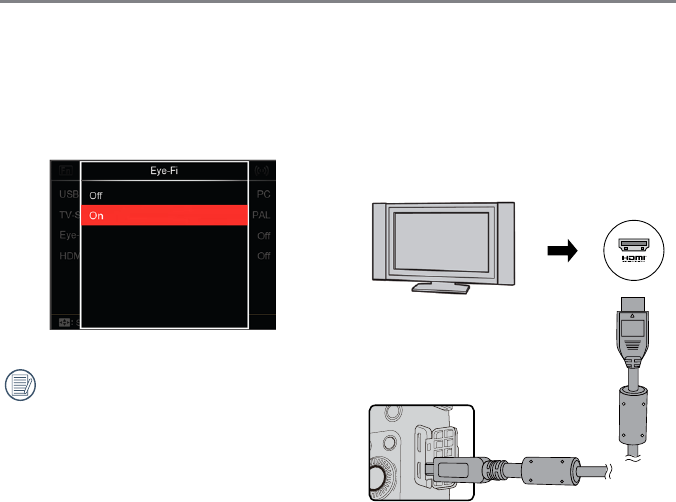
120 121
Set Eye-Fi Card Connection Mode
This camera supports wireless connection
for Eye-Fi card. Please follow the steps
below to upload les in camera to the
Internet.
If the Eye-Fi card is not available in the
camera, this feature is not displayed.
Supported HDMI Connections
HDMI (High Denition Multimedia Interface),
is a fully digital audio/video transmission
interface, through which uncompressed
audio and video signals are transmitted.
HDMI
(Type D)
122 123
Connecting HDMI-Ready TV
1. Use the cable with high resolution output
terminal (which should be purchased
separately) to connect the camera to the
television which meets HDMI standard.
2. The camera will be automatically detected
by the TV.
3. After connecting via HDMI, the camera
enters Playback Mode.
Make sure the camera and the TV are
both turned on before connecting.
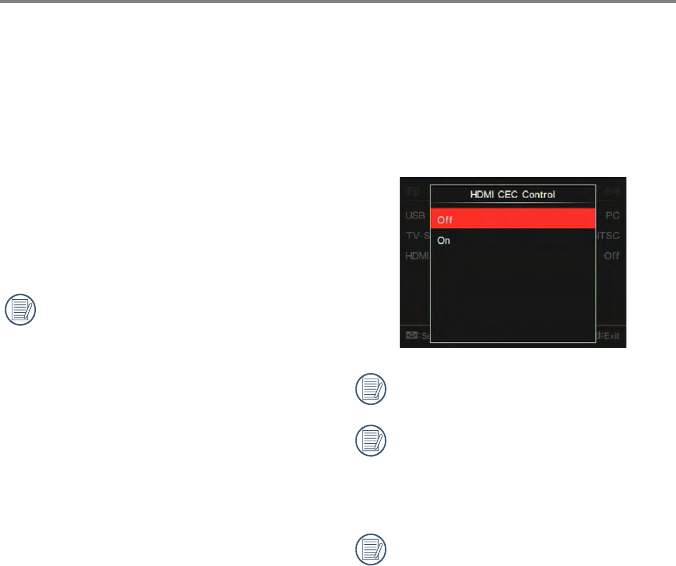
HDMI CEC Control
After connecting the camera with
TV-System, you may view pictures taken
with the camera on the TV screen and
operate the camera with your TV remote
control to view and edit all images.
It is required that the TV-System
supports HDMI CEC.
After the camera is successfully
connected with TV-System, other
buttons of the camera except the
Power button cannot work, with the
LCD staying dark.
Please refer to TV manual for relative
settings of TV-System.
122 123
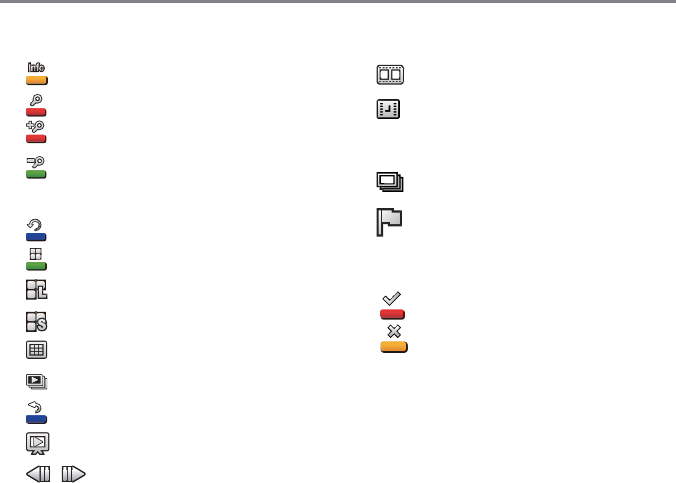
Introduction on Icons
1. Info Hiding/Display
2. Zoom-in
: Zoom in Images
: Zoom out Images
3. Rotate Images
: Only Turn Left
4. Image Index
: 5*3 Index Playback
: 10*5 Index Playback
: 3*1 Date Folder Index
: 5*3 Cont. Group Index
5. Back
6. Play Slide Show
7. Button for Switching Between
Previous and Next Images
8. Videos
9. Time-lapse Movies
10. Movie Length: 00:00:00
11. Cont. Group File
12. : First Image Mark
13. 000/000: Current Sorting/Total Number
of Images in Group
14. : Conrm Effect
15. : No Change
124 125
The following operations are available
during HDMI CEC playback:
• 1:1 Single Playback
• Zoom-in Playback
• Rotate
• Index Playback
• Cont. Group Playback
• Slide Show Playback
• Video Play
• Time-lapse Movie Play
• Panoramic File Play
• Image Edit
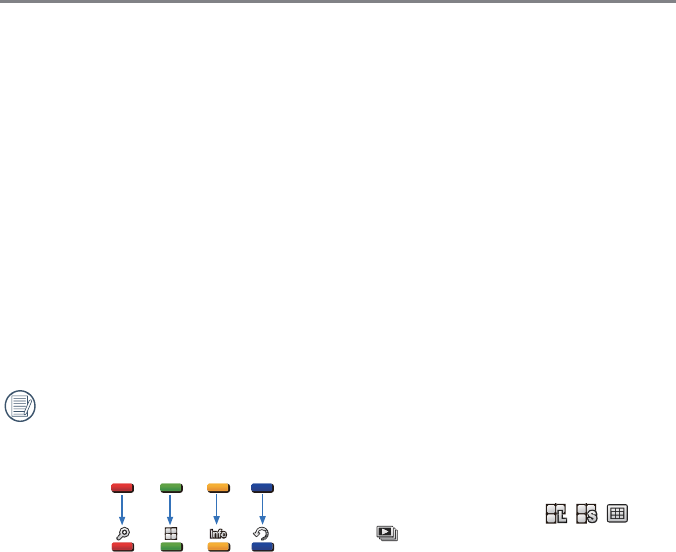
Pressing the four-color button on
remote control can enable relative
functions displayed on the TV-System
screen.
Remote control
TV-System
Red Green Yellow Blue
1:1 Single Playback:
Pressing the left and right arrow buttons
can switch among images.
Zoom-in Playback:
Under the 1:1 single playback mode,
press the red button to zoom in images;
press the red and green buttons on
remote control to zoom out images.
Rotate:
Under the 1:1 single playback mode,
press the blue button to rotate single
picture.
Index Playback:
Under the 1:1 playback mode, press the
green button to enter index playback;
press the central button to enter image
selection and then the arrow buttons to
select les you want and nally press
the central button again to back to the
1:1 single playback.
Under the 5*3 index playback mode,
press the green button to enter index
selection and then the left and right
arrow buttons to select , , and
, and nally press the central button
again to conrm your selection.

124 125
Cont. Group Playback:
Under the 1:1 single playback mode,
press the central button to start playing
images in continuous group.
If no images in the camera’s cont. group,
there will appear a prompt of no pictures
if you select on the index playback
interface.
Slide Show Playback:
Under the 1:1 single playback mode,
press the down arrow button to enter
slide show playback. During the playing,
you may press the left and right arrow
buttons to directly switch between
previous and next images and the
central button to end playing.
Video Play:
Under the 1:1 single playback mode,
select a video and then press the
central button to start playing. During
the playing, you may use the arrow
buttons and the central button to
perform operations such as fast forward/
backward, pause, frame forward/
backward, back to play, etc. according to
prompts on the screen.
Time-lapse Movie Play:
Same play mode as that of images.
There is no volume in playing time-lapse
les.
Panoramic File Play:
Under the 1:1 single playback mode,
select a panoramic le and then press
the central button to begin playing.