Sintai Optical CWFB124 Wi-Fi module User Manual Part 4
Sintai Optical (Shenzhen) Co., Ltd. Wi-Fi module Part 4
Contents
- 1. User Manual.pdf
- 2. User Manual Part 1.pdf
- 3. User Manual Part 2.pdf
- 4. User Manual Part 3.pdf
- 5. User Manual Part 4.pdf
- 6. User Manual Part 5.pdf
- 7. User Manual Part 6.pdf
- 8. User Manual Part 7.pdf
- 9. User Manual Part 8.pdf
- 10. User Manual Part 9.pdf
- 11. User Manual 1.pdf
- 12. User Manual 2.pdf
- 13. User Manual (1 of 4).pdf
- 14. User Manual (2 of 4).pdf
- 15. User Manual (3 of 4).pdf
- 16. User Manual (4 of 4).pdf
- 17. User Manual (1 of 2).pdf
- 18. User Manual (2 of 2).pdf
- 19. User Manual (1 of 5).pdf
- 20. User Manual (2 of 5).pdf
- 21. User Manual (3 of 5).pdf
- 22. User Manual (4 of 5).pdf
- 23. User Manual (5 of 5).pdf
User Manual Part 4.pdf
56 57
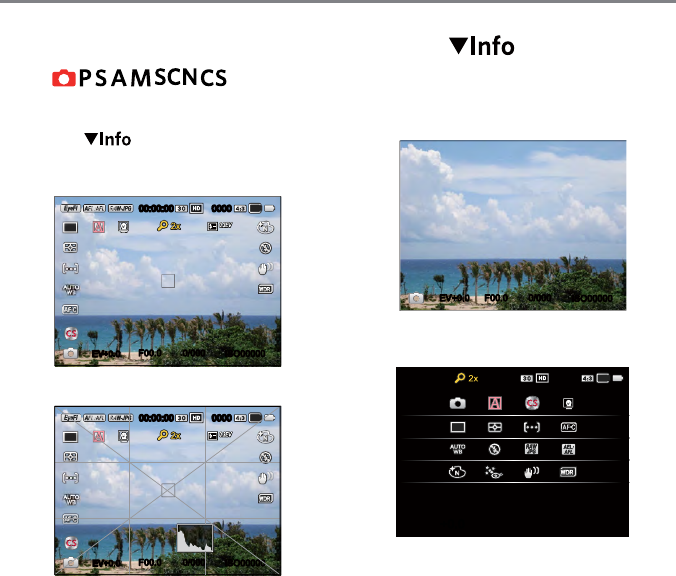
Mode:
Display of Messages on Control Interface.
Press the [ ] button to switch among
4 screens.
Function Message Display
EV+0.0
+0.0
ISO00000
0/000F00.0
00:00:00 0000
16M
Display with Grid and Histogram
EV+0.0
+0.0
ISO00000
0/000F00.0
00:00:00 0000
16M
Function Message Display
ISO00000
0/000F00.0EV+0.0+0.0
Message Display
ISO00000
0/000F00.0EV
00:00:00 0000
16M
+0.0+0.0
Introduction of Functions of Message Button
56 57
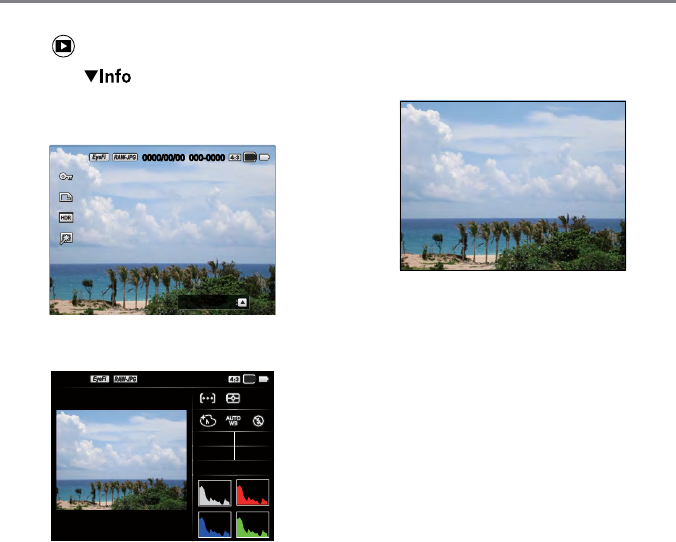
Mode:
Press the [ ] button to switch among
3 screens.
Function Message Display
Thumbnail3x3
000-00000000/00/00
16M
Detailed Message Display
000mm
ISO00000
0/000F00.0
EV
000-00000000/00/00
16M
+0.0+0.0
No Message Display
58 59
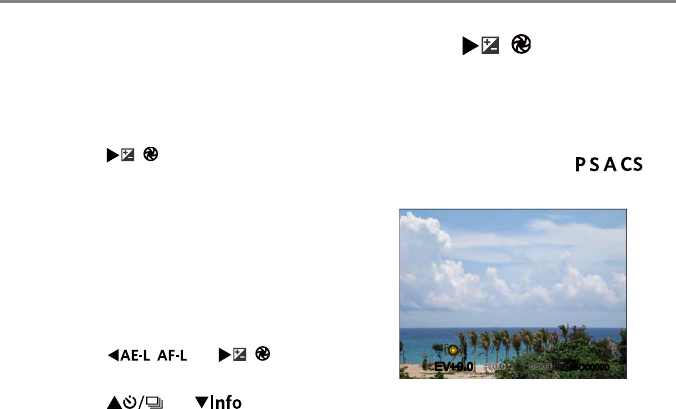
Introduction on Functions of Exposure Button
For adjusting the EV value, ISO value, shutter
speed and aperture size.
Please follow the steps below to set:
1. Press the [
] button to enter the
setting interface.
4 options in「Exposure Button Functions」:
• EV Value Setting
• ISO Value
• Shutter Speed Setting
• Aperture Adjustment
2. Press the [
] / [
] button
to select options to be adjusted.
3. Press the [ ] / [ ] button to
adjust parameters.
EV Value Setting
For adjusting the brightness of pictures to
be adjusted. Applicable to conditions with
a big contrast between the object and the
background. (Adjustable under
mode)
EV ISO00000
+0.0
+0.0
The EV value may be adjusted between
EV-3.0 and EV+3.0.
58 59
ISO Value
ISO may allow you to set the sensitivity of
the camera sensor. Please use a higher ISO
value in darker places while a lower
value in brighter conditions.
(Adjustable under mode)
ISO00000
0/0000F00.0EV-0.0
Options of ISO value: Auto, 200, 400, 800,
1600, 3200, 6400 and 12800.
Shutter Speed Setting
For shutter speed, the camera may
automatically set the aperture value
corresponding to the manually set shutter
speed so as to obtain a most suitable
exposure value. The movement of object may
be shown by adjusting the shutter speed. High
shutter value can make you clearly capture
the movement of fast moving object while low
shutter value can allow you to take a picture
for fact moving object with a strong sense of
bouncing. (Adjustable under mode)
0/000
ISO00000
EV+0.0
+0.0
With BULB (shutter B) selected, press the
shutter button to start exposing and then
the exposure time (30min at most) will be
displayed on the screen. Press again the
shutter button to stop exposing and complete
shooting. (Suggest using tripod.)

60 61
Aperture Adjustment
You can adjust the aperture size value.
Selecting a large aperture opening will
emphasize the point of focus and show a
blurry background. A small aperture opening
will keep both the background and main
object in clear focus. (Adjustable under the
mode)
F00.0 ISO00000
EV+0.0
+0.0
Introduction on Functions of
Quick Record Button
The camera will directly enter the record
mode and then start recording by pressing
the Quick Record button under the photo
mode.
00:00:00
00/15
15 pictures at most can be taken by pressing
the shutter when recording.
The sizes of images taken are as below
when playing them back:
FHD -> 2M
2M
HD -> 1M
DVD -> VGA
After recording, press again the Quick
Record button to save the video and
then back to the recording screen.
60 61
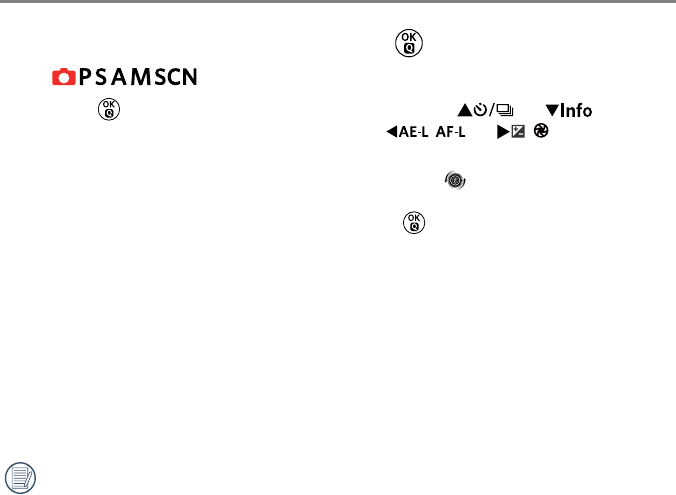
Introduction on Functions of OK Button
Mode:
1. Press the button to enter the shooting
menu under the photo mode.
9 options in 「OK Button Functions」:
• Timer/Self-timer Mode (refer to P53)
• Metering Mode
• AF Area
• WB Mode
• Focus Mode
• Picture Effect
• Flash Mode
• OIS
• WDR
Functions that can be enabled are
different under each mode.
2. Press the [ ] / [ ] /
[
] / [
] button to select
the shooting menu to be set.
3. Roll the [ ] to select options of the
shooting menu to be set and then press
the button to conrm.
Please refer to the following sections to
know details of each setting.
62 63
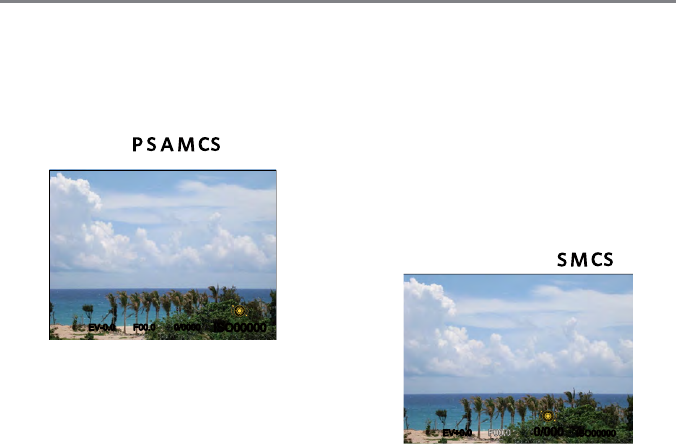
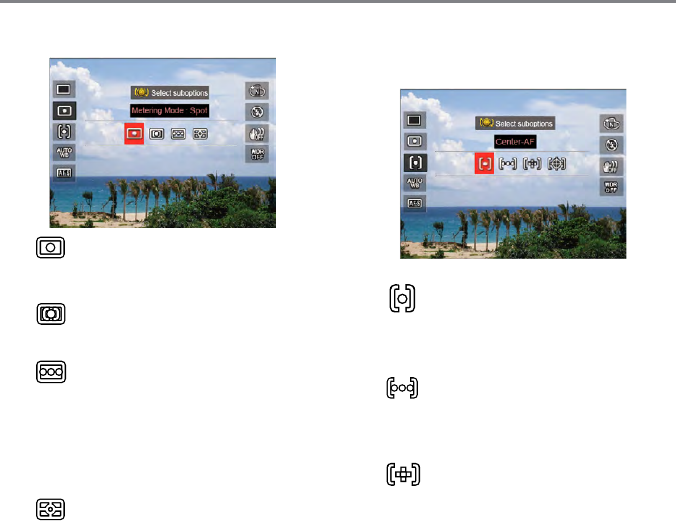
Metering Mode
For setting the AE area.
• Spot
For metering the block displayed
area in central screen.
• Center
For metering the object in central
screen.
• Multi
For performing brightness
distribution for the whole screen
and then automatically measuring
a most suitable metering. (Used to
shoot images with even brightness
without sharp contrast.)
• AiAE
For automatically selecting the
central and surrounding metering
to weight a proper metering value.
AF Area
In different photo shooting modes, you can
select different focus methods.
• Center-AF
The focus frame appears on the
center of the LCD screen to focus
on the subject.
• Multi-AF
The camera automatically focuses
the subject in a wide area to nd
the focus point.
• Spot Focus
Judge single-point focus position
voluntarily within the scope of
focus
62 63
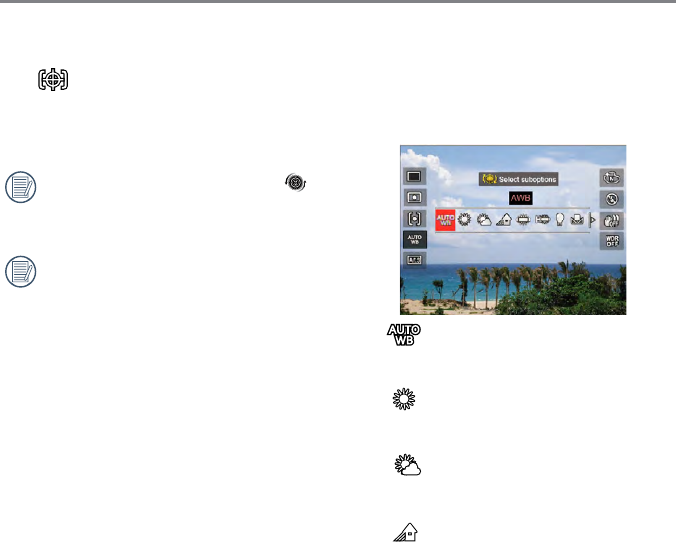
• Object Tracking
Smart tracking of the object
in motion under the focusing
shooting.
After enabling spot focus, roll the [ ]
to adjust the position of focus point in the
screen.
The function of object tracking cannot
be enabled until successful focus. For
tracking the focus, you need to keep the
shutter semi-pressed.
WB Mode
The WB function may allow user to adjust
color temperatures under different light
sources, so as to conrm that the color can
be presented properly.
• AWB
For auto shooting based on
lighting conditions.
• Daylight
For outdoor shooting in sunny
day.
• Cloudy
For outdoor shooting in cloudy
day.
• Shadow
For shooting under outdoor
shadow in sunny day.
64 65
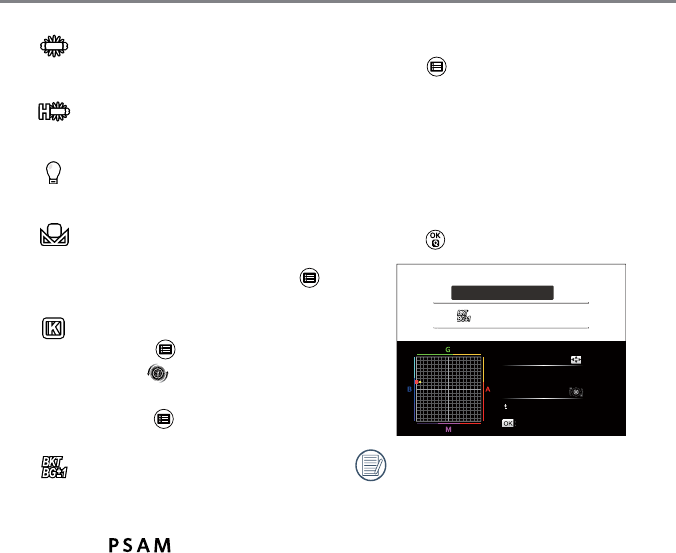
• Fluorescent
For indoor shooting in the light of
uorescent.
• Fluorescent H
For indoor shooting in the light of
uorescent H.
• Incandescent
For indoor shooting in the light of
incandescent.
• Manual WB
For changing the WB based on
current light source. Press the
button to set.
• Color Temp. (1900K~10000K)
Press the to enter and roll the
jog dial [ ] to adjust the color
temperature value; then, press
again the button to conrm
your selection.
• WB Bracketing
Press once the shutter button to
take three photos with different
WB settings. (Adjustable under
the mode)
WB Bracketing:
Press the button to enter options and
then press the directional buttons to adjust
the shift and roll the jog dial to adjust the
BTK value (0, 1 and 2).
Rotate clockwise to adjust X axis (B-A).
BTK value
Rotate counterclockwise to adjust Y axis
(G-M). BTK value
Press the button to conrm your settings.
WB Bracketing : BG 1
+
Shift
BKT
B9
1
2G
Confirm
WB bracketing is for setting the
bracketing range. Shift to both sides
for 3 spaces at most. If at the page
border, shift only to the other side and
2 photos can be taken. If no shift, only
one photo can be taken.
64 65
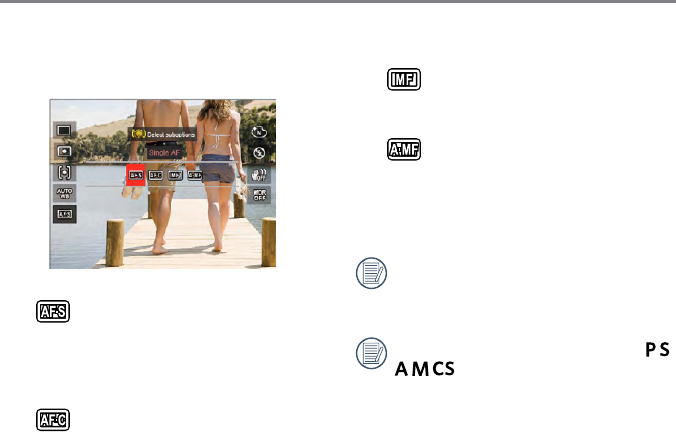
Focus Mode
For auto and manual focus settings.
• Single AF
Applicable to shoot relatively still
landscape; semi-press the shutter
rst and release it after the focus
is complete.
• Cont. AF
Applicable to shoot moving
objects (such as moving persons).
Perform continuous focus when
the shutter is semi-pressed. The
shutter can be released even if
the focus isn't fully complete.
• Manual Focus
Manually rotate the focus ring to
obtain a clear focus.
• Auto + Manual Focus
After auto focus, you may use the
focus ring to manually adjust the
focus as needed while
semi-pressing the shutter button.
Manual focus and AF area cannot work
at the same time. Subject to in the nal
settings.
Manual focus works only under the
mode.