Sintai Optical CWFB124 Wi-Fi module User Manual 3 of 4
Sintai Optical (Shenzhen) Co., Ltd. Wi-Fi module 3 of 4
Contents
- 1. User Manual.pdf
- 2. User Manual Part 1.pdf
- 3. User Manual Part 2.pdf
- 4. User Manual Part 3.pdf
- 5. User Manual Part 4.pdf
- 6. User Manual Part 5.pdf
- 7. User Manual Part 6.pdf
- 8. User Manual Part 7.pdf
- 9. User Manual Part 8.pdf
- 10. User Manual Part 9.pdf
- 11. User Manual 1.pdf
- 12. User Manual 2.pdf
- 13. User Manual (1 of 4).pdf
- 14. User Manual (2 of 4).pdf
- 15. User Manual (3 of 4).pdf
- 16. User Manual (4 of 4).pdf
- 17. User Manual (1 of 2).pdf
- 18. User Manual (2 of 2).pdf
- 19. User Manual (1 of 5).pdf
- 20. User Manual (2 of 5).pdf
- 21. User Manual (3 of 5).pdf
- 22. User Manual (4 of 5).pdf
- 23. User Manual (5 of 5).pdf
User Manual (3 of 4).pdf
66
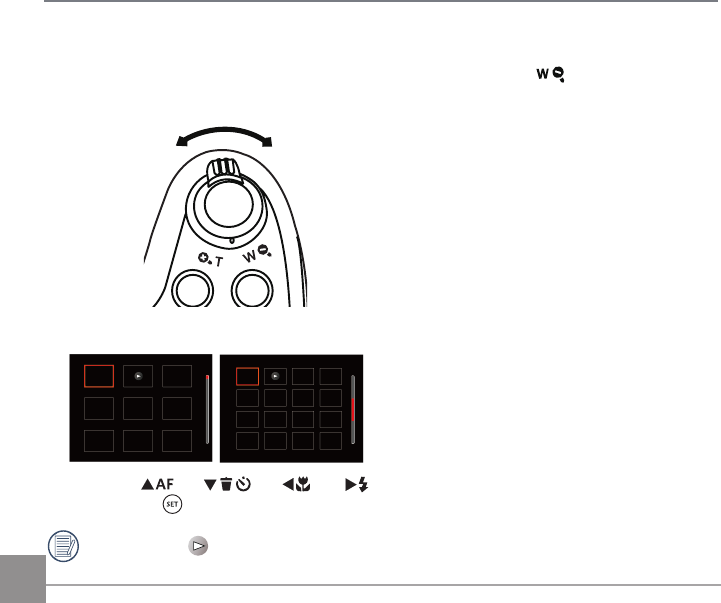
Thumbnail View
When in Playback Mode, rotate the Zoom Lever counter clockwise to the position to display
thumbnail images of the photos and videos on the screen.
W Zoom Out T Zoom In
1. Slide the Zoom Lever to switch between 3x3 and 4x4 thumbnails.
2. Press the
AC
/
C
A
/
AC
/
CA
buttons to select a picture or video clip to view
and press the button to restore it to the original size.
When the icon appears, it means this is a video file.

67
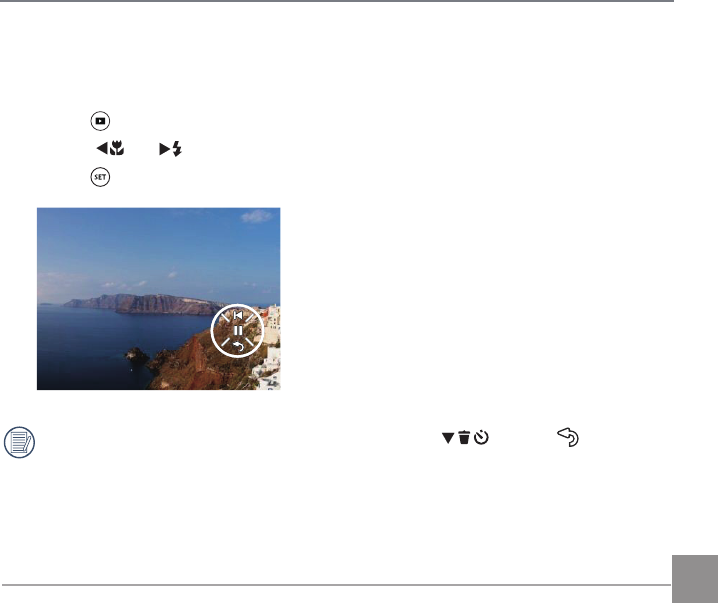
Using Zoom Playback (for still pictures only)
When playing back photos, you can also use the Zoom Lever to zoom in on the photos 2 to 8 times.
1. Press the button to switch to Playback mode.
2. Press the
AC
/
CA
button to select a picture to be zoomed in.
3. Rotate the Zoom Lever clockwise to to zoom in.
4. The bottom right corner of the screen will
display the number of times and area of
the photo zooming operation.
5. Press the
AC
/
C
A
/
AC
/
CA
buttons to navigate and select a part of the image
to be zoomed in.
6. Press the button to return the image to its original scale.
Movie images cannot be magnified.
x2
68
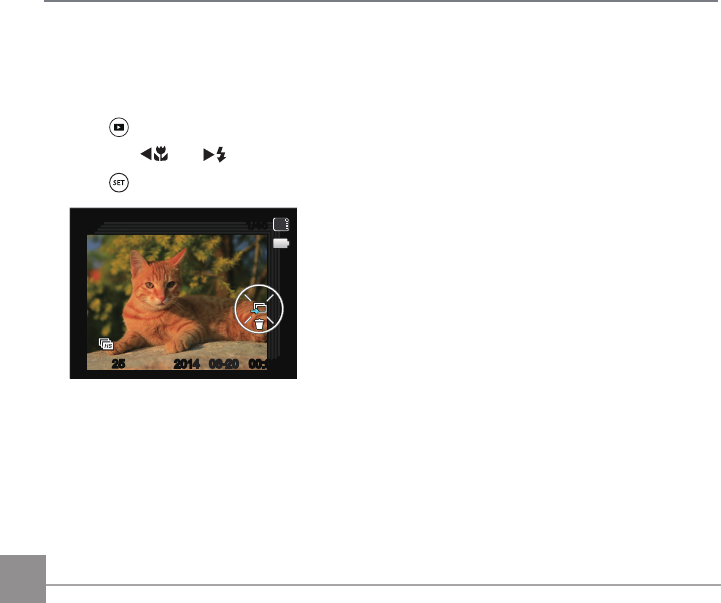
Photos and Video Deletion
In Playback mode, press the
C
A
button to delete your photos and videos.
To delete photos or videos:
1. Press the button to switch to Playback mode.
2. Press the
AC
/
CA
button to select the photos and videos to be deleted.
3. Press the
C
A
button and the deletion screen is displayed.
Delete One
Exit
4. Press the
AC
/
C
A
button to select 「Delete One」or「Exit」and press the button
to confirm.
Erased photos/video clips cannot be recovered.
Please refer to page 91 for instructions on deleting more than one image at a time.
69
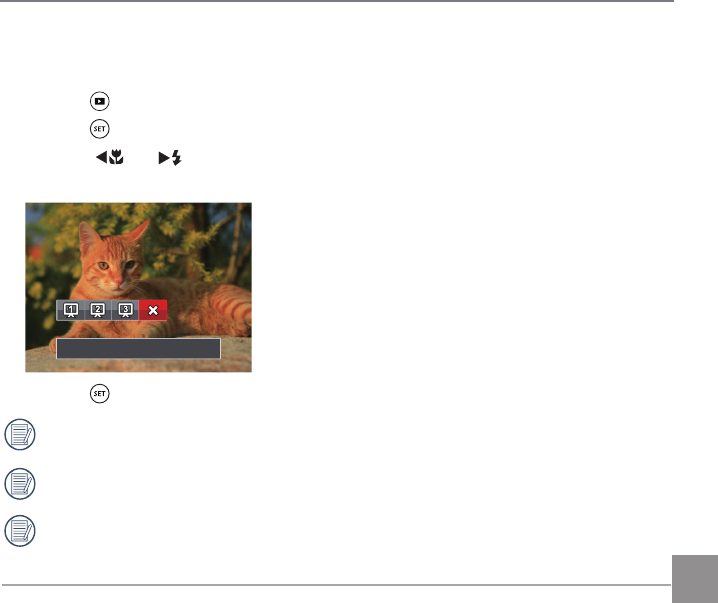
Slideshow
This setting allows you to view all the stored images as a slideshow.
1. Press the button to enter playback screen.
2. Press the button to enter slide option.
3. Press the
AC
/
CA
button to select slideshow playing or「Cancel「to return to the playback
screen.
Cancel
4. Press the button to confirm the setting.
The continuous capture group playback may be displayed by slideshow.
Pictures rotate automatically during a slide show.
Slide playing function supports movie playing.
70
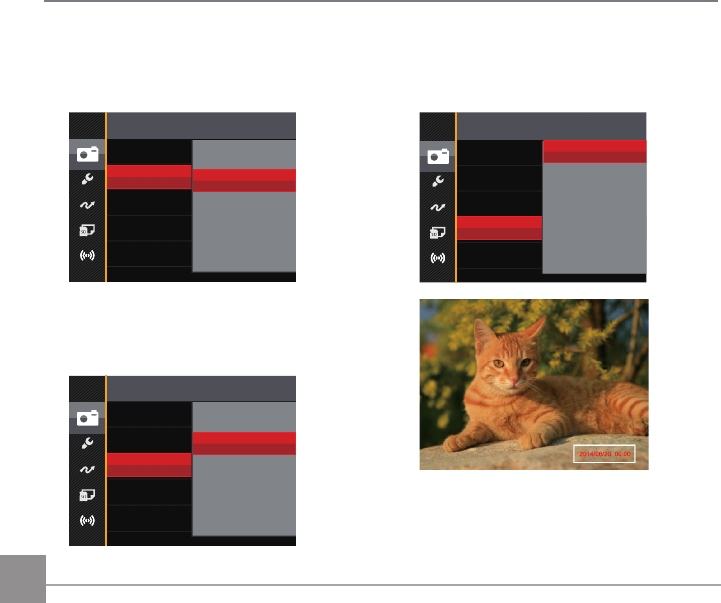
Continuous Capture Group Playback
Cont.Shot-High Speed (VGA) and Cont.Shot-Fast (4M) can make continuous capture for group
image playback.
1. Press button to enter playback screen.
2. Press the
AC
/
CA
button to select Cont. Group.
3. Press to start playback.
25
1/45
SD
06-2006-20 00:0000:00
4
2014
71
Animation panorama play
Panoramic animation playing is to play full size image in accordance with the shooting direction.
After playing, it will automatically return to the static screen of panoramic image.
1. Press the button to enter playback screen.
2. Press the
AC
/
CA
button to select animated panoramic photos.
3. Press the button to play in selected shooting direction.
In the process of panoramic animation playback, press the
C
A
button ( ) to stop
playing and return to the playback screen.
72 73
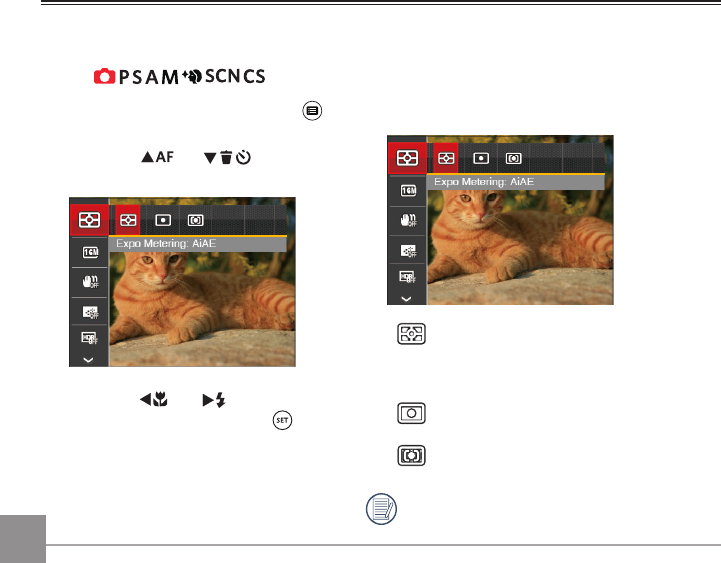
Photo Setup Menu
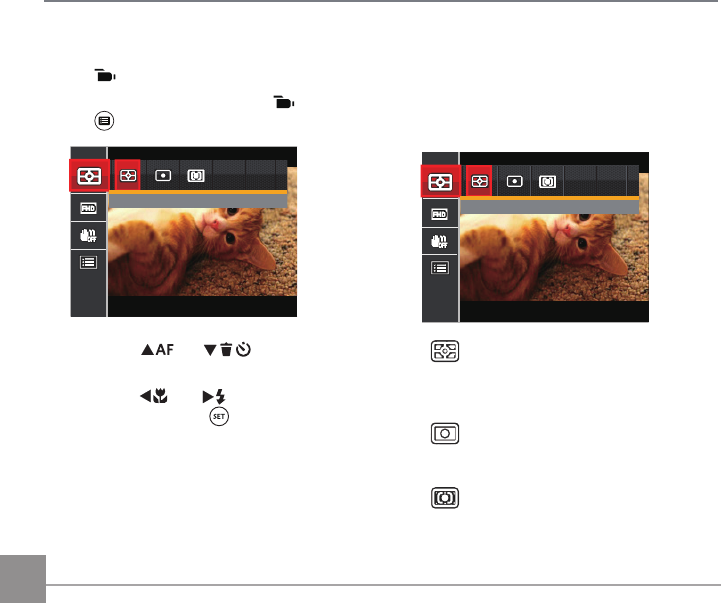
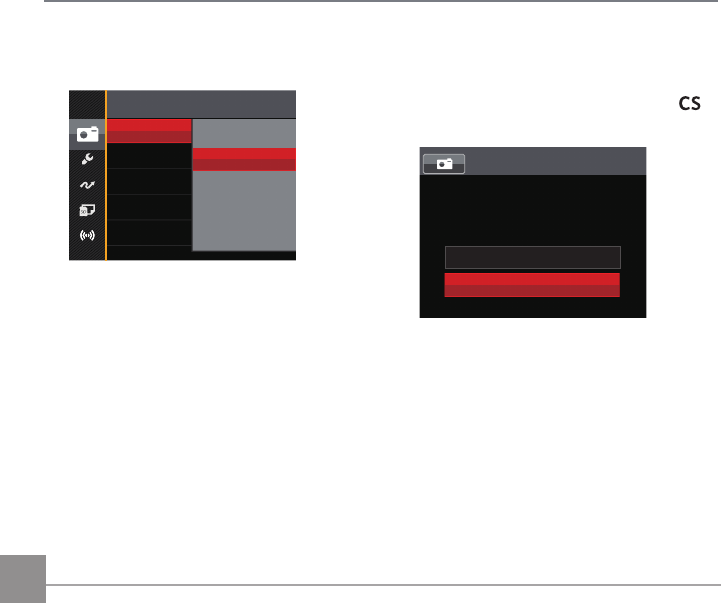
Using the Menus
Mode:
1. In Photo Shooting Mode, press the
button to enter the Photo Setup menu.
2. Press the
AC
/
C
A
button to
select the item to be set.
3. Press the
AC
/
CA
button to
select an option and press the
button to confirm.
Refer to the following pages for more
details about each setting.
Expo Metering
Use this setting to select the “target” size of the
camera’s field of view to be metered.
• AiAE (Artificial Intelligence AE): For
automatically selecting the central
and surrounding metering to weight a
proper metering value.
• Spot: For metering the block displayed
in the center of the screen.
• Center: For metering the object in the
center of the screen.
It can be adjusted in all modes except for
Panorama Mode.
7372 73
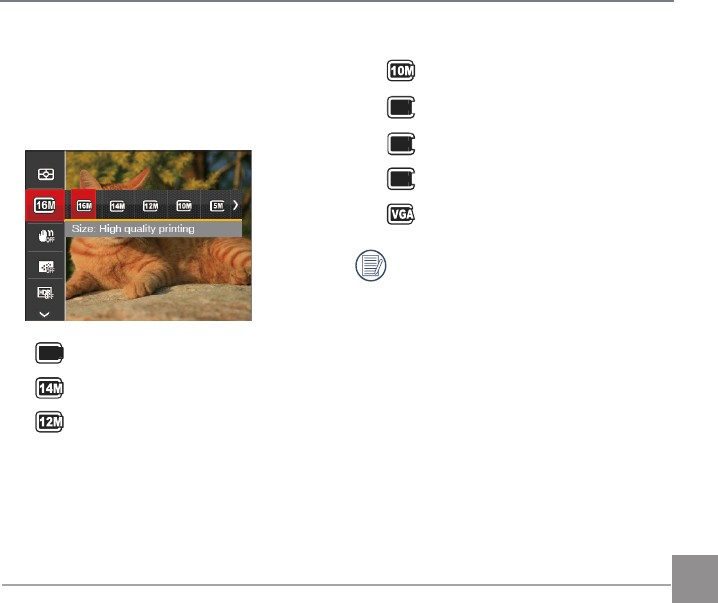
Image Size
The size setting refers to the image resolution
in pixels. A higher image resolution allows
you to print that image in larger sizes without
degrading the image quality.
•
16
M
Size: High quality printing
• Size: Full size printing
• Size: 16:9 display
• Size: Poster printing
•
5M
Size: A3 printing
•
3M
Size: A3 printing
•
2M
Size: 4”x 6” printing
• Size: E-Mail
The larger the number of recorded pixels,
the larger the file size and the fewer files
that can be saved on your memory card.
74
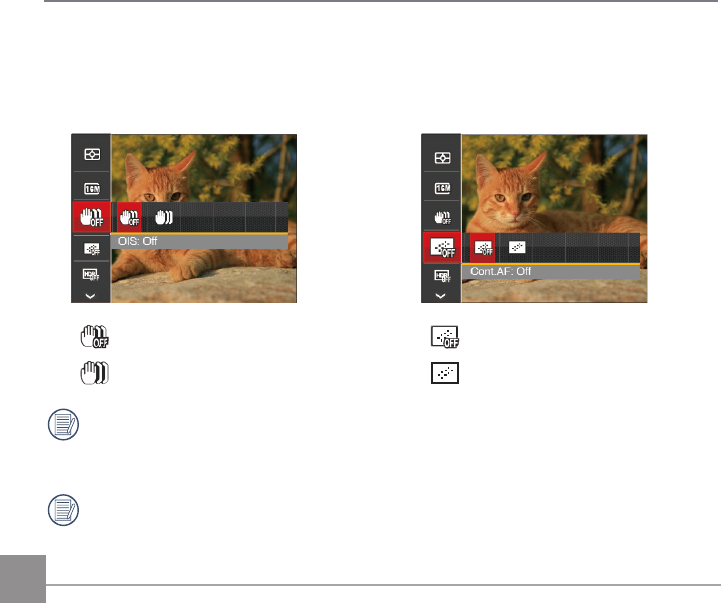
OIS (Optical Image Stabilization)
This mode can help reduce photo blur caused
by unintentional hand shake, low light or slow
shutter speed.
• OIS: Off
• OIS: On
Use Stabilization Mode in dark
environments or when using a slower
shutter speed.
Shooting in a windy or unstable
environment (such as a moving vehicle)
may cause blurred images.
Cont. AF
Enable the continuous AF to be able to
continuously focus automatically when
taking pictures.
• Cont.AF: Off
• Cont.AF: On
75
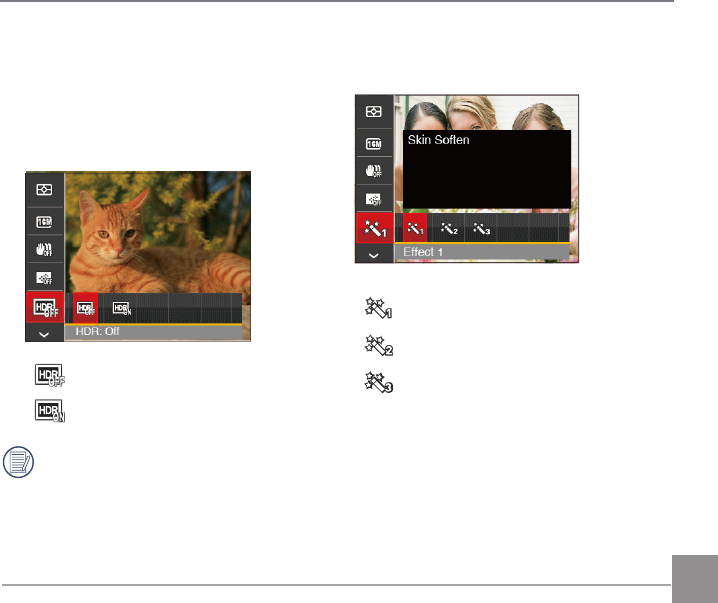
Beautifier
Set the effect of the face beautifier mode.
• Effect 1: Skin Soften
• Effect 2: Skin Soften+Eye Brightening
• Effect 3: Skin Soften+Eye Brightening
+Eye Enlargement
HDR
Use this setting to control wide dynamic
image range when taking static pictures.
Photos with extreme contrast of bright and
dark areas will still maintain distinguishable
detail and depth. (Suggest using tripod)
• HDR: Off
• HDR: On
In the scenario with high light contrast
(too dark or too light), this function can
be used to shoot satisfactory photos.
76
Scene
Select the scene mode under the SCN
mode.
Night Portrait
Press SET To Select Scene
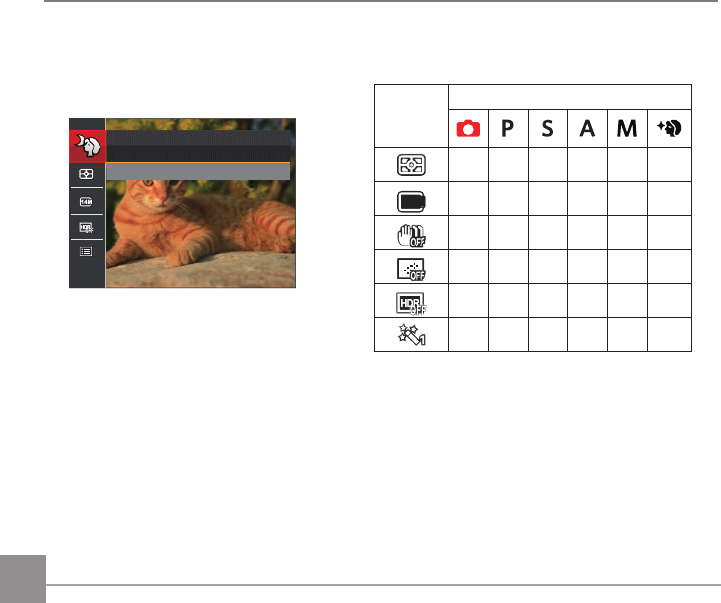
Shooting menu in the Photo shooting mode
( O: Optional X: Not optional)
Options
Photo Shooting Modes
O O O O O O
16
M
O O O O O O
X O O O O O
X O O O O O
X O O O O X
X X X X X O

77
Mode:
1. Press the button in Photo Shooting mode
and press the
AC
/
C
A
button to
select .
2. Press the button to enter the menu.
3. Press the
AC
/
C
A
button to select
, and press the button or the
CA
button to enter the menu.
4. Press the
AC
/
C
A
button to select
the item to be set and press the button or
the
CA
button to enter the menu.
5. Press the
AC
/
C
A
button to select an
option and press the button to confirm.
Photo Shooting Settings Menu
Quality
The Quality Setting can be used to adjust the
image compression ratio.
QualityBest
Fine
Normal
There are three options for picture quality:
• Best
• Fine
• Normal
78
AF-Assist Beam
In a darker environment, AF Assist Beam can
be turned on for better focus.
AF Assist Beam
Off
On
Digital Zoom
Turn on or off the digital zoom.
Digital Zoom
Off
On
Date Imprint
Include a Date/Time stamp on the photo
image.
Date Imprint
Off
Date
Date/Time
• Off
• Date
• Date / Time
79
Quick Review
This option allows quick review of the photos
immediately after they are taken. Each photo
is displayed on the LCD based on the selected
time.
Quick Review
Off
1 sec
2 sec
3 sec
There are 4 options:
• Off
• 1 sec
• 2 sec
• 3 sec
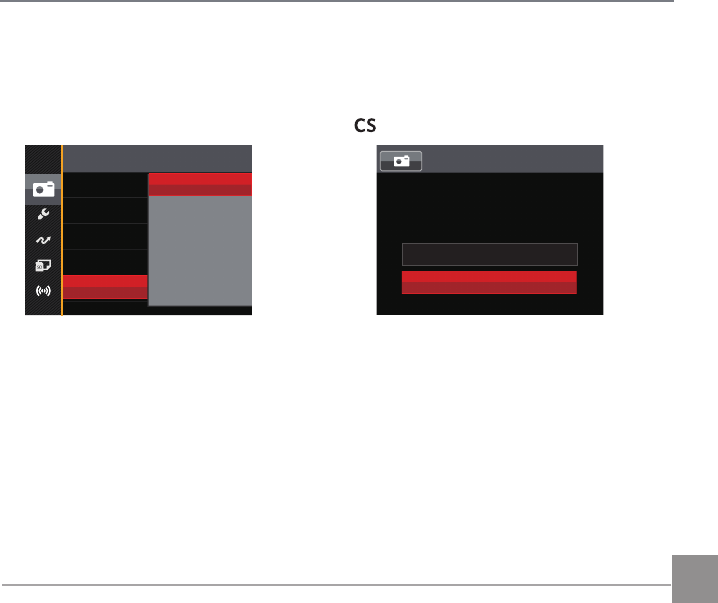
Custom Settings
Custom Settings stores the current photo
shooting mode and its parameters. The stored
mode and parameters are directly invoked in
mode.
Custom Settings
Reset camera settings to
custom settings mode.
No
Yes
There are 2 options:
• No
• Yes
80
Movie Menu
Mode:
1. Rotate the mode dial to select and press
the button to enter the Movie menu.
Expo Metering: AiAE
2. Press the
AC
/
C
A
button to
select the item to be set.
3. Press the
AC
/
CA
button to select an
option and press the button to confirm.
Expo Metering
Use this setting to select the “target” size of
the camera’s field of view to be metered.
Expo Metering: AiAE
• AiAE (Artificial Intelligence AE)
For automatically selecting the
central and surrounding metering
to weight a proper metering value.
• Spot
For metering the block displayed
in the center of the screen.
• Center
For metering the object in the
center of the screen.
81
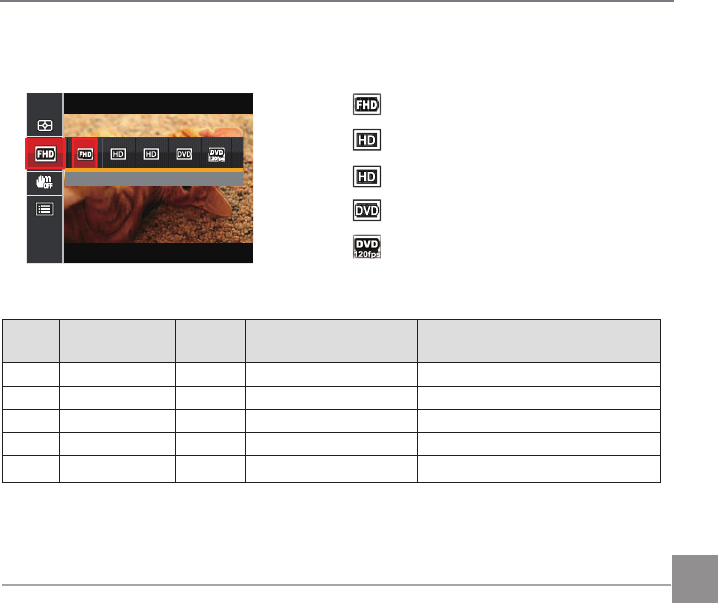
Movie Size
Set the image resolution used during video recording.
Size: 1080p 30fps
The speed requirements for reading and writing high image pixel images to SD card are as follows:
No. Image Pixel Frame Recommendation Recording time (4GB) About
1 1920x1080 30 Class 6 30 minutes
2 1280x720 60 Class 6 32 minutes
3 1280x720 30 Class 4 59 minutes
4 640x480 30 Class 4 106 minutes
5 640x480 120 Class 6 54 minutes
• Size: 1080p 30fps
• Size: 720p 60fps
• Size: 720p 30fps
• Size: 640x480 30fps
• Size: High Speed Movie
82
Recording time limit above 1280x720 30
fps format is under 29 minutes.
When recording in higher pixel
resolutions for extended periods of time,
this can cause the camera to generate
heat. This is not a camera malfunction.
When the video format is set as
640x480 (120fps), shooting time is 30
seconds, playback time is 2 minutes.
Sound recording is disabled when
640x480 120fps is chosen.
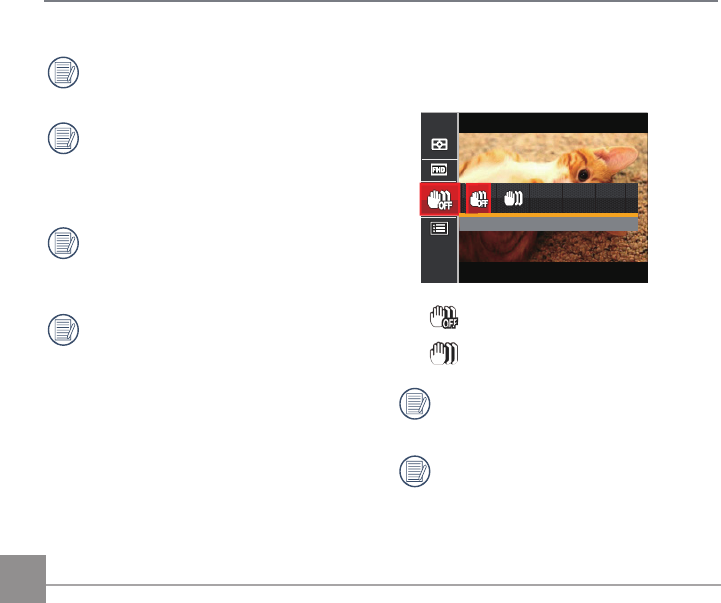
OIS (Optical Image Stabilization)
This mode can help reduce photo blur caused
by hand shake and low light.
5/9 5LL
• OIS: Off
• OIS: On
Use this image stabilization mode in dark
environments.
Shooting in a windy or unstable
environment (such as a moving vehicle)
may cause blurred images.
83
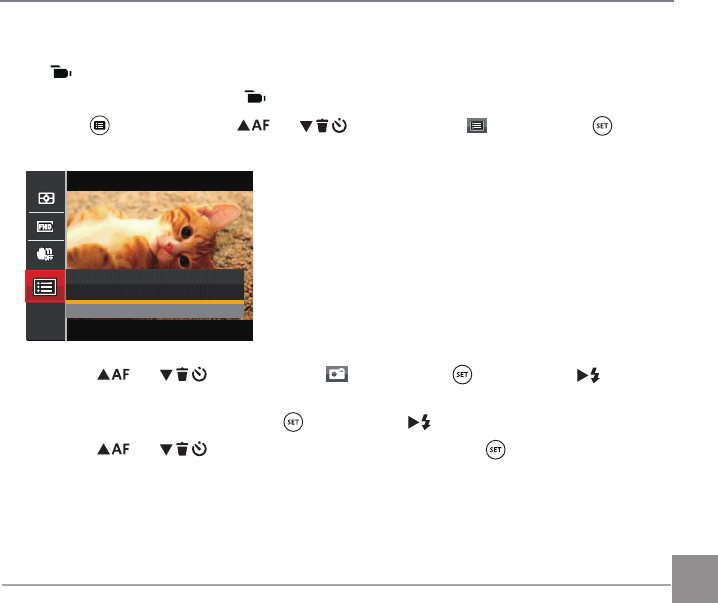
Movie Setting Menu
Mode:
1. Rotate the Mode Dial and select to enter the video recording screen.
2. Press the button, press the
AC
/
C
A
button to select , and press the button
to enter the Movie Setting menu.
Press SET To Enter
Menu
3. Press the
AC
/
C
A
button to select , and press the button or the
CA
button
to enter the menu.
4. Select the item to be set and press the button or the
CA
button to enter the menu.
5. Press the
AC
/
C
A
button to select an option and press the button to confirm.
84
Custom Settings
Custom Settings stores the current movie
mode and its parameters. The stored mode
and parameters can be invoked directly in
mode.
Custom Settings
Reset camera settings to
custom settings mode.
No
Yes
Digital Zoom
Turn on or off the digital zoom.
Digital Zoom Off
On
85
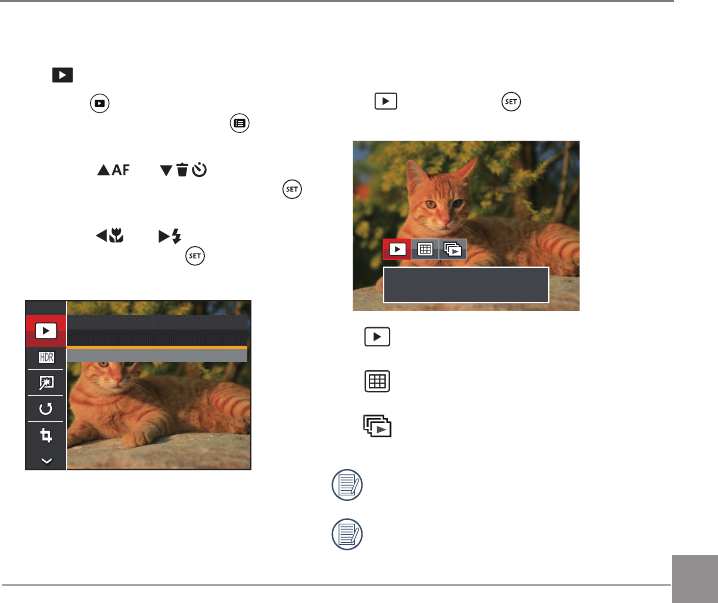
Playback Menu
Mode:
1. Press the button to display the
playback screen and press the button
to enter the Playback menu.
2. Press the
AC
/
C
A
button to
select the item to be set and press the
button to enter.
3. Press the
AC
/
CA
button to select
an option and press the button to
confirm.
Normal Mode
Press SET To Confirm
Refer to the following pages for more details
about each setting.
Playback Mode
Select , and press the button to enter the
settings screen:
Normal Mode: Display all images.
• Normal Mode:
Display all images.
• Date Mode:
Arranged by date.
• Cont. Photo Mode:
Arranged by Cont. Photo Group.
The Date Folder is displayed in date order
based on camera's Date/Time Settings.
If there is no any continuous shot image file
in the memory, continuous shot playback
mode cannot be enabled.