Yaesu Musen 20345X40 AMATEUR RADIO WITH SCANNING RECEIVER User Manual OM
Yaesu Musen Co., Ltd. AMATEUR RADIO WITH SCANNING RECEIVER OM
Contents
- 1. User Manual
- 2. User Manual 1
- 3. User Manual 2
- 4. User Manual 3
- 5. User Manual 4
- 6. User Manual 5
- 7. User Manual 6
- 8. User Manual 7
- 9. User Manual 8
- 10. User Manual 9
- 11. User Manual 10
- 12. User Manual 11
- 13. User Manual 12
- 14. User Manual 13
- 15. User Manual 14
- 16. User Manual 15
- 17. User Manual 16
- 18. User Manual 17
- 19. User Manual 18
- 20. User Manual 19
- 21. User Manual 20
- 22. User Manual 21
User Manual 18

180
Customize Menu Settings and User Preferences
UsingtheSet-upMenu
Tonesignalsettings
Settingthesquelchtonefrequency(CTCSS)
The tone frequency can be set. Refer to “Setting the tone frequency” ( P.102) for details.
SettingtheDCScode
The DCS code can be set. Refer to “Setting the DCS code” ( P.104) for details.
SettingthetransmissionmethodoftheDTMFcode
The transmission method of the registered DTMF code can be set.
Refer to “Transmitting registered DTMF code” ( P.113) for details.
RegisteringtheDTMFcode
Telephone numbers used when connecting to a public line from a phone patch can be
registered using a DTMF code up to a maximum of 16 digits.
Refer to “Registering the DTMF code” ( P.112) for details.
Recallingonlyspecifiedstations
The function for calling only specified stations using the pager code can be set.
Refer to “Using the pager function” ( P.106) for details.
SettingtheuserprogrammedreverseCTCSStone
The frequency of the user programmed reverse CTCSS tone squelch can be set at100 Hz
intervals between 300 Hz and 3000 Hz
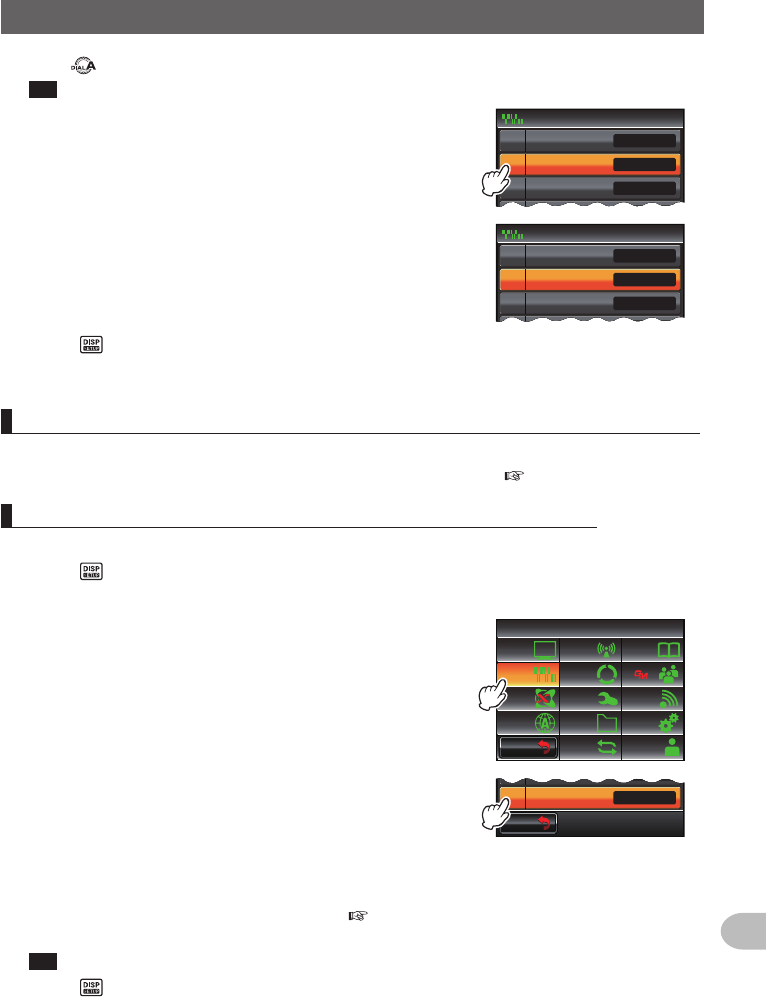
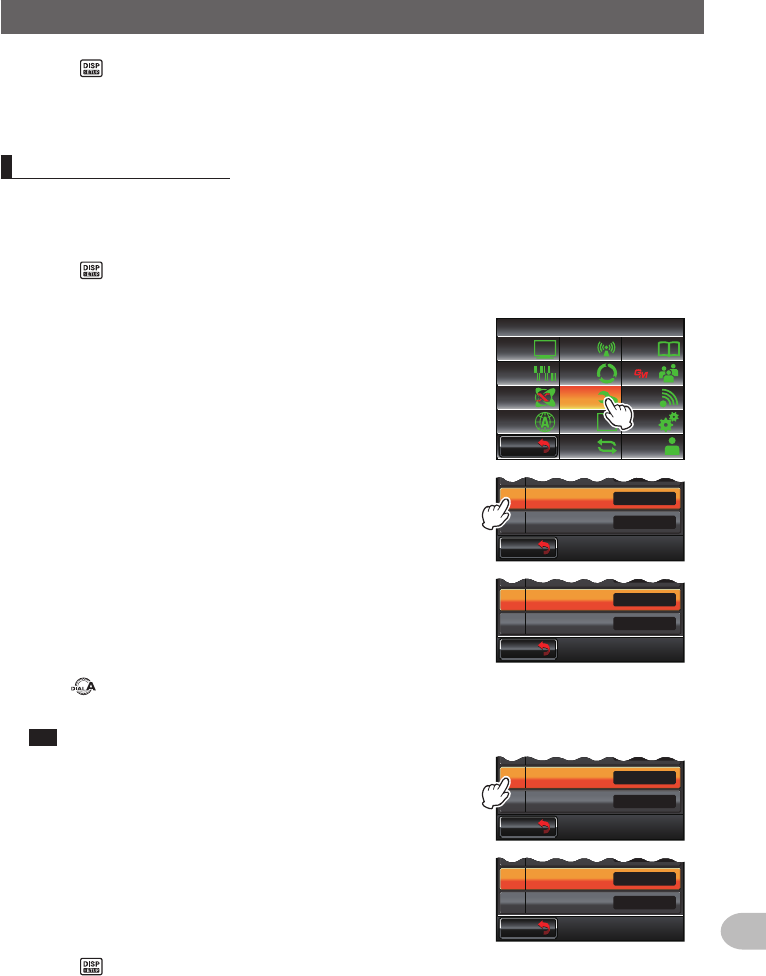
1 Press for one second or longer
The set-up menu will be displayed.
2 Touch [SIGNALING]
$#%-
$#%-
6:4:
5'672/'07
4'5'6
%.10'
%10(+)9Ჰ4'5
5%#0
&+52.#;
5+) 0#.+0)
#245 126+10
5&%#4&
/'/14;
#
%#..5+) 0
3 Select and touch [6PRGREVTONE]
The characters of the set value will turn orange in
color.
$#%-
$#%-
24)4'8610'
2#)'4%1&'
53.':2#05+10
$'..4+0)'4
5+) 0#.+0)
1((
1((
*\
ᲸᲸᲹᲽ
Ჽ
Ჾ
Ჿ
᳀
Ż
24)4'8610'
2#)'4%1&'
53. ':2#05+10
$'..4+0)'4
5+) 0#.+0)
1((
1((
*\
ᲸᲸᲹᲽ
Ჽ
Ჾ
Ჿ
᳀
Ż
Application for FCC / IC
FCC ID: K6620345X40 / IC: 511B-20345X40
181
Customize Menu Settings and User Preferences
UsingtheSet-upMenu
4 Turn to select the frequency
Tip Factory default value: 1500 Hz
5 Touch [6PRGREVTONE]
The characters of the set value will turn green in color.
24)4'8610'
2#)'4%1&'
53. ':2#05+10
$'..4+0)'4
5+) 0#.+0)
1((
1((
*\
ᲸᲸᲺᲽ
Ჽ
Ჾ
Ჿ
᳀
Ż
24)4'8610'
2#)'4%1&'
53. ':2#05+10
$'..4+0)'4
5+) 0#.+0)
1((
1((
*\
ᲸᲸᲺᲽ
Ჽ
Ჾ
Ჿ
᳀
Ż
6 Press for one second or longer
The frequency will be set and the display will return to the previous screen.
UsingthebellNotificationofanincomingcallfromapartnerstationusingthebell
Notification of an incoming call from a partner station can be provided by a bell sound.
Refer to “Using the bell to notify an incoming call by a partner” ( P.110) for details.
Settingthesquelchtypeseparatelyfortransmitandreceive
Different squelch types can be used for transmit and receive.
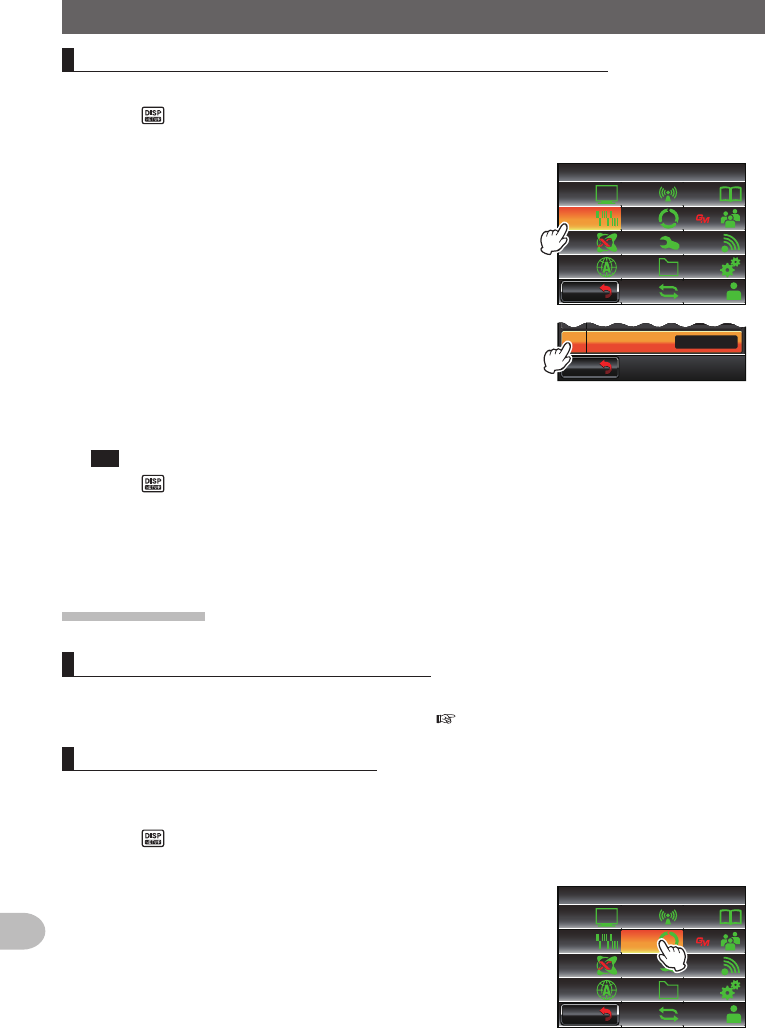
1 Press for one second or longer
The set-up menu will be displayed.
2 Touch [SIGNALING]
$#%-
$#%-
6:4:
5'672/'07
4'5'6
%.10'
%10(+)9Ჰ4'5
5%#0
&+52.#;
5+) 0#.+0)
#245 126+10
5&%#4&
/'/14;
#
%#..5+) 0
3 Touch [8SQLEXPANSION] to select OFF/ON
The setting will switch between “OFF” and “ON” each
time it is touched.
OFF: Use the same squelch for transmit and receive.
ON: Use different squelch for transmit and receive.
Refer to “Other squelch functions”( P.110) for
details.
Tip Factory default value: OFF
$#%-
$#%-
53.':2#05+10
$'..4+0)'4 1((
1((
Ჿ
᳀
4 Press for one second or longer
The squelch type when transmitting and receiving will be set and the display will
return to the previous screen.
Application for FCC / IC
FCC ID: K6620345X40 / IC: 511B-20345X40
182
Customize Menu Settings and User Preferences
UsingtheSet-upMenu
Settingtheweatheralertoperation(USAVersionOnly)
The reception of the weather alert can be disabled.
1 Press for one second or longer
The set-up menu will be displayed.
2 Touch [SIGNALING]
$#%-
$#%-
6:4:
5'672/'07
4'5'6
%.10'
%10(+)9Ჰ4'5
5%#0
&+52.#;
5+) 0#.+0)
#245 126+10
5&%#4&
/'/14;
#
%#..5+) 0
3 Touch [9WXALERT] to select OFF/ON
The setting will switch between “OFF” and “ON” each
time it is touched.
OFF: The weather alert will not be received.
ON: The weather alert will be received.
Tip Factory default value: OFF
$#%-
$#%-
9:#.'46
$'..4+0)'4 1((
1((
Ჿ
4 Press for one second or longer
The weather alert operation will be set and the display will return to the previous
screen.
Scansettings
Settingthesignalreceptionmethod
The reception method when a signal is picked up in the home channel can be set.
Refer to “Setting the signal reception method” ( P.82) for details.
Settingthescanningdirection
The scanning direction can be set to scan for increasing or decreasing frequencies or
memory channel numbers.
1 Press for one second or longer
The set-up menu will be displayed.
2 Touch [SCAN]
$#%-
$#%-
6:4:
5'672/'07
4'5'6
%.10'
%10(+)9Ჰ4'5
5%#0
&+52.#;
5+) 0#.+0)
#245 126+10
5&%#4&
/'/14;
#
%#..5+) 0
Application for FCC / IC
FCC ID: K6620345X40 / IC: 511B-20345X40
183
Customize Menu Settings and User Preferences
UsingtheSet-upMenu
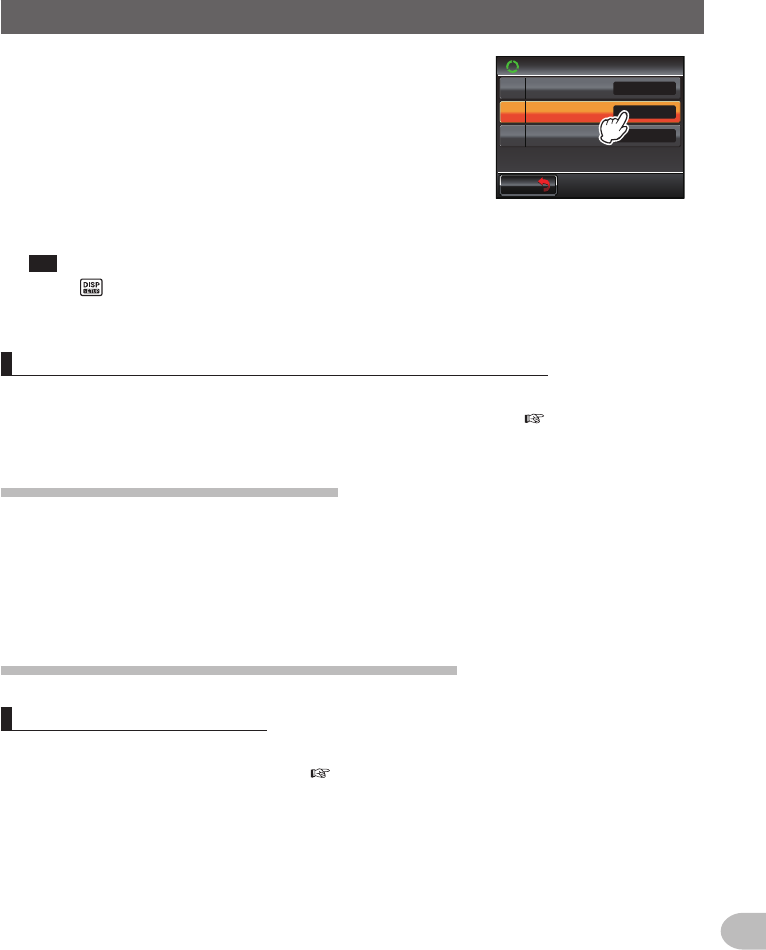
3 Touch [2SCANDIRECTION] to select the scanning
direction
The setting will switch between “UP” and “DOWN”
each time it is touched.
UP: Scan for increasing frequencies or memory
channel numbers.
DOWN: Scan for decreasing frequencies or memory
channel numbers.
Tip Factory default value: UP
$#%-
$#%-
UGE
5%#0
5%#04'57/'
5%#0&+4'%6+10
Ჹ
Ჺ
#761
&7#.9#6%*5612
72
4 Press for one second or longer
The scanning direction will be set and the display will return to the previous screen.
Settingthereceiveoperationwhenthescanningstops
The reception method when the scanning stops can be set.
Refer to “Setting the receive operation when the scanning stops” ( P.73) for details.
Groupmonitorfunctionsettings
The GM (group monitor) function automatically checks to find if there are any registered
group members within communication range.
Refer to the separate Operating Manual GM Edition for further details (download the
operating manual from the YAESU website).
Settingsonthefunctionsandconfiguration
Settingthedate and time
The date and time of the radio can be set.
Refer to “Adjusting the data and time” ( P.56) for details.
Application for FCC / IC
FCC ID: K6620345X40 / IC: 511B-20345X40
184
Customize Menu Settings and User Preferences
UsingtheSet-upMenu
Settingthedisplayformatforthedateandtime
The display format of the clock inside the radio can be changed as follows.
· Date format: Month/Day/Year format, Year/Month/Day format, Day/Month/Year
format, Year/Day/Month format
· Time format: 24 hours format, 12 hours format
1 Press for one second or longer
The set-up menu will be displayed.
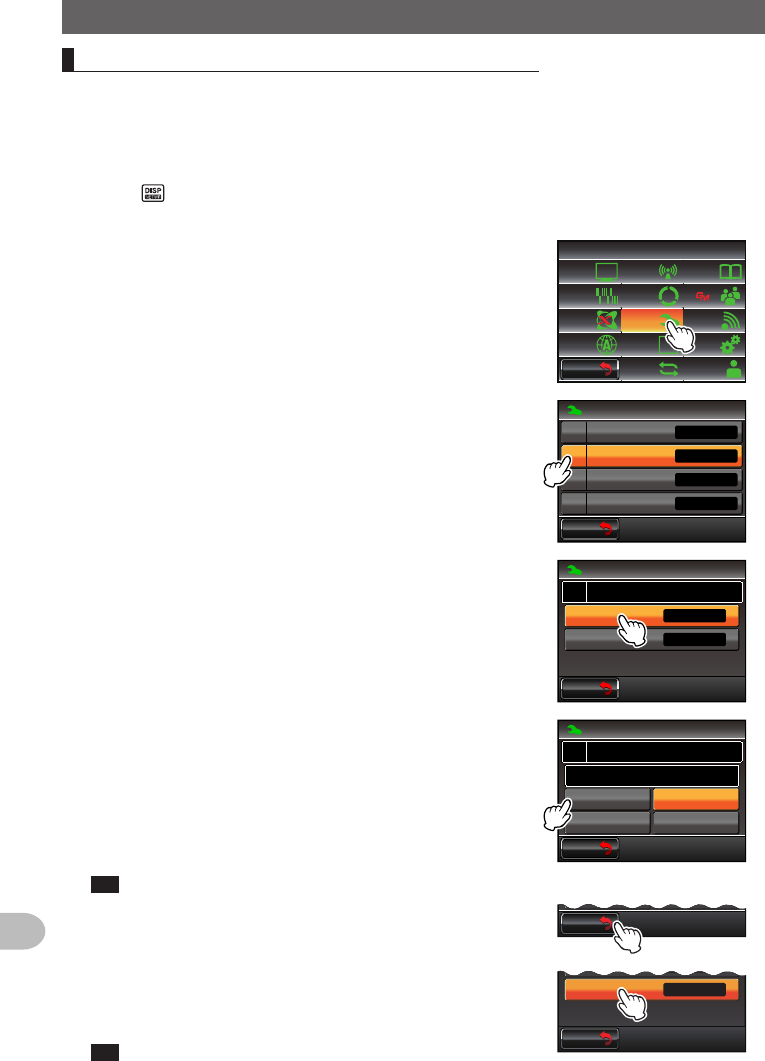
2 Touch [CONFIG]
$#%-
$#%-
6:4:
5'672/'07
4'5'6
%.10'
%10(+)9Ჰ4'5
5%#0
&+52.#;
5+) 0#.+0)
#245 126+10
5&%#4&
/'/14;
#
%#..5+) 0
3 Touch [2DATE&TIMEFORMAT]
The display setting screen for the date and time will
be displayed.
$#%-
$#%-
%10(+)
'6+/'(14/#6
6+/'<10'
#7614265*+(6
76% ᲸᲸ
Ჹ
Ჺ
10
Ż
Ż
'6+/'#&,756
4 Touch [DATE]
The display setting screen for the date will be
displayed.
$#%-
$#%-
6+/'
'
ᲺJQWT
%10(+)
'6+/'(14/#6
[[[[OOOFF
Ჺ
5 Touch the format to be displayed
Touch and select the date format to be displayed.
mmm/dd/yyyy: Display in Month/Day/Year format.
yyyy/mmm/dd: Display in Year/Month/Day format.
dd/mmm/yyyy: Display in Day/Month/Year format.
yyyy/dd/mmm: Display in Year/Day/Month format.
Tip Factory default value: mmm/dd/yyyy
$#%-
$#%-
[[[[OOOFF
[[[[FFOOO
OOOFF[[[[
FFOOO[[[[
%10(+)
'6+/'(14/#6Ჺ
'
6 Touch [BACK]
$#%-
$#%-
[[[[FFOOOFFOOO[[[[
7 Touch [TIME] to select the display format for the time
The setting will switch between “24 hour” and “12
hour” each time it is touched.
Tip Factory default value: 24 hour
$#%-
$#%-
6+/'
'
ᲺJQWT
[[[[OOOFF
Application for FCC / IC
FCC ID: K6620345X40 / IC: 511B-20345X40
185
Customize Menu Settings and User Preferences
UsingtheSet-upMenu
8 Press for one second or longer
The display format for the date and time will be set and the display will return to the
previous screen.
Settingthetimezone
The time of the clock inside the radio can be synchronized with the time in the time data
(Coordinated Universal Time) from the GPS.
The time zone can be set at 0.5 hour intervals up to ±14 hours.
1 Press for one second or longer
The set-up menu will be displayed.
2 Touch [CONFIG]
$#%-
$#%-
6:4:
5'672/'07
4'5'6
%.10'
%10(+)9Ჰ4'5
5%#0
&+52.#;
5+) 0#.+0)
#245 126+10
5&%#4&
/'/14;
#
%#..5+) 0
3 Select and touch [3TIMEZONE]
The characters of the set value will turn orange in
color.
$#%-
$#%-
'6+/'(14/#6
6+/'<10'
#7614265*+(6
76% ᲸᲸ
Ჺ
10
Ż
$#%-
$#%-
'6+/'(14/#6
6+/'<10'
#7614265*+(6
76% ᲸᲸ
Ჺ
10
Ż
4 Turn to select the time zone
The time zone can be set at 0.5 hour intervals up to ±14 hours.
Tip Factory default value: UTC+0:00
5 Touch [3TIMEZONE]
The characters of the set value will turn green in
color.
$#%-
$#%-
'6+/'(14/#6
6+/'<10'
#7614265*+(6
76% ᲸᲸ
Ჺ
10
Ż
$#%-
$#%-
'6+/'(14/#6
6+/'<10'
#7614265*+(6
76% ᲸᲸ
Ჺ
10
Ż
6 Press for one second or longer
The time zone will be set and the display will return to the previous screen.
Application for FCC / IC
FCC ID: K6620345X40 / IC: 511B-20345X40