Yaesu Musen 20345X40 AMATEUR RADIO WITH SCANNING RECEIVER User Manual OM
Yaesu Musen Co., Ltd. AMATEUR RADIO WITH SCANNING RECEIVER OM
Contents
- 1. User Manual
- 2. User Manual 1
- 3. User Manual 2
- 4. User Manual 3
- 5. User Manual 4
- 6. User Manual 5
- 7. User Manual 6
- 8. User Manual 7
- 9. User Manual 8
- 10. User Manual 9
- 11. User Manual 10
- 12. User Manual 11
- 13. User Manual 12
- 14. User Manual 13
- 15. User Manual 14
- 16. User Manual 15
- 17. User Manual 16
- 18. User Manual 17
- 19. User Manual 18
- 20. User Manual 19
- 21. User Manual 20
- 22. User Manual 21
User Manual 19
186
Customize Menu Settings and User Preferences
UsingtheSet-upMenu
Settingtheauto repeater shift
When communicating using the repeater, the repeater auto shift function automatically
shifts the transmit frequency to match the repeater input frequency This allows the
repeater to be used by simply tuning the FTM-400XDR/DE to the repeater output
frequency This setting may turned ON or OFF.
1 Press for one second or longer
The set-up menu will be displayed.
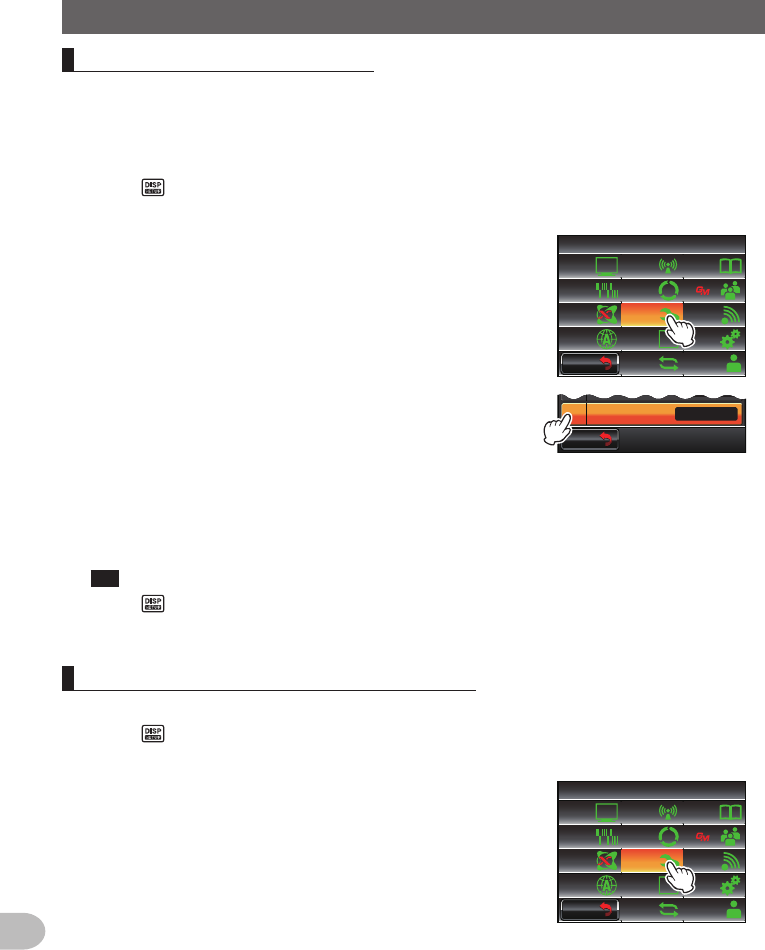
2 Touch [CONFIG]
$#%-
$#%-
6:4:
5'672/'07
4'5'6
%.10'
%10(+)9Ჰ4'5
5%#0
&+52.#;
5+) 0#.+0)
#245 126+10
5&%#4&
/'/14;
#
%#..5+) 0
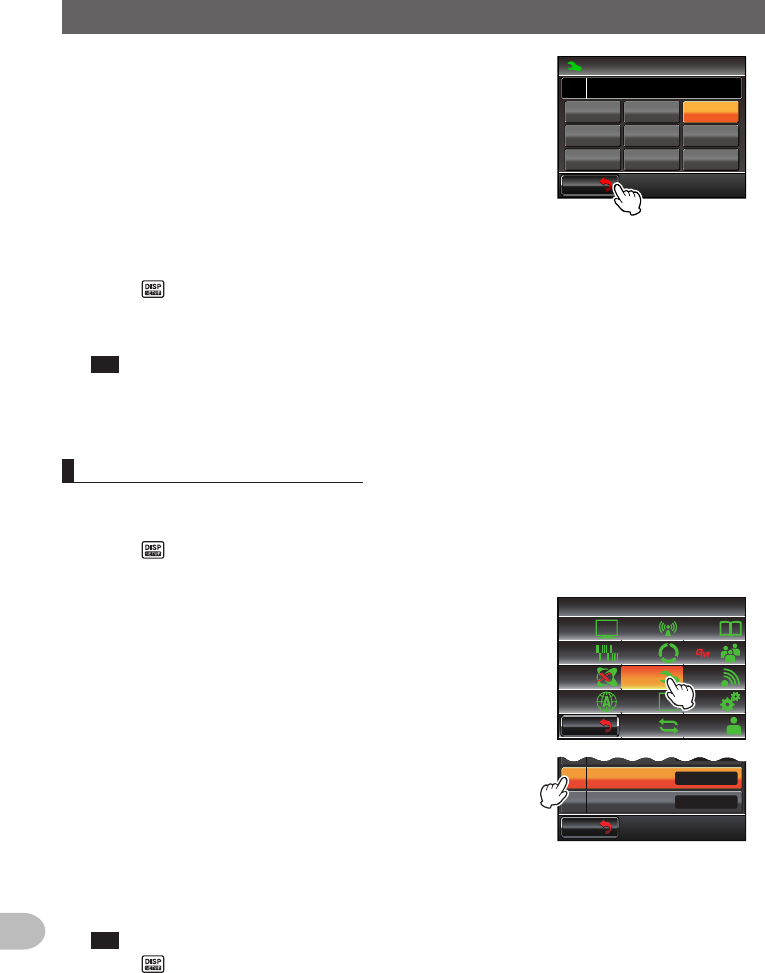
3 Touch [4AUTORPTSHIFT] to select ON/OFF
The setting will switch between “ON” and “OFF” each
time it is touched.
ON: The auto repeater shift function will be switched
on.
OFF: The auto repeater shift function will be switched
off.
Tip Factory default value: ON
$#%-
$#%-
6+/'<10'
#7614265*+(6
76% ᲸᲸ
10
4 Press for one second or longer
The auto repeater shift will be set and the display will return to the previous screen.
Settingthedirection of the repeater shift
The direction of the repeater shift function can be set.
1 Press for one second or longer
The set-up menu will be displayed.
2 Touch [CONFIG]
$#%-
$#%-
6:4:
5'672/'07
4'5'6
%.10'
%10(+)9Ჰ4'5
5%#0
&+52.#;
5+) 0#.+0)
#245 126+10
5&%#4&
/'/14;
#
%#..5+) 0
Application for FCC / IC
FCC ID: K6620345X40 / IC: 511B-20345X40
187
Customize Menu Settings and User Preferences
UsingtheSet-upMenu
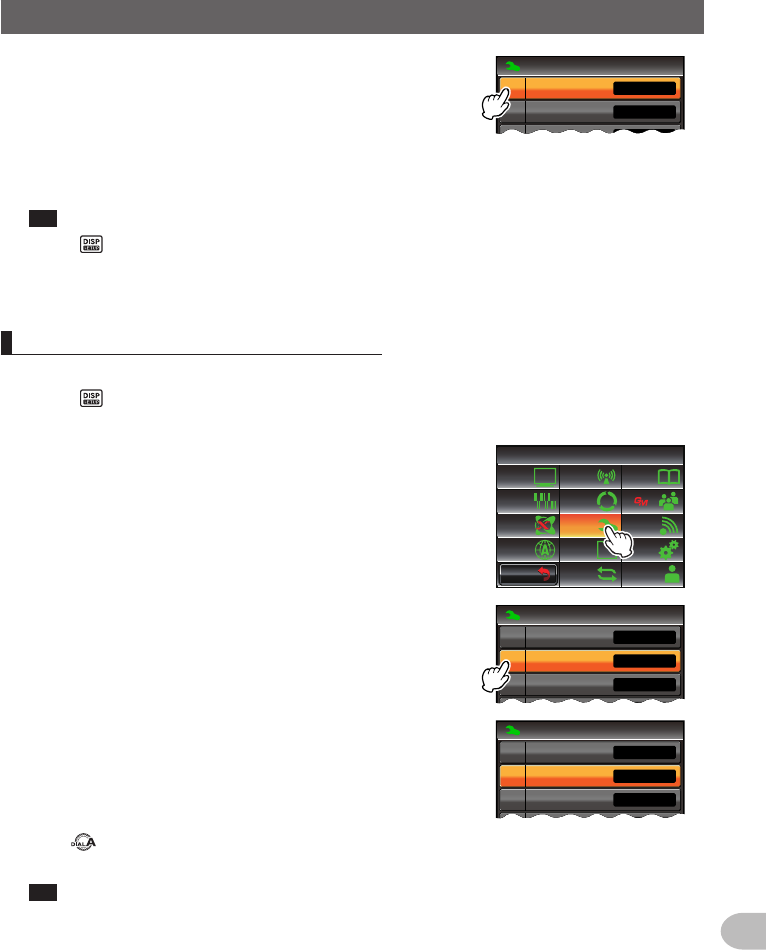
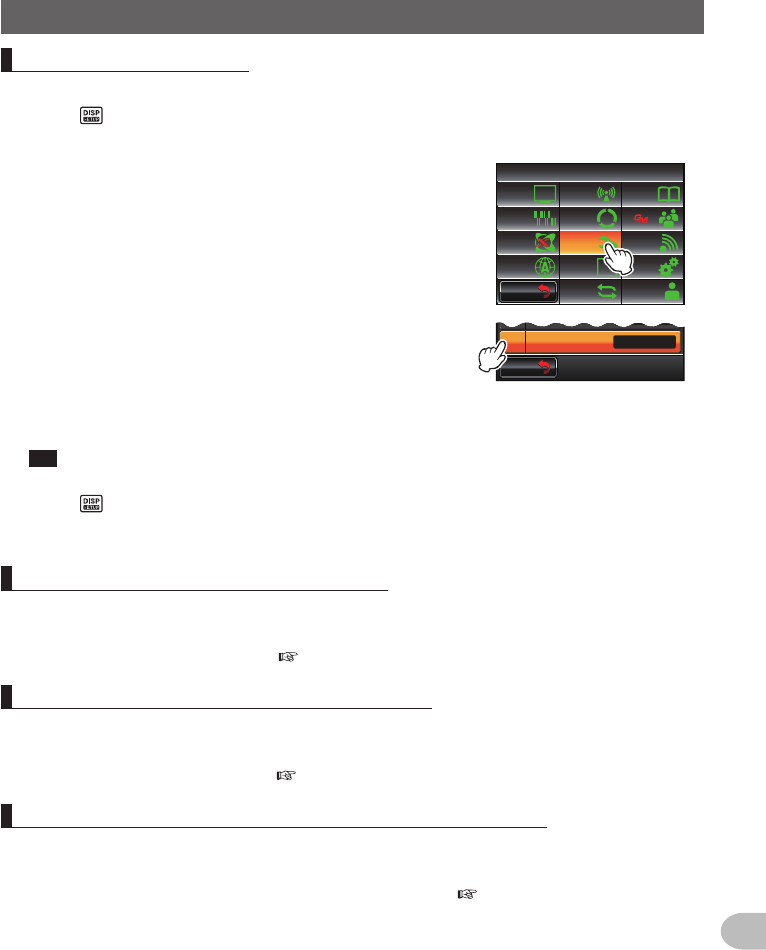
3 Touch [5RPTSHIFT] to select the shift direction
The setting will switch between “OFF”, “-” and “+”
each time it is touched.
OFF: The transmit frequency will not shift.
-: The transmit frequency will shift down.
+: The transmit frequency will shift up.
Tip Factory default value: Differs depending on frequency
%10(+)
4265*+(6(4'3
(/ #/ 56'2
/*\
#761
1((
4265*+(6
4 Press for one second or longer
The direction of the repeater shift will be set and the display will return to the
previous screen.
Settingtheshift width of the repeater
The offset frequency of the repeater shift function can be set.
1 Press for one second or longer
The set-up menu will be displayed.
2 Touch [CONFIG]
$#%-
$#%-
6:4:
5'672/'07
4'5'6
%.10'
%10(+)9Ჰ4'5
5%#0
&+52.#;
5+) 0#.+0)
#245 126+10
5&%#4&
/'/14;
#
%#..5+) 0
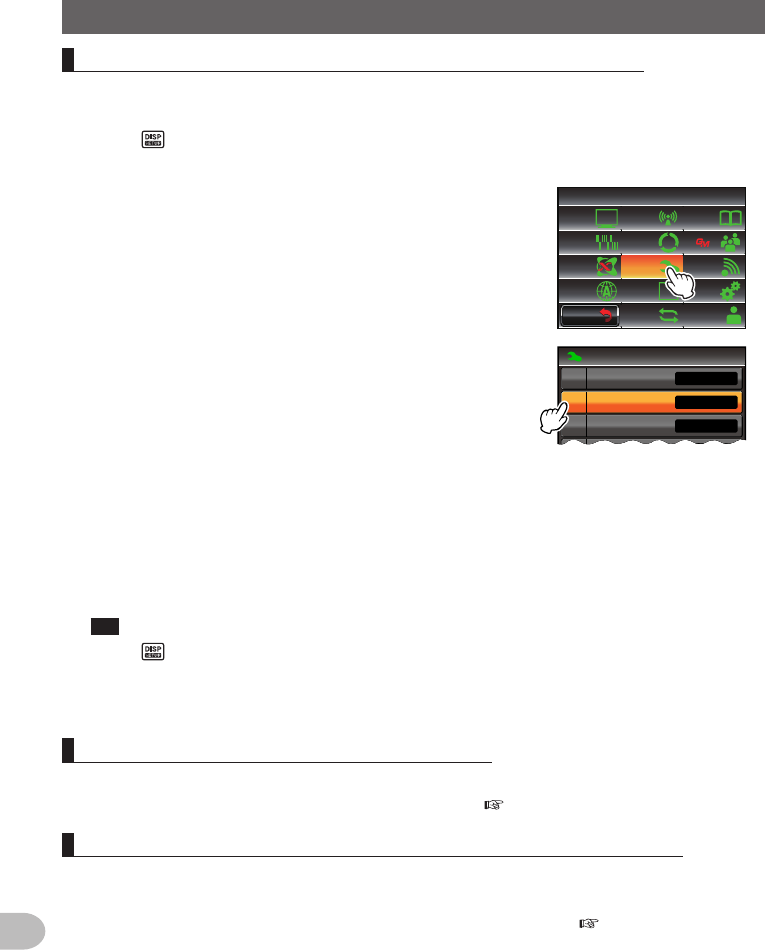
3 Select and touch [6RPTSHIFTFREQ]
The characters of the set value will be displayed in
orange color.
%10(+)
4265*+(6(4'3
(/#/56'2
$''2
/*\
.19
#761
1((
4265*+(6
%10(+)
4265*+(6(4'3
(/#/56'2
$''2
/*\
.19
#761
1((
4265*+(6
4 Turn to set the shift offset frequency
The shift width can be set at 0.05 MHz intervals between 0.00 MHz and 99.95 MHz.
Tip Factory default value: Differs depending on frequency
Application for FCC / IC
FCC ID: K6620345X40 / IC: 511B-20345X40
188
Customize Menu Settings and User Preferences
UsingtheSet-upMenu
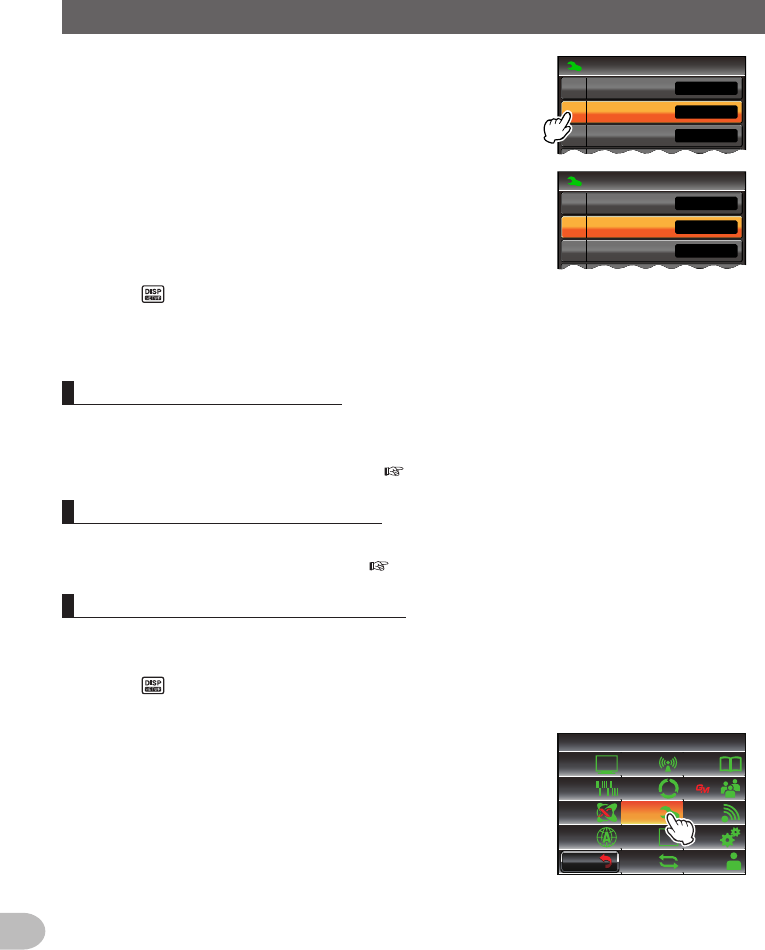
5 Touch [6RPTSHIFTFREQ]
The characters of the set value will turn green in
color.
%10(+)
4265*+(6(4'3
(/#/56'2
$''2
/*\
.19
#761
1((
4265*+(6
%10(+)
4265*+(6(4'3
(/#/56'2
$''2
.19
#761
1((
4265*+(6
/*\
6 Press for one second or longer
The offset of the repeater shift function will be set and the display will return to the
previous screen.
Settingthefrequencystep
The change in the frequency when the tuning knob is turned, or when the key is pressed
can be set.
Refer to “Changing the frequency step” ( P.41) for details.
Settingthevolumeofthebeep
The confirmation sound (beep) that goes off when a key is pressed can be changed.
Refer to “Changing the beep volume” ( P.54) for details.
SettingtheclockshiftoftheCPU
The clock signal of the CPU can be changed so that it is not heard as an internal
spurious signal by the receiver. Select “A” during normal operation.
1 Press for one second or longer
The set-up menu will be displayed.
2 Touch [CONFIG]
$#%-
$#%-
6:4:
5'672/'07
4'5'6
%.10'
%10(+)9Ჰ4'5
5%#0
&+52.#;
5+) 0#.+0)
#245 126+10
5&%#4&
/'/14;
#
%#..5+) 0
Application for FCC / IC
FCC ID: K6620345X40 / IC: 511B-20345X40
189
Customize Menu Settings and User Preferences
UsingtheSet-upMenu
3 Touch [9CLOCKTYPE] to set the clock type
The setting switches between “A” and “B” each time
it is touched.
A: The clock shift operation will automatically switch
on and off.
B: The clock shift will be kept in operation at all
times.
Tip Factory default value: A
%10(+)
/+%241)4#/-';
%.1%-6;2'᳁
ᲹᲸ
#
Ż
4 Press for one second or longer
The clock shift type will be set and the display will return to the previous screen.
Settingtheprogramkeyofthemicrophone
Functions can be assigned to the program keys (P1 to P4) of the provided microphone
(MH-48).
1 Press for one second or longer
The set-up menu will be displayed.
2 Touch [CONFIG]
$#%-
$#%-
6:4:
5'672/'07
4'5'6
%.10'
%10(+)9Ჰ4'5
5%#0
&+52.#;
5+) 0#.+0)
#245 126+10
5&%#4&
/'/14;
#
%#..5+) 0
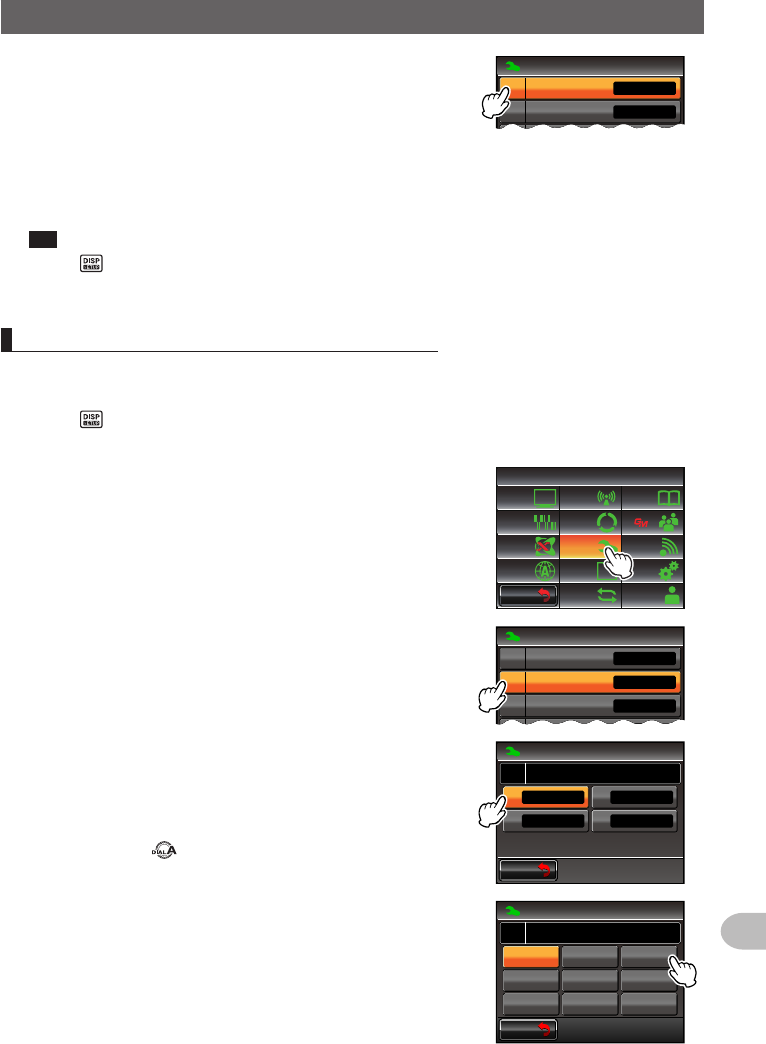
3 Touch [10MICPROGRAMKEY]
The setting screen for the microphone program key
will be displayed.
%10(+)
/+%241)4#/-';
%.1%-6;2'᳁
ᲹᲸ
70+6
014/#.
/'64+%
4:%18'4#)'ᲹᲹ
ᲹᲺ
#
Ż
4 Touch the program key (P1 to P4) where the function
is going to be assigned
The functions that can be assigned will be displayed.
When the function you want to assign is not
displayed, turn to scroll the display.
$#%-
$#%-
2
22
2
Ჹ
Ჺ
%10(+)
/+%241)4#/-';
ᲸᲹ
53.1((
6:219'4
9+4'5
*1/'
5 Touch and select the function that you want to assign
$#%-
$#%-
%10(+)
/+%241)4#/-'; ᲺᲺ2Ჹ
ᲸᲹ
/'&+6
81+%'6%#..53.1((
/5) 4'2.;
5.+56&A:24(4'3
Application for FCC / IC
FCC ID: K6620345X40 / IC: 511B-20345X40
190
Customize Menu Settings and User Preferences
UsingtheSet-upMenu
6 Touch [BACK]
The display will return to the selection screen for the
program keys (P1 to P4).
$#%-
$#%-
%10(+)
/+%241)4#/-'; ᲺᲺ2Ჹ
ᲸᲹ
/'&+6
81+%'6%#..53.1((
/5) 4'2.;
5.+56&A:24(4'3
7 Set other program keys
Repeat Steps 4 to 6 to set the functions to be assigned to other program keys.
8 Press for one second or longer
The function will be assigned to the program key and the display will return to the
previous screen.
Tip Factory default value: P1: SQL OFF (T-CALL: European version)
P2: HOME
P3: D_X
P4: TX POWER
Expandingthereceiverange
The frequency can be set to receive frequencies such in the air band (108 to 137 MHz)
and the information wireless band (174 to 400 MHz, 480 to 999.99 MHz) as well.
1 Press for one second or longer
The set-up menu will be displayed.
2 Touch [CONFIG]
$#%-
$#%-
6:4:
5'672/'07
4'5'6
%.10'
%10(+)9Ჰ4'5
5%#0
&+52.#;
5+) 0#.+0)
#245 126+10
5&%#4&
/'/14;
#
%#..5+) 0
3 Touch [11RXCOVERAGE] to set the receive range
The setting switches between “NORMAL” and
“WIDE” each time it is touched.
NORMAL: Receives only the 144 MHz and the 430
MHz bands.
WIDE: Receives the air band and the information
wireless band as well.
Tip Factory default value: NORMAL
$#%-
$#%-
/+%241)4#/-';
ᲹᲸ
70+6
014/#.
/'64+%
4:%18'4#)'ᲹᲹ
ᲹᲺ
Ż
4 Press for one second or longer
The receive range will be set and the display will return to the previous screen.
Application for FCC / IC
FCC ID: K6620345X40 / IC: 511B-20345X40
191
Customize Menu Settings and User Preferences
UsingtheSet-upMenu
Settingtheunitdisplay
The unit to be used when displaying the altitude, distance and speed can be set.
1 Press for one second or longer
The set-up menu will be displayed.
2 Touch [CONFIG]
$#%-
$#%-
6:4:
5'672/'07
4'5'6
%.10'
%10(+)9Ჰ4'5
5%#0
&+52.#;
5+) 0#.+0)
#245 126+10
5&%#4&
/'/14;
#
%#..5+) 0
3 Touch [12UNIT] to set the unit
The setting switches between “METRIC” and “INCH”
each time it is touched.
METRIC: Displays the unit using the metric system.
INCH: Displays the unit using the inch system.
Tip Factory default value: Depends on the transceiver
version
$#%-
$#%-
70+6
014/#.
/'64+%
4:%18'4#)'ᲹᲹ
ᲹᲺ
4 Press for one second or longer
The display unit will be set and the display will return to the previous screen.
Switchingthepoweroffautomatically
The radio can be set to switch the power off automatically when there is no operation for
a period of time.
Refer to “Using the APO function” ( P.119) for details.
Limitingthecontinuoustransmissiontime
The radio can be set to return to the reception mode automatically after a time specified
in advance has passed in the transmit mode.
Refer to “Using the TOT function” ( P.120) for details.
SettingthePINcodeoftheoptionalBluetoothheadset
The headset that you are using can be paired with the optional Bluetooth unit mounted
in the radio.
Refer to “Setting the PIN code of the Bluetooth headset” ( P.137) for details.
Application for FCC / IC
FCC ID: K6620345X40 / IC: 511B-20345X40
192
Customize Menu Settings and User Preferences
UsingtheSet-upMenu
SettingthegeodeticreferencesystemoftheGPSfunction
The geodetic reference system which serves as the positioning standard of the GPS
function can be set.
1 Press for one second or longer
The set-up menu will be displayed.
2 Touch [CONFIG]
$#%-
$#%-
6:4:
5'672/'07
4'5'6
%.10'
%10(+)9Ჰ4'5
5%#0
&+52.#;
5+) 0#.+0)
#245 126+10
5&%#4&
/'/14;
#
%#..5+) 0
3 Touch [16GPSDATUM] to set the geodetic
reference system
The setting switches between “WGS-84” and
“TOKYO MEAN” each time it is touched.
WGS-84: Positions using the global geodetic
reference system. This is being used as a
standard all around the world.
TOKYO MEAN: Positions using the Japanese
geodetic reference system. When
positioning in Japan (Tokyo), the
error can be made smaller.
Tip Factory default value: WGS-84
%10(+)
+06'40 .#
1((
Ż
ᲹᲽ
ᲹᲾ
ᲹᲿ
Ჹ᳀
)25C/
)25&'8+%'
)25.1)
$ WGVQQVJ2#+4+0)
)95᳀
4 Press for one second or longer
The geodetic reference system of the GPS function will be set and the display will
return to the previous screen.
PositioningusingtheexternalGPSdevice
This is set when connecting an external GPS reception device.
Refer to “Positioning using an external GPS device” ( P.84) for details.
SettingtheintervalforrecordingtheGPSpositioninformation
The time interval for recording your own position information in the micro-SD card can
be set.
Refer to “Recording the position information (GPS log function)” ( P.89) for details.
Application for FCC / IC
FCC ID: K6620345X40 / IC: 511B-20345X40
193
Customize Menu Settings and User Preferences
UsingtheSet-upMenu
Datacommunicationsettings
SettingtheCOMport
The communication speed and function when using the [DATA] jack at the back of the
main body as a COM port can be set.
1 Press for one second or longer
The set-up menu will be displayed.
2 Touch [DATA]
$#%-
$#%-
6:4:
5'672/'07
4'5'6
%.10'
%10(+)9Ჰ4'5
5%#0
&+52.#;
5+) 0#.+0)
#245 126+10
5&%#4&
/'/14;
#
%#..5+) 0
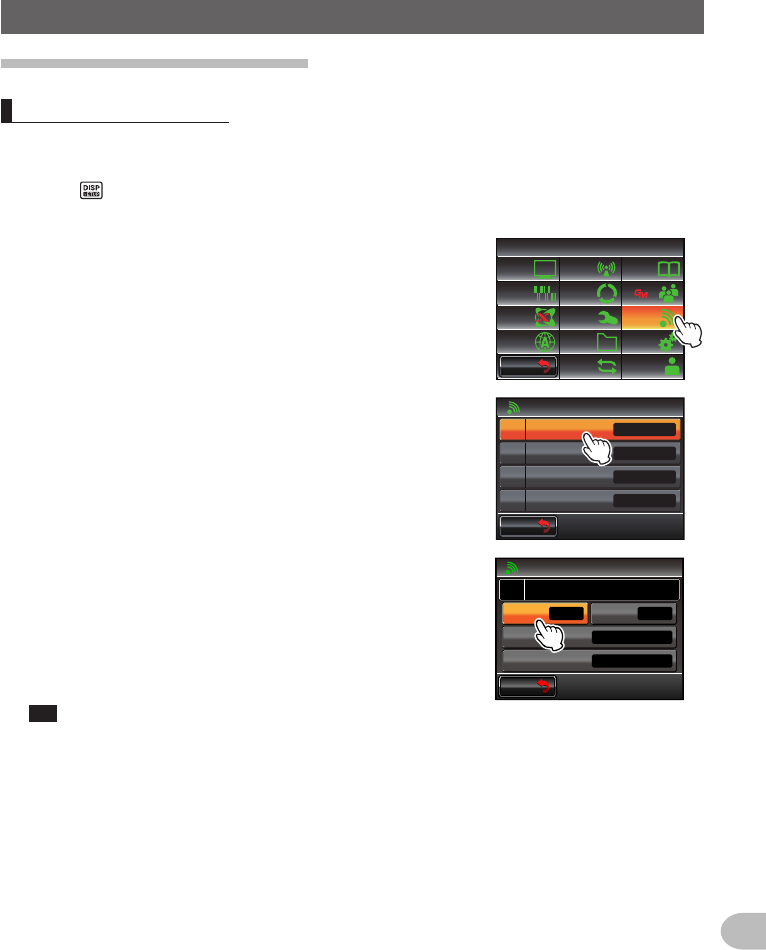
3 Touch [1COMPORTSETTING]
The screen for the detailed settings will be displayed.
Ż
Ż
Ż
#$#0&5'.'%6
%1/21465'66+0)
#52''&
Ჹ
Ჺ
Ż
#537'.%*
#
$#%-
$#%-
4 Touch [SPEED] to select the communication speed
of the COM port
The setting changes as follows each time it is
touched.
“4800 bps” → “9600 bps” → “19200 bps” →
“38400 bps” → “57600 bps”
Tip Factory default value: 9600 bps
$#%-
$#%-
%1/21465'66+0)
)25176
52''&
92(+.6'4
176276
᳁ᲾᲸᲸDRU
#..
92(14/#6 0/'#
Ჹ
#
Application for FCC / IC
FCC ID: K6620345X40 / IC: 511B-20345X40